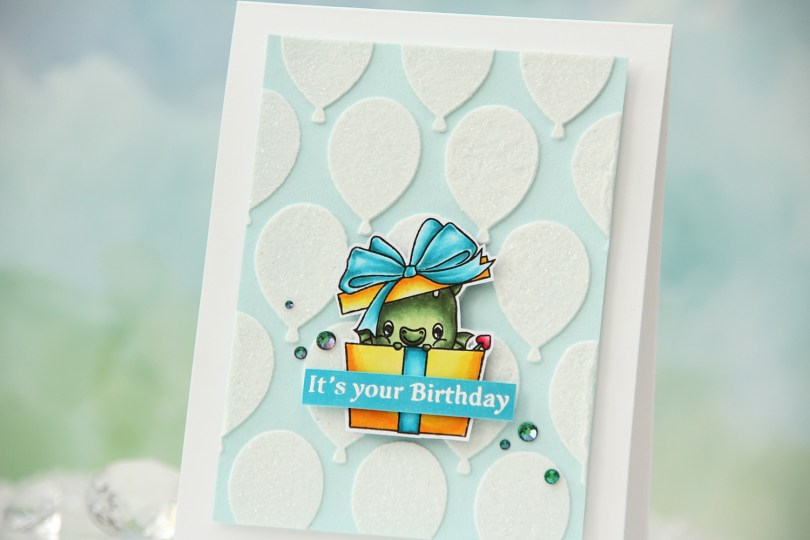
Hi, crafty friends. Crafty Meraki is turning 2!! They asked me to guest design and I have a fun birthday card to share today featuring a couple of products from their anniversary release.
 I used one of the dragons in the Flamin’ Birthday stamp set for the focal point of my card. I stamped it in Copic friendly ink, colored it with Copics, then stamped on top using VersaFine Onyx Black ink to get crisp, black lines. Copics and VersaFine don’t play nice together, so you need to do the stamping after you’ve finished coloring. I use my Misti to make sure I stamp in the exact same spot as the first stamping.
 I fussy cut around the image leaving a thin white border. There’s a set of coordinating dies to go with the stamp set, but I don’t have it, and fussy cutting this one was simple enough.
 I added a thick coat of modeling paste through the Birthday Balloons stencil on a piece of Sno Cone cardstock from My Favorite Things that I’d cut down to 3 1/2 x 4 3/4″. Once I’d slathered on the modeling paste and before it had a chance to dry, I quickly sprinkled distress glitter Rock Candy over the top for a glittery balloon effect. Once dry, I lightly sanded the rough edges and mounted the panel to the center of a top fold A2 card base using foam tape. Lots of foam tape, I’m not shy with my foam tape.
 Using 1/16″ foam squares, I added my colored dragon towards the bottom center of the card. I added a little bit of liquid glue to make sure it really adhered to my glitter balloons, I didn’t want it coming off at any point. I didn’t have the right shade of cardstock to match my tealy blue coloring, so I colored a scrap strip of X-Press It blending card using one of the markers I used for the bow, before stamping and white heat embossing a sentiment from the Flamin’ Birthday stamp set. I cut it to fit the sentiment, added a couple of strips of cardstock behind it for dimension and stability and adhered it to the present.
 I finished off the card by adding a few sparkle gems. These are from the Green Illusion mix, and they’re really fun because they change color depending on how you tip them in the light. I love that there are many sizes in the mix, and the smallest ones really are tiny at 1.5 mm.
![]() Last, but certainly not least – the colors I used for this cute dragon present. BG05 is the color I also used on the sentiment strip.
Last, but certainly not least – the colors I used for this cute dragon present. BG05 is the color I also used on the sentiment strip.
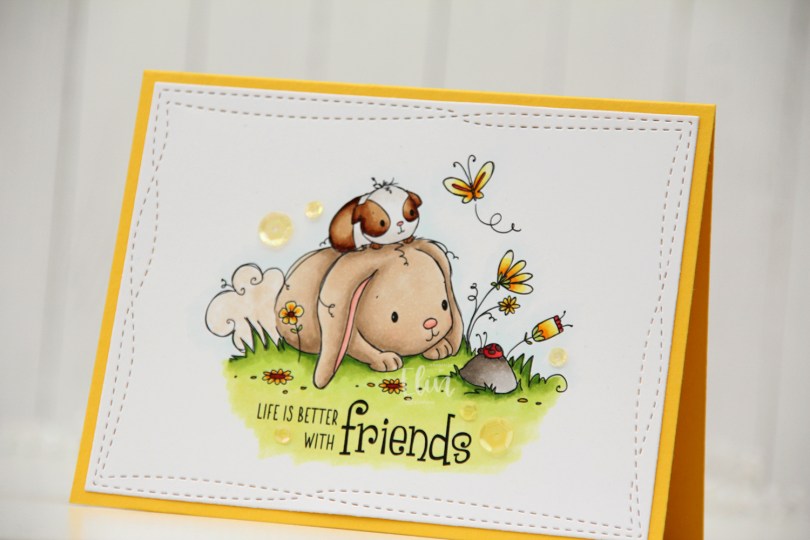
 I printed the image in the center of a panel of X-Press It blending card and colored it in with Copics.
 I used the largest die in the Wonky Stitched Rectangles STAX die set from My Favorite Things to create a little bit of interest on the edge of my panel.
 I adhered the panel to a top fold A2 landscape card base I created from Bright Buttercup cardstock from Papertrey Ink. The yellow border around the edge picks up the yellow of the flowers and makes them pop.
 I added a few yellow sequins from the Seashore mix from Little Things from Lucy’s Cards around the image and sentiment, and my card was finished.
 The end result is a very mail friendly card without a lot of bulk. The sequins add a tiny bit of lift off the base of the card, but not much.
 Simple color palette for this one.
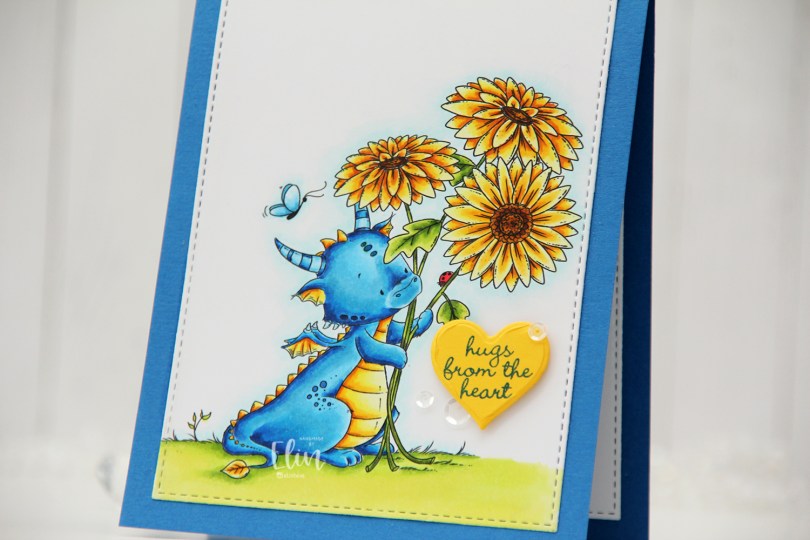
 It’s no secret that I’m a fan of Lee’s Dragons, and this one holding sunflowers was begging for a blue/yellow combo. Once I’d colored the image with Copics, I used the second largest die in the A2 Stitched Rectangles STAX 1 die set from My Favorite Things to give the panel a nice finishing edge. I adhered it to a card base I created from Cornflower cardstock, also from MFT.
 I die cut a heart from Bright Buttercup cardstock from Papertrey Ink and stamped a sentiment from an Inky Wings stamp set in the center using Cornflower ink from My Favorite Things. I added the heart using foam tape and then a few sequins from the White Orchid Sequin Mix from Little Things from Lucy’s Cards to finish off this simple card.
 I stamped the image using Extreme Black ink from My Favorite Things, before creating a mask, adding that on top and stamping the
  I colored in my scene using Copics and stamped a sentiment from the older
  Last, but not least – the Copics I used. I also used B30 (which is a color I’ve created myself) for the sky in addition to B32.
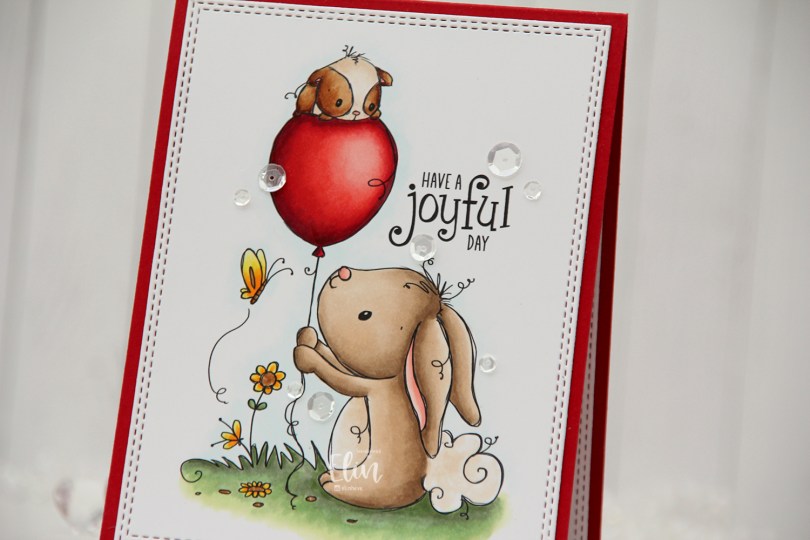
 I printed the image with the accompanying sentiment and made it bigger than what I normally color. I wanted the focus to really be on this stamp.
 I colored the image with Copics, then used a die from the A2 Double Stitched Rectangles STAX set from My Favorite Things to create the faux stitch look around the edge that I really enjoy having on my cards.
 I adhered the panel to a card base I created from Pure Poppy cardstock from Papertrey Ink.
 The red cardstock matches the red balloon and really makes it pop.
 To finish the card I added Sparkling Clear sequins from Pretty Pink Posh here and there. These are my favorite sequins, and they’re near impossible to find in stock anywhere. I need to get some more soon, though, I’ve almost run out.
 Last, but not least; the colors I used for this. The ones on the bottom row were all used for the balloon. I went a little overboard on the balloon.
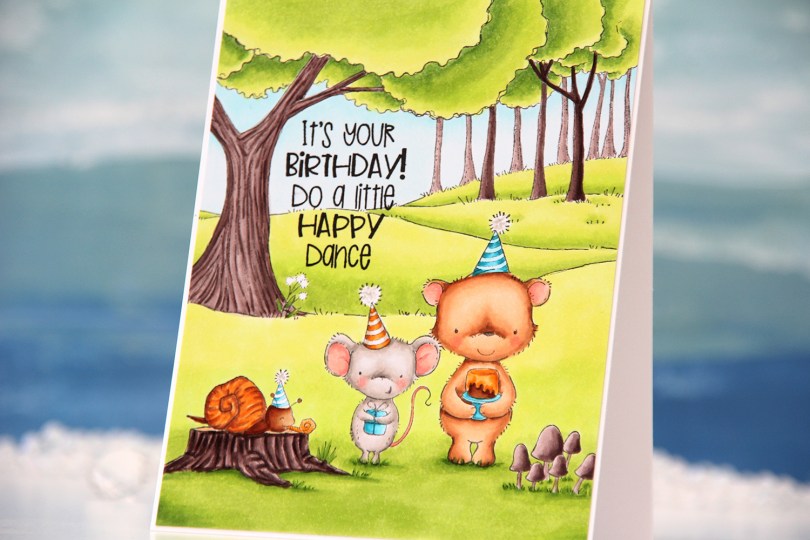
 My first card with images from the release is this one. I love creating birthday cards, so this collection is right up my alley!! Using Extreme Black ink from My Favorite Things, I stamped and masked
  I cut down my colored panel ever so slightly and adhered it to a top fold A2 card base I created from Stamper’s Select White cardstock from Papertrey Ink. I love that little 1/16″ border around the edge.
 I kind of thought I’d use a whole lot more Copics for a full panel card, but I admit I love the orange color with the teal and the bright green, it’s such a classic color combo for a reason.
 I colored the image with Copics, die cut the word HURRA from my panel using a die from Kort & Godt and the largest die in the A2 Stitched Rectangles STAX 2 set from My Favorite Things for the faux stitching to frame the image. I printed a second image to put behind, so the ball of yarn is continuous throughout the word.
 I adhered my panel to an A2 card base I created from Berry Sorbet cardstock from Papertrey Ink. Onto a strip of the same color cardstock, I stamped and white heat embossed a sentiment from Huldra Designstudio, added a couple of additional layers of cardstock behind it for dimension and embellished with a couple of sequins from Pretty Pink Posh to finish the card.