Hi, crafty friends! Is it too early to think about Christmas cards? I know there are lots of people who don’t like creating holiday cards this time of year, and I totally get it. I, myself, am an all year Christmas card maker. My problem for the past couple of years hasn’t been creating the cards, but getting them in the mail. I’ll try to be better this year, we could all use the extra joy that fun mail brings, right? If I want to send cards, I also need to create some, and this Peeking Reindeer from Mo Manning was so cute, I couldn’t resist. It was the November 2025 freebie over on her Patreon.
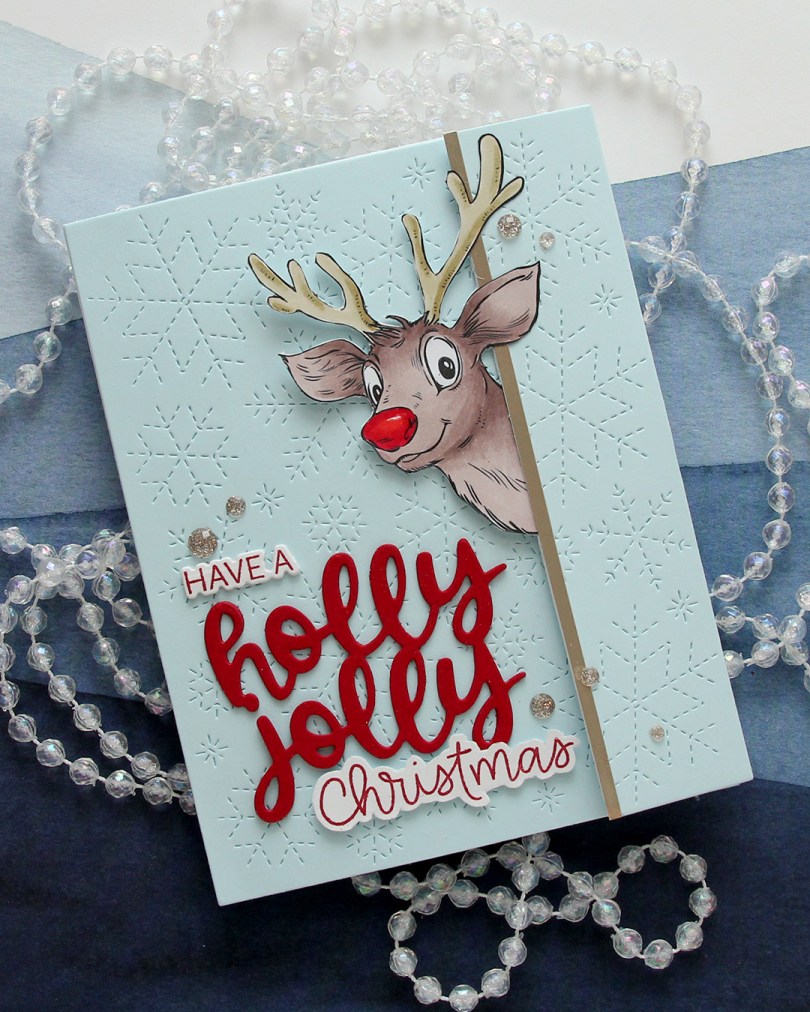
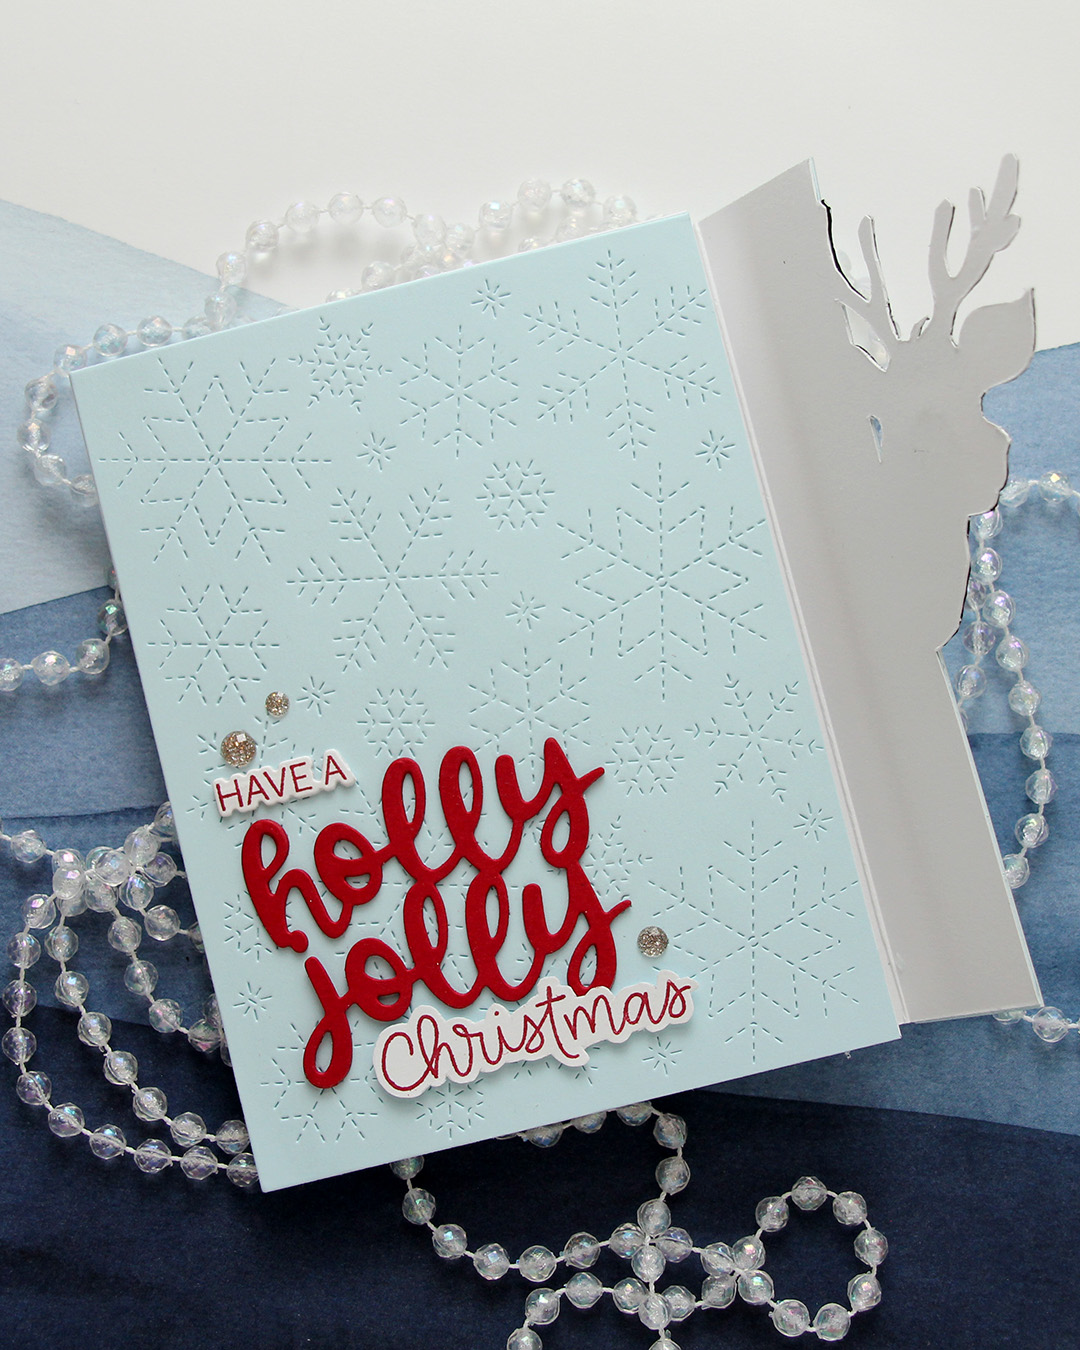
 I created a tri fold card this time, with the reindeer peeking out from one of the folds. I couldn’t resist a red Rudolph nose, even if that makes my card inaccurate in its reindeer portrayal. Only female reindeer have antlers in the winter, so this is technically a female reindeer. It’s not like a red nosed reindeer is all that believable to begin with, so I guess it doesn’t really matter, it’s just a fun little tidbit.
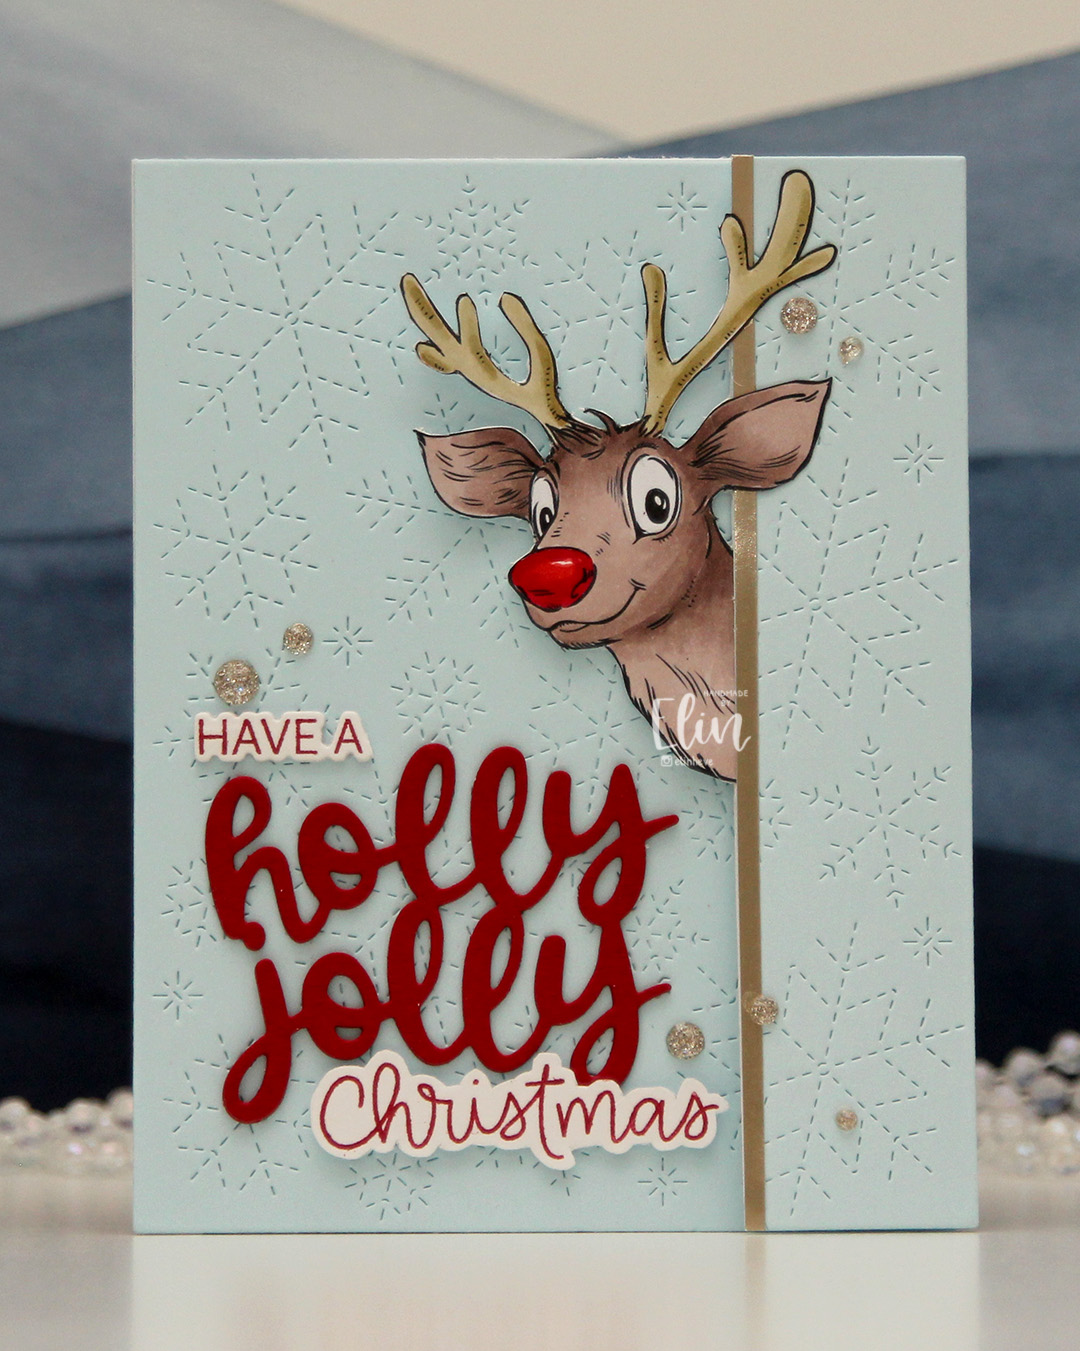
 For the blue background, I used Powder cardstock from Concord & 9th. I used the Stitched Snowflake Backdrop die from Lawn Fawn to create some interest in the background. I die cut the a sentiment from the Jolly Holiday Greetings die set from Concord & 9th using Cranberry cardstock, also from C9. I stacked three layers, stamped part of a sentiment (have a) from the Christmas Wishes stamp set from My Favorite Things and the word Christmas from the Scripty Xmas stamp set from Mama Elephant, both in Cranberry ink. I die cut the have a with the coordinating die and fussy cut around the Christmas (there’s no coordinating die for this set), and put the three parts together to form a complete sentiment.
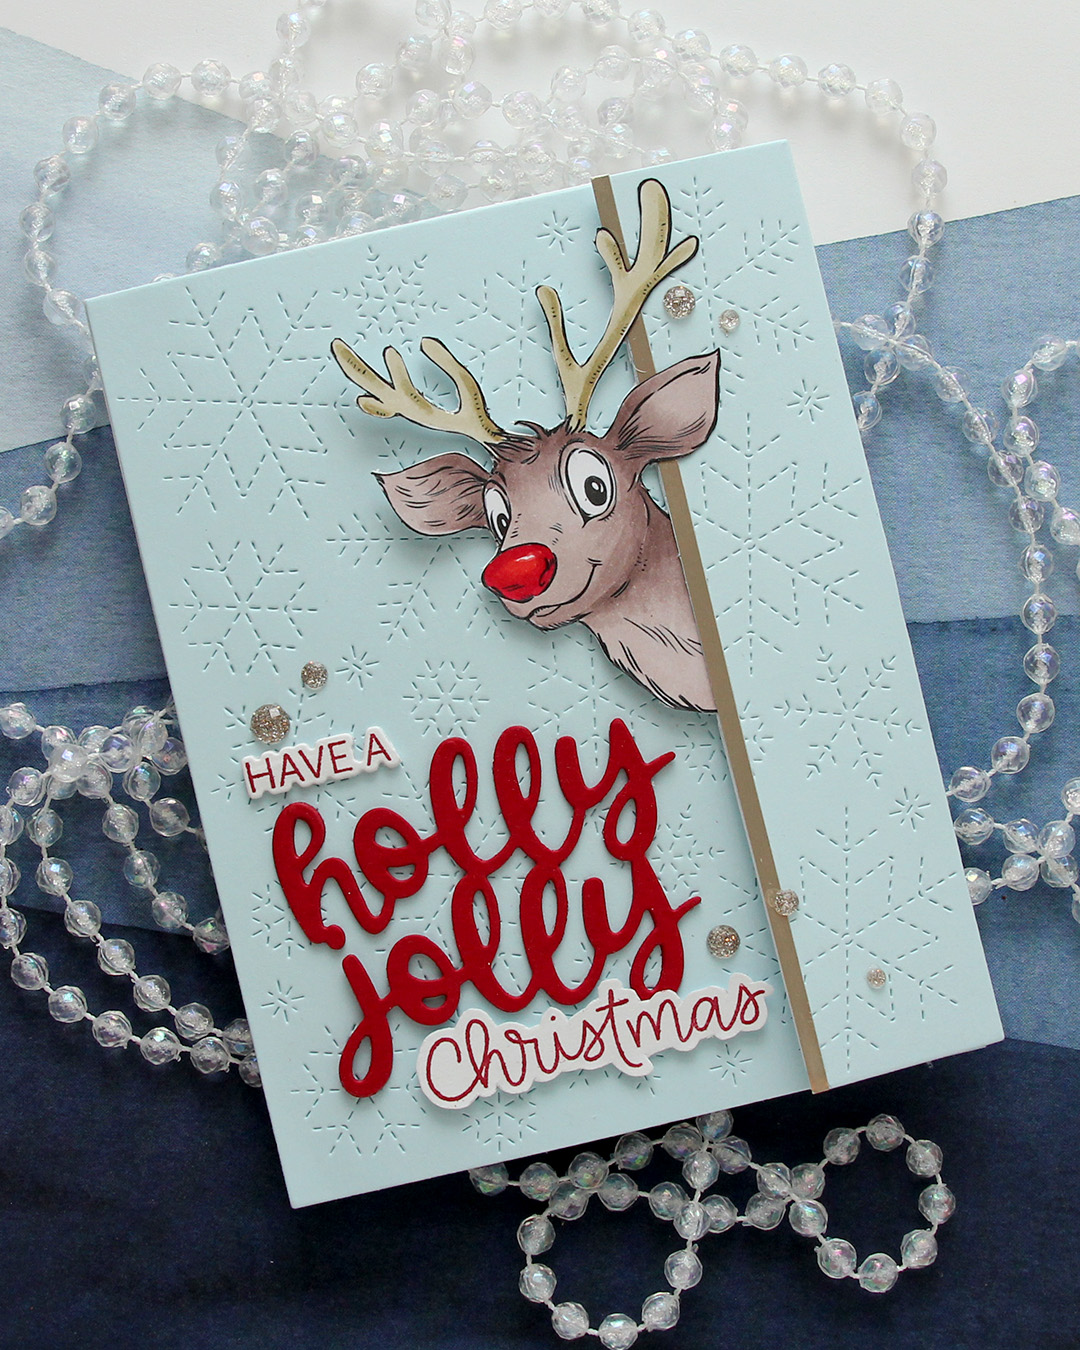
 I added a strip of Champagne cardstock from C9 to the edge where Rudolph (not really Rudolph) is peeking out, to emphasize the edge of the panel that opens. I scattered a few Champagne glitter drops from Pinkfresh Studio for a little bit of embellishment.
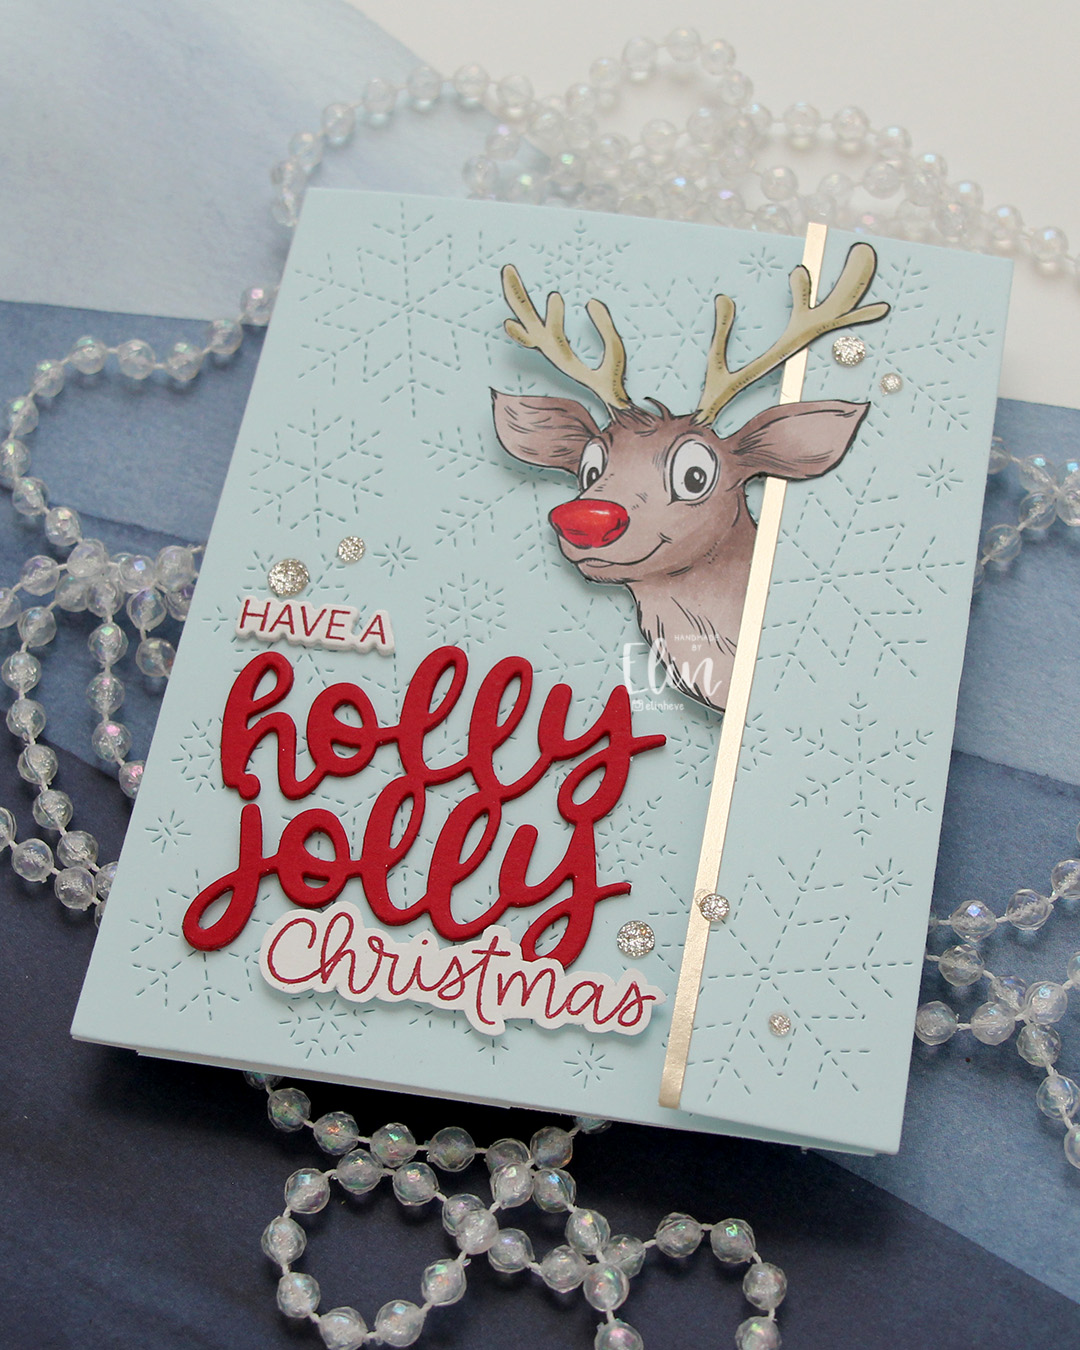
 When you lift the flap with Rudolph (not Rudolph), you’re left with a regular side folding card. I’ve hidden magnets so Rudolph (not Rudolph) keeps the flap closed until it’s time to open the card.
 This one has a super simple color combo, there’s was very little coloring to do on Rudolph (not Rudolph).
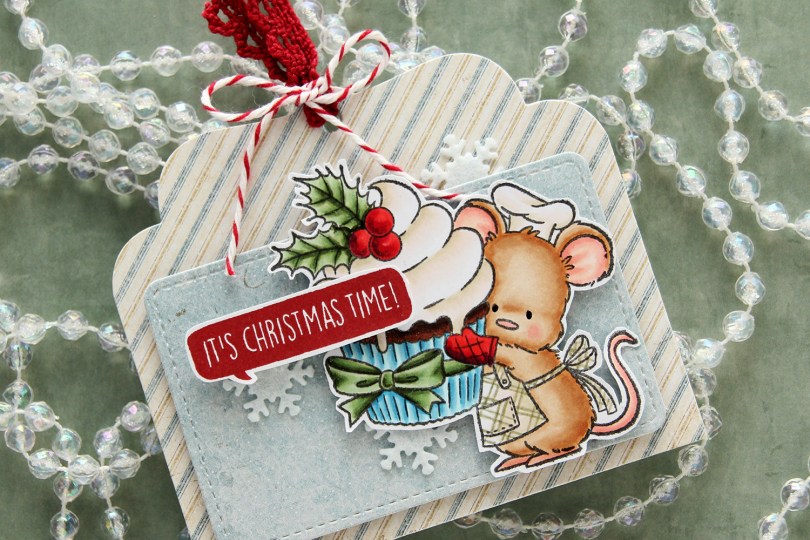
 I colored up the cute little mouse with Copics, adding a plaid pattern to the apron using a Zig watercolor brush marker (No. 98 Pale Dawn Gray), before fussy cutting the image leaving a white border. I used the Gift Pocket Tag die set from Mama Elephant to die cut from patterned paper from the Christmas Nostalgia collection from Maja Design to create my tag. I mounted the smaller piece with foam squares and did the same with the cute little mouse.
 I stamped a sentiment from the
 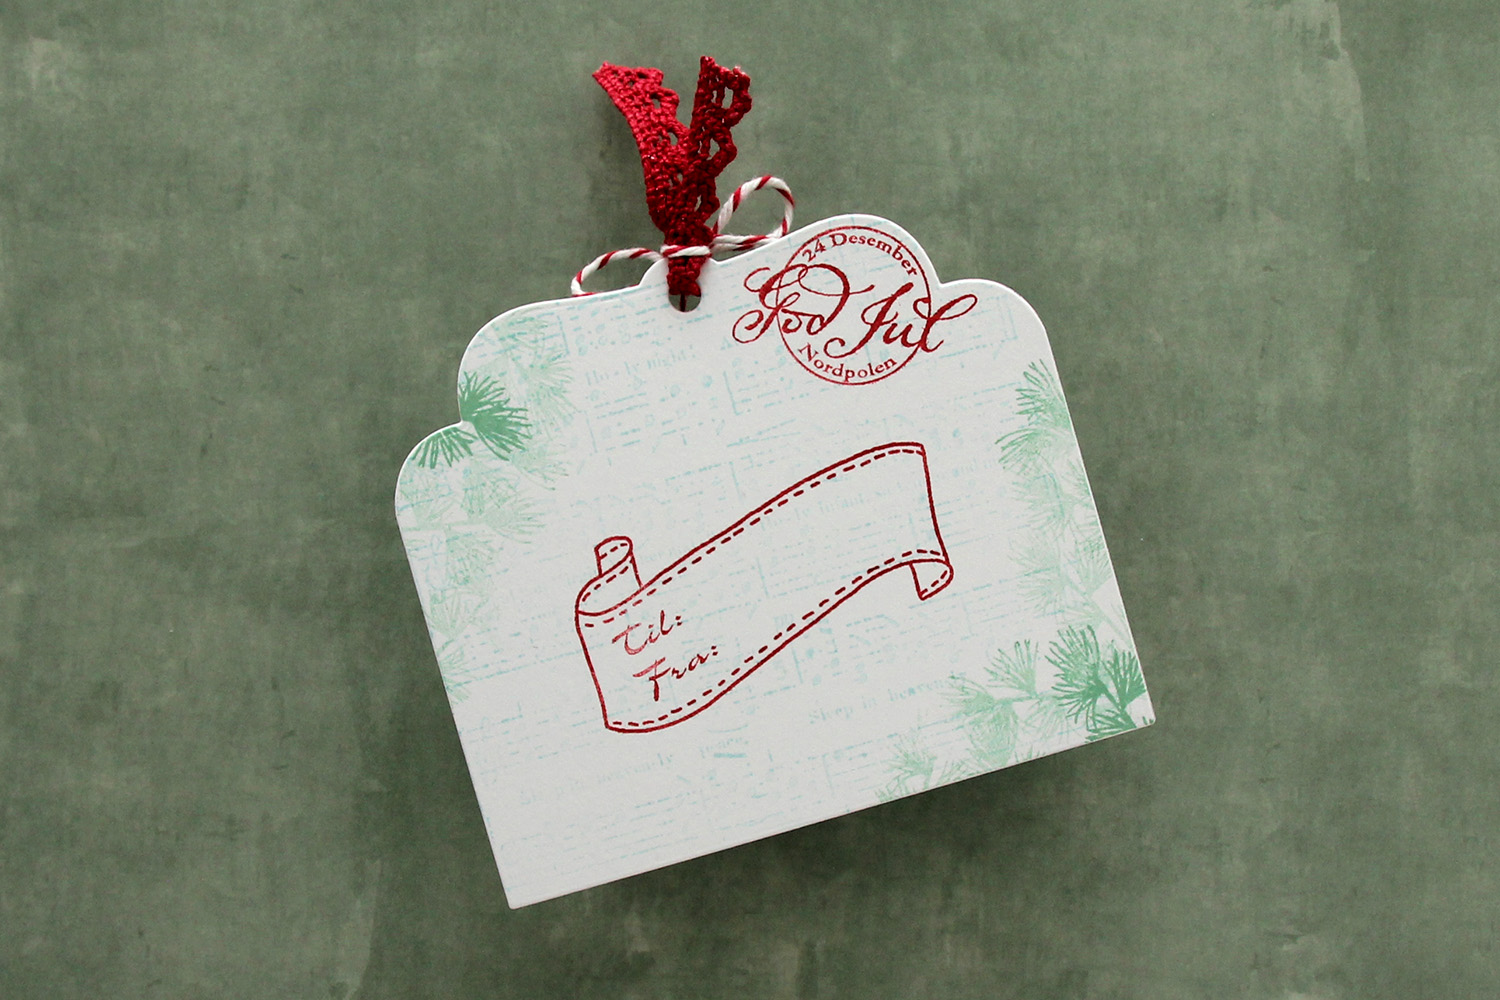 I die cut the tag a second time from white cardstock and did quite a bit of stamping on it. I used second generation stamping of an old sheet music stamp from Magnolia using Powder ink from Concord & 9th – I wanted it to be very soft. The sheet music is actually for Silent Night, making it extra Christmas-y – not that you can really tell. I used first and second generation stamping of a branch from a Mathia Design stamp set using Eucalyptus ink from Concord & 9th to add a little something to the corners. I stamped a postmark stamp from Ladybug & Friends, as well as a to/from stamp from Norsk Stempelblad AS using Amarena Cherry ink from My Favorite Things. I don’t think Ladybug & Friends is in business anymore. Neither is Norsk Stempelblad, but I love their stamps and can’t bring myself to stop using them.
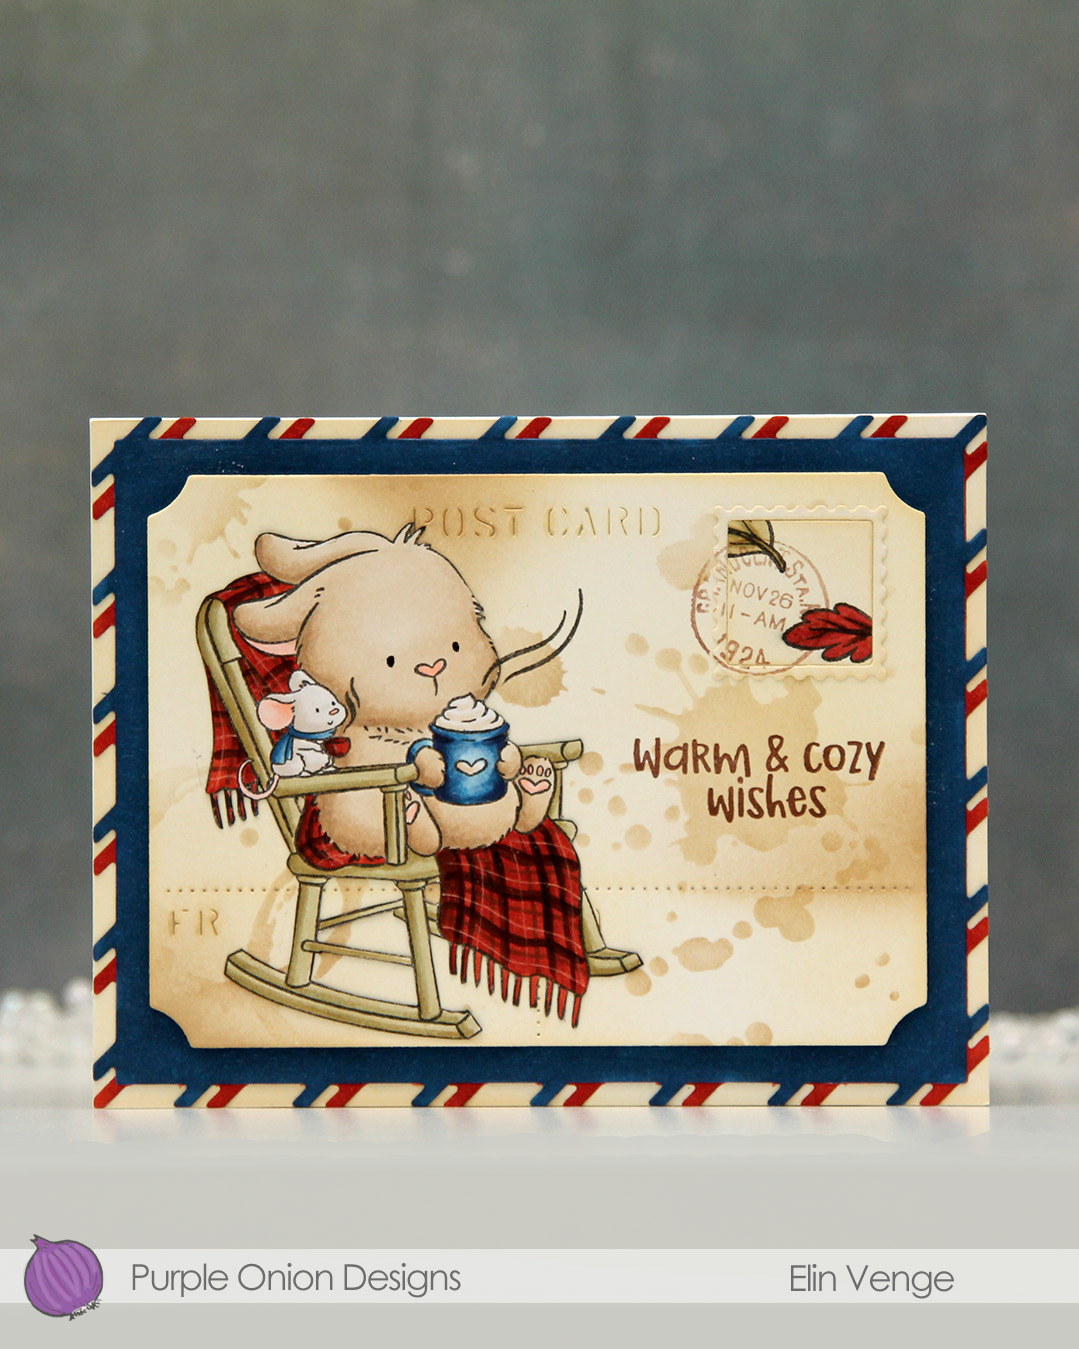 I colored the image with Copics onto X-Press It blending card and fussy cut it right up against the black lines. From another piece of X-Press It, I die cut the postcard shape using the Postcard combo die set from Mama Elephant. I used Peachy Glow ink from Altenew to ink blend across the panel, giving it a vintage feel. I then went in with a stencil from the mini stencil set 3 from Tim Holtz and added the splatter texture using Classic Kraft ink from Papertrey Ink along with a blending brush. In some areas, I added ink with the blender brush without using the stencil.
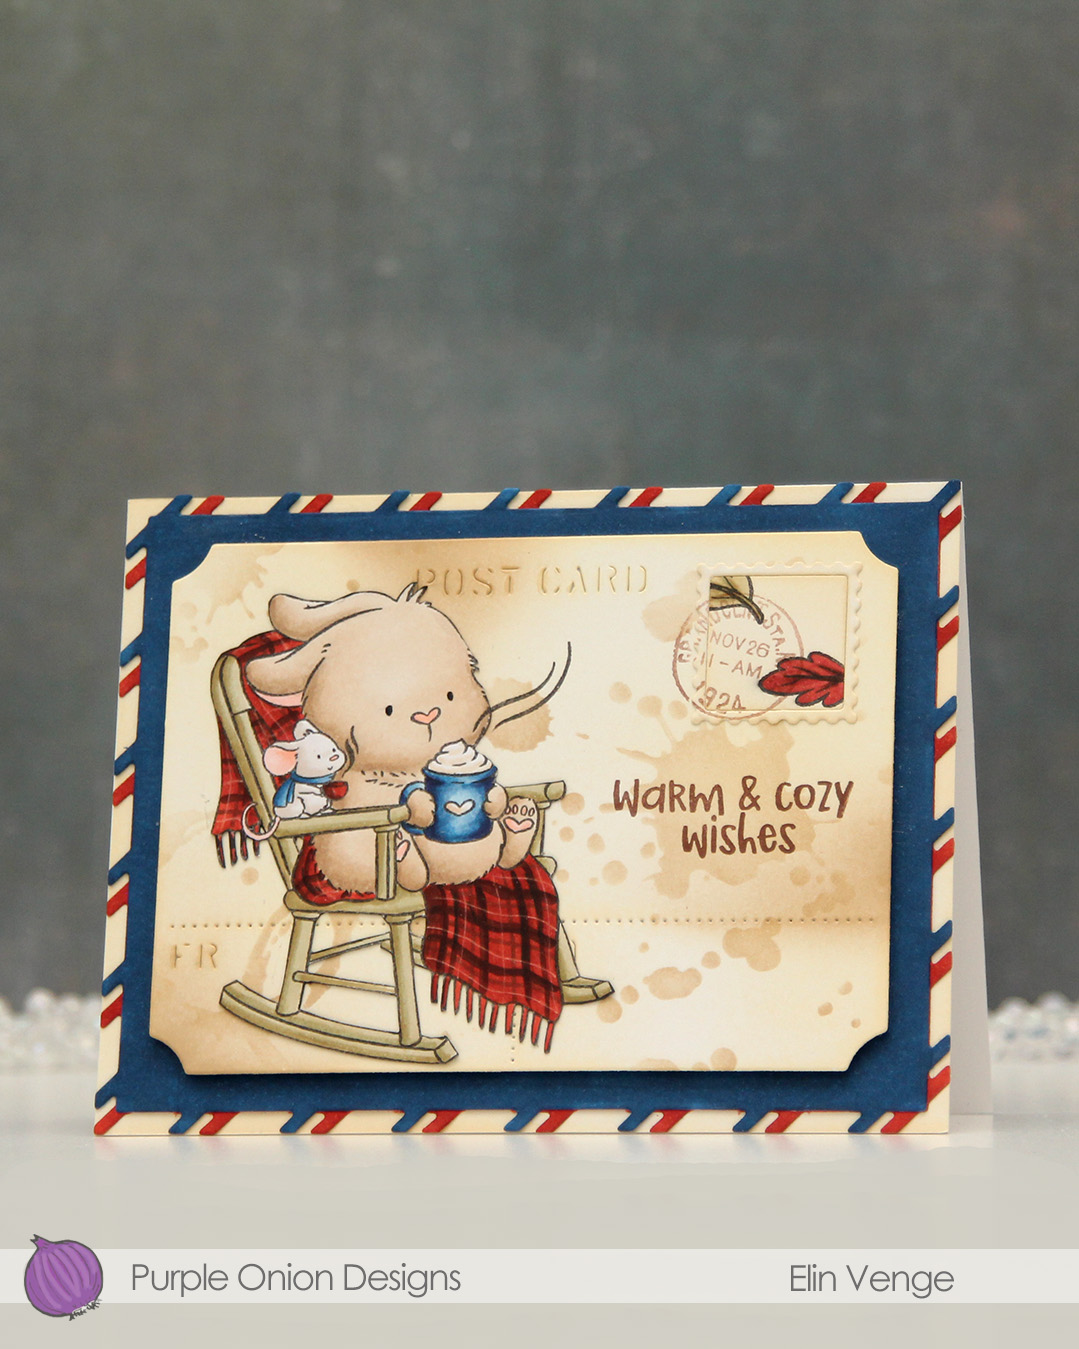 I stamped the leaves from the

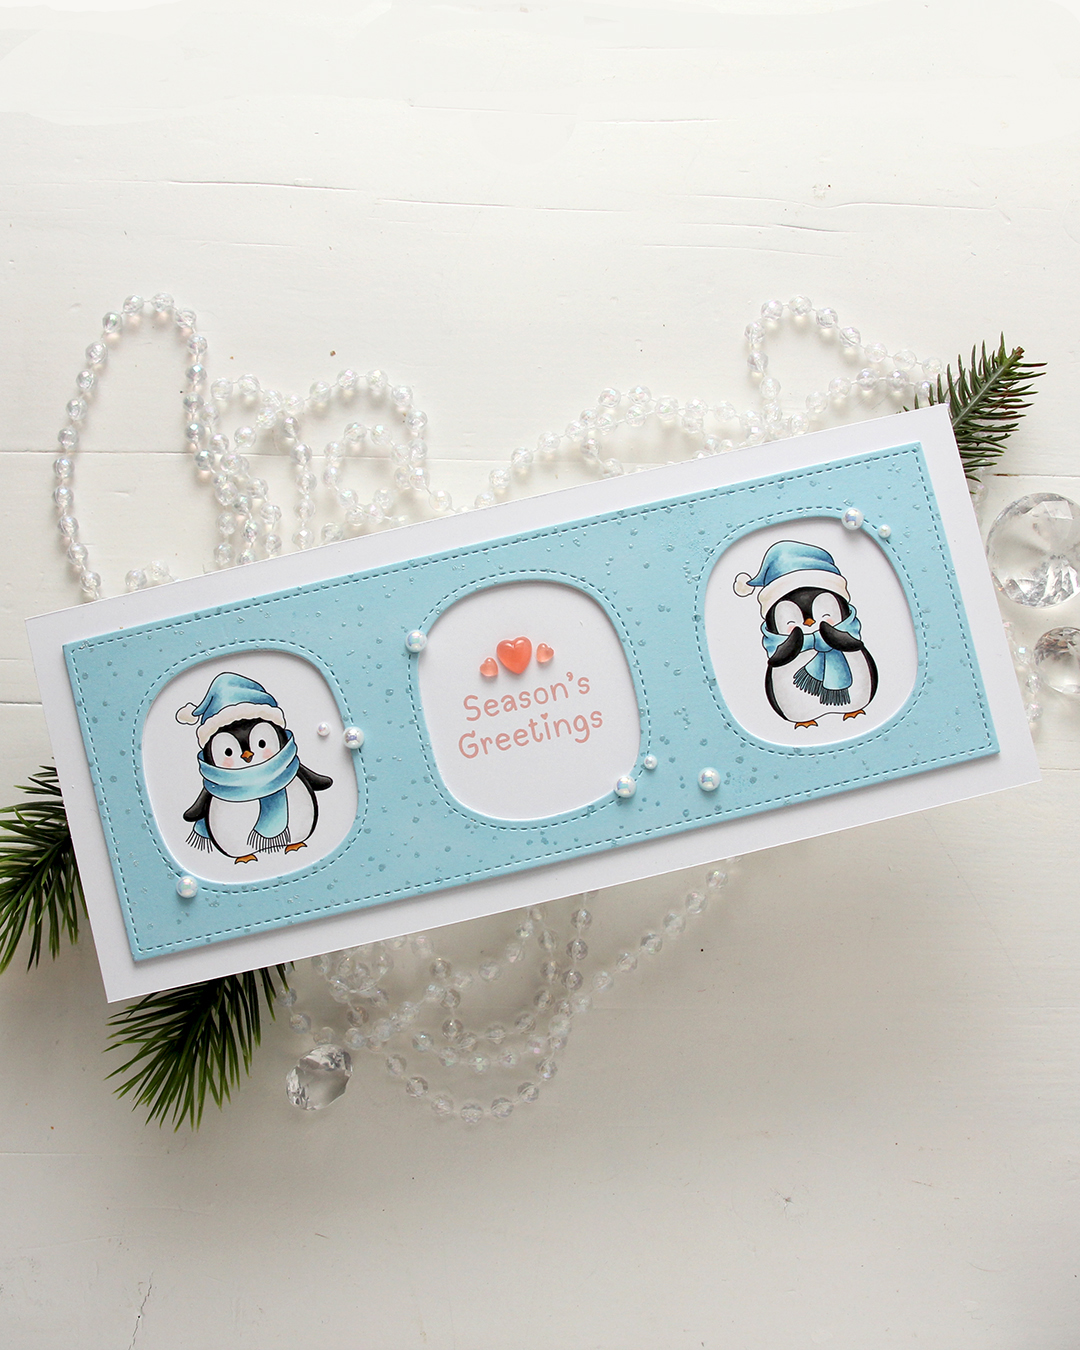 I colored the penguins with my Copics, making sure to add blue for their hats and scarves. Nothing beats blue for Christmas, right? I left plenty of space between the penguins for a greeting, which is from the
  I used a die in the Slim card basics die set from Mama Elephant to die cut the frame with openings from Harbor cardstock from Concord & 9th. I also cut two from white to add behind it for dimension. I stamped the Paint Splatter background stamp from My Favorite Things onto the blue using VersaMark ink, then sprinkled on White Satin Pearl embossing powder from Hero Arts and heat set.
 I added pearls from the Glossy Porcelain mix from Little Things from Lucy’s Cards here and there around the openings and also three Coral Heart Droplets, also from Little Things from Lucy’s Cards.
 Limited color palette for these two penguins.
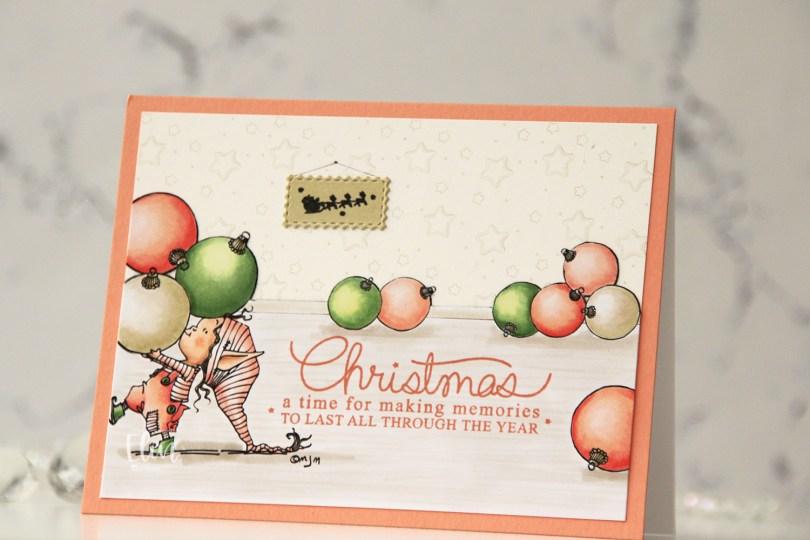
 I separated out the baubles from the image and did some copy paste work to create my scene. It’s one of the advantages of using digital stamps, and it makes them super versatile. I drew in a base board at the back with a black Copic multiliner and colored my scene.
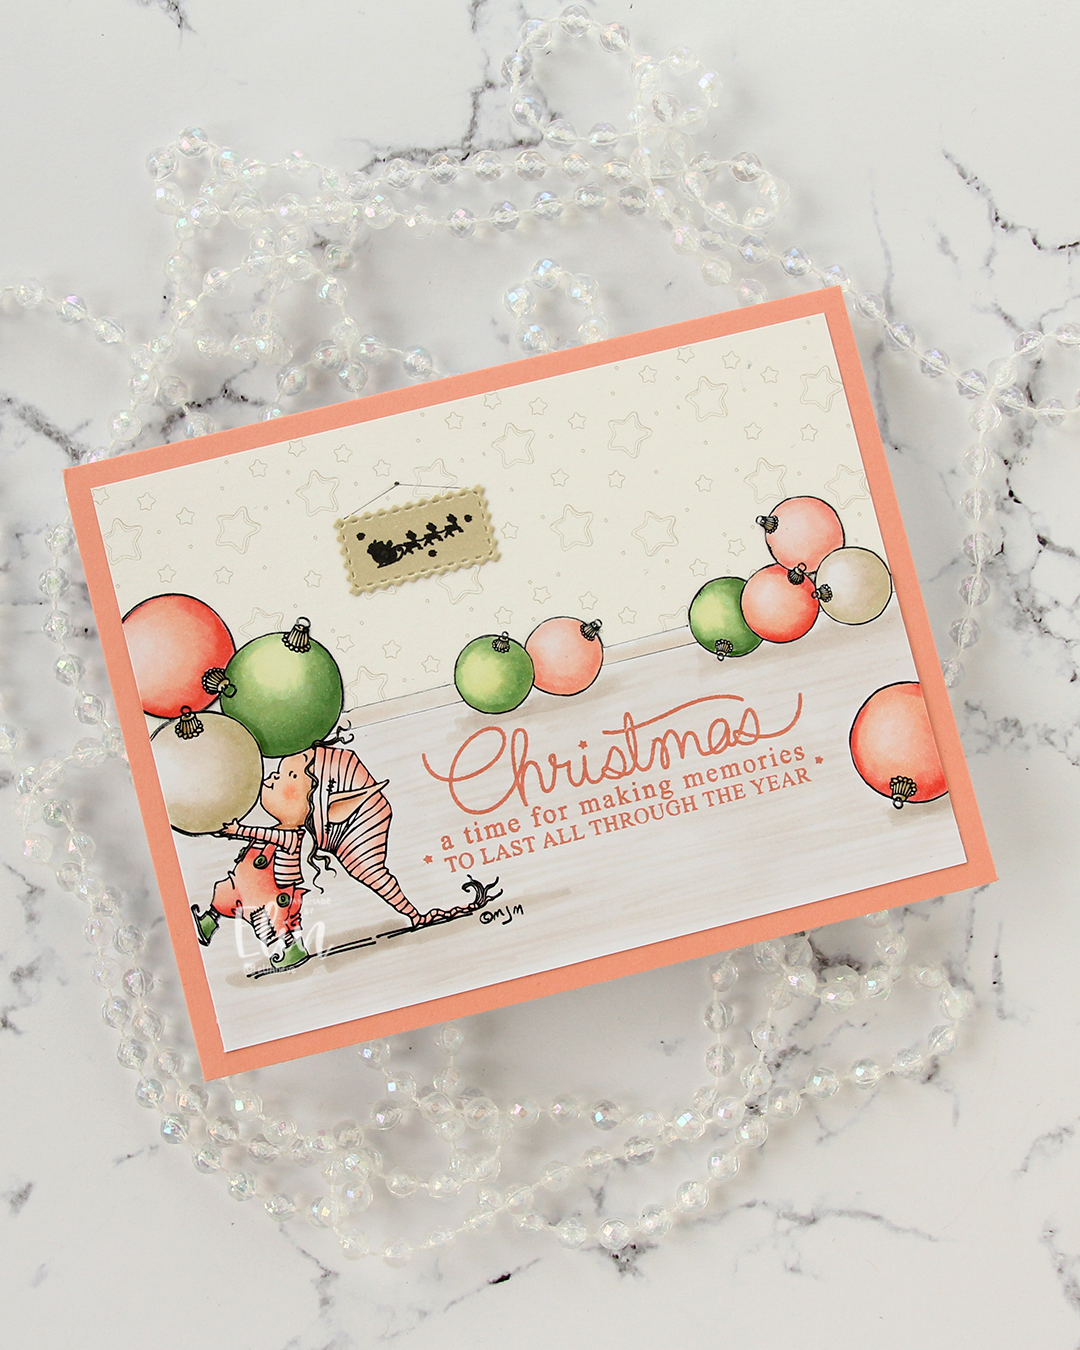 I fussy cut around the back bauble and base board and adhered my colored piece onto a piece of patterned paper from ModaScrap that acts as a wall paper for my background. To make it even more obvious that it’s supposed to be a wall, I stamped part of the Window Signs image from Purple Onion Designs using Altenew Obsidian ink onto a scrap piece of X-Press It blending card that I’d colored with one of the neutral colors (E81) I used for my baubles. I then die cut that using the Postage Collage Die set from Waffle Flower and adhered it to my wall, drawing in strings and a nail on the wall for it to hang from.
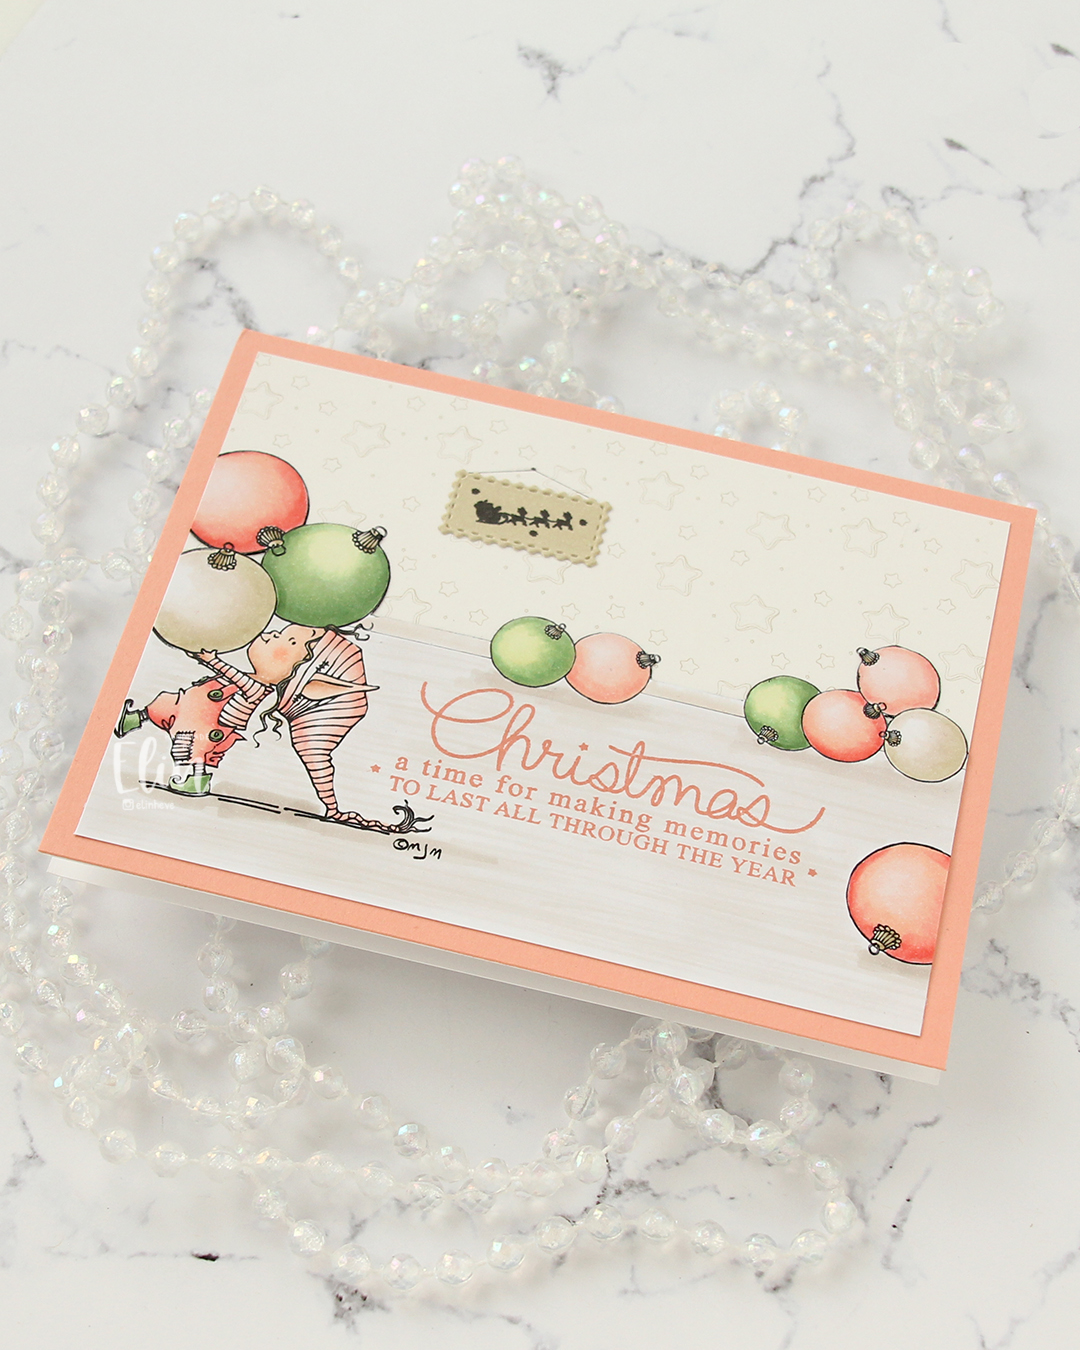 I stamped a sentiment from the Merry Greetings stamp set from Mama Elephant using Melon Berry ink from Papertrey Ink. It matches really well with the coloring. I adhered my scene to a card base covered with a quarter sheet of Grapefruit cardstock from Concord & 9th to create a matching frame and my card was finished.
 Limited Copic color palette for this one. I also used W3, W1 and W0, but I see now that I cut my graphic off too short, so they’re missing here.
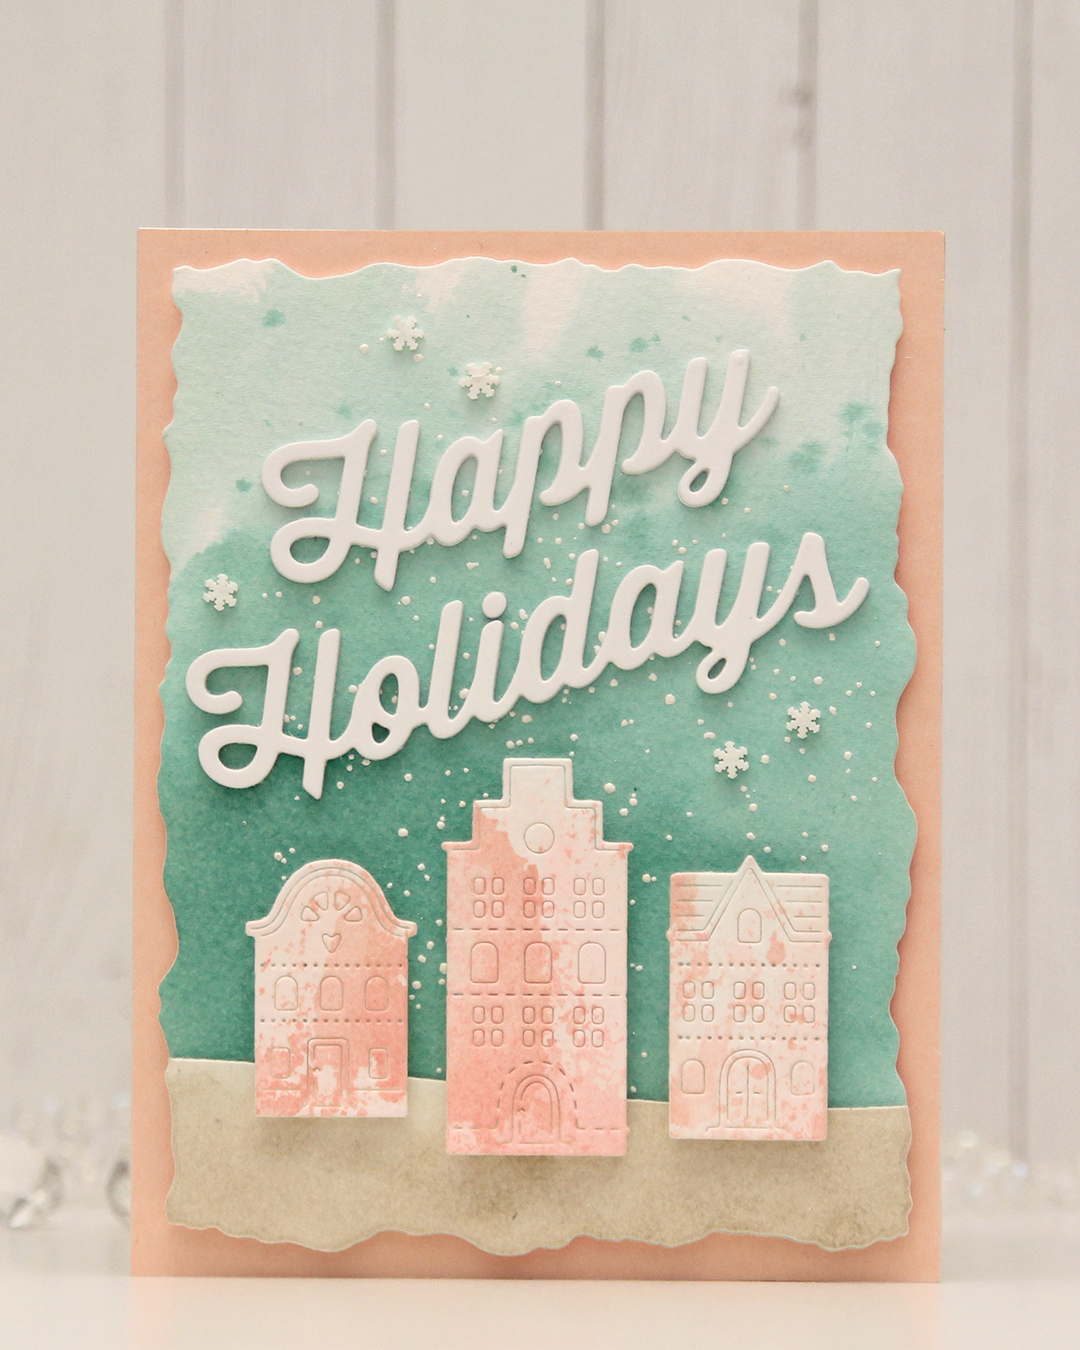 For this card, I really tried. I chose a color combo of Pebble, Ballet Slipper, Brickyard, Cranberry, Cobblestone and Tidepool from C9. I wanted to focus on Ballet Slipper, Cranberry and Tidepool for the Gummiapan diecut houses, but Tidepool and Ballet Slipper created mud when they mixed, while ink smooshed Cranberry looked like an episode of Dexter. I switched gears and ink smooshed Ballet Slipper on its own on watercolor paper. When it dried it looked like Grapefruit. So much for not using peach tones. I watercolored a background using Tidepool reinker and did the same with Pebble reinker on a separate piece of watercolor paper. Once dry, I die cut the Pebble piece with a curved landscape die from the Slim Card Basics die set from Mama Elephant, then layered the two pieces together and die cut them using the largest die in the Watercolor Rectangle STAX die set from My Favorite Things.
 I sprinkled on Chunky white embossing enamel from Stampendous onto the background, heat set it so the granules melted to look like snow, adhered the slope with 1 mm foam squares and mounted the entire panel onto a card base that I covered with a piece of Nectar cardstock from Concord & 9th. I tried Grapefruit first, but felt it was too dark against the background. I mounted the houses using foam tape, die cut and stacked four layers of Happy Holidays from the Jolly Holidays Greetings die set from Concord & 9th and adhered the greeting at an angle above the houses, before finishing off with Snowdrift Sprinkles from Little Things from Lucy’s Cards.
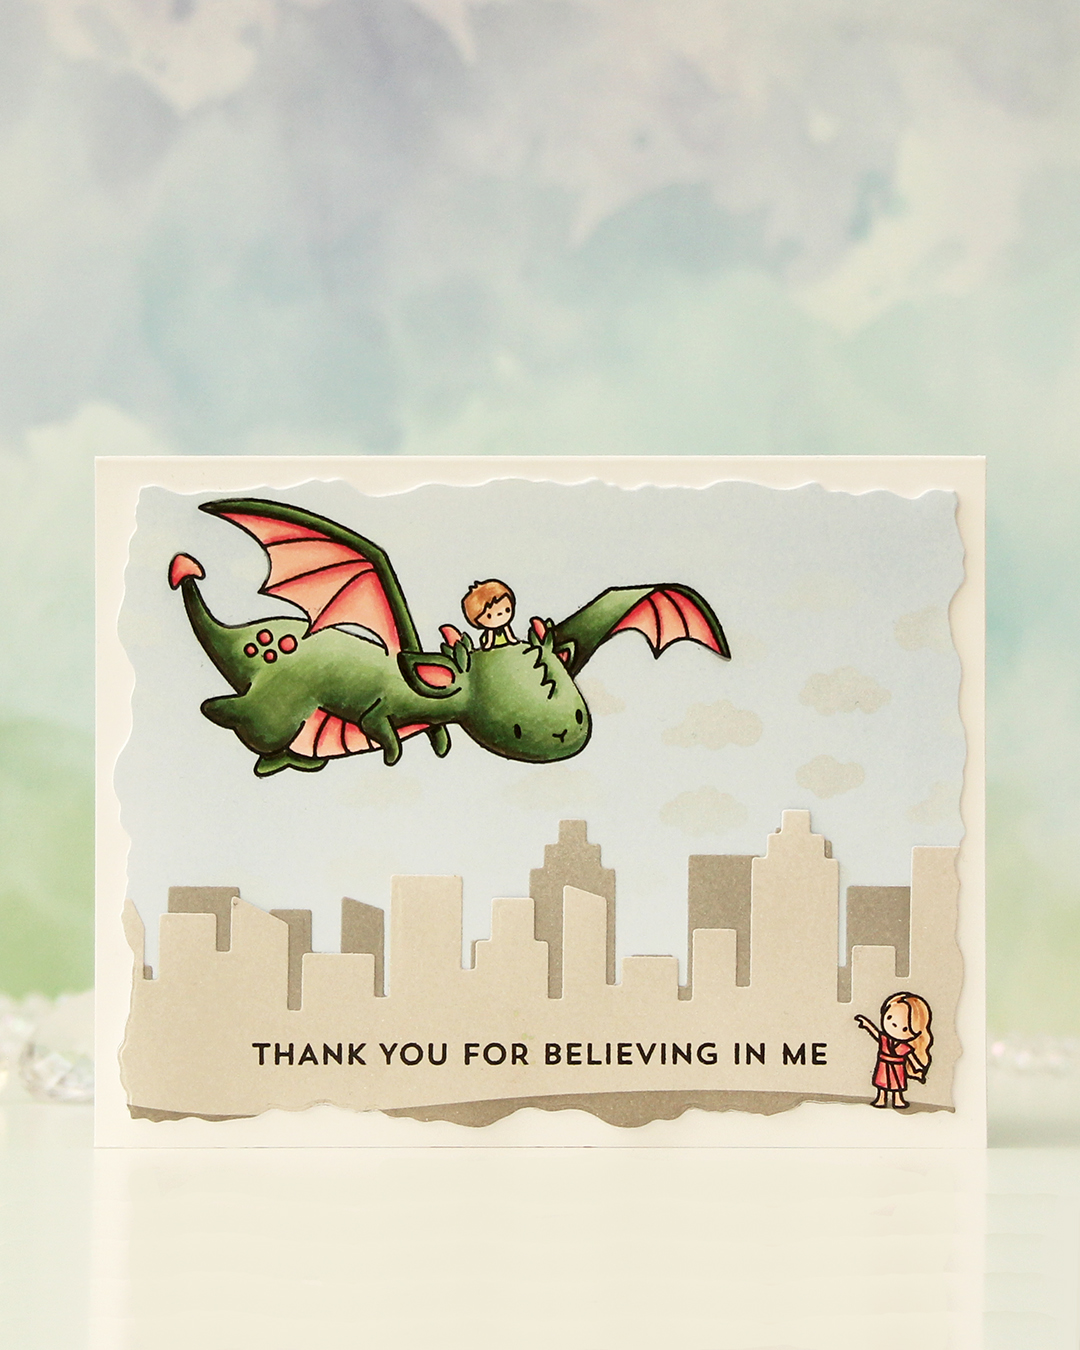 I started with two panels of X-Press It blending card and stamped the flying dragon and little boy on one of the panels, and the little girl in the corner of the other. I stamped in Copic friendly ink, colored up the images, then stamped on top with Altenew Obsidian ink, which gives really crisp black lines.
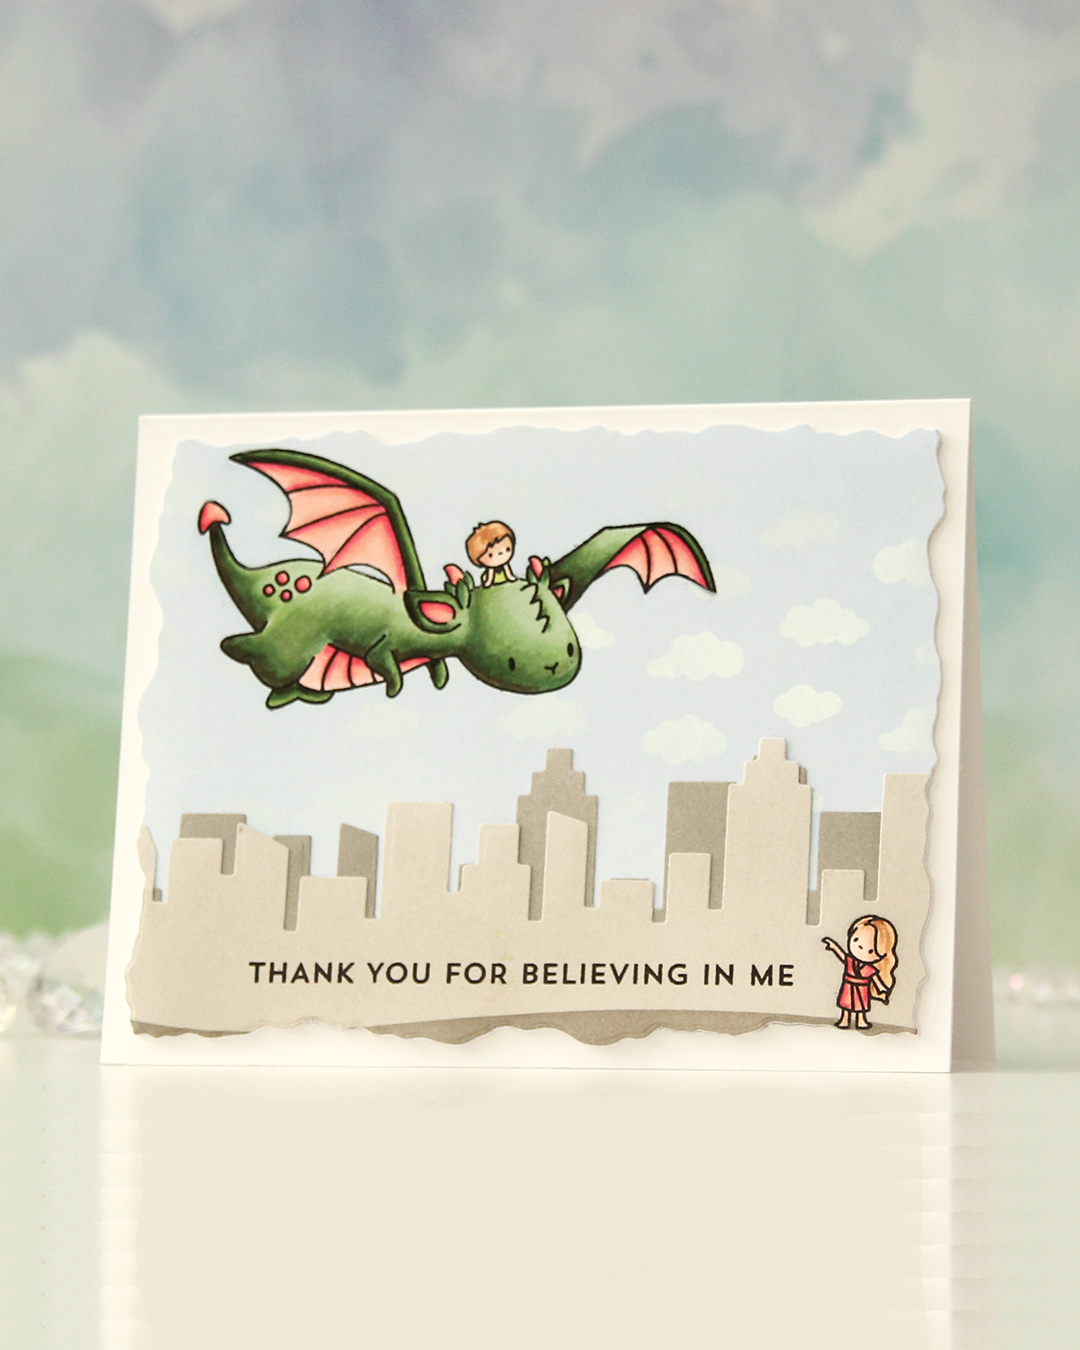 Once the coloring was complete, I put masks on top of my images and ink blended around them. For the piece with the little boy and the dragon, I used Icy Water fresh dye ink from Altenew, and for the panel with the little girl, I used Evening Gray ink, also fresh dye ink from Altenew. I also used Moon Rock at the very bottom to ground the little girl. In the sky, I also added clouds with Fresh Snow hybrid ink from Papertrey Ink through the Tiny Clouds stencil from My Favorite Things. This barely showed on my very pale blue sky, so I added Perfect Pearls powder on top, which makes the clouds stand out a little more, and it gives great shine when you tilt it in the light.
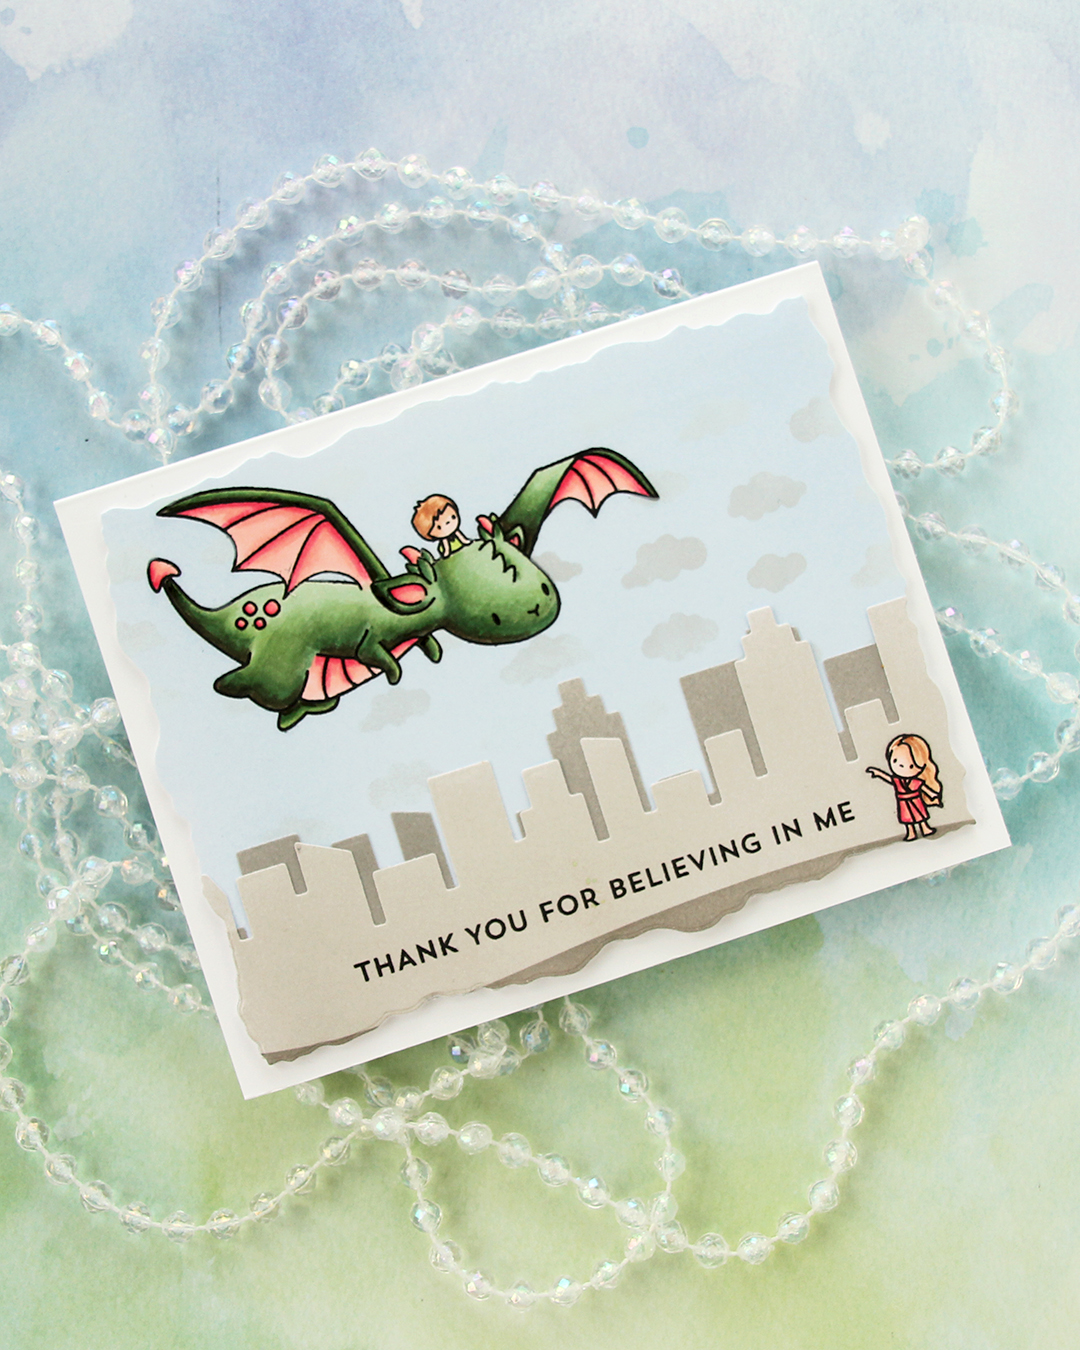 Using the Slim Film City die set from Mama Elephant, I die cut the city skyline from the panel with the little girl, and I also added a second skyline silhouette behind her that I die cut from the remainder of the panel, which I’d inked with Moon Rock ink.
 I stamped a sentiment from the Bitty Thanks & Gratitude stamp set from My Favorite Things using Altenew Obsidian ink, die cut the whole thing using a die from the Watercolor Rectangle STAX die set from My Favorite Things, added an additional three layers behind it for dimension and adhered it to a white card base. I decided not to add any embellishments to this, those clouds really do add quite a bit of shine in real life, and I didn’t think the card needed any more.
 I used a very basic color palette for this one.
 When I printed my image, I printed
  Once my coloring was complete, I used the Notebook Edge die from My Favorite Things to cut from the edge of the panel for a little bit of interest. I mounted my little scene using foam tape onto a card base I created from Cornflower cardstock from My Favorite Things.
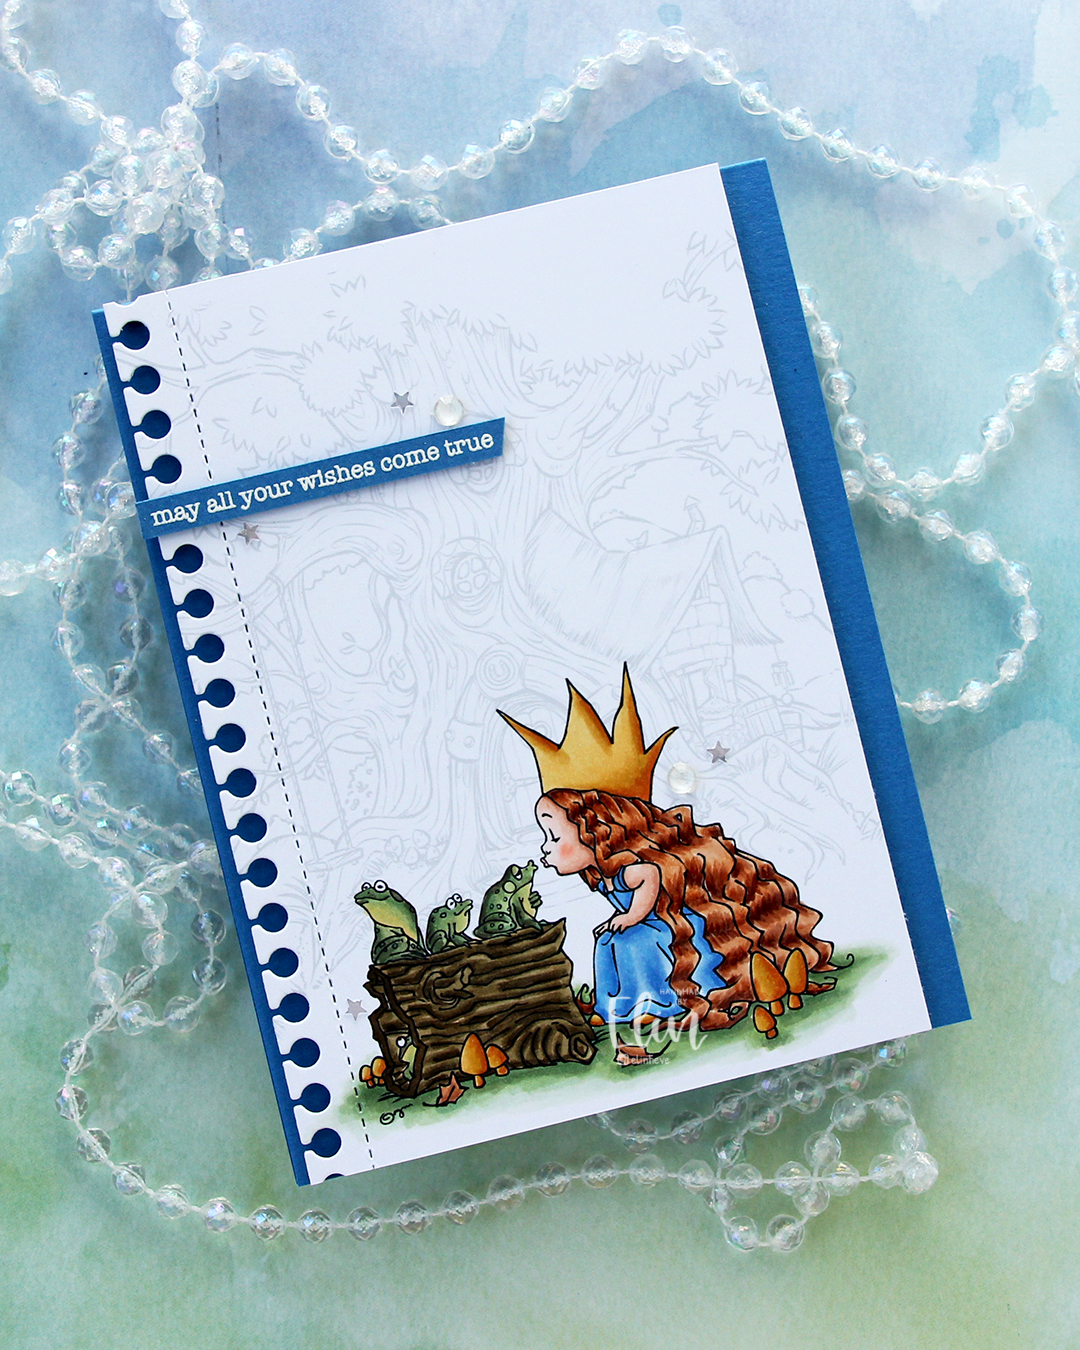 I stamped a sentiment from the Birthday messages stamp set from Mama Elephant using VersaMark ink onto a scrap of Cornflower cardstock, added super fine detail embossing powder from Ranger and heat embossed. I always heat emboss from the back of the back of the cardstock only, it gives a much better result than heat embossing from the front.
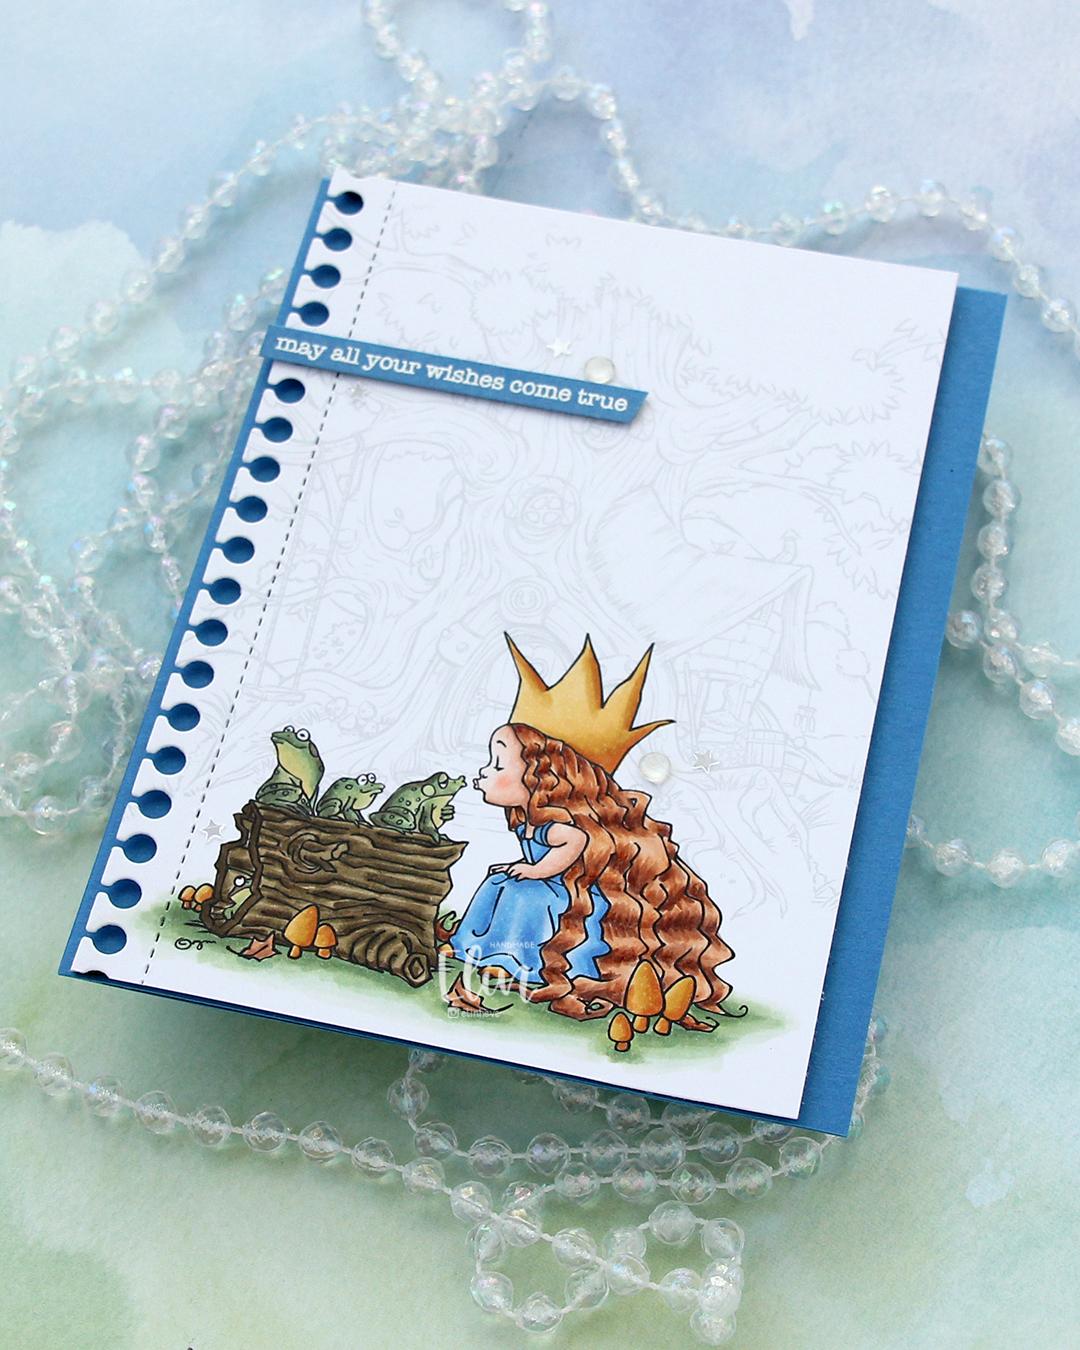 I cut my sentiment down to a strip, added a couple of layers of cardstock behind it for dimension and adhered it near the top left of the card, before finishing off with a few gems and confetti stars from the Starry Night mix from Little Things from Lucy’s Cards. The stars made me think of “When you wish upon a star”, which goes perfectly with the sentiment and the “Once upon a time” theme for the Coloring Club Challenge.
 I used a fairly limited color palette for this one, I feel.
 I colored my cutie with Copics and made sure to color enough on the sky and the ground beneath him so I could die cut my panel with a circle die. I used a black glaze pen to get some shine into his eyes, and once the black was dry, I added a dot of white Gelly Roll 05. I die cut a white ornament using the Snowflakes and Ornament die set from Hero Arts, and glued my colored panel on top, before working on the rest of the card.
 For my background, I used the Magic Snow Cover die from Mama Elephant to die cut from Powder cardstock from Concord & 9th. I adhered that to a top fold white card base and glued my ornament in the center with a couple of layers of cardstock behind it for a little bit of dimension. I die cut a sentiment from white cardstock using the Jolly Holiday Greetings die set from Concord & 9th. I die cut the back from Champagne cardstock, also from Concord & 9th and added the complete sentiment to my card with a little dimension behind it, before finishing off with a die cut bow in the same cardstock color, die cut using the Gift Bows die set from Kristina Werner.
 Simple palette for this one.
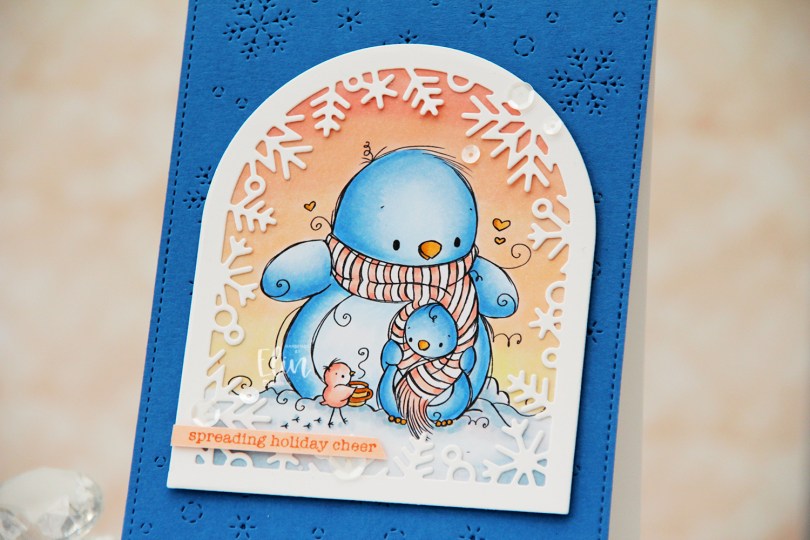
 I printed the image onto X-Press It blending card and colored it with my Copics, creating a soft winter sunset behind the cute penguins. From white cardstock (Stamper’s Select White from Papertrey Ink), I die cut a frame using the Winter Wonderland window die from Lawn Fawn and adhered it to my colored piece.
 I used the Magic Snow Cover die from Mama Elephant to create texture and interest to a piece of Cornflower cardstock from My Favorite Things, which I adhered to my top fold card base. I added some dimension behind my winter wonderland window and adhered it in the center of the card. I stamped a sentiment from the Holiday messages stamp set from Mama Elephant onto Nectar cardstock from Concord & 9th using Grapefruit ink, also from Concord & 9th, cut it down to a strip and added it to my frame with a couple of extra layers of cardstock behind it for dimension, before finishing off with sequins from the Ivory Sequin mix from Little Things from Lucy’s Cards.