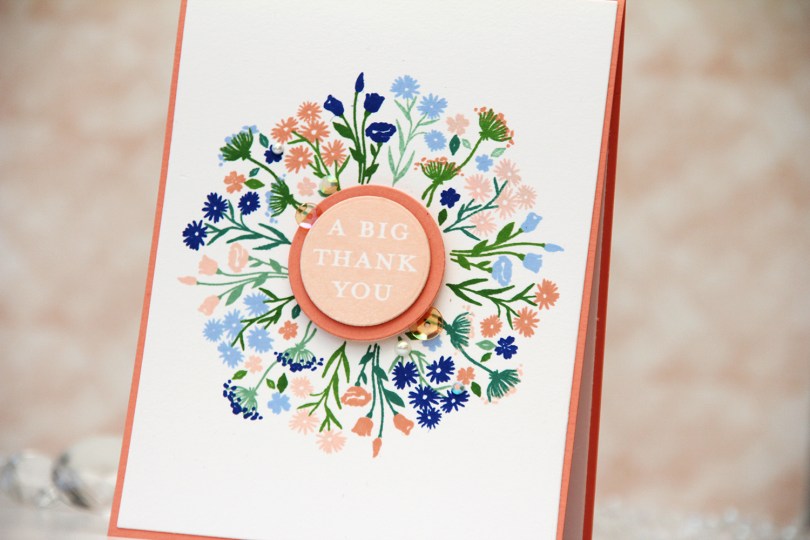
Hi, crafty friends! A few weeks ago, I spent a crafty session playing with the Bouquet turnabout stamp set from Concord & 9th. I tried a bunch of different color combos and turned a couple of my panels into cards. Today I’m sharing one of them.
 I’ve been made aware that this beautiful peach is my signature color. I kind of thought it would be blue, it’s my favorite color, after all, but I don’t make as many blue cards as I used to. Anyway, peach works with just about everything. It’s great with blue, it works really well with green and it’s also dynamite with pinks and yellows. It’s just a really good color. For this card I teamed it up with blue. More specifically, Capri and Bluebell from Concord & 9th, which were both in the new color release this spring. Capri is the most amazing color!!
The Bouquet turnabout set is a little different, as the turnabout itself is actually two separate stamps. There’s one turnabout for the stems and the greenery, and there’s another for the actual flowers. I inked up the greenery with Eucalyptus, Juniper, Parsley and Basil, turning for each color. For the florals, I used Nectar, Grapefruit, Bluebell and Capri, all from Concord & 9th. You’d think it would be messy with eight colors together on one card, but it worked really well.
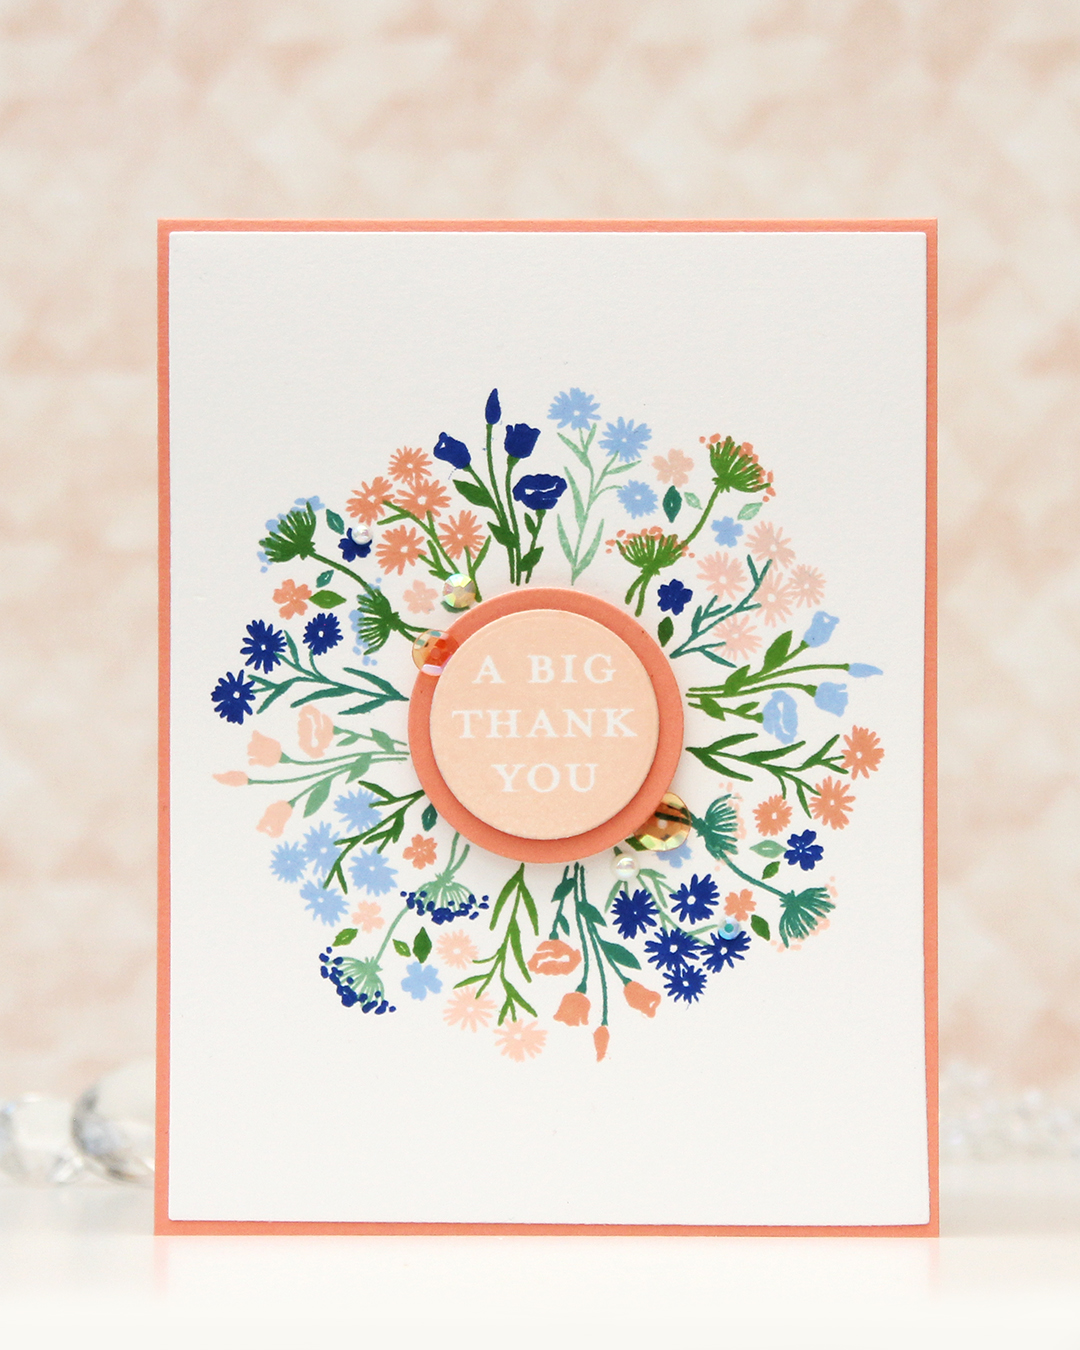
 I cut my panel down using the largest die in the Additional A2 Layers die set from Waffle Flower and adhered it to an A2 card base I created from Grapefruit cardstock from Concord & 9th. I stamped one of the sentiments in the Bouquet turnabout stamp set using Nectar ink, die cut it with a circle die, then mounted it on a die cut circle from Grapefruit cardstock, which I then mounted in the center of the card.
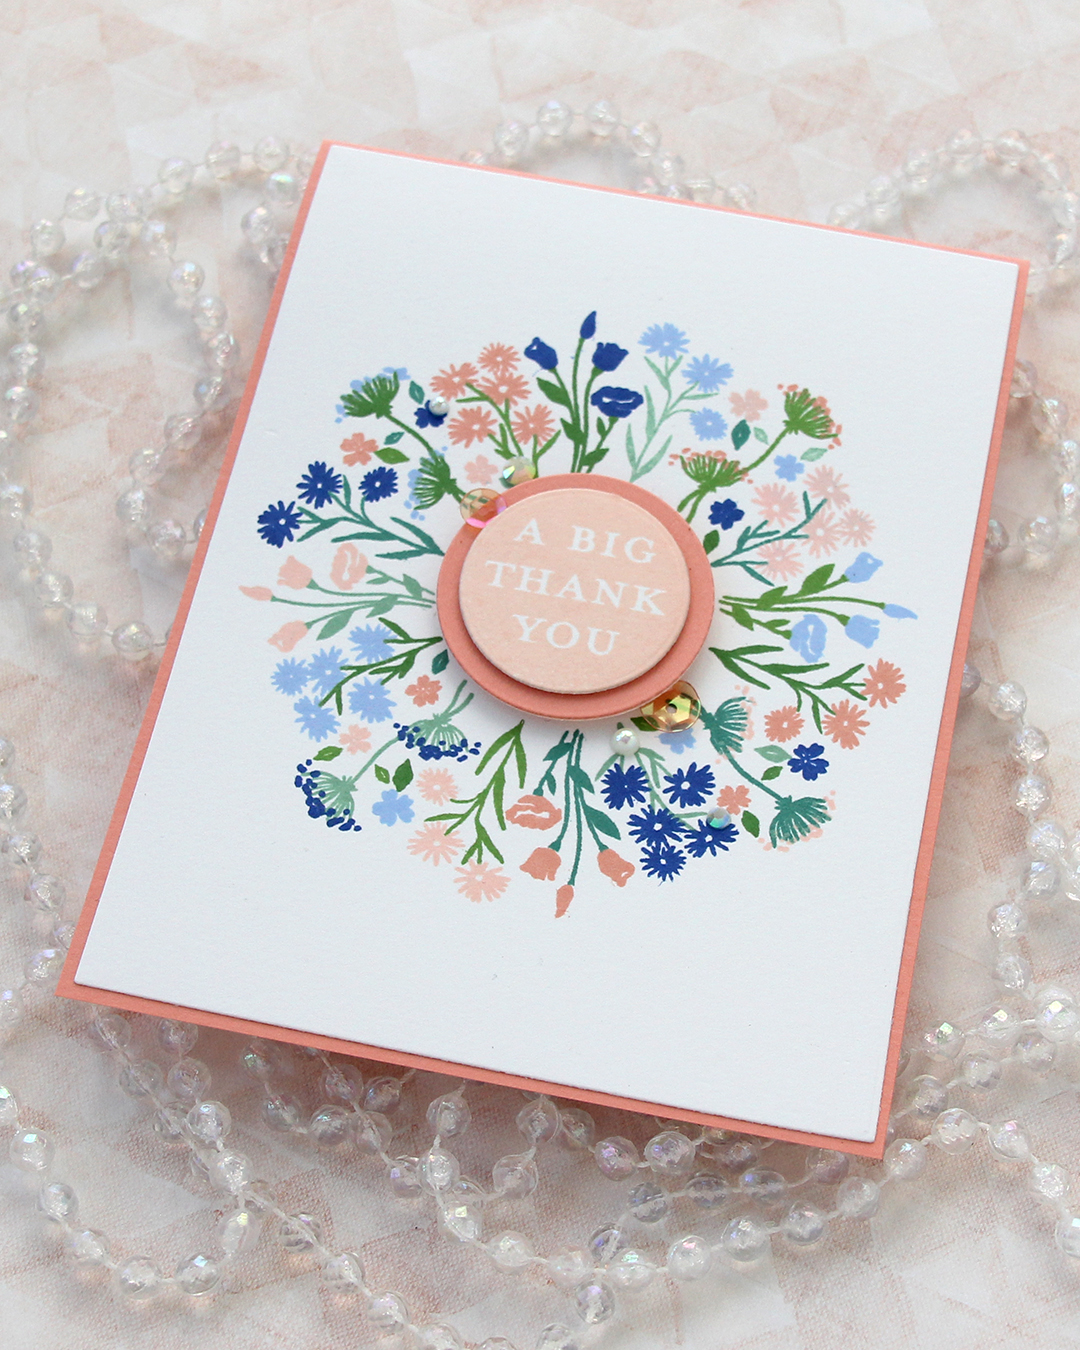 I finished off the card with a few pearls, gems and sequins from the Melon mix from Little Things from Lucy’s Cards.
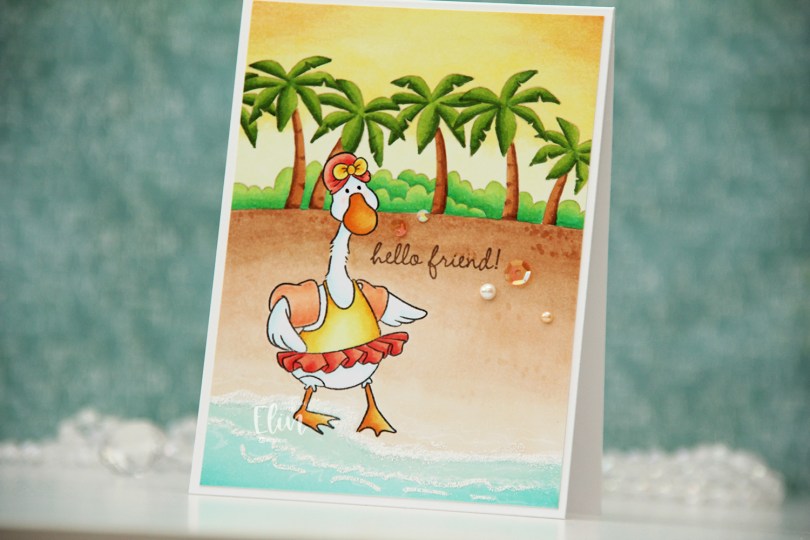

 I added White puff embossing powder from Wow! for a seafoam look near the bottom of my panel and stamped a sentiment from the much older
 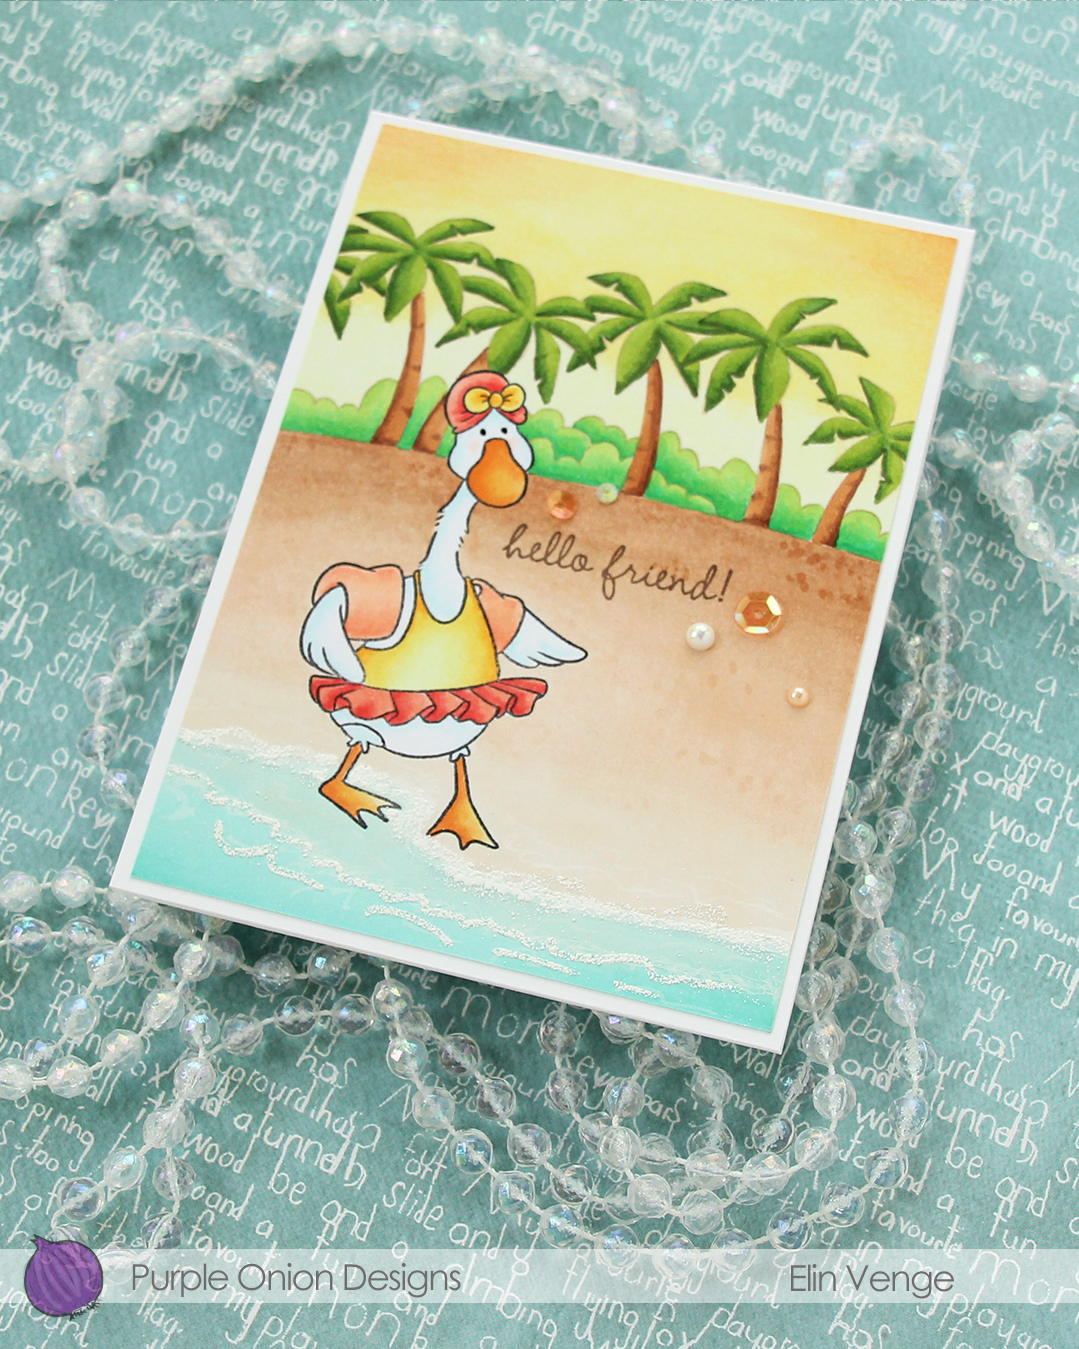 To finish off the card, I added a few sequins, gems and pearls from the Melon embellishment mix from Little Things from Lucy’s Cards.
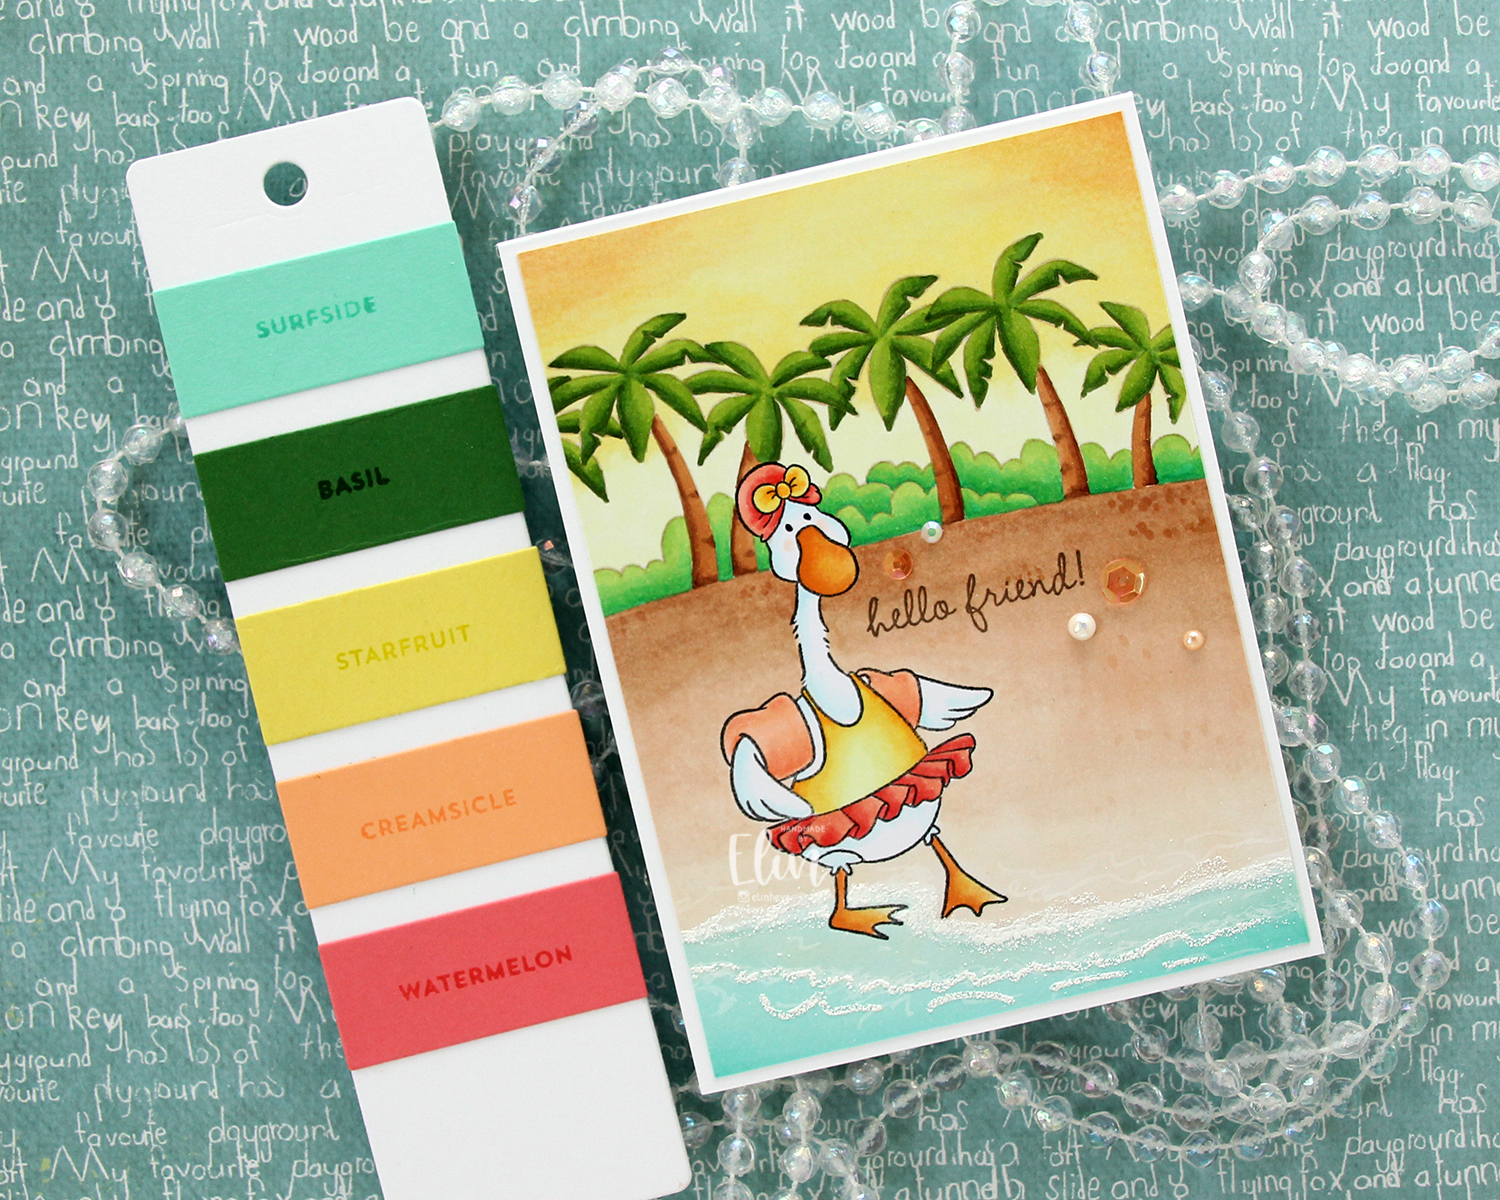 This Tropic color combination from Concord & 9th was my inspiration for this card.
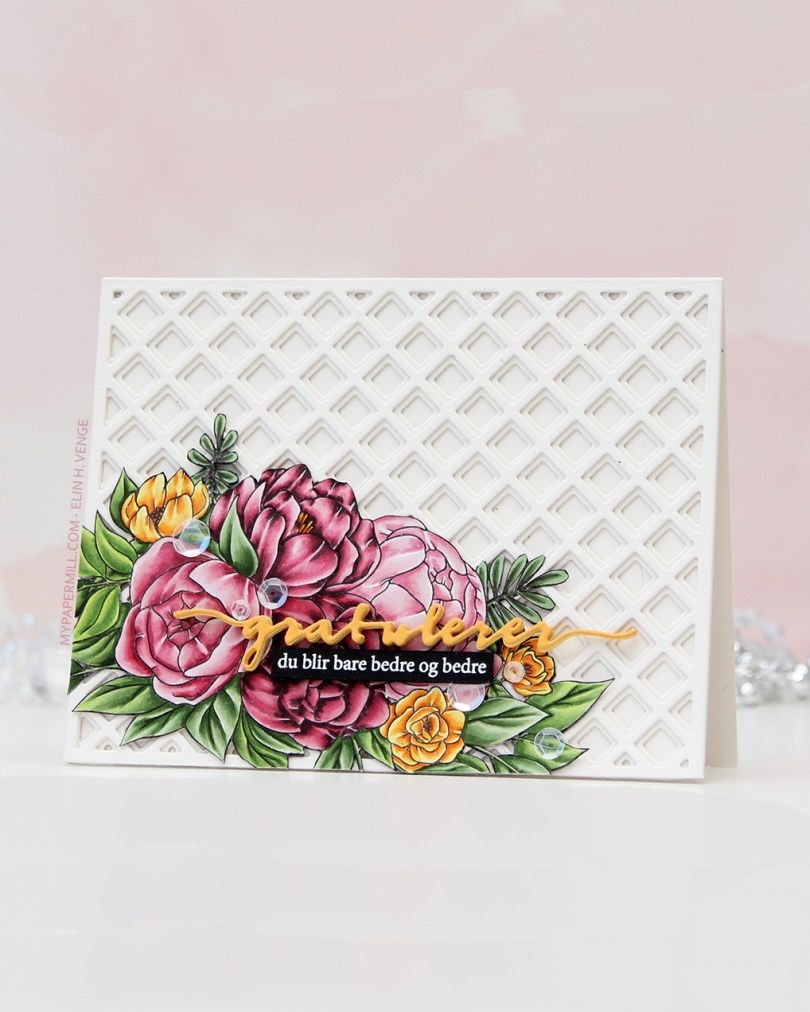
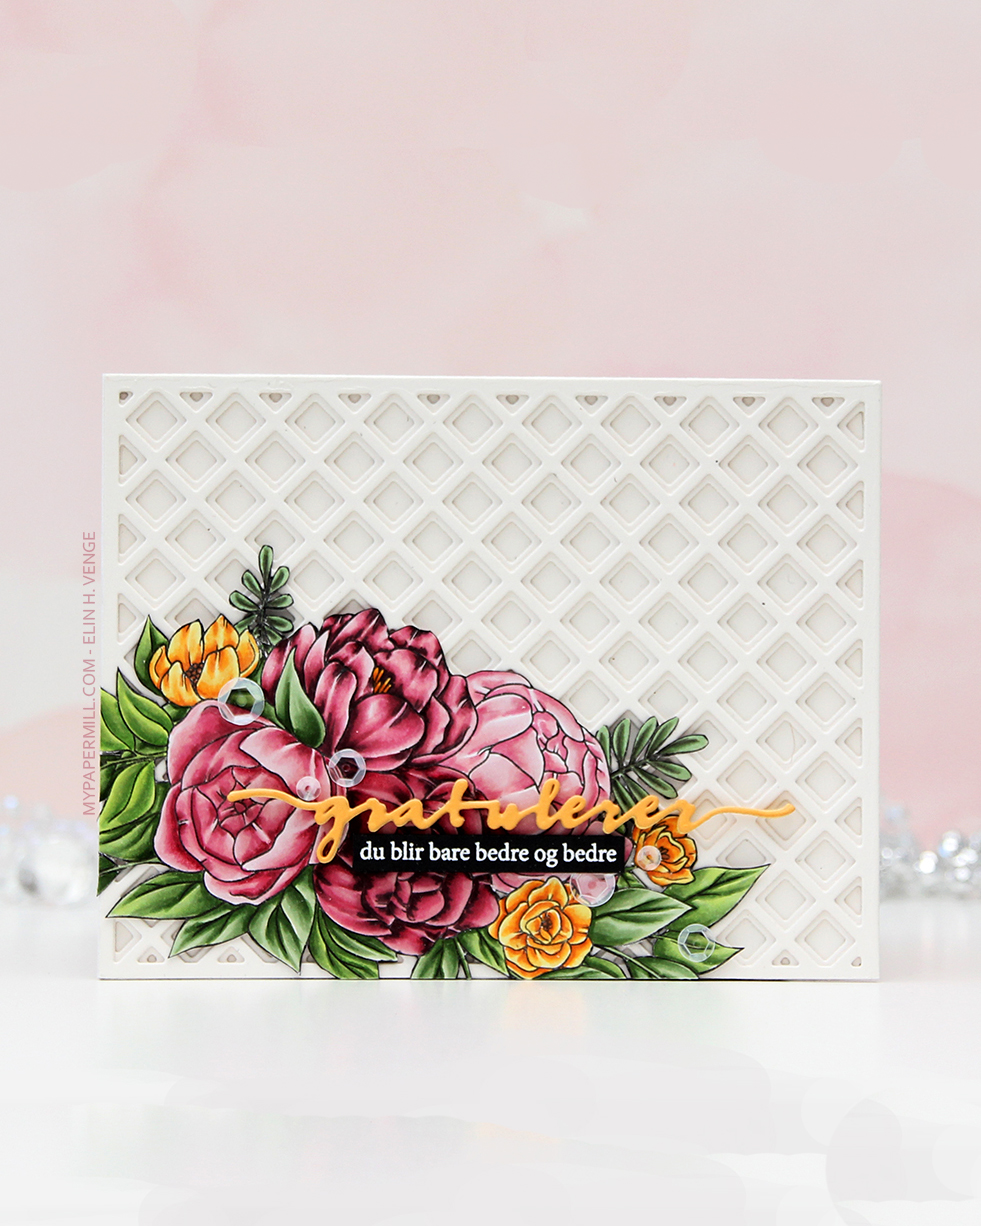 The floral stamp’s an old Stamptember collaboration stamp with Studio Katia called Flower Bunch. Studio Katia is no longer in business, I believe, but that doesn’t mean this image is any less gorgeous. I stamped it with Extreme Black ink from My Favorite Things onto X-Press It blending card, colored it with Copics and fussy cut the whole thing.
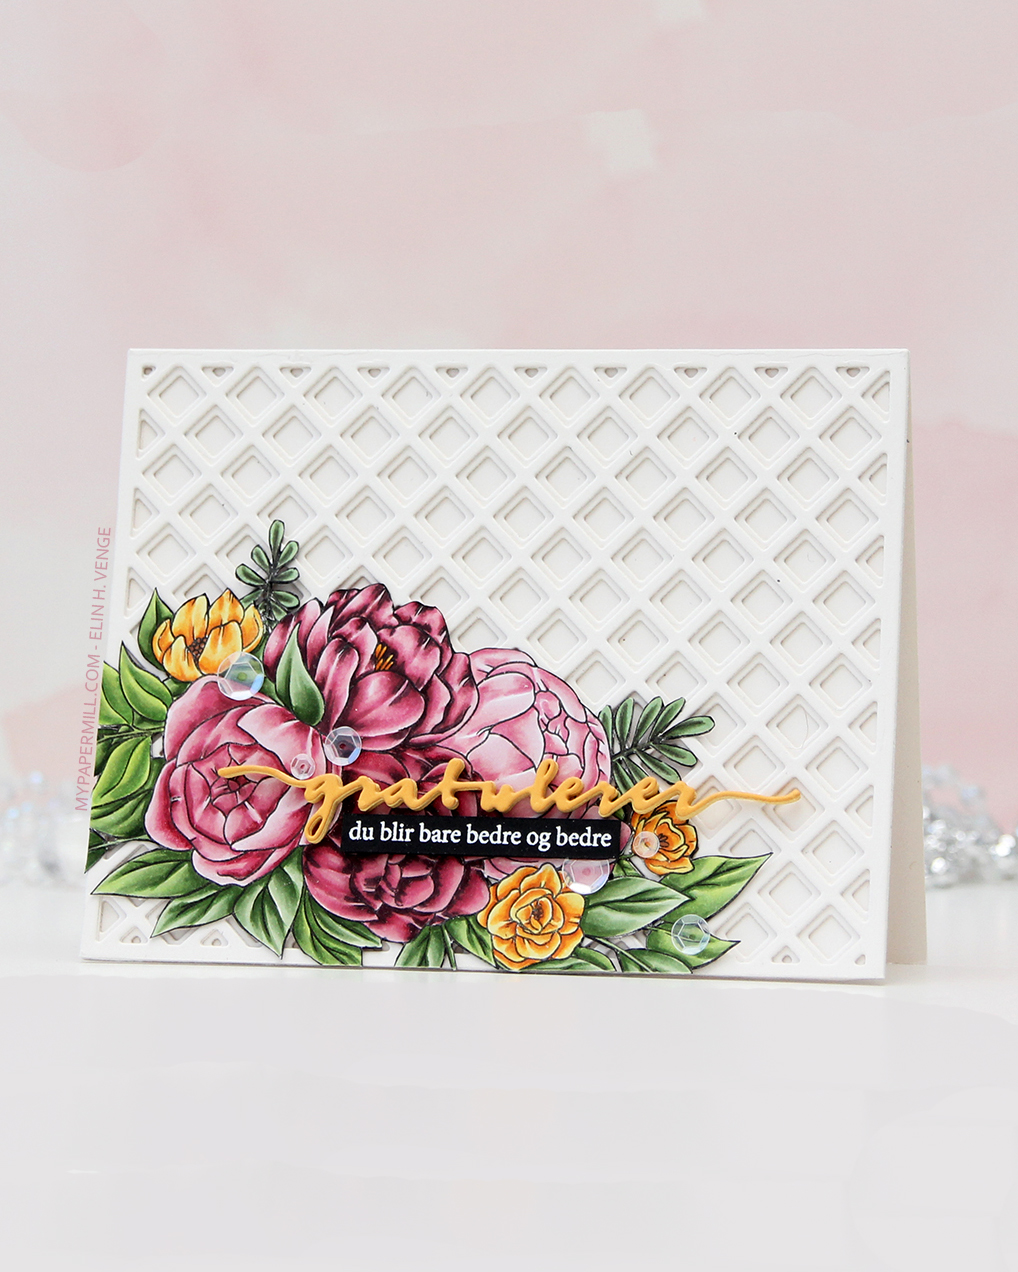 I created a card base from Rustic White cardstock from Papertrey Ink and added some interest to the background with the Garden Lattice Base and Garden Lattice Top dies, both from Honey Bee. I cut two of each, stacked them and adhered them to my card base, gluing the fussy cut image down in the bottom left corner.
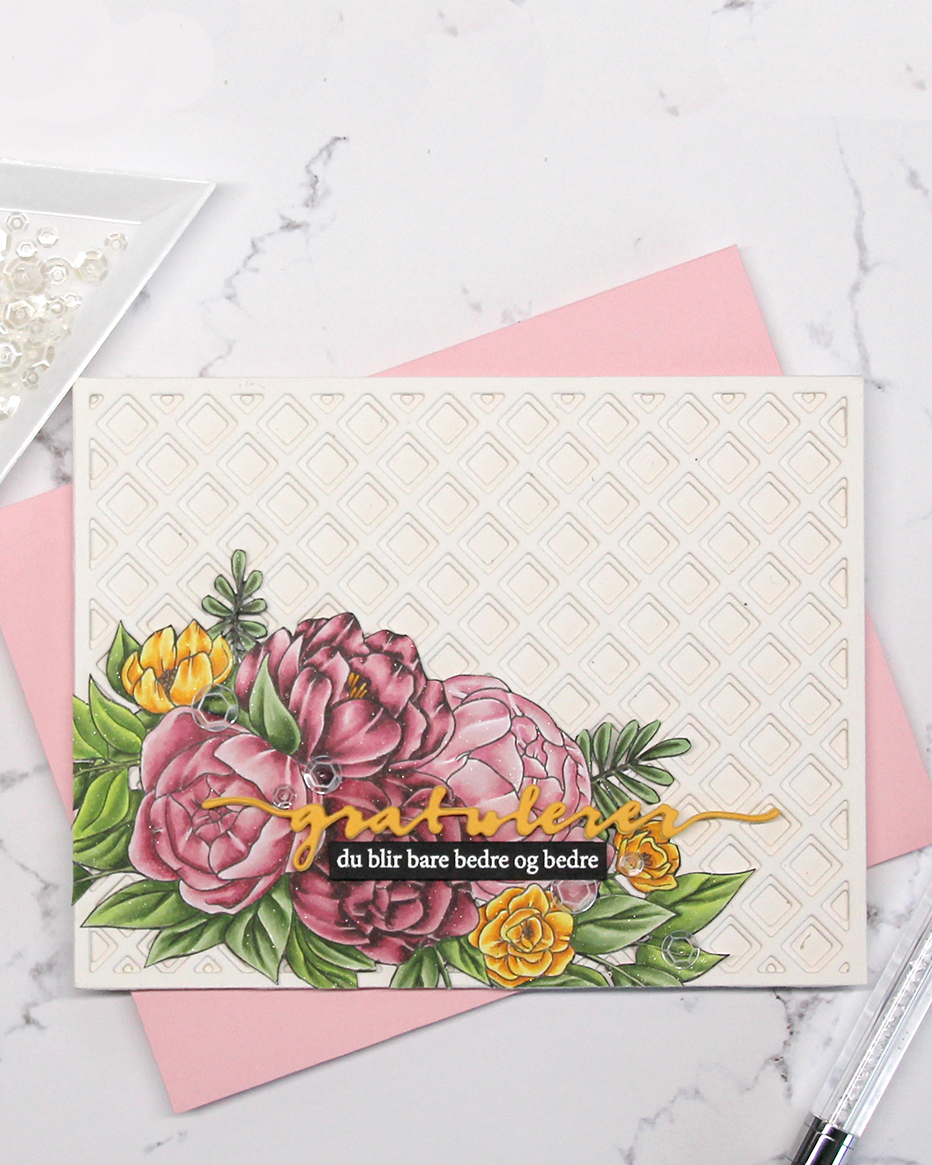 I die cut the Gratulerer 6 die (PD17240) from Papirdesign from Summer Sunrise cardstock from Papertrey Ink and backed it with a couple of additional ones die cut from Harvest Gold cardstock, also from PTI. I stamped and white heat embossed a sub sentiment from the A06 stamp set from Norsk Stempelblad AS onto a scrap of True Black cardstock from Papertrey Ink, trimmed it down to a strip and backed it with additional strips for dimension. I’m pretty sure I used some glitter spray at the end of my coloring, because the image on this card really sparkles. It’s not in my notes, though. To finish off I scattered a few sequins from the White Orchid sequin mix from Little Things from Lucy’s Cards.
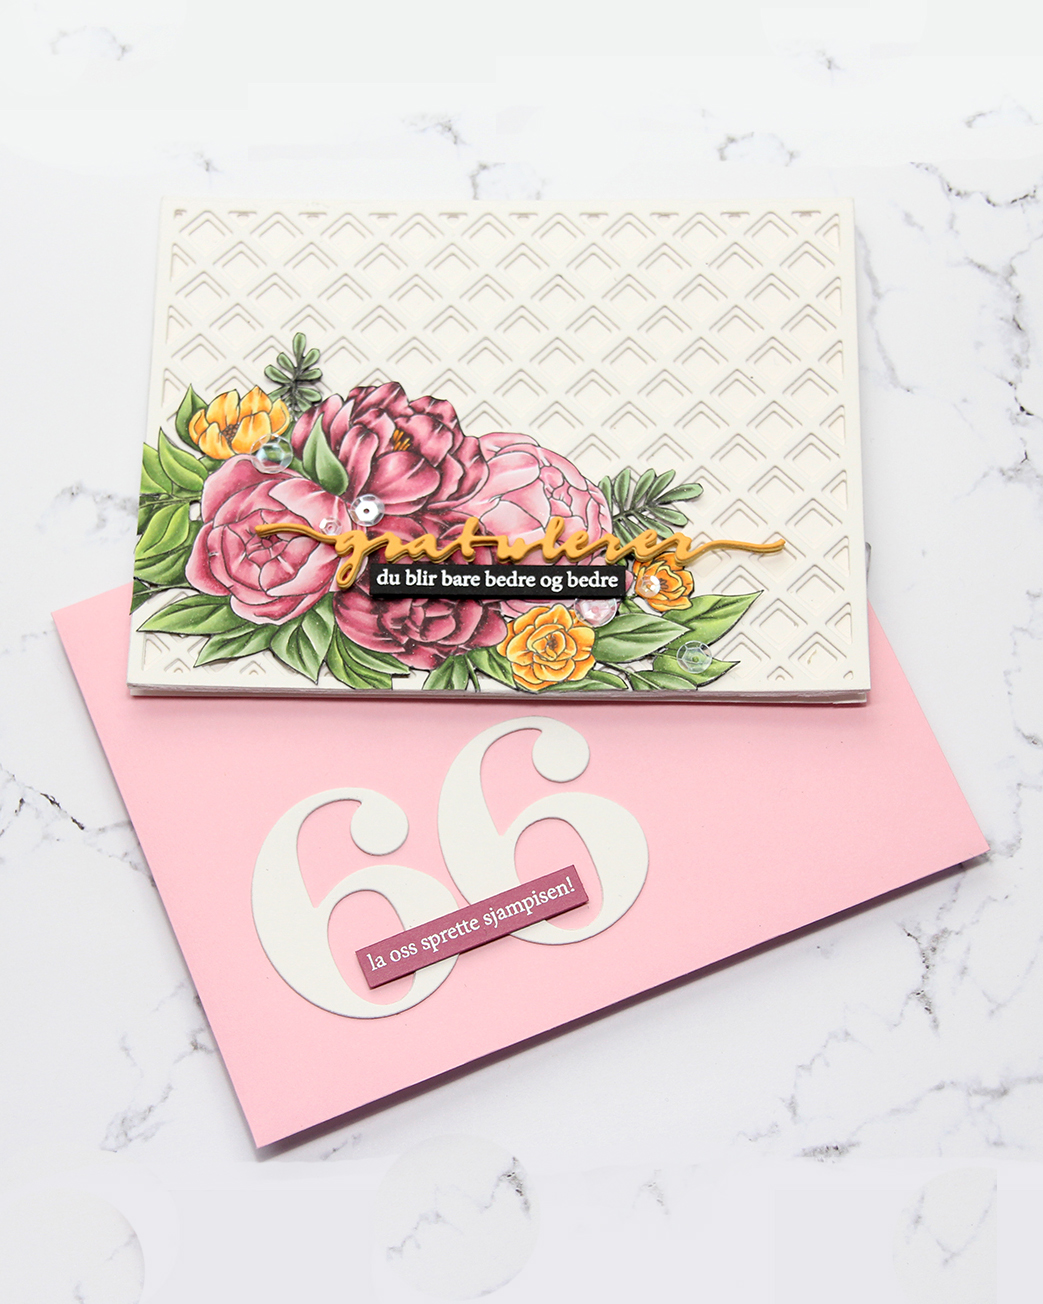 I even embellished my envelope. I used the By the numbers die set from Papertrey Ink for the big numbers, then white heat embossed another sentiment from the A06 stamp set from Norsk Stempelblad AS, this time onto Autumn Rose cardstock from Papertrey Ink.
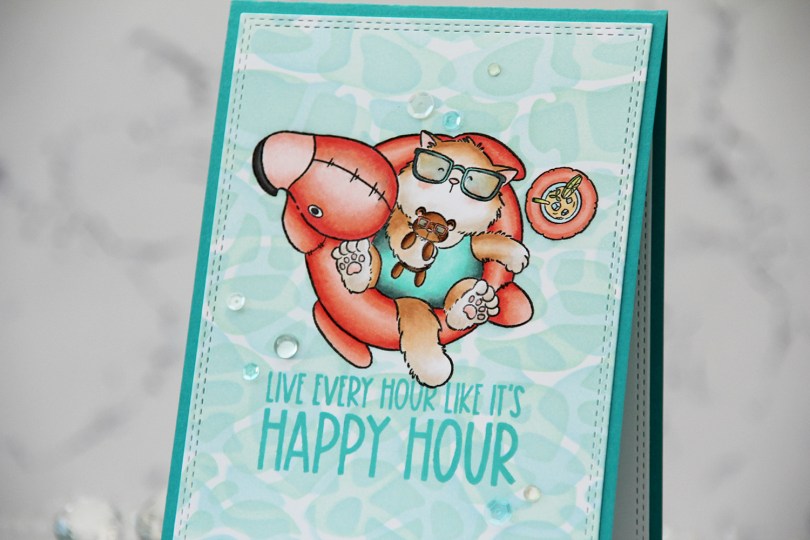
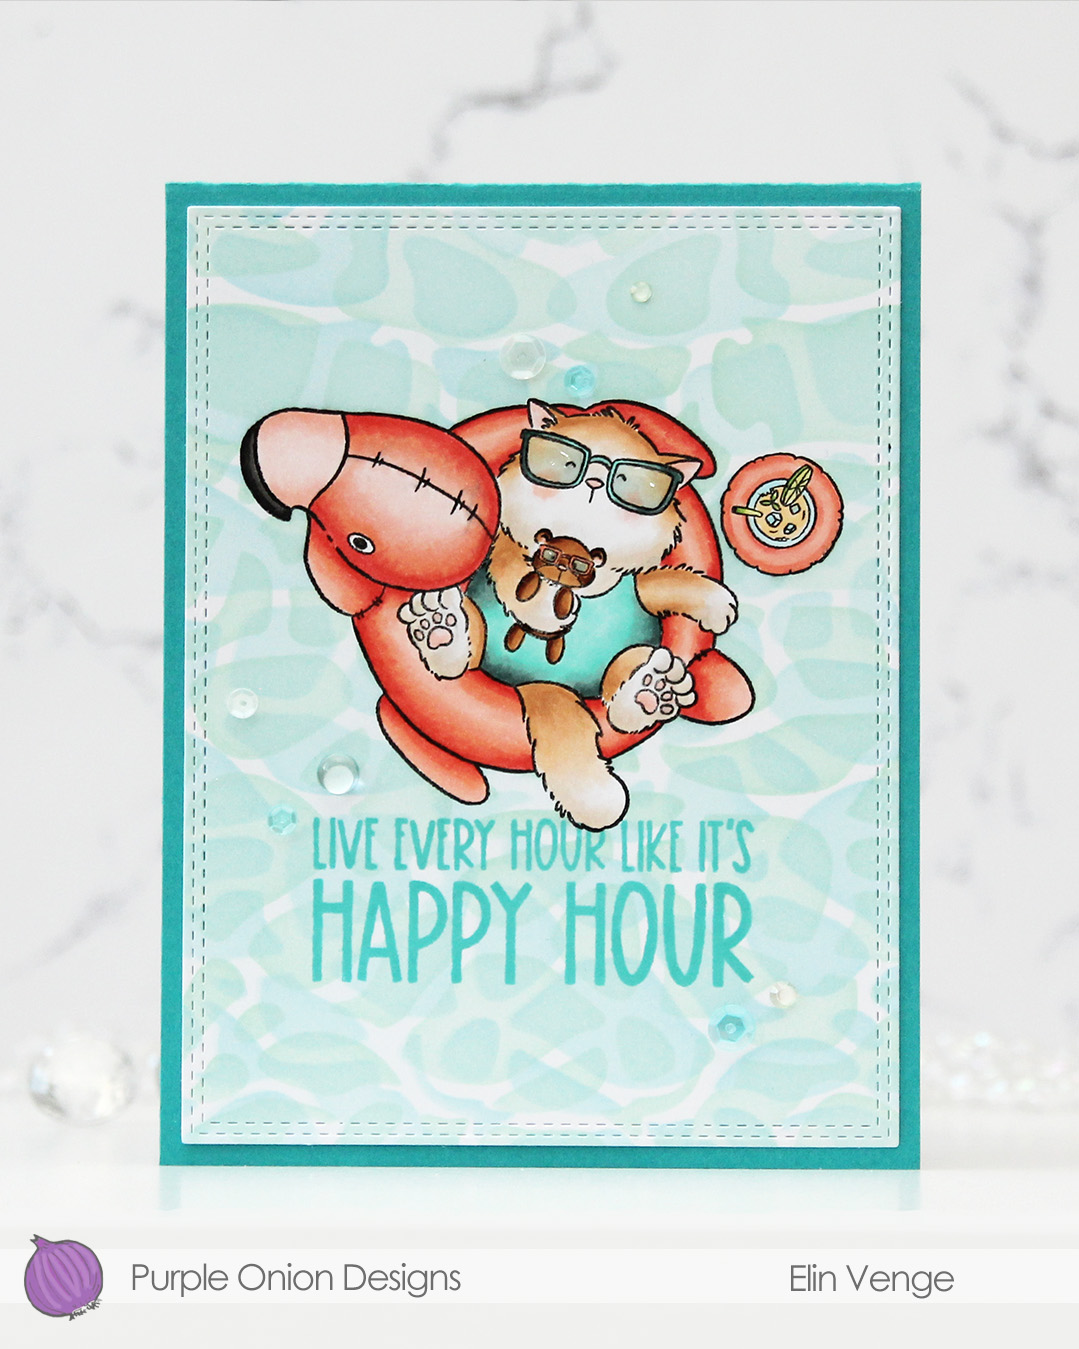 I stamped and colored my image with Copics on X-Press It blending card, before using a die in the A2 Double Stitched Rectangle STAX die set from My Favorite Things to create faux stitching around the perimeter of my panel.
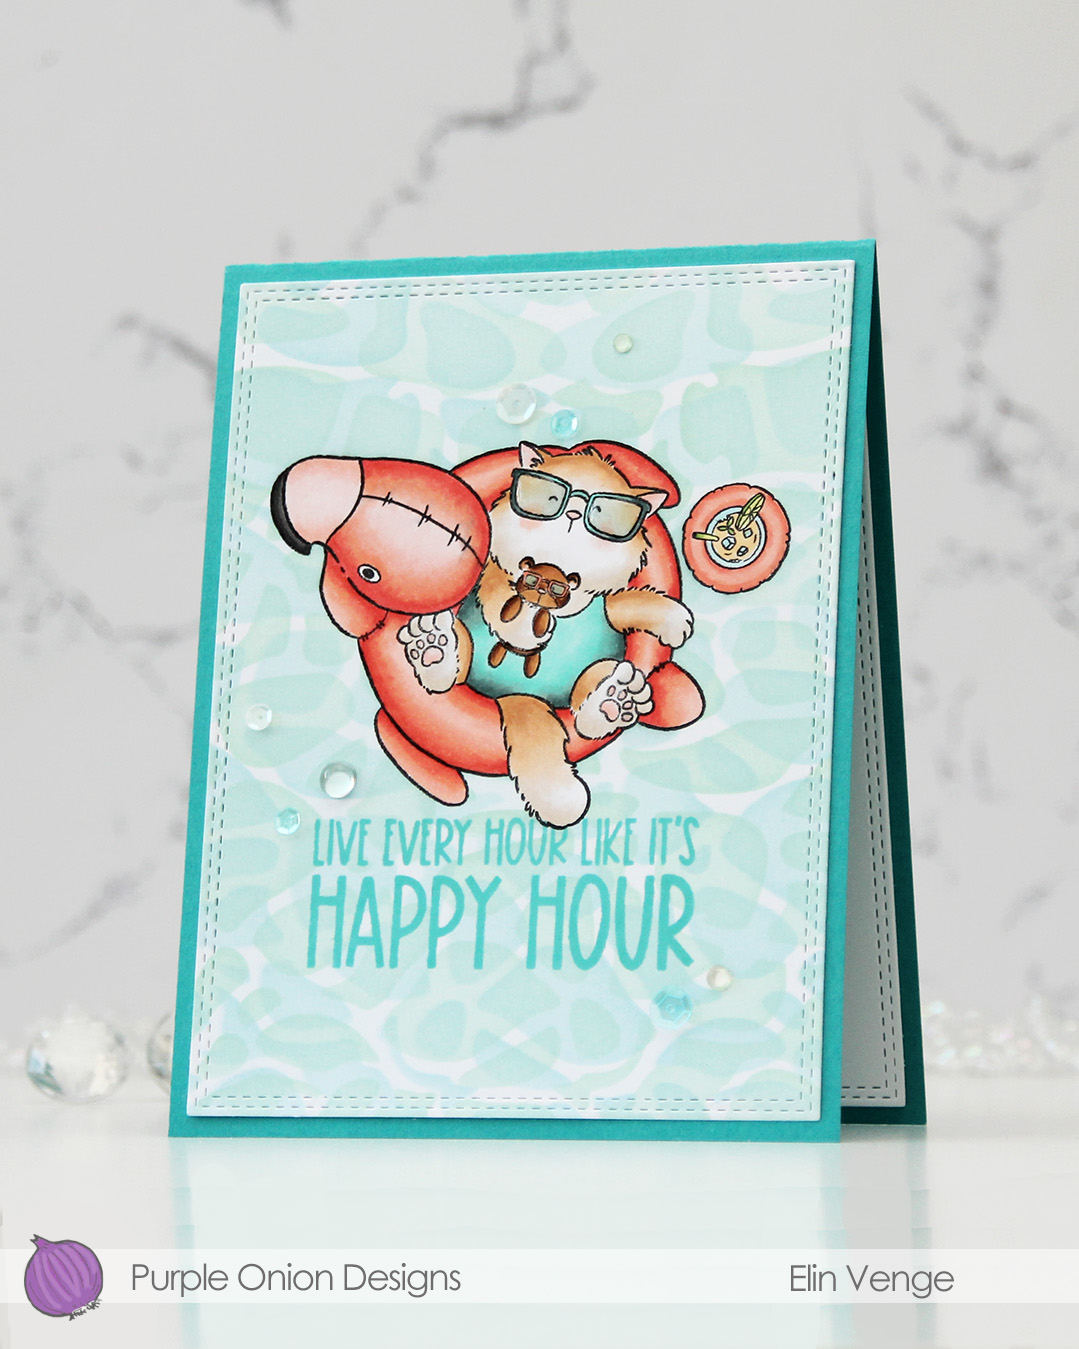 I masked off my image, before using Powder, Harbor and Sea Glass inks from Concord & 9th to ink blend the background through the Perfect Pool Water stencil from My Favorite Things. I flipped and rotated the stencil to create my pool water.
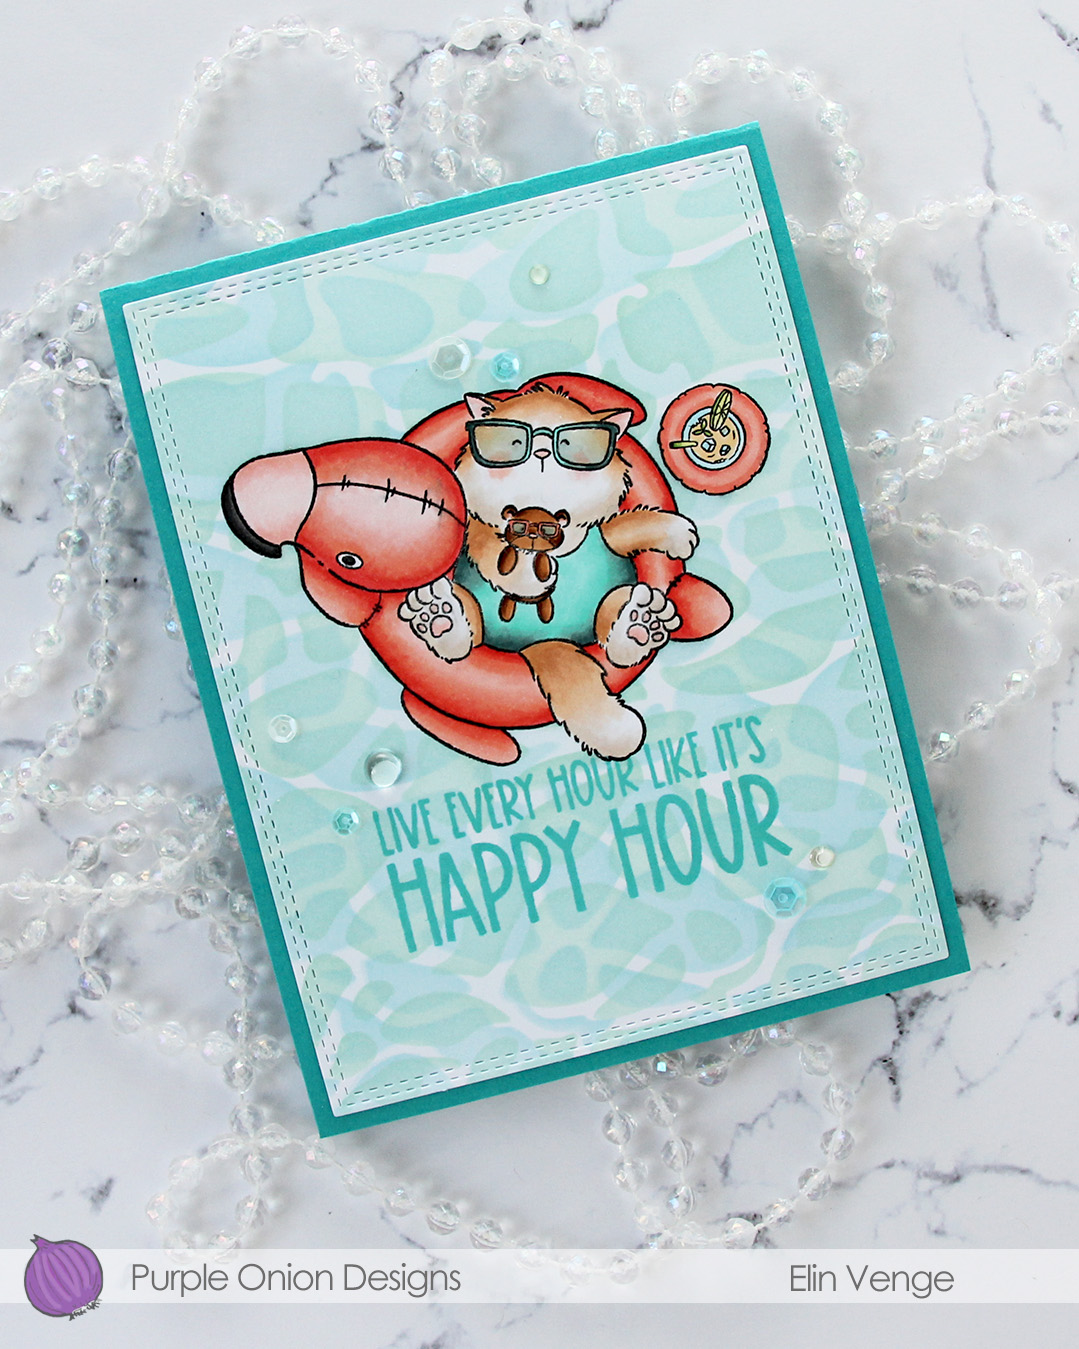 While I still had my mask in place, I stamped a sentiment from the
 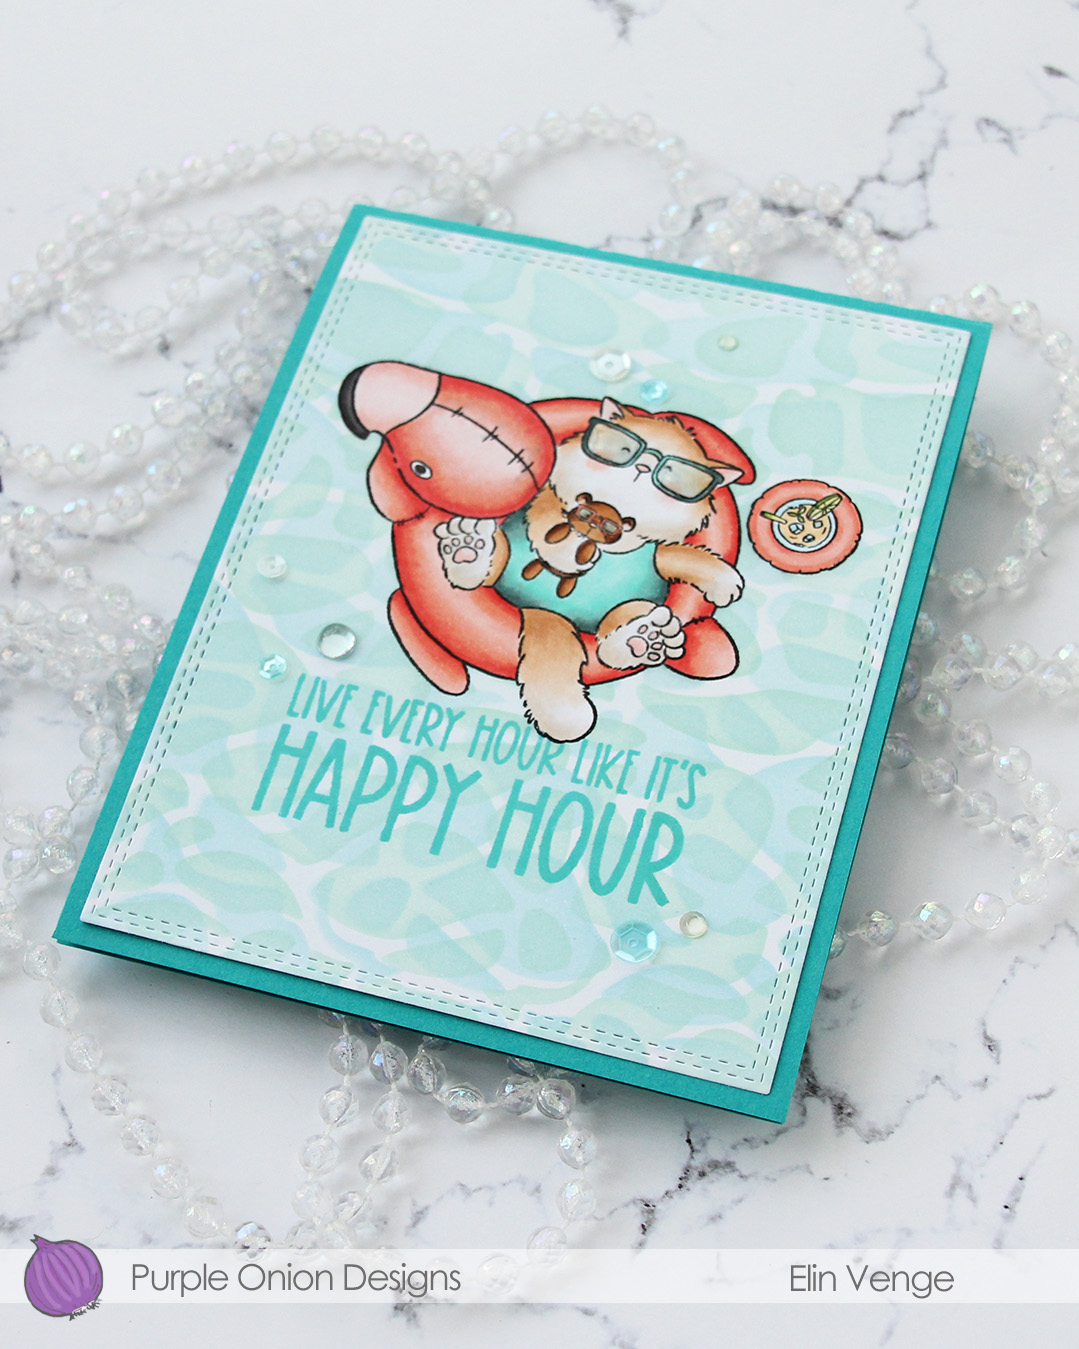 I adhered my panel to a card base I created from Oceanside cardstock from Concord & 9th, added a layer of Glossy Accents to Tofu’s glasses and finished off with a mix of sequins and gems from the Ice Water embellishment mix from Little Things from Lucy’s Cards.
 Very limited color palette for this one.
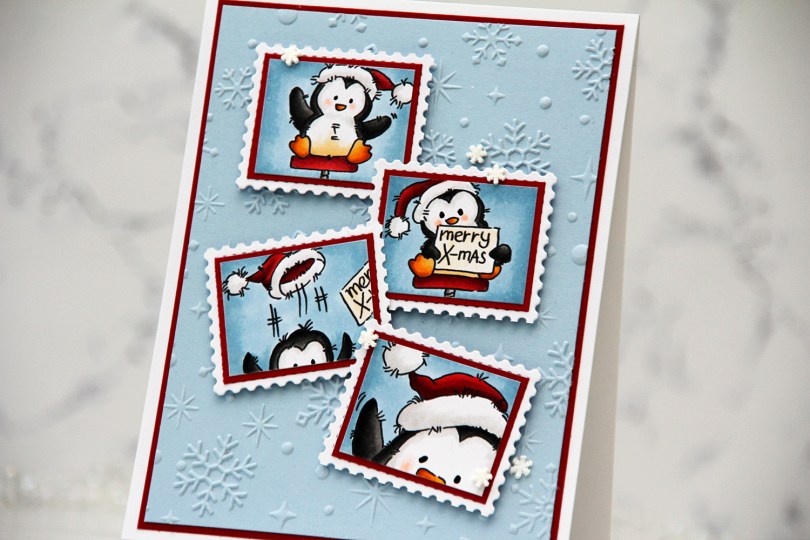
 I started by coloring the images with Copics. They each come with a frame, but I wanted this postage stamp look, so I cut my images on the inside of the frames.
 I wanted some interest in the background, and the Sparkling Snow embossing folder from Simon Hurley/Spellbinders is amazing! It creates proper six pointed snowflakes and gives such a cool texture, I want to use it on everything. I used it with a panel of Blue Breeze cardstock from My Favorite Things. It’s one of my favorite light blue colors, I may need to hoard it since MFT went out of business. I trimmed my panel down, matted it with a panel of Cranberry cardstock from Concord & 9th and adhered both to a top fold white card base I covered with an A2 panel of X-Press It blending card, just so that my whites would match.
 I adhered each of my colored images onto Cranberry cardstock for a nice framed look, then adhered my matted images to postage stamps I die cut with the Postage Collage die from Waffle Flower.
 I mounted each of my postage stamps using foam squares, adding the first two straight before making sure the last two were wonky. I like that both the images and their placement tell a story about what happened in that photo booth, everything going perfectly at the start, followed by slight chaos. To finish off the card, I added black glaze to the eyes for some shine and a tiny bit of dimension, as well as snowdrift sprinkles from Little Things from Lucy’s Cards.
 I stamped the
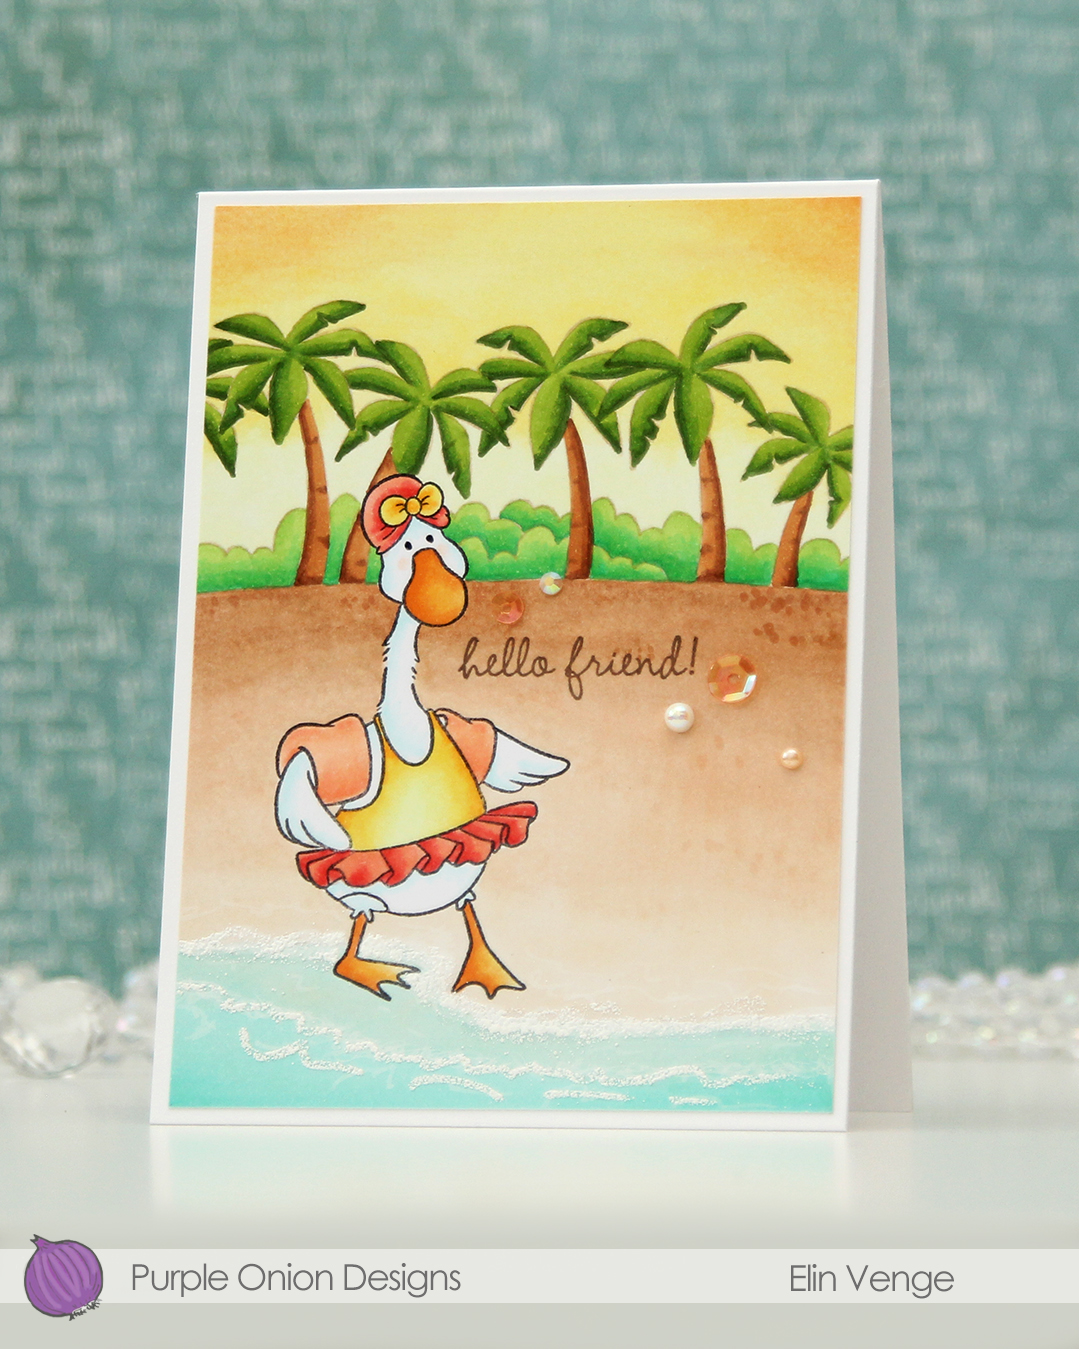
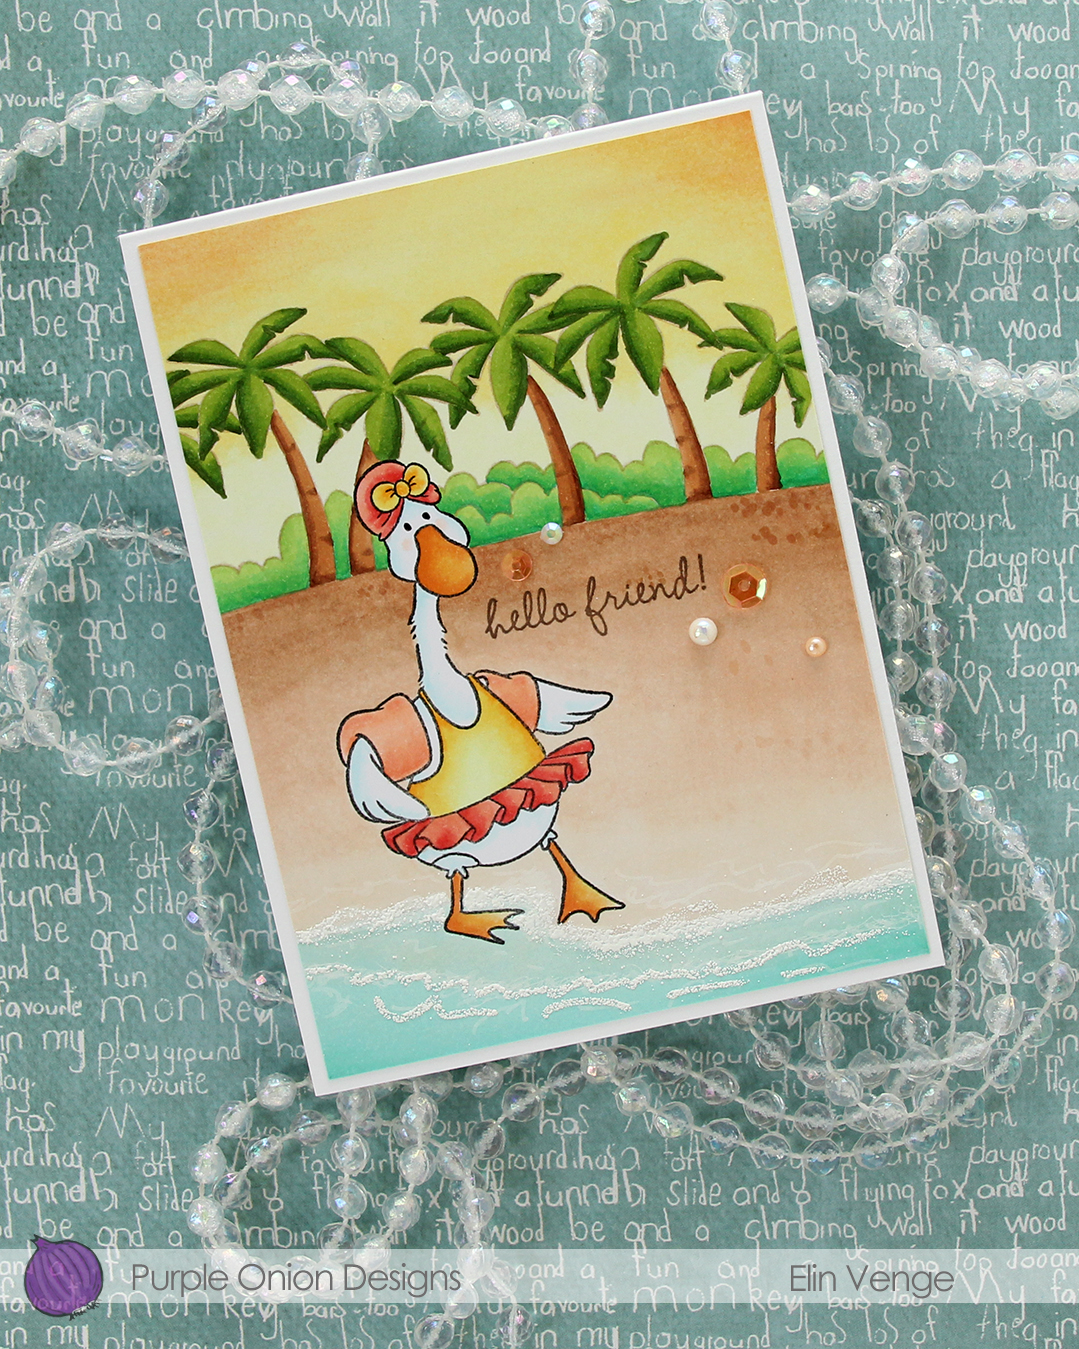
 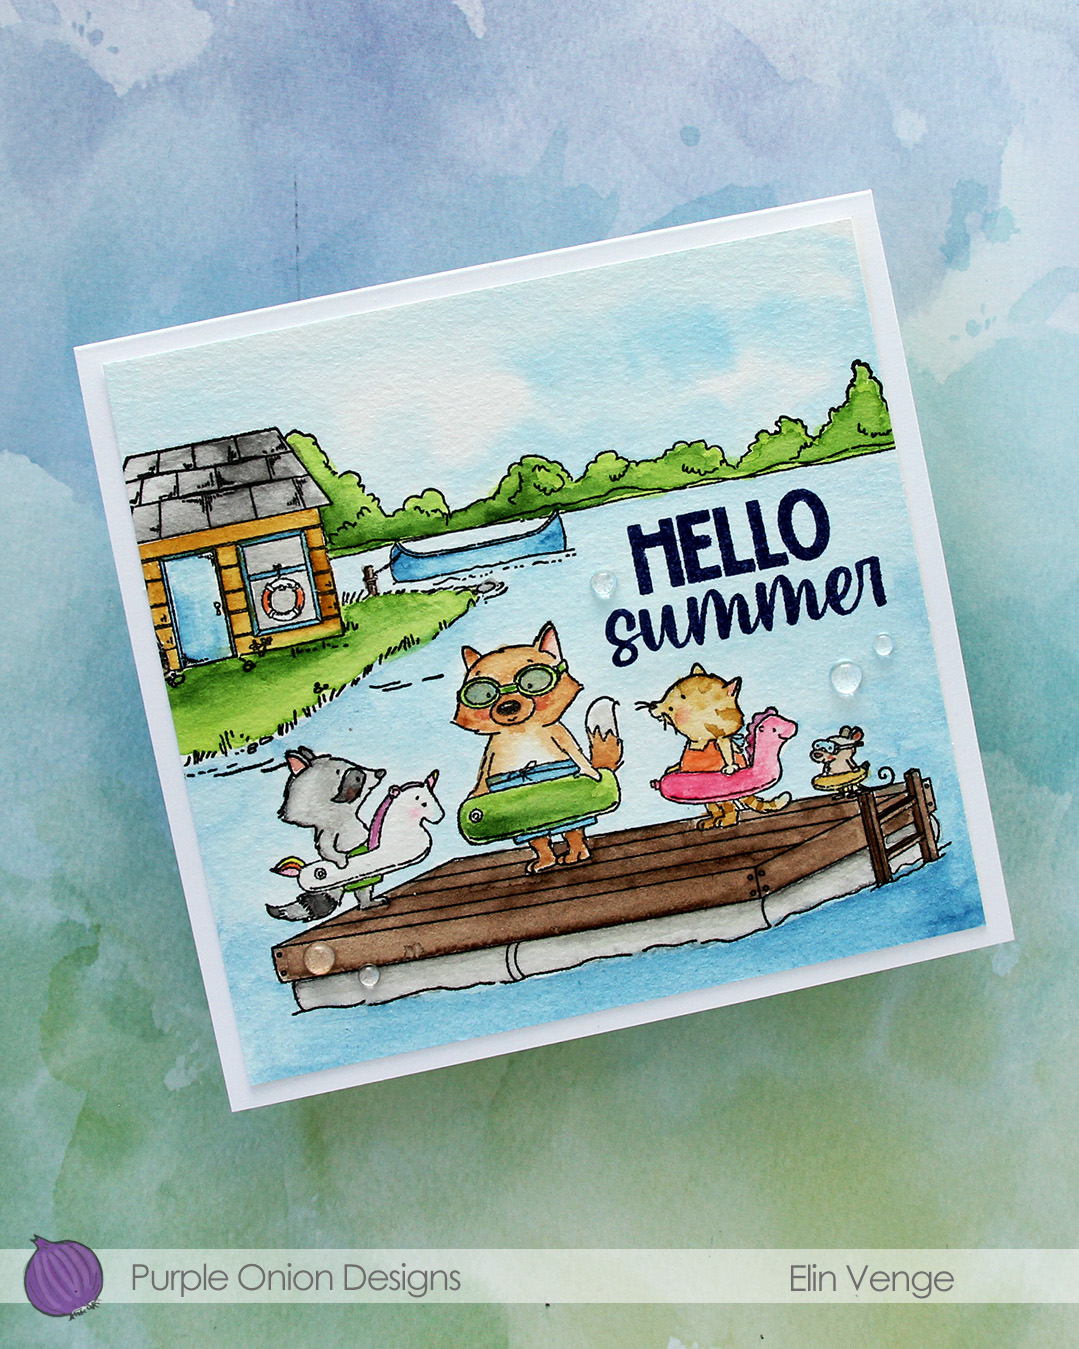 I used my Mijello Mission Gold watercolors and brushes in varying sizes to color in my scene, cut it down and stamped a sentiment from the
  I adhered the panel to a 5 3/4 x 5 1/2″ top fold card base I created from Stamper’s Select White cardstock from Papertrey Ink, before finishing off with a few Raindrops from Little Things from Lucy’s Cards.
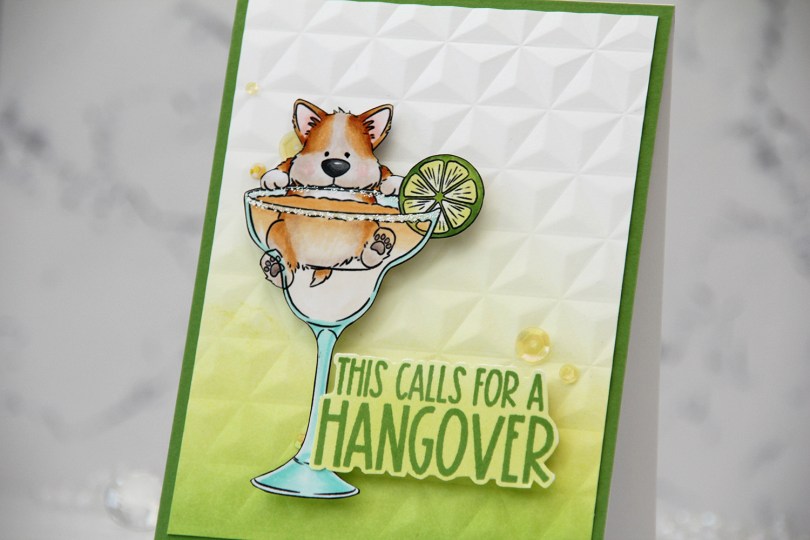
 I knew I had to color up this image as soon as I saw it. This is so adorable with the corgi hanging off the top of the glass. And so funny, and very typical of Pei’s illustration style. I love it!
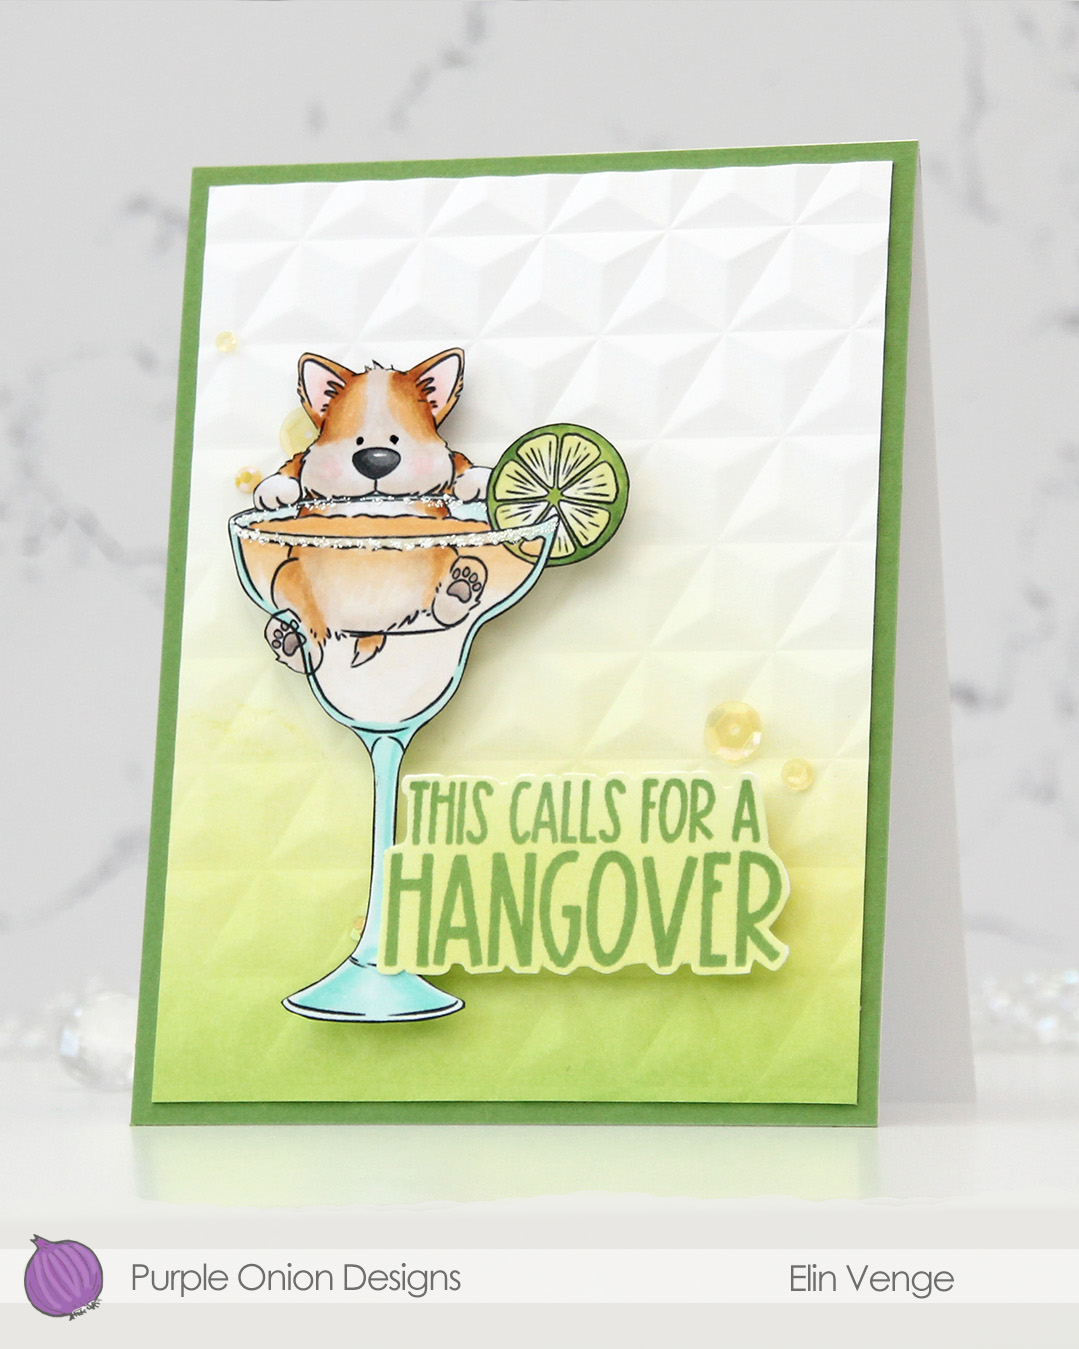 I colored the image with Copics, fussy cut him, then added VersaMarker pen to the rim of the glass and used white puff embossing powder from Wow! to mimic a salt rim. The embossing also adds some fun texture to the glass. I also used a black glaze pen to add a little bit of shine and dimension to his eyes.
 I ink blended Parsley and Starfruit inks from Concord & 9th onto a white cardstock panel for an ombré effect, then used the Geometric embossing folder from WRMK to create some subtle dimension. I added the panel to a card base I’d covered with Parsley cardstock from Concord & 9th, before mounting the image using foam tape.
 In this release there are also a few sentiment sets, and this one from the
  Simple color palette for this one. This was so fun to color!!!
 I actually decided to watercolor this one with my Zig Clean Color Real Brush markers. I prefer using a paintbrush with water with these, but there’s also a blender that you can use. Marcel is small, but I still used three different browns and a pink for him (064 Oatmeal, 607 Milk Tea, 068 Deep Brown and 200 S. Almond Pink). For Elliot and the die cut letters I used 312 Overcast Sky only. I did use a little pink for the bow on his tail, but for the actual elephant, it was just the one blue. I love the movement you get with watercolor, it’s something you can’t really achieve with Copics.
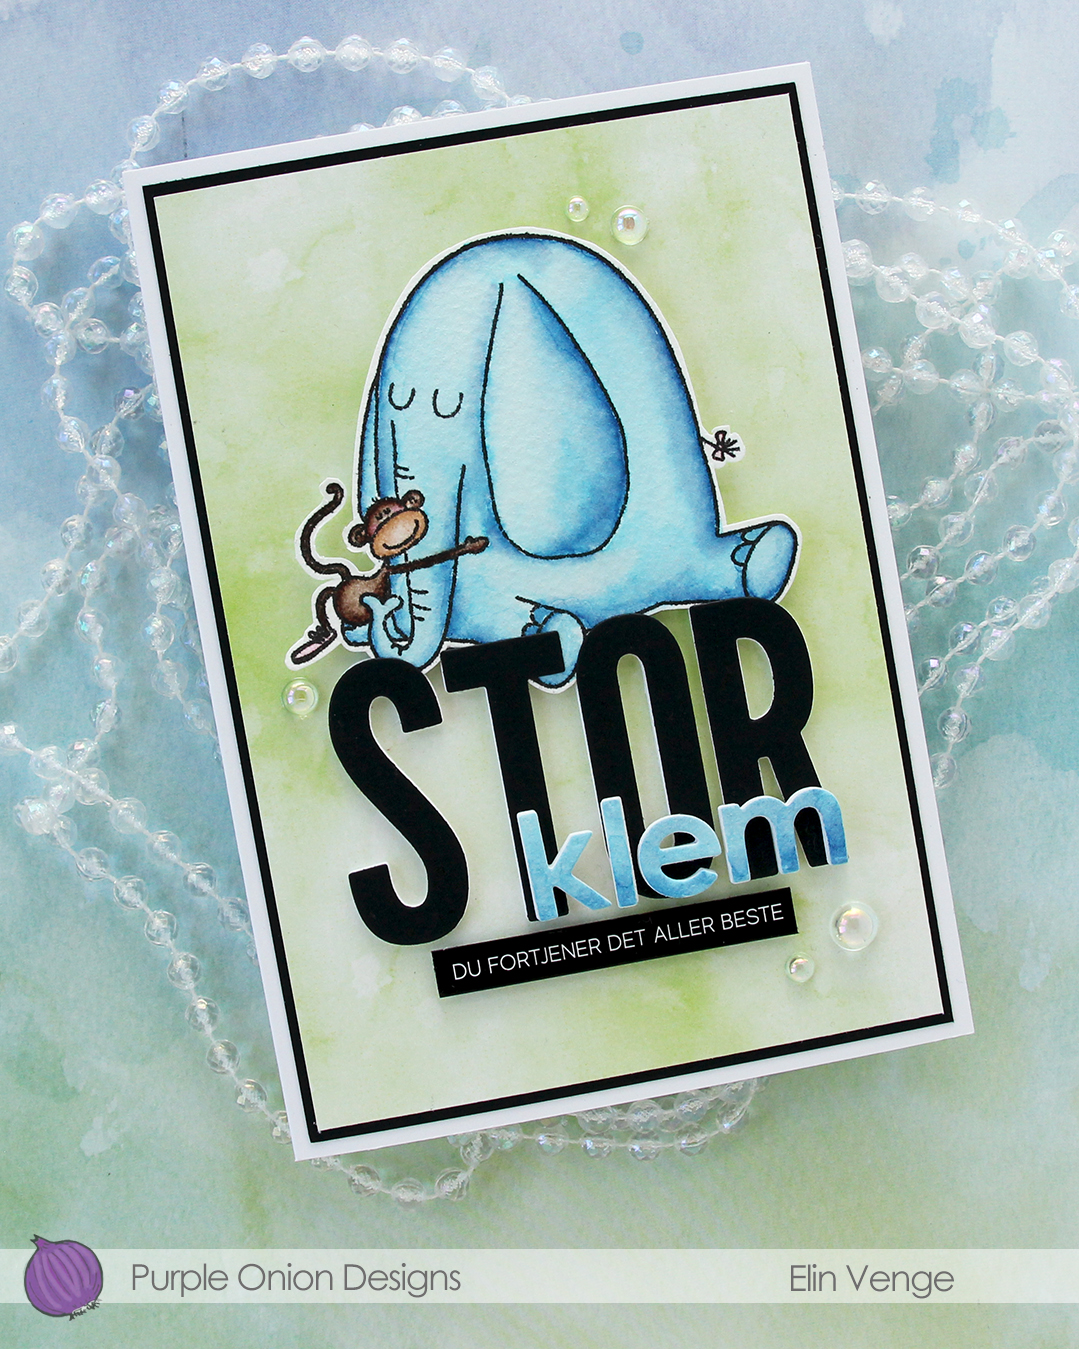 I fussy cut my image, leaving a thin white border. Using the Impact Alphabet die set from My Favorite Things, I die cut the letters to spell out STOR (big) four times from white cardstock and once from Black cardstock from Concord & 9th. I used the Parker lowercase alphabet die set from Memory Box to die cut the letters for klem (hug), again four layers of white, this time topped by a layer of the watercolor paper.
 I stacked my layers, and sandwiched the image between the white and black letters for the large word. I created a black mat on the card front, covered that with a piece of green patterned paper from the Watercolor Wash 6×6″ paper pad from My Favorite Things and mounted the letters and image in the center. I adhered the klem letters directly on top of the larger letters and added a sub sentiment sticker strip from Kort & Godt below it. I popped it up a bit to level it with the black letters, before finishing off with a few dew drops from the Spring Leaves embellishment mix from Little Things from Lucy’s Cards.
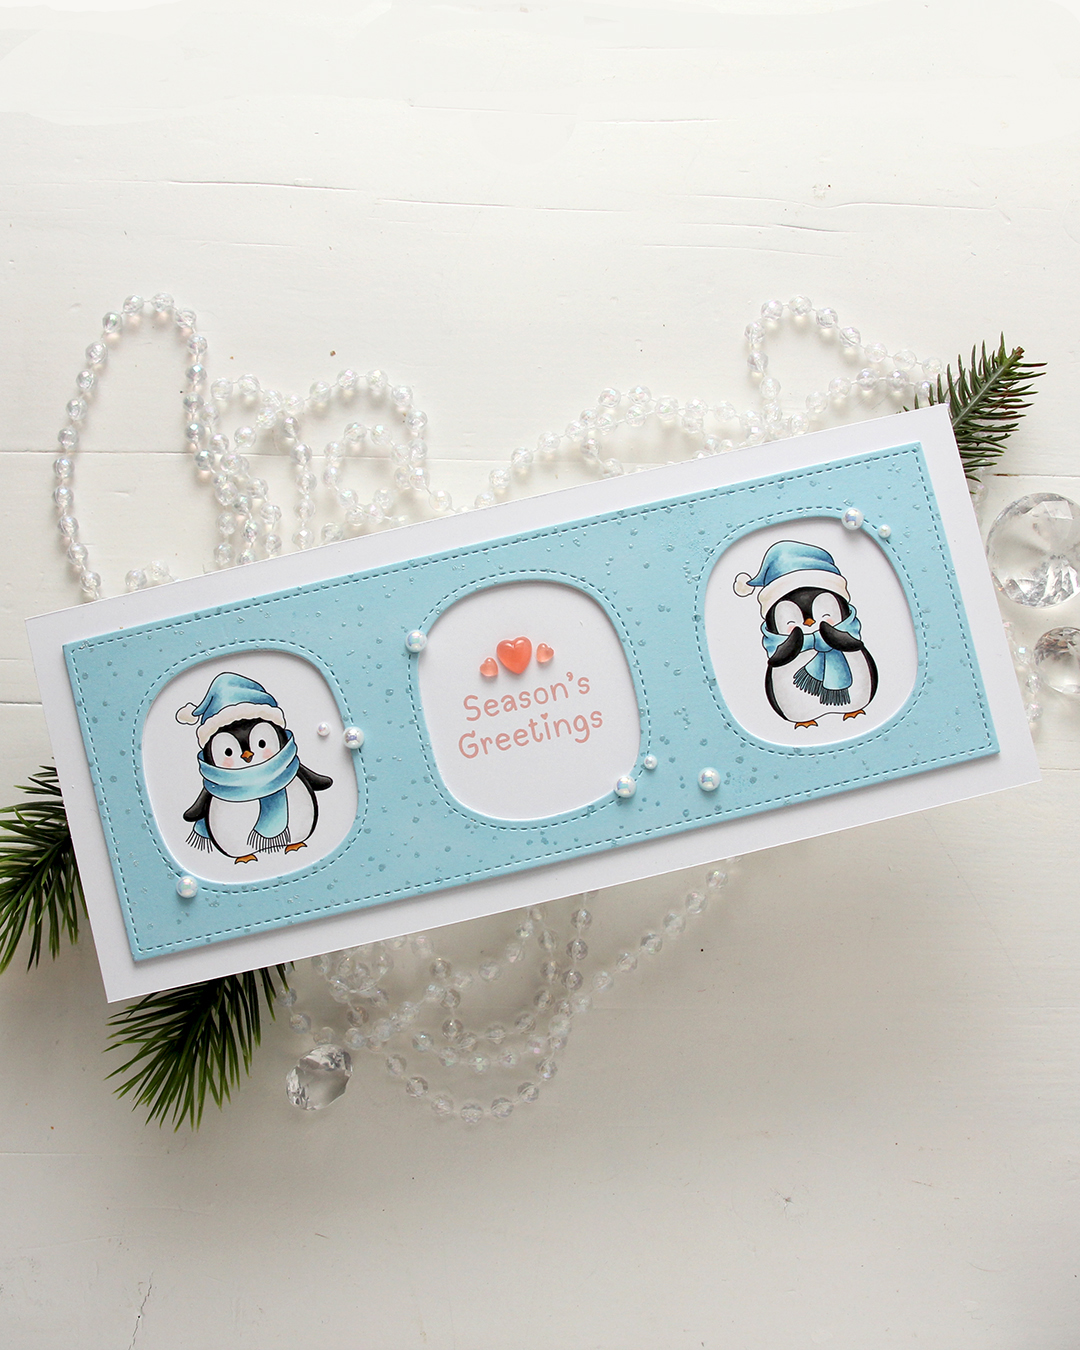 I colored the penguins with my Copics, making sure to add blue for their hats and scarves. Nothing beats blue for Christmas, right? I left plenty of space between the penguins for a greeting, which is from the
  I used a die in the Slim card basics die set from Mama Elephant to die cut the frame with openings from Harbor cardstock from Concord & 9th. I also cut two from white to add behind it for dimension. I stamped the Paint Splatter background stamp from My Favorite Things onto the blue using VersaMark ink, then sprinkled on White Satin Pearl embossing powder from Hero Arts and heat set.
 I added pearls from the Glossy Porcelain mix from Little Things from Lucy’s Cards here and there around the openings and also three Coral Heart Droplets, also from Little Things from Lucy’s Cards.
 Limited color palette for these two penguins.
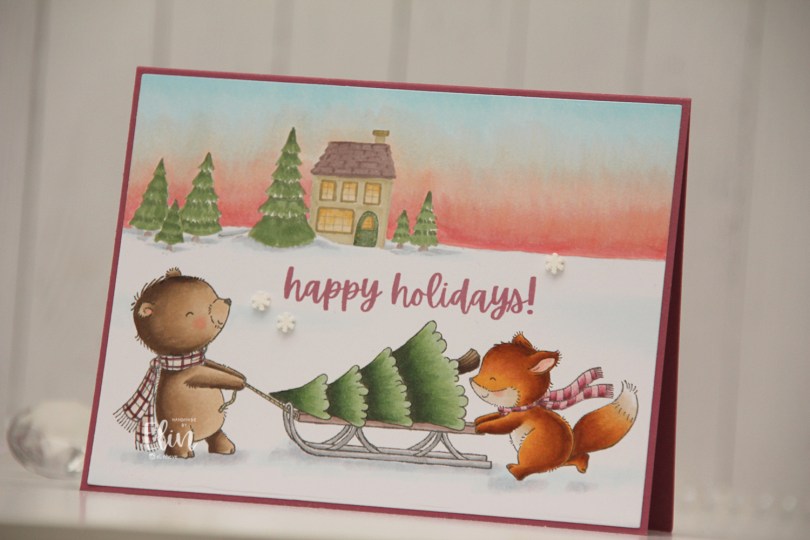
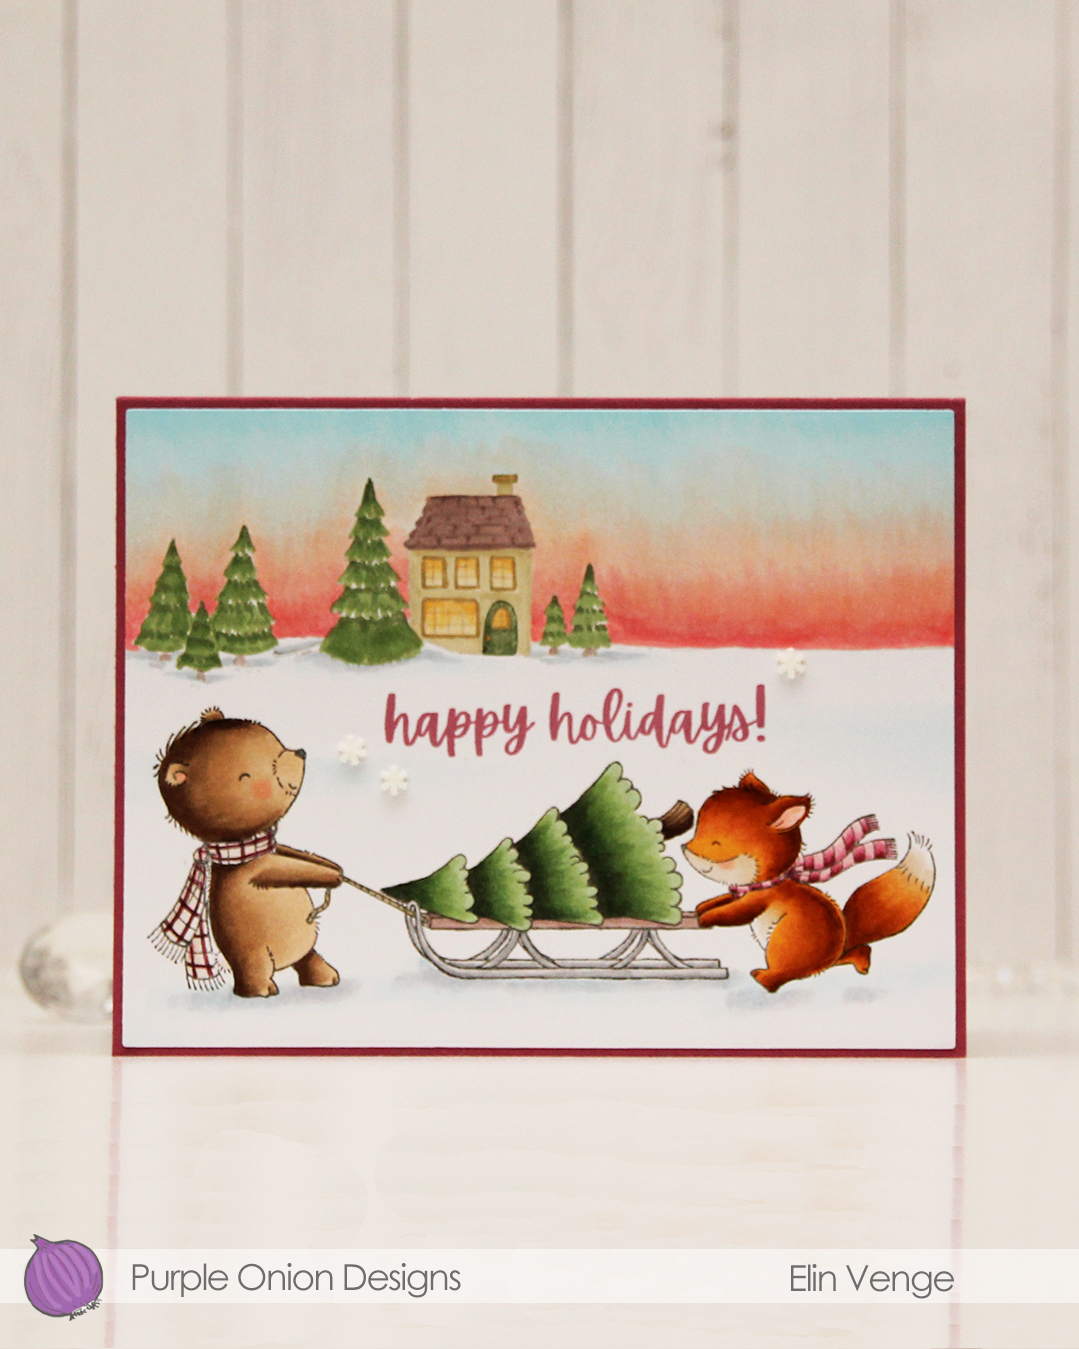 I colored these cuties with my Copics and did the same with
  I used the Additional A2 Layers die set from Waffle Flower to cut my panel down slightly, then adhered it to a card base I created from Autumn Rose cardstock from Papertrey Ink, before I added a few snowdrift sprinkles from Little Things from Lucy’s Cards.
 Lots of Copics for this one. I even created a new combo for the fox which requires less markers than the one I used to use.