
Hi, crafty friends. This month’s release from Rachelle Anne Miller is another adorable Christmas one, and I chose Oh Christmas Tree for today’s card.
 As usual, I colored the image with Copics, cut my panel down a little on the sides and added Glossy Accents to all the ornaments. This time, I decided to use the Light blue gingham digital paper that also came out in this release. I love the wonky lines and gorgeous color in this paper, and colored some of the ornaments on my tree to match. I mounted the panel on foam tape and adhered it right of center on my card.
 My signature clean and simple cluster cards have been few and far between this year, and I thought a mini cluster would work well for this card. I started with a scrap of a mini paper doily from Doodlebug Design that I adhered to my colored panel with liquid glue. I die cut a couple of additional pieces using the Happy Days Ticket Stubs die from XCut. This is one die that cuts nine different tickets, and it’s one I use a lot. I cut one from the light blue gingham patterned paper, and the other one from a scrap piece of patterned paper from Kaisercraft. I put them both on foam squares for dimension. The sentiment is from the Itty Bitty Holiday stamp set from My Favorite Things, stamped and white heat embossed on a piece of Autumn Rose cardstock from Papertrey Ink, which I then die cut into a strip with flag ends using a die from the Itty Bitty Strips die set from My Favorite Things. I finished off with a few sequins from the Ice Water mix from Little Things from Lucy’s Cards.
 A very simple color palette for this card. I started out with blue ornaments, but once I printed the patterned paper, I realized they needed to have a green tinge and went over the blue with BG32 and G00.

 I knew I wanted lots of green on this card, and as soon I was done coloring skin, hair and the ground, I grabbed a few green combos and colored in all the elves. I hit a bit of a snag when I got to Mrs. Claus’ dress, because I felt like there were no good color options. Grey would have been boring, brown would have been sad, red wouldn’t work with the amount of green I had and I felt a little lost, to be honest. Color buddy Liz to the rescue. She suggested the RV90s, and they worked beautifully. I’ve combined RV90s with green plenty of times in the past, but usually for florals, and I have to admit it’s been a while, so it was fun to use an old classic again.
 Once the coloring was complete, I used the largest die in the A2 Double Stitched Rectangle STAX die set from My Favorite Things to create a nice detailed edge around my panel and adhered it to a top fold card base I created from Autumn Rose cardstock from Papertrey Ink. I used most of a mini doily from Doodlebug in the top right corner of the card for a little bit of soft texture, and added a small scrap of the same doily in the lower left corner for a little bit of balance. I used a tag die from the Everyday Gift Box die set from My Favorite Things to create my tag, and stamped and white heat embossed a sentiment from the Mini messages stamp set from Mama Elephant in the center of it. I tied some Green Apple Divine twine into a bow and mounted the tag using a couple of foam squares before finishing off the card with a few gems from Crafty Meraki. These are the Green Illusion Sparkle and they change color when you tilt them in the light. They appear green and somehow shift to a pink/purple tone, they’re really cool, and the colors worked perfectly for this card.
 Lots of green for this one. I used four different green combos to color in the elves so they wouldn’t all look the same. I also used RV97, a color I’ve created myself, for the dress on Mrs. Claus.
 I added a bunny to the top of the teacup stack and colored the image with Copics, before fussy cutting, leaving a thin white border around the edge. I used a black glaze pen from Sakura to add shine and a tiny bit of dimension to the bunny’s eyes, then a white dot of Gelly Roll 05 on top of the black, once the black was dry. The glaze pen dries fairly quickly once applied, so I didn’t have to wait long.
 I adhered a panel of Blueberry cardstock from My Favorite Things to my white card base. Using a die in the A2 Double Stitched Rectangle STAX die set, also from My Favorite Things, I die cut a piece of patterned paper from Sunny Studio to adhere on top of the blue. This patterned paper is from the Subtle Grey Tones pack, and it really is subtle.
 I realized I hadn’t made any of my signature clusters in a while, and decided to pull out my die cut scraps of patterned paper and have a play. These patterned papers are from Sunny Studio (more from the subtle grey pack), Kaisercraft (light blue with dots), Papirdesign (dark blue with smaller dots) and Maja Design (pink floral), all die cut using a combination of the Happy Days Ticket Stubs die from XCut and the Fishtail Flag Frames dies from My Favorite Things. I used a mini paper doily from Doodlebug to mat my little clusters, and embellished with sequins from Pretty Pink Posh and Simon Says Stamp.
 The sentiment is from the Coffee and Chocolate stamp set from hÄnglar & Wings, white heat embossed on a strip of the same color cardstock I used for the card front. I then die cut it using one of the dies in the Itty Bitty Banners die set from My Favorite Things.
 The interactive element that I mentioned at the beginning of the post is actually the image. As you can see in this photo, it sits pretty high off the base. The reason for that is that it’s on an action wobble, so it’ll shake and move once you help it along a tiny bit.
 Fairly simple color palette for this one.
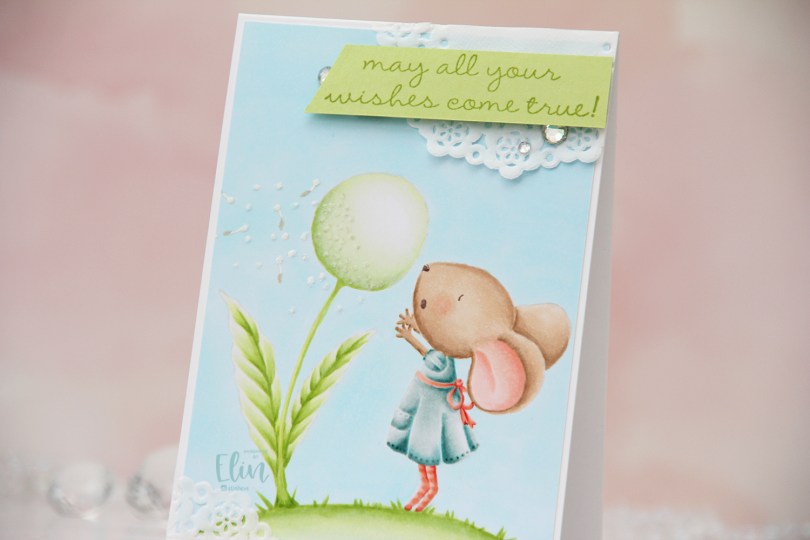
 This is
  I love no line coloring, and no line is perfect for an image like this, which has just enough detail to make it interesting, but it’s still large enough to get soft gradient in colors and not too fiddly.
 Once I finished my coloring, I added my panel to a 4 bar card base I created from Stamper’s Select White cardstock from Papertrey Ink. I created some texture to the dandelion fluff by using my Quickie glue pen and sprinkling on Rock Candy Distress glitter.
 I adhered scraps of a Doodlebug mini paper doily to opposite corners of the card to add to the soft, delicate look I was aiming for. Using Sour Apple ink from My Favorite Things, I stamped a sentiment from the
  Very soft color palette.
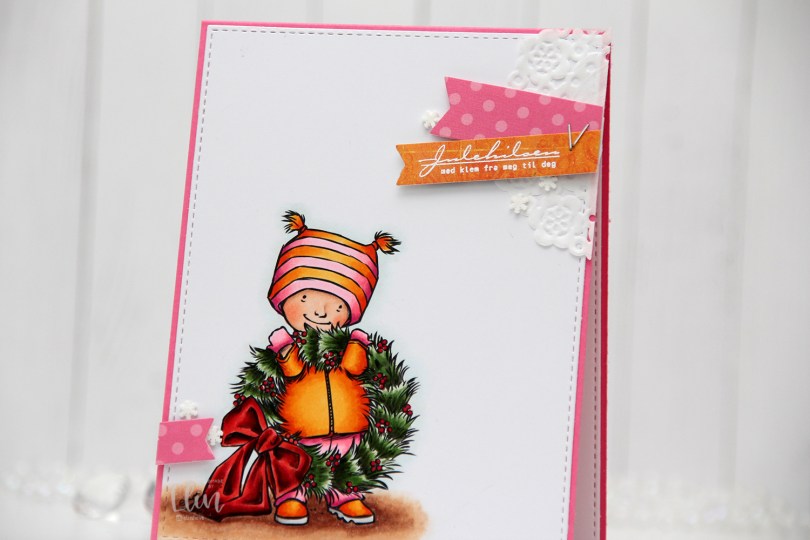
 This is
  After coloring the image with Copics, I used the largest of the dies from the A2 Stitched Rectangles STAX 1 set from My Favorite Things to turn it into a panel. I adhered it to a top fold card base I created from Hibiscus Burst cardstock from Papertrey Ink, before gluing on a scrap piece of doily from Doodlebug Design in the upper right corner. I stamped and white heat embossed a sentiment from the Julehilsen stamp set from Norsk Stempelblad AS onto a die cut piece of patterned paper from Bo Bunny. I added another die cut piece of patterned paper (this dotted pink is from Sunny Studio) and stapled the two pieces together before mounting them to the card using foam tape. I put another scrap of the pink in the opposite corner of the card and finished off with a few snowdrift sprinkles from Little Things from Lucy’s Cards.
 Colors for this crazy combo. Evidently I forgot to include the greens, but they are BG99, G99, YG67, YG63 and YG61.
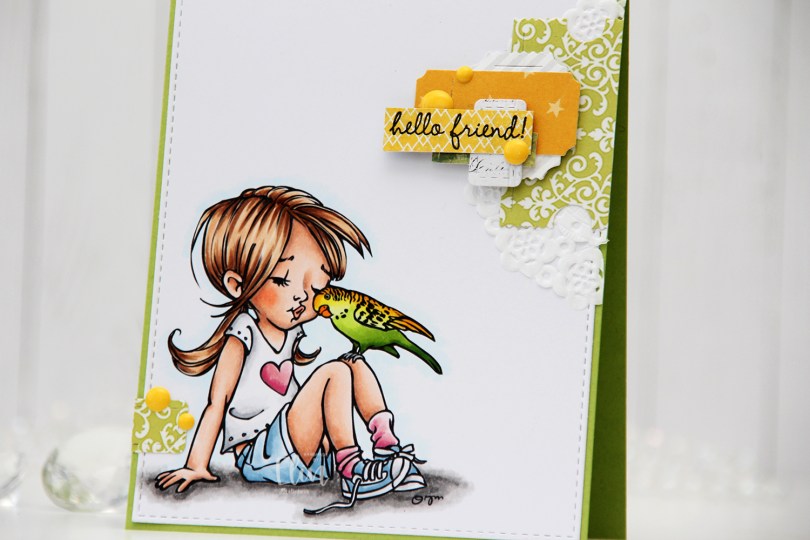
 I colored the image with Copics and die cut the panel using the largest die in the A2 Stitched Rectangles STAX 1 die set from My Favorite Things, before adhering it to a card base I created from Sour Apple cardstock, also from My Favorite Things.
 On my cluster cards, I usually choose two to three colors from the image to create scraps from. This time I chose green and yellow with a little bit of gray. Neutrals are always a good thing to add. I keep die cut scraps in stamp storage pockets on my desk, sorted by color. Whenever I want to create a cluster, I choose the storage pockets with the colors I want, dump the contents on my desk and start PLAYING.
 For this card I wound up using scraps from 3ndypapir, Karen Foster, Sunny Studio, P13, Magnolia and Papirdesign. By limiting the size and colors of my clusters, the design stays harmonious and you can’t tell that I’ve used patterned paper from 6 different companies. I adhere some directly to the layer below, some using foam squares. As a base, I used half a doily from Doodlebug Design that I had in a drawer. I love these tiny paper doilies, they’re perfect for this.
 Using VersaFine Onyx Black ink, I stamped a sentiment from the
  These cluster cards are so fun to make. They make my piles of scraps shrink EVER so slightly, but anything’s better than nothing, and I love the dimension they add to the card.
 I used quite a few colors for this one.
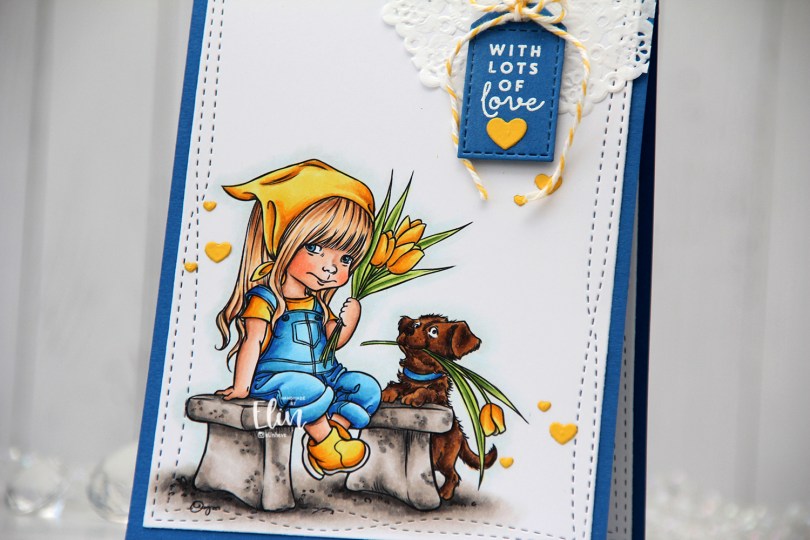
 I couldn’t choose any other colors for this card, it simply had to be blue and yellow. I colored the image with Copics, then used the largest die in the Wonky Stitched Rectangles STAX set from My Favorite Things to create a little bit of interest to the edges of the panel, before adhering it to a card base created from Cornflower cardstock from My Favorite Things.
 In the top right corner, I adhered part of a mini doily from Doodlebug using liquid glue. To the top of the card, I tied a piece of Divine Twine from Whisker Graphics in the color Lemon. I stamped and white heat embossed a sentiment from the Mini Messages stamp set from Mama Elephant on a scrap piece of blue cardstock and die cut it into a tag using a die from the Everyday Gift Box die set from My Favorite Things. I tied the ends of the twine to the tag, added a bow and put foam tape behind the tag for a little bit of dimension to my card.
 I put a small piece of Stick-it adhesive behind a scrap of Bright Buttercup cardstock from Papertrey Ink and die cut lots of tiny hearts from it using a die from the Say What? Gift Tags die set from Lawn Fawn. I adhered the hearts in three little groupings of three. They form a nice visual triangle and add more yellow goodness to the card. There’s no such thing as too many hearts!
 I’m sending lots of love to the people in Ukraine. It’s heartbreaking that certain people haven’t yet learned the lesson that war’s never the answer. Love always is. 💙💛
 Lots of Copics used for this. Thankfully, they were already out on my desk from previous projects, so I didn’t add to the pile of markers I have to clean before I put them back where they belong in my block stands.
 I cut down my panel of X-Press It blending card significantly when my coloring was done, and mounted it on foam tape onto the cardbase, which I’d covered with a scrap piece of patterned paper from the Hjem til jul collection from Papirdesign.
 I added a small cluster towards the top right corner of the card, using a mini doily from Doodlebug, as well as some die cut scraps of patterned paper from Maja Design and Sunny Studio. I stamped a sentiment from Norsk Stempelblad AS using Dark Chocolate ink from Papertrey Ink onto Classic Kraft cardstock, also from Papertrey Ink. The dies I used in my cluster are a combination of My Favorite Things (Fishtail Flag Frames and Itty Bitty Strips) and X-Cut (Happy Days Ticket Stubs). I also used the Hero Arts Snowflake Confetti fancy die to die cut snowflakes that I scattered across the card, and I put a white pearl from Kort & Godt in the center of each snowflake to finish the card.
 This color combination of blue and bright pink sure was fun, and these are brighter blues than the ones I normally use. I also used a ton of colors for the snow in this little scene. I just can’t help myself.
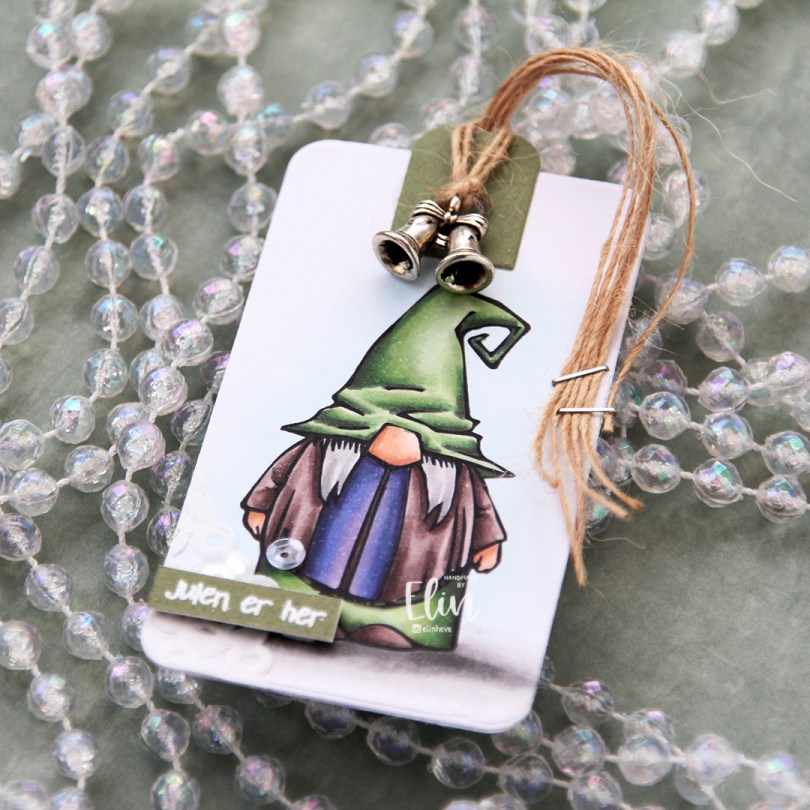
 I colored the gnome (his name’s Alf, you can find him
  I added a scrap of a paper doily from Doodlebug to the bottom left corner, put my sentiment strip on 1 mm foam squares and added a couple of sequins from the White Orchid Sequin mix from Little Things from Lucy’s Cards. I put some natural twine from May Arts through the hole at the top of the tag, added a charm and stapled the ends of the twine to the tag using a mini stapler.
 On the back of the tag I stamped a to/from image from Norsk Stempelblad AS using Jalapeño Popper ink from My Favorite Things.
 For such a small image, I used quite a few colors.
 I actually colored this in May last year. I keep my colored image in stamp storage sleeves from Tim Holtz. They’re super sturdy and you can put a lot of colored images in one pocket. They come five in a pack, which is perfect for me, that way I can dedicate each sleeve to one design team, since I’m currently on five design teams. Sometimes, I just want to color without having to turn it into a card right away, and sometimes I just want to make a card, but don’t feel like coloring, or simply don’t have time to do both. Compartmental crafting for the win.
 I mounted my colored panel using foam tape and adhered it to the center of the card. I felt like it was missing something and needed a little bit extra. Mini paper doilies from Doodlebug Design to the rescue. I love these mini doilies, I use them often. And you don’t need the whole doily, either, I just used two small pieces for this card, and there are 75 doilies in one pack, they last forever. Onto a piece of Blue Breeze cardstock from MFT I stamped a Norsk Stempelblad AS sentiment using Blueberry Sky ink from Papertrey Ink. I cut it down to a 1″ circle using a circle punch from EK Success, added it to my card using foam tape and finished the card with a few pink enamel dots from Papirdesign.