
Hi, crafty friends. I’ve got a super simple card coming your way today, featuring the Belated Birthday Sloth image from Mo’s Digital Pencil. This actually comes as a set. You get two sloths, one with birthday gear and one without. I used the one without the birthday gear for this one, but used the party hat from the one WITH the gear to add a bit more color to my card.
 I colored and fussy cut the sloth, colored in the party hat and fussy cut that, before putting both pieces aside while I worked on the rest of my card. I created a card base from Blue Breeze cardstock from My Favorite Things and created a wall for the sloth to hang onto using Stamper’s Select White cardstock from Papertrey Ink. To create a bit of texture to the wall, I stamped the Touch of Texture background stamp from My Favorite Things using Soft Stone ink from Papertrey Ink. It’s subtle, but still adds a little bit of interest.
 I stamped a sentiment from the Anything-but-Basic Birthday Wishes stamp set from My Favorite Things using Obsidian ink from Altenew, before adding the wall to the card base with 1 mm foam squares. I added the sloth using foam tape and finished off the card with a few Starry Sky Ombré Glitter Drops from Pinkfresh Studio. I also added a dot of Black Glaze pen to his eyes for a bit of shine and dimension, which is easy to see in real life, but tricky to photograph.
 This was initially a very muted, very simple color palette. Let’s just say things changed when I decided to add the party hat 🙂

 I stamped and colored my images, before fussy cutting them, leaving a bit of a white border around them all. I put my colored pieces aside and started working on the rest of the card. I decided to do a bit of ink blending with the Paint Strokes stencil from My Favorite Things. I thought the brush strokes would be good for a background for my colored images.
 I started out with Coral Bliss and Pink Pearl inks from Altenew for the pink, but wanted a little more oomph and went over them with Picked Raspberry and Worn Lipstick distress inks, which gave it the pink I wanted. On the orange paint stroke, I only used Spiced Marmalade distress ink, and for the yellow, I chose Mustard Seed and Squeezed Lemonade distress inks. I then stamped a sentiment from the
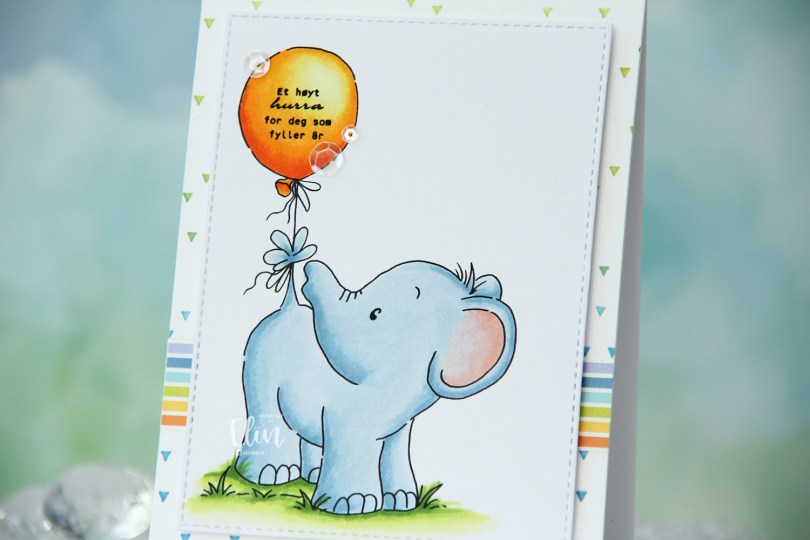
 I colored the elephant with Copics, stamped a Norsk Stempelblad AS sentiment inside the balloon using Altenew Obsidian ink, then used a die from the A2 Stitched Rectangle STAX 1 set from My Favorite Things to turn it into a panel with that nice faux stitch line that I use a lot on my cards. In my stash I had a white card base with a stamped background (the Scattered Triangles Background stamp from My Favorite Things, stamped with Sour Apple and Blue Yonder inks, also from My Favorite Things) on the front that I decided to also make use of. The colors match my elephant nicely. I was actually planning on using this card base for my
  On top of my scattered triangle background, I adhered a strip of a patterned paper from the Party Patterns paper pad from My Favorite Things, mounted my colored panel using foam tape and embellished near the sentiment using the White Orchid Sequin mix from Little Things from Lucy’s Cards.
 Simple card means simple color palette.
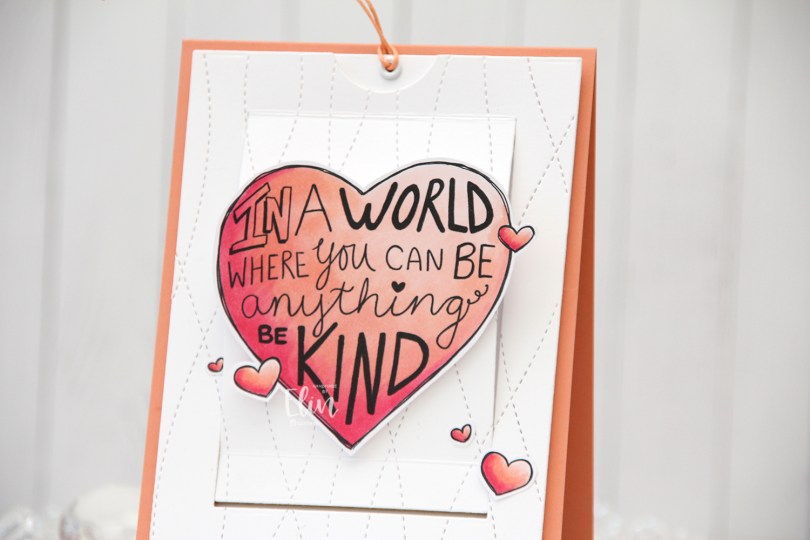
 As you might be able to tell from the front, this isn’t a regular card. It’s a slider card. At first I wasn’t sure how to turn this particular stamp into a card, but then I had a lightbulb moment and realized it was perfect for a slider card.
 I colored the images with Copics, did some fussy cutting leaving a think white border and put my pieces aside while I worked on the rest of the card.
 When you pull on the string at the top, these mice from the Be Kind stamp are revealed. Nice little surprise there, huh? The slider mechanism itself is made using the Slider Surprise die set from My Favorite Things, but you could easily do this on your own, it’s not difficult. They’re straight cut lines and just a few score lines.
 I wanted a little texture to my white cardstock, and used the Stitched Ripple Backdrop die from Lawn Fawn, which creates these faux stitch lines across the panel. In hindsight, I realize I probably should have dry embossed it only and not die cut it, because where the stitched lines intersect with the die cut edge of the part that folds up, it kind of snags a little. It’s not a huge deal, but it’s enough to make me think simply dry embossing would have been enough.
 In the opening, I added a piece of Gold Foil Pinstripe washi tape from Altenew for the mice to have a little bit of a grounding element, then adhered the mice using liquid glue. The top die cut panel is mounted on foam tape, and everything adhered to a top fold card base I created from Melon Berry cardstock from Papertrey Ink.
 Probably the simplest color palette I’ve ever used on a card.
 I decided to cut off about half of the bench. Since I’m only using one of the kids, I didn’t need the whole thing. If you want, there’s also a
  I adhered my panel directly to a card base I created from Green Parakeet cardstock from Papertrey Ink. I stamped a sentiment from Norsk Stempelblad AS onto a strip of the same color cardstock using Green Apple ink from Simon Says Stamp and put the sentiment aside while I worked on the rest of my card.
 I die cut the word hipp 8 times from Tropical Teal cardstock from Papertrey Ink using a die from Kort og Godt, and created two stacks of four each for a dimensional look. I adhered my stacked die cuts to the card and put the green cardstock strip on top of the bottom hipp.
 To finish off the card I added a few enamel dots from Papirdesign. I decided to go for orange ones to pick up the color from the little boy’s ice cream.
 It’s a fairly simple card, but the clouds add a little something to the white space, and the die cuts and dots add dimension.
 For such a small image, I used a lot of colors.