
Hi, crafty friends. We’ve reached the end of 2023, can you believe it? I thought I’d round out the year with a thank you card, featuring one of my favorite images – Penguin Hug from Rachelle Anne Miller. This is actually my card number 137 for 2023.
 I’ve used this image a few times in the past, but I’ve never colored the penguins blue, which kind of blew my mind when I realized. I decided to remedy that and created soft blue penguins and a corally pink scarf. I cut my panel down to a square, die cut a heart in the center using a die from Papirdesign and mounted the negative onto a square card base I created from Berry Sorbet cardstock from Papertrey Ink.
 Onto my colored heart, I stamped a sentiment from the Mini Messages stamp set from Mama Elephant using Berry Sorbet ink from Papertrey Ink. I adhered the heart to the card front and added a few sequins from the Starry Night mix from Little Things from Lucy’s Cards to finish my card.
Thanks so much for coming with me on this creative journey, and I wish you a happy, healthy and creative 2024.
 Oh, and before I forget, I used a super simple color palette for this one.


 I printed the image onto X-Press It blending card and colored it with Copics. I went with a grayish green/muted pink combo, which is one I often use for holiday cards. I’m not a fan of bright red and green together, but this works for me. Once colored, I used a die from the Wonky Stitched Rectangle STAX set from My Favorite Things for a fun faux stitch look on the edges. I adhered my panel to a top fold card base I created from Autumn Rose cardstock from Papertrey Ink, which is a nice match with my pink coloring.
 I used a fairly simple color combo, but it’s still a lot of Copics, I never can seem to rein it in.
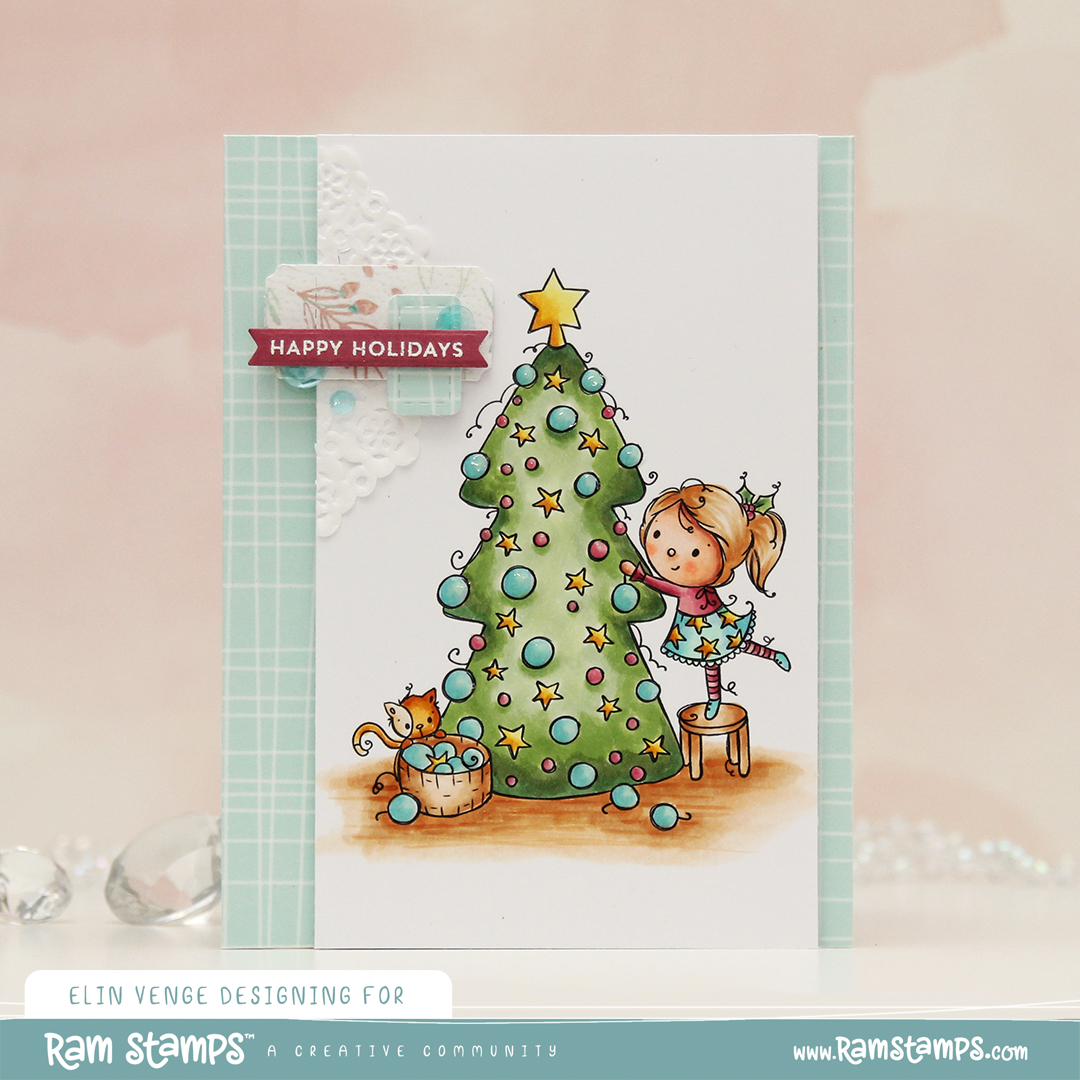 As usual, I colored the image with Copics, cut my panel down a little on the sides and added Glossy Accents to all the ornaments. This time, I decided to use the
  My signature clean and simple cluster cards have been few and far between this year, and I thought a mini cluster would work well for this card. I started with a scrap of a mini paper doily from Doodlebug Design that I adhered to my colored panel with liquid glue. I die cut a couple of additional pieces using the Happy Days Ticket Stubs die from XCut. This is one die that cuts nine different tickets, and it’s one I use a lot. I cut one from the light blue gingham patterned paper, and the other one from a scrap piece of patterned paper from Kaisercraft. I put them both on foam squares for dimension. The sentiment is from the Itty Bitty Holiday stamp set from My Favorite Things, stamped and white heat embossed on a piece of Autumn Rose cardstock from Papertrey Ink, which I then die cut into a strip with flag ends using a die from the Itty Bitty Strips die set from My Favorite Things. I finished off with a few sequins from the Ice Water mix from Little Things from Lucy’s Cards.
 A very simple color palette for this card. I started out with blue ornaments, but once I printed the patterned paper, I realized they needed to have a green tinge and went over the blue with BG32 and G00.