Hi, crafty friends! I shared this card on the Mo Manning Dream Team blog last week, but thought I’d share it here as well. When I first started making cards, they were very layered with lots of embellishments. These days, I’m more of a clean and simple (or in my case clean and time consuming) maker, but every once and again, I go back to my roots, and that’s definitely true for this card.
 I made a Christening card this time, for a little boy whose christening was this Sunday. I’ve used this image so many times over the years I’ve lost count. I colored the image with Copics and die cut it using the Stitched Circle STAX die set from My Favorite Things. I matted it on a piece of Maja Design patterned paper cut with the Nesting Circles die set from Lifestyle Crafts.
 I created a shaped card using the Nesting Frames 8 die set from Lifestyle Crafts, and used a few sizes of this die for the patterned paper panels on my card, which are all created from the Vintage Spring Basics collection from Maja Design. I die cut a white doily using the English Tea Party die from Cheery Lynn, mounted it in the center of the card and added my circles on top. I die cut the letters to spell the boy’s name using Die 304 from Kort & Godt and adhered them to a strip I die cut with the Essential Stitched Sentiment Strips die set from My Favorite Things. I added some Studio Calico veneer stars to embellish and a button from Kort & Godt that I put on top of a bow I created from Chalk White seam binding which I’d colored with Copic B95 and B91. This took me back – I used to color seam binding with Copics to match my card sooo often back in the day, and it honestly made me a little nostalgic doing this.
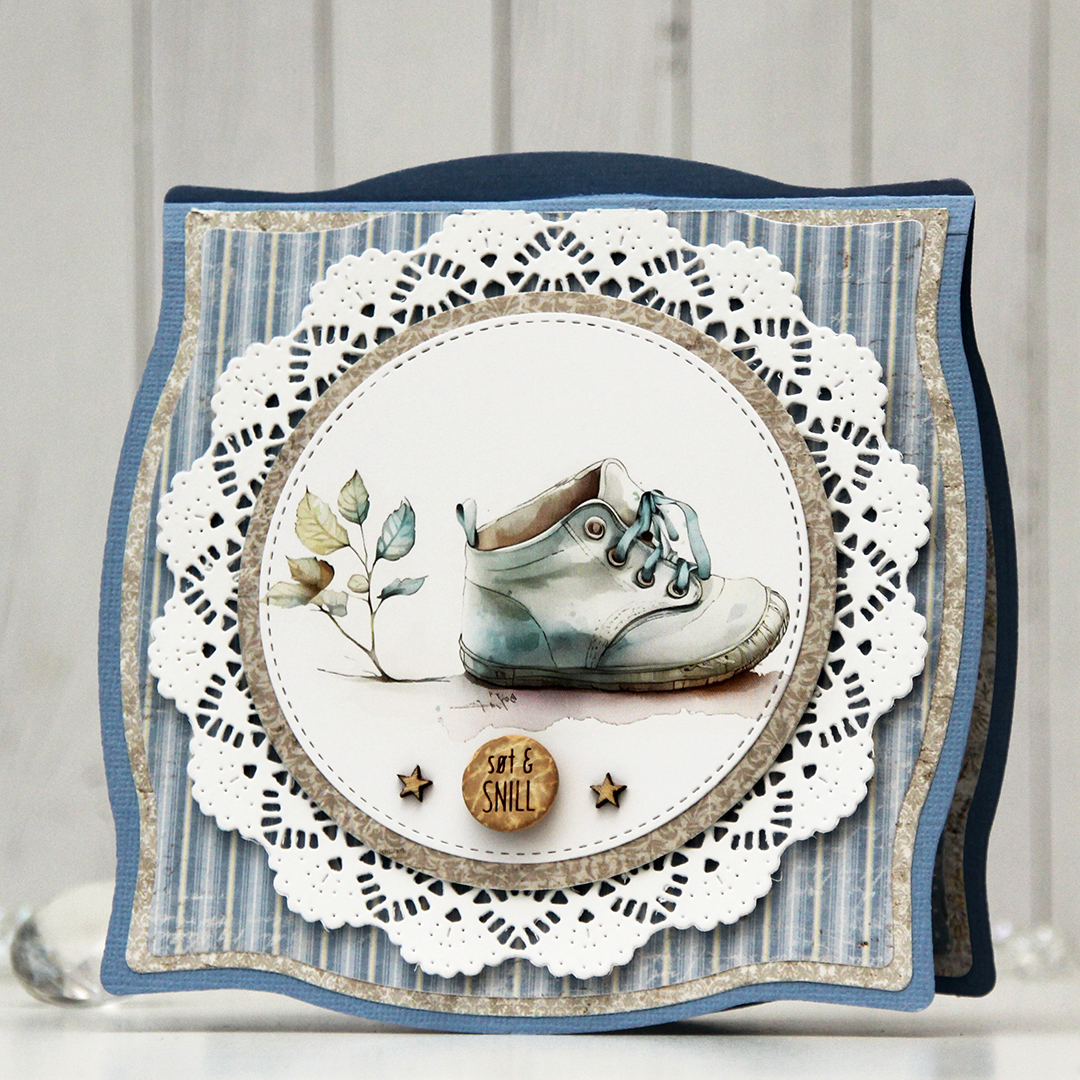 The insides of the card have the same basic layout as the front, just different patterns, and I left the stitched circles plain white for the personal message. On the back of the card, I die cut a pre printed image from Kort & Godt, found another button and added a star on each side of it to finish.
 Very limited color palette for this one, there wasn’t much to color.

 I love Stacey’s images, they all work so well together to tell stories. I colored my scene with Copics and cut my panel down ever so slightly.
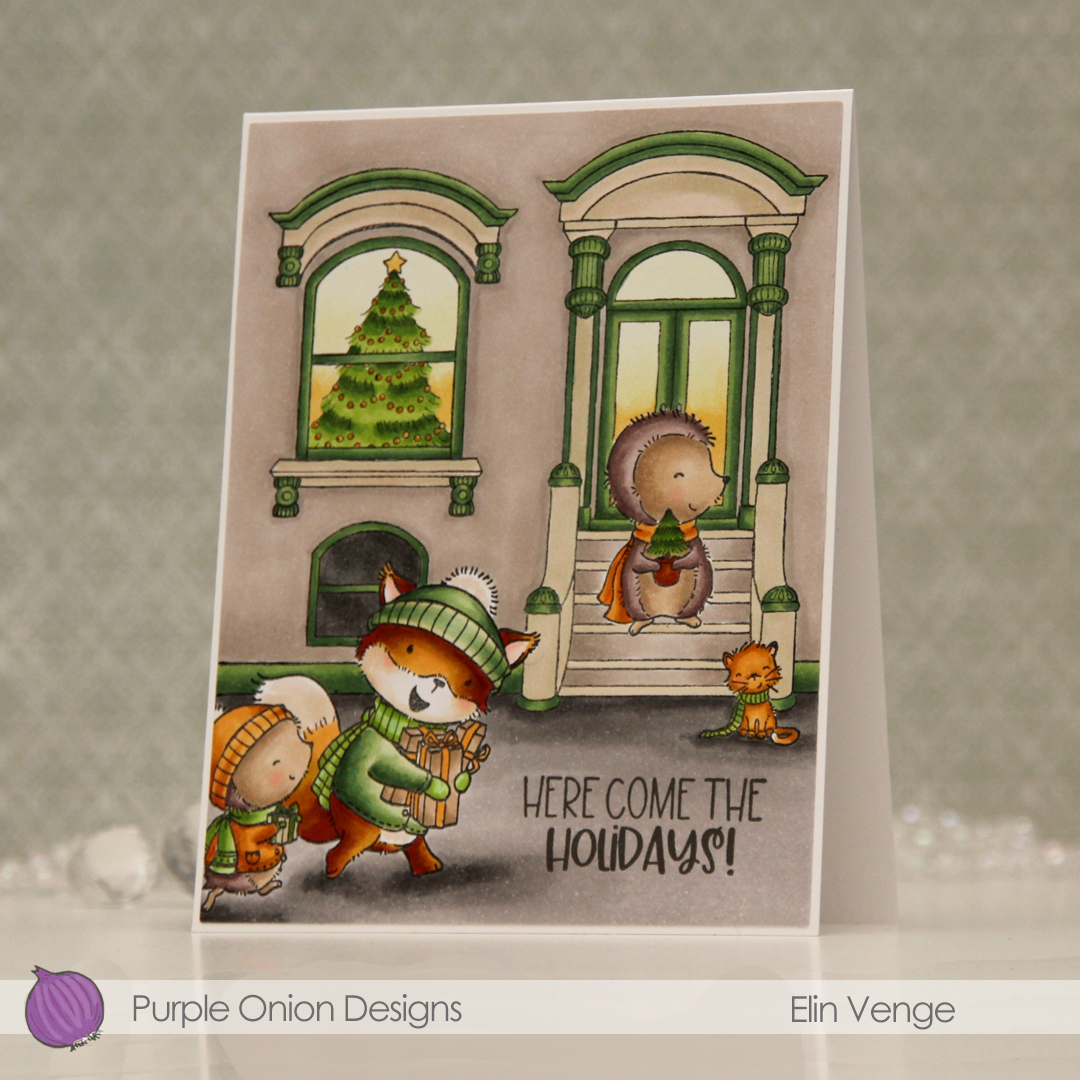 I stamped a sentiment from the Holiday Time Sentiment set using Eiffel Tower ink from My Favorite Things. I tend to opt for a colored ink to match the card whenever I stamp my sentiment, and I’m not sure how I feel about this grey. It might have been better in green, who knows? I adhered my panel to a top fold card base I created from Stamper’s Select White cardstock from Papertrey Ink and decided not to embellish at all. Sometimes simple is all you need.
 Even with a fairly limited color palette on the card, I used quite a few Copics.
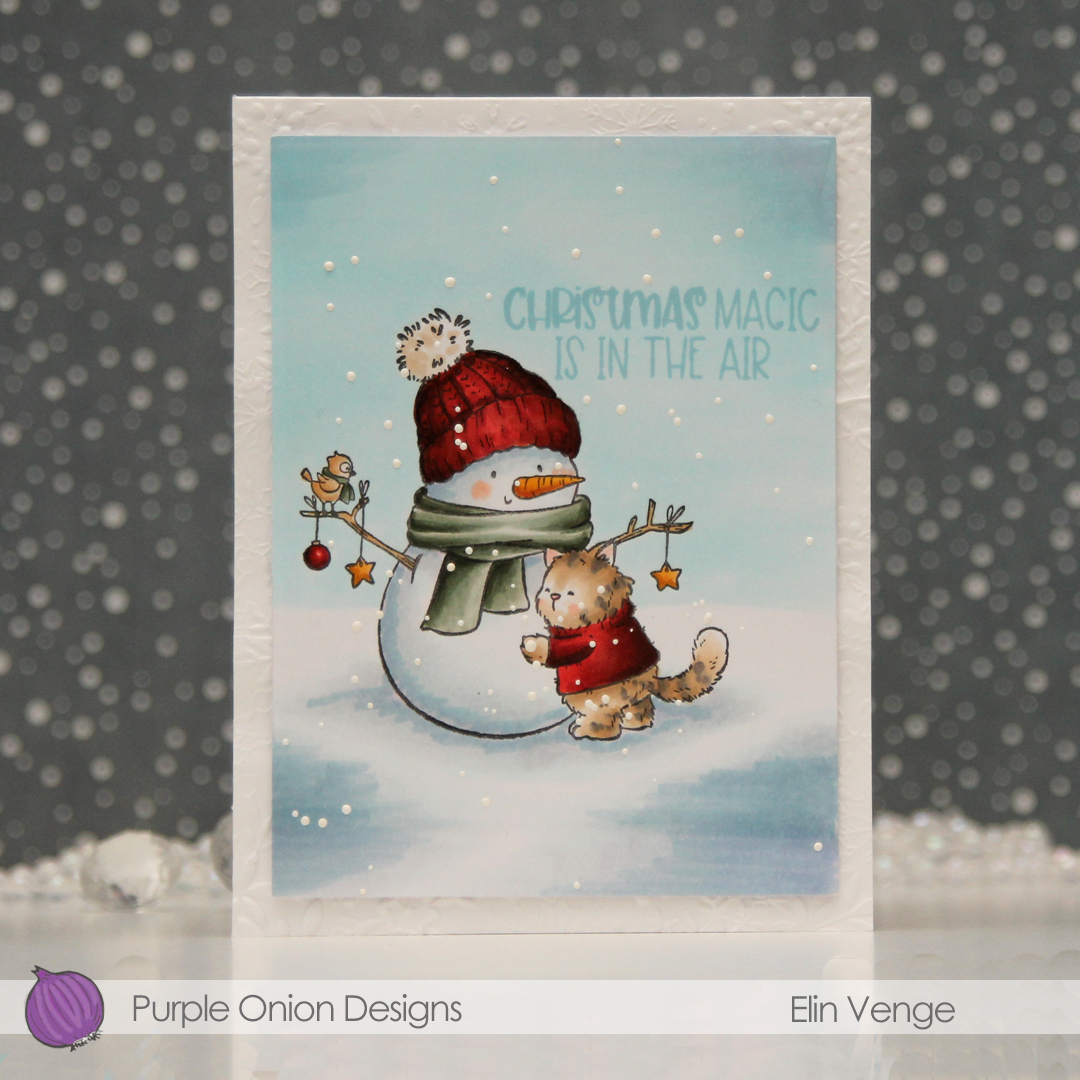 i colored the scene with Copics, before using a die in the Additional A2 Layers die set from Waffle Flower to trim down my panel. I stamped a sentiment from the
  I used the Snowflake Oval Frame embossing folder from Simon Says Stamp to create some texture on a panel of white cardstock which I adhered directly to a top fold card base, before mounting the panel on foam tape to finish the card. Super simple, right?
 A lot of Copics for this one.
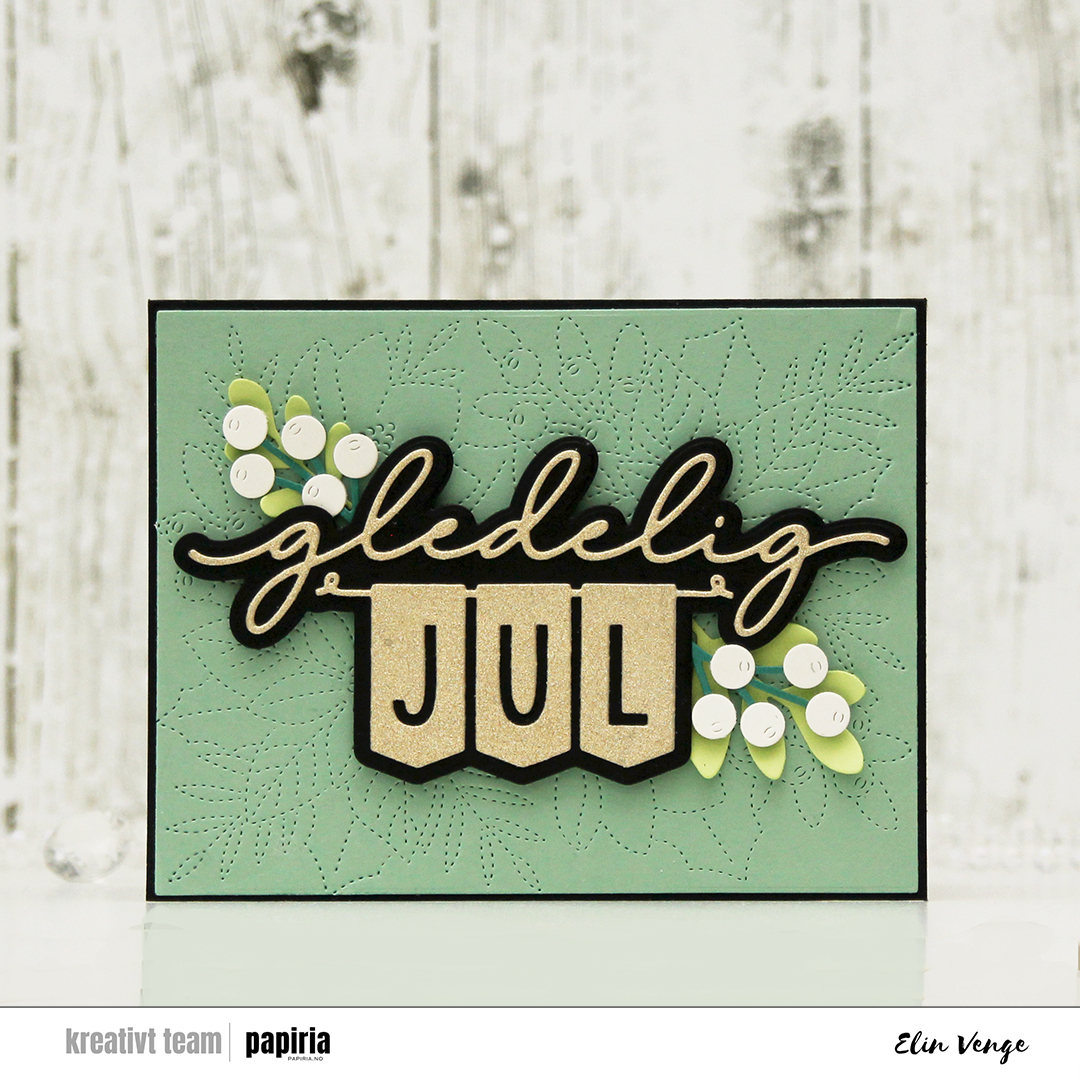 I started by die cutting the sentiment. I cut the shadow layer from True Black cardstock from Papertrey Ink and the top layer from gold glitter cardstock from Kort & Godt. I love their glitter cardstock, it’s so smooth and nothing rubs off. I used the largest die in the Additional A2 Layers die set from Waffle Flower on a piece of Eucalyptus cardstock from Concord & 9th, before using the faux stitch die in the Festive Blooms die set from Concord & 9th to dry emboss the panel, which I then adhered to my black card base. I love that there’s a tiny little black border.
 I die cut leaves and sprigs from the Festive Blooms die set and the Joyful Season die set (also from Concord & 9th) to frame my sentiment. I used Sprout and Juniper cardstocks from Concord & 9th for the leaves and sprigs, and a little bit of Rustic White cardstock from Papertrey Ink for the berries. I curled up the ends of the leaves, added foam tape on the back of the berries and adhered it all to flank my popped up sentiment. There you have it, a Christmas card with what I believe to be a very modern palette.
 This is one of those super simple cards. I stamped the image using Extreme Black ink from My Favorite Things and masked it before stamping the
 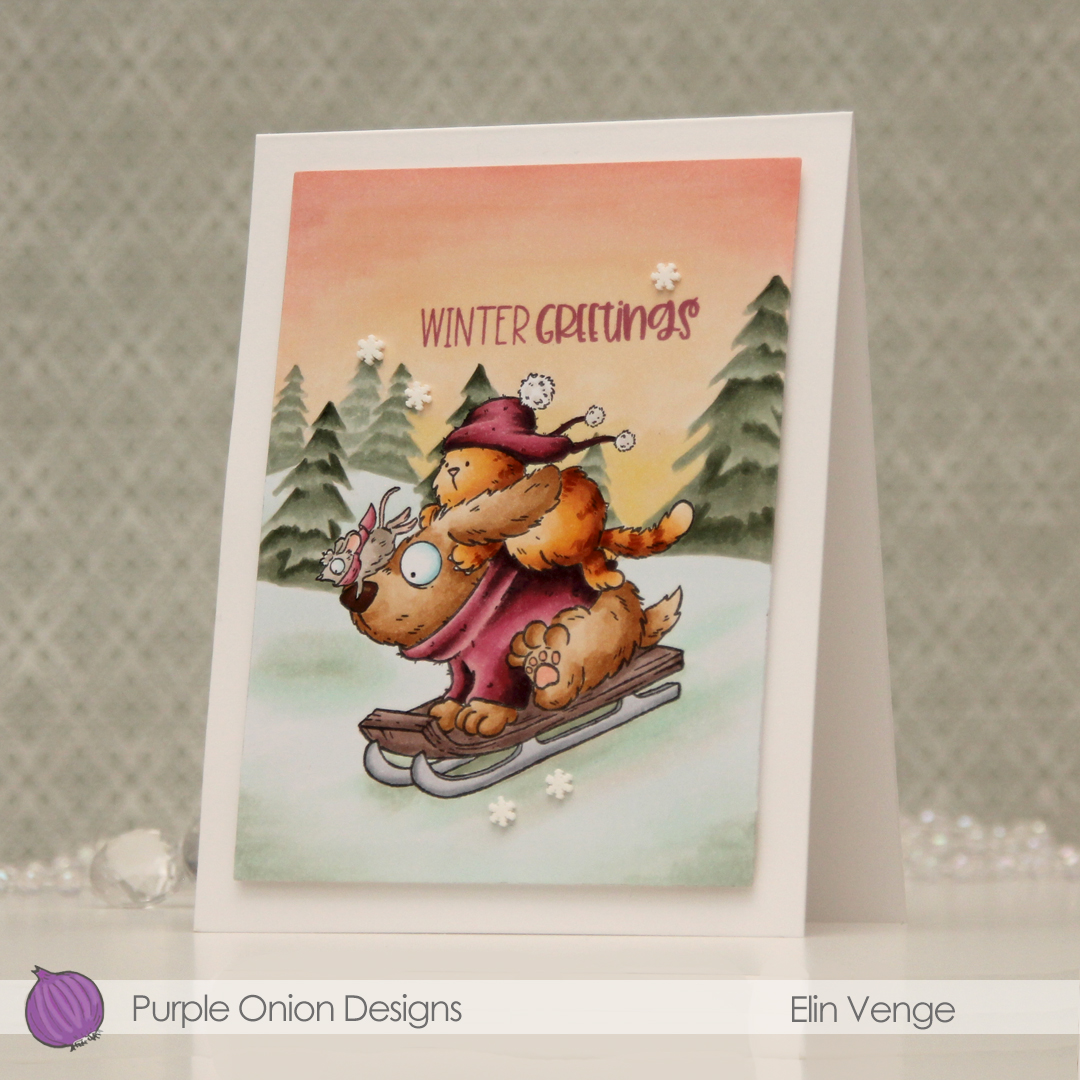 I stamped a sentiment from the
  I stuck to a pretty limited color palette, I feel, but there’s still a lot of markers.

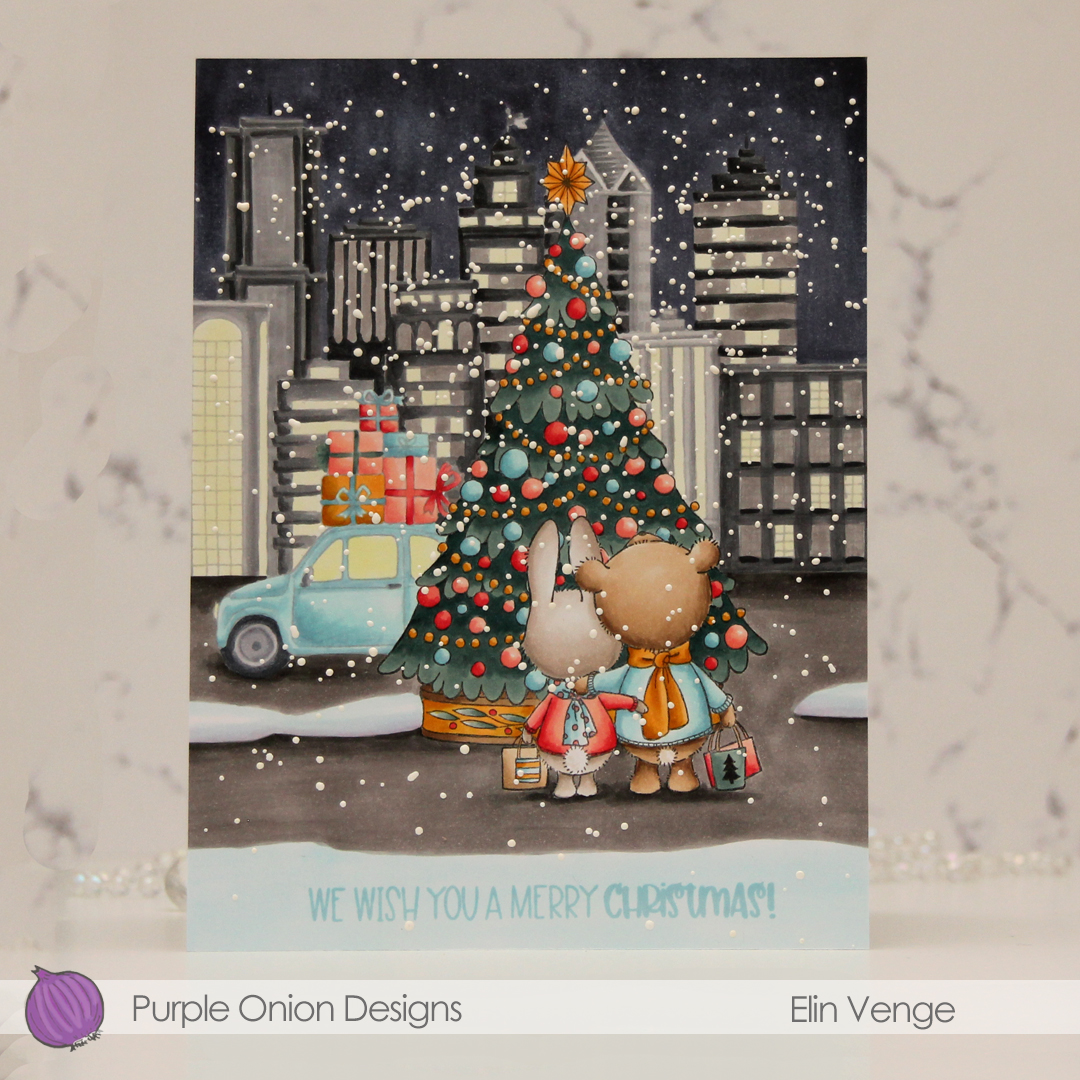 This scene is created entirely with images from last years holiday collection from Stacey Yacula.
  I colored the entire scene with Copics, stamped the sentiment from the
  I used lots of Copics for this, and all the different gray families, actually.
 I used a large pennant die (
 I took some white cotton thread (

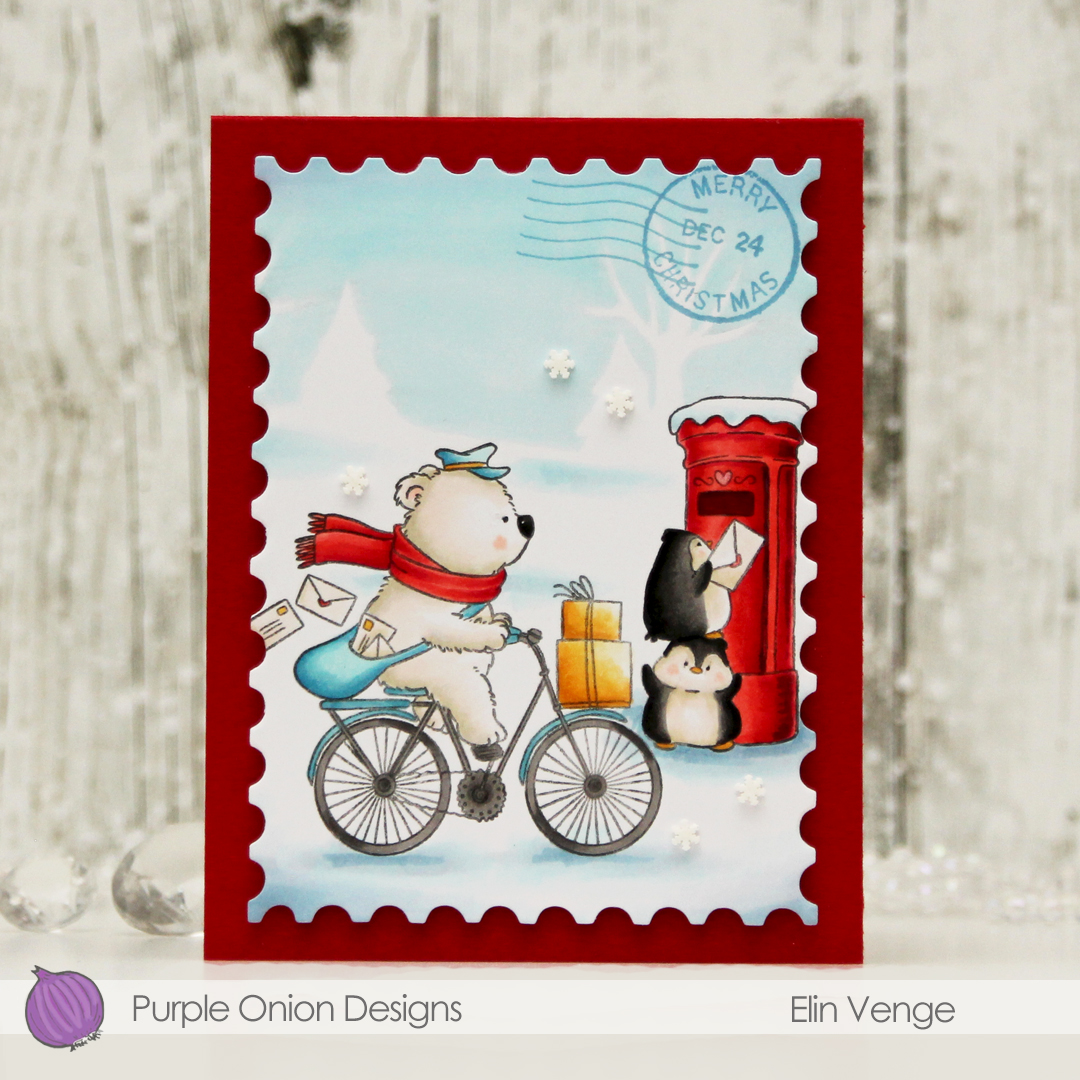 I suggest you put this image in your cart, it’s so awesome. I colored it with my Copics, adding an actual no line horizon behind my critters to complete the wintry scene, before using a die from the Nesting Postage Stamps infinity die set from Hero Arts to turn it into a huge postage stamp. I then used the
  I created a top fold card base from Pure Poppy cardstock from Papertrey Ink, mounted my large postage stamp using lots of foam tape and adhered a few Snowdrift sprinkles from Little Things from Lucy’s Cards to finish.
 I actually used red markers for red this time, with a little bit of B14 where I wanted it to be darker than R29 can create on its own. I usually use earth tones for red, this was a fun change.