
Hi, crafty friends. I have a simple birthday card to share today, featuring Animal Number: 5 Monkeys from Rachelle Anne Miller. I love her number stamps, they’re so fun and playful.
 I did a lot of coloring the day I colored these monkeys. As you can probably tell by their fur, my markers needed to be reinked at this point. I could have chosen a different brown combo. I could have taken the time to refill my markers, but I had colored so much the day I colored this that I just wanted to keep coloring. I probably should have stopped and taken the time to refill or chosen a different combo that didn’t need reinking. This is a good reminder to reink your markers. You can be an amazing colorist, but if you don’t take care of your markers, your coloring will look uneven. I went with it anyway. The 5 year old getting this card is not going to notice that my coloring’s not perfect, and it doesn’t always have to be. I’m trying to let go of my perfectionist tendencies, and this was a good exercise. I will refill these markers before I use them again, though, don’t you worry.
 The card itself is very simple. I stamped a sentiment from the A06 stamp set from Norsk Stempelblad AS below the image, using Cornflower ink from My Favorite Things. I then used the second largest die in the Watercolor Rectangle STAX die set from My Favorite Things to turn it into a panel with a fun edge, before I added dimension behind it and adhered it to a top fold card base I created from Cornflower cardstock from My Favorite Things. I finished off the card with some enamel dots from Papirdesign.
 Simple color palette. And I really do need to refill those browns. Even E23 was giving me trouble.
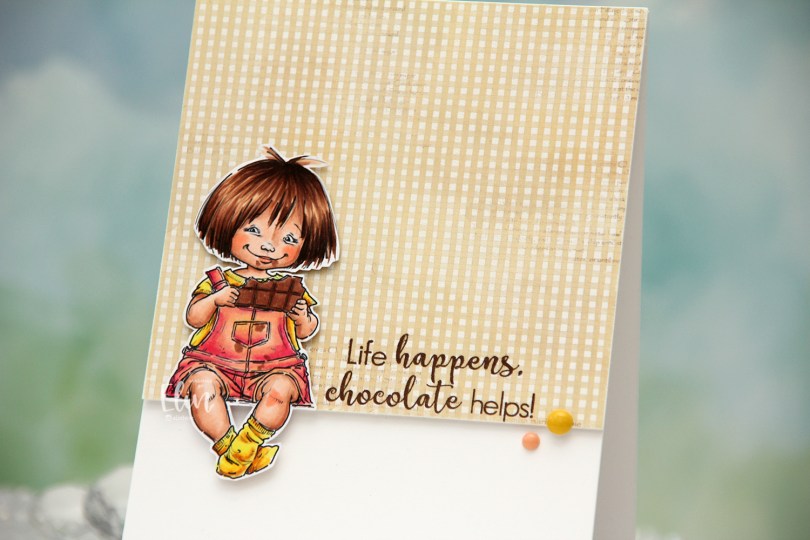
 I colored the image with Copics, fussy cut leaving a white border and created a very simple card for her to sit on. I pulled out a piece of patterned paper from the Coffee in the Arbour 6×6″ paper stack from Maja Design and cut it down to fill about 2/3 of the front of an A2 card.
 I stamped a sentiment from the Coffee and Chocolate stamp set from hÄnglar & Wings onto the bottom of the pattern using Dark Chocolate ink from Papertrey Ink. I added a few layers of cardstock behind the patterned paper for a bit of dimension, and did the same with the little girl, making sure to add a couple of extra layers behind her legs so they wouldn’t sag. I adhered her so she’s sitting right on the edge of the patterned paper and finished off the card with a couple of enamel dots from My Mind’s Eye. The yellow one is from the “Oxford Lane” pack, the peach from the “Sky’s the Limit” pack.
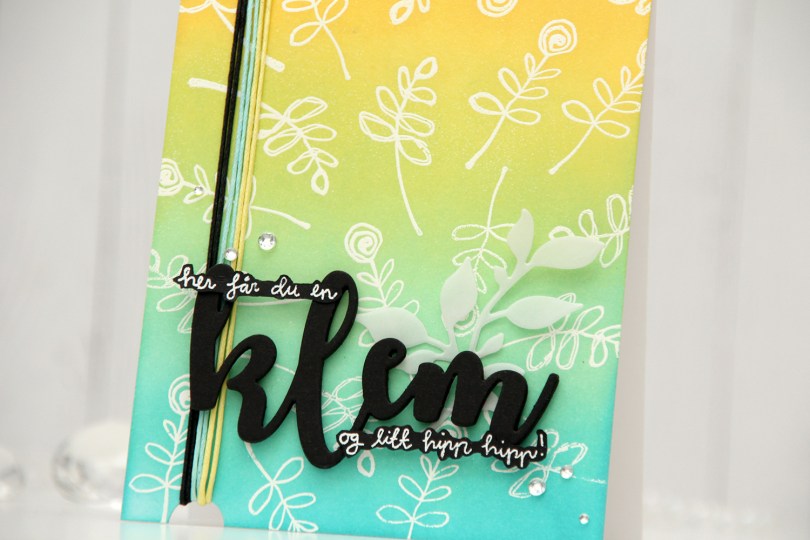
 I started with an A2 top fold white card base. I stamped and white heat embossed two stamps repeatedly across the background, before ink blending on top with Distress Oxide inks. From bottom to top, I used Peacock Feathers, Cracked Pistachio, Twisted Citron and Fossilized Amber. I die cut klem four times from True Black cardstock from Papertrey Ink and stamped and heat embossed coordinating sentiments. I figured they’d be too tall if I cut them down to regular sentiment strips, so I fussy cut around them. So far, so good, right? Yeah, that’s when I hopped on the struggle bus. I figured the sentiment on its own was a bit meh against the background, and it wasn’t exactly revolutionary. Also, the first part of the sentiment was floating on its own, which I also didn’t like too much.
 I used a leaf die to cut some leaves from vellum (Heavyweight Translucent Vellum from My Favorite Things), hoping that would work. It helped, but the first part of the sentiment was still floating. I needed an anchor point. I tried adding some thread on the side. Better already. I decided to cut a half circle notch from the bottom and top of the card for the thread to be looped around. Two strands each of three colors that matched the card. I was quite happy with that and decided to add the die cut word, and also adhered the stamped pieces of the sentiment on top of the die cut. Instant anchor points, and the first part of the sentiment was no longer floating on its own. I finished off with diamonds that framed the sentiment, and felt like it all ended up as a cohesive design in the end, even if it took me a while to get there.
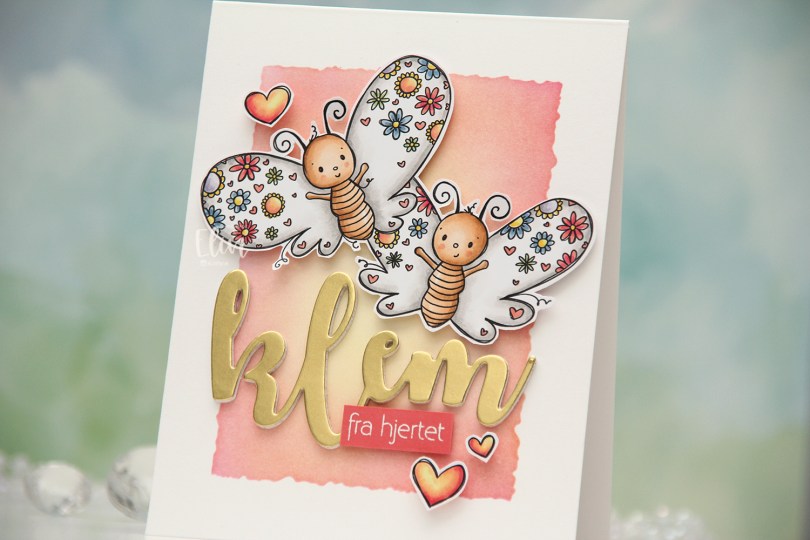
 I colored the butterflies (and the three hearts that are part of the image) with Copics and fussy cut them, leaving a thin white trim around the edge. Onto a top fold card base I created from Stamper’s Select White cardstock from Papertrey Ink, I ink blended the center of the card, using the Watercolor Rectangle stencil from My Favorite Things and various inks (Distress Ink Picked Raspberry, Distress Ink Worn Lipstick, Altenew Pink Pearl, Distress Ink Scattered Straw). I went with pink on the edge and yellow in the center to mimic the colors in the hearts.
 I die cut the word klem (hug) four times from white cardstock and once from Gold Shine cardstock from My Favorite Things, and stacked them for a layered look. I added foam tape to the back of my butterflies, adhered them top center on the card and put the stacked klem below them. I also added a sub sentiment from Norsk Stempelblad AS that I white heat embossed on a piece of Berry Sorbet cardstock from Papertrey Ink. I put a few layers of cardstock behind it for dimension and added it to the card, partly on top of the die cut, before embellishing with the colored hearts to finish.
 I colored the cow with Copics, before fussing cutting it, leaving a white trim around the edge. Onto a top fold fold card base, I ink blended blue inks from Altenew (Winter Lake, Icy Water and Polar Bear) through the Geometric Landscape stencil, also from Altenew, before stamping a Happy Birthday background stamp from My Favorite Things on top, using the darker two of the inks I used for the blending. I also used the stencil in the top right corner and used what was left on my ink blender brush for a soft look.
 I added Light & Fluffy modeling paste from The Crafters Workshop through the Tiny Clouds stencil from My Favorite Things. I wanted dimension to my clouds and put down a very thick layer of the paste. While that dried I worked on the rest of the card. I die cut four polaroid framed using the Precious Polaroids die set from My Favorite Things and stacked them for dimension. Onto Grapefruit cardstock from Concord & 9th, I stamped and white heat embossed three sentiments from the Bitty Birthday Wishes stamp set from My Favorite Things and cut them all down to strips, adding a few extra layers of cardstock behind each for dimension. I adhered the polaroid frame to my card base at an angle, glued the cow on top, added my sentiment strips and finished off with sequins and gems from the
  Super simple and very neutral color palette for this one.
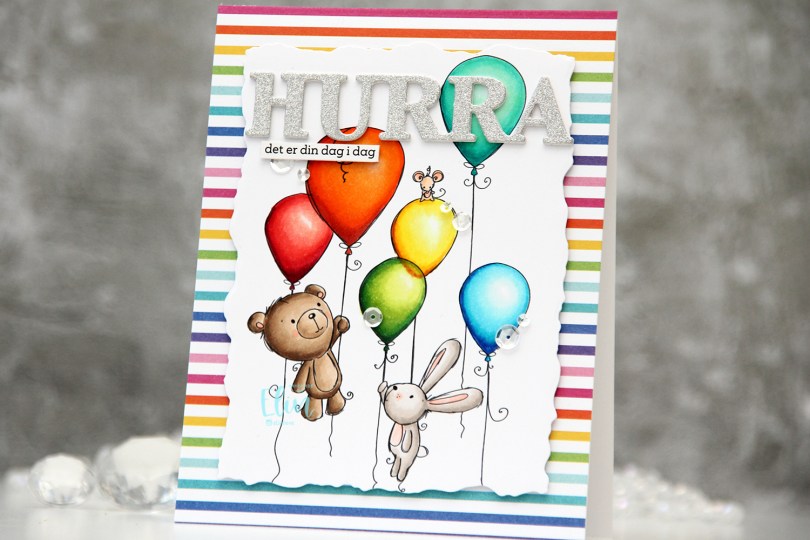
 I colored my image with (a lot of) Copics, before using the second largest die in the Watercolor Rectangle STAX die set from My Favorite Things to cut it out. Onto a top fold white card base, I adhered a piece of patterned paper from the Rainbow Love paper pad from My Favorite Things. I added some dimension behind my colored panel and adhered it in the center of the card.
 Using a die from Kort & Godt, I die cut three layers of the word HURRA; twice from white cardstock, and once from silver glitter cardstock from Kort & Godt. I stacked the three and adhered my layered die cut near the top of the card. I added a sentiment sticker strip, which I also popped up, before finishing off the card with sequins from the Seaglass mix from Simon Says Stamp.
 I used way more colors than normal for this card, and probably a few more than I technically needed. I probably could have skipped a couple of colors on the orange balloon, as well as on the teal balloon.
 I colored the image with Copics, then used a die from the Blueprints 27 die set from My Favorite Things to give the panel a nice border around the edge. I added a few layers of cardstock scraps behind the panel for strength and dimension. I created a top fold card base from Lavender Moon cardstock from Papertrey Ink and ink blended from the bottom using Autumn Rose ink, also from Papertrey Ink. This gave my card base a nice ombre effect.
 I used the Big Happy Holidays die from Mama Elephant to die cut four layers from Lavender Moon cardstock. I used the same ink blending trick for the top layer that I used for the card base, ink blending it before I die cut and stacked all four together for a nice, dimensional sentiment. To finish off the card I added a few die cut snowflakes. I used the Snowflake Confetti Fancy die from Hero Arts and CR1335 from Marianne Design to create my snowflakes, and my card was complete.
 I always go overboard when I color snow, even though there was very little of it this time.
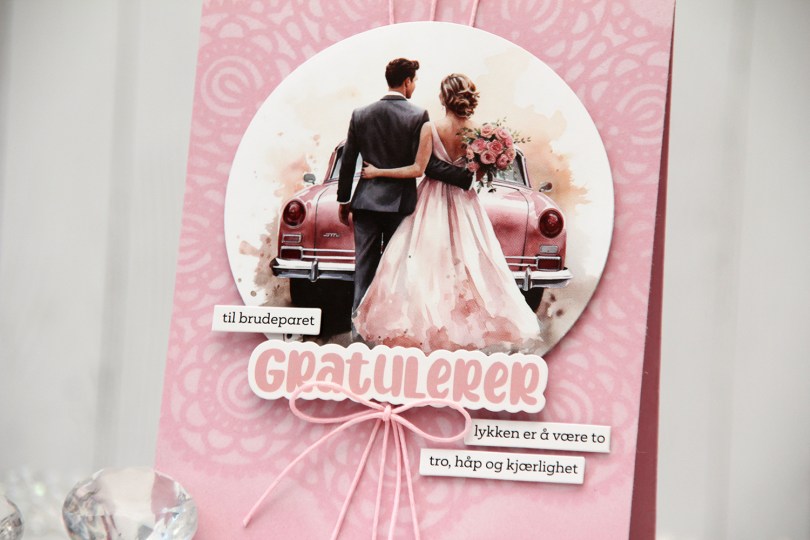
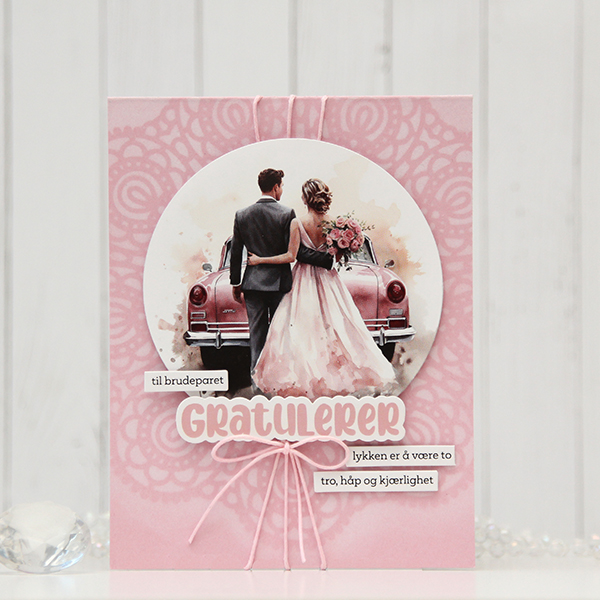 I used the Circular Lace stencil from Simon Says Stamp and ink blended white hybrid ink from Papertrey Ink onto the card base, which I created from Lavender Moon cardstock, also from Papertrey Ink.
 I used pink thread to create a little bit of texture on the background. I created three holes at the top center of the card to loop my thread through and tied a bow. I die cut the image using a circle die, added foam tape to the back and adhered it to my threaded background, before adding a “Gratulerer” sticker using a few foam squares for additional lift. I also did the same with a few sticker sentiment strips, and my card was complete.
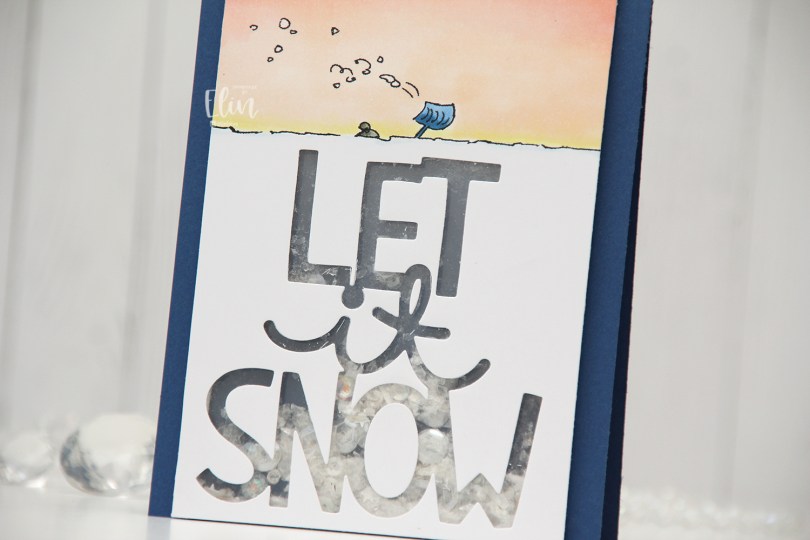
 I really don’t want the sentiment to come true right now, I don’t remember there ever coming this much snow in the city in such a short time, and I’d very much like to not have to walk to work tomorrow. I saw plenty of people out with their shovels today when I walked home, their cars were snowed in, their driveways were full of snow and they could barely open their front doors. It’s winter, we get it, but it’s enough now, we don’t need more snow.
 I’m done venting. I think. I was originally planning on adding a stacked die cut where all the snow is, but then I came up with the idea of a shaker card instead. It’s kind of like the little person under the beanie is trapped inside the shaker with all the shaker bits, which I thought was a fun concept.
 I used the Giant Let It Snow die from Lawn Fawn, covered my window with acetate and filled my shaker well with Distress Mica Flakes, a little bit of Rock Candy Distress Glitter and a small pile of embellishments from the Starry Night mix from Little Things from Lucy’s Cards.
 I added my shaker panel to a top fold card base I created from Blueberry cardstock from My Favorite Things and decided not to add anything else.
 Very simple color palette for this one.
 I colored up
  I stamped a sentiment from InkyWings using Pink Pearl ink from Altenew. The stamp actually has the word hugs in it too, but I opted for a die cut hugs, using the Sweet Sentiments die set from Altenew. I die cut four from Grapefruit cardstock and stacked them together for a dimensional look.
 I finished off with a couple of heart droplets from Little Things from Lucy’s Cards.
 Fairly simple color palette for this one.