
Hi! Today I’m sharing a Christmas card in a somewhat untraditional color scheme. Bright green and brown are not colors that come to mind when I hear the word Christmas. Let’s face it, I think of blue, white, silver and a touch of brown, but this combo felt fresh and unexpected, so I went with it.
 I love Flannel the raccoon. This is such an awesome image, and it’s great for gift tags, as well. It doesn’t even have to be holiday related, he would also be great for a tag on a birthday present to someone born in the winter months.
 I stamped Flannel using Extreme Black ink from My Favorite Things onto X-Press It blending card. It’s my favorite cardstock for coloring. It’s super bright white and the Copics blend very well on it. It’s no surprise, though, the paper is made especially for Copic use.
 I die cut the panel using the largest of the dies in the Wonky Stitched Rectangles STAX set from My Favorite Things, which is one of the many things I purchased with the $250 gift card I won in this year’s Superstar contest. I love my MFT faux stitch dies, and this wonky one is a fun change from my regular faux stitched rectangles. I sprinkled on chunky white embossing enamel from Stampendous and melted the granules from the back of the cardstock, before adhering it to an A2 card base I created from Green Parakeet cardstock from Papertrey Ink.
 Using the Very Merry and Bright die from My Favorite Things, I die cut the letters for the word Merry five times from the same green cardstock that I used for the card base. I glued them together for a stacked, dimensional look and adhered them to my colored panel using liquid glue. Onto a small strip of Cocoa Bean cardstock from Papertrey Ink, I stamped and white heat embossed part of a sentiment from the Holiday Messages Sentiment set, added two layers of brown cardstock behind it and glued it onto my die cut letters to complete the sentiment.
 To finish off the card I added a few Snowdrift sprinkles from Little Things from Lucy’s Cards for a little bit of extra interest and dimension. I love these tiny clay snowflakes, I use them all the time.
 Simple color palette. That bright green really is fun!
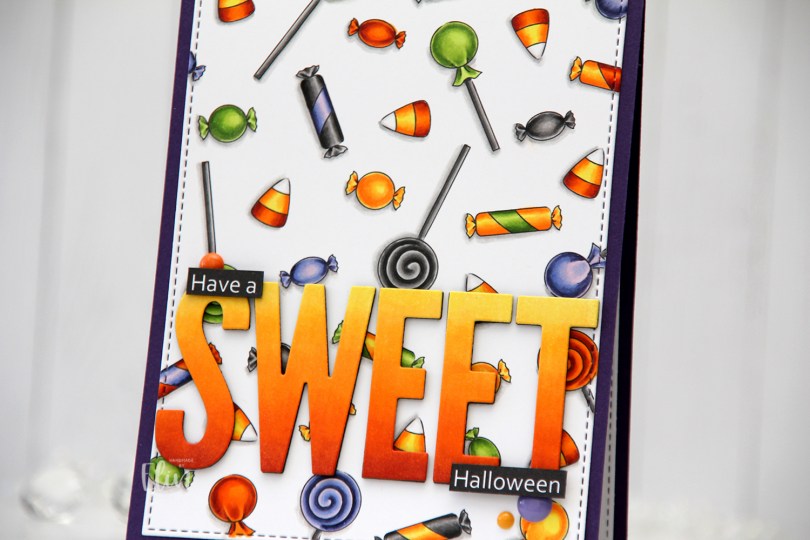
 In the stamp set, there are three fairies, a few ghosts, an adorable bat (yes, it’s adorable) and various accessories. Among them are different candies. I created a panel of these candies, and colored them in with my Copics using very Halloween-y colors. That was last year.
 I wasn’t sure what to do with my colored background, but I didn’t want to cover too much of it, and opted for a very simple design. Using the largest die from the A2 Stitched Rectangles STAX 2 set from My Favorite Things, I turned my colored piece into a panel with a nice faux stitched edge. I love these faux stitch dies from MFT and use them for nearly every card I make. It adds such a wonderful detail. It’s all in the details, to paraphrase a famous German architect.
 I adhered my die cut panel onto a card base I created from Royal Velvet cardstock from Papertrey Ink. It’s a deep purple that goes well with the coloring.
 I created the remainder of my sentiment in Photoshop and printed it, cut it down to two strips and added them on top of the letters with an extra strip of black cardstock behind for a little added dimension and stability. I added three enamel dots from Papirdesign (yellow and orange) and Altenew (purple) to finish my card.
 Not a lot of colors for this one, and yet they’re very Halloween-y.
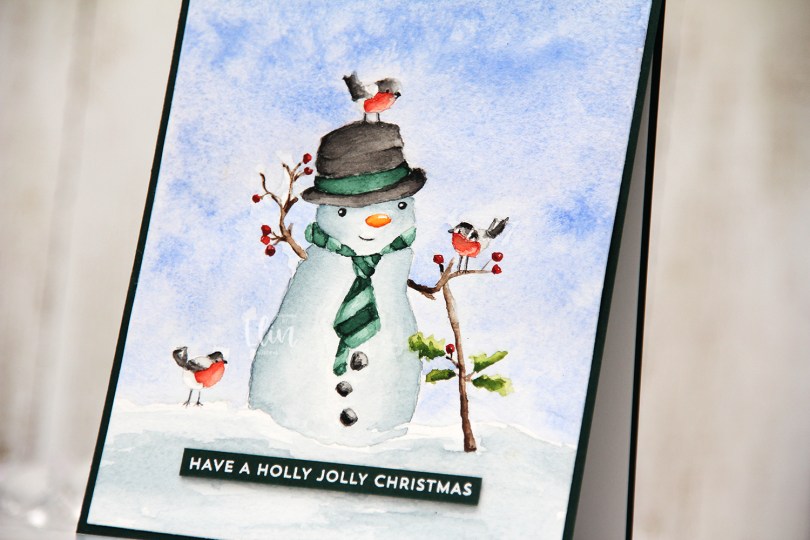


 I wanted a really dark, intense moon to illuminate and cast shadows in my scene. Once I’d placed all the different images where I wanted them in Photoshop, I drew a large circle to create the edges of my moon. I set the opacity very low, so I could use it as a guide when I did the actual coloring to get a perfect circle and not have any black lines around the edges.
 My original plan when I colored this scene (which was actually last year) was to create a shaker card where the tombstone was the actual shaker recessed into the card, while everything else was popped up. Plans change, though, and when I sat down to actually make the card I decided to go for a very simple approach. I glued my colored panel onto a card base made from Sour Apple cardstock from My Favorite Things, and that was it. No embellishments, no nothing. Some people might call this a one layer card, but to me, a one layer card is one where everything is done on the card base. This is adhered to the card base, so I wouldn’t technically call it a one layer card. What do you think? One layer or not? What’s your definition of a one layer card?
 Not a whole lot of Copics, given the fact that the entire front panel is colored in.
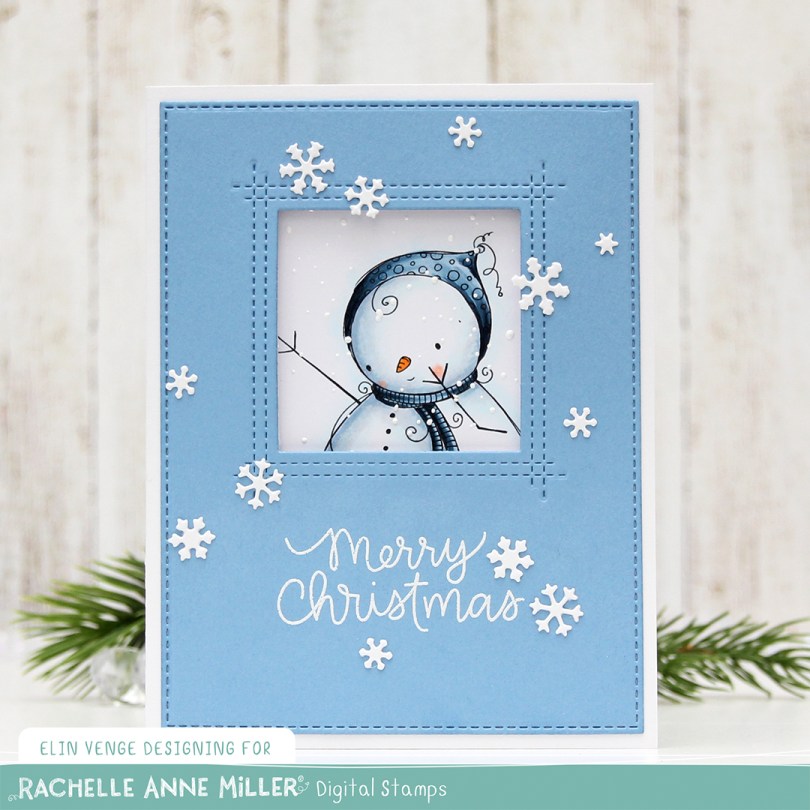
 This cute image is called
  I actually turned this into a trifold card. I used the largest of the A2 Stitched Rectangles STAX 2 dies from My Favorite Things, as well as the Square Peek-a-Boo Window die to die cut from this panel of Lazy Day cardstock, also from My Favorite Things.
 When you open the card, the rest of the image is revealed, and that cute snowman isn’t alone. He has a little friend giving him a present. Below the image I stamped a sentiment from the Holiday Messages stamp set from Mama Elephant using Lazy Day ink from My Favorite Things. This panel is also die cut using that die from the Stitched Rectangles STAX set from MFT. I love these faux stitch rectangle dies, they’re my most used dies by far. I sprinkled on chunky white embossing enamel from Stampendous and heated the panel from the back to melt the granules before adhering it to my card. This opens up to reveal ample space to write a personal message to the recipient.
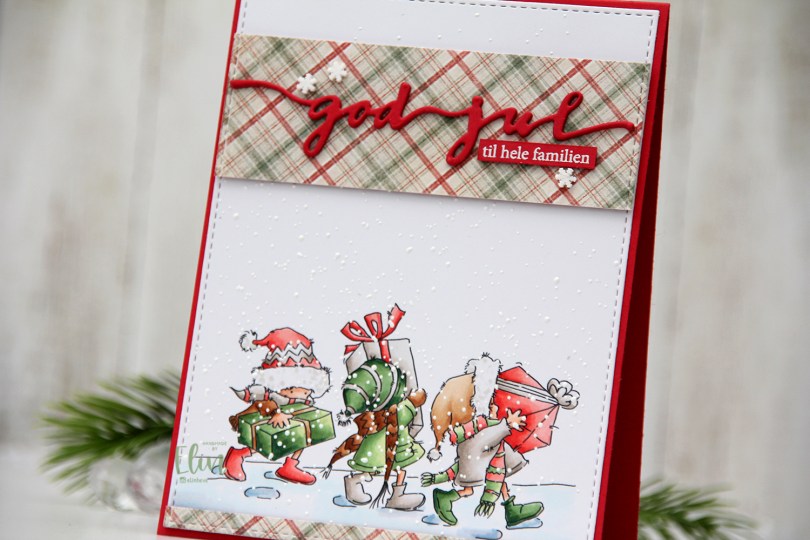
 I colored up these
  I’m usually good at using scraps of patterned paper and rarely use a brand new sheet. Today was the day, though. I thought this patterned paper from the I wish collection from Maja Design went really well with my coloring, and I didn’t have a single scrap of this particular paper. Using the same die that I used on the white panel, I die cut my patterned paper before cutting up my die cut into pieces I could use on my card. I added two layers of cardstock behind both pieces and glued them to my card. I now have a continuous stitched border, even though some of it is my colored panel and some is patterned paper. I love little details like that. I die cut three of the god jul die from Papirdesign from red cardstock and glued them together for a stacked look. I glued my die cut to the center of the wide patterned paper before adding a sub sentiment. The sub sentiment is from Norsk Stempelblad AS, white heat embossed on the same color red cardstock and cut down to a strip, with two additional pieces of cardstock behind it to make it flush with the die cut. I added three snowdrift sprinkles from Little Things from Lucy’s Cards to the patterned paper, and my card was finished.
 Not a whole lot of colors for this one. Soft colors too (except for the darkest green, I wanted a little bit of contrast there), which is rare for me.
 I actually colored this in May last year. I keep my colored image in stamp storage sleeves from Tim Holtz. They’re super sturdy and you can put a lot of colored images in one pocket. They come five in a pack, which is perfect for me, that way I can dedicate each sleeve to one design team, since I’m currently on five design teams. Sometimes, I just want to color without having to turn it into a card right away, and sometimes I just want to make a card, but don’t feel like coloring, or simply don’t have time to do both. Compartmental crafting for the win.
 I mounted my colored panel using foam tape and adhered it to the center of the card. I felt like it was missing something and needed a little bit extra. Mini paper doilies from Doodlebug Design to the rescue. I love these mini doilies, I use them often. And you don’t need the whole doily, either, I just used two small pieces for this card, and there are 75 doilies in one pack, they last forever. Onto a piece of Blue Breeze cardstock from MFT I stamped a Norsk Stempelblad AS sentiment using Blueberry Sky ink from Papertrey Ink. I cut it down to a 1″ circle using a circle punch from EK Success, added it to my card using foam tape and finished the card with a few pink enamel dots from Papirdesign.
 I blame the cardinal. I really wanted to create something of a scene with this bird flying to trees in the distance to add the star to the top, and I couldn’t really choose any other color for him.
 Onto a piece of X-Press It cardstock, I stamped the hillside in a grayish green ink, before using the Sending Christmas Joy die to partially cut from it. I only wanted the word joy to be cut from the white panel, so I made sure not to cut the words above by not having the cutting plates cover the top two words of the die as I ran everything through my die cutting machine. I did this twice, stacking the two layers together, trimming off a little on each side before adhering it to a cardbase I created from Wild Cherry cardstock. I added the center of the o back in, and really love how the cardbase is showing through the opening of the die cut letters.
 I die cut my little colored cardinal with the Christmas Cheer die set that coordinates with the Christmas Cheer stamp set, added two more die cut layers behind him for stability and a little bit of dimension and adhered him to the front of the card.
 Here you can see the tiny bit of dimension you get by stacking die cuts and also the recessed JOY.
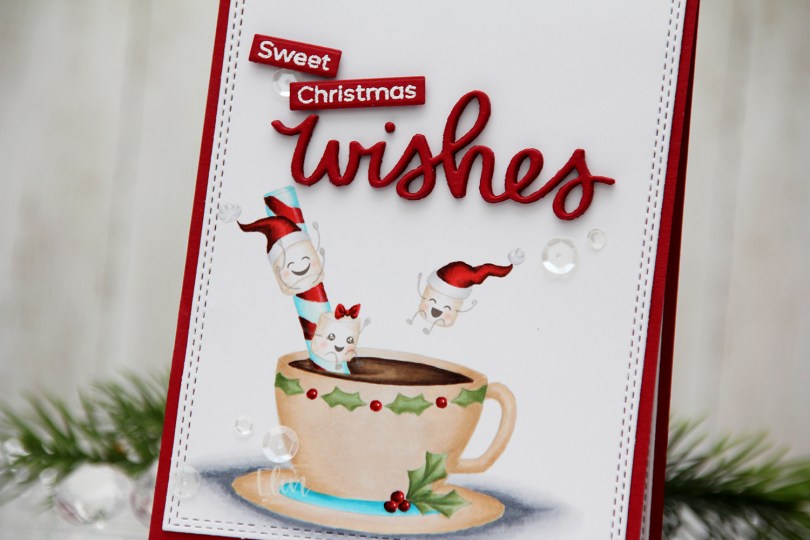
 I printed my image with gray lines so I could do no line coloring. Whenever I do this, I like keeping facial features black or a dark brown, so I don’t have to free hand draw them back in once I’m done coloring. It’s a neat little trick.
 I die cut my colored panel using the largest die in the A2 Double Stitched Rectangle STAX die set from My Favorite Things and adhered it directly onto a cardbase I created from Amarena Cherry cardstock, also from My Favorite Things.
 I die cut the word wishes five times from my red cardstock using a die from Mama Elephant. I stacked the words for a dimensional look and also stamped and white heat embossed the words Sweet and Christmas onto separate pieces of the same color cardstock. The stamped words are from two separate sentiments from the Bitty Bears stamp set from My Favorite Things. I love using pieces of sentiments from stamp sets to create new sentiments, it makes them more versatile.
 I felt like I had to add a little something to this, so I pulled out my White Orchid Sequin mix from Little Things from Lucy’s Cards and added them in a visual triangle on my card. This mix is one of my favorites, it’s right up there with the Sparkling clear mix from Pretty Pink Posh.
 These badgers are the
  I adhered my colored panel to a top fold card I made from Bright Buttercup cardstock from Papertrey Ink. I added a strip of that same cardstock below my image and left tons of white space. I printed a sentiment from the
  Simple color palette, of course with a pop of yellow in there.