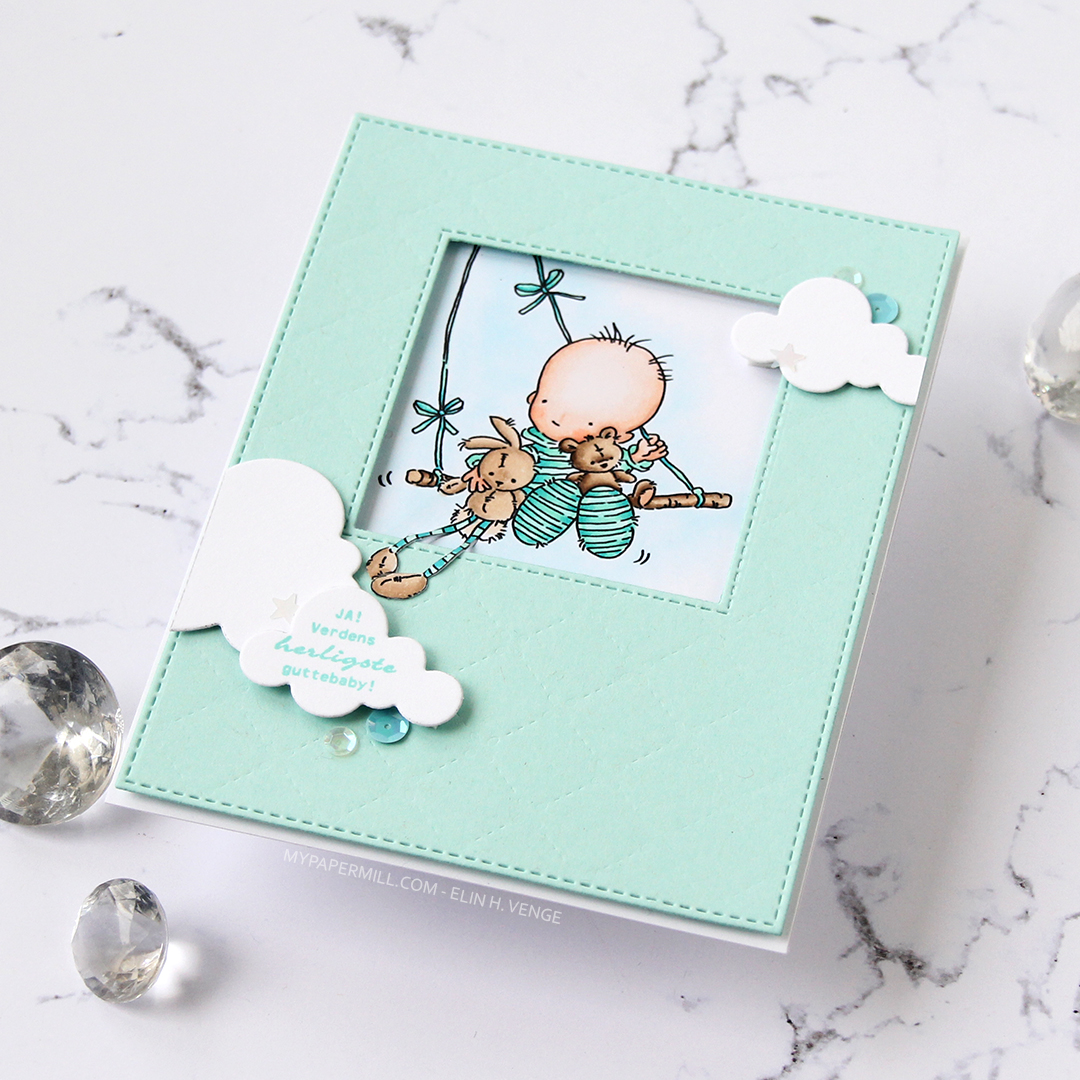
Hi, again! Two posts in one day doesn’t happen very often, but I have a baby card to share, featuring Baby Cloud from Lili of the Valley. Baby sitting on a cloud, what’s not to love?
 I had the beginnings of a plan before I started coloring this cutie, and knew that I wanted a window of sorts for the image to be sitting in. I traced a square die onto my panel before I started coloring, so I knew how large of an area I needed to fill in beyond the baby and the cloud.
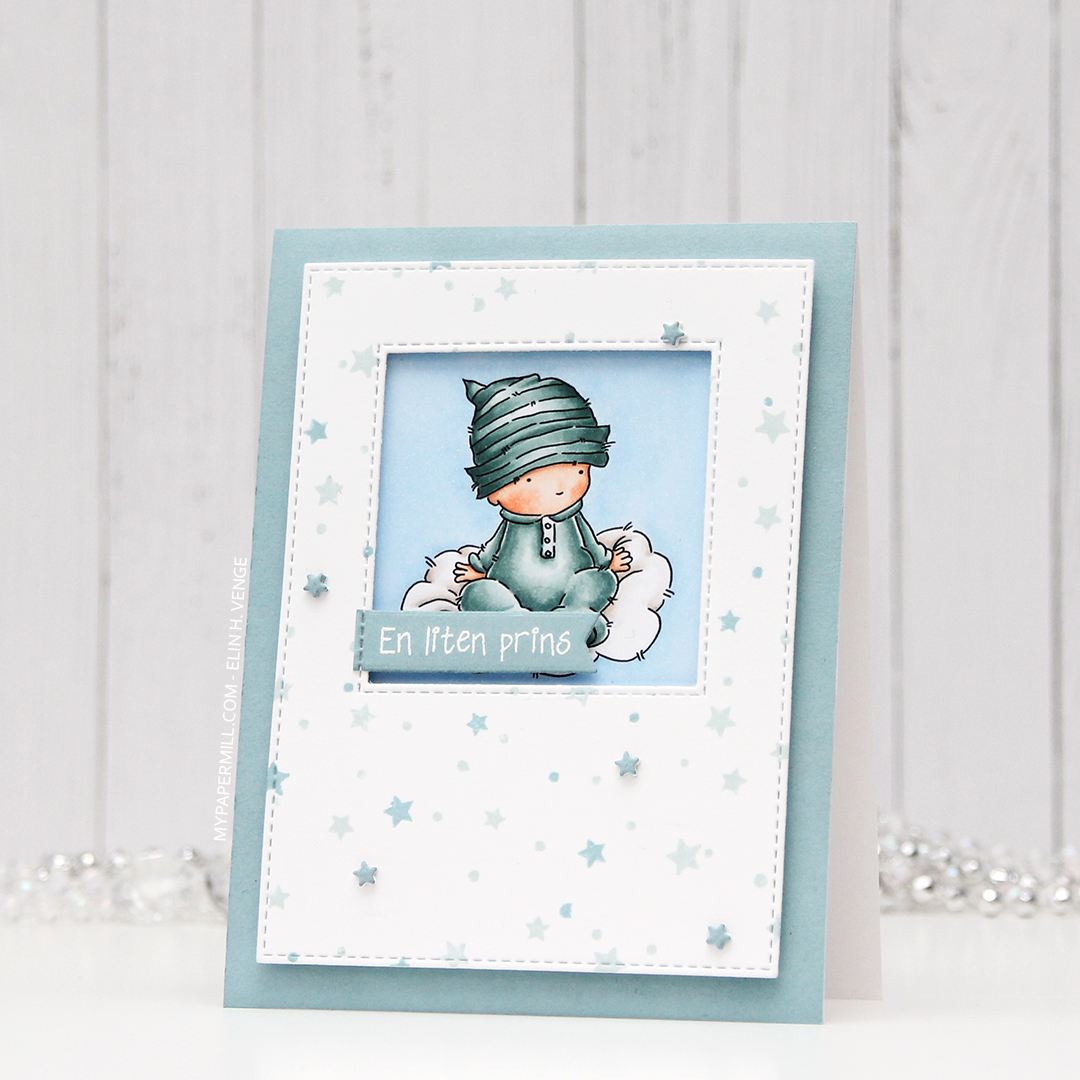 Using the Star turnabout stamp from Concord & 9th along with Misty Morning and Cloudy Sky Ink from Altenew, I was able to create a quick panel of scattered stars in colors that matched my colored image. Using dies from two die sets from My Favorite Things, I turned my panel into one with a window and nice faux stitching along the edges. I really like the look of the faux stitch lines that many of the MFT dies have. Other companies have faux stitching dies too, but there’s something about the length of the stitches, the distance between them and the adjacency to the edge of the MFT ones that make them a favorite of mine. I put foam tape on the back of my stamped star panel, making sure to center my image in the window.
 I didn’t have any card stock colors that fit my stamping and coloring perfectly, so I went direct to paper using the Cloudy Sky ink from Altenew onto a quarter piece of white lettersize card stock. I adhered that to a white top folding card base made out of Stamper’s Select White card stock from Papertrey Ink, which is the same card stock that I use throughout (except for the colored image, which is on X-Press It blending card, the only paper I use for Copic coloring). Using another die set from MFT, I die cut tiny little stars and stacked some scattered around on the stamped star panel. I stamped and white heat embossed a Norsk Stempelblad AS sentiment onto a scrap piece of my dyed card stock, before using a couple of additional dies from MFT to turn it into a banner. I love my MFT dies!
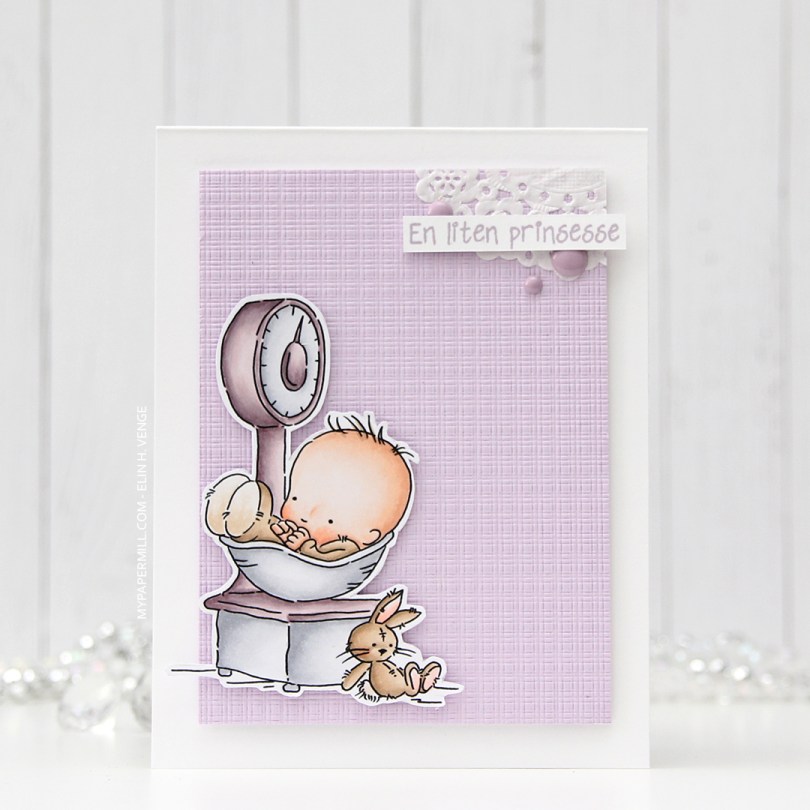
 Limited color palette. For the sky, in addition to B21, I used B20, which is a color I’ve made myself. I also used BG71, another color I’ve made, for the clothing on the baby.
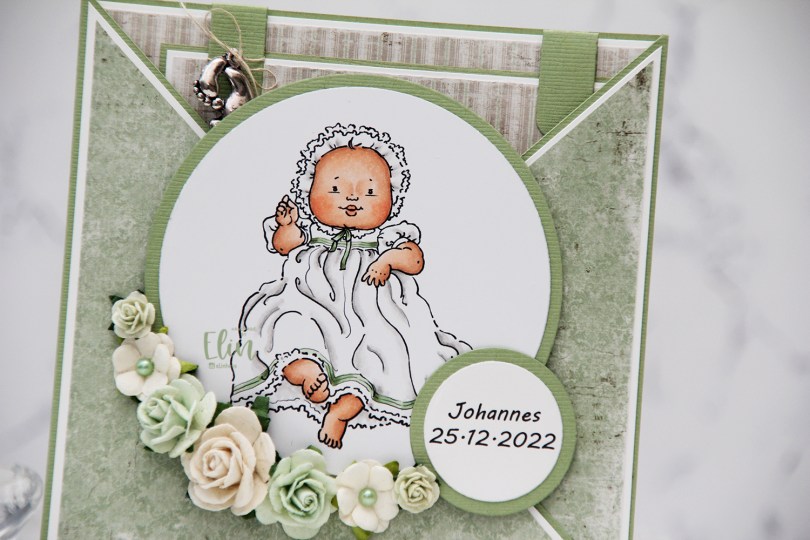
 This Christening image is one that I’ve used several times in the past. It’s super easy to color, which came in handy this time for two reasons: 1 – I didn’t have a lot of time on my hands, and 2 – I haven’t colored in what felt like eons. This was the perfect image to start with after a long break from my markers.
 I colored the image with Copics and used patterned paper from Maja Design to create this criss cross card. I added some flowers, a few pearls and also a charm to the large square tag I put inside, which has plenty of room for a personal message.
 On the back I put an additional sentiment, and the card was complete. Easy peasy.
 Simple color palette, not a whole lot of Copics.
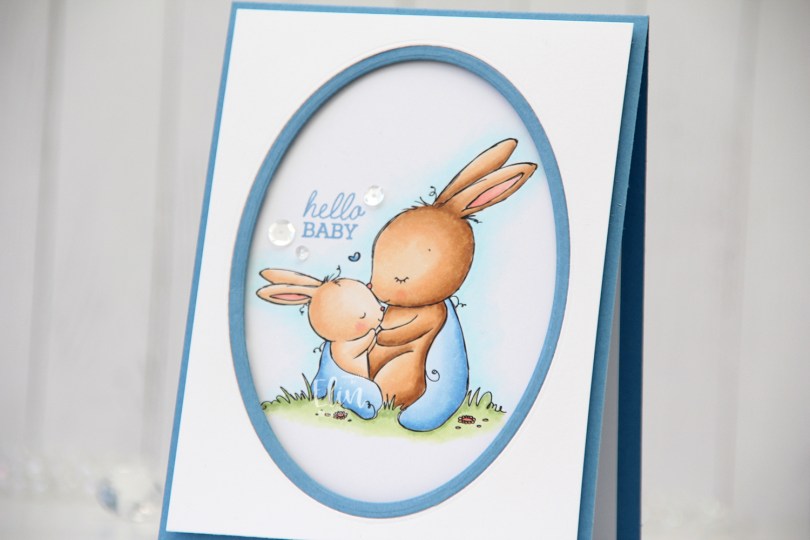
 The card isn’t just simple, it’s super simple. I colored the scene with my Copics and decided to just create a frame around it and leave it at that, letting the image really shine.
 Using the Card Front Designs die set from Neat & Tangled, I die cut the oval frame twice; once in the center of a panel of Stamper’s Select White cardstock from Papertrey Ink, once from Blueberry Sky cardstock, also from PTI. I used the negative of the white die cut and the actual frame from the blue, taped them together on the back and mounted them on my colored panel with lots of foam tape.
 In the perfect “corner” of the image, I stamped a sentiment from the Mini Messages stamp set from Mama Elephant using Blueberry Sky ink from Papertrey Ink.
 I added three sequins from the Seaglass mix of sequins from Simon Says Stamp around the sentiment. Nothing else, I wanted this to be very simple.
 A little dimension, a little shine and an adorable image. What more does a card really need?
 Super simple color palette for this one. I also used a color I’ve made myself. I’ve made my own B20 using a couple of refills and an empty marker, which I used for the blanket.
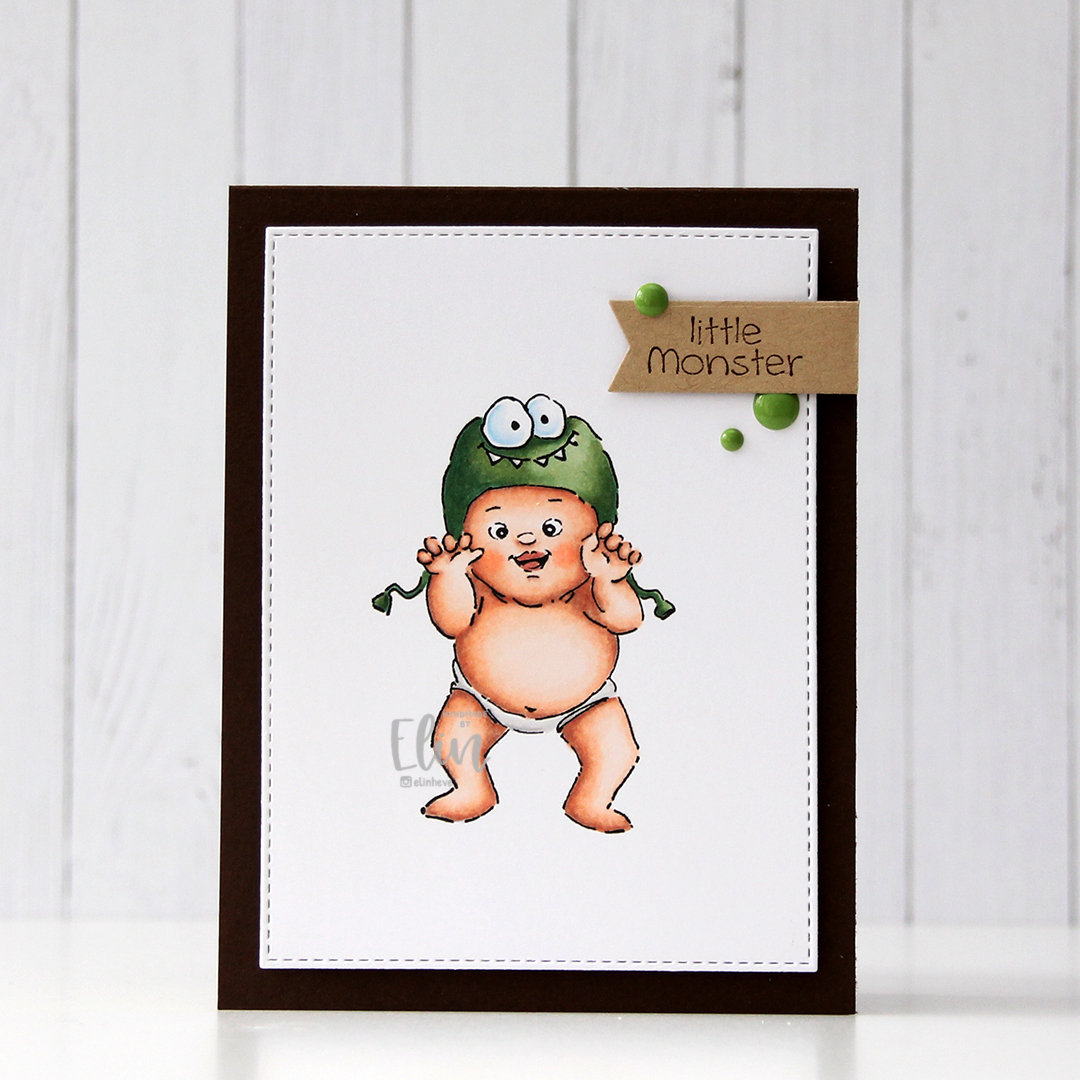


 Not a whole lot of Copics used for this image, it IS simple, after all. I also used V97, which is a color I’ve made myself.
 I thought
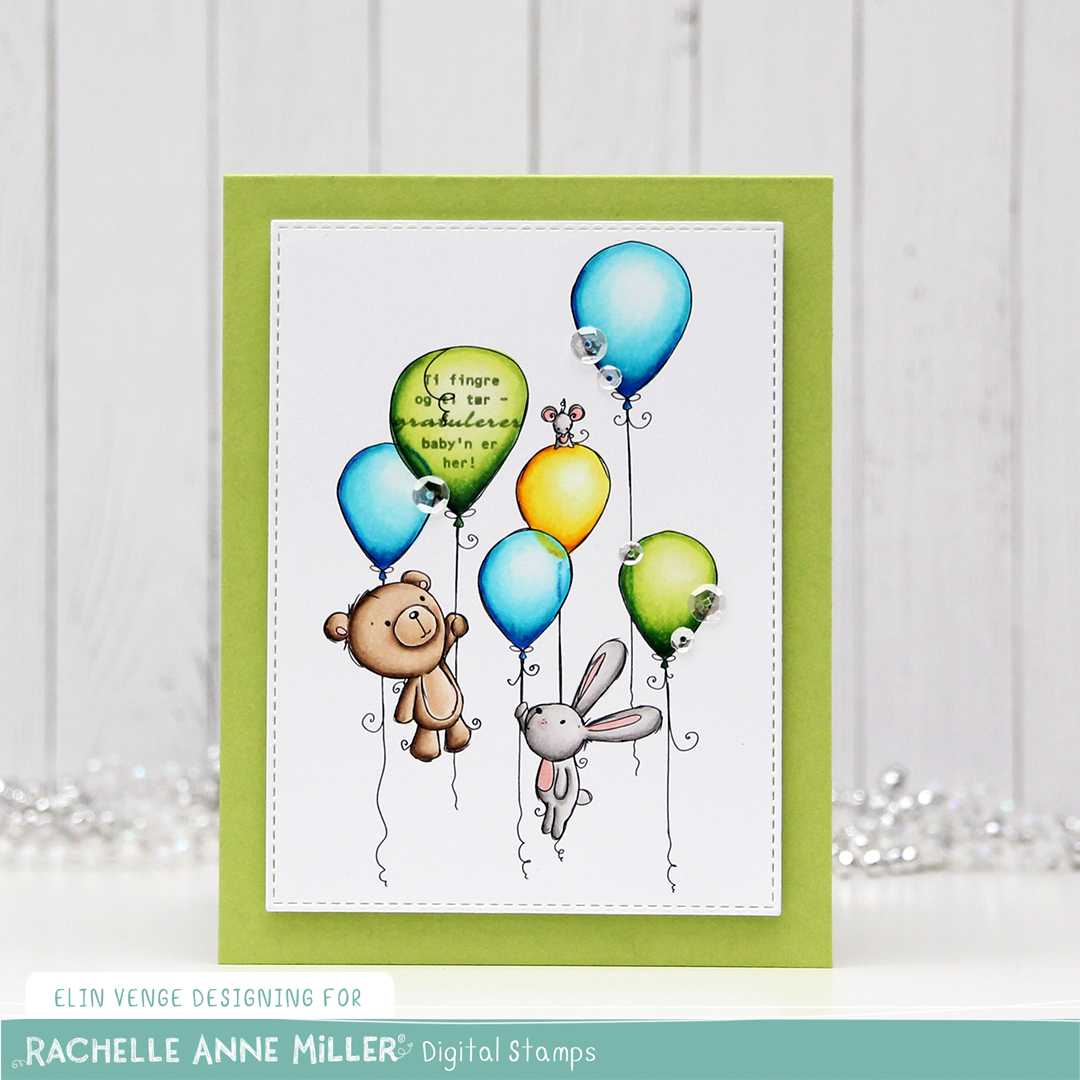
 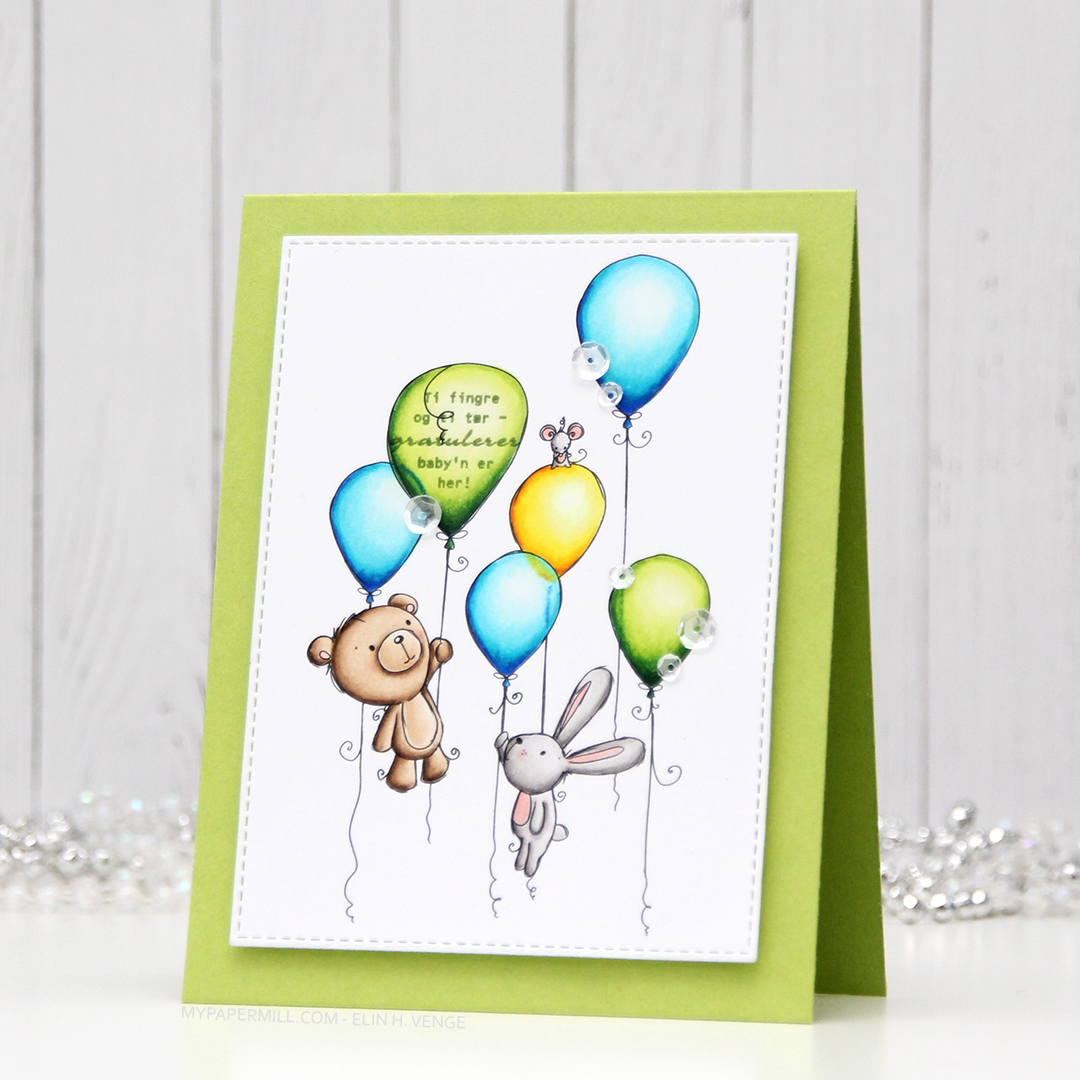 Using Memento Bamboo Leaves ink, I stamped a sentiment from Norsk Stempelblad AS inside one of the balloons, stamped again in VersaMark ink and clear heat embossed it. It makes it stand out a little more from the balloon. I die cut the panel using a die from the A2 Stitched Rectangles STAX 1 set from My Favorite Things and adhered it to a card base made from Sour Apple card stock from MFT using lots of foam tape for dimension.
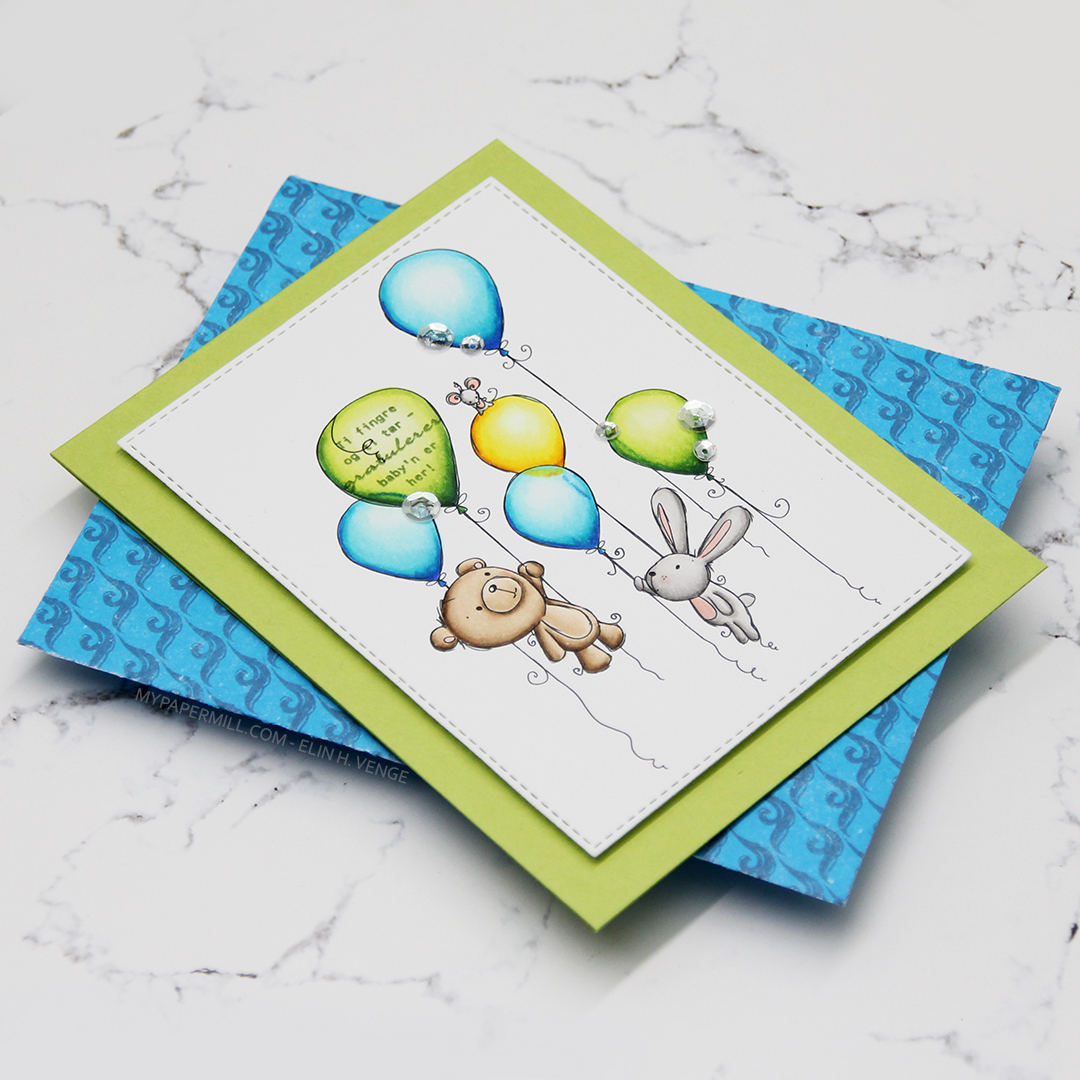 I added Sparkling Clear sequins from Pretty Pink Posh to three of the balloons, and my card was finished. All that was missing was an envelope. The only colored envelopes for A2 sized cards I have left are in warm tones, so I decided to make my own using the A2 V flap envelope dies from Simon Says Stamp with a scrap piece of patterned paper from Papirdesign.
 I thought the color of the patterned paper matched the blue balloons on the card so well, and it made the pile in my scrap drawer shrink ever so slightly, gotta love that!
 I kind of went overboard with the number of Copics used for each balloon, but I think it turned out pretty good in the end.
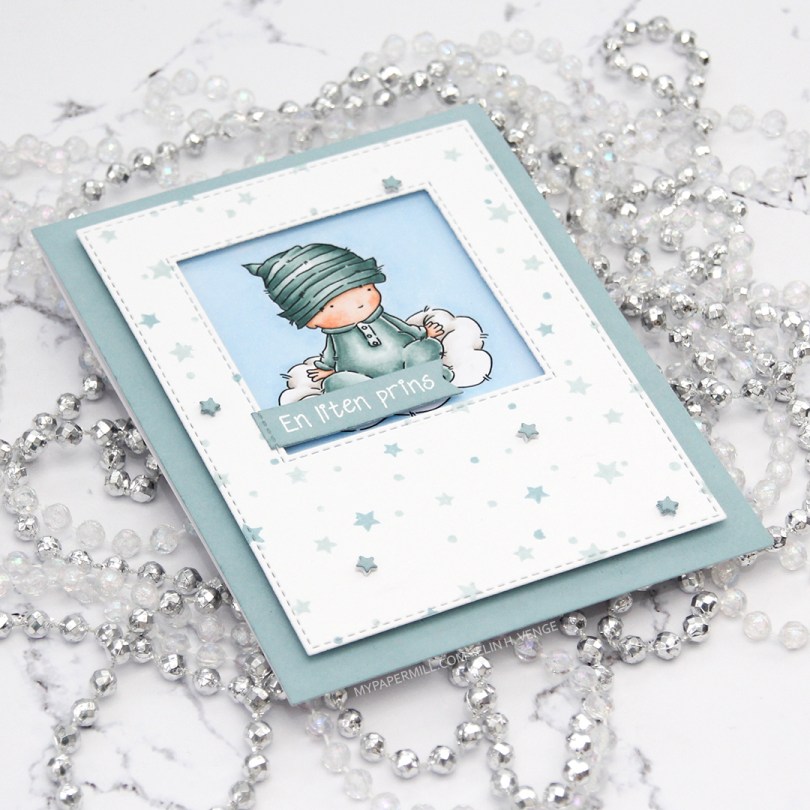

 After coloring the image, I used a die from the nested stitched doily set from Cottage Cuts to turn my colored piece into a circle with some nice detailing along the edge. I die cut two more from white cardstock and added them to the back for a little bit more strength and stability.
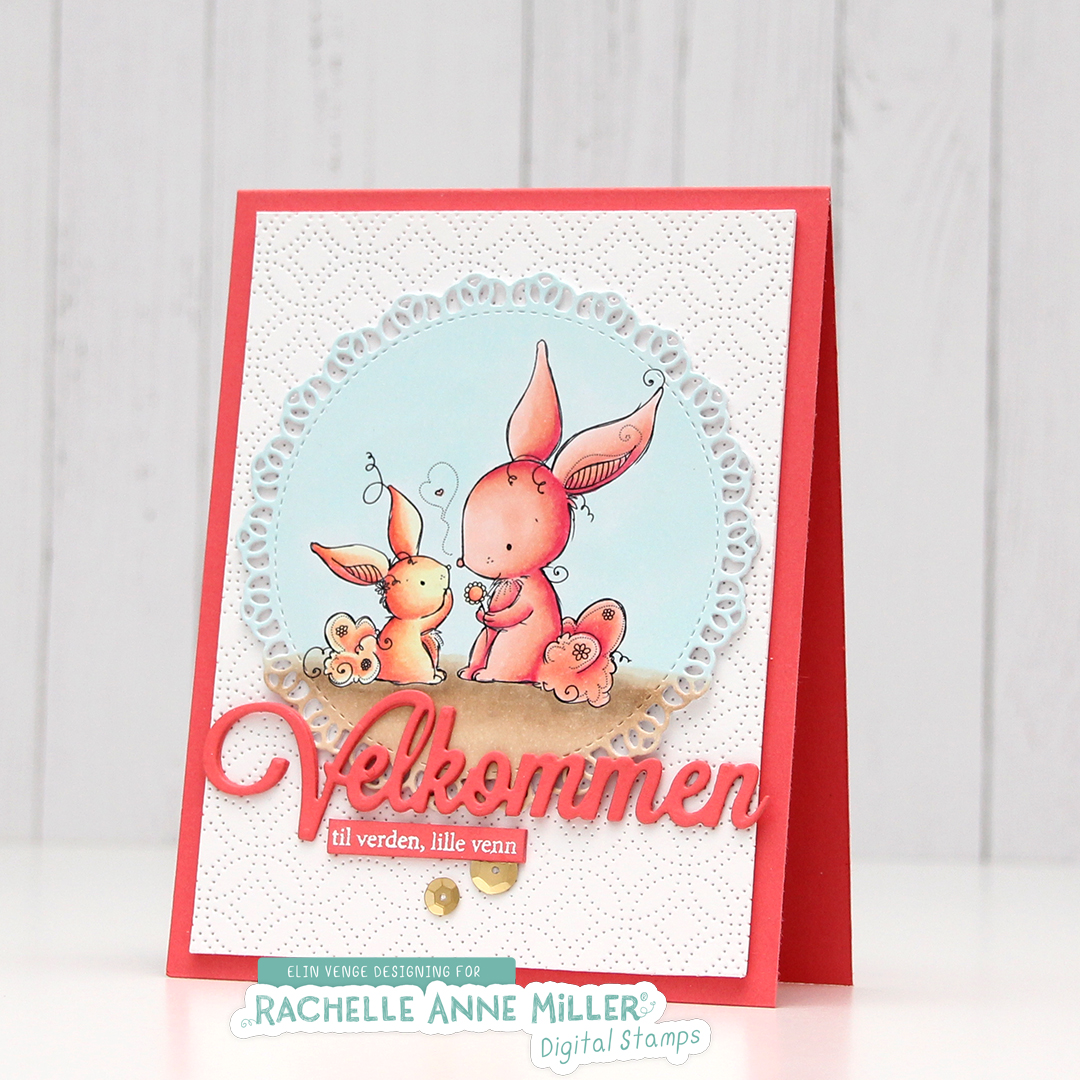 Using the Detail Ringlet Plate from Simon Says Stamp, I created a white panel with subtle texture. I wanted something that wasn’t too plain while at the same time not being too distracting from the image. I cut down four more pieces of white card stock, added them to the back of the die cut one and adhered it to a card base I made from Berry Sorbet card stock from Papertrey Ink.
 A stacked die cut sentiment (die from Papirdesign) and a heat embossed sub sentiment from Norsk Stempelblad AS were added to the front, and finally a couple of matte gold sequins from Little Things From Lucy’s Cards. Before adhering it to the card, I used a shimmer spray on my colored piece, you can sort of see it in this photo, but it’s a lot more sparkly in person.

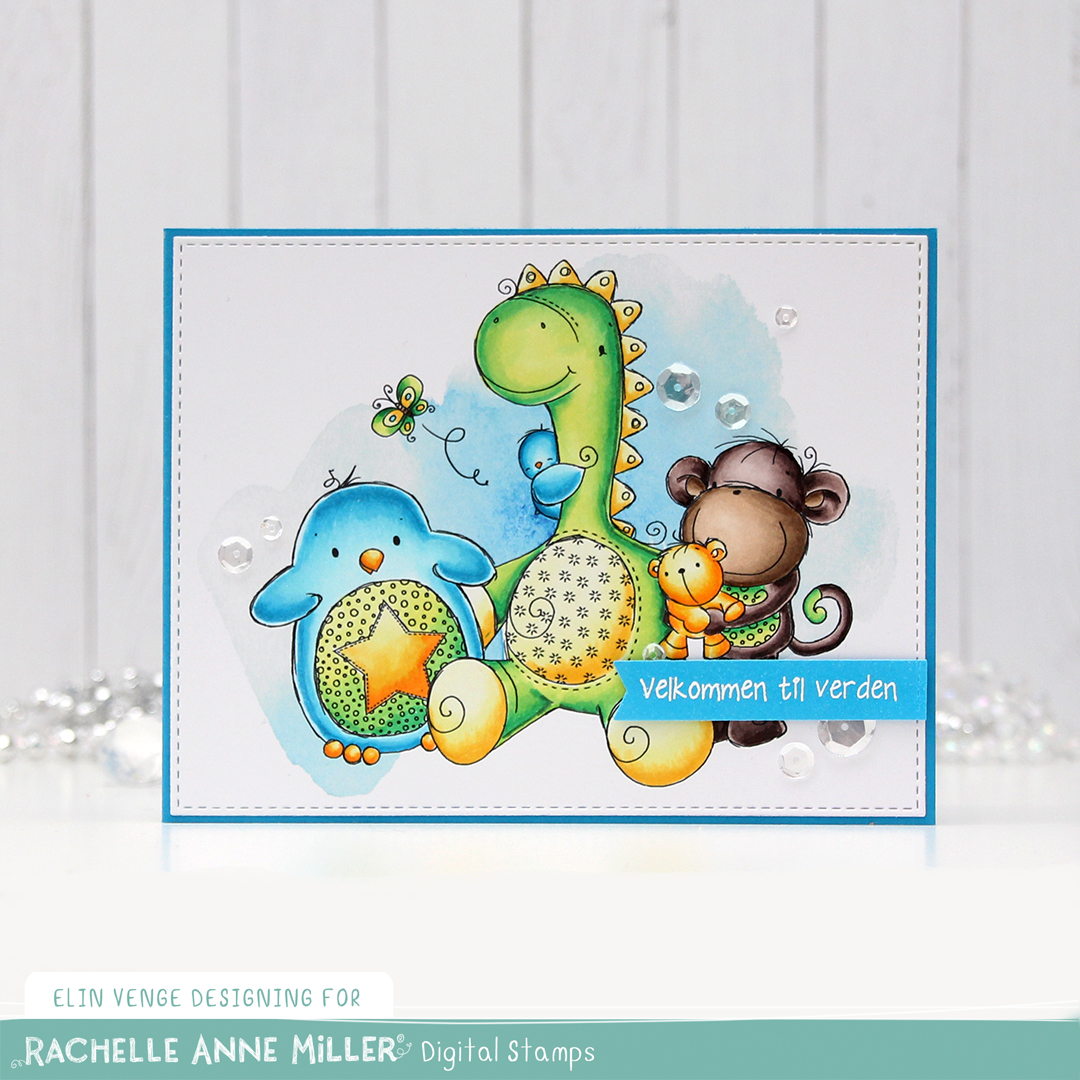
 I had trouble deciding whether to make a card for a baby girl or for a baby boy, so I decided to go somewhat neutral with a combo of yellow and green. I colored the image with my Copics, added a clear coat of glitter on the green areas using a Wink of Stella glitter brush.
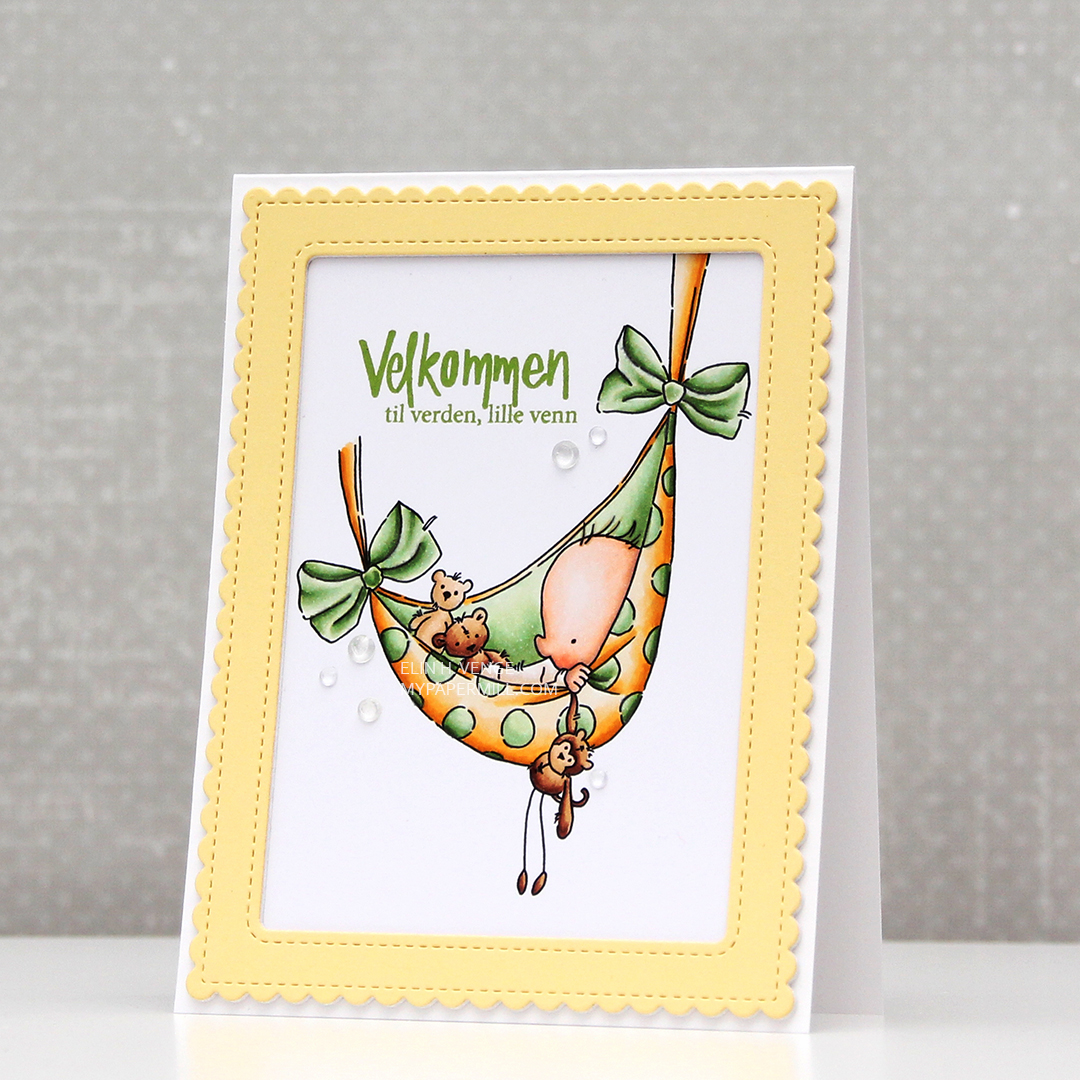 I stamped a sentiment from Norsk Stempelblad AS using Fresh Leaf ink from Altenew, and decided to even add some clear crystals of various sizes from the Crystal Collection from Little Things from Lucy’s Cards.
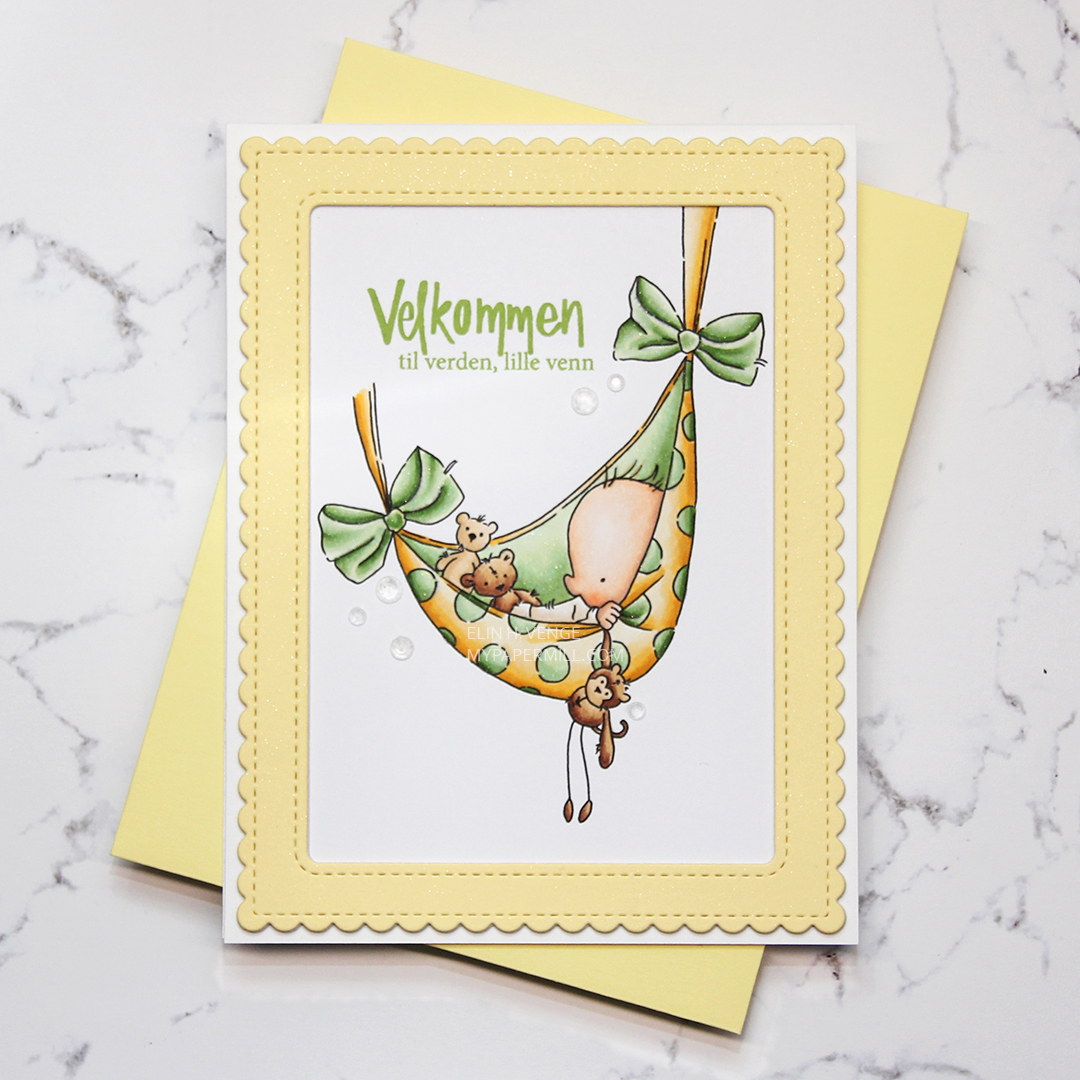 I used a frame die from Mama Elephant and die cut 3 frames; two from white card stock and one from Lemon Tart card stock from Papertrey Ink, which is a very nice soft yellow. I glued all three frames together for a stacked look and spritzed the frame with a sheer shimmer spray from Imagine, before adhering the frame onto the colored piece, and then onto a white card base. I paired it with a Lemon Chiffon envelope from My Favorite Things. It’s not a perfect match, but it’s close enough.