Hi, there! Another Wednesday’s come around, which means another Mo Manning creation. Today, I actually have a Christmas card to share. Christmas is only 8 months away, time will fly.
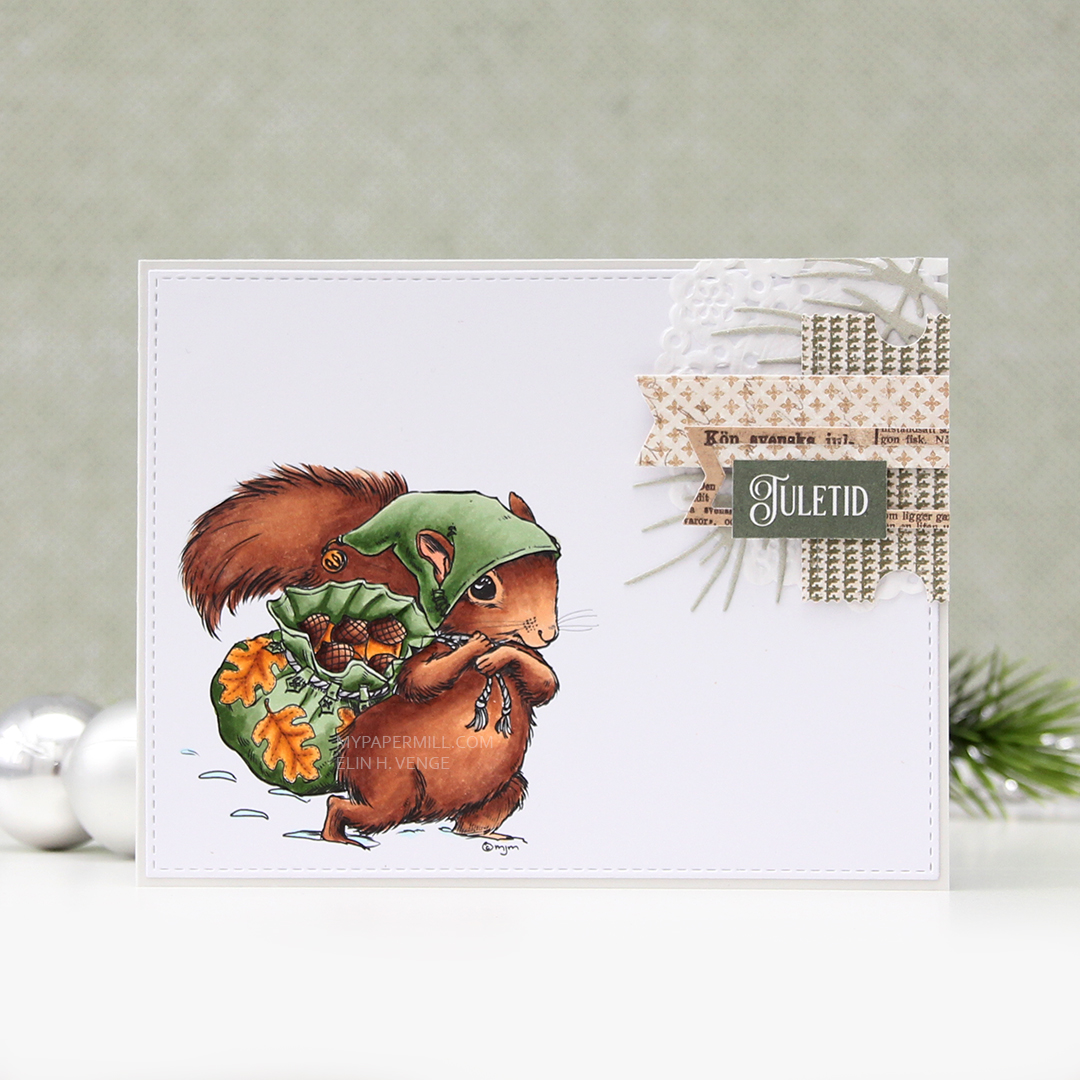
I’m getting close to the end of the alphabet of my previously unused images from Mo Manning. I have close to 400 digital stamps from Mo, and it’s a pretty good feeling to have used nearly all of them. This is Winter Delivery, a cute hatted squirrel carrying a bag of acorns through the snow.

I colored the image with my Copics, before taking out my most used cluster dies and scraps of patterned Christmas paper from Maja Design (and that sentiment strip from Papirdesign) to create a tiny cluster in the top right corner. I used part of a Doodlebug doily at the bottom, a branch die cut with a Papirdesign die, as well as tickets die cut using the Happy Days Ticket Stubs die from XCut (Docrafts) and the Fishtail Flag Frames dies from My Favorite Things. I used another favorite MFT die to die cut the panel with the squirrel, before adding it directly to a side fold landscape card base made out of Soft Stone card stock from Papertrey Ink. I rarely make side fold cards, but I had a piece of card stock already cut to 4 1/4 x 11″, and it made more sense to fold that down the middle rather than pulling out a new sheet to make a top fold card.

Simple color palette today.


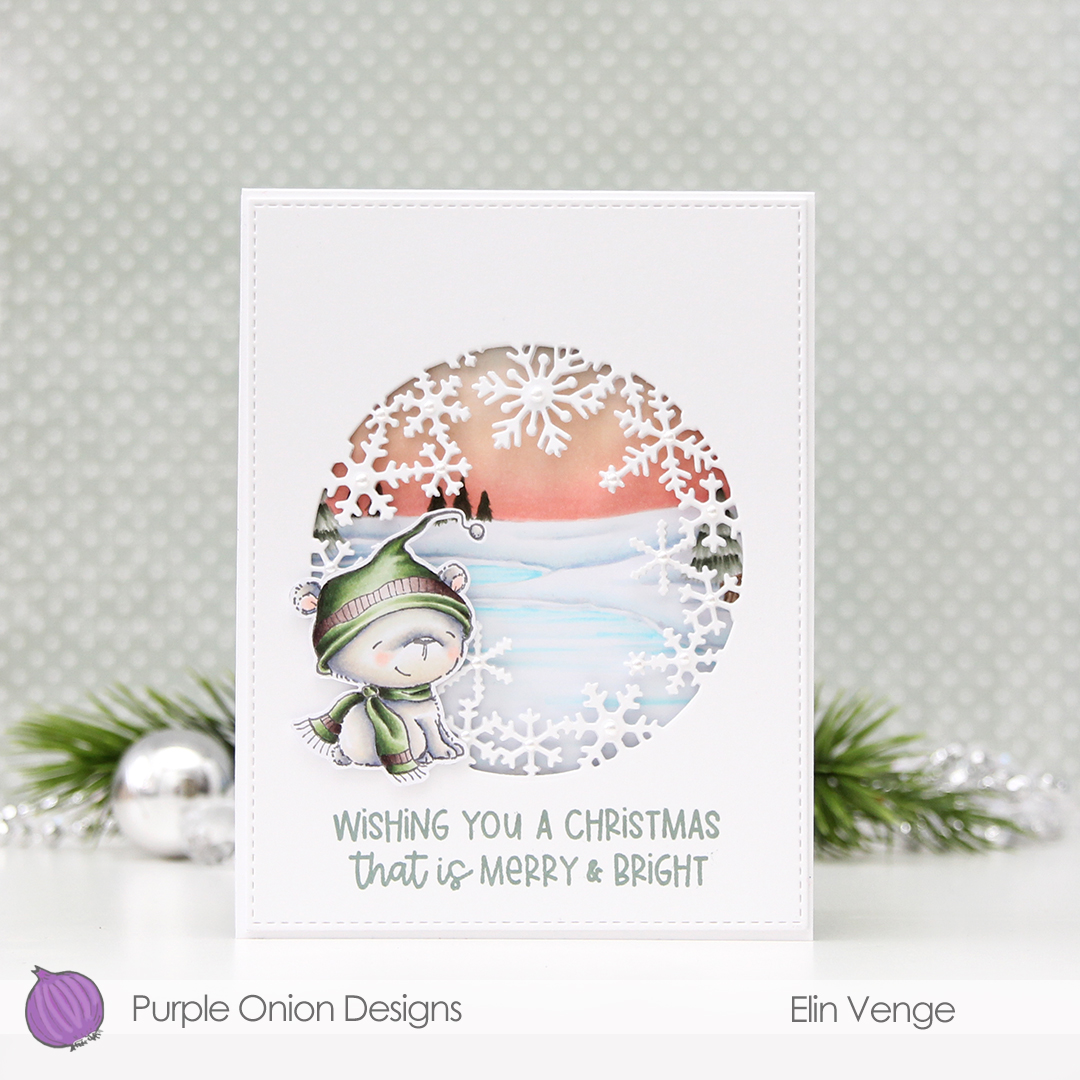 I started by coloring the polar bear (
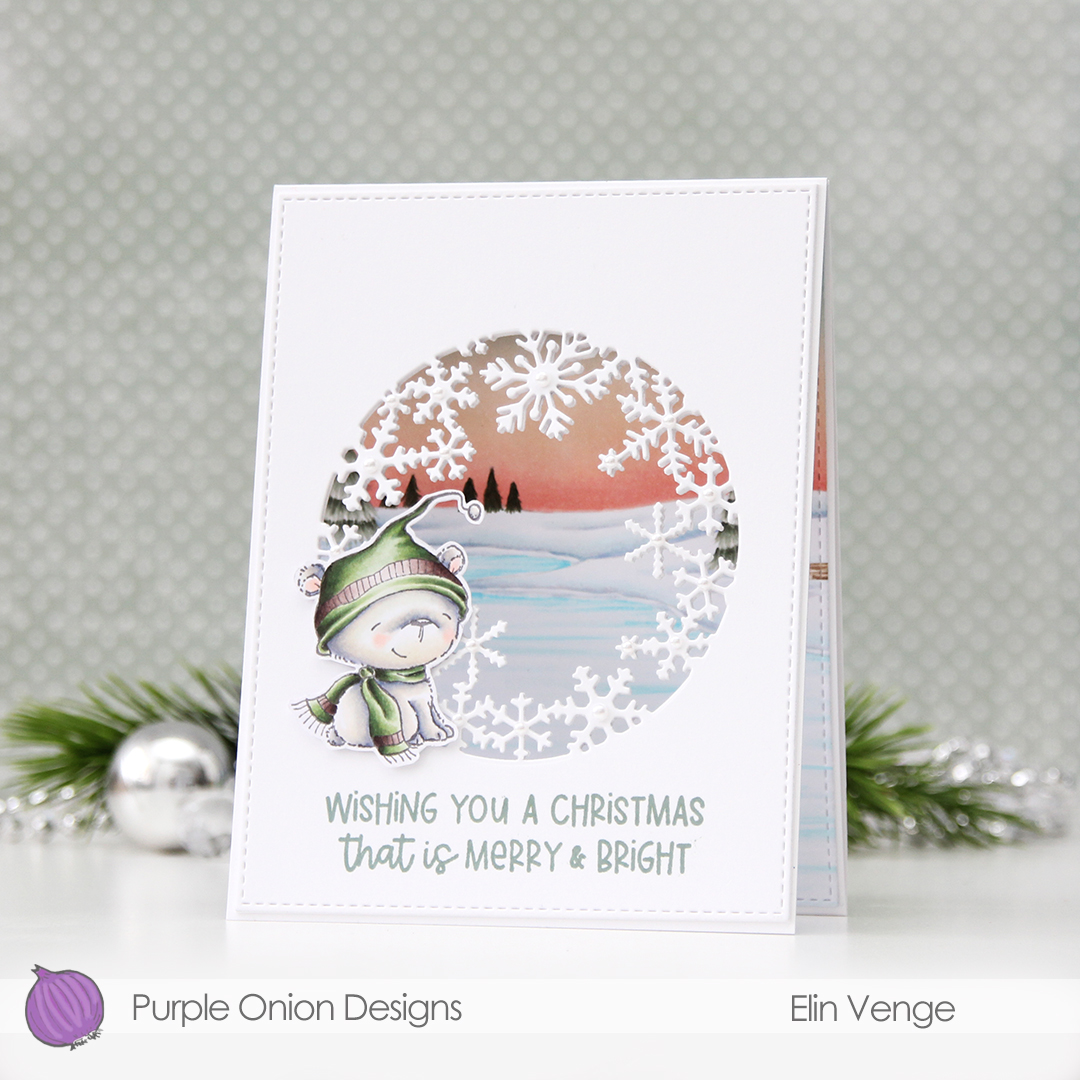 I love the snowflake circle die from Hero Arts and have used it many times before. I die cut a window into the center of the front of my card base, and at first thought that would be it. Once it morphed into a trifold, though, it was so back heavy that I needed an additional two die cut windows on top of the card base for some strength and stability. I used the largest of the A2 Stitched Rectangles from My Favorite Things to create a nice finished edge to the top layer.
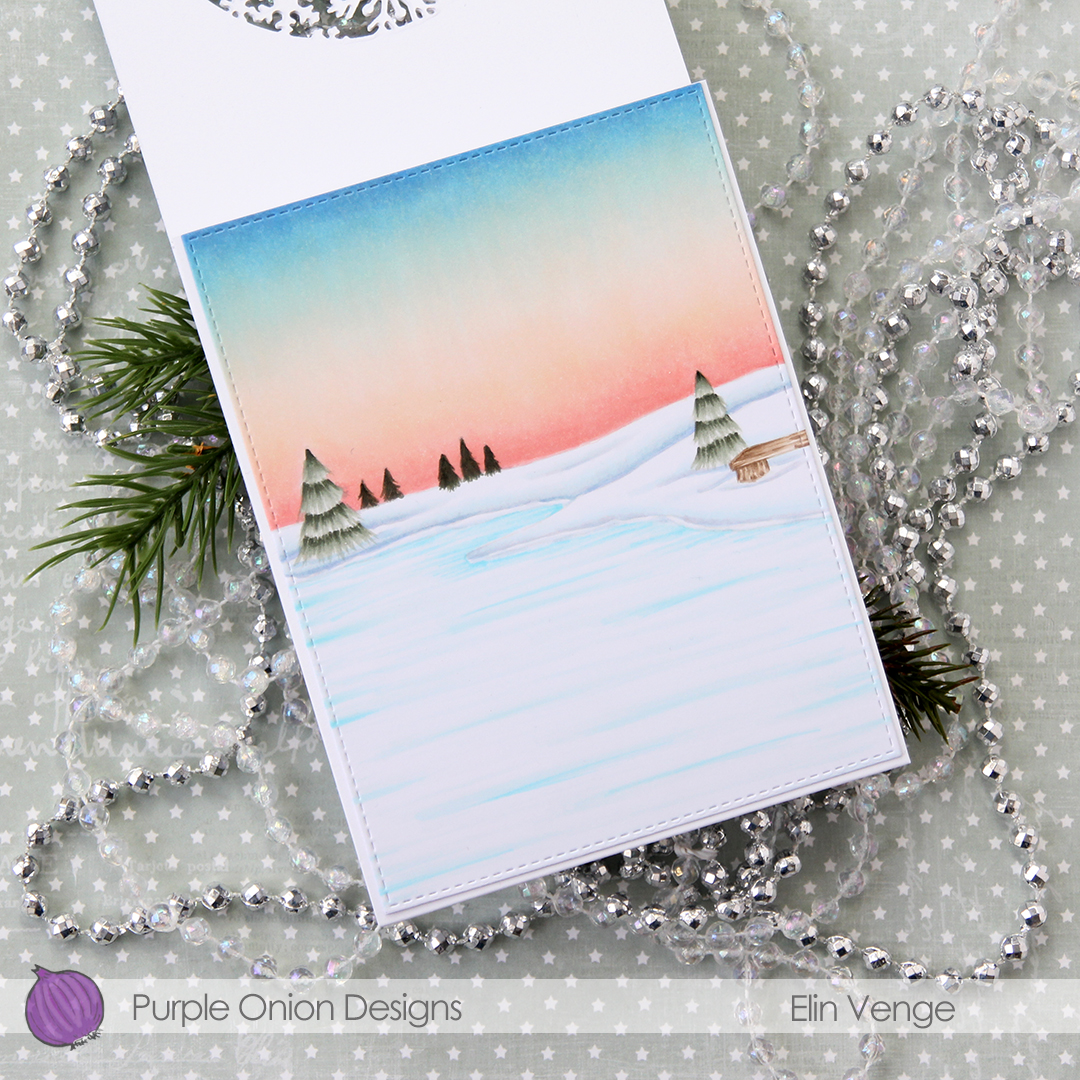 For the inside panel that you can see from the front, I stamped the
 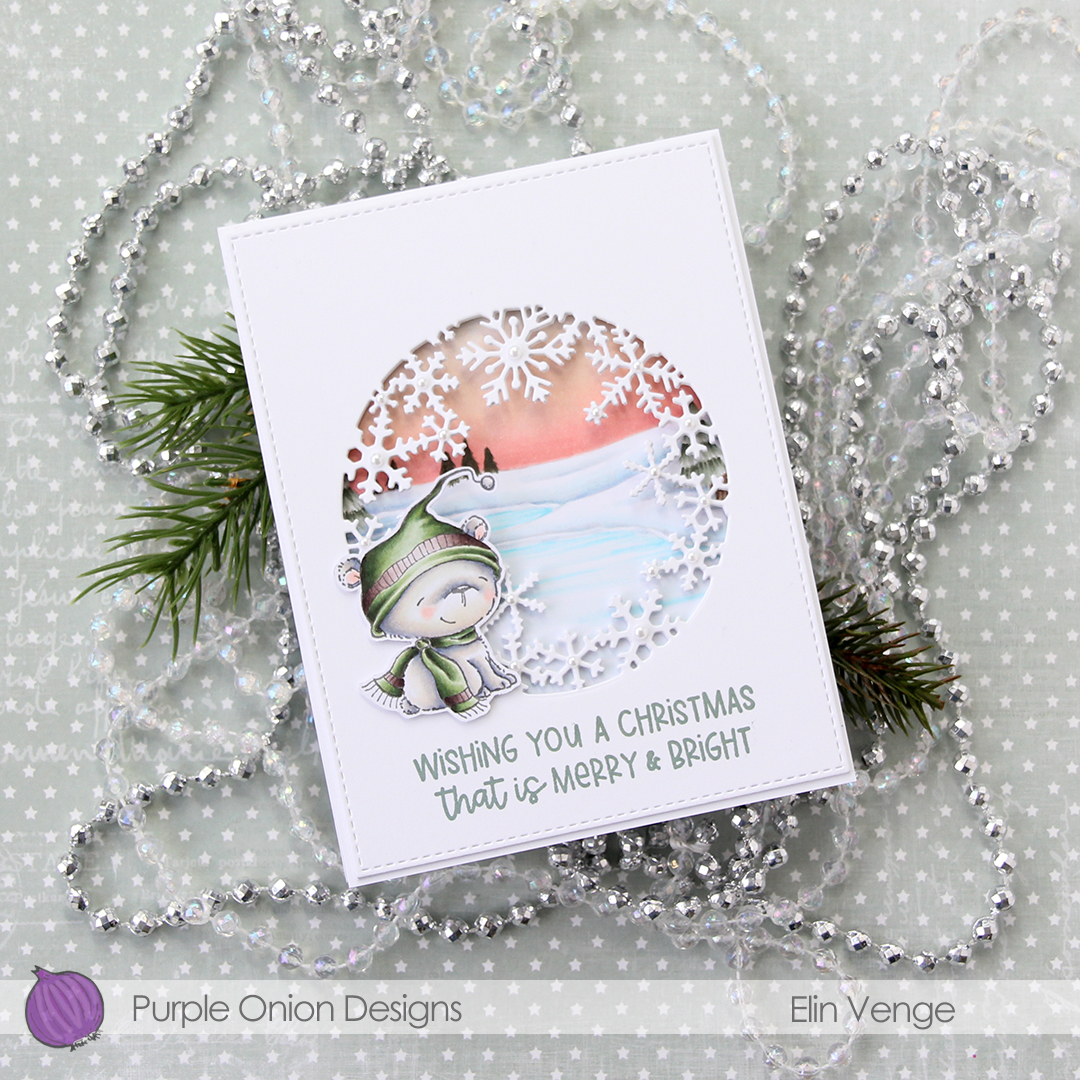 I stamped a sentiment from the
 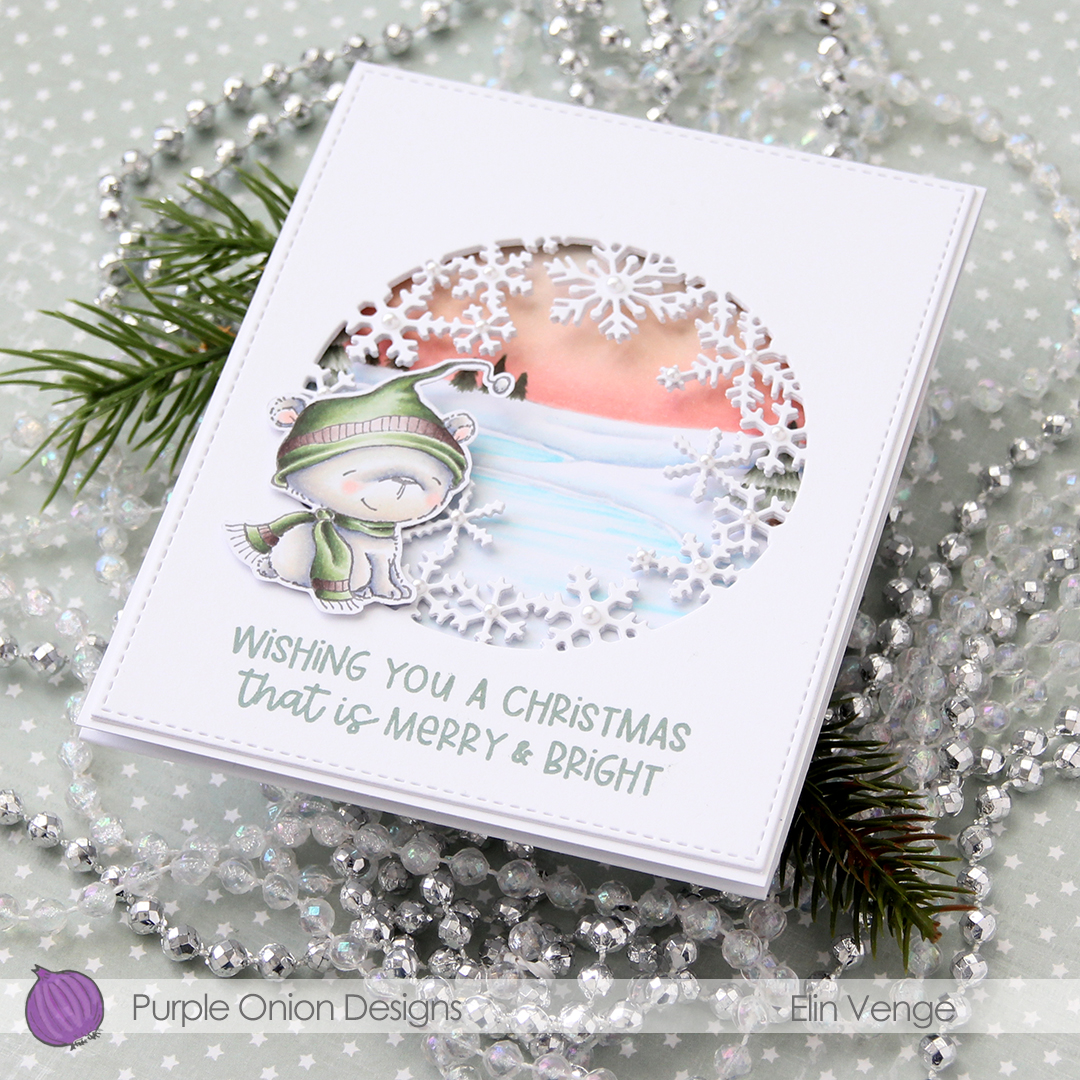 In this photo it’s pretty evident that the three layers of panels with die cut windows add a nice bit of dimension, as well as stability to what would otherwise be a pretty floppy card front, since the window is so big. I use 110 lb white card stock (Stamper’s Select White from Papertrey Ink), which is a nice, sturdy card stock, but with that big of a window, the only thing that will work is using several layers.
 I added white pearls from Kort & Godt to the center of the snowflakes. 3 mm pearls for the largest snowflakes, 2.5 mm pearls for all the others.
 Lots and lots of Copics for this one. I used 20 markers to color just the bear, 10 for his fur alone, which is a little bit crazy.
 I colored the image with my Copics, cut the panel down quite a bit and put lots of foam tape on the back. I dug through my patterned paper Christmas scraps and found a blue piece from Papirdesign that was large enough to cover the card front, as well as a couple of smaller pieces from Maja Design.
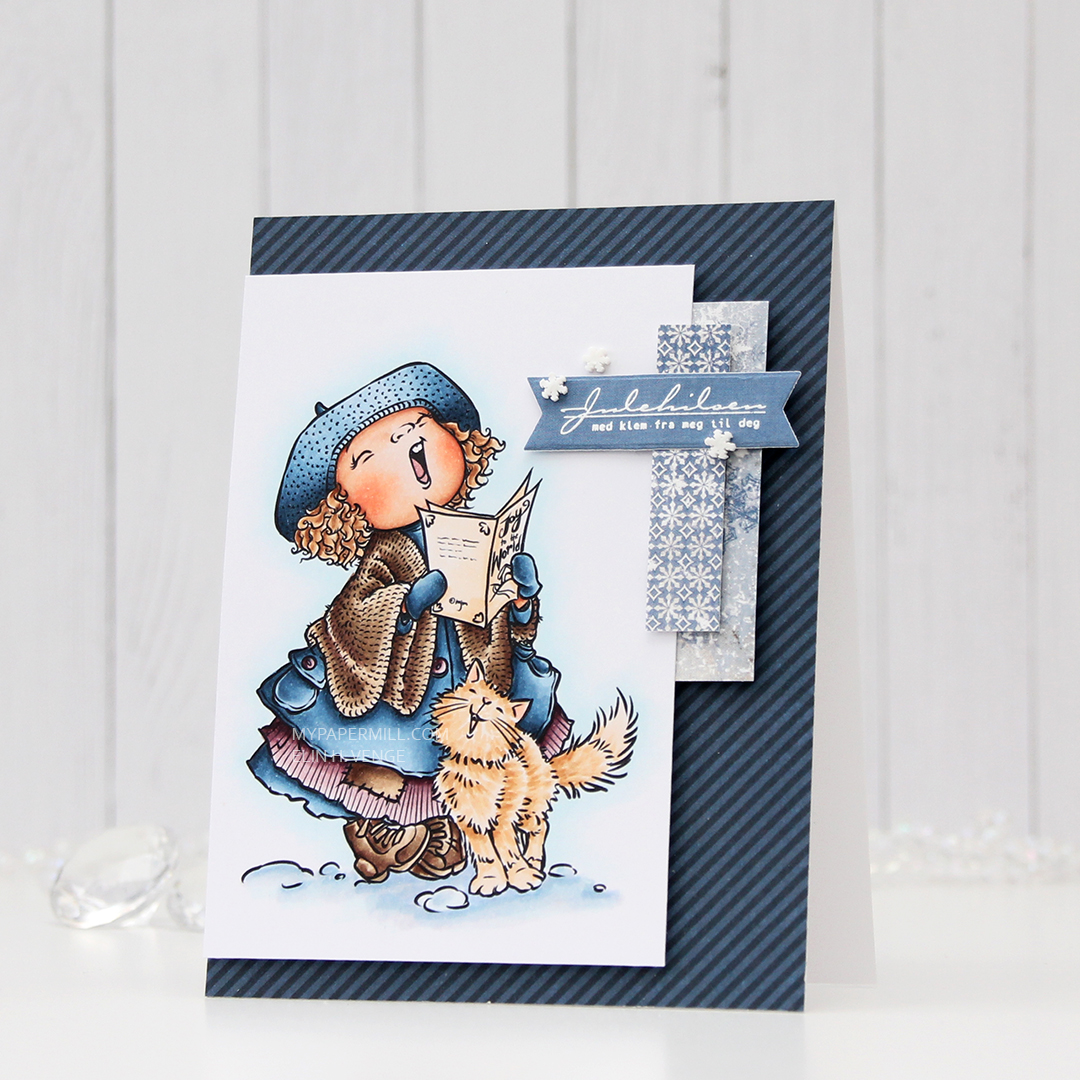 I stamped and white heat embossed a sentiment, before die cutting it with the mid size fishtail flag frame die from My Favorite Things. I added a few snowdrift sprinkles from Little Things from Lucy’s Cards, and my card was all done. Super simple, and one more card in the Christmas 2021 box. Feels good to have the pile grow!
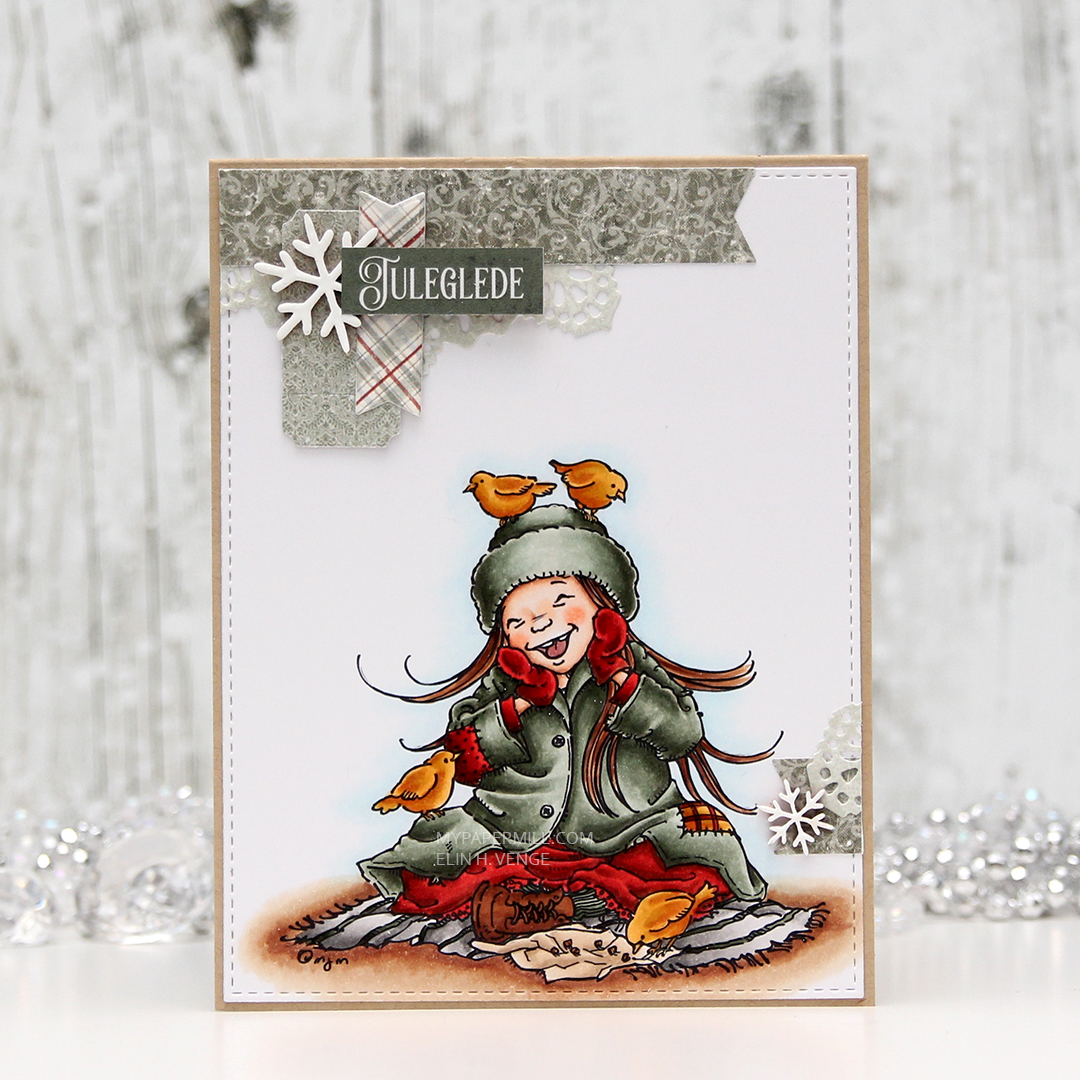
 Nothing too fancy in my coloring today. The combo I used for the cat happens to be nearly identical to the one I used for the girl’s hair, I just omitted the darkest one.
 I colored the penguin with my Copics, fussy cut him and added 1 mm foam squares to the back. I created a fold over tag using the second largest die in the fold over tags nesting die set from We R Memory Keepers and some really old pink patterned paper from Magnolia.
 I created a tag to go inside the folded over tag using scraps of patterned paper from Papirdesign. Using one of the dies in the Tag Builder Blueprints 6 die set from My Favorite Things, I created the to/from circle using that pink patterned paper, and matted it with a white die cut circle. I probably didn’t need the white circle, I’m thinking the letters would have stood out more against the grey patterned paper, but what’s done is done. I still like the white.
 Fairly quick coloring on such a small image means I didn’t use a lot of markers. I originally colored his feet and beak orange/yellow, but didn’t like the look and covered it with grey. You can still see the orange shining through in the finished coloring. That, I don’t mind, for some reason, I just didn’t like the look of the orange alone. Some species of penguins have black feet anyway 😉
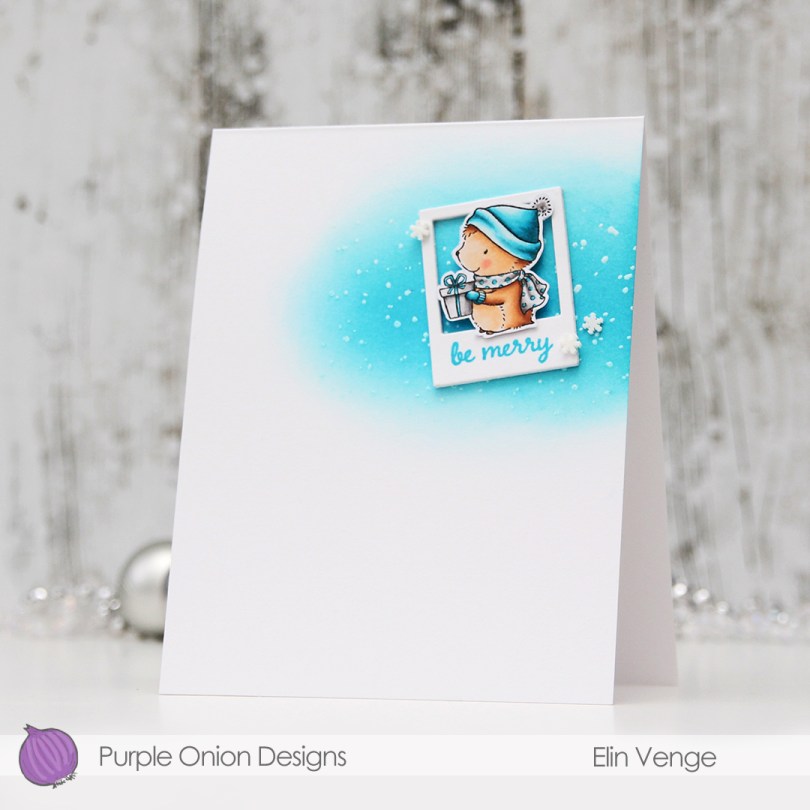
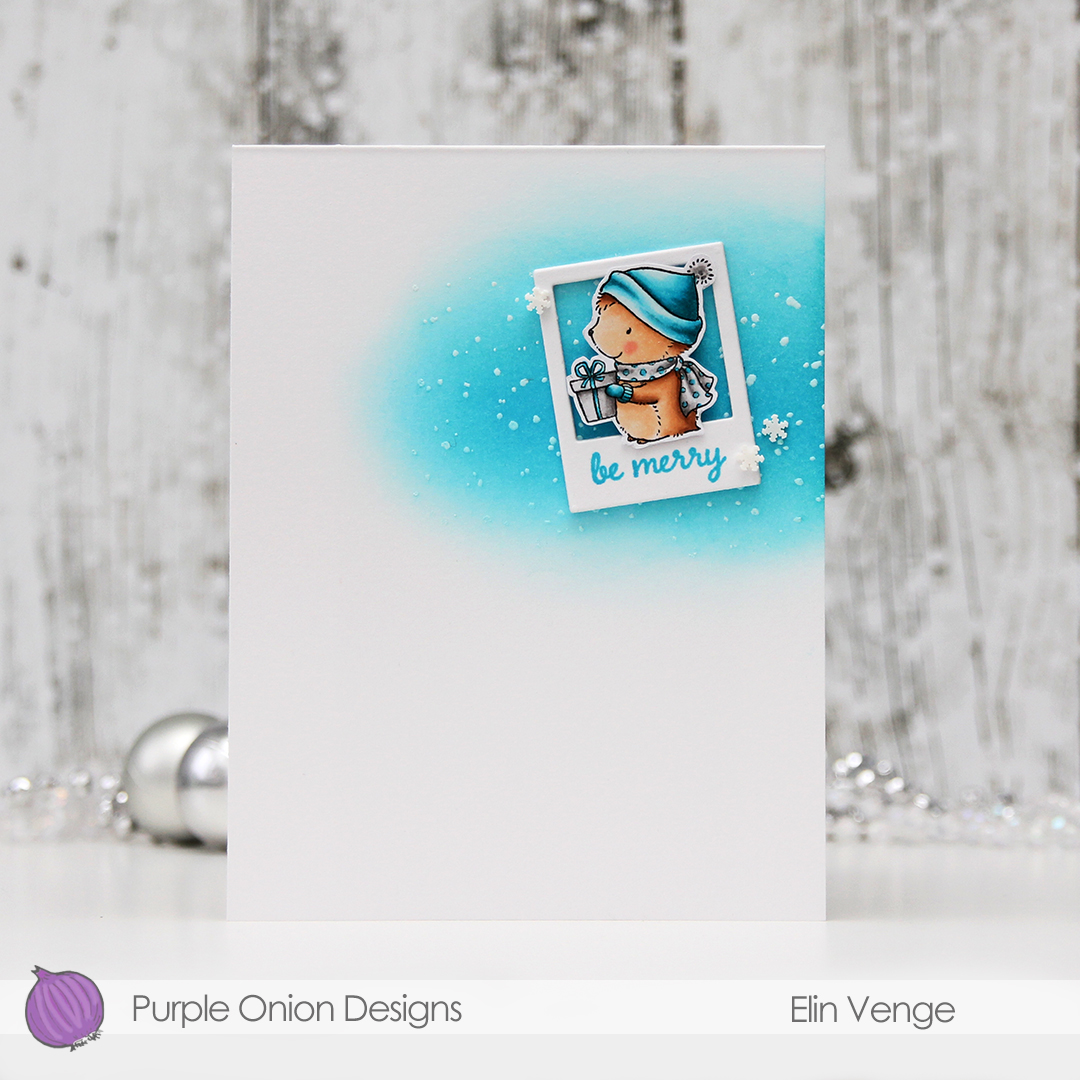 My card is heavily inspired by a card
  Tenia’s card had a wide piece of washi tape going in from the right near the top of the card, with a rectangle perpendicular to the washi with a couple of small colored flowers on top, a sentiment and a few enamel dots. Once I’d ink blended a little bit using Audrey Blue and Island Blue inks from Simon Says Stamp, I tried to add a rectangle to my card, but it was too long and too wide for my liking. I scrapped that idea and die cut a polaroid frame instead for my little hedgehog to sit in. I used the second smallest die from the Precious Polaroids die set from My Favorite Things, and stacked four on top of each other for dimension. The die cut was just big enough to stamp a sentiment onto. The shortest sentiment in the
 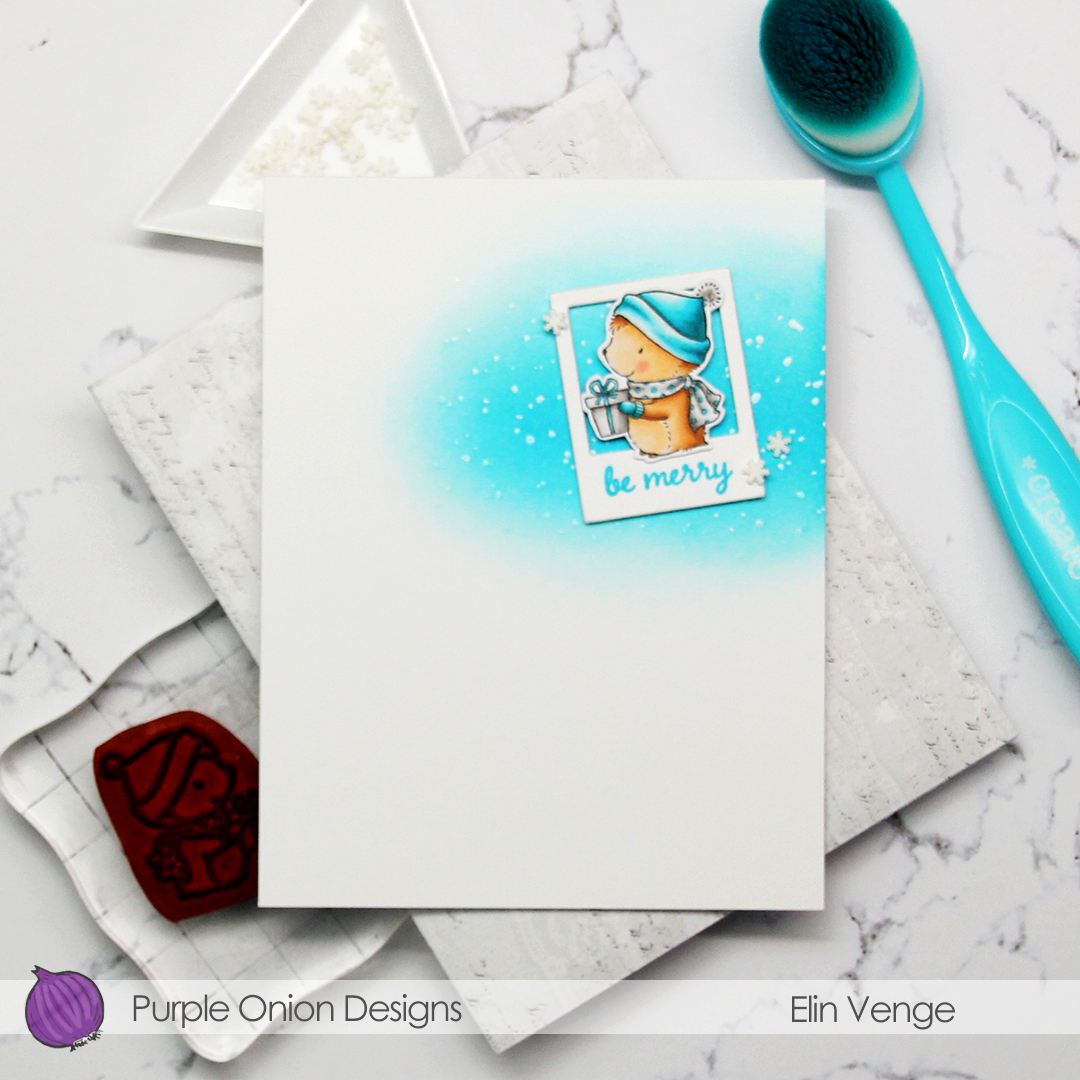 I added a few snowdrift sprinkles from Little Things from Lucy’s Cards, and my card was complete. Lots of white space, a cute hedgehog and one more Christmas card in the bank for 2021. Doesn’t get much better than that!
 Super limited color palette for this tiny image.
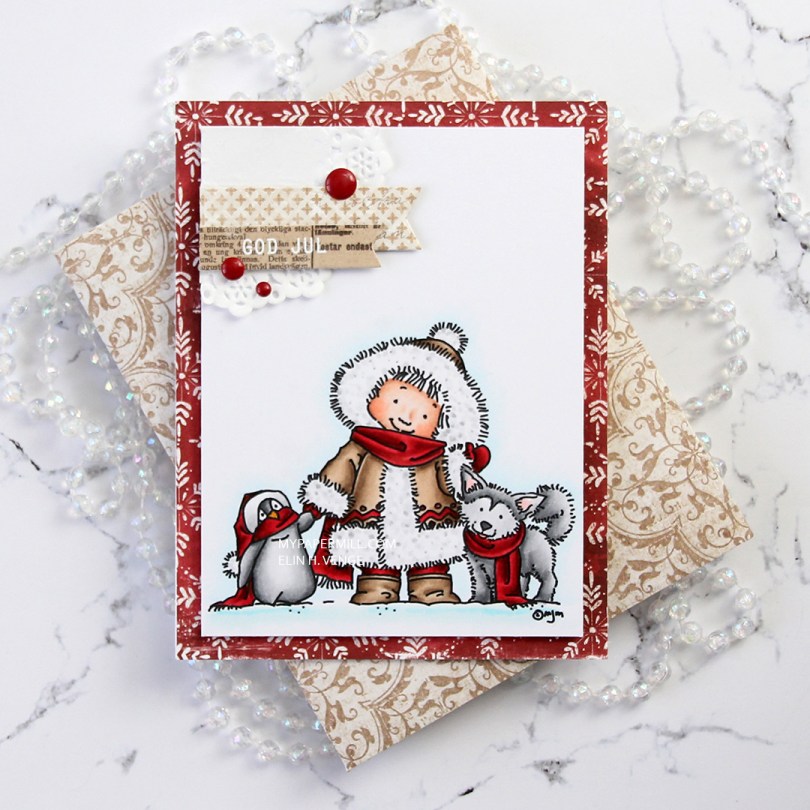
 I don’t know what’s going on with me, but I’ve made another red Christmas card. I love creating Christmas cards, but I’m not a fan of red, not even for Christmas. The best thing about creating cards is that they get sent to someone else, so even if I personally don’t like certain colors, I’m getting rid of them eventually anyway, so it doesn’t matter. 😉
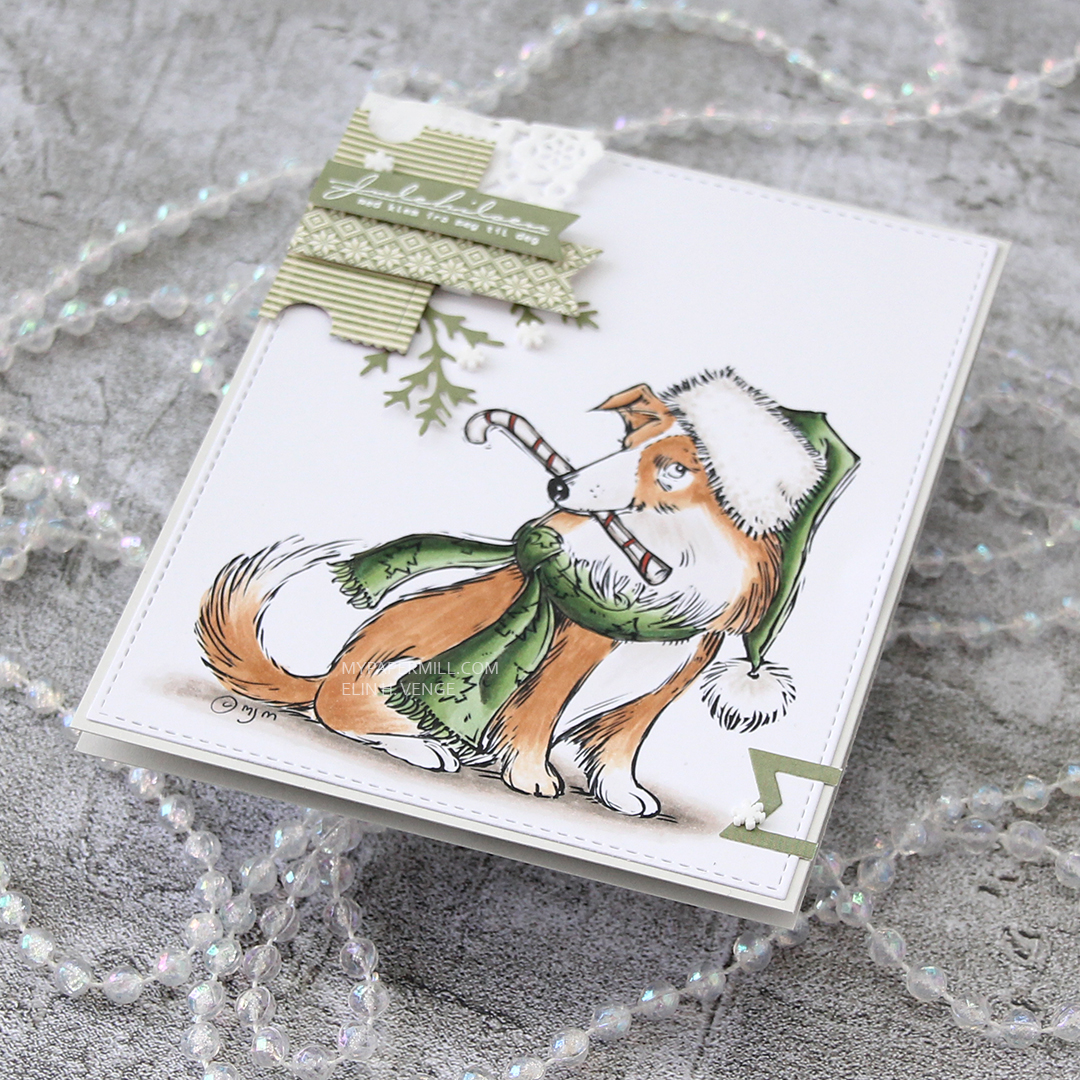
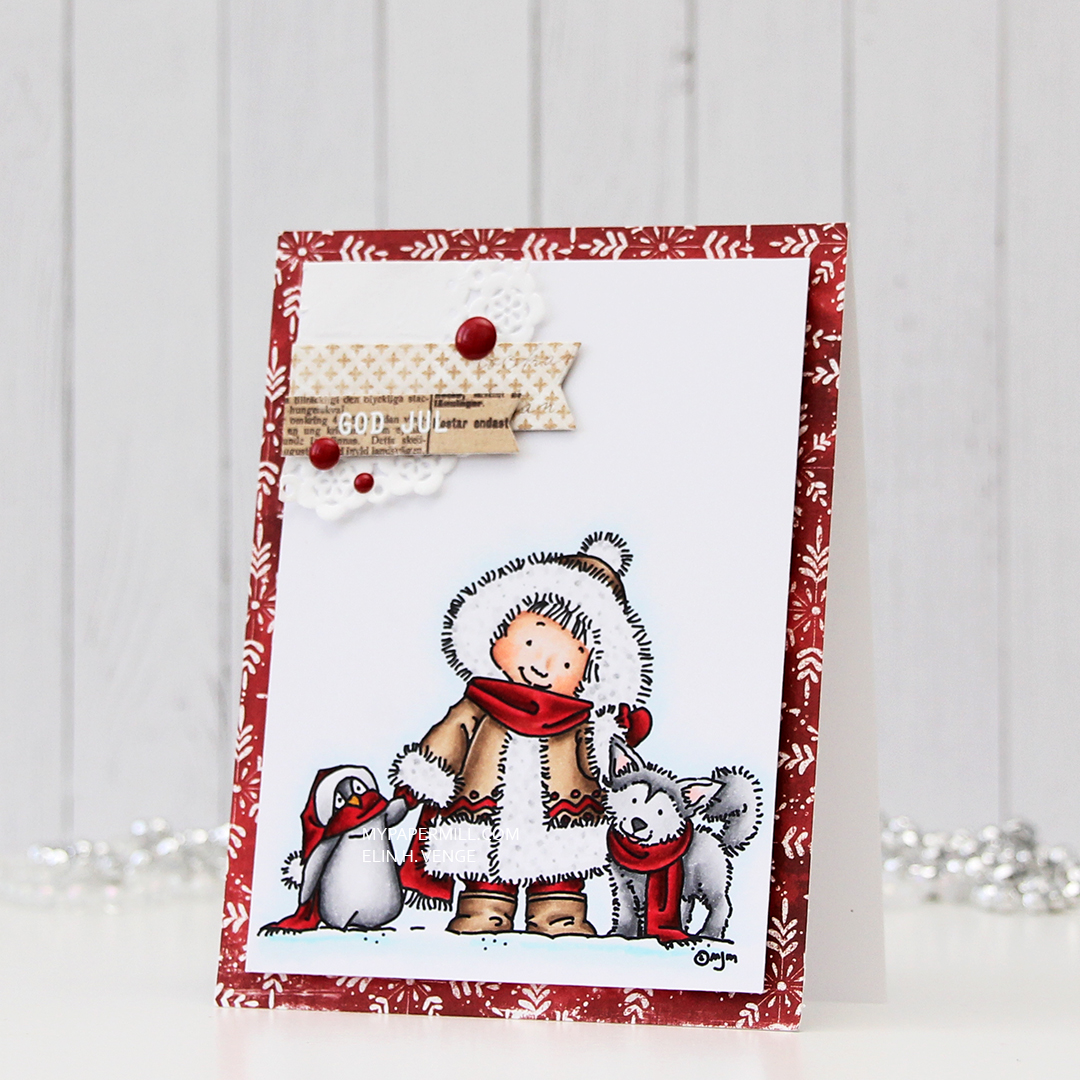 Once I’d colored the image with my Copics, I trimmed 1/4″ off each of the four sides and covered the back with foam tape. I found an old scrap of patterned paper from Magnolia that was already cut down to 4 1/4 x 5 1/2″, probably a reject from a previous project, but perfect for this one, the red matches my coloring! It has white “snowflakes” on it. These have 8 points, so they’re not actually snowflakes. There’s no such thing as an eight pointed snowflake (or a five pointed, for that matter), it has to do with how water molecules are formed.
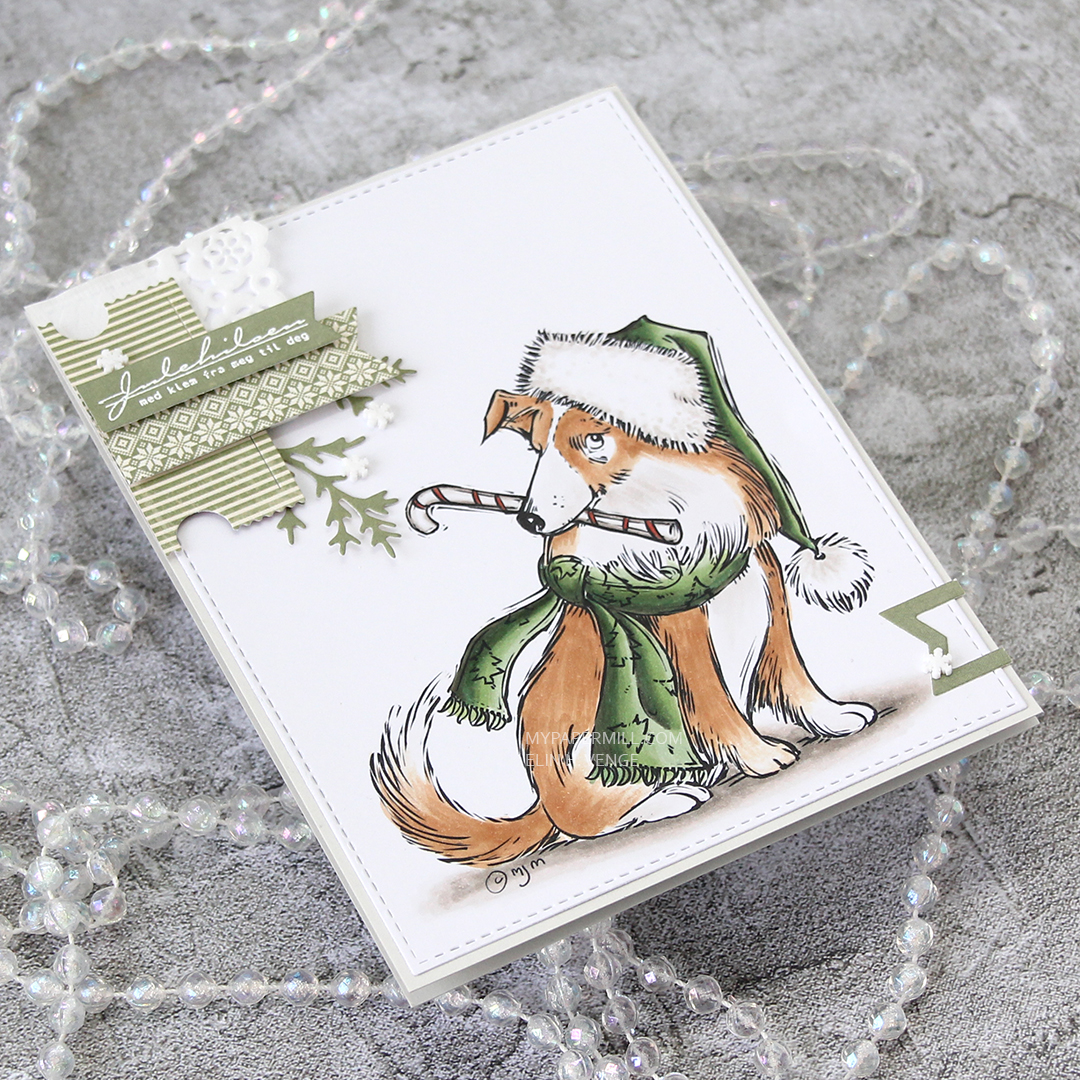
 I die cut a couple of scraps of Maja Design patterned paper using two of the Fishtail Flag Frames dies from My Favorite Things. I stamped and white heat embossed a sentiment from Norsk Stempelblad AS onto one of the die cut banners, adhering it to the larger one using 1 mm foam squares for a little bit of dimension. I used the same foam squares on the back of the bigger one and glued both banners to part of a mini doily from Doodlebug adhered to the top left corner of my colored panel. I added a few enamel dots from Papirdesign, and my card was done.
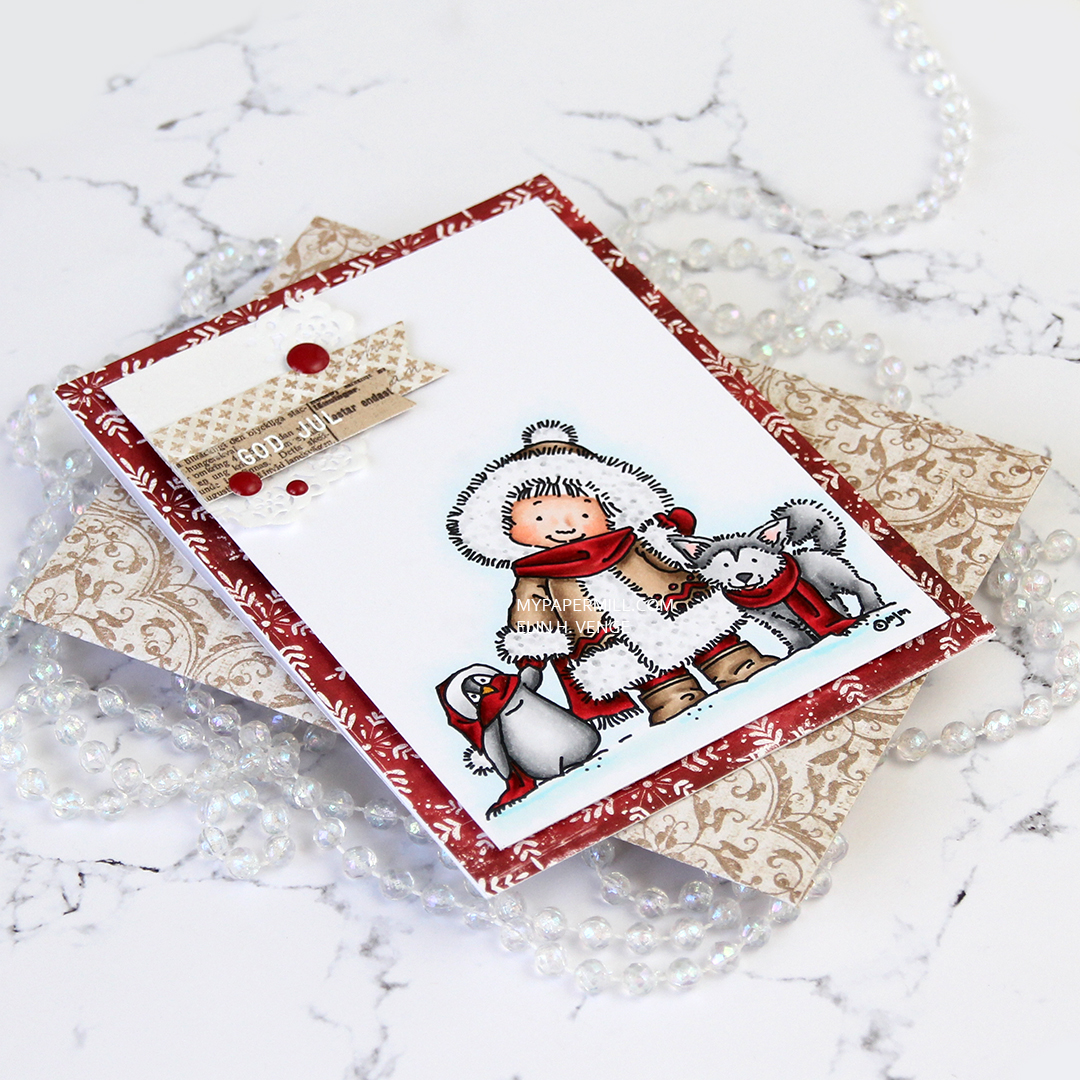 I found an old scrap of patterned paper from 3ndypapir that was just large enough to create an envelope from using the A2 V flap envelope dies from Simon Says Stamp. I thought the color matched the brown in my card nicely.
 Not a lot of colors used for this one.
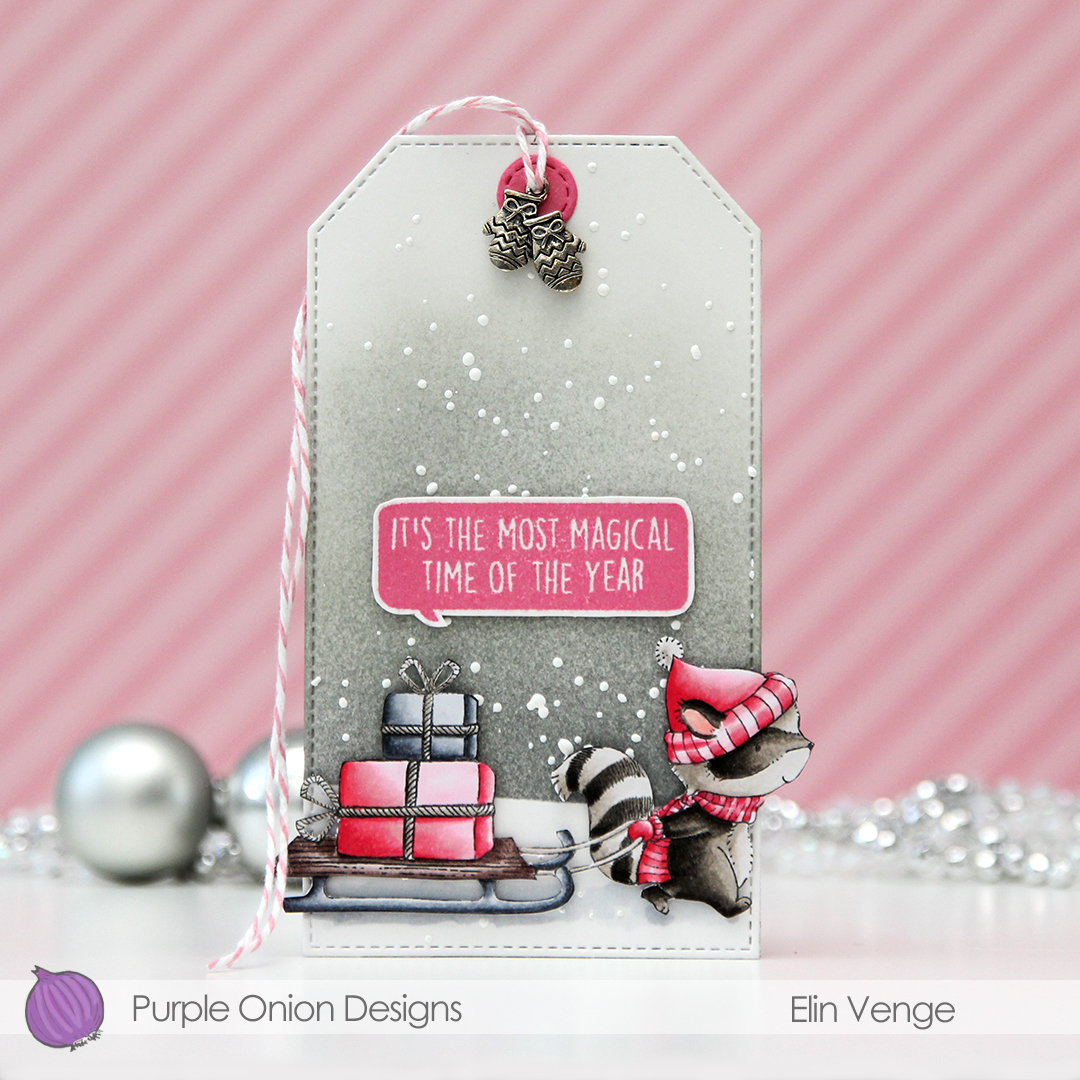 I went with a really bright pink, colored in the image with my Copics and did some serious fussy cutting, before adding 1 mm foam squares to the back. I also stamped one of the sentiments from the
 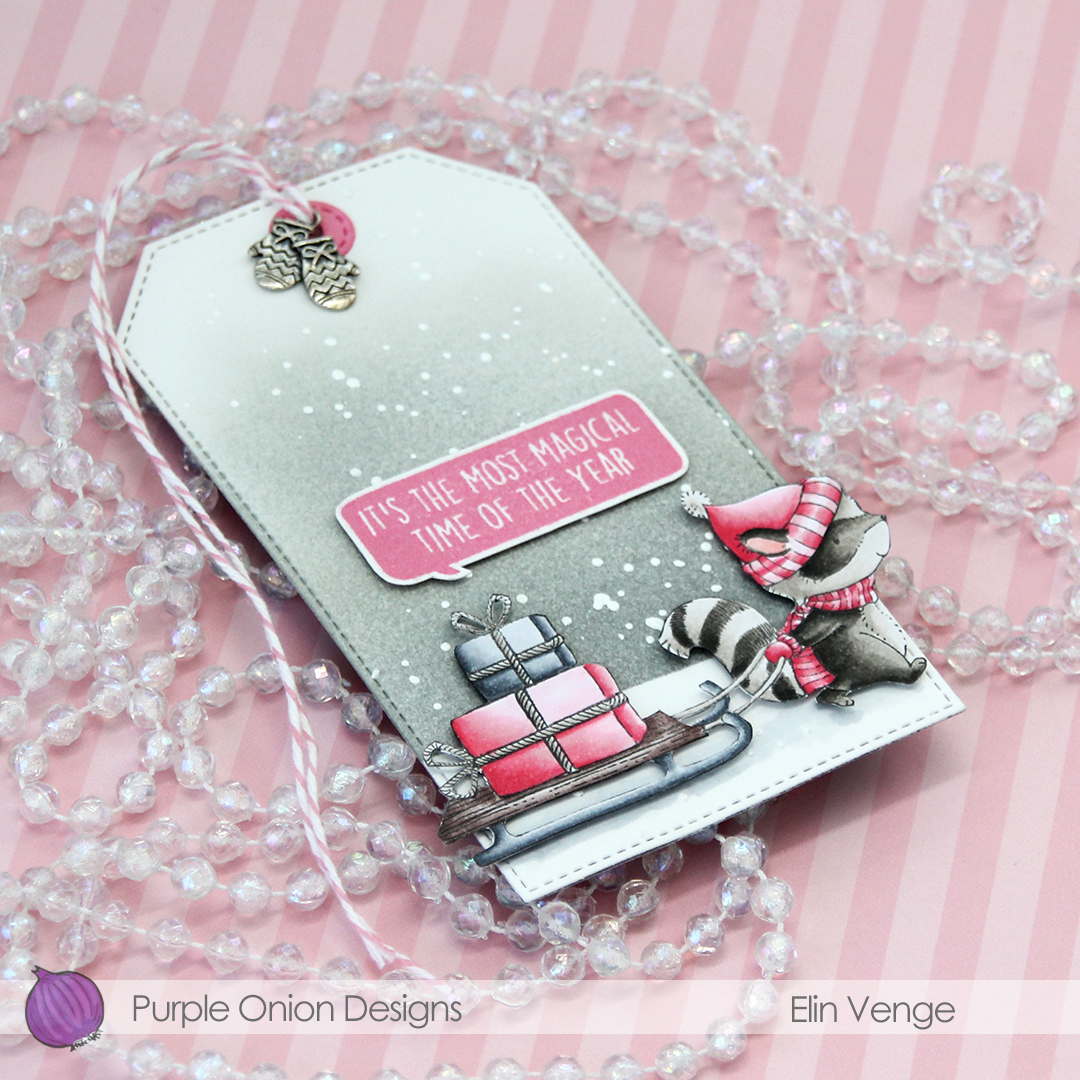 From a piece of Bristol Smooth card stock, I used the largest of the dies in the Stitched Traditional Tag STAX die set from My Favorite Things, masked off a curved line towards the bottom and ink blended a gray sky using Charcoal, Soft Granite and Wet Cement ink from Hero Arts, as well as Soft Stone ink from Papertrey Ink. The Charcoal is fairly dark, but the Soft Stone super soft, giving a nice gradient feel. I sprinked on chunky white embossing enamel from Stampendous and heated the tag from behind to melt the granules for a snowy effect on my background.
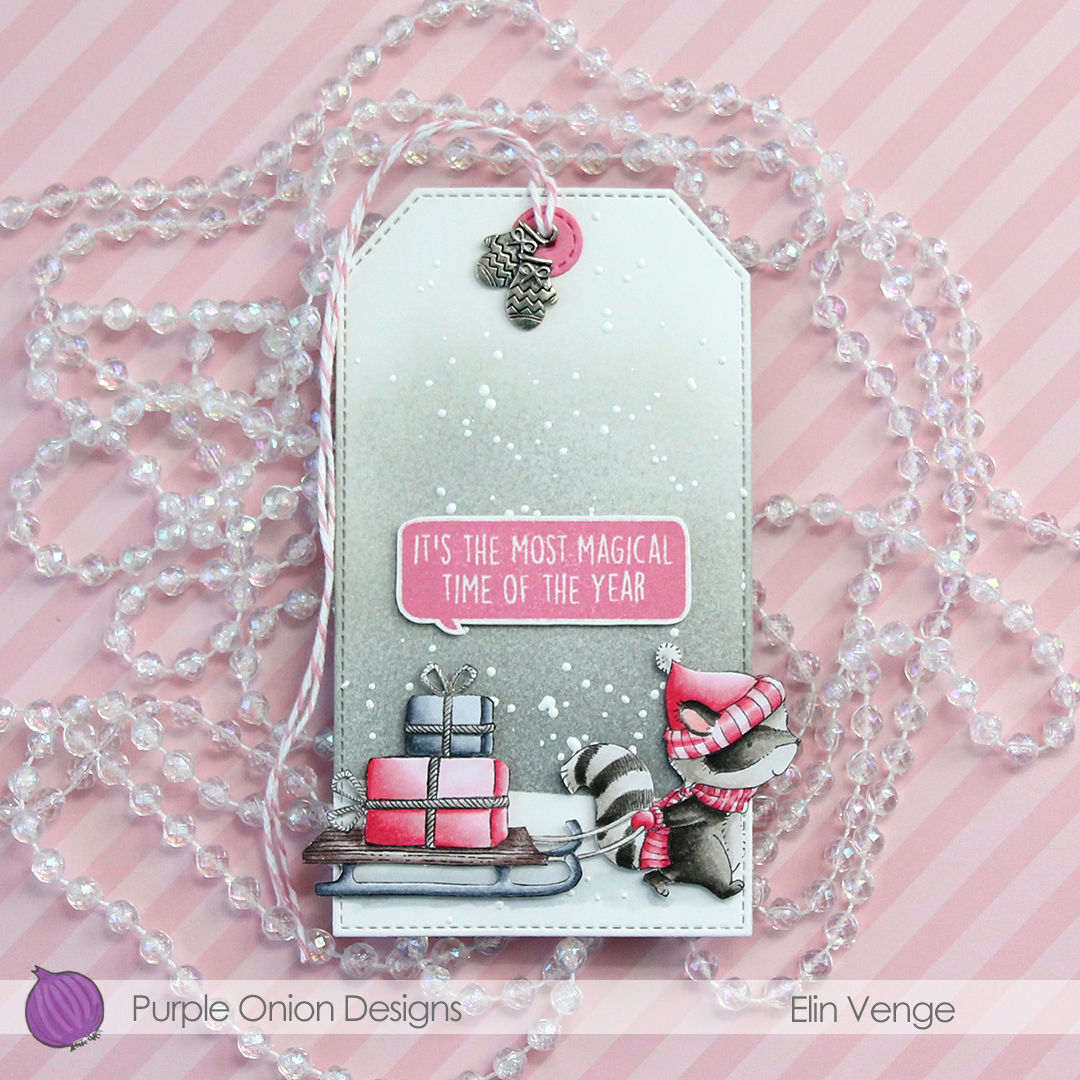 Going direct to paper, I colored a scrap of Bristol Smooth with the Hibiscus Burst ink pad that I used for the sentiment, before using one of the tiny dies in the Tag Builder Blueprints 6 die set from My Favorite Things to create my reinforcement piece. I think the faux stitching on the circle matches the stitching on the tag perfectly, one of many reasons why I love my MFT dies, they’re so awesome to mix and match. I added a bit of Cotton Candy twine from Whisker Graphics and a charm from my stash near the top to complete the tag.
 Not a lot of colors for this one, but I did my best to make the pink really pop against the other colors.
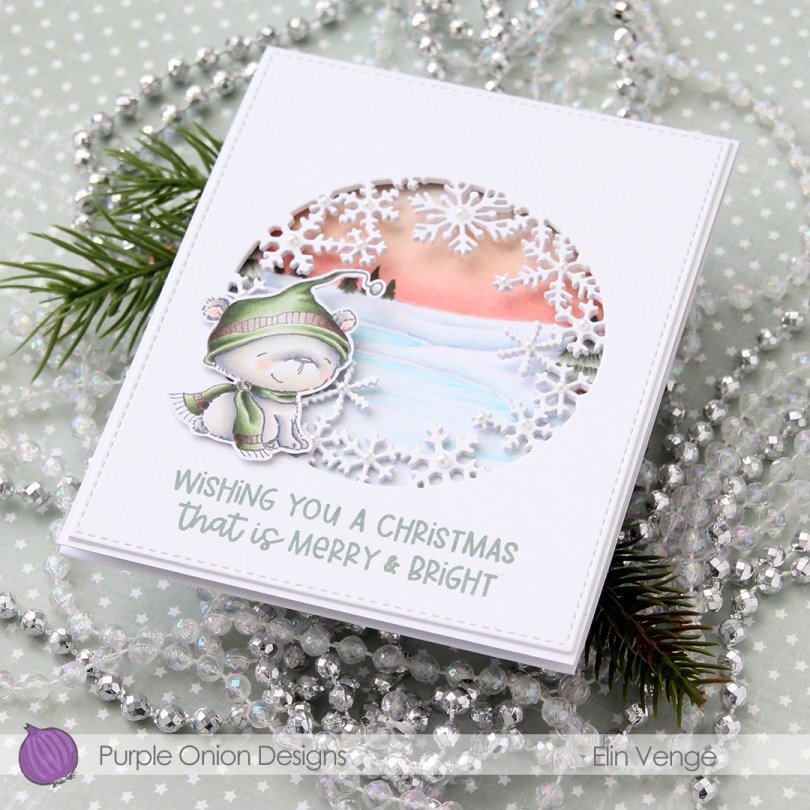
 I didn’t have any birthday sentiment dies that fit my slimline plan, but this Stacked Merry die from My Favorite Things was perfect. I die cut four from white card stock and stacked them for a dimensional look, before adding embossing powder on top and heat embossing for a shine that matches the embossed snow in the background. I stamped “& bright” from the
  I used quite a few colors for this very simple image. Building color to create contrast is key when doing no line coloring, and the first 7 markers in this graphic were all used for the snow. It might be difficult to tell from the photo, but the orange combo I used for carrot is different than the combo I used for the scarf and pocket, which isn’t as bright a combo in real life.
 I adhered everything to my die cut panel, some directly, and some with a couple of more layers of paper behind them for added dimension. I added a couple of veneer snowflakes from Crafty Moly that I’d already white heat embossed with three layers of super detail embossing powder from Ranger. I used a piece of the strip of 12×12″ paper that has the barcode on it from Papirdesign. Their barcode strips are awesome. One side has the barcode and all the information, the other side of the strip actually has a design on it, so nothing needs to go to waste.
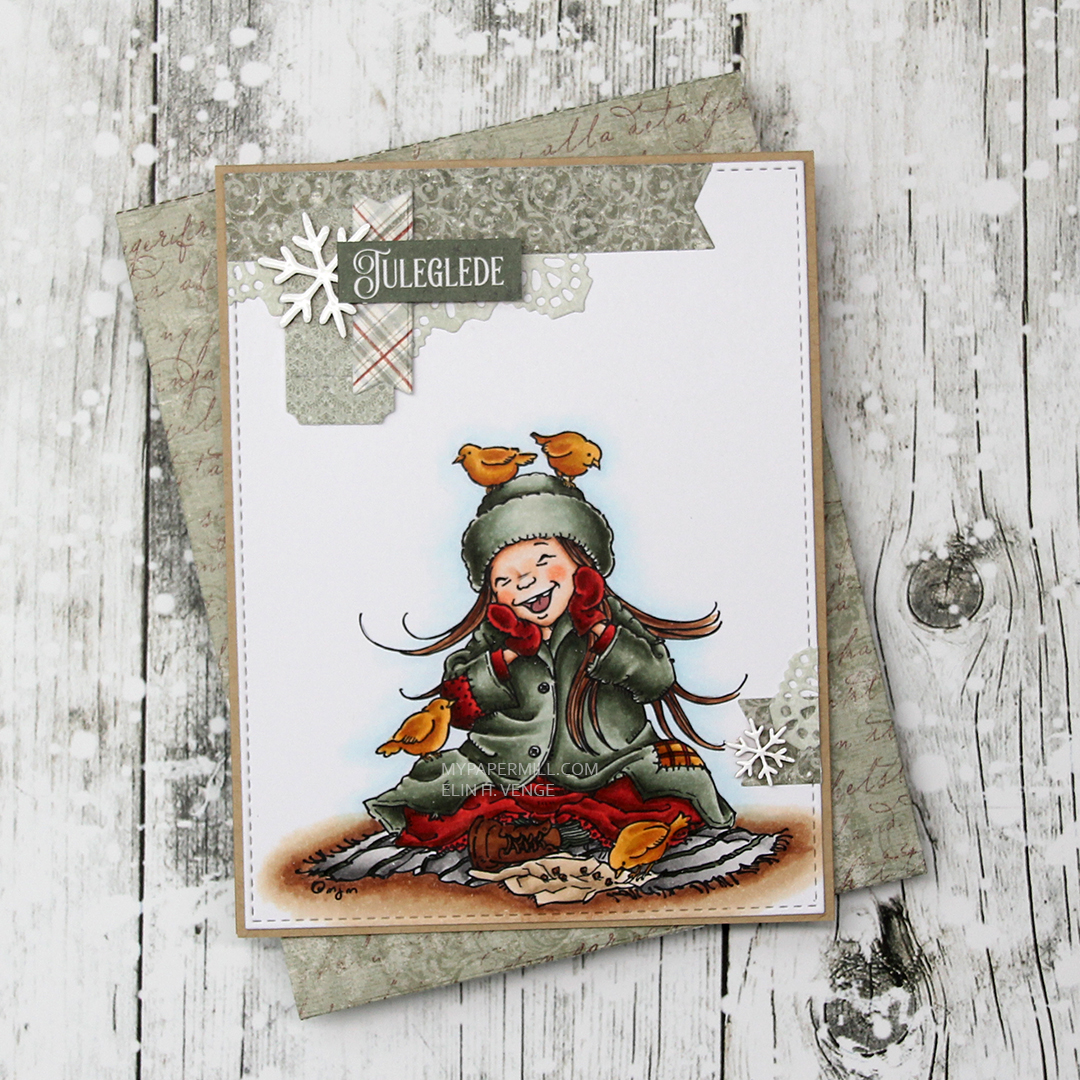 I adhered everything onto a card base I made from Classic Kraft card stock from Papertrey Ink. I didn’t have any colored envelopes to match (and I’ve run out of white envelopes for A2 sized cards), so I used the A2 V Flap Envelope dies from Simon Says Stamp to create an envelope from some larger scraps of Maja Design patterned paper.
 As usual, I leave you with the Copics I used. In addition to B0000 and the blender, I also used B90, which is a color I’ve made myself, for the sky.