I did it. Very under the pump towards the end there, but I finished my entry into the Coloring Virtuoso category for the MFT Superstar contest. And I’m so happy with how it turned out. Looks like an ordinary landscape A2 card, but when you open it up, there’s more fun on the inside.
 I stamped a couple of penguins running into the scene to assist the little mouse decorating the tree. The sky that you see at the top is actually the inside.
 In this photo the card is half open. I used the die with the snowbanks and trees from a coordinating die set to cut the top of my front. I traced on the back and used a knife and scissors to fussy cut a mirrored version of the die cut line for the the inside.
 And this is it. Another Christmas tree, a couple of bunnies, a few more penguins and the rest of the sentiment. I had so much fun coloring this, and kept everything else very simple. I used the new Sending Christmas Joy die to die cut the letters for Christmas twice from Blue Breeze card stock. I glued the two layers together for each of the letters and added it below my horizon line. I’d planned this out carefully so there would be room between the stack of presents on the penguin’s head and the bunny’s ear on the right. I stamped the word Cheer from the Christmas Cheer stamp set in light blue ink right over my coloring. I’m glad I didn’t mess that up!
 I thought I’d include some close ups. I wasn’t sure which color to choose for the sweater on this little mouse. I didn’t want it green, because it was next to the tree, and I didn’t want red, because there’s already enough of that. I figured why not go for the same “gold” color as I used for the baubles and the string on the tree. I think it worked out pretty good. I also wanted the tree to be a different green than the green I used for the clothing on the other animals, so I added some YG90s to the tree as well as the BG90s I’ve used elsewhere.
 I love adding textured fur to my penguins. Penguins are usually lighter towards the underside of their “arms” (Flaps? Wings? What are they, really?), so I tried to mimic that a little in these ones. A lot of them also have yellow on their bellies. I couldn’t decide between gray or orange feet and beaks, so I went gray with a hint of orange. I think it turned out pretty good.
 More gold, red and green. I never thought I’d use these colors on a Christmas card, they’re so not me. Adding texture on the fur of that tiny penguin was a challenge, but you can definitely see it, at least on his head.
 I had no idea which colors to choose for my little fox, there are so many to choose from. In the end I think I ended up with a total of 6 colors for his fur, 8 if you include the lighter parts. I went with a warm gray ribbon on his present. I obviously couldn’t choose red or green, I already had those right next to it. The same was true of the E40s (his belly). I used warm grays on the last bunny as well, so it all ties together.
 Speaking of – here he is. Warm gray fur, with a hint of E43 here and there. He’s holding a tiny candy cane, and I somehow managed to get 5 different red shades in there. I wanted it to look like he was entering the card from the right, so I made footprints behind him in the snow.
I used three different stamp sets and two die sets for this card, as well as an obscene amount of Copics.
Sweet Holiday Penguins stamp set.
Merry Wishes stamp set
Christmas Cheer stamp set
Christmas Cheer die set
Sending Christmas Joy die
Blue Breeze card stock
 A total of 57 Copics. It’s actually 58, because for the sky I also used B90, which is a color I’ve created myself.

 I colored in my little scene using more Copics, die cut that using the same die, then fussy cut around the trees, snow and house. I added a sprinkling of snow by heat embossing chunky white embossing enamel on both panels. I glued my blue background to a cardbase I made from Pure Poppy cardstock from Papertrey Ink and added the rest of the scene on top using 1 mm foam squares – lots of them! I added a stacked die cut sentiment using a die from the So Many Snowmen die set from Mama Elephant and my card was done.
 I didn’t use too many colors on this, and most of these were actually used on the sky and the snow.

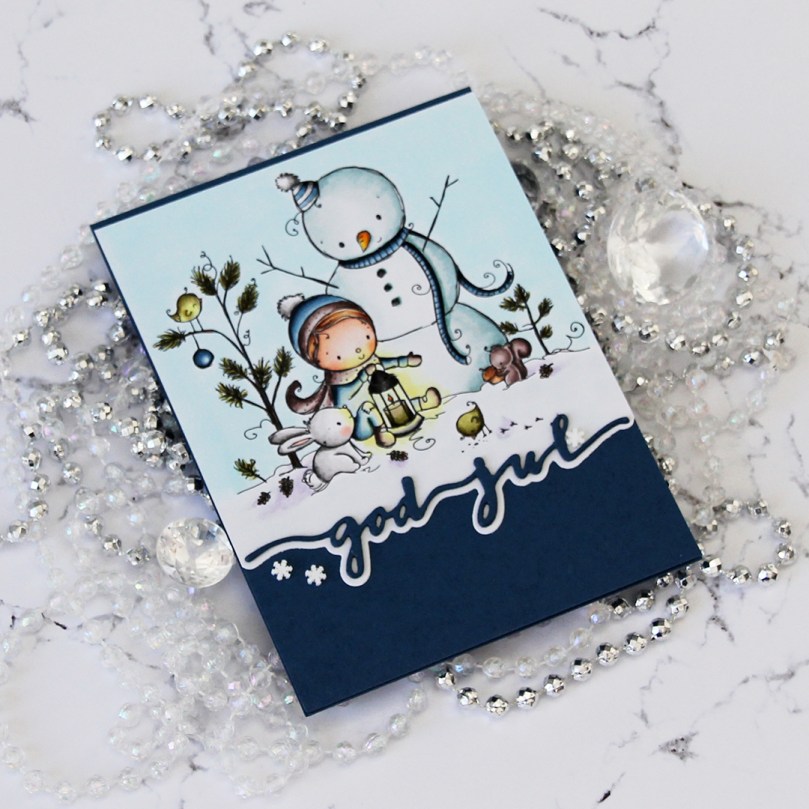
 As usual, I colored my image in with my Copic before die cutting it down to a panel using a stitched reclangle die from My Favorite Things. I glued it to a card base I made from Stormy Sky cardstock from Papertrey Ink, also a gorgeous color, and it matches my coloring pretty well.
 I didn’t want to do too much to distract from my coloring, so I die cut a God jul (Merry Christmas) sentiment using a die from Papirdesign and that same color cardstock as my base, and glued that next to the little girl. I didn’t even stack several die cuts on top of each other like I normally would.
 I finished my card by gluing on some diamonds from the Glass mix in the Crystal Collection from Little Things from Lucy’s Cards.
 Those last six colors in this graphic? All the colors I used to create the red scarf (I only used E08 for the red on the bird).
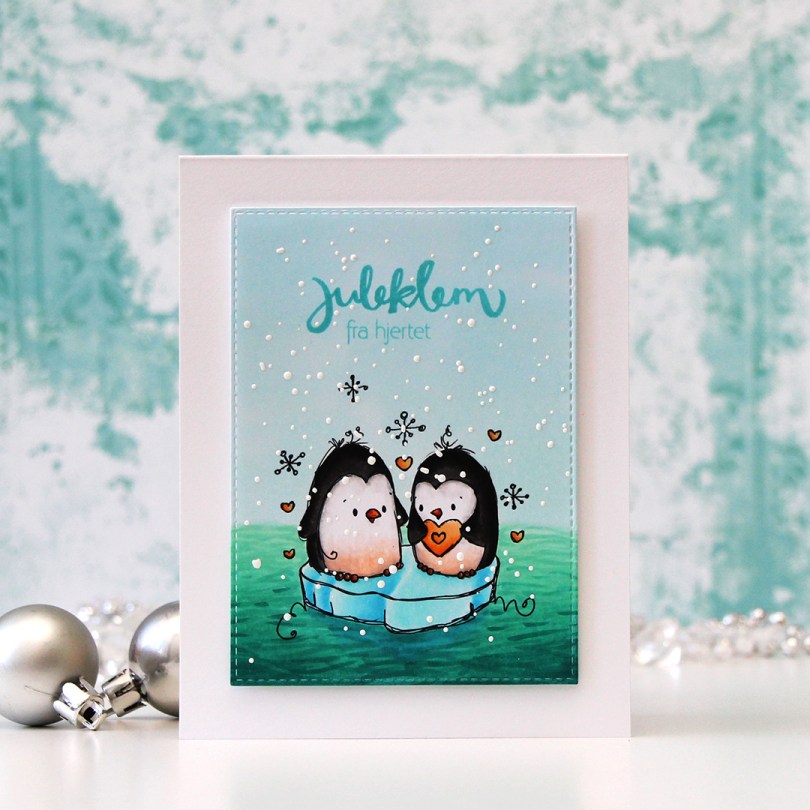
 This is the
  I colored in the image using my Copics. I don’t think I’ve ever colored ocean before, and I was genuinely surprised by how easy it was. I even a little hint of blue to the ocean beneath the ice, giving the illusion of something more under water. 9/10 of an iceberg is under water, after all. It may seem weird that I chose yellow hearts for a Christmas card, but I have a very specific recipient in mind for this card, and she loves yellow 😉
 I die cut my panel using the third largest die in the Stitched Rectangles STAX 2 set from My Favorite Things and stamped a sentiment that I made from two different Norsk Stempelblad AS stamp sets using Simon Says Stamp Audrey Blue ink. I sprinkled on some chunky white embossing enamel from Stampendous and heated it from behind, melting the granules. The last thing to do was add lots of foam tape to the back and attach it to my white card base. Couldn’t get much simpler than this, really.
 Lots of blue and blue green Copics used on this image. Oh, and grays, quite a few of those, as well.
 I colored up these snowmen for Kathy Racoosin’s 30 day coloring challenge in June of last year, so it felt good to finally put them to use. Another thing I put to use? Those die cut squares. They were left over from
  I had 12 snowmen, but I needed room for a sentiment, so I stamped one from Norsk Stempelblad AS onto one of the die cut white squares using Papertrey Ink Enchanted Evening ink and glued the last snowman to the inside of the card instead.
 I used the largest die in the Stitched Rectangles Stax Set 1 from My Favorite Things on some Enchanted evening card stock, and glued it to my Stamper’s Select White card base before adding all the squares with 1 mm foam squares. I then used more 1 mm foam squares on the back of the snowmen. Dimension is life, as Laura Bassen says. I didn’t want this card to be too thick, though, so I stuck with the 1 mm. Added some snowflakes die cut with the Hero Arts Snowflake Confetti die, and my card was finished.
 This image was part of the Christmas release from Lili of the Valley that came out a few weeks ago, you can find the stamp


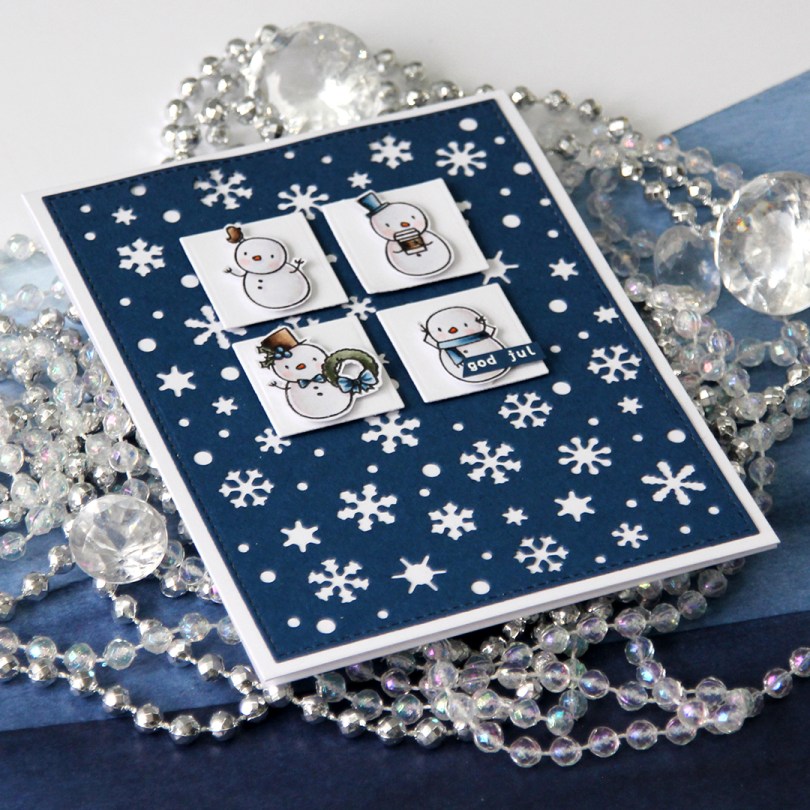

 I had loads of diecut squares left over from my previous card, they were the interior pieces of the stacked frames I used. Instead of letting them go to waste, I thought I’d put them to good use. I took four squares and mounted them to my blue snowflake panel using 1 mm foam squares. Believe it or not, but this was the part that took the longest. Getting them centered perfectly near the top with equal spacing between them all and equal distances to both sides and the top of the panel took…. well, it felt like forever. With this kind of design, though, you have to get it just right, or it’ll throw off the balance of the entire card. They’re equally distanced down to 1/32″, that’s about as good as it gets.