Hi, crafty friends! It’s a well known fact that I’m a sucker for penguins, so I was over the moon for this month’s release from Rachelle Anne Miller. It’s the Penguin Party scene creator set, which is geared toward celebrations with balloons, party hats, presents and little pennant flags. I created a birthday card with this set earlier in the month. Today, I chose a penguin that doesn’t have any accessories besides a scarf and created a holiday card.
 I colored my penguin with Copics, fussy cut him and used a black Glaze pen to add shine to his eyes, before putting him aside while I worked on the rest of my card.
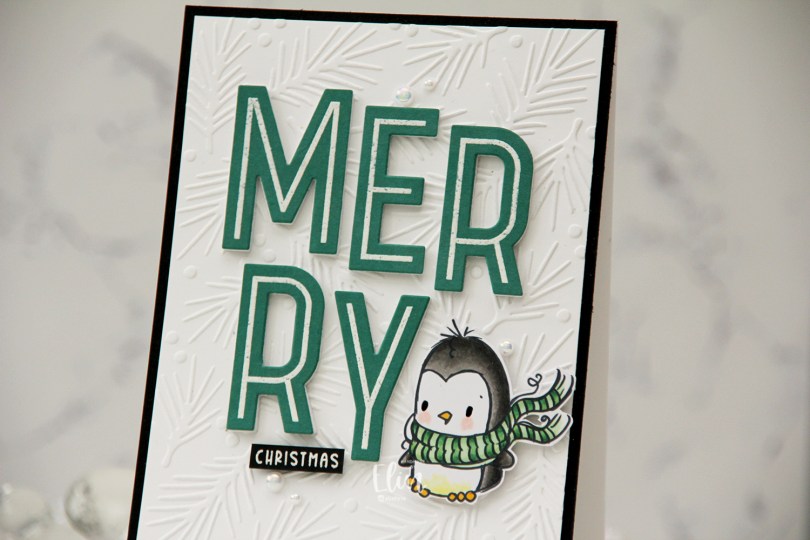
 I really wanted to use the big MERRY greeting in the Merry Trees stamp set from Kristina Werner. I love her cleanly designed products, they’re right up my alley, and this greeting makes a statement. I stamped with VersaMark onto Juniper cardstock from Concord & 9th, before sprinkling on super fine detail embossing powder from Ranger, which I then heat set. I die cut an additional four layers of the letters from white cardstock and stacked them with the green on top.
 I used the Berries & Boughs embossing folder from Concord & 9th to create a little bit of interest to the background. I trimmed my white dry embossed panel slightly and adhered it to a black cardstock panel that I adhered to a top fold white card base. I arranged my merry letters on the front of the card, added my penguin with foam tape and also added a white on black heat embossed sub sentiment from the Christmas Greetings stamp set from Lili of the Valley.
 I added a few pearls from the Glossy Porcelain mix from Little Things from Lucy’s Cards to finish. I love how I was able to turn this cute party penguin into a holiday penguin, and I’m kind of liking the untraditional Christmas palette of green and black.
![]() I messed around with a few greens to find the right combo to somewhat match my green cardstock. If it hadn’t been for that, this would have been a very limited color palette.
I messed around with a few greens to find the right combo to somewhat match my green cardstock. If it hadn’t been for that, this would have been a very limited color palette.
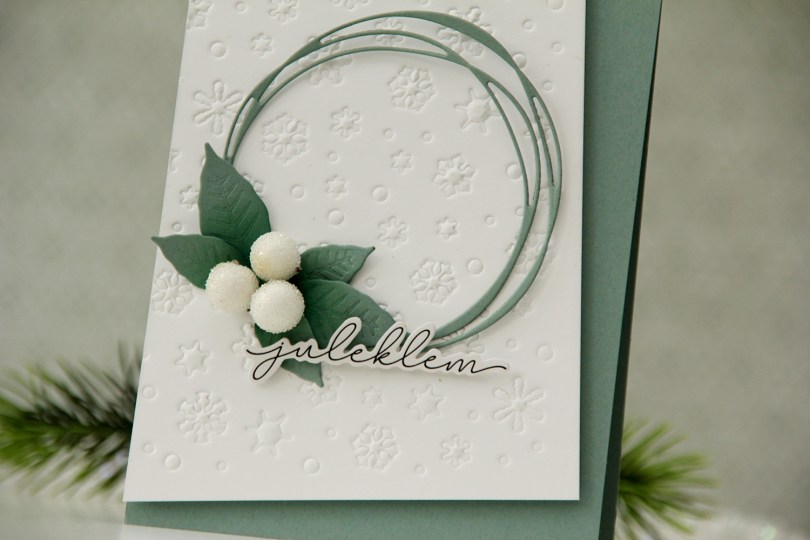
 I had a dry embossed white panel in my stash I thought I’d put to good use (I used the Snowflake Confetti fancy die from Hero Arts with an embossing mat to create this texture).
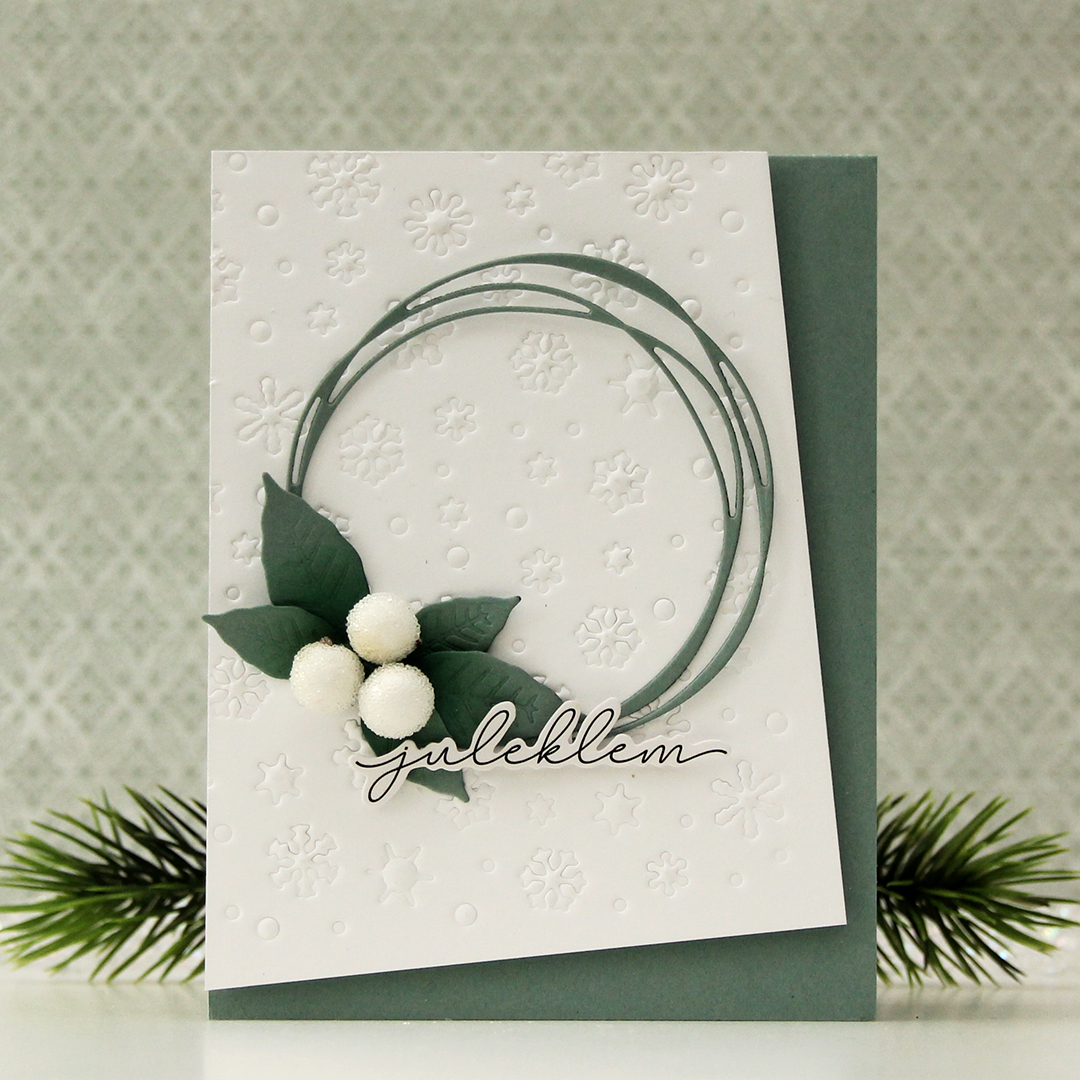
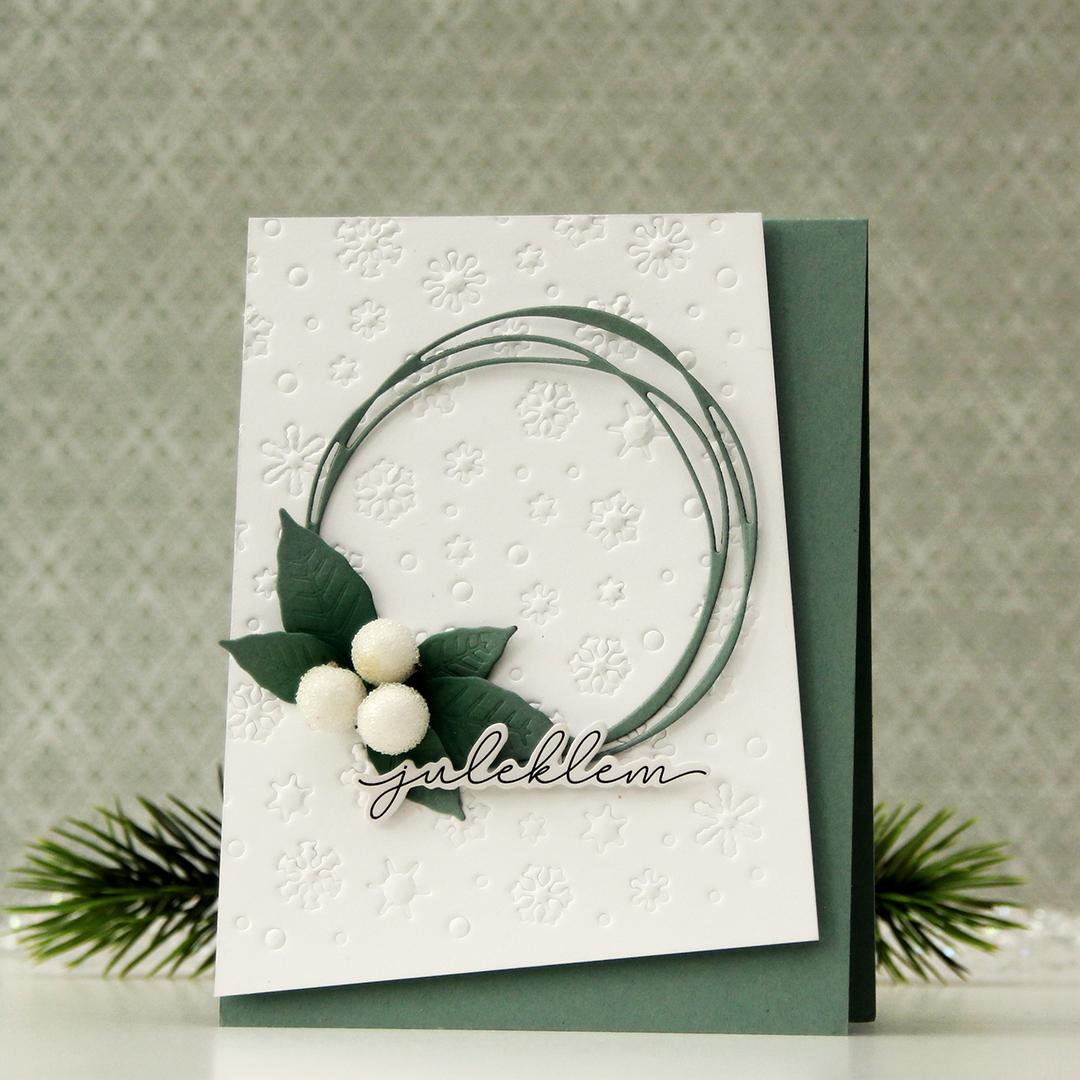 I die cut a scribbled circle and a couple of layers of a poinsettia from Ocean Tides cardstock from Papertrey Ink. I used the same color cardstock to create my card base and mounted my white panel at an angle to create a dynamic design.
 I adhered the circle with a tiny bit of glue where my leaves would cover it, making the rest of the circle float above the rest.
 I cut apart the poinsettia petals to use as leaves and inked over them with Eucalyptus and Rainforest inks from Concord & 9th. I adhered the large ones with a bit of foam behind each leaf for dimension, but glued the smaller ones straight down at the base of the leaves.
 Using liquid glue, I added three large berries to the center of my leaf arrangement before finishing off with a sticker, which I put slivers of foam on the back of for even more lift. I like that it kind of floats above the rest.
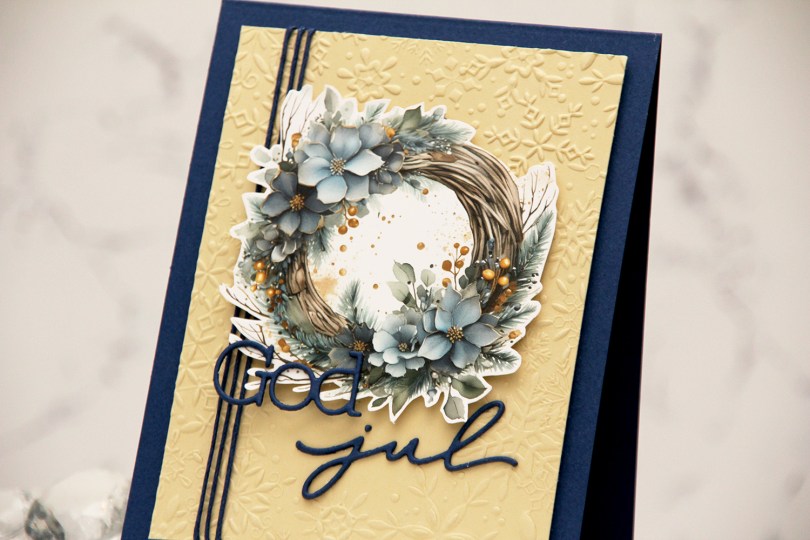
 I love the new image sheets from Kort & Godt, and the Christmas ones they just released are AWESOME! I used one of the blue ones for this card and decided to fussy cut the wreath. This is pretty easy to fussy cut leaving a white border. I used the Snowflake Oval Frame embossing folder from Simon Says Stamp on a piece of Fine Linen cardstock from Papertrey Ink to create some texture to my background. I cropped off quite a bit on the edges and used a blue cotton thread from Kort & Godt to add a little something to the design.
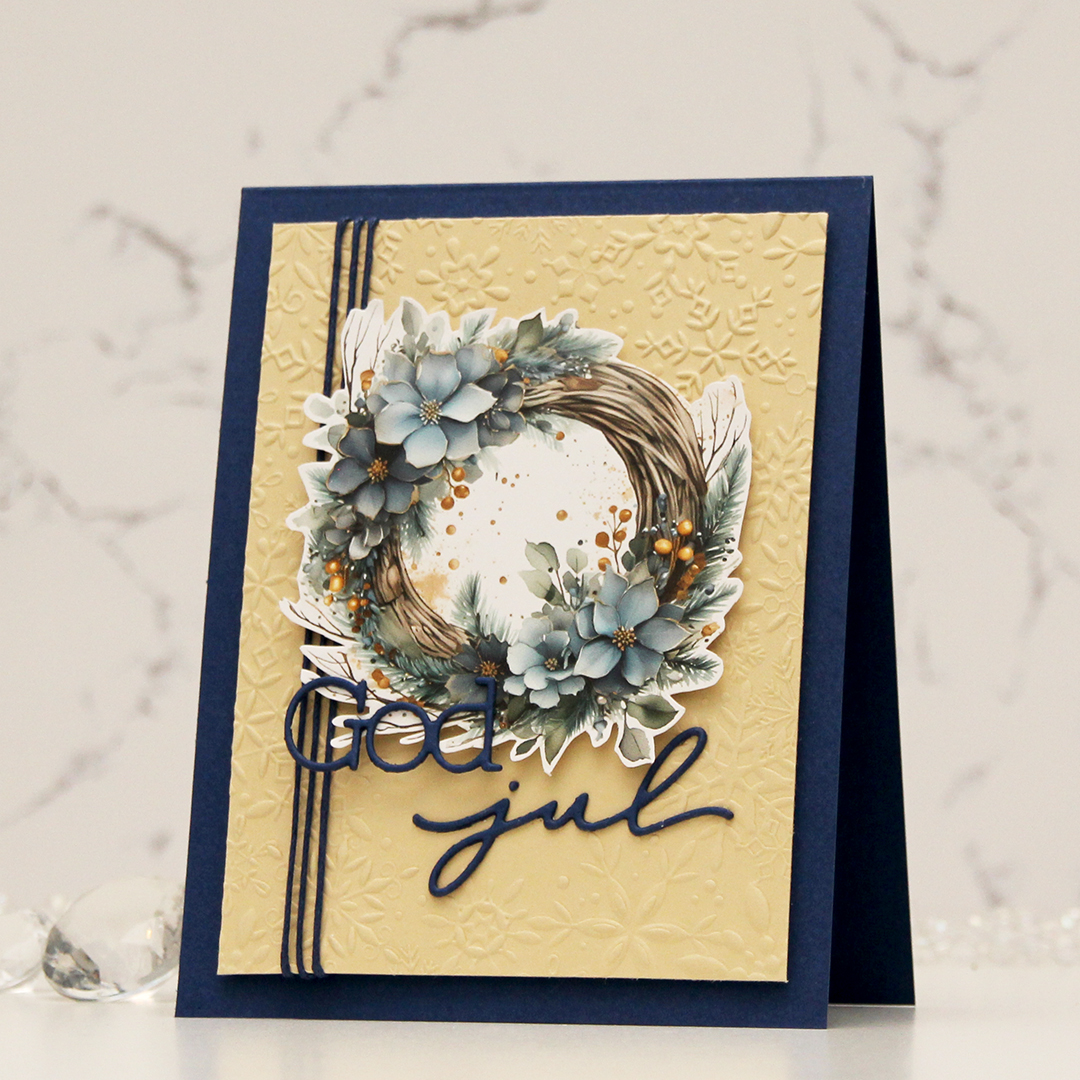 I mounted my embossed panel onto a card base I created from Blue Beyond cardstock from My Favorite Things. I used the same color cardstock to die cut my sentiment. I stacked two, so they would be a little sturdier, mounted the wreath in the top center, adhered God directly to the wreath and jul onto the embossed piece. And that’s it, I didn’t add any embellishments to this.
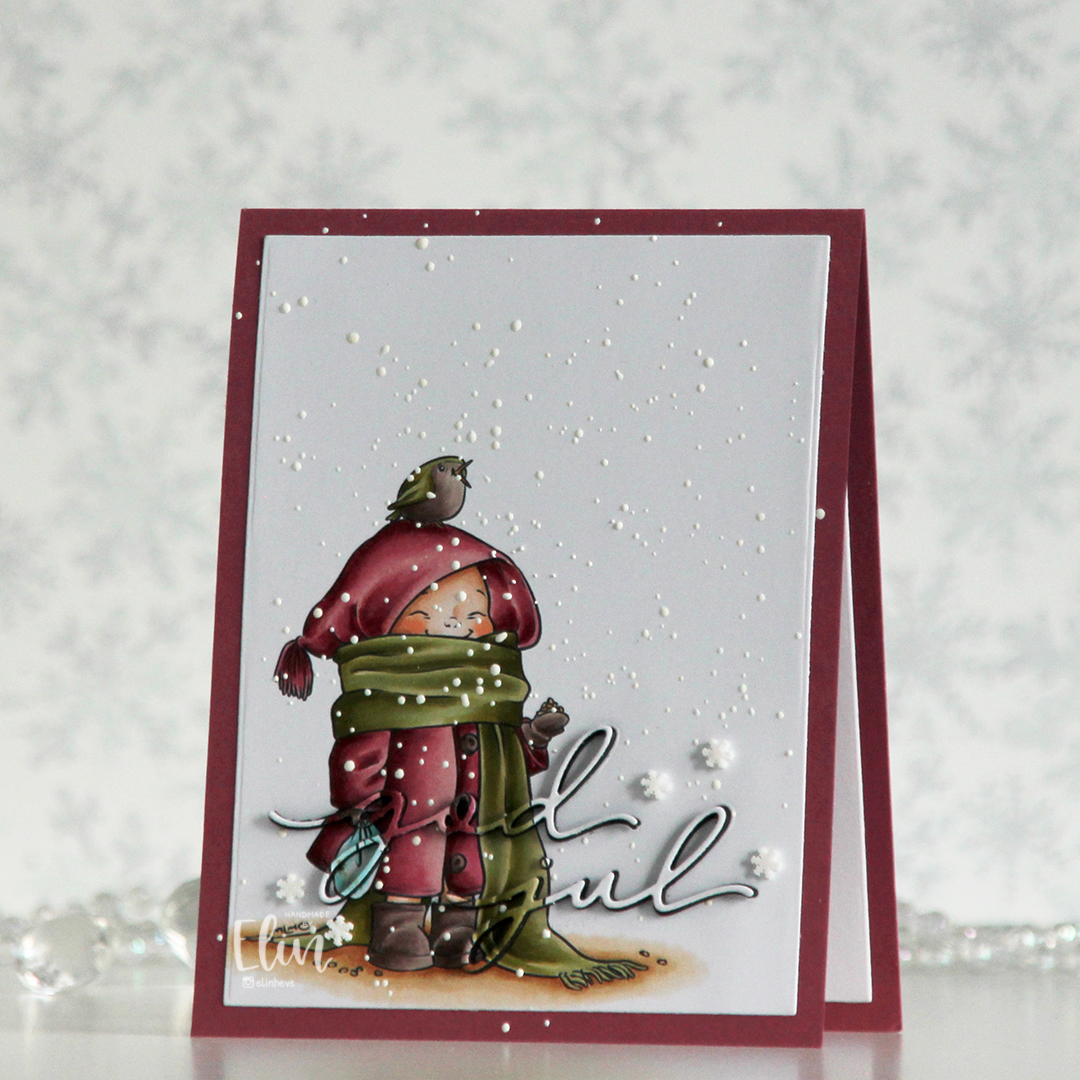 I printed the image on a piece of X-Press It blending card, colored it with my Copics and used a die in the Additional A2 Layers die set from Waffle Flower to trim the rectangle down a bit. You could also use a trimmer for this. Into the panel, I die cut the words god jul using dies from Kort & Godt. The two words are actually from separate die sets, but work perfectly together like this.
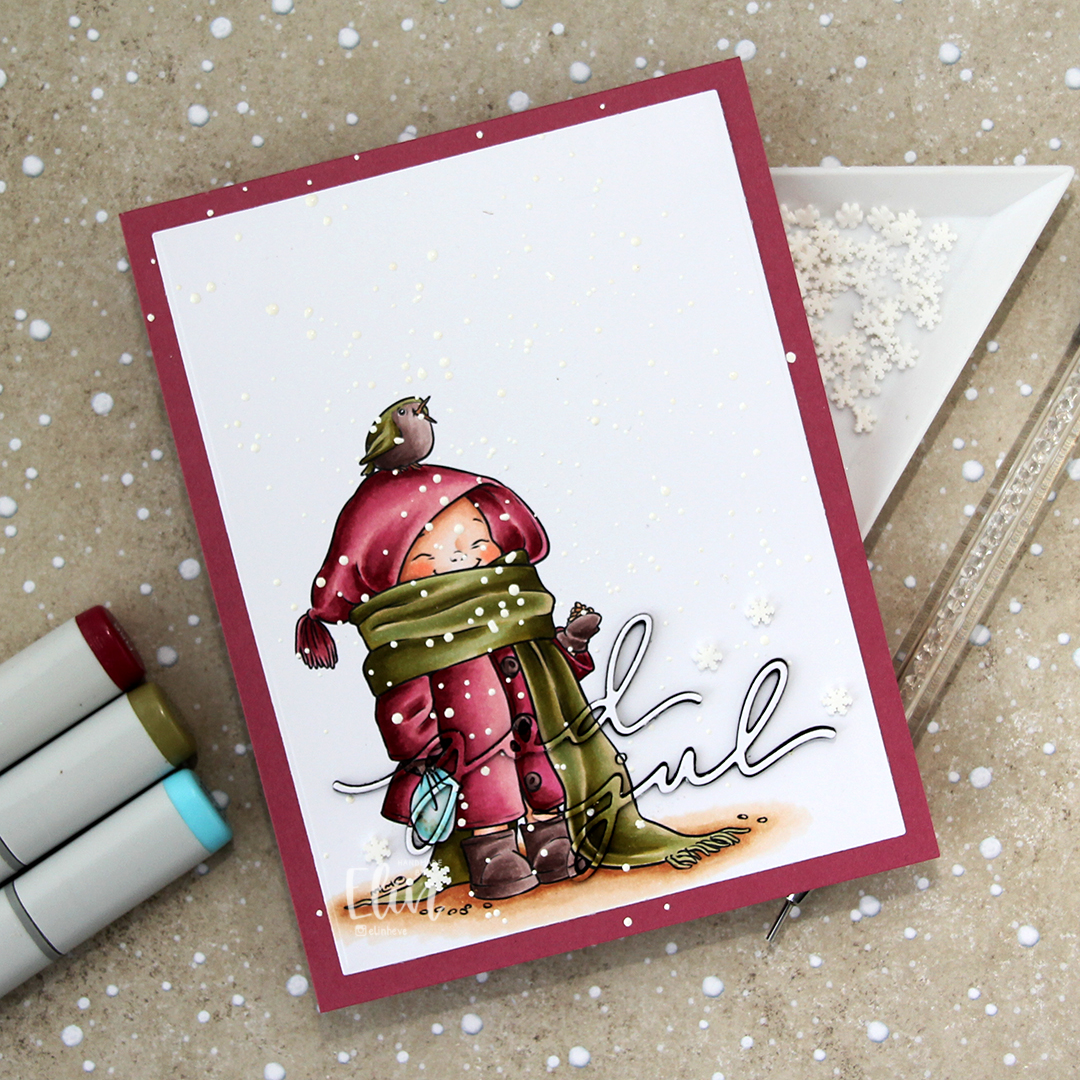 I adhered my panel to a top fold card base I created from Autumn Rose cardstock from Papertrey Ink, paper pieced the counters back into place, sprinkled on Chunky White embossing enamel from Stampendous and heated the granules from the back. I should have done this before adhering my panel to the card base to spend less time with the heat gun (melting the powder through two layers of cardstock takes significantly longer than doing it through just the one layer), but I honestly forgot about it. It does work through two layers, it’s just a matter of patience.
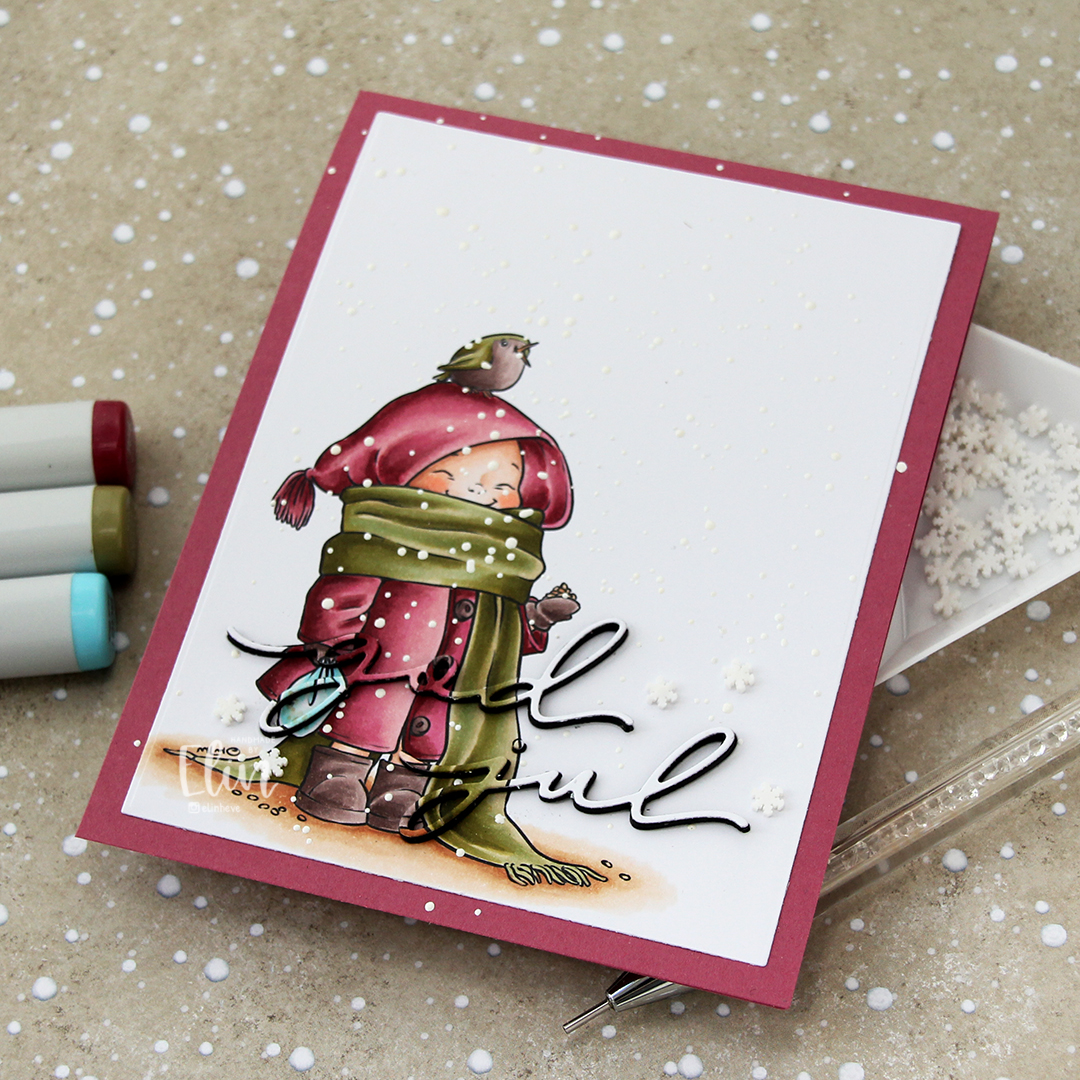 Once my snow was in place, I die cut four layers of each of the words from black cardstock. I stacked them, added the colored one on top and puzzle pieced them in where they belonged, before adding a few Snowdrift sprinkles from Little Things from Lucy’s Cards to finish the card.
 Pink and dirty green. This is about as close as I (willingly) get to using red and green together on a card.
 I colored up the penguins with my Copics and fussy cut them right up against the black lines. These are very simple shapes and easy to fussy cut. I put the penguins aside while I worked on the rest of my card. Onto a card base I created from Blue Breeze cardstock from My Favorite Things, I stamped tiny snowflakes from North Star Design using Spring Rain ink from Papertrey Ink for a subtle tone on tone look. This is super subtle, my ink pad needed reinking, but I went with it and didn’t reink until after the project was complete, I didn’t want to stop half way.
 I used the Stitched Snowflake Backdrops die from Lawn Fawn to create an impressed snowflake pattern on a piece of Stamper’s Select White cardstock from Papertrey Ink. I added a few extra layers of cardstock behind it and adhered it to the card base. Using the Postage Collage Die and coloring stencil from Waffle Flower, I created postage stamps for my penguins to sit on. I stamped the snowflakes on these as well, and ink blended a little in from the edges to define them a tiny bit. It’s still subtle, I hadn’t reinked my ink pad at this point. I added dimension behind each of the postage stamps, adhered them to the card and mounted the penguins on top. I used the Hjerte 3 die set from Papirdesign to die cut my sentiment from Berry Sorbet cardstock from Papertrey Ink. I die cut four and stacked them together for a dimensional look, before adding a
  Simple coloring for simple images.
 I colored the image with Copics, then used a die from the Blueprints 27 die set from My Favorite Things to give the panel a nice border around the edge. I added a few layers of cardstock scraps behind the panel for strength and dimension. I created a top fold card base from Lavender Moon cardstock from Papertrey Ink and ink blended from the bottom using Autumn Rose ink, also from Papertrey Ink. This gave my card base a nice ombre effect.
 I used the Big Happy Holidays die from Mama Elephant to die cut four layers from Lavender Moon cardstock. I used the same ink blending trick for the top layer that I used for the card base, ink blending it before I die cut and stacked all four together for a nice, dimensional sentiment. To finish off the card I added a few die cut snowflakes. I used the Snowflake Confetti Fancy die from Hero Arts and CR1335 from Marianne Design to create my snowflakes, and my card was complete.
 I always go overboard when I color snow, even though there was very little of it this time.
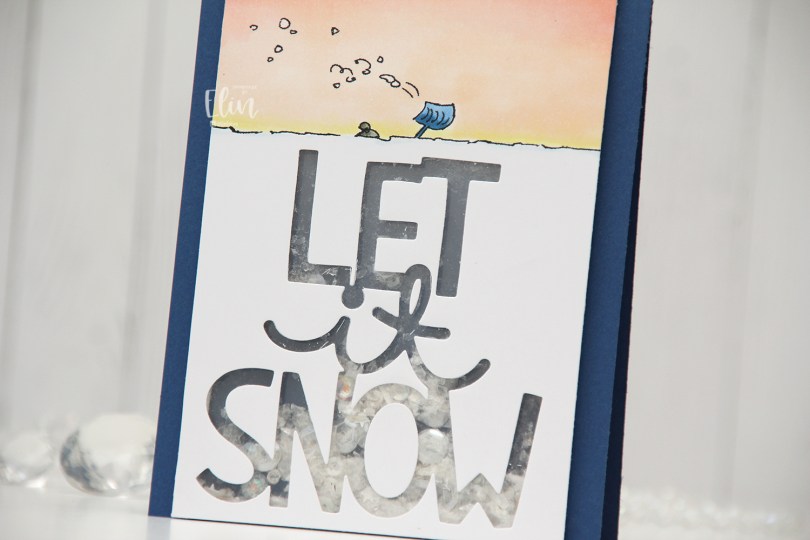
 I really don’t want the sentiment to come true right now, I don’t remember there ever coming this much snow in the city in such a short time, and I’d very much like to not have to walk to work tomorrow. I saw plenty of people out with their shovels today when I walked home, their cars were snowed in, their driveways were full of snow and they could barely open their front doors. It’s winter, we get it, but it’s enough now, we don’t need more snow.
 I’m done venting. I think. I was originally planning on adding a stacked die cut where all the snow is, but then I came up with the idea of a shaker card instead. It’s kind of like the little person under the beanie is trapped inside the shaker with all the shaker bits, which I thought was a fun concept.
 I used the Giant Let It Snow die from Lawn Fawn, covered my window with acetate and filled my shaker well with Distress Mica Flakes, a little bit of Rock Candy Distress Glitter and a small pile of embellishments from the Starry Night mix from Little Things from Lucy’s Cards.
 I added my shaker panel to a top fold card base I created from Blueberry cardstock from My Favorite Things and decided not to add anything else.
 Very simple color palette for this one.


 I printed the image onto X-Press It blending card and colored it with Copics. I went with a grayish green/muted pink combo, which is one I often use for holiday cards. I’m not a fan of bright red and green together, but this works for me. Once colored, I used a die from the Wonky Stitched Rectangle STAX set from My Favorite Things for a fun faux stitch look on the edges. I adhered my panel to a top fold card base I created from Autumn Rose cardstock from Papertrey Ink, which is a nice match with my pink coloring.
 I used a fairly simple color combo, but it’s still a lot of Copics, I never can seem to rein it in.
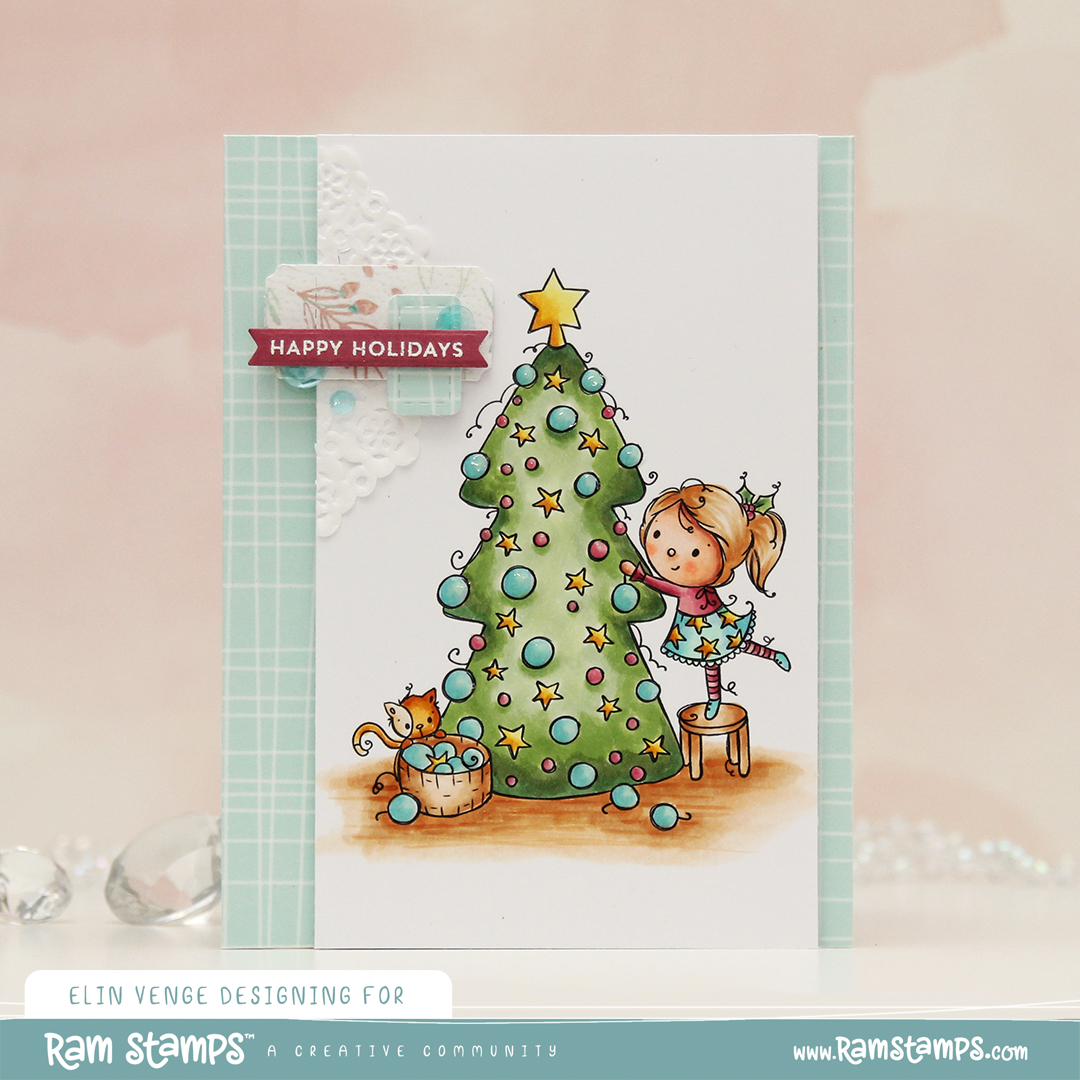 As usual, I colored the image with Copics, cut my panel down a little on the sides and added Glossy Accents to all the ornaments. This time, I decided to use the
  My signature clean and simple cluster cards have been few and far between this year, and I thought a mini cluster would work well for this card. I started with a scrap of a mini paper doily from Doodlebug Design that I adhered to my colored panel with liquid glue. I die cut a couple of additional pieces using the Happy Days Ticket Stubs die from XCut. This is one die that cuts nine different tickets, and it’s one I use a lot. I cut one from the light blue gingham patterned paper, and the other one from a scrap piece of patterned paper from Kaisercraft. I put them both on foam squares for dimension. The sentiment is from the Itty Bitty Holiday stamp set from My Favorite Things, stamped and white heat embossed on a piece of Autumn Rose cardstock from Papertrey Ink, which I then die cut into a strip with flag ends using a die from the Itty Bitty Strips die set from My Favorite Things. I finished off with a few sequins from the Ice Water mix from Little Things from Lucy’s Cards.
 A very simple color palette for this card. I started out with blue ornaments, but once I printed the patterned paper, I realized they needed to have a green tinge and went over the blue with BG32 and G00.