
Hi, crafty friends. Today is the first Friday of the month, which means it’s RAM Stamps release day. This month’s release is a birthday creator set. If you’re not familiar with the creator sets, they contain lots of different images that you can put together to create different scenes. There are so many options, the sky’s the limit for these. I chose to use this Balloon stamp only for this card, but do know there are lots of other images to choose from in this release.
 I printed the image fairly small, I wanted it to fit the width of a portrait style A2 sized card. I colored the image with my Copics, going in somewhat of a rainbow order.
 I covered the front of a card base with a piece of pink patterned paper with hearts. I don’t know where this patterned paper is from, it came in a mystery box from Simon Says Stamp a few years ago. I think it might be Doodlebug, based on some of the other patterns in the pack, but I’m not sure.
 Above and below my colored piece, I added thin strips of Gold Shine cardstock from My Favorite Things, before mounting it all on foam tape near the top of the card.
 I used the Sweet Sentiments die set from Altenew to die cut the word celebrate. I die cut four out of white cardstock and one from the gold shine cardstock I used for the strips. I stacked them all together for dimension, and adhered the sentiment onto the balloon strings, before finishing off the card with a few sequins from the Heaven Sent mix from Little Things from Lucy’s Cards.
 Happy color palette.
P.S. I apologize for the stray hair in the background on the flatlay photos, I didn’t notice it until I wrote this post. #keepingitreal


 Very simple color palette for this one.
 I colored Tofu with Copics and fussy cut him leaving a thin white border. Onto my card base I stamped the Touch of Texture background stamp from My Favorite Things in VersaMark ink, sprinkled on Iridescent Sparkle embossing powder from JudiKins and heat embossed for a subtle texture on the white card base.
 I wanted an angled panel near the bottom of my card, so I stamped a sentiment from the Bitty Thanks & Gratitude stamp set from My Favorite Things, using Sour Apple ink on Sour Apple cardstock, both from My Favorite Things. I glued a piece of patterned paper below it and mounted it to my card base. I wish I remember where this patterned paper was from, but it came in a mystery box from Simon Says Stamp and there was no label on the packaging, so I don’t know. I put my little cat on foam tape and finished off with a few sequins from the Waterfall mix from Little Things from Lucy’s Cards.
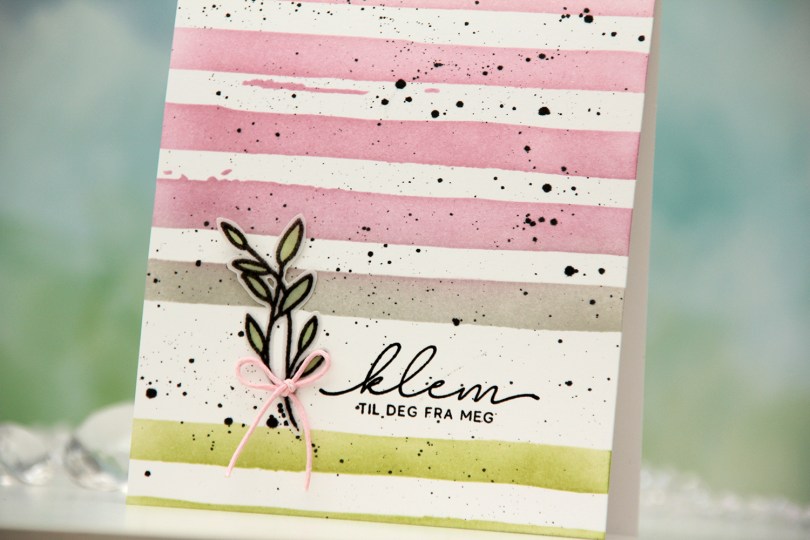
 I started by stamping and heat embossing the sentiment directly on the card base, which I created from Stamper’s Select White cardstock from Papertrey Ink. I stamped in Obsidian ink from Altenew and used clear embossing powder from Ranger. This is my preferred way to get a black embossing, as black embossing powder is tricky to work with. Once the sentiment was in place, I used the Watercolor Stripes stencil from Altenew and masked off the stripe that showed the sentiment through the opening. I ink blended using Avocado, Cobblestone, Briar Rose and Carnation inks from Concord & 9th, as well as Pink Crystal Fresh dye ink from Altenew.
 I wanted some black splatters on my card and used a size 4 paint brush with My Favorite Things Extreme Black reinker to get those black spots. I may have gone a little overboard, but I still like it. I stamped and heat embossed onto vellum a leaf image from the same stamp set as the sentiment, fussy cut it and colored the leaves from the back using my YG25 Copic marker. The vellum is heavyweight translucent vellum from My Favorite Things. I adhered the vellum piece to my card and finished off with a pink bow.
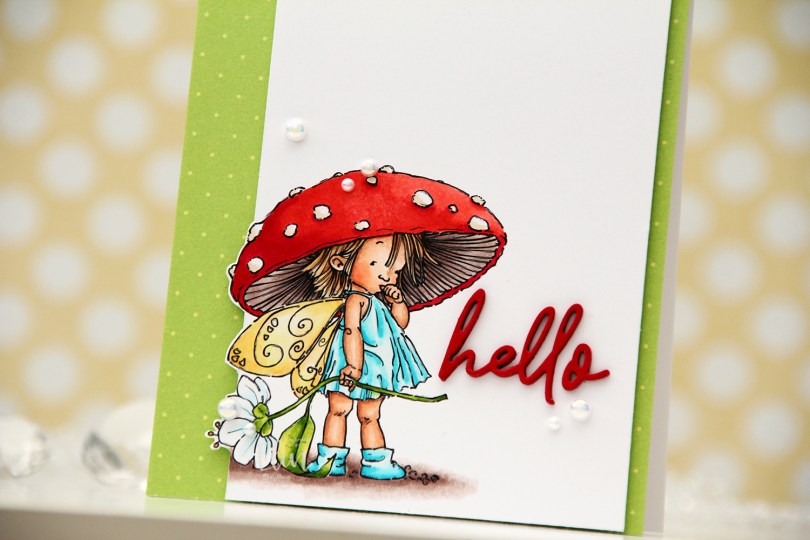
 I colored the image with my Copics, cut my panel way down and even cut a little bit around the image for a fun effect.
 I decided to cover the card base with patterned paper. This one is from Waffle Flower, it’s from their dot pattern in the Christmas color scheme. It’s not too distracting, the colors work well with the colors I’ve used and the dots work well with this amanita mushroom hat.
 I mounted the panel with my image using foam tape and adhered it left of center on the card, so a little bit of the patterned paper would peek out on the right, and a lot of it would peek out on the left.
 I die cut the word hello from the Sweet Sentiments die set from Altenew using Pure Poppy cardstock from Papertrey Ink. I die cut four layers and stacked them together for dimension. This is a very fine lined die cut, and I’ve found that using microdot adhesive is a good way to go. Even liquid glue in a fine tip bottle will ooze out the sides on this one, it’s so fine.
 I finished off with a few pearls from the Glossy Porcelain mix from Little Things from Lucy’s Cards.
 This is such a bright, happy color palette.
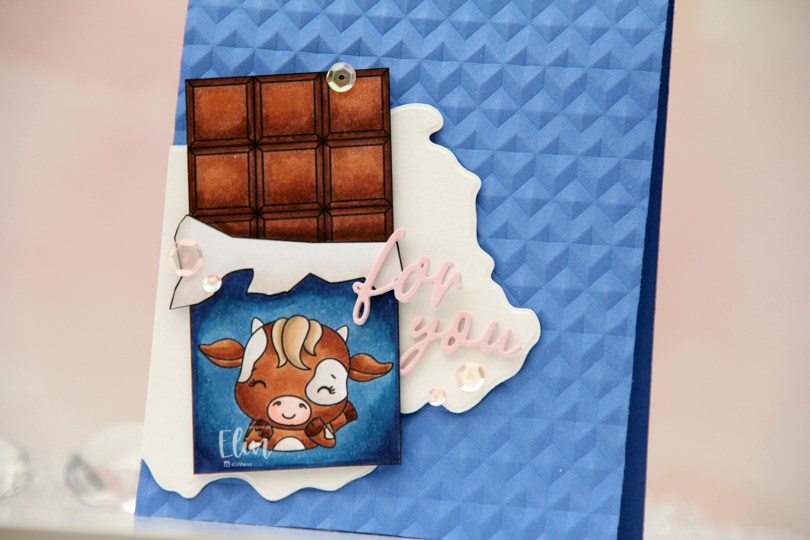
 I colored my chocolate bar with Copics and fussy cut right up against the black stamp lines. Most of these lines are straight, which made it super easy to use a steel ruler and a craft knife to get precise cuts.
 The Stratos cow is a very happy blue card, so it’s not entirely the same, but I don’t think it’s too much of a stretch with the blue wrapper and the cow on the card.
 I created the card base from Something Blue cardstock from My Favorite Things. I used the Angled Mosaic 3D embossing folder from Altenew to give it some texture and interest.
 I used the Watercolor Wash Free Form die from My Favorite Things and die cut from white cardstock. I think the free form makes it look like spilled milk, and it was the perfect grounding element for the chocolate.
 I used the Sweet Sentiments die set from Altenew to die cut the sentiment. I stacked four die cuts of each word for strength and dimension, the top one from Ballet Slipper cardstock from Concord & 9th, added the sentiment to the card and finished off with a few sequins from the She’s So Lovely mix from Little Things from Lucy’s Cards.
 Simple color palette.
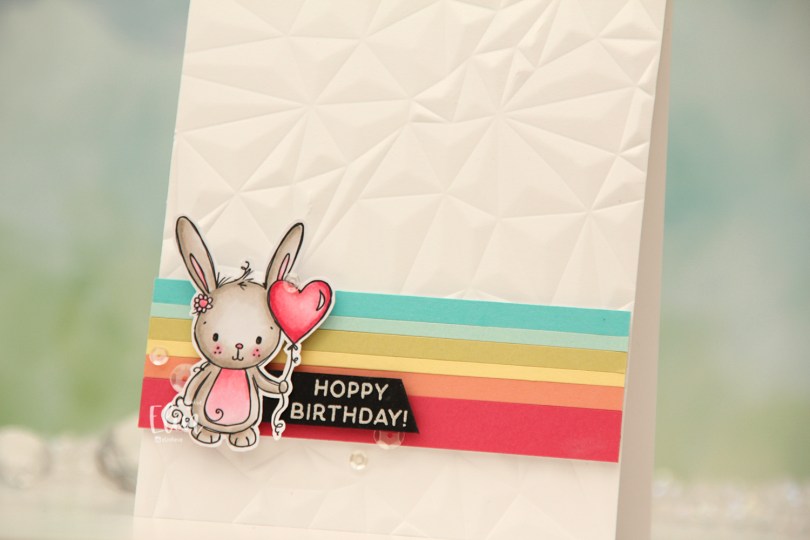
 I colored the bunny with my Copics (I actually only used 6 Copics for this card) and fussy cut around it, leaving a white trim to prefer the whispy lines and squiggles that are so characteristic of Rachelle’s images. I created a card base from Stamper’s Select White cardstock from Papertrey Ink and ran it through my die cutting machine with the Crystal Distortion embossing folder from Simon Says Stamp to create some texture.
 Onto a piece of scrap paper, I adhered strips of solid colored cardstock. I didn’t measure, they’re all different widths for a playful look. The colors are (bottom to top) Honeysuckle and Grapefruit, both from Concord & 9th, and then Lemon Tart, Spring Moss, Aqua Mist and Hawaiian Shores, all from Papertrey Ink. I put a few layers of cardstock behind my strips and adhered them near the bottom of the card. I stamped and white heat embossed a sentiment from the Easter bunnies stamp set from Simon Hurley onto a piece of True Black cardstock from Papertrey Ink, cut it down to a strip and used a craft knife (I don’t trust scissors) to create the angle at the end. I glued the piece left of the sentiment to the back of the bunny, put 2mm foam squares behind everything and adhered it on top of the colored strips, before finishing off with a few sequins from the White Orchid Sequin mix from Little Things from Lucy’s Cards.
 Color palettes don’t get much simpler than this.
 I die cut the image into a circle and put lots of foam tape on the back. I created a card base from Periwinkle cardstock from Hero Arts, and used the Angled Mosaic 3D embossing folder from Altenew to create some fun texture.
 I added the circle to the top center, die cut the word klem (hug) three times from Something Blue cardstock from My Favorite Things, stacked the three for dimension and adhered the top of the letters to the bottom of the circle. This creates a shadow on the bottom half of the letters that I wouldn’t get if I had created additional layers and adhered the die cut directly on the card base. Because the die cut is three layers thick, it won’t get squished in the mail even though it’s floating. I added a sentiment sticker strip on top of the die cut and finished off with a couple of faceted pearls.
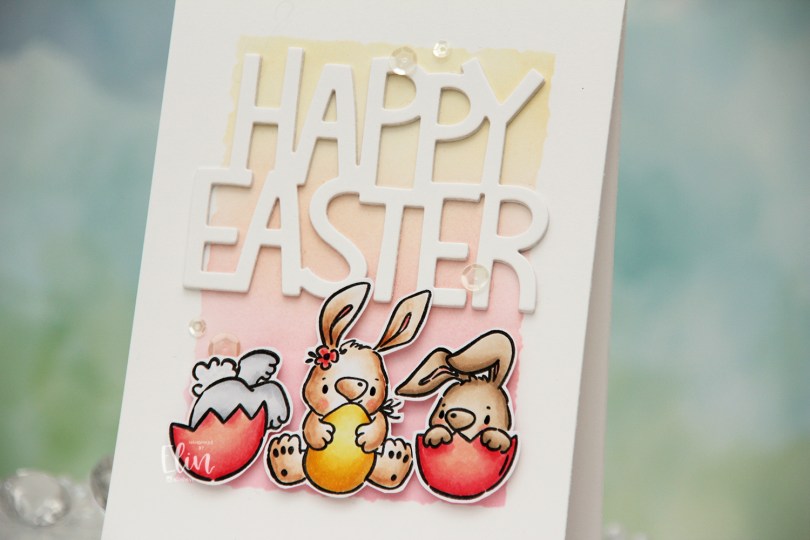
 The Easter Bunnies stamp set from Simon Hurley was the perfect one to teach with. It’s a stamp set with lots of images to choose from. They’re all small, easy to color and very beginner friendly, as there aren’t any big areas to fill in. Once colored, we fussy cut the bunnies. There’s a coordinating die set for this stamp set, but these are pretty easy to fussy cut.
 I did some simple ink blending on the background. I used the Watercolor Rectangle stencil from My Favorite Things and ink blended from the bottom to the top using Worn Lipstick distress ink, Pink Pearl ink from Altenew and Scattered Straw distress ink. These colors went well with the Copics I used for the bunnies, and it creates a little bit of interest to the background. I used the Giant Happy Easter die from Lawn Fawn and die cut that four times from white cardstock, before gluing them all together for a stacked look. I adhered the sentiment in the top center of the card, mounted the bunnies on foam tape and added a few sequins from the White Orchid Sequin mix from Little Things from Lucy’s Cards. I also used a black Glaze pen for the eyes, which the attendees really enjoyed, as it creates a little bit of dimension and shine very quickly and easily.
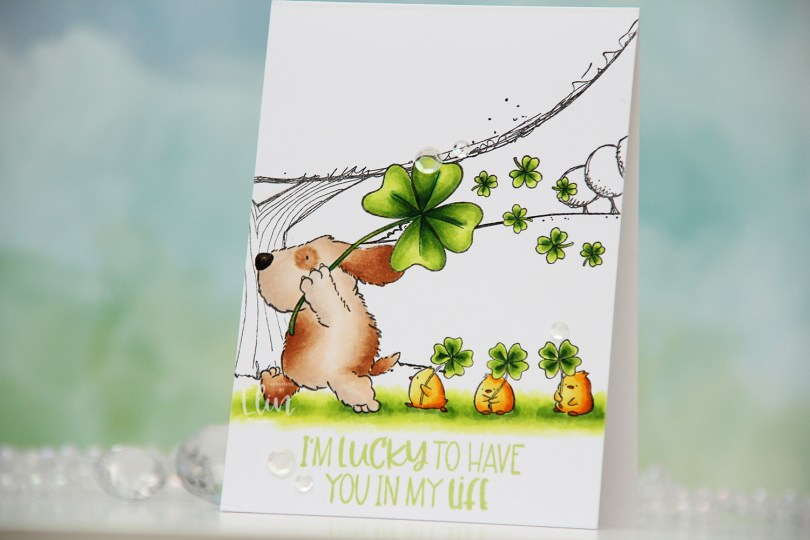
 I didn’t want to use Flappy and his little friends on their own, so I decided to create a mask and stamp
  Once my coloring was complete, I stamped a sentiment from the coordinating
  I used a mixture of brown and gray for Flappy’s fur, and an obscene amount of colors for the green.