
Hi, crafty friends. I promise I will move on from holiday cards, but can you really resist penguins? I know I can’t, and I turned these cuties from Amanda Jayne Designs into a slimline card.
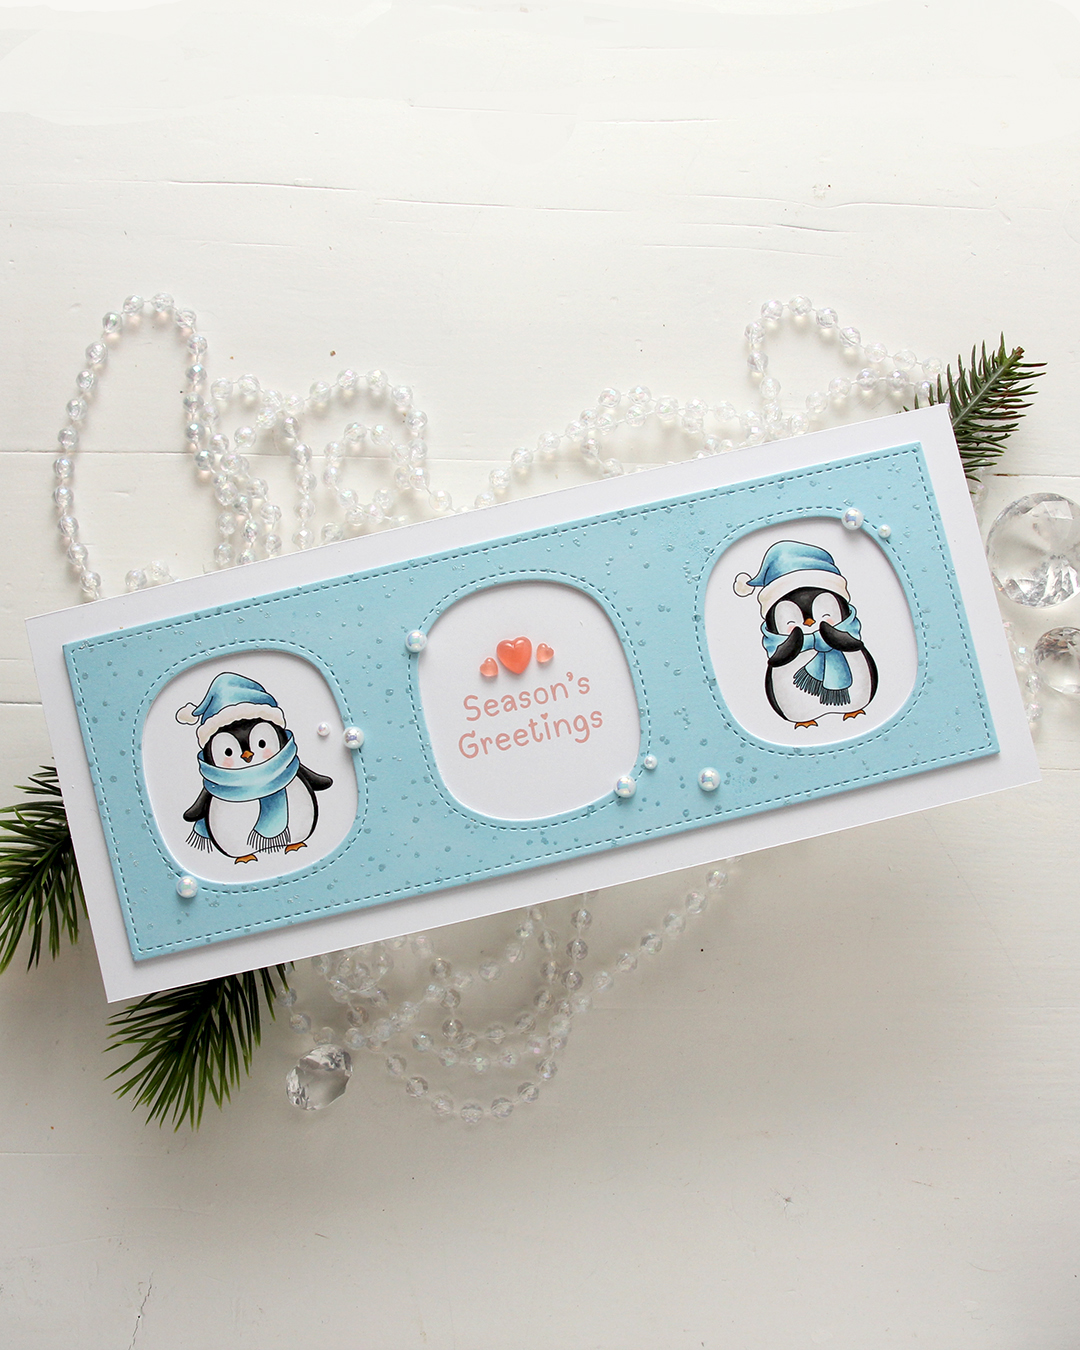 I colored the penguins with my Copics, making sure to add blue for their hats and scarves. Nothing beats blue for Christmas, right? I left plenty of space between the penguins for a greeting, which is from the Christmas Sentiments set, also from Amanda Jayne Designs.
 I used a die in the Slim card basics die set from Mama Elephant to die cut the frame with openings from Harbor cardstock from Concord & 9th. I also cut two from white to add behind it for dimension. I stamped the Paint Splatter background stamp from My Favorite Things onto the blue using VersaMark ink, then sprinkled on White Satin Pearl embossing powder from Hero Arts and heat set.
 I added pearls from the Glossy Porcelain mix from Little Things from Lucy’s Cards here and there around the openings and also three Coral Heart Droplets, also from Little Things from Lucy’s Cards.
 Limited color palette for these two penguins.
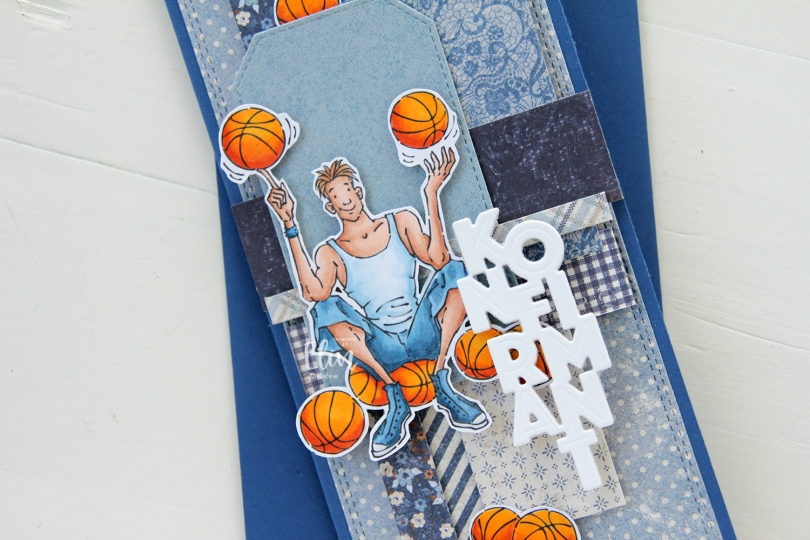
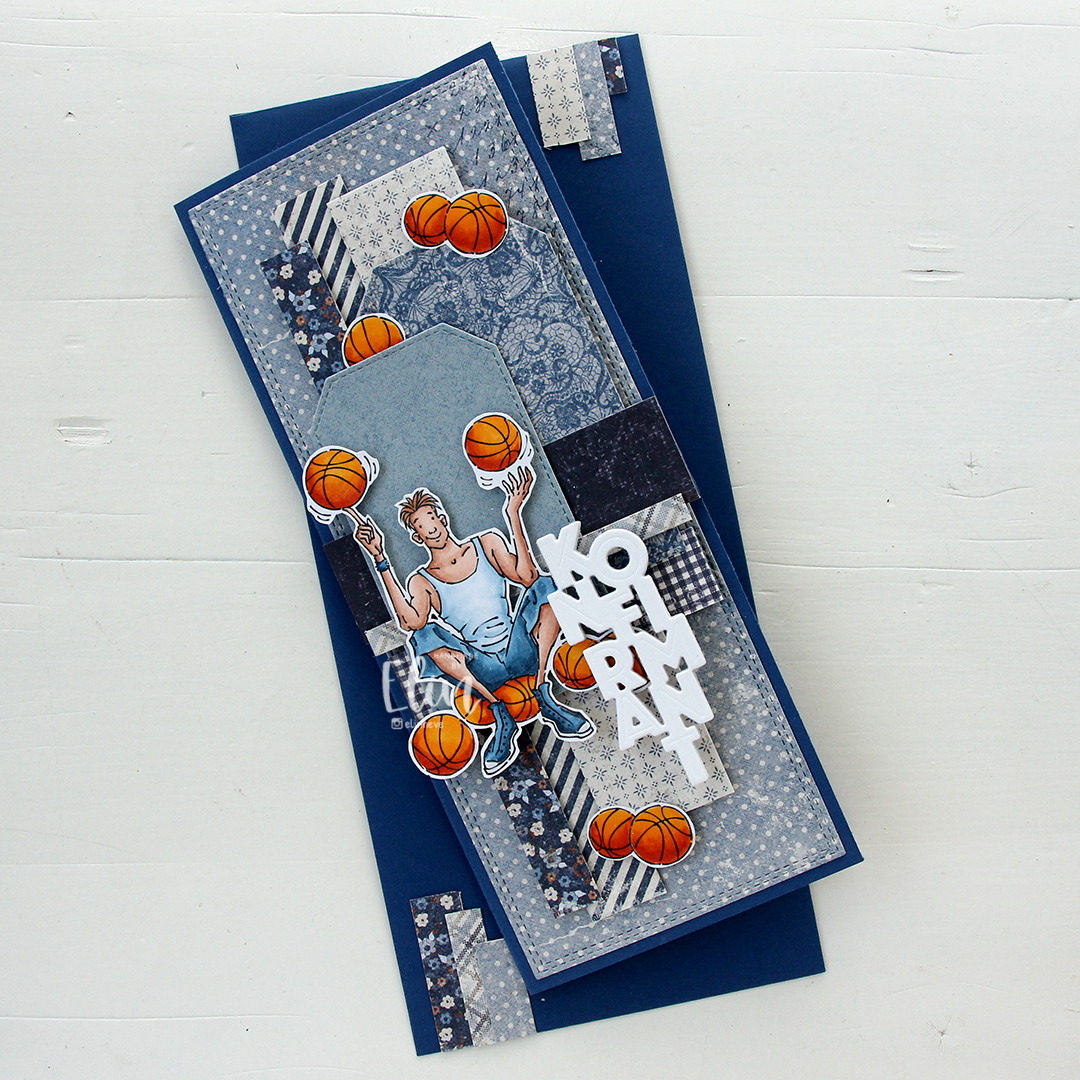 I made a slimline card this time. I created a background from blue scraps from several collections from Maja Design – Denim & Friends, Denim & Girls, Fika and Vintage Autumn Basics are all represented. One of the things I like about the Maja Design patterned paper is that papers match across collections. They’re also made from really good heavyweight paper, which is another tick in the pro column for me. I used the Slimline Double Stitched Rectangle STAX die set from My Favorite Things to create the panel in the back and also the Stitched Traditional Tag STAX die set, also from MFT, to create the tags.
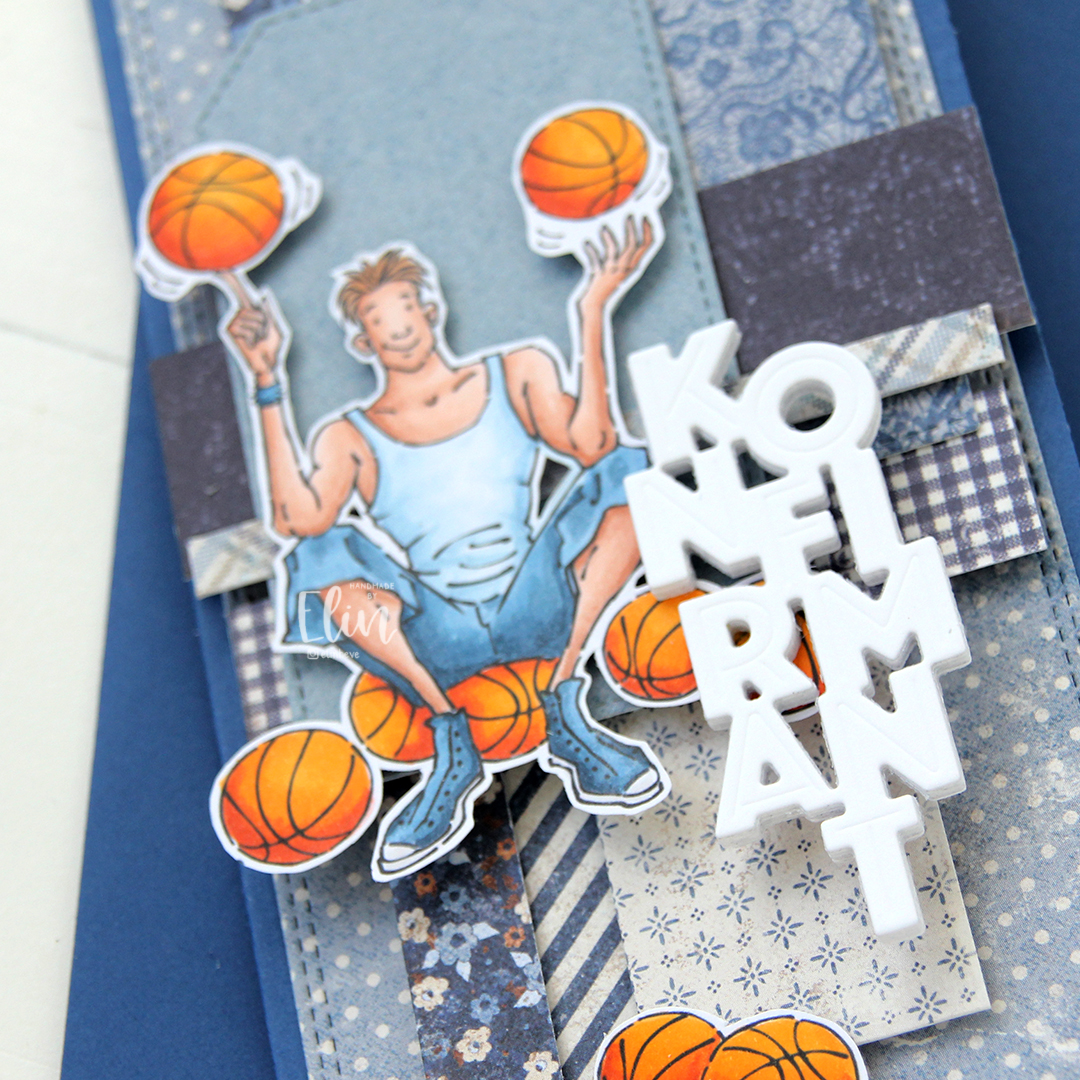 I added the image on top of one of the tags and scattered a few more basketballs around to work as embellishments. The orange really stands out against the blue background. To finish off I die cut the Konfirmant 5 die from Papirdesign six times from white cardstock and stacked them for a dimensional look. I adhered it on top of the image, and it floats above the card further down.
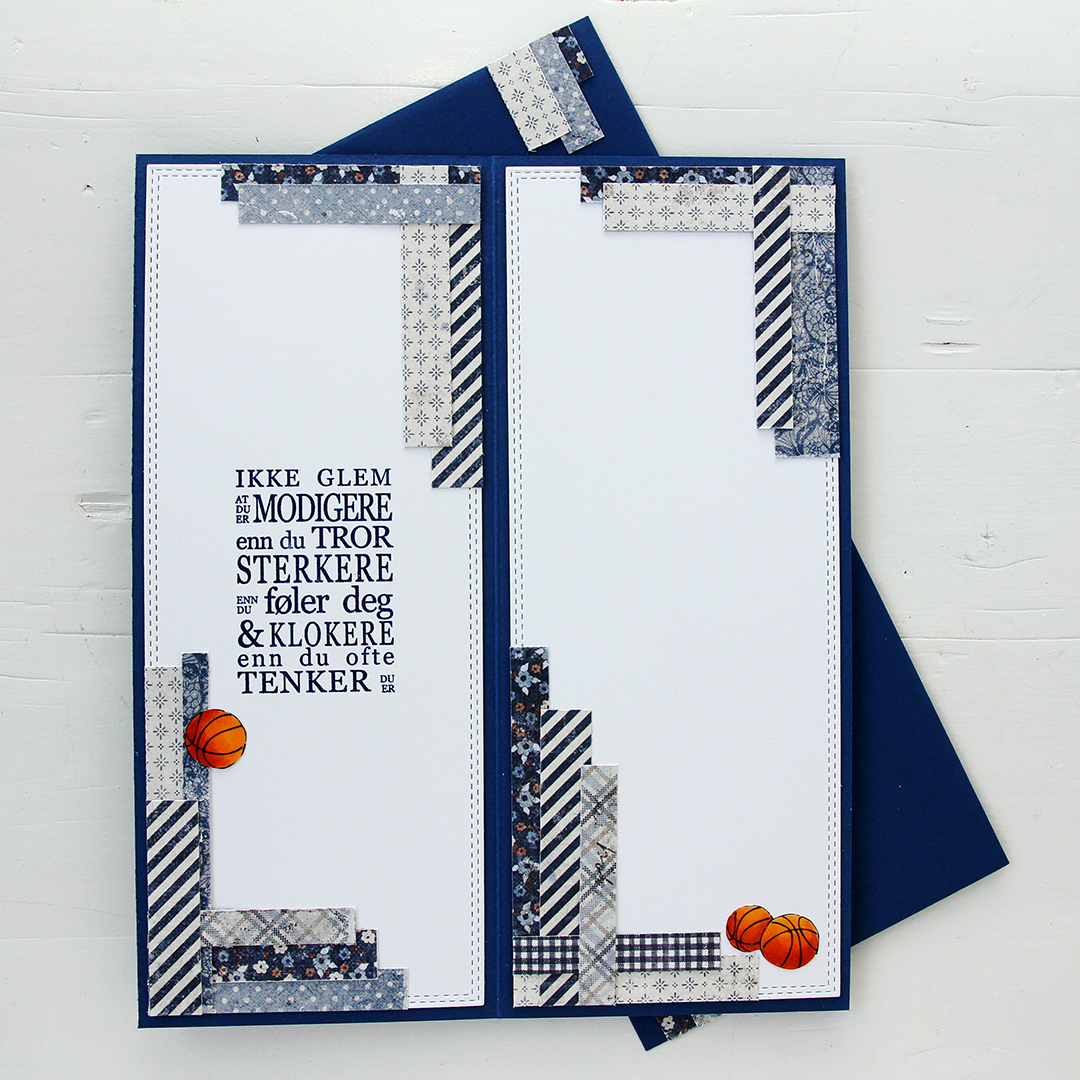 Whenever I make cards to order, I always decorate the inside too. I used the largest slimline double stitched rectangle die to create the white panels on the inside, adding more strips of patterned paper to continue the look from the front of the card and also fill the pages a little. Slimline cards are large, and the added elements make it less daunting to have to come up with a message for the recipient. On one side, I stamped a sentiment from the Konf. 01 stamp set from Norsk Stempelblad using Blue Beyond ink from My Favorite Things, the right side still has plenty of room for a personal message. I also included more basketballs.
 For the back of the card, I used a few strips of patterned paper I had left, die cut a white cardstock circle using the Stitched Circle STAX die set from My Favorite Things and stamped my personal stamp in the center of it using Blue Beyond ink from MFT. The card base is also from My Favorite Things, it’s made from Blueberry cardstock, and the envelope is also in that same Blueberry color.
 Limited color palette for this one.
 I used the Big Balloons stencil from My Favorite Things and did a rainbow of balloons going across the card. Each balloon is a gradient color, from dark at the bottom right, to a lot lighter at the top left. I used sooooo many ink colors to achieve this look.
 I die cut the word bursdag from Gold Shine cardstock from My Favorite Things. This is a very dainty die cut, so I chose to put double sided adhesive (I used a sheet from Altenew) on the back of the cardstock before die cutting, which made everything easy once it came to assembly. I die cut the shadow layer from True Black cardstock from Papertrey Ink and used black foam tape to pop it up in the center of my card. I used some sticker strips to fill out my sentiment, and added those using foam tape as well, before finishing off with a little gold bling.


 Meet
Meet 

 I colored the characters with Copics, fussy cut them leaving a white border, then added black glaze to their eyes and then a white dot on top with a Gelly Roll 05. Rudolph got special treatment with a little bit of Glossy Accents on his nose for additional shine.
 I used the Slim Card Basics die set from Mama Elephant to create my window panel. I die cut one from Blueberry Sky cardstock from Papertrey Ink and four white ones that I adhered behind it for dimension. I die cut the bigger scalloped rectangle in the Slim Card Basics set from Spring Rain cardstock, also from Papertrey Ink, and adhered it to a white card base.
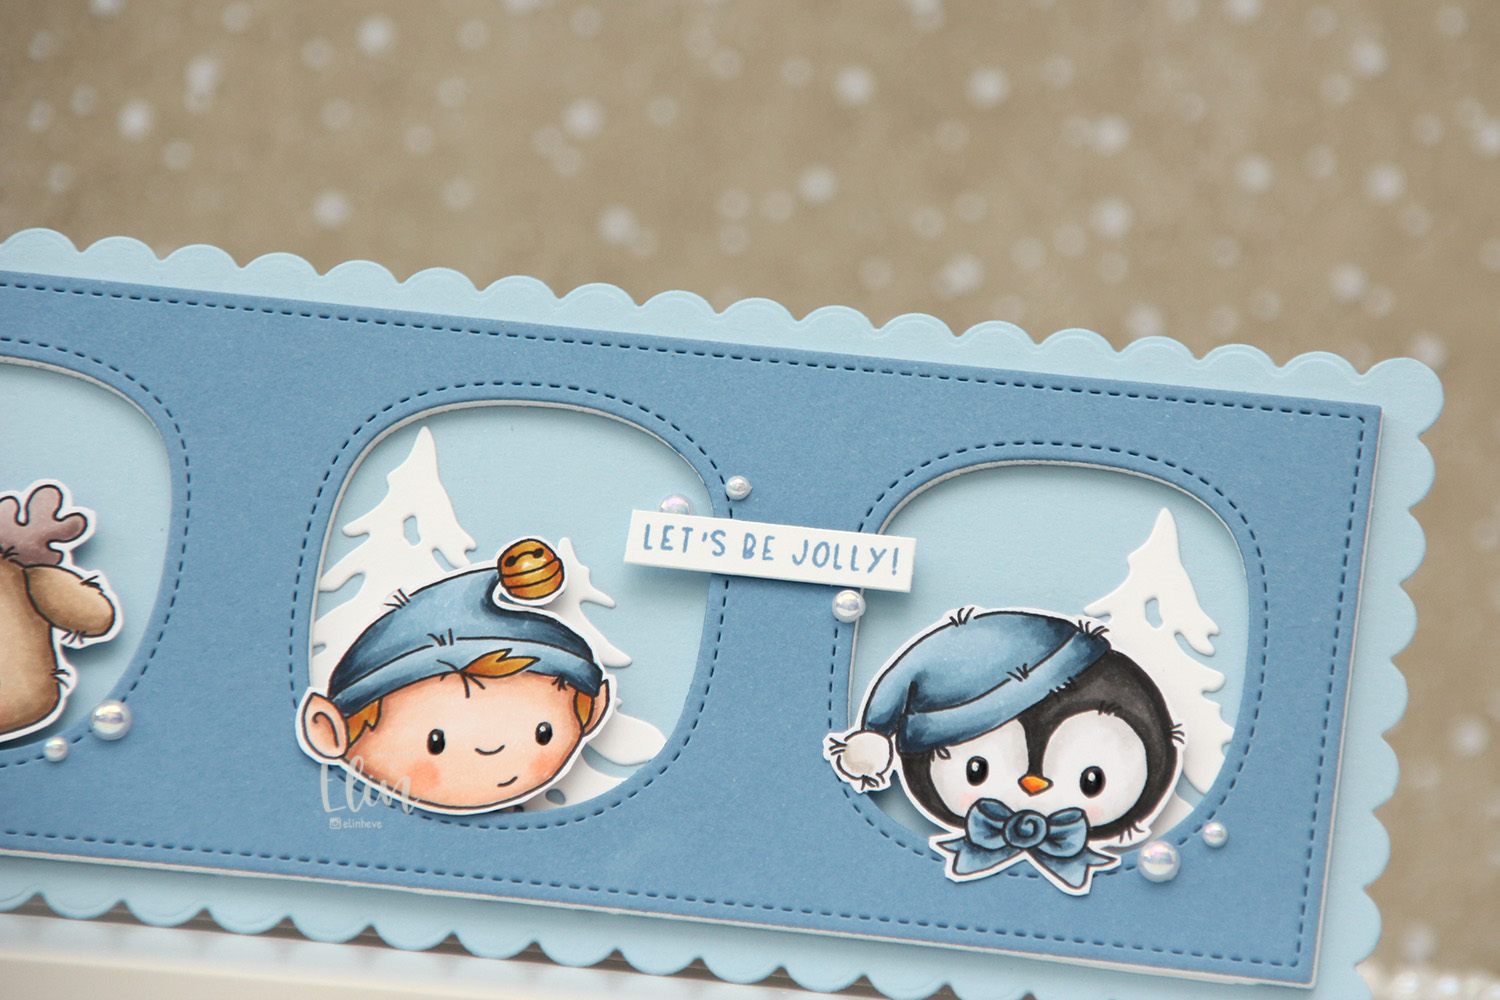 I used the Silhouette Snow Trees die set from Mama Elephant to create white trees to go into the window openings behind my characters.
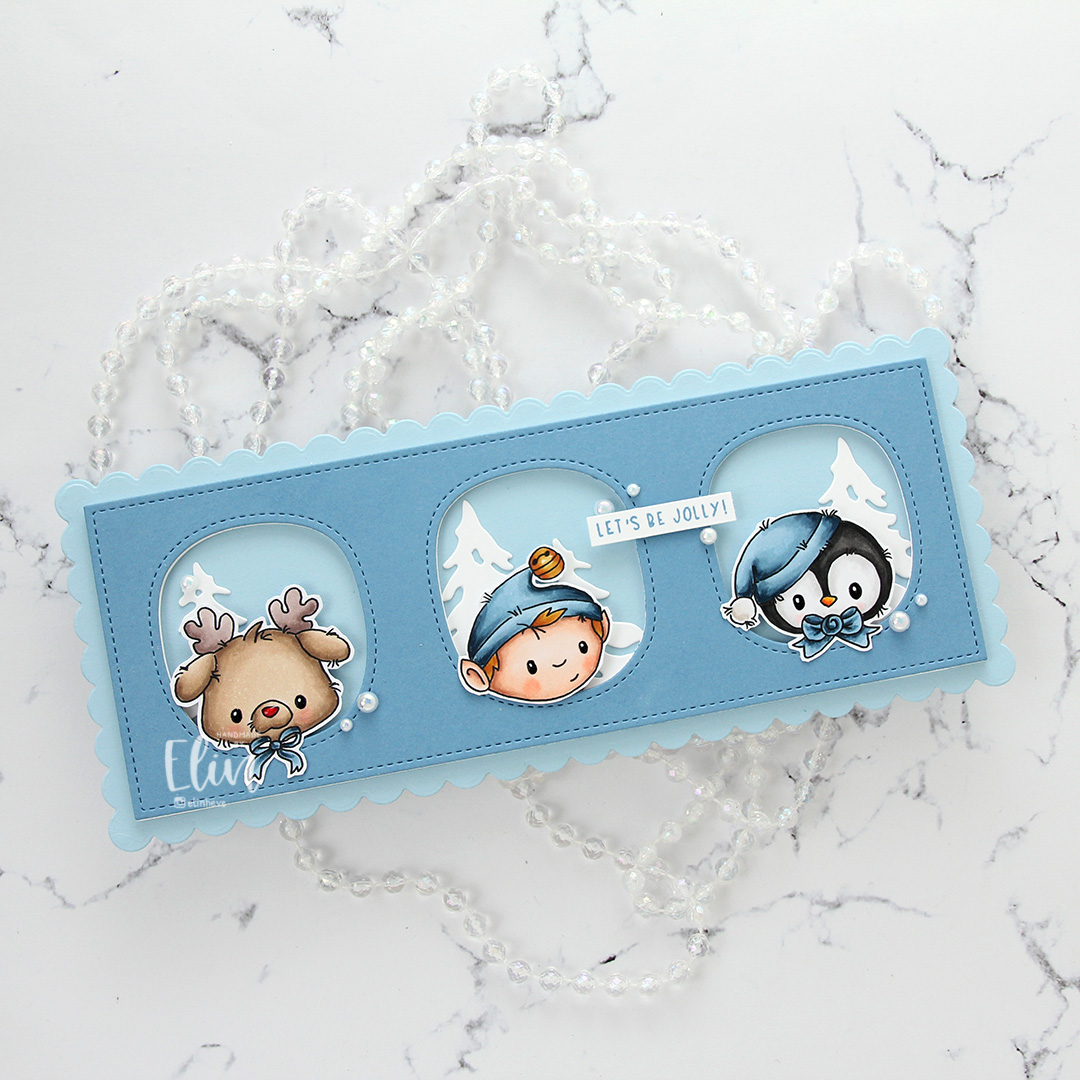 I stamped a sentiment from the
 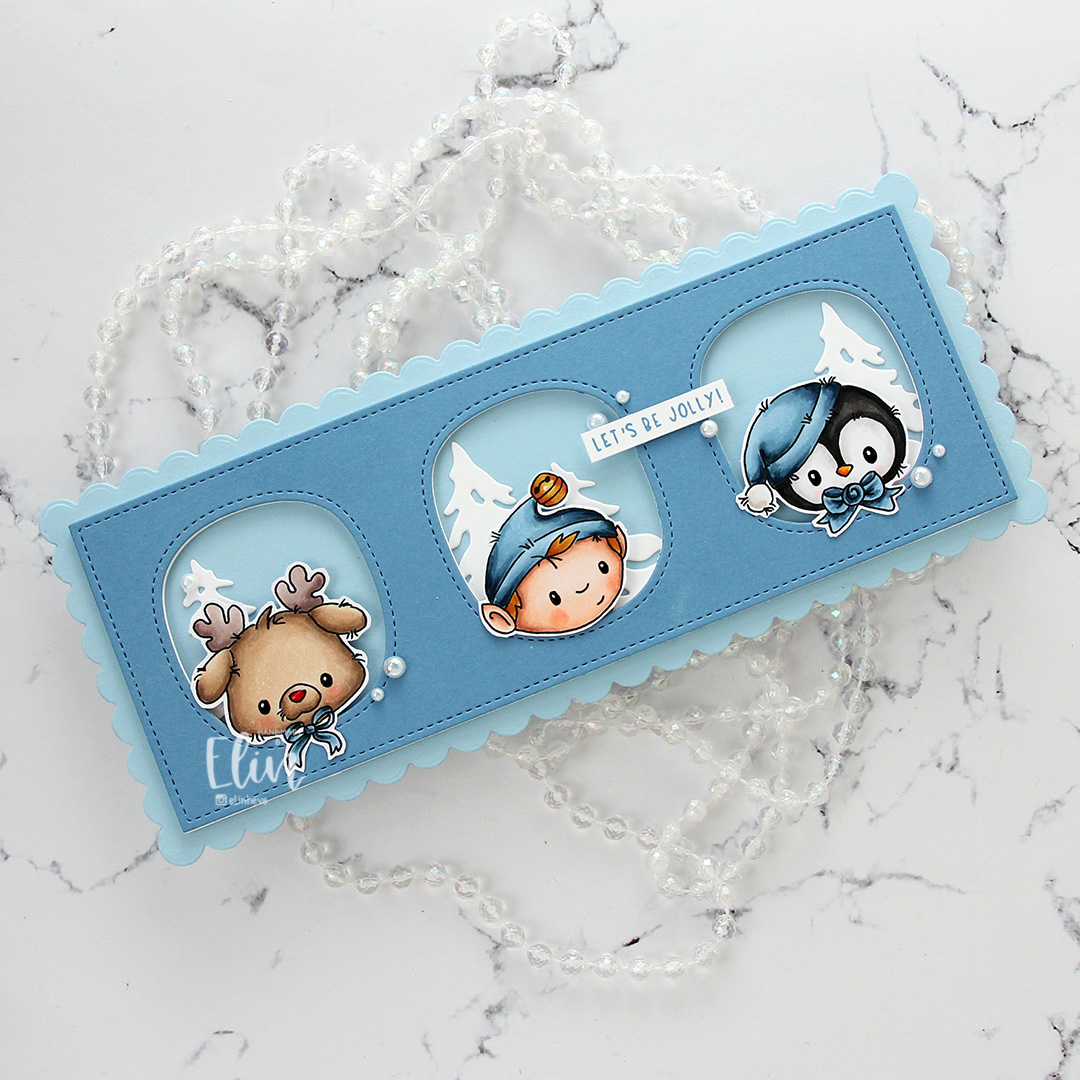 I finished off the card with a few pearls from the Glossy Porcelain mix from Little Things from Lucy’s Cards.
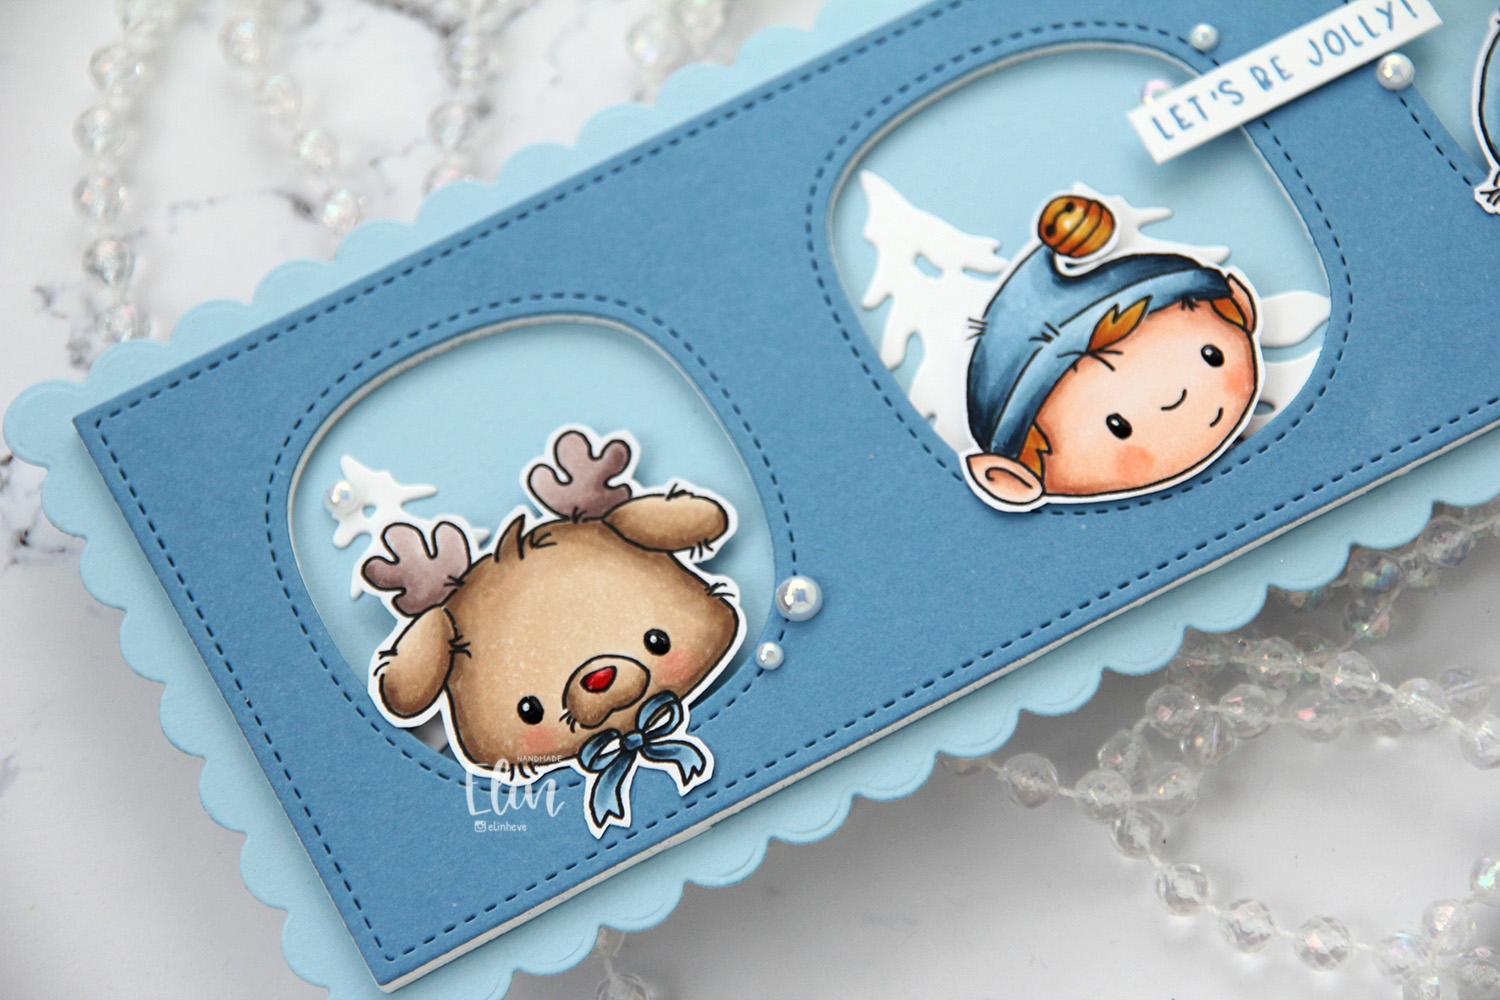 I love dimension on my cards, and this one certainly has that.
 Between the shine on Rudolph’s nose, all the blue and all the dimension, this card makes me happy. I just wish it was easier to photograph slimline cards.
 I used way too many Copics for these three.
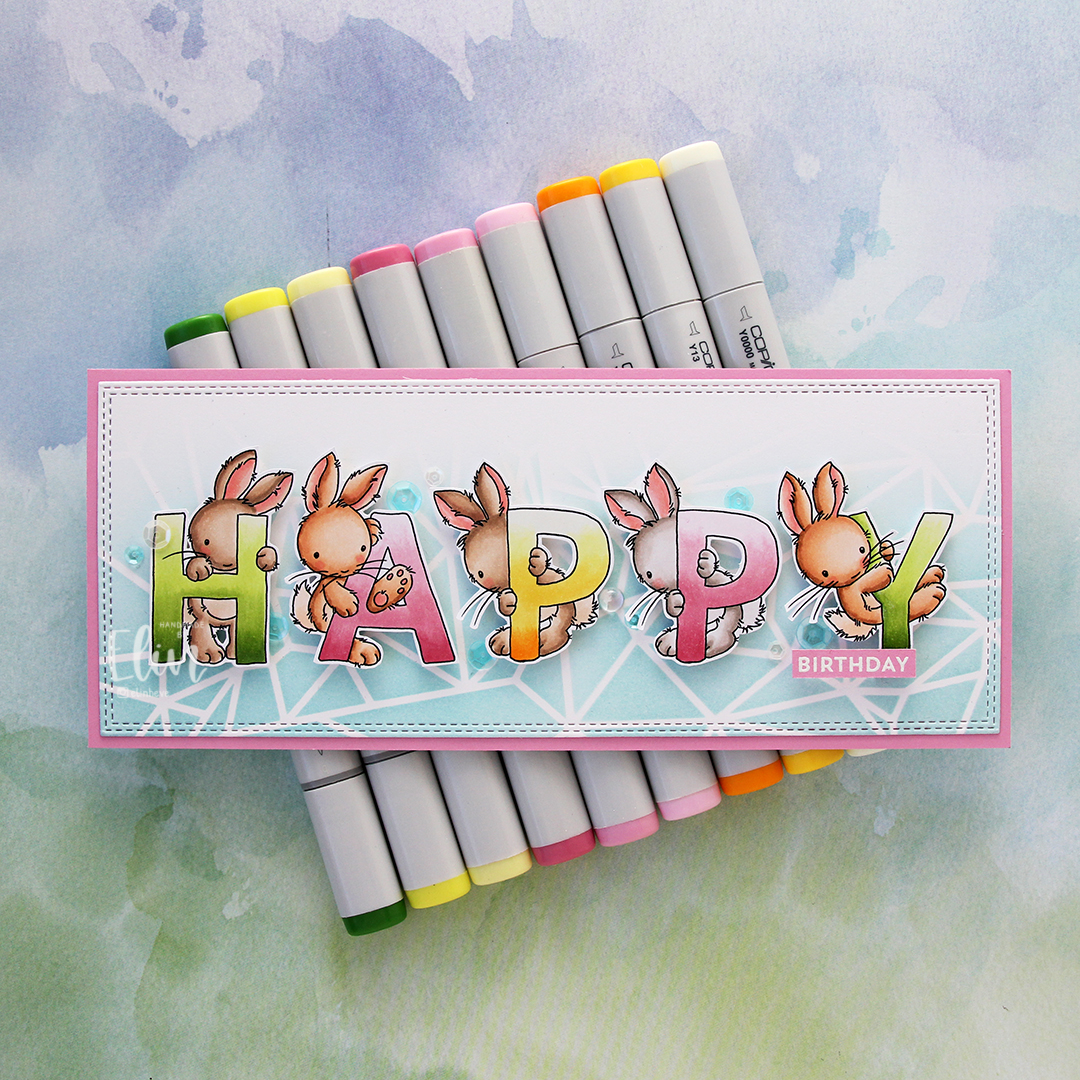 This set offers so many possibilities for customizing your card to suit your needs. I colored the letters to spell happy and fussy cut them, leaving a thin white border and put them aside while I worked on the rest of the card.
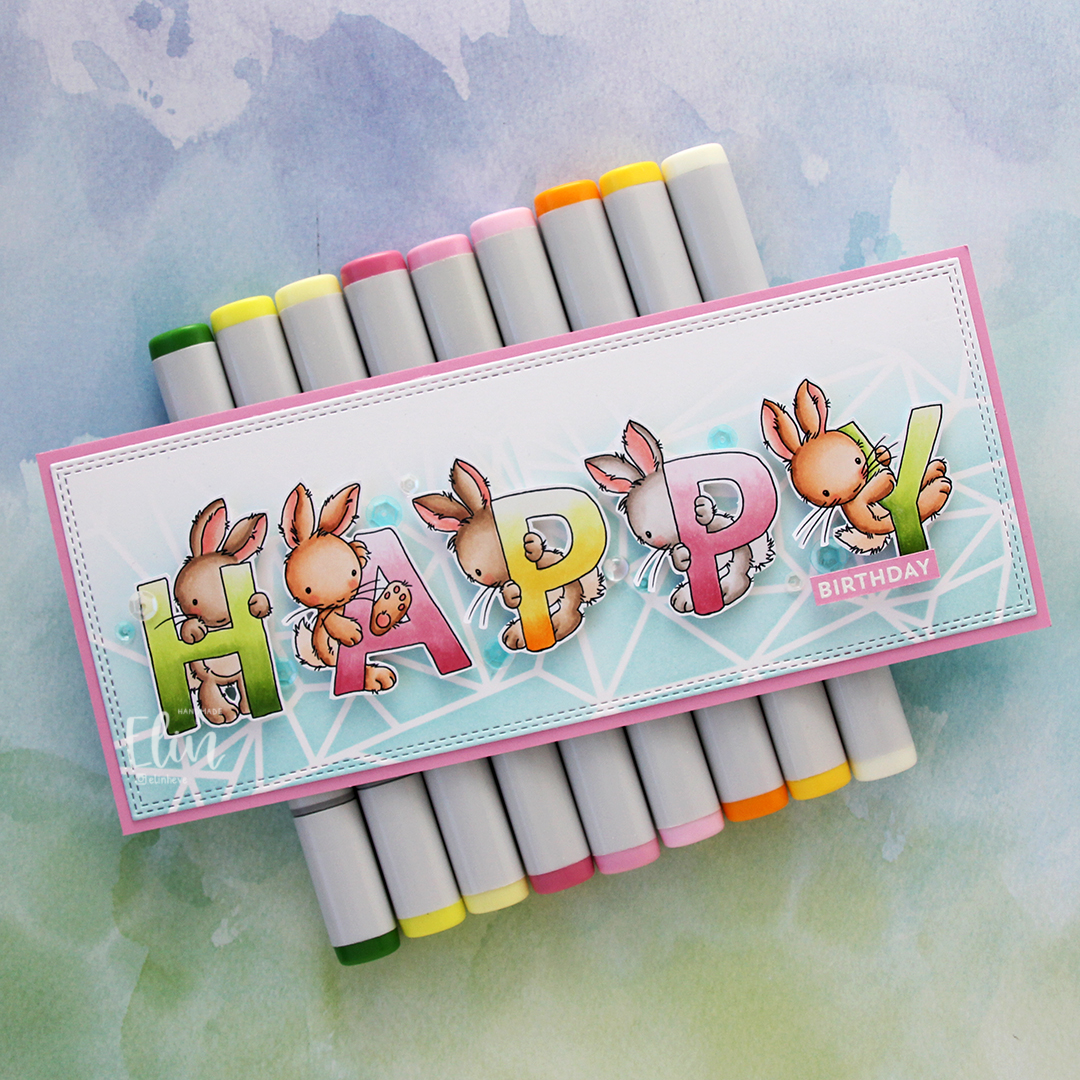 Onto a piece of Stamper’s Select White cardstock from Papertrey Ink, I ink blended Sno Cone ink from My Favorite Things using the Geometric Landscape stencil from Altenew. It’s a 6×6″ stencil, but it was easy to create a longer section with a little bit of masking and moving the stencil. I then diecut the panel using the Slimline Double Stitched Rectangle STAX die set from My Favorite Things and adhered it to a card base made from Cotton Candy cardstock, also from My Favorite Things.
 I popped my colored, fussy cut letters on foam tape in the center of the card, heat embossed a sub sentiment from the Bitty Birthday Wishes stamp set from My Favorite Things and finished off the card with drops and sequins from the Ice Water mix from Little Things from Lucy’s Cards.
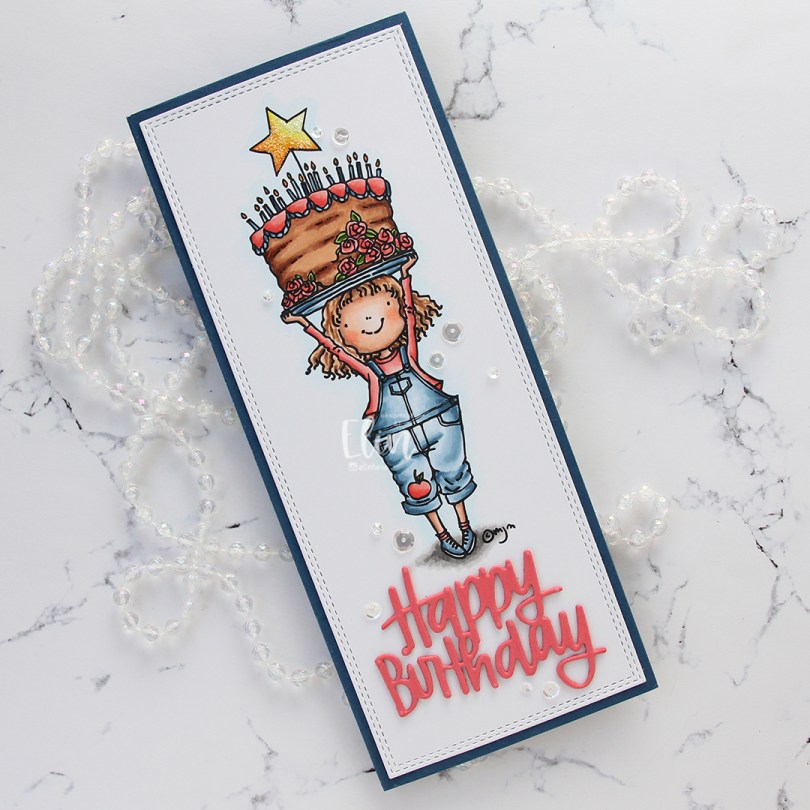
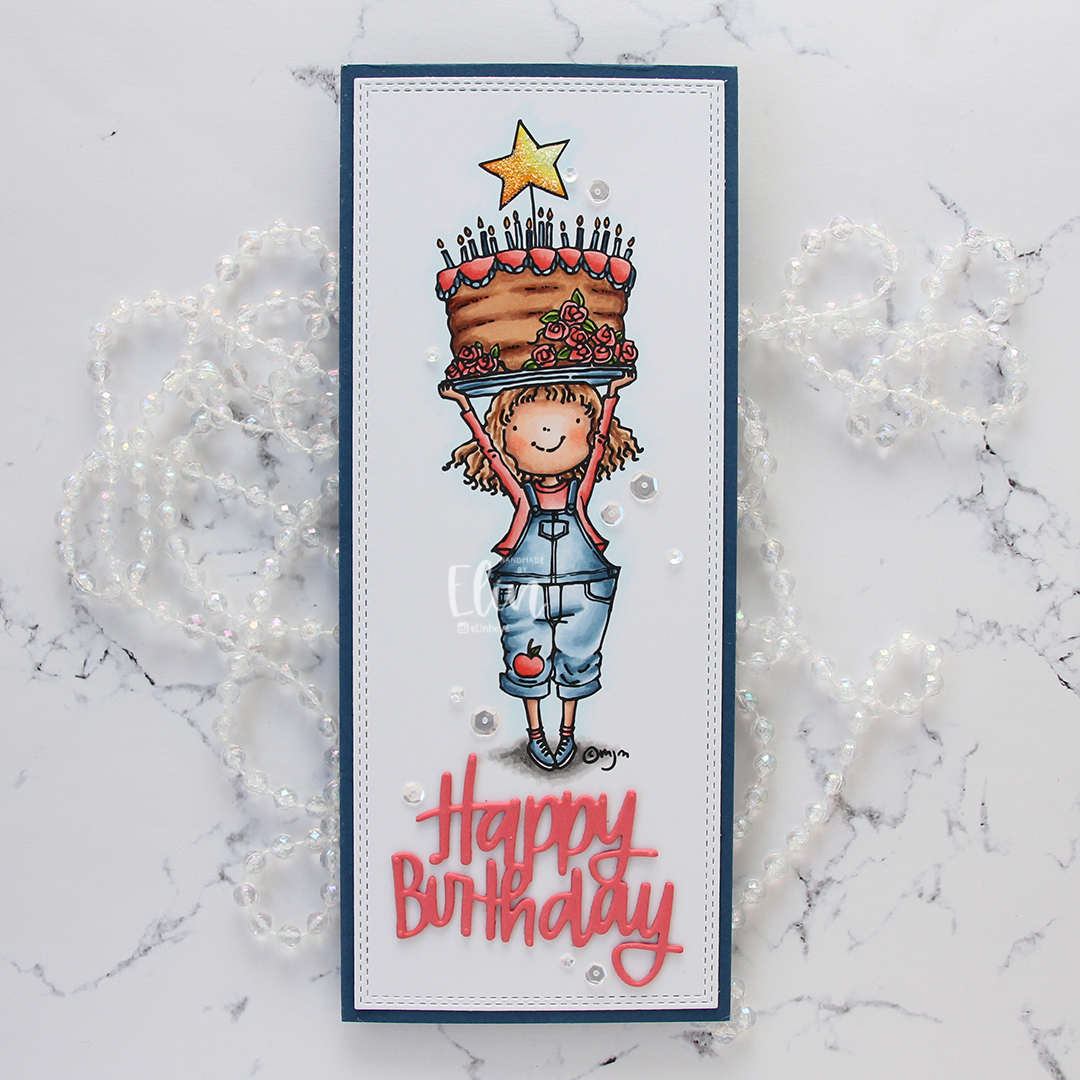 I colored the image with Copics and used the largest die in the Slimline Double Stitched Rectangle STAX die set from My Favorite Things to cut it down to the perfect size panel to go onto a slimline card. I adhered it directly onto a card base I created from Enchanted Evening cardstock from Papertrey Ink.
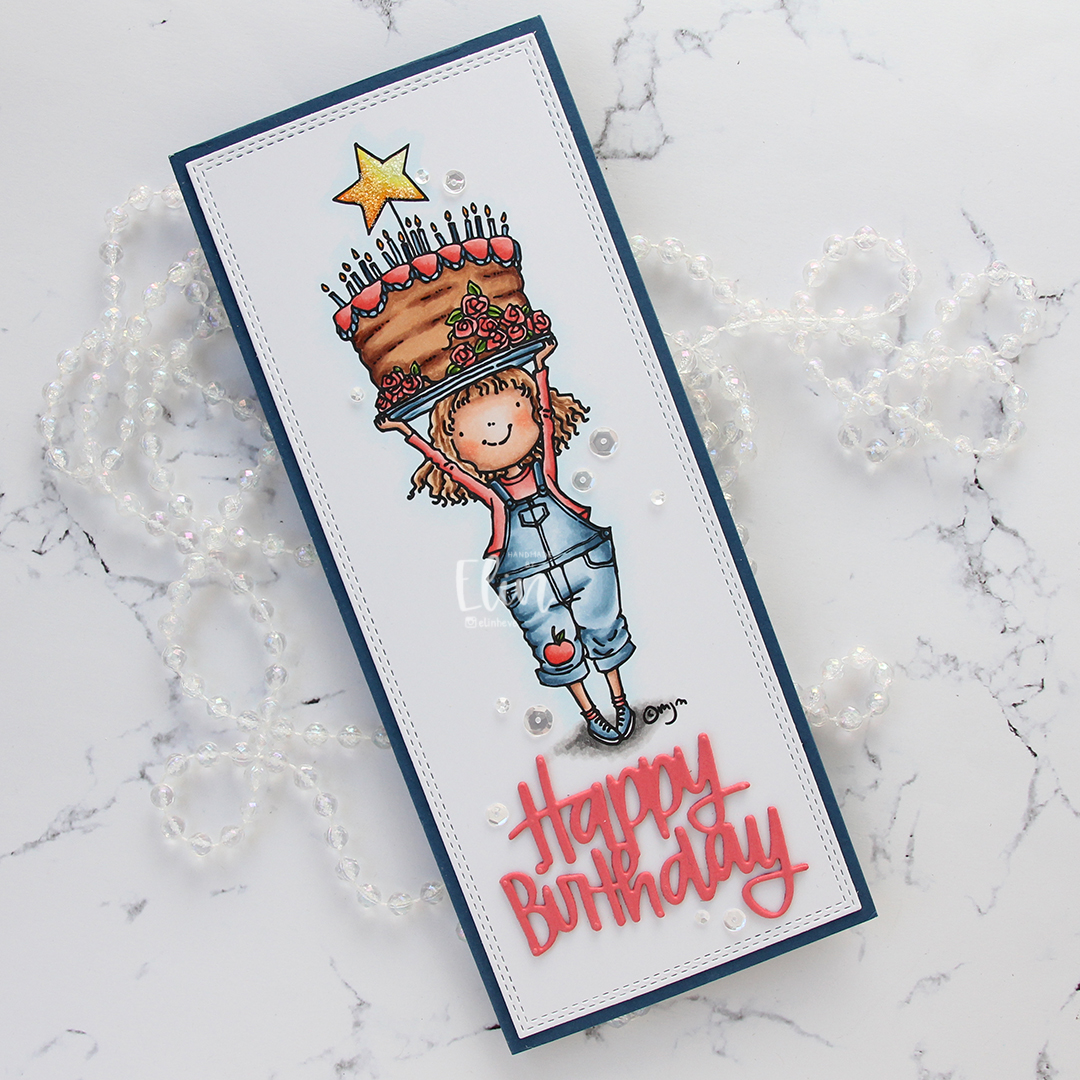 From Berry Sorbet cardstock from Papertrey Ink, I die cut the Happy Birthday Brush Script die from Simon Says Stamp three times and stacked the diecuts for a dimensional look, before adhering them below the image on my card. I added a layer of Frosted Lace Stickles to the star on top of the cake and scattered a few chosen sequins from the Seaglass mix of sequins from Simon Says Stamp to finish the card.
 Lots of Copics for this one.
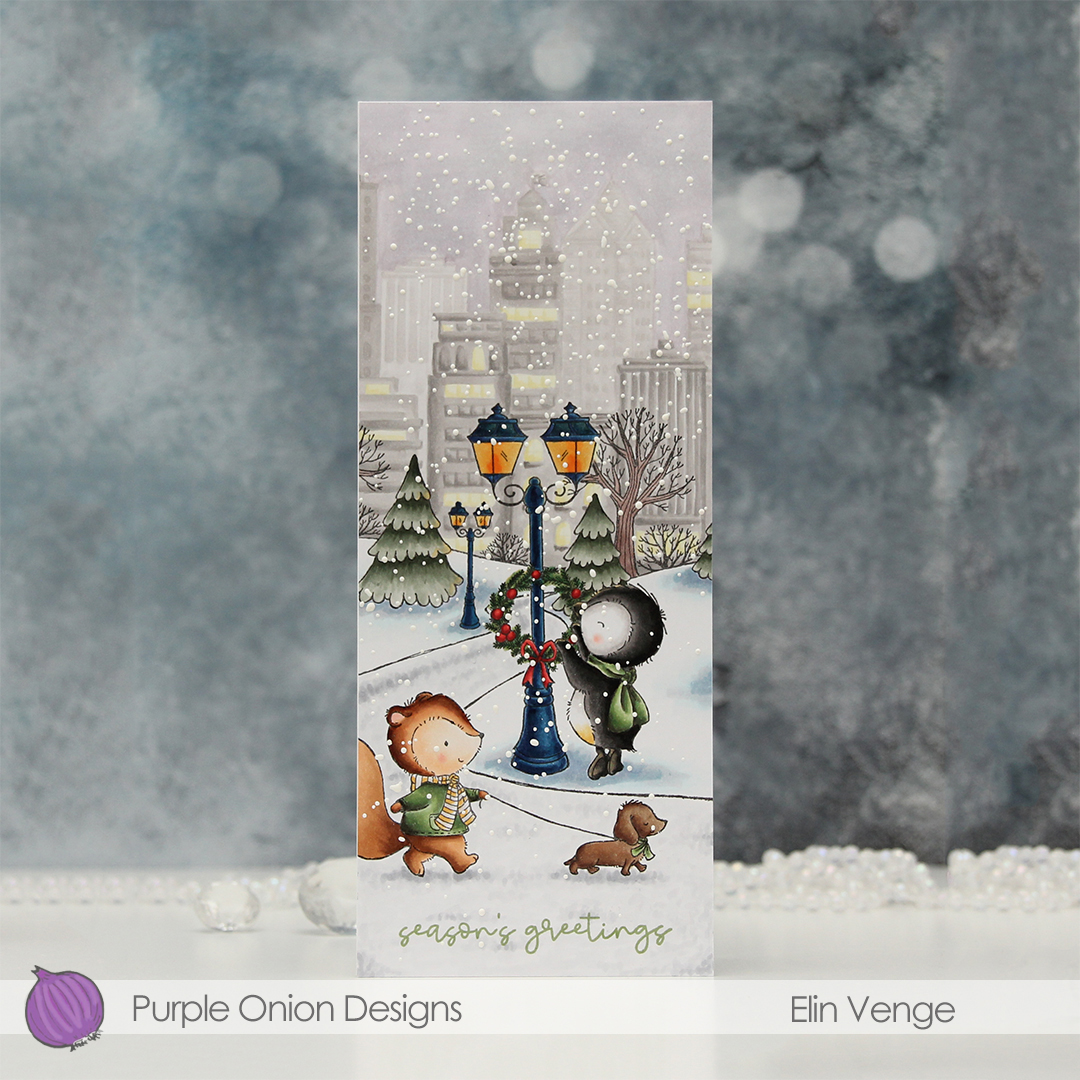
 I’ve made a slimline card this time, with images from a Stamptember collaboration set from Mama Elephant and Simon Says Stamp that I colored up in November 2020. These have been sitting on my desk for a while, and I always planned on creating this window design with them – Get Cracking on Christmas is the perfect opportunity to execute plans you’ve had for a while, but not had time for.
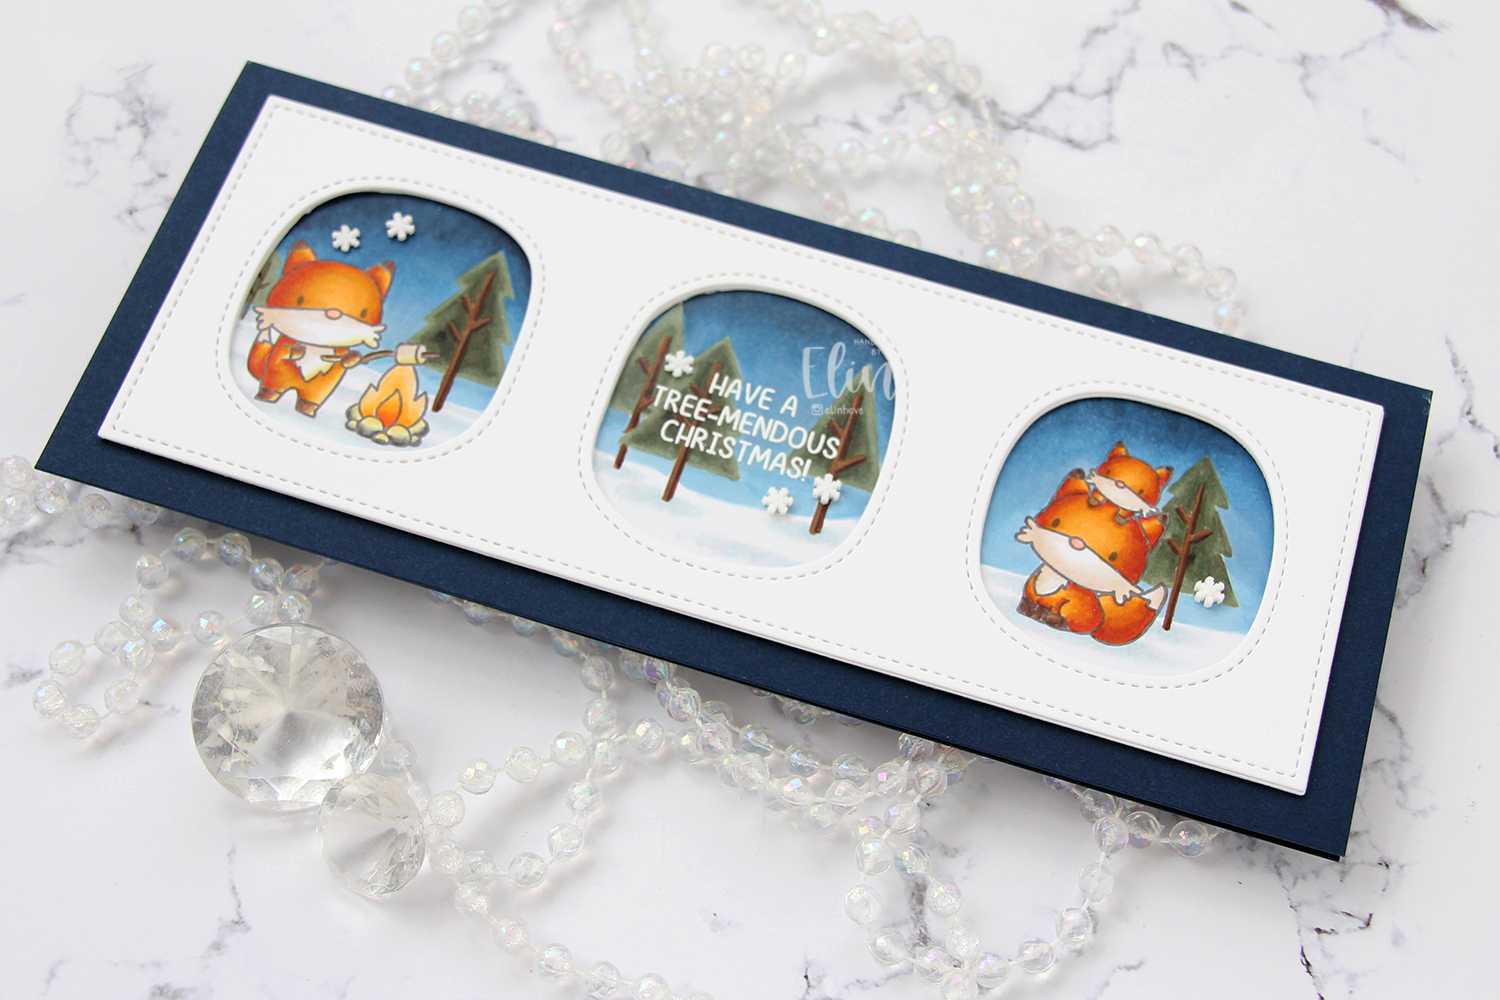

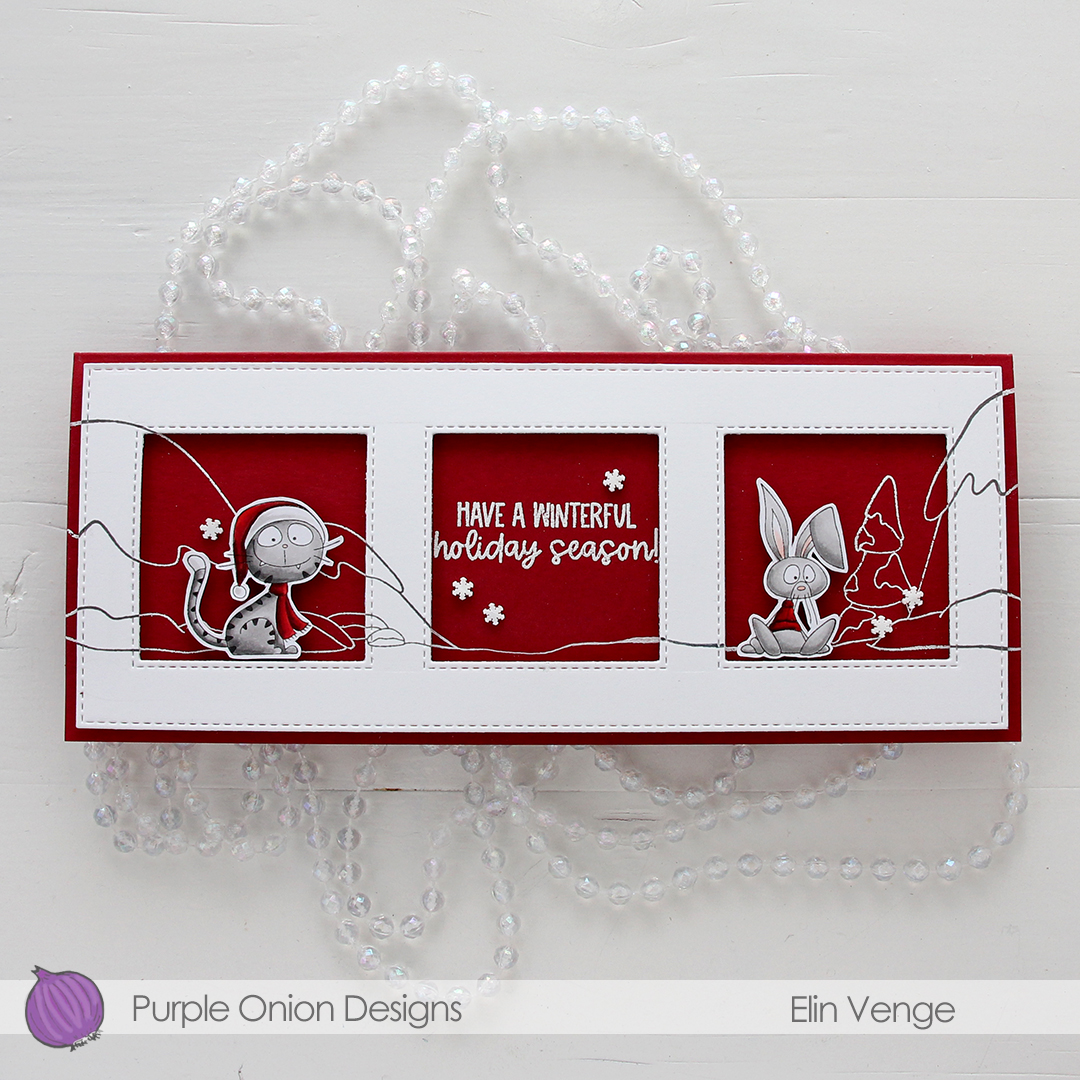 This time, I have a fun slimline card to share featuring
 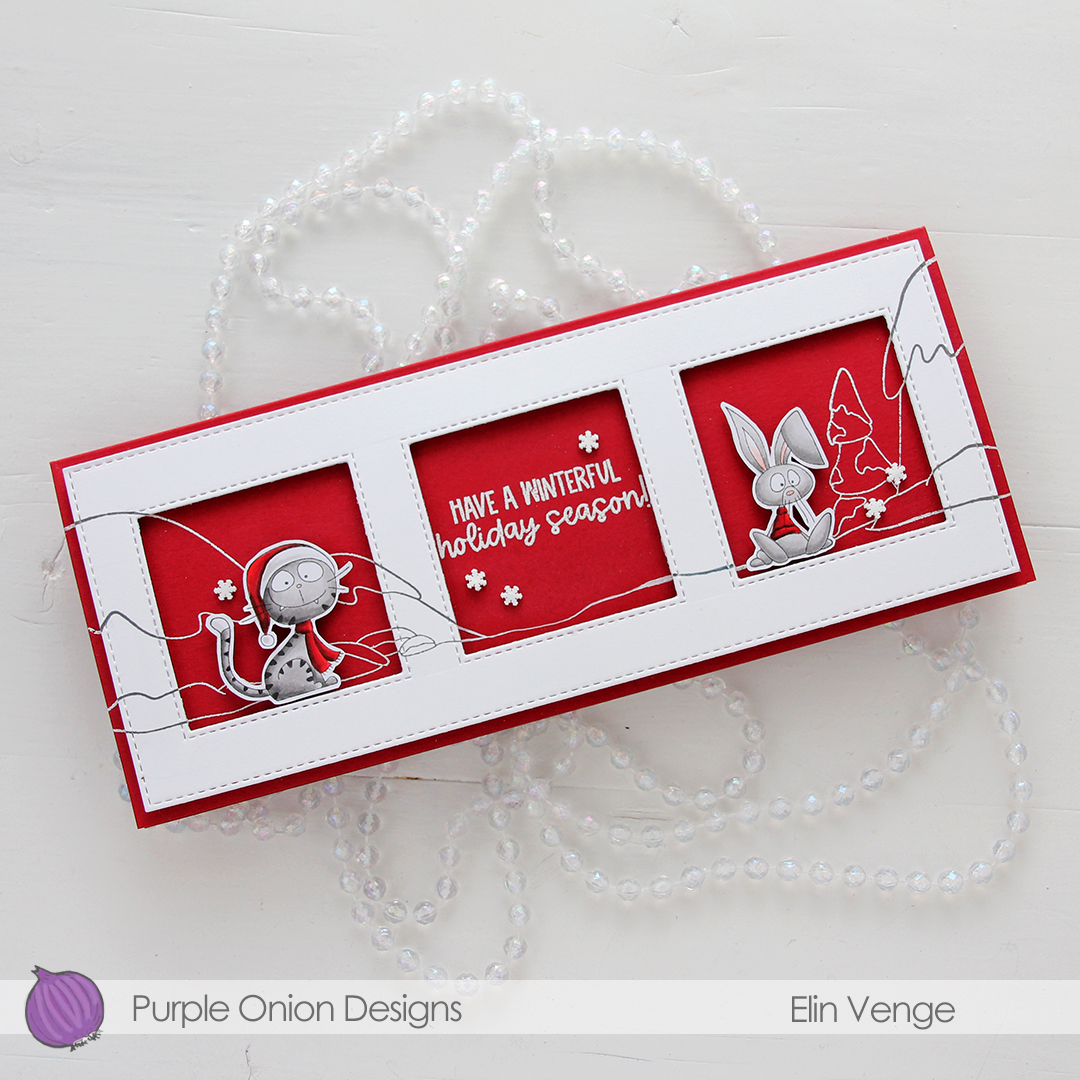 I used a couple of dies from My Favorite Things to create the window openings and the faux stitch edge around the white cardstock. I stamped the
 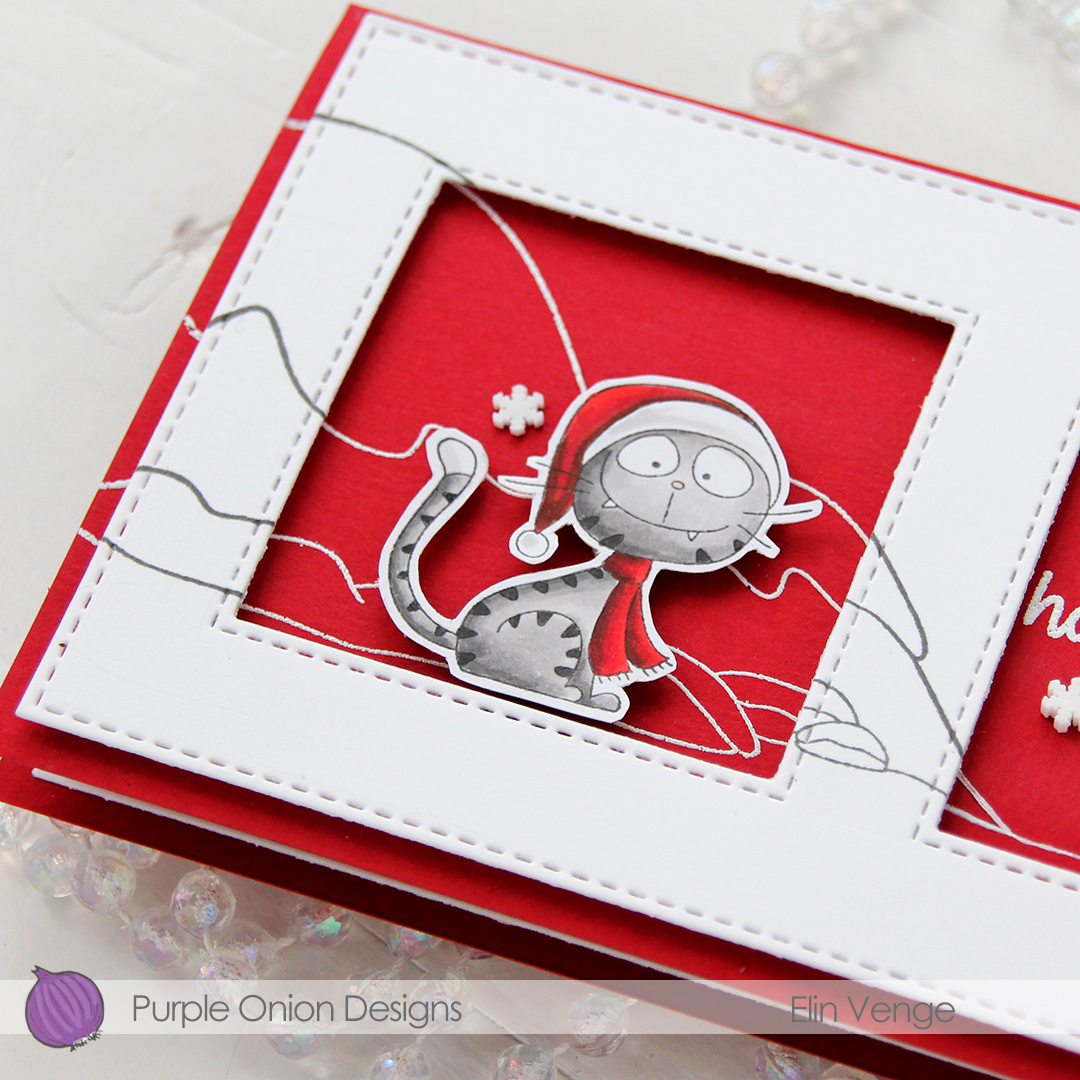 I colored both the images in greys and reds and mounted the white panel with the window openings using foam tape for dimension. This cat is like a grey version of Garfield, it’s too funny.
 Fiona looks like she’s kind of done with Christmas, Shari creates so much personality in each of her critters.
 I kept the card very simple, but did add a few snowdrift sprinkles from Little Things from Lucy’s Cards.