Hi, crafty friends! Is it too early to think about Christmas cards? I know there are lots of people who don’t like creating holiday cards this time of year, and I totally get it. I, myself, am an all year Christmas card maker. My problem for the past couple of years hasn’t been creating the cards, but getting them in the mail. I’ll try to be better this year, we could all use the extra joy that fun mail brings, right? If I want to send cards, I also need to create some, and this Peeking Reindeer from Mo Manning was so cute, I couldn’t resist. It was the November 2025 freebie over on her Patreon.
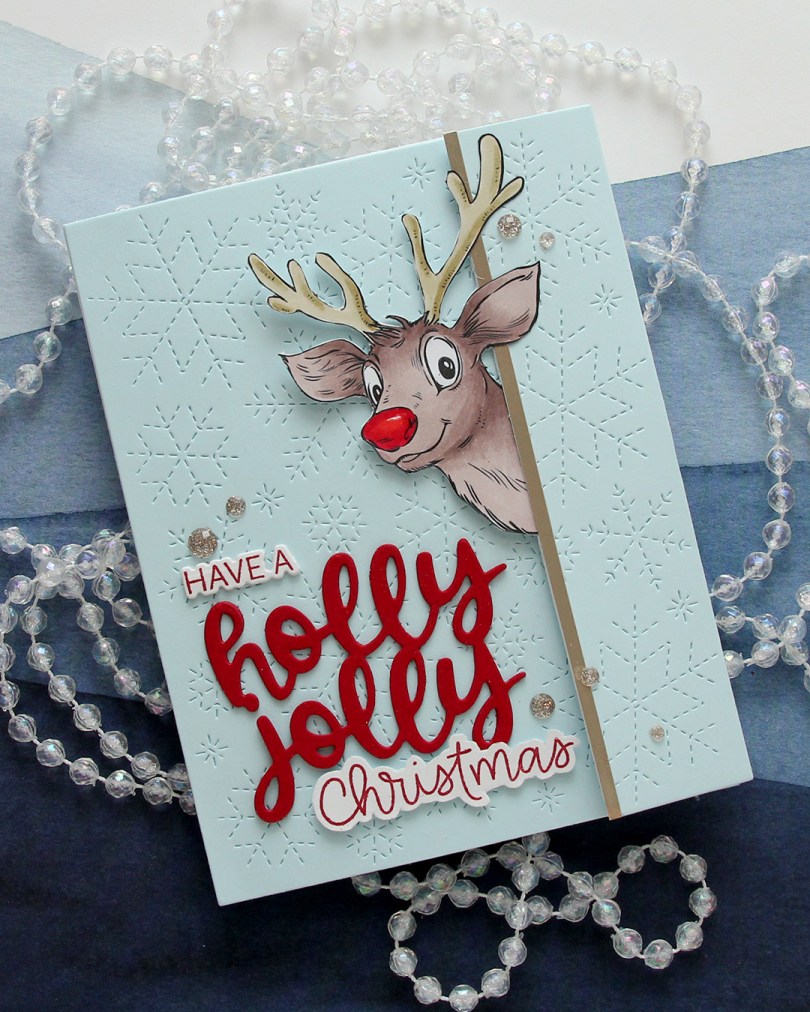
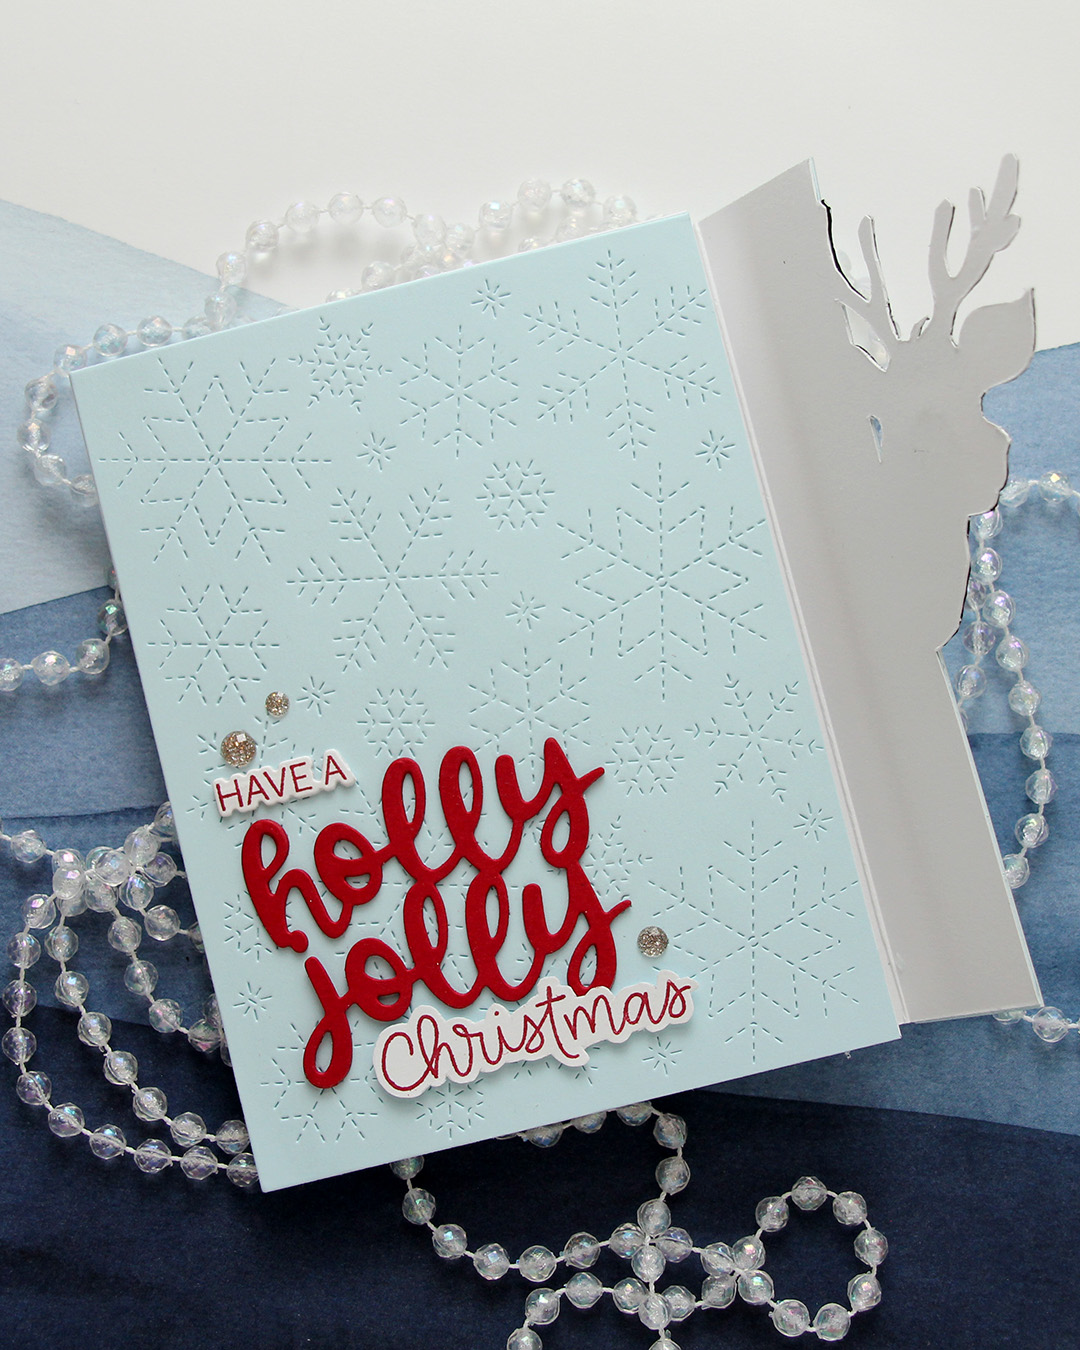
 I created a tri fold card this time, with the reindeer peeking out from one of the folds. I couldn’t resist a red Rudolph nose, even if that makes my card inaccurate in its reindeer portrayal. Only female reindeer have antlers in the winter, so this is technically a female reindeer. It’s not like a red nosed reindeer is all that believable to begin with, so I guess it doesn’t really matter, it’s just a fun little tidbit.
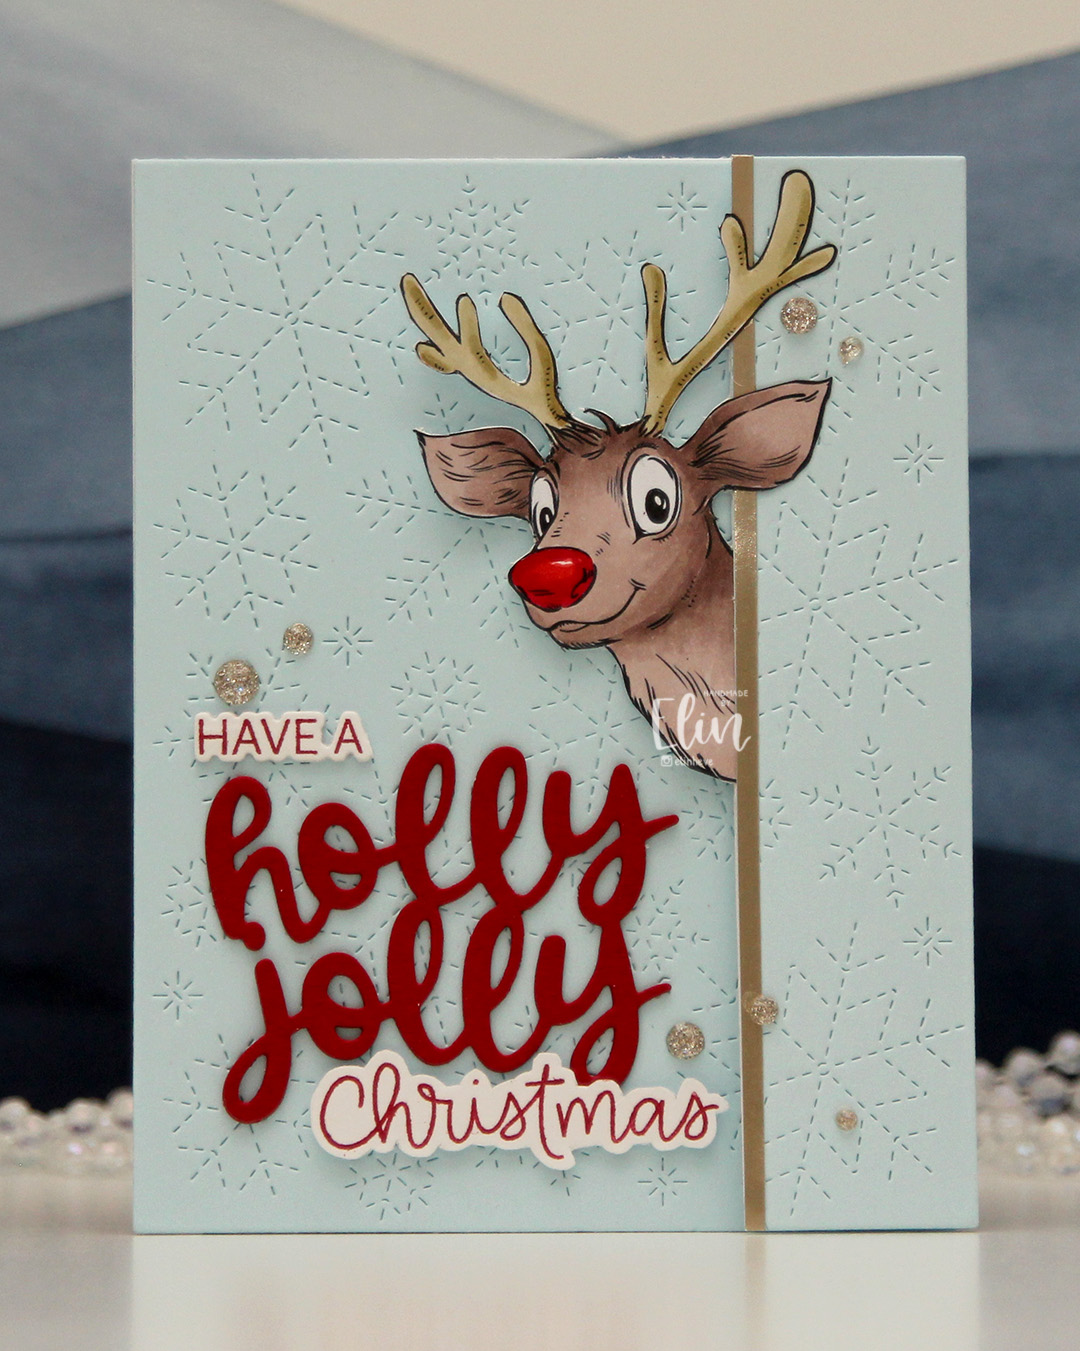
 For the blue background, I used Powder cardstock from Concord & 9th. I used the Stitched Snowflake Backdrop die from Lawn Fawn to create some interest in the background. I die cut the a sentiment from the Jolly Holiday Greetings die set from Concord & 9th using Cranberry cardstock, also from C9. I stacked three layers, stamped part of a sentiment (have a) from the Christmas Wishes stamp set from My Favorite Things and the word Christmas from the Scripty Xmas stamp set from Mama Elephant, both in Cranberry ink. I die cut the have a with the coordinating die and fussy cut around the Christmas (there’s no coordinating die for this set), and put the three parts together to form a complete sentiment.
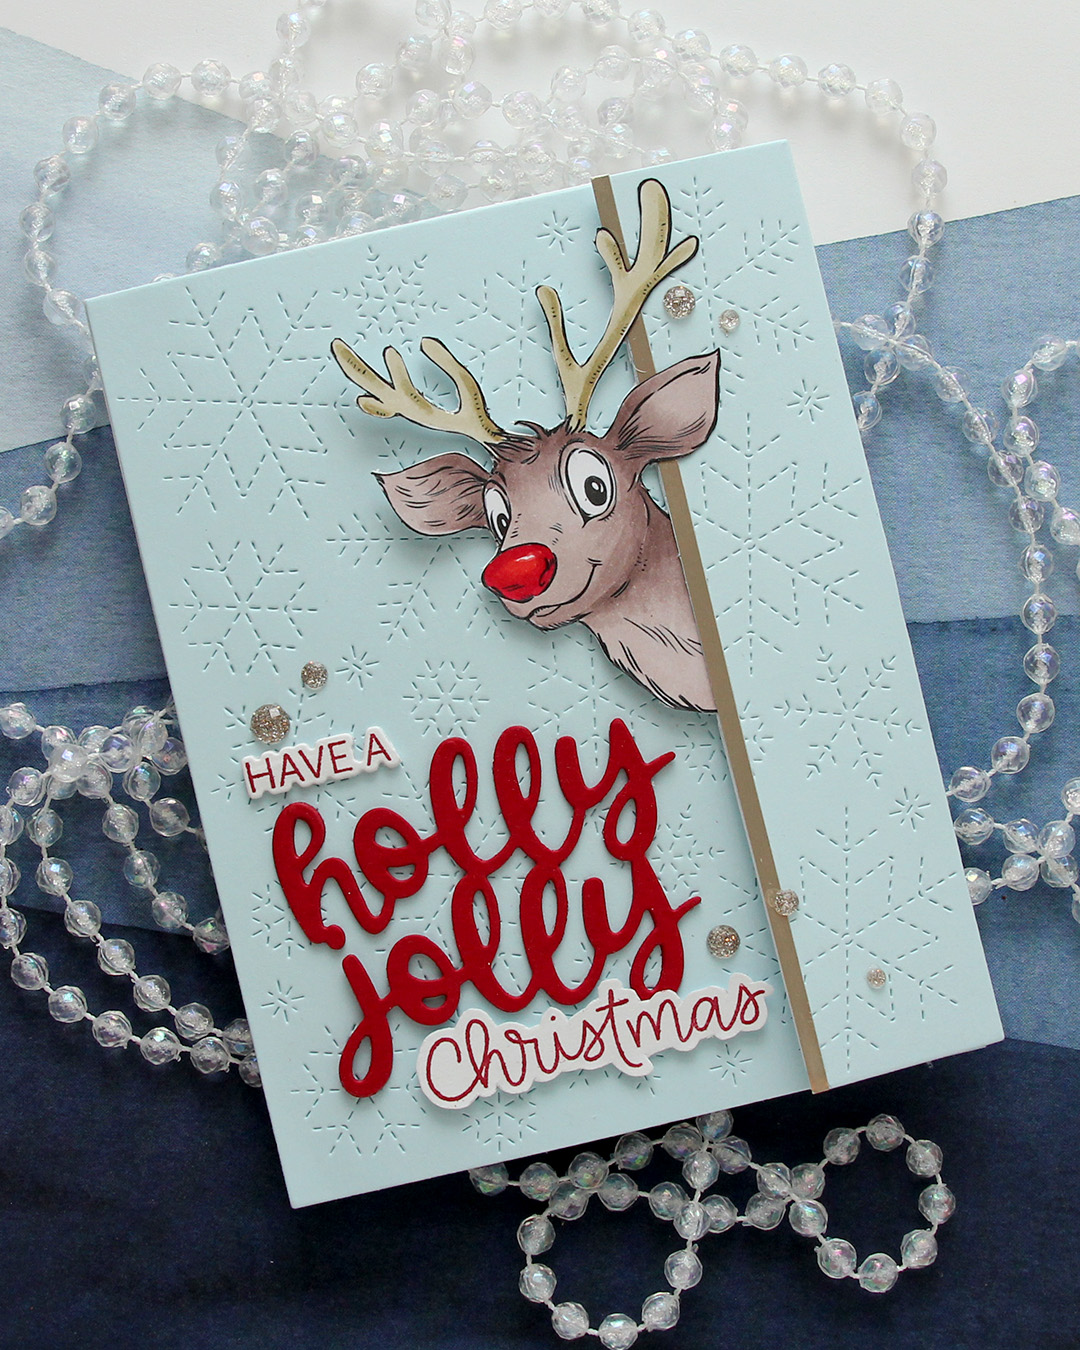
 I added a strip of Champagne cardstock from C9 to the edge where Rudolph (not really Rudolph) is peeking out, to emphasize the edge of the panel that opens. I scattered a few Champagne glitter drops from Pinkfresh Studio for a little bit of embellishment.
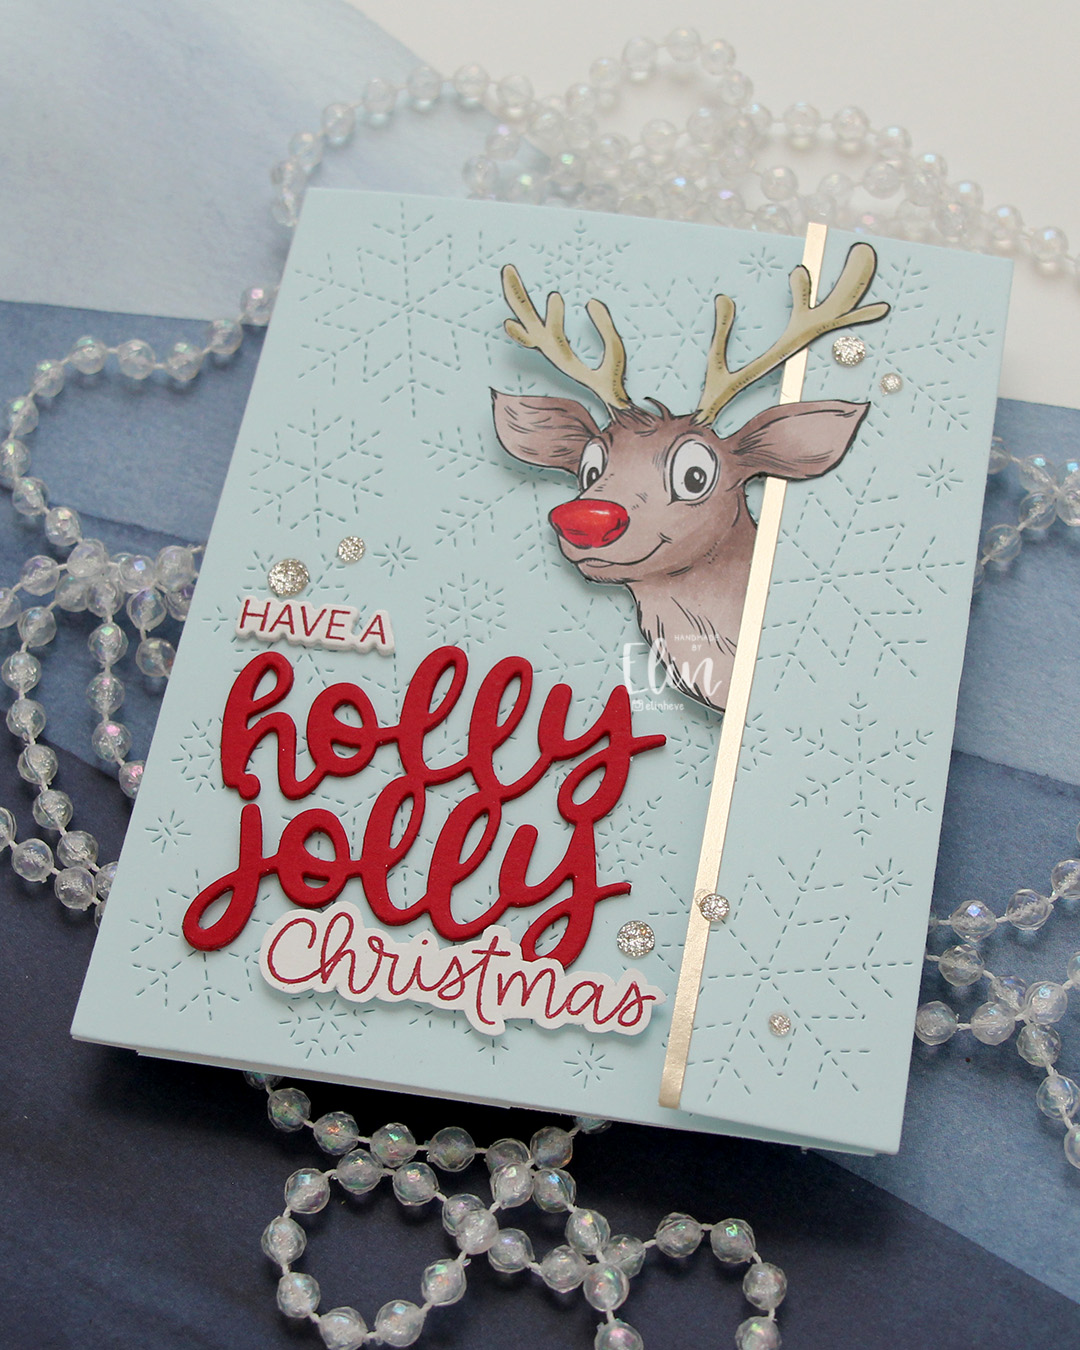
 When you lift the flap with Rudolph (not Rudolph), you’re left with a regular side folding card. I’ve hidden magnets so Rudolph (not Rudolph) keeps the flap closed until it’s time to open the card.
 This one has a super simple color combo, there’s was very little coloring to do on Rudolph (not Rudolph).
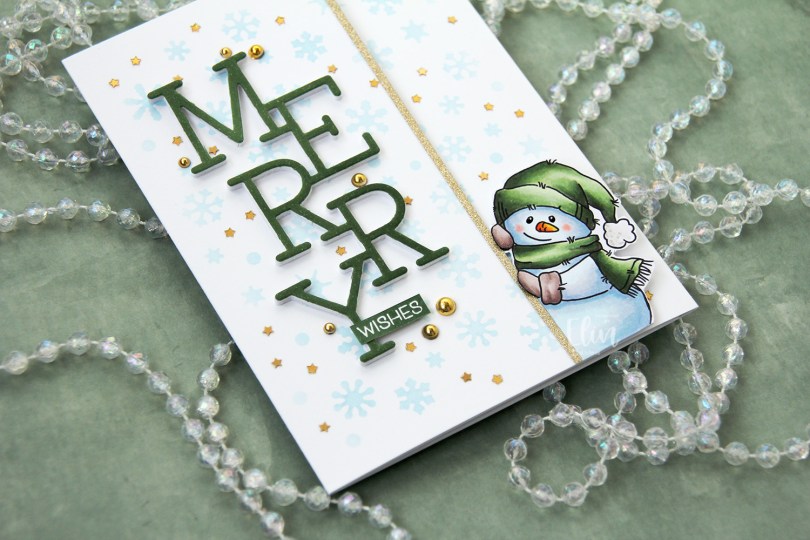

 This is the card closed. I created this by gluing 2 side fold A2 card bases together; the half with the snowman with the fold on the left and the other one with the fold on the right.
 I used the Snowflake Confetti fancy die from Hero Arts to die cut from Gina K Masking Magic to create a stencil to ink blend through. I used Iceberg ink from Altenew to create subtle blue snowflakes in the background on the front of the card to the left of the snowman and also on the other flap.
 I adhered an 1/8″ gold glitter cardstock strip from Kort & Godt for the snowman to hold on to for a defining edge and used the Stacked Merry die from My Favorite Things to die cut 6 times for a stacked look. 5 layers from white cardstock, the top layer from a piece of X-Press It blending card that I colored to match the green on the snowman. I stacked the six layers and adhered them in the center of the left front panel, stamped and white heat embossed a sub sentiment from the
  I embellished with a combination of gold pearls around the sentiment and tiny confetti stars all across the background. Both are from the Vanilla Kiss mix from Little Things from Lucy’s Cards. I also added a bit of black glaze pen to the eyes of the snowman. It adds a tiny bit of dimension and some shine. Once dry, I went over with a dot of white, using a Gelly Roll 05.
 On the inside flap, behind the snowman, I stamped another sentiment from the Christmas Greetings stamp set from Lili of the Valley, this time using Jalapeño Popper ink from My Favorite Things.
 Simple color palette for this one. Lots of colors for the snow, though, I can’t seem to help it.
 I colored my scene with Copics on X-Press It cardstock and fussy cut right up against the black lines. This image has very simple outlines, making fussy cutting a cinch.
 I covered the entire colored panel with sheer sparkle craft spray from Imagine, it adds so much sparkle, which unfortunately is hard to capture in photos. It’s there in real life, though, trust me. I glued my colored piece onto a thicker white cardstock, both for a bit of stability and to hide the back of the colored panel. Copics bleed through to the back (you want that, it’s actually a sign that you’re using a good cardstock for Copic coloring), and I usually add my panels to card bases, but this one was different. I scored the white cardstock at the bottom and glued the back flap to the back bottom of an A2 card base I created from Lovely Lady cardstock from Papertrey Ink. With hidden magnets between the layers of the card, it stays shut and doesn’t fall open.
 You can see some of the shimmer in this photo, a couple of big droplets fell on the mushroom and the rainbow. I added pearls from the Igloo mix from Little Things from Lucy’s Cards for the mushroom, and used a black glaze pen from Sakura to make the eyes stand out.
 Lots of Copics for this one.
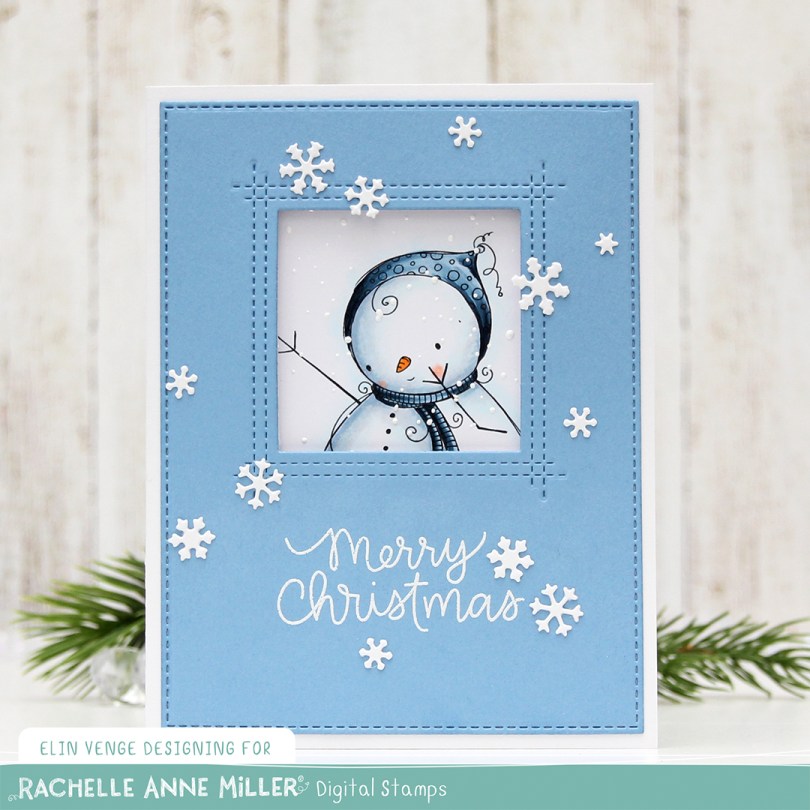
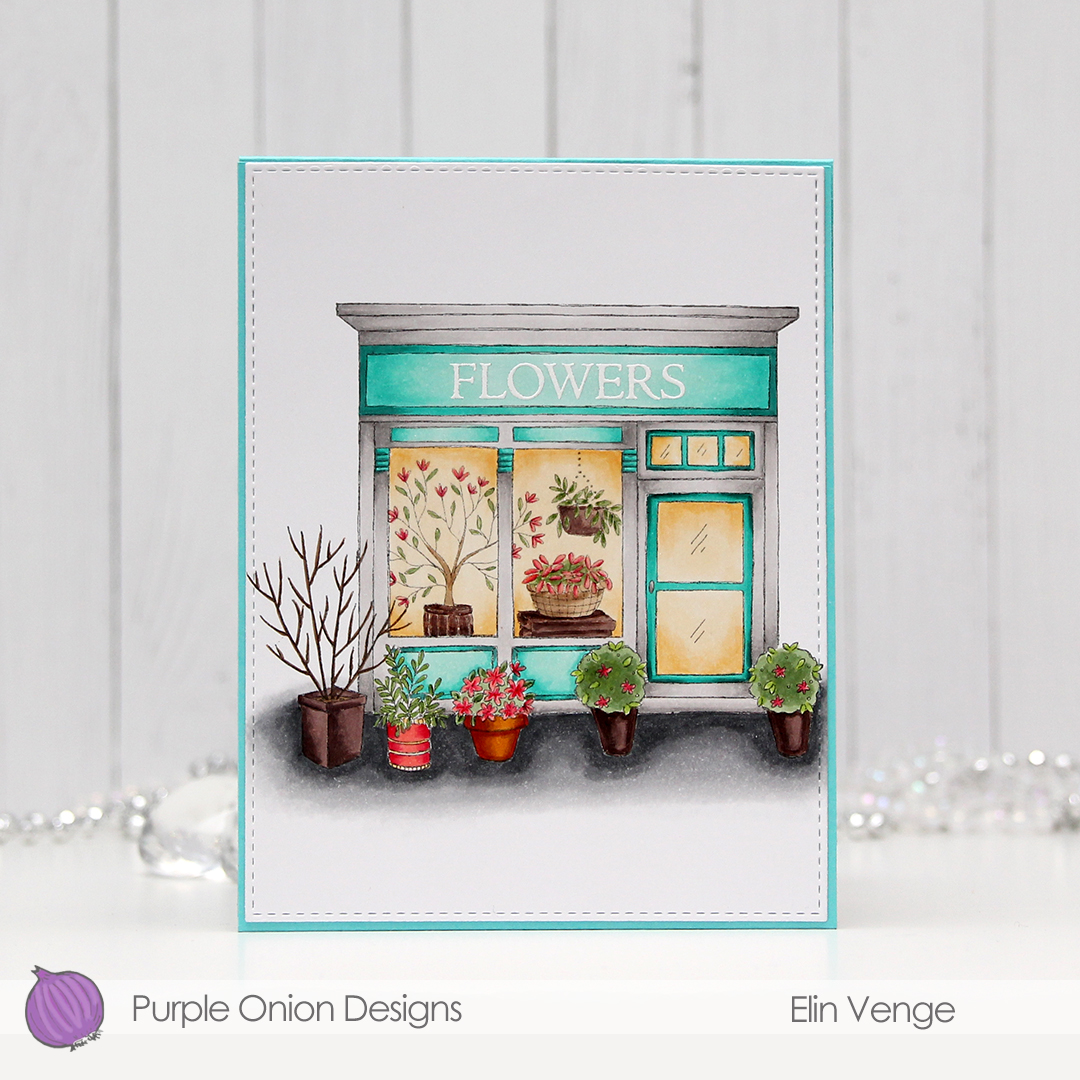
 This cute image is called
  I actually turned this into a trifold card. I used the largest of the A2 Stitched Rectangles STAX 2 dies from My Favorite Things, as well as the Square Peek-a-Boo Window die to die cut from this panel of Lazy Day cardstock, also from My Favorite Things.
 When you open the card, the rest of the image is revealed, and that cute snowman isn’t alone. He has a little friend giving him a present. Below the image I stamped a sentiment from the Holiday Messages stamp set from Mama Elephant using Lazy Day ink from My Favorite Things. This panel is also die cut using that die from the Stitched Rectangles STAX set from MFT. I love these faux stitch rectangle dies, they’re my most used dies by far. I sprinkled on chunky white embossing enamel from Stampendous and heated the panel from the back to melt the granules before adhering it to my card. This opens up to reveal ample space to write a personal message to the recipient.


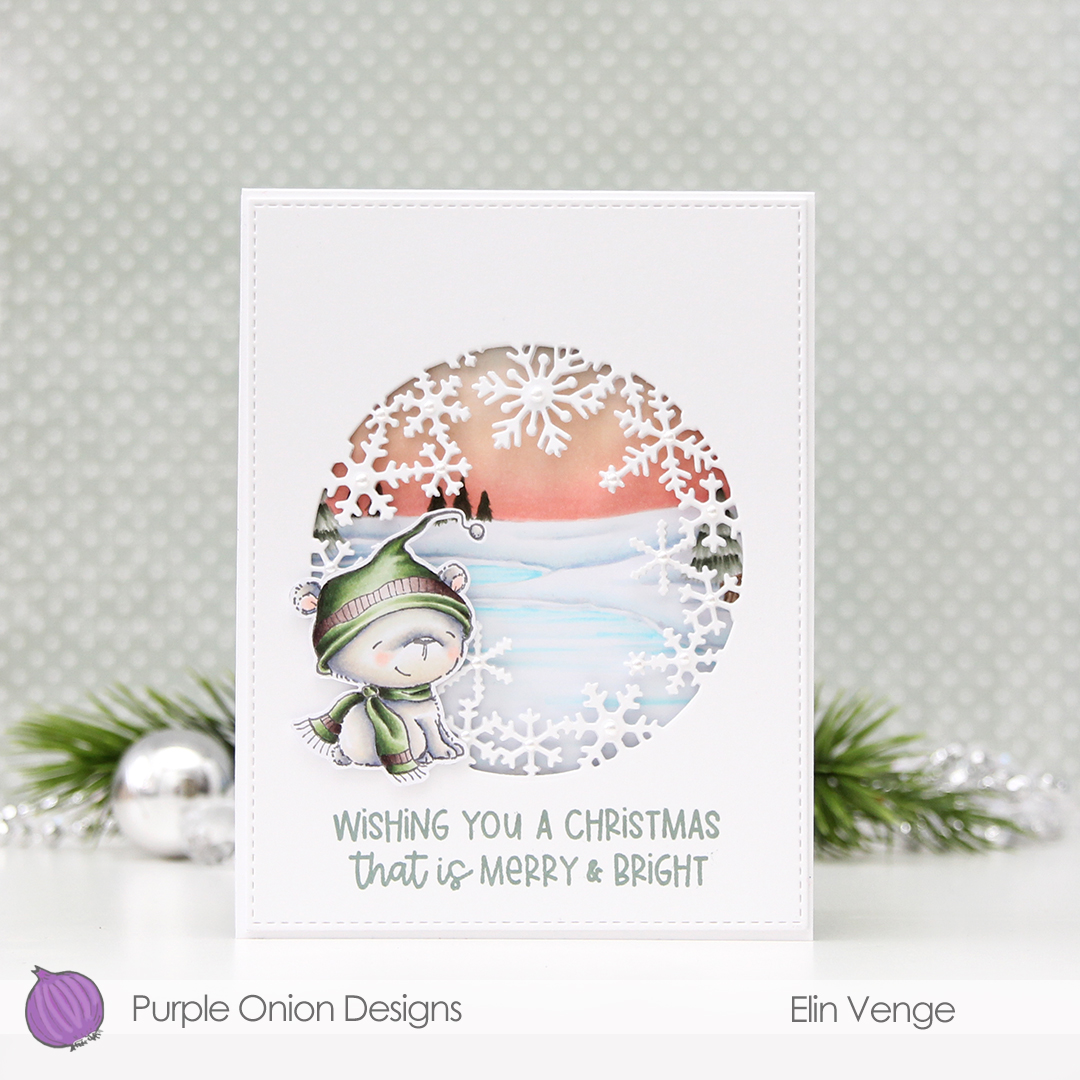 I started by coloring the polar bear (
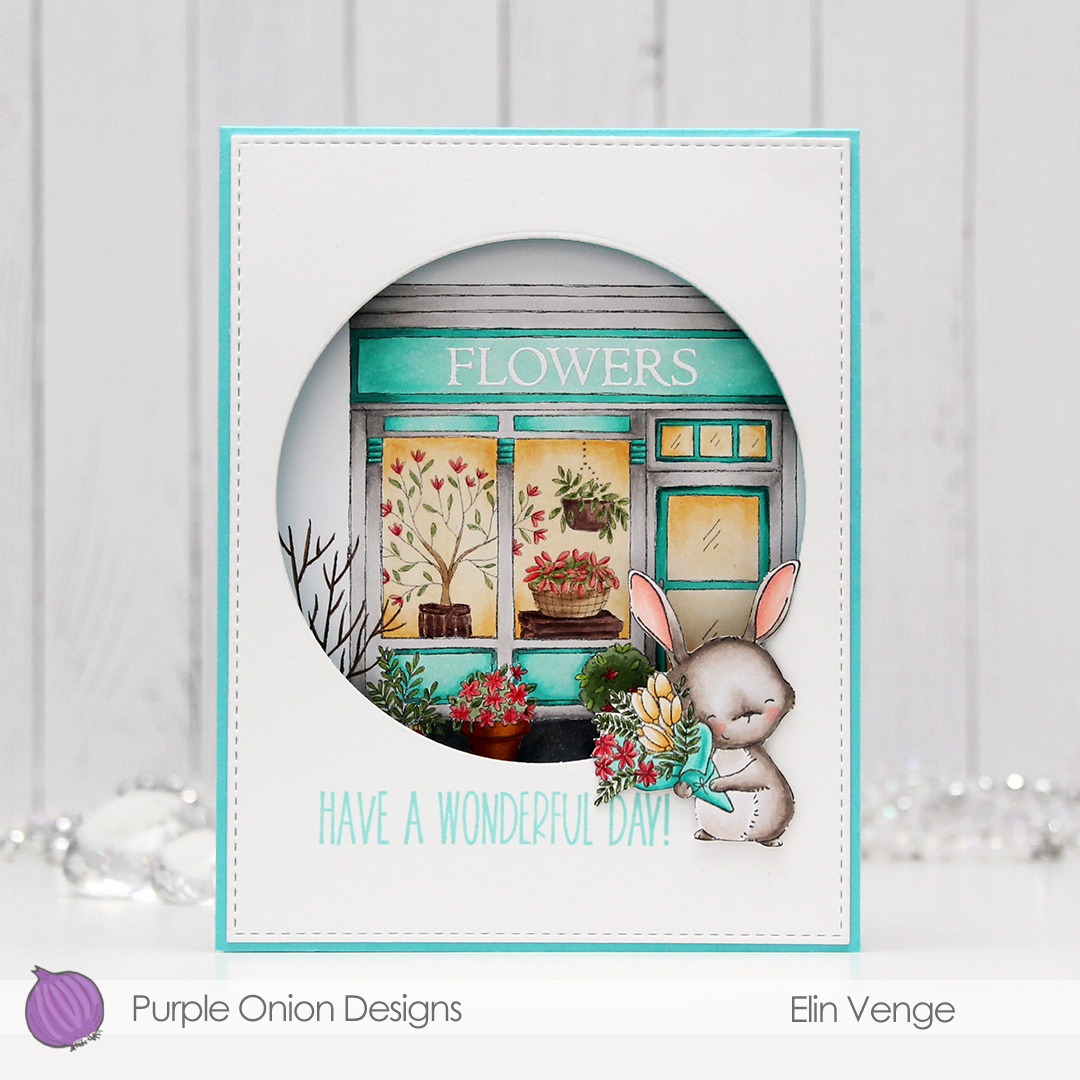
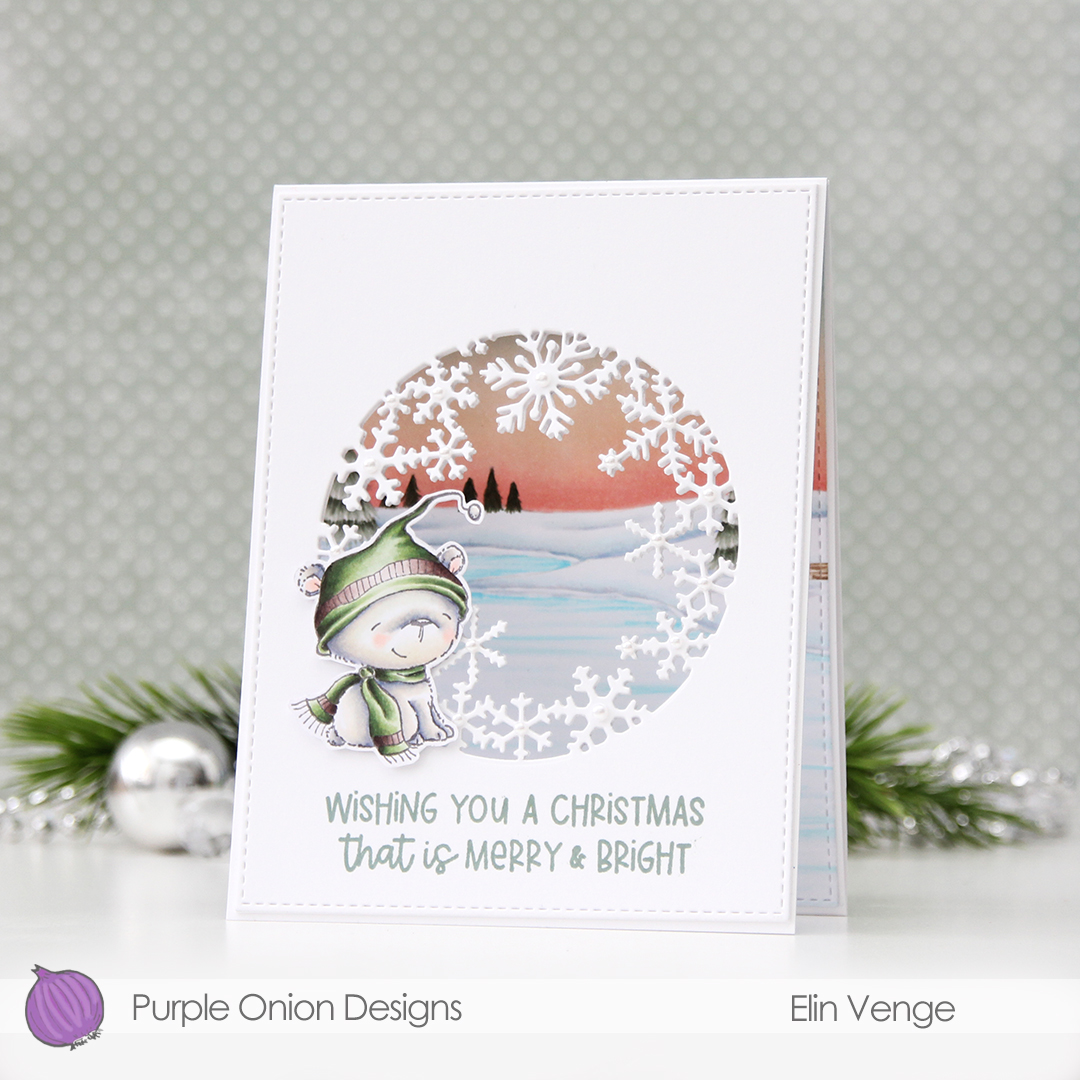 I love the snowflake circle die from Hero Arts and have used it many times before. I die cut a window into the center of the front of my card base, and at first thought that would be it. Once it morphed into a trifold, though, it was so back heavy that I needed an additional two die cut windows on top of the card base for some strength and stability. I used the largest of the A2 Stitched Rectangles from My Favorite Things to create a nice finished edge to the top layer.
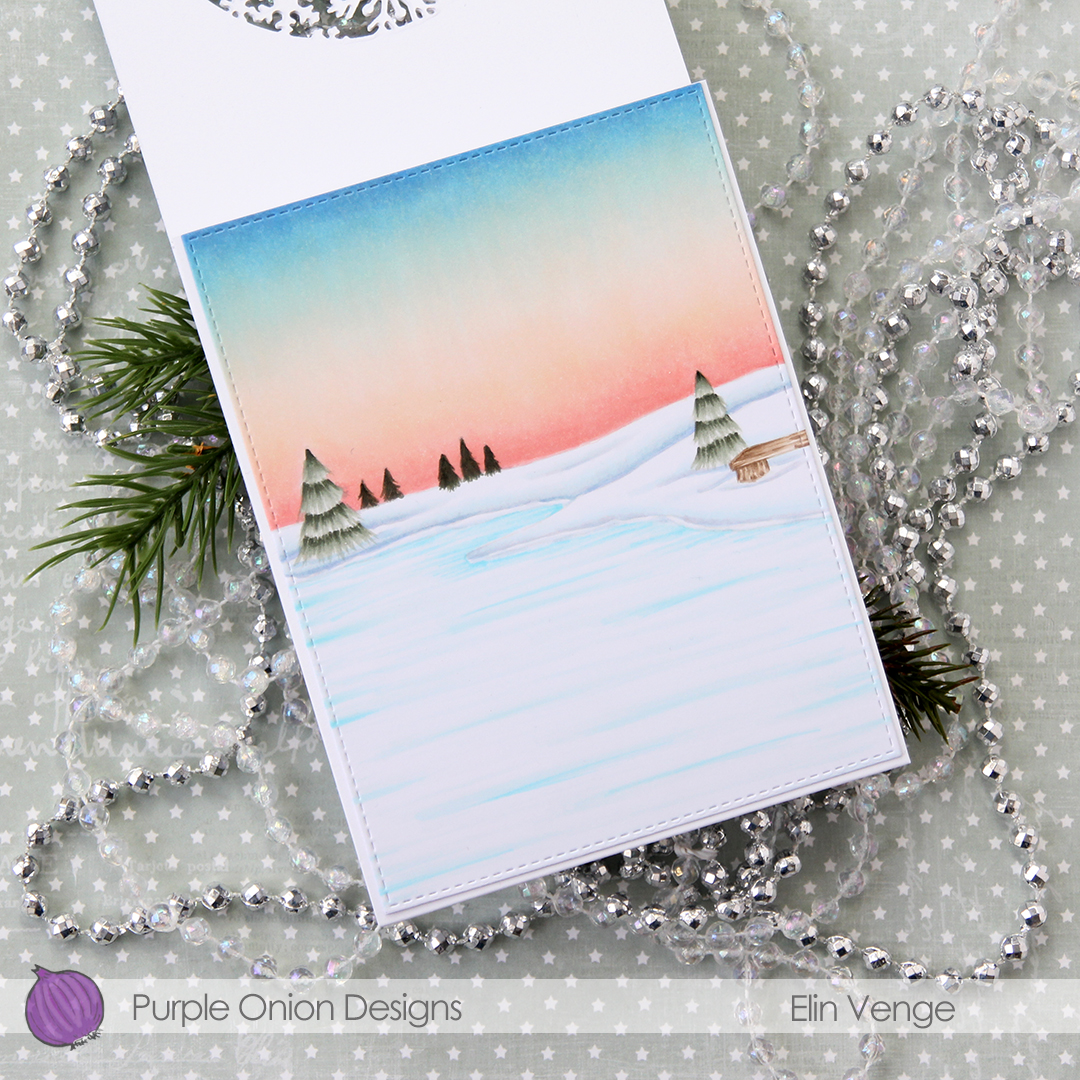 For the inside panel that you can see from the front, I stamped the
 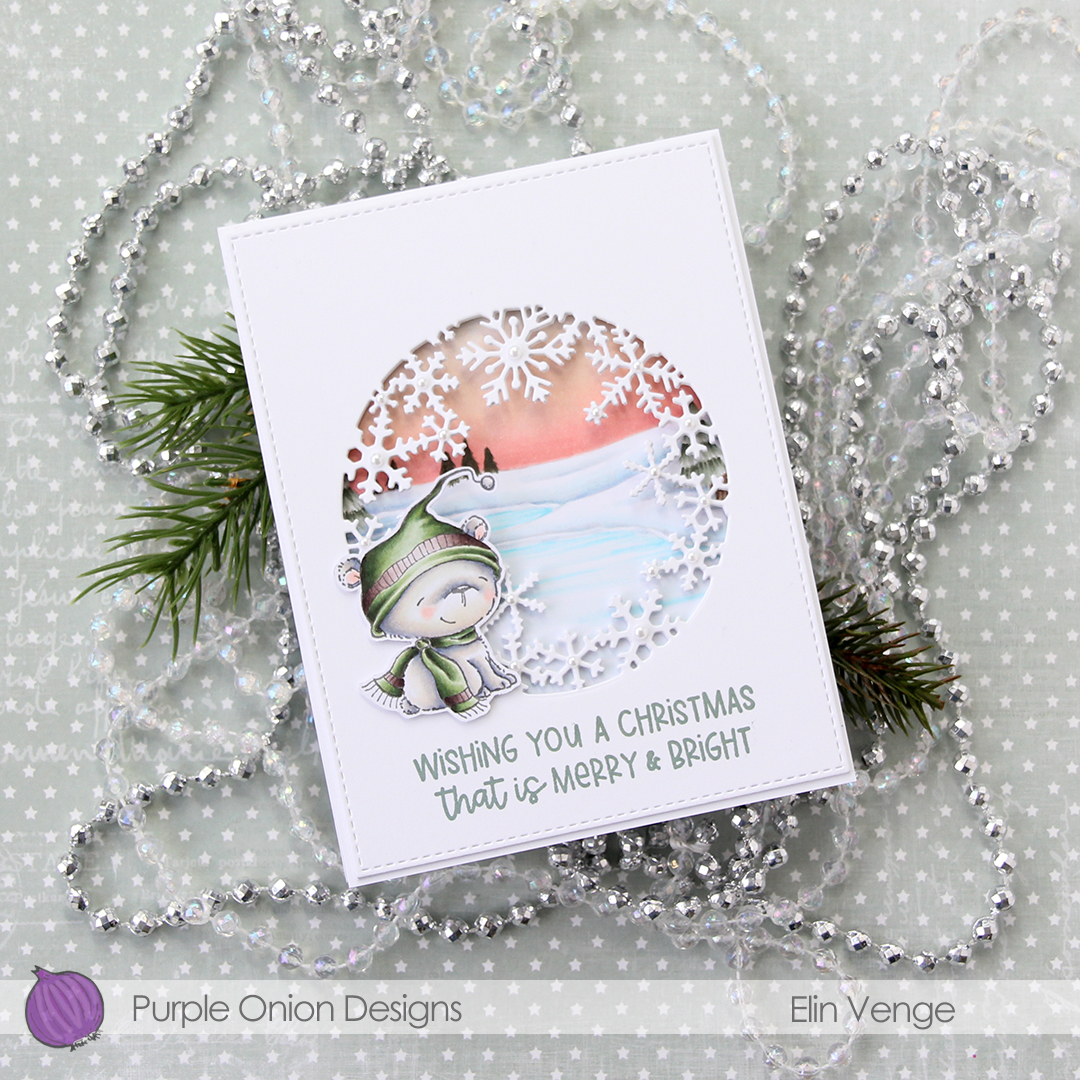 I stamped a sentiment from the
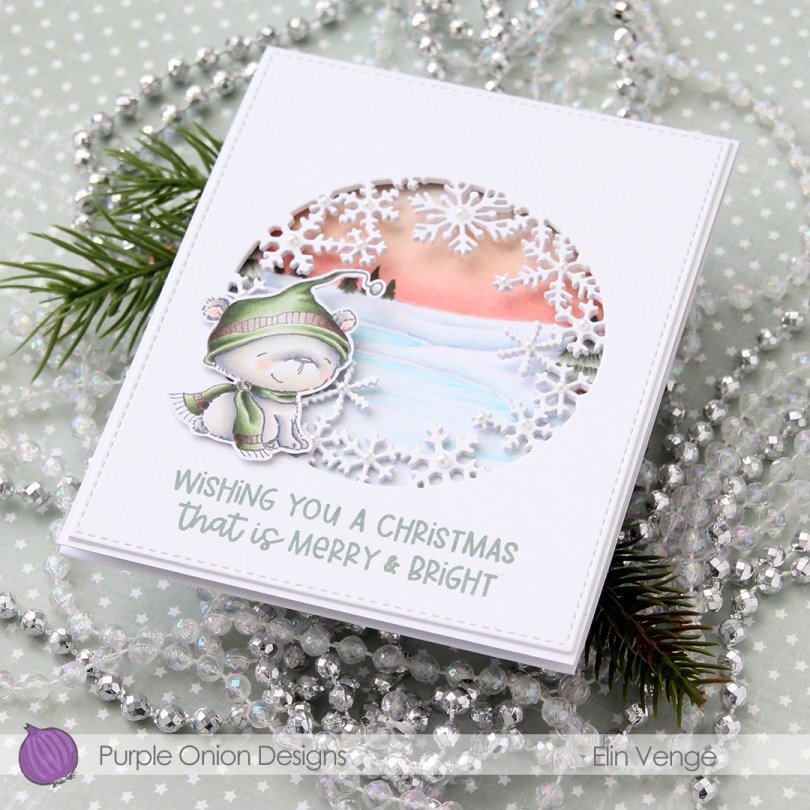
 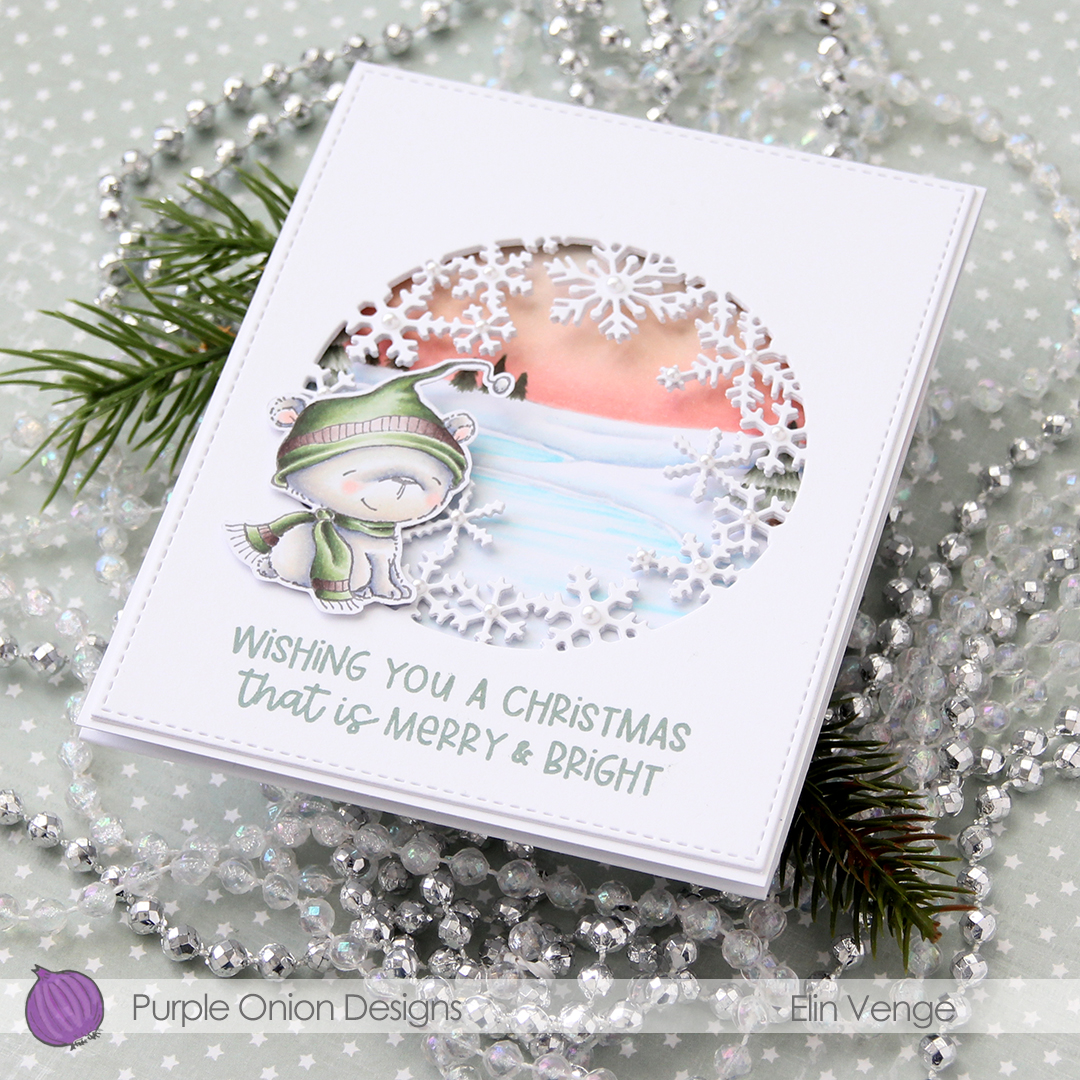 In this photo it’s pretty evident that the three layers of panels with die cut windows add a nice bit of dimension, as well as stability to what would otherwise be a pretty floppy card front, since the window is so big. I use 110 lb white card stock (Stamper’s Select White from Papertrey Ink), which is a nice, sturdy card stock, but with that big of a window, the only thing that will work is using several layers.
 I added white pearls from Kort & Godt to the center of the snowflakes. 3 mm pearls for the largest snowflakes, 2.5 mm pearls for all the others.
 Lots and lots of Copics for this one. I used 20 markers to color just the bear, 10 for his fur alone, which is a little bit crazy.
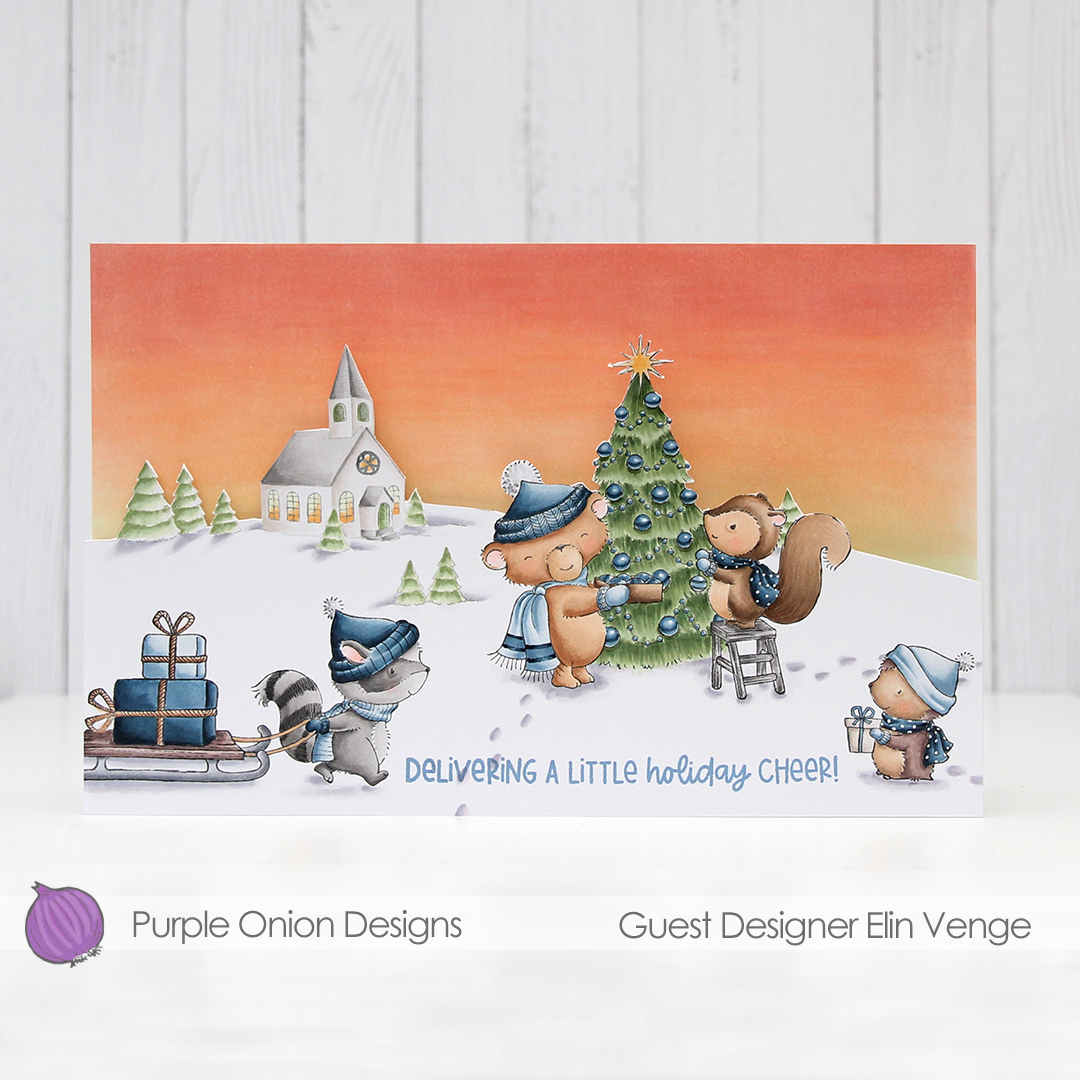 I wanted to create a scene with a couple of the cute critters (
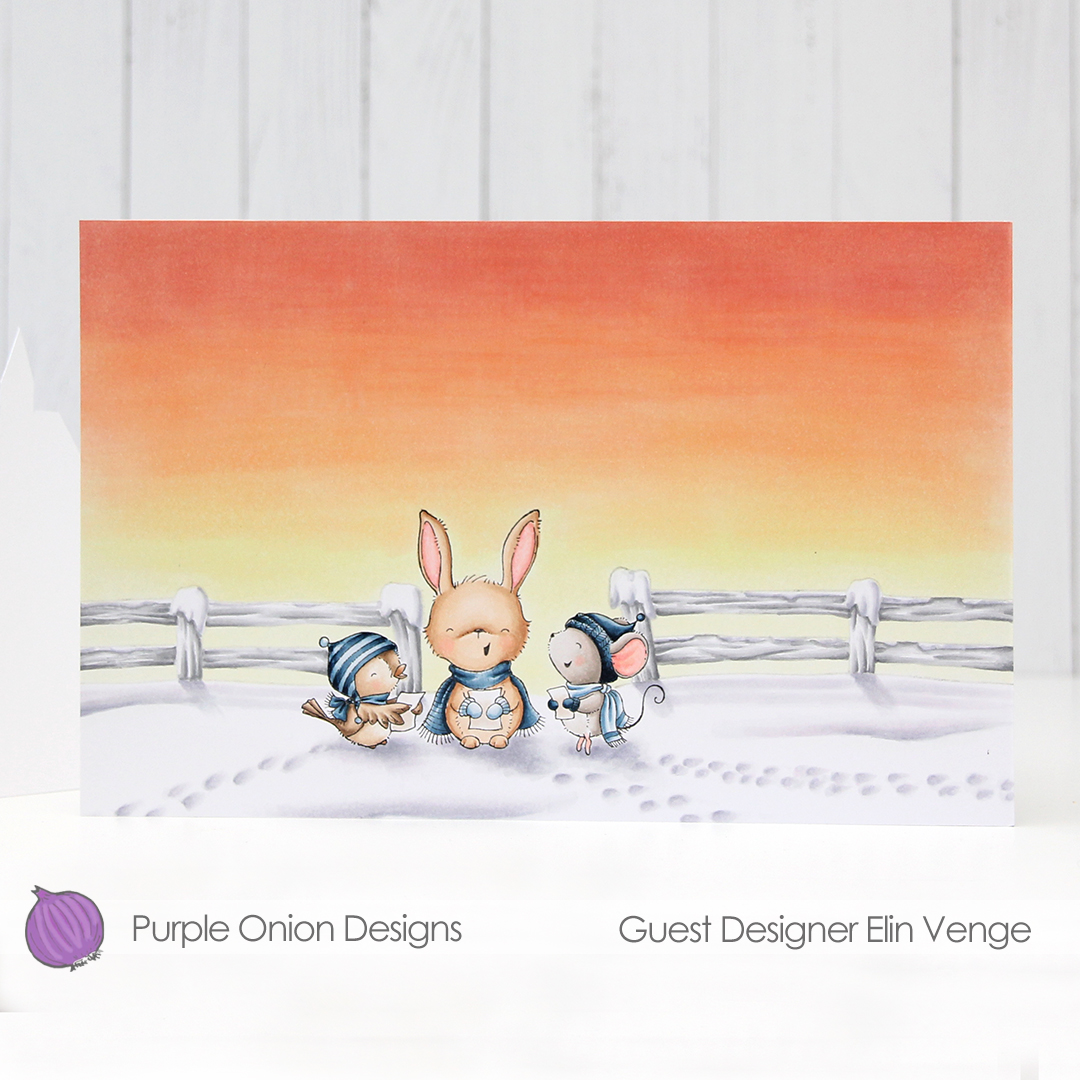 When you open the card, the sky’s still there, but below it are the
  I also stamped a sentiment from the new
 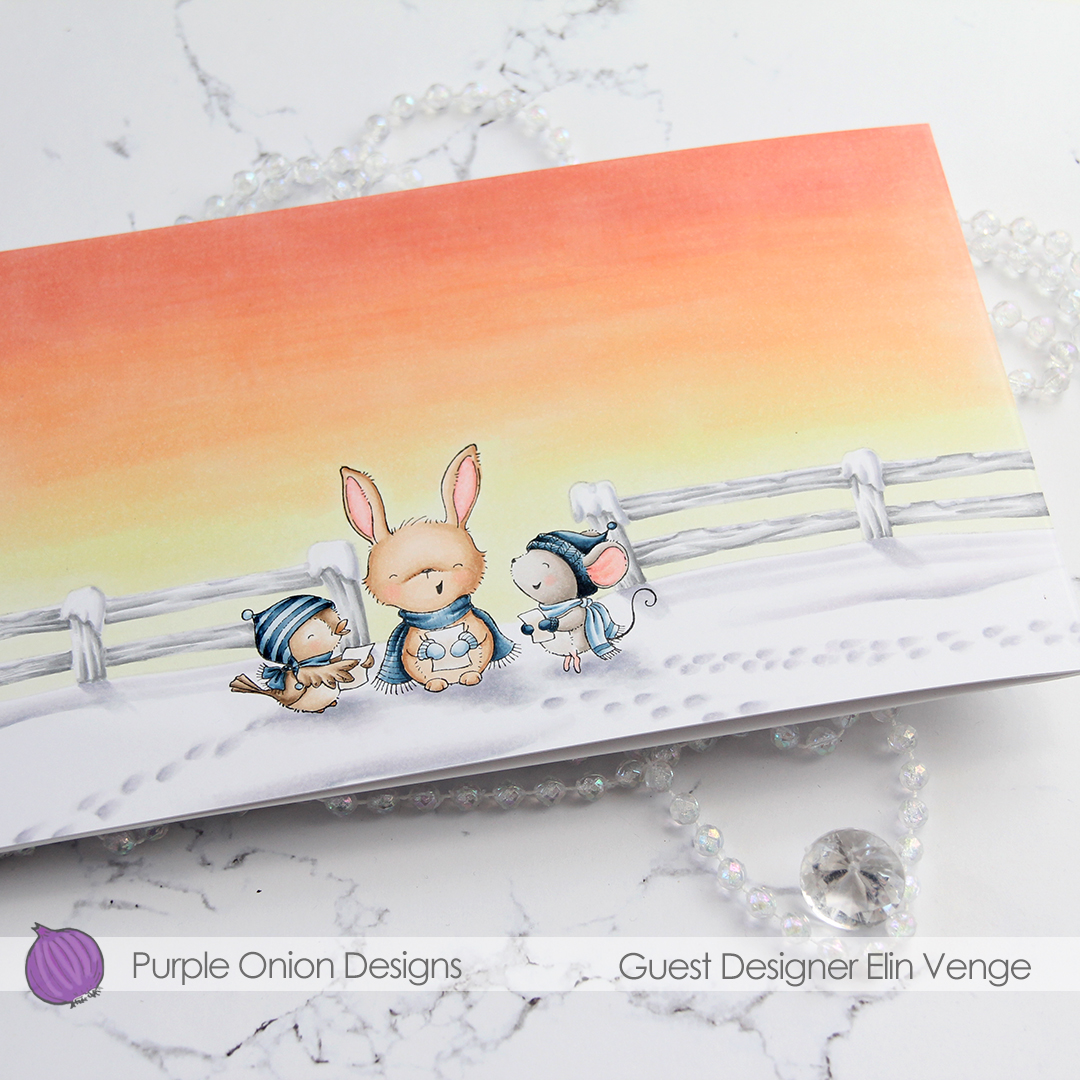 In this photo, you can see that there’s another layer of the card behind this panel with the singing critters.
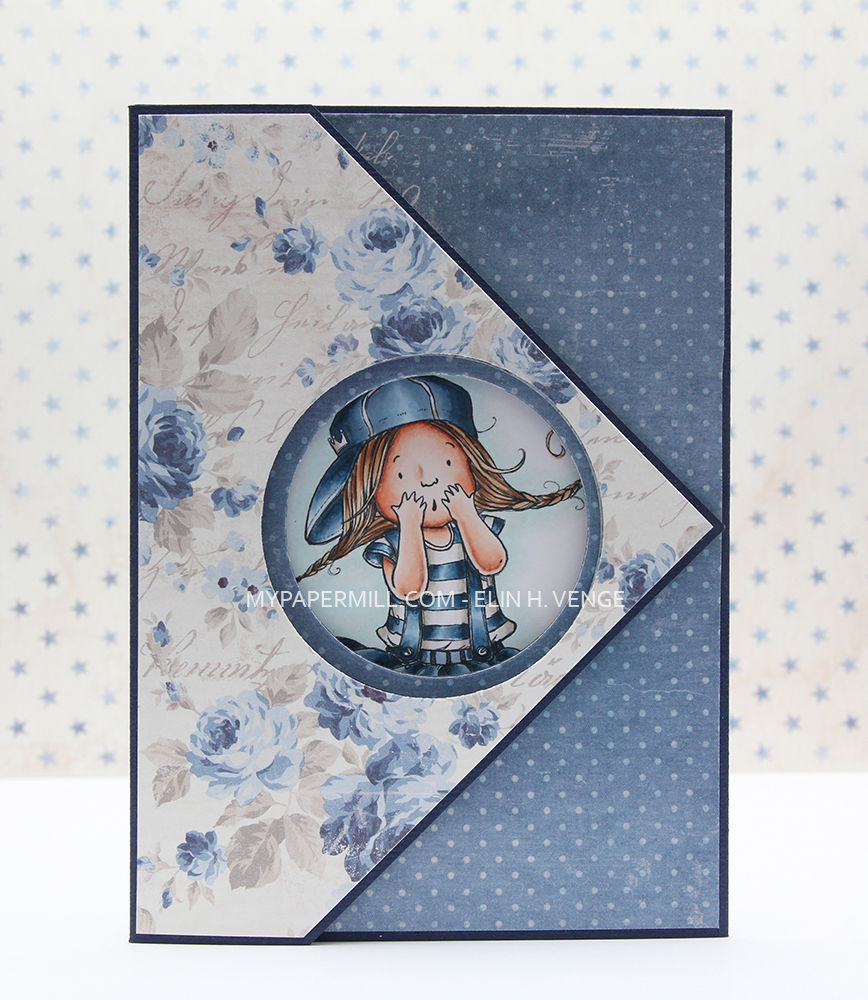 Kortet mitt er omtrent i A2-størrelse, og jeg har brukt
 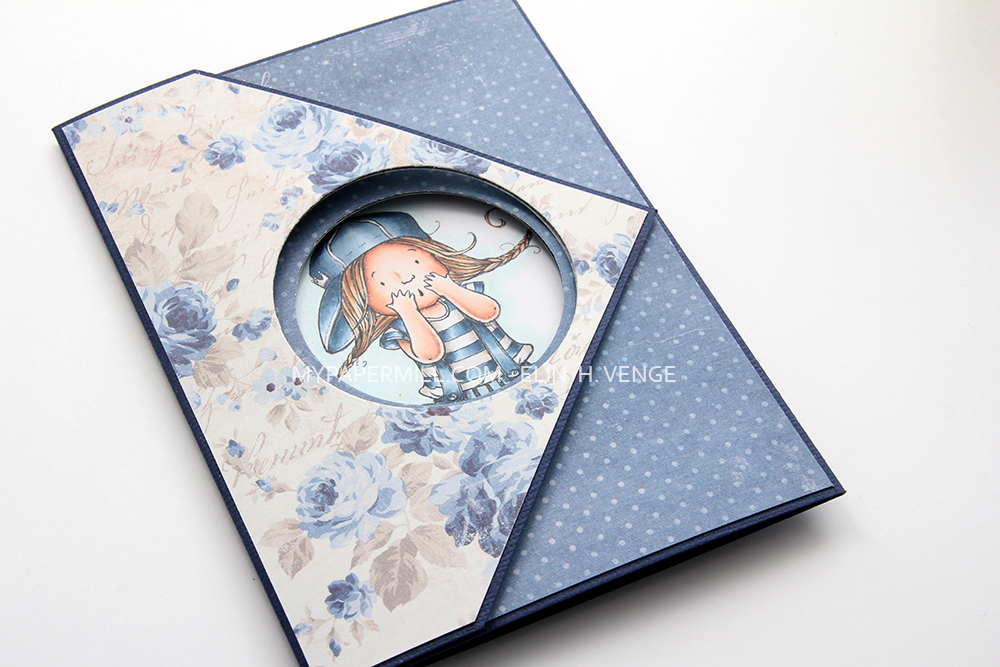 Hvis jeg ikke husker helt feil hadde jeg akkurat gått til innkjøp av utvalgte ark fra Summertime-kolleksjonen til Maja Design, og disse arkene bare ropte etter å bli brukt – de er jo tross alt blå.
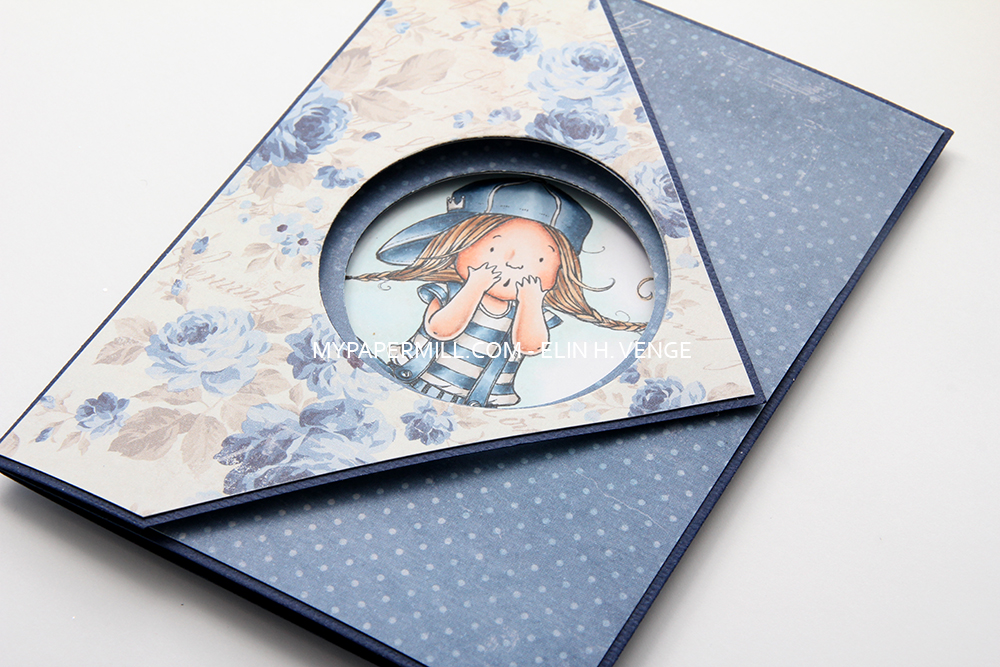 I bunn og grunn er jo dette et tri fold-kort, men det doble vinduet gjør selve mekkingen litt mer innviklet. Og jeg fant fort ut at det er viktig å være nøye. Nå er jo jeg stort sett alltid nøye, men hvis du ikke er det er nok ikke dette kortet for deg.
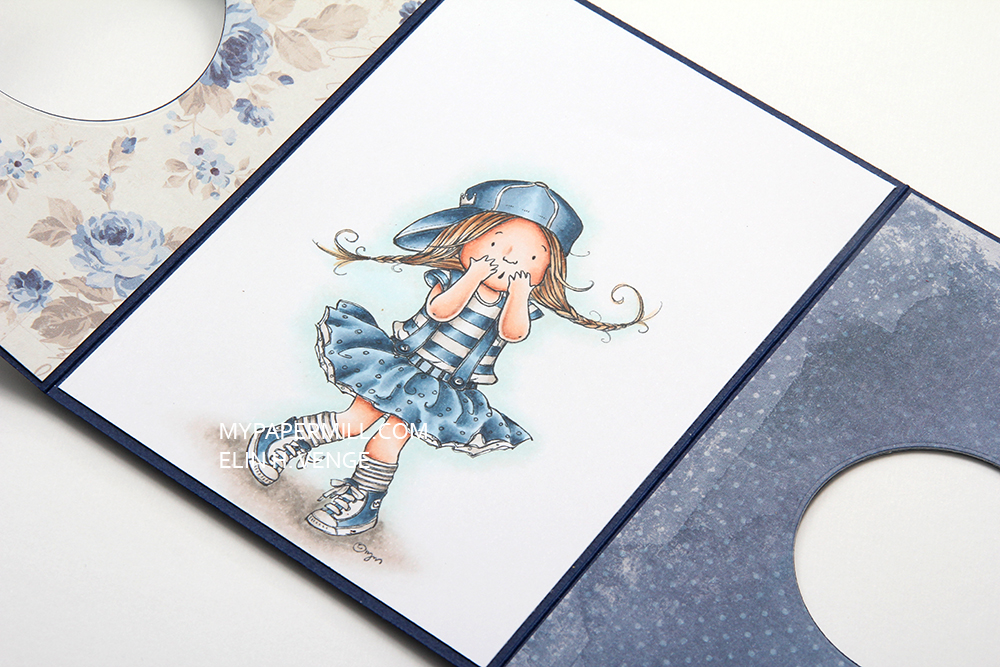 Når kortet åpnes kommer hele motivet til syne. Jeg ville ikke ødelegge med tekster eller pynt på innsidene, så jeg lot det være HELT enkelt.
 Det ville jo ikke ha vært et Elin-kort uten plass til å skrive en hilsen, og siden jeg ikke hadde plass til skrivefelt inni måtte jeg komme opp med en annen løsning. Jeg endte opp med å lage en lomme av det ene mønsterarket med plass til skrivefelt nedi. Satte på en liten 1″ sirkel med stemplet tekst fra Norsk Stempelblad AS som pynt. Og det er faktisk hele kortet.