Hi, everyone! I’ve got a new Christmas card to share today, featuring some awesome images from Purple Onion Designs.
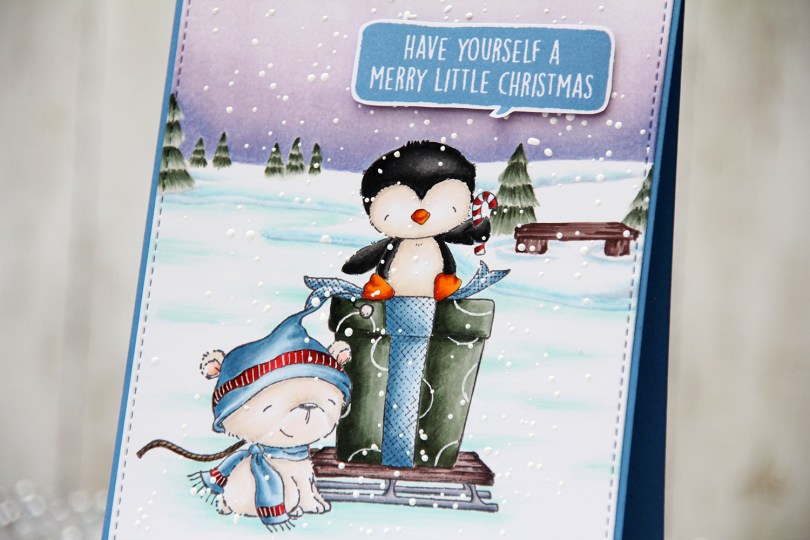
 It’s no secret that I’m a fan of penguins and polar bears, and even though their habitats are on opposite sides of the globe, they’ve come together for this card. I mean look at them; that cute cub with a scarf and hat and that penguin sitting on a present with a candy cane in his hand – just too cute to pass up.
 The little polar bear’s name is Icicle, and the penguin’s name is Merry, I love that these characters actually have names! I put Merry on a sled, masked everything and stamped the frozen pond horizon behind my cute critters using fadeout ink from Inkon3.
 Here’s a bit of a closeup. I swear the bear has some color, even though he looks very one dimensional here. I stamped a sentiment from the Holiday Blurbs II set in blue ink, fussy cut that with a thin white border and popped it up on the front of my card, making it look like the penguin is wishing you a merry Christmas.
 Once I finished my coloring, I took the largest of my A2 Stitched Rectangle STAX dies from My Favorite Things to create a nice edge on my scene. I sprinkled on chunky white embossing enamel from Stampendous, heating the panel from the back until the granules melted. I glued my panel straight onto a top folding card base I made out of Papertrey Ink Blueberry Sky cardstock.

I wish you could feel the texture of the embossing powder once it’s melted. It’s raised, and kind of like braille, it’s really cool. The Gina K foam tape adds a little lift to the speech bubble, but doesn’t add too much bulk, I love it.
 The Purple Onion Designs holiday sale starts today and lasts till the end of next week. 25 % off rubber stamps is a really good deal, and nothing stamps better than rubber stamps, I love them so much!
I still haven’t redone my template for the Copic graphic I usually share, I’m hoping to have time to do it next week, I know there are people relying on it to choose colors!
 I wanted my cluster with the sentiment to be more to the right than to the left, so I flipped my image in Photoshop to make the boy and the dog look to the right instead of the left, it fit my card better. It’s one of the great advantages of digital stamps.
 Once I’d colored in my image, I used my favorite faux stitch rectangle die from My Favorite Things to turn my colored piece into a panel for the front of my card. I added about half a tiny paper doily from Doodlebug Design, and some die cut scraps of Maja Design patterned paper, before adding a green strip with a word (Christmas hug) from Papirdesign using foam tape.
 I added another little piece of the green patterned paper from Maja Design towards the bottom of the left hand side and glued on a few snowdrift sprinkles from Little Things from Lucy’s Cards, before adhering everything to a card base I made out of Soft Stone cardstock from Papertrey Ink. Easy peasy, lemon squeezy, right?
 I tried to limit the amount of Copics I used on the snow for this one. Only five (plus the blender) isn’t too shabby.
 I used Anyu and Nanook Igloo for my card today. They’re part of the
  I used my trusty faux stitch rectangle die from My Favorite Things to turn my colored piece into a panel before stamping the perfect sentiment from Mama Elephant’s Holiday Messages stamp set using Enchanted Evening ink. I wanted to pick up the blue from the little girl’s coat, and this is such a pretty blue. I sprinkled on chunky white embossing powder and heated the panel from the back to create my snowy look, before adhering my panel onto a cardbase I made from After Midnight cardstock from My Favorite Things. I added a few snowflakes that I diecut using an old Marianne Design die that I absolutely love, and my card was finished.
 Here you can see the effect of the chunky white embossing enamel. It’s nice and thick and adds a bit of texture to the card, it kind of feels like braille when you touch it, it’s really cool, not to mention quicker than drawing on snowflakes with a white pen, also with the added bonus of it being more random than you’re able to achieve on your own.
 No surprise that I used mostly cool tones for this card, except for the skin colors and the ears and tongue of the dog.

 Whenever I have background elements, I pretty much always start with those, and today was no different. I colored in the snow first, both on the roofs and on the ground, before coloring the sky and then the building.
 After I’d also colored in the fox, the mailbox and the penguin, I added a sentiment from the
  Plenty of colors used, but there are a lot of images in this one.
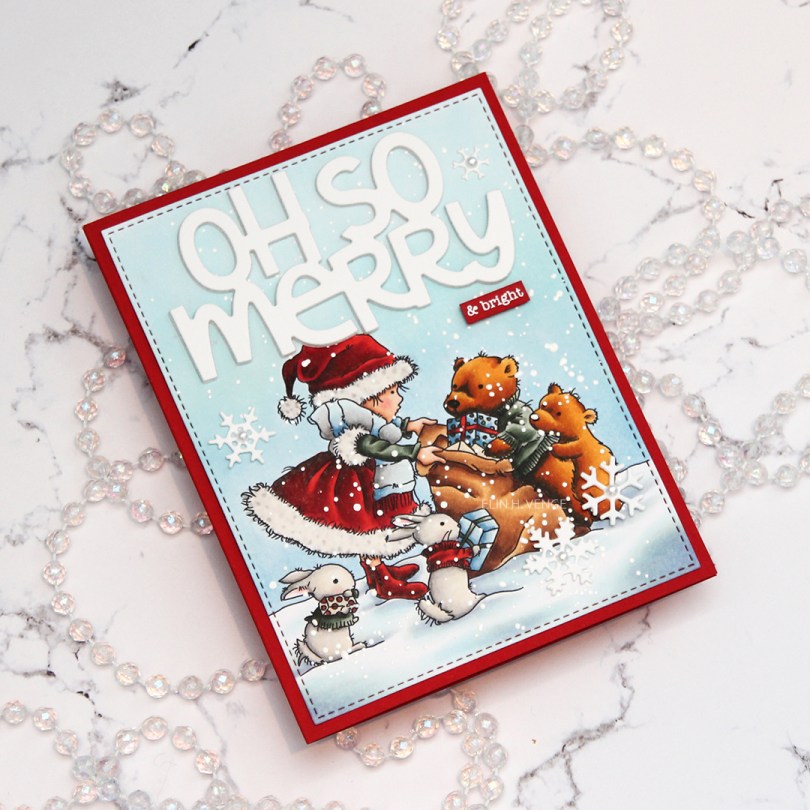
 For today’s card, I used the image “
 I die cut the words oh so merry from the Penguin’s Waddle die set from Mama Elephant a few times from white cardstock and stacked them for a dimensional look. I added chunky white embossing enamel to my scene, glued my panel onto a card base made from Pure Poppy cardstock from Papertrey Ink and glued my diecut words in the sky. I stamped and white heat embossed “& bright” from the Holiday messages stamp set from Mama Elephant onto a scrap of the same red cardstock and glued that below my diecut words. I added a few diecut snowflakes with pearls in the centers as my finishing touch.
 Lots and lots of marker, many of them used on the snow, believe it or not.
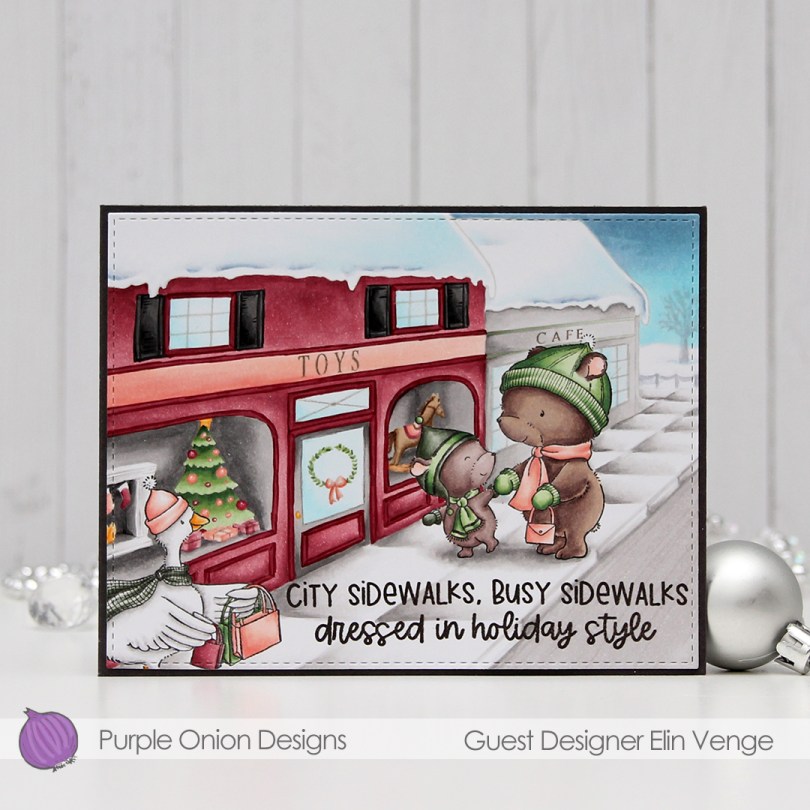
 I love these stamps!! And I do believe this is the first time I’ve colored a goose! And it’s such a cute goose too, she (her name is
  I was going to make a 5×7″ card, but changed my mind. It meant that
  The bears are
  To me, this color scheme is a bit untraditional, but I didn’t want to go with the same red and green combo I used for my last card, so I had to come up with something new. Somehow, I had it in my head (thanks to Liz) that my toy store needed to be red, so I came up with a combination of a pink based red, a light, peachy color and a brighter green than the greens I usually go for.
 Lots of Copics used for this one, I did color in the whole front of the card, after all. I stamped the background using Fadeout ink from Inkon3, so once my Copic coloring was done, I went in with a gray Prismacolor for details on the windows and a little bit of brown for the horse and the ribbon on the presents in the display windows.
 When I first got the stamps, the first thing I did was create masks for each and every single one of them. Time consuming, sure, but so worth it to be able to create scenes like this. For this card, I started by stamping the S
 I colored the scene using Copics, making sure to use muted, soft colors for the background and brighter colors and more detailed coloring for the snowman and his friends. That penguin chick had me, I love him!! I stamped a sentiment from the
  I cut my colored piece down a little and was going to add it to a 5×7″ card base, but realized I’d cut too much off the height, so I had to shrink the card front accordingly. The finished card measures 5 x 6 1/2″. A bit of an unusual size, I guess, but I think it works. I added a piece of green patterned paper from Papirdesign to my white side folding card base and mounted my colored piece with plenty of foam tape. Normally I’d use Stormy Sea card stock for my base, but I didn’t have a piece big enough, and that patterned paper (without much of a pattern) was a great match.
 Lots of colors for this one, but I used the ones before T7 on the snow alone… No wonder it’s a lot.
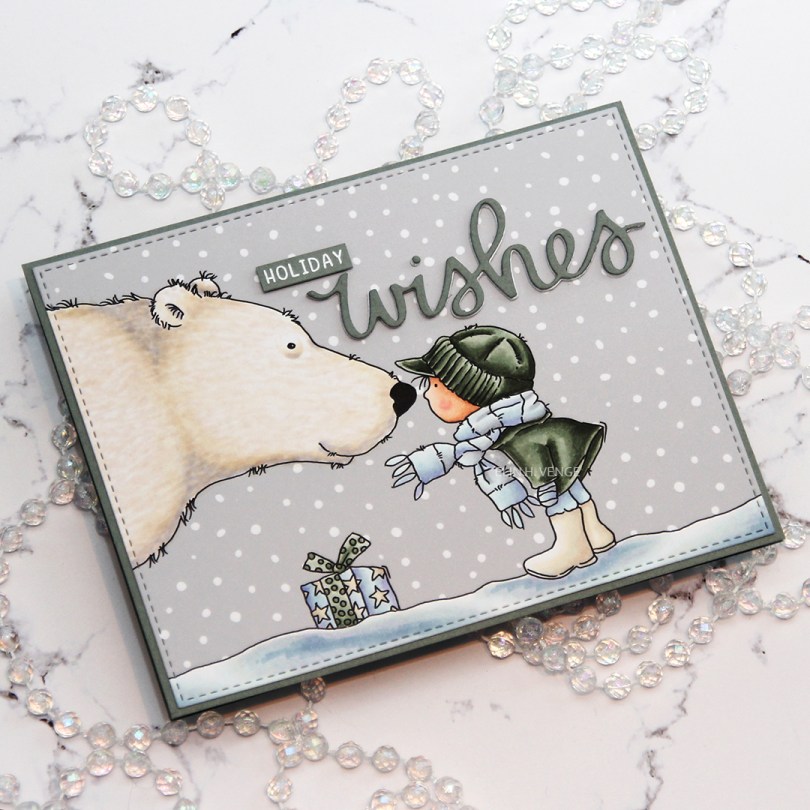
 Once I’d colored the image with Copics, I used the largest die in the A2 Stitched Rectangle STAX Set 2 from My Favorite Things to die cut a landscape oriented panel that would fit perfectly on my card base with a 1/16″ border around. I like the 1/16″ little frame, AND it’s the same width as the distance from the faux stitching to the cut line. I like having them the same. Little details like that matter, to paraphrase a famous German architect (Ludwig Mies van der Rohe, who coined the term “God is in the details”).
 I created a top fold card from Stormy Sea cardstock from Papertrey Ink. It’s a color that matches the BG90 family from Copic really really REALLY well. I need to order more, I only have half a sheet left of this color. I used the same color cardstock to diecut the word wishes using a die from Mama Elephant that was free with purchase if you spent a certain amount during their birthday extravaganza back in September. Normally I’d diecut the word several times in the color I wanted, but since I was running super low on this particular grayish green, I used a few layers of white diecut words, and only one layer of the colored cardstock on top. I stamped and white heat embossed the word “holiday” from the Iconic Ornament stamp set from Mama Elephant, also free with purchase over a certain amount on the Mama Elephant site back in September. I added a few more layers of cardstock behind it for dimension and glued it to my sky using Gina K liquid glue, which I also used for the die cut word.
 I decided not to add any additional elements. No embellishments, no nothing, I didn’t want to distract too much from that adorable image.
 Not a lot of Copics for this one, and 14 of these were used for the snow and polar bear.
 I used a very bright red for the hat and sweater on the mouse, and the only color that really goes with it, in my opinion, is gray. I found some red and gray die cut scraps from a couple of Maja Design collections (Fröjdefull Jul and Joyous Winterdays) and made a little mini cluster in the top right corner.
 I started with a mini paper doily from Doodlebug Design, added a red fishtail flag frame die cut with a die from My Favorite Things, then a piece of a ticket die cut with a Docrafts die. I used some 1 mm foam squares for that. I added my sentiment at the end, which is from one of those strips at the bottom of the 12×12″ papers that you usually cut off. Maja Design has always had some kind of pattern on the back of theirs, which means that nothing needs to go to waste. This one was perfect in gray with a hint of red, and I used 1 mm foam squares to add it. I even doubled up on the foam on the left hand side of it.
 I added some red enamel dots from Papirdesign to finish it off, and glued a leftover piece of the doily to the bottom left corner and an additional two dots. I added my panel to a top folding card base I made from Gravel Gray card stock from My Favorite Things.
 This was a very simple image to color, so obviously I didn’t use a lot of colors.
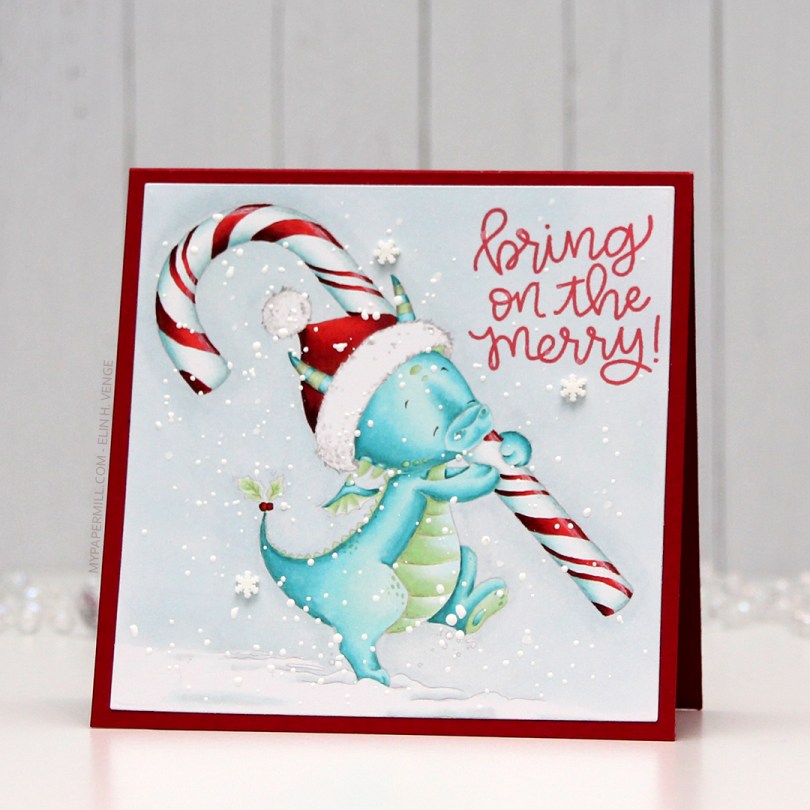
 I love no line coloring, and this guy with the candy cane was so much fun to color up. I added snow flurries to the background with a gelly roll pen when I did my coloring, and once I’d die cut my colored piece I wanted even more snow, so I sprinkled on embossing enamel, as well, and melted that.
 I even added a few snowdrift sprinkles from Little Things from Lucy’s Cards once my card was assembled. I love this look of snow on Christmas cards.
 The sentiment is from the Scripty Xmas stamp set from Mama Elephant, stamped in Lady Bug ink from Memento. I added my panel onto a 4 1/4 x 4 1/4″ top folding card base I made from Electric Red card stock from My Favorite Things.