
Hi, crafty friends. I have a super simple Christmas card to share today, created for the Kort & Godt gallery blog.

I made a slimline card this time. I don’t make a lot of slimline cards, I find them tricky to photograph. I cut a piece of patterned paper (from the Essential Craft Papers – Ink Drops Ocean 12 x 12 pad from Craft Consortium) down to fit my card base with a small margin. I used silver glitter cardstock from Kort & Godt and heavyweight vellum from My Favorite Things to die cut my sentiment and shadow layer. I put foam tape on the back in a few strategic spots and placed the sentiment in the center of my card, before flanking it with a few felt snowflakes, also from Kort & Godt. I added a silver gem in the center of each snowflake and my card was done. Super simple!
Kort & Godt products used:
DIE 303 – Gledelig Jul
GP 202 – silver glitter cardstock
ST102 – felt snowflake
ST103 – felt snowflake
ST104 – felt snowflake
BE106 – silver gems
I hope the holidays will give you a chance to relax and recharge, and I’ll be back soon with another card.

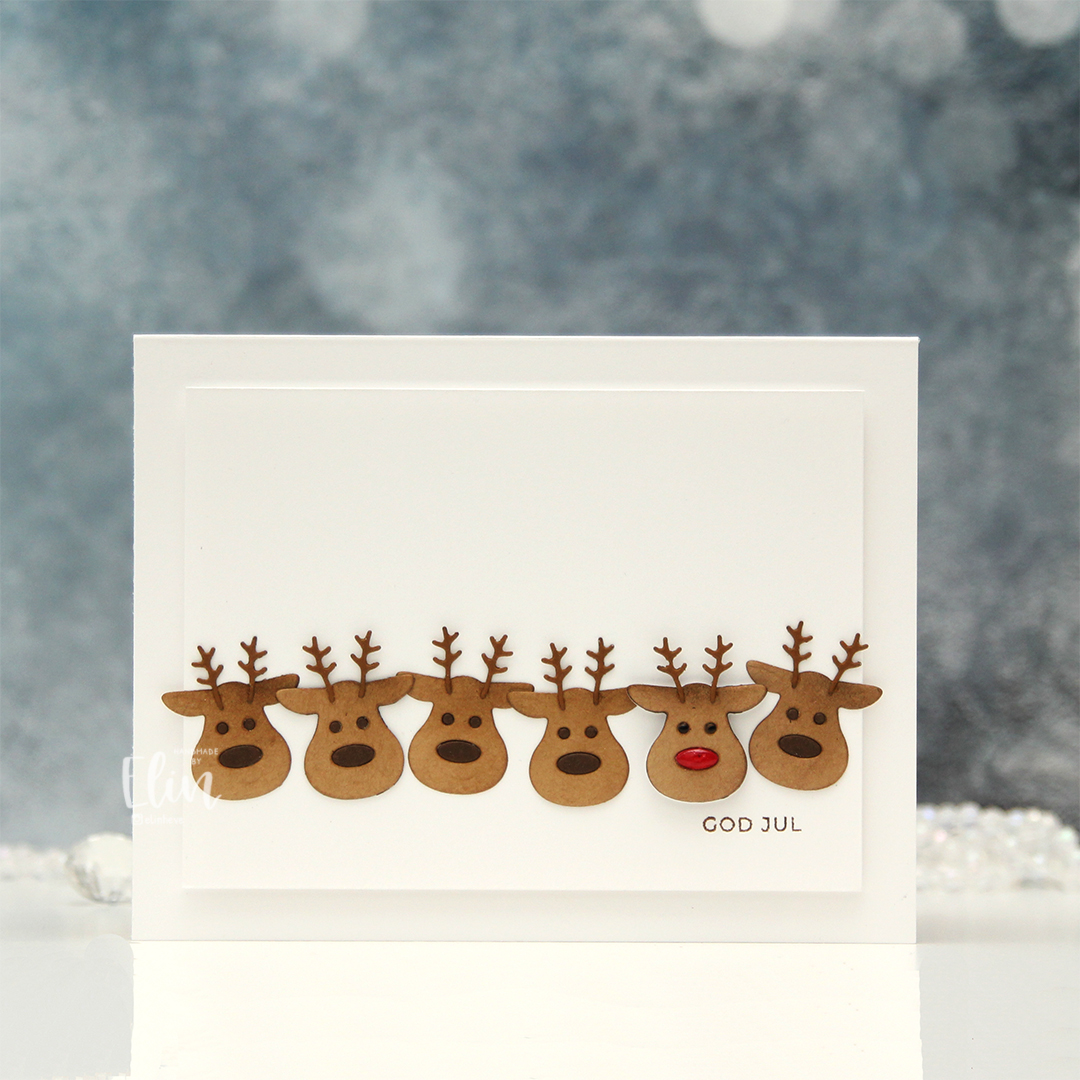 I die cut the reindeer from several colors of colored cardstock. I used Cocoa Nibs from Papertrey Ink for the antlers, Amarena Cherry from My Favorite Things for the red nose, Milk Chocolate from My Favorite Things for eyes and the remaining noses, as well as Kraft from Bazzill. I would have preferred Classic Kraft from Papertrey Ink, as it’s a heavier weight cardstock, but I’ve run out, and the Bazzill kraft worked just fine.
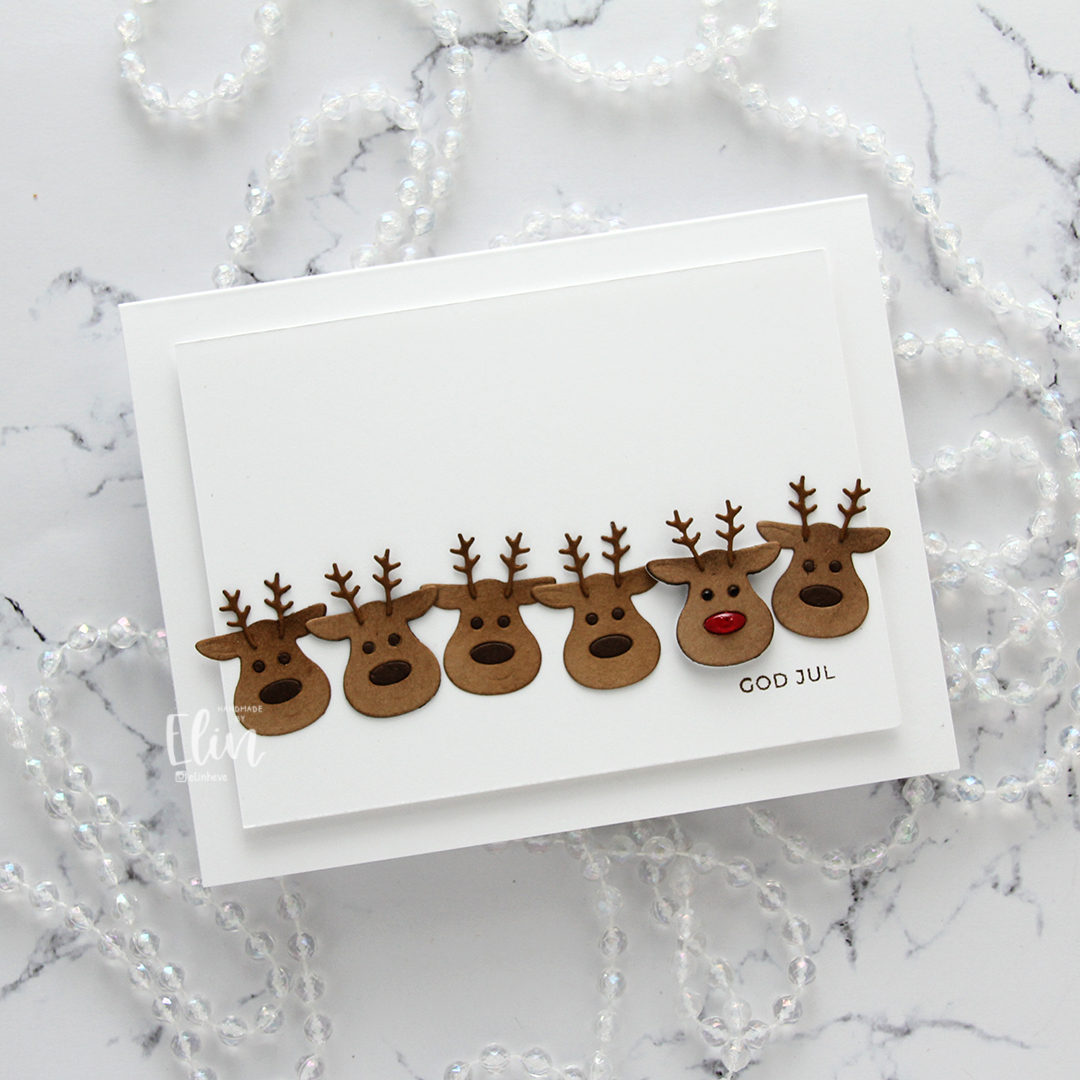 I mounted a white panel onto my top fold landscape card base and adhered the reindeer in a line. A couple of them have additional layers of cardstock behind them for a tiny bit of dimension, Rudolf has lots of layers behind him, as well as shine to his nose. I added a very thick coat of Glossy Accents, and I also added black Glaze to his eyes for shine and dimension. I stamped GOD JUL using Milk Chocolate ink from My Favorite Things.
 I had an extra reindeer that I decided to add to the inside of the card, you can see his ear peeking out in this photo.
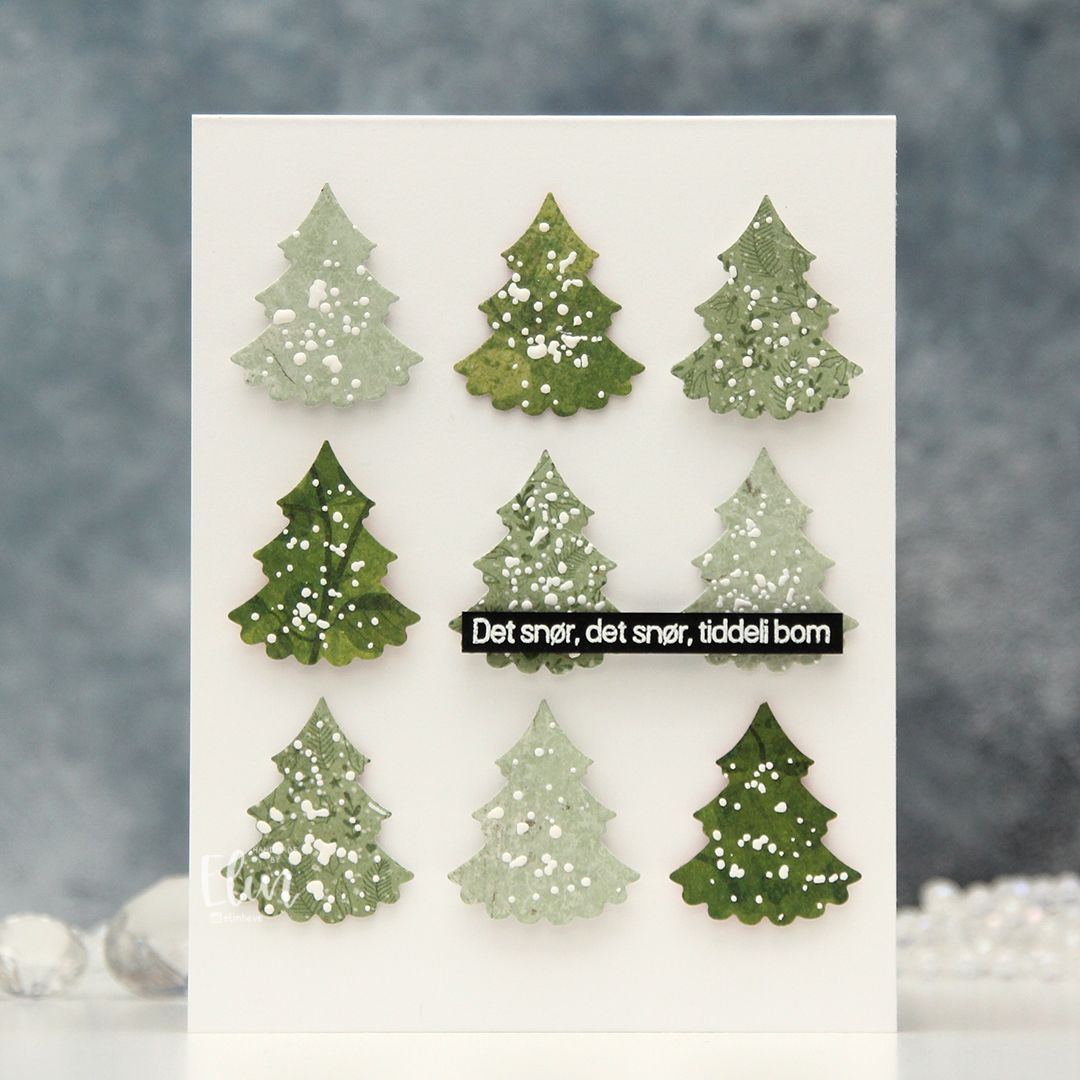 I die cut a tree nine times from three different shades of green patterned paper. The two lighter ones are both from Maja Design, while the dark one’s from Kaisercraft. This die is pretty small and perfect for scraps. There’s also a die in the sets that cuts the trunk, but I decided not to use that for this card.
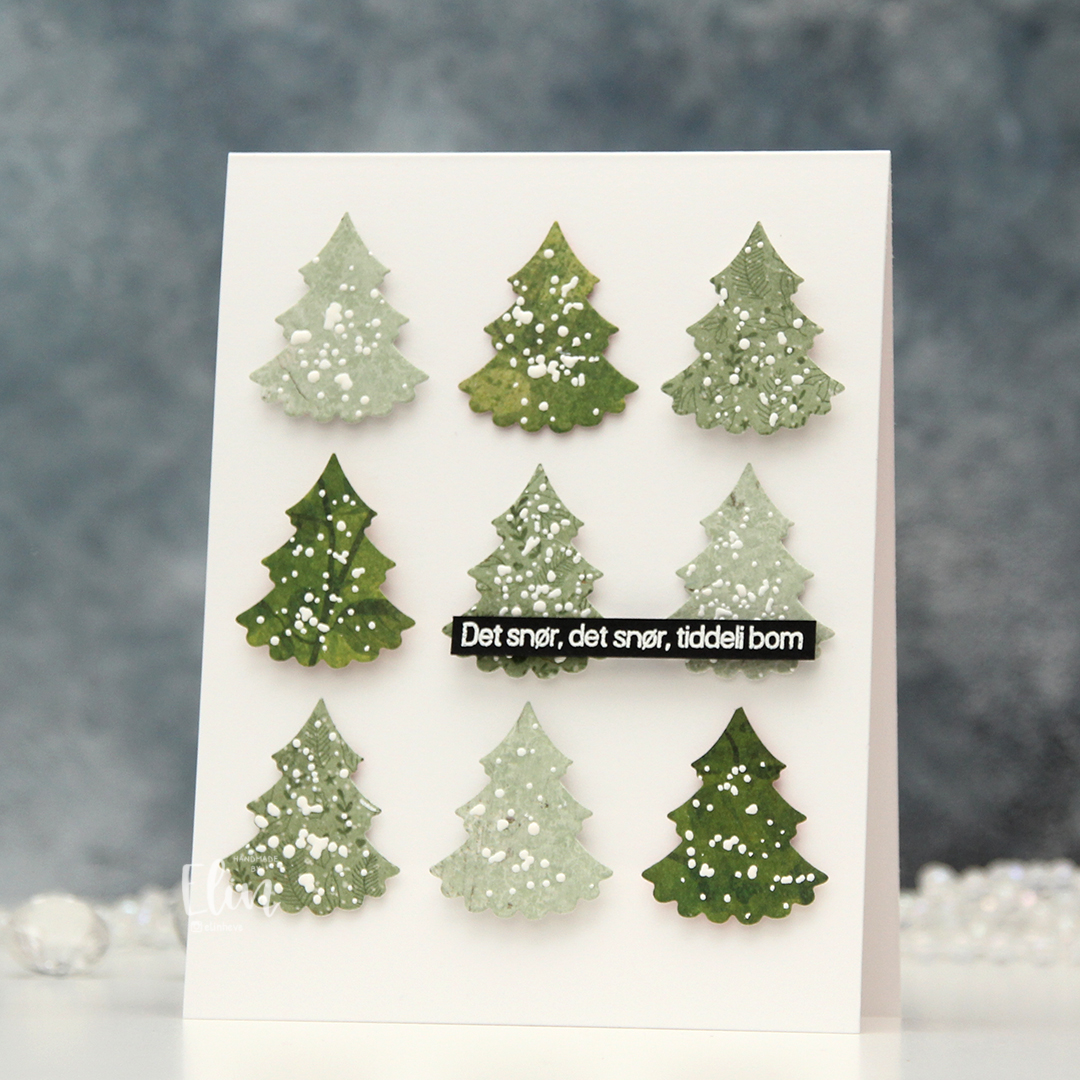 I sprinkled on Chunky white embossing enamel from Stampendous to each of the trees and melted the granules from the back to make snowy trees. I then used three different thicknesses of foam tape behind the trees for varying dimension.
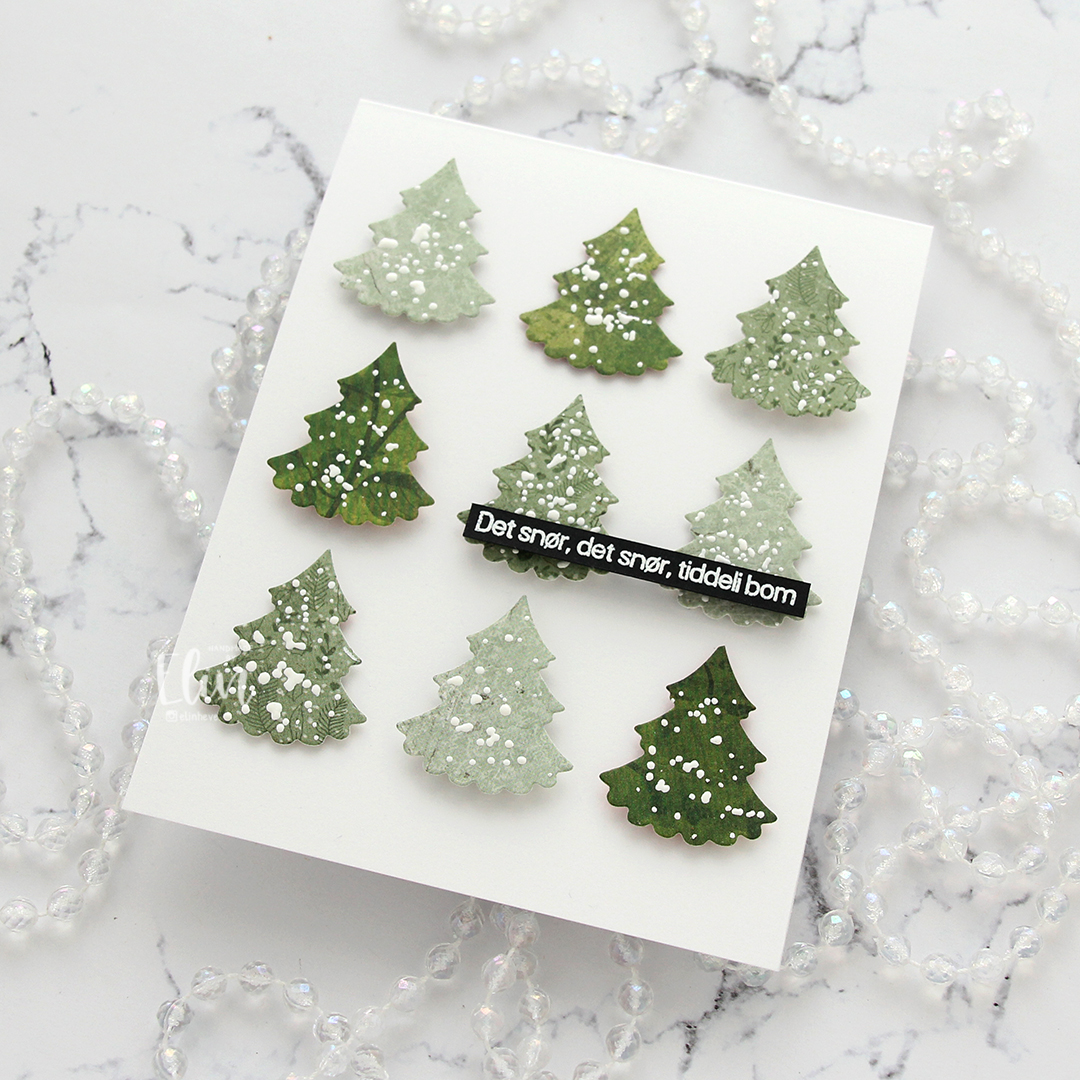 I stamped and white heat embossed the sentiment onto a black cardstock strip (True Black cardstock from Papertrey Ink), added a couple of more layers of cardstock behind it for dimension and glued it on top of two of my trees.
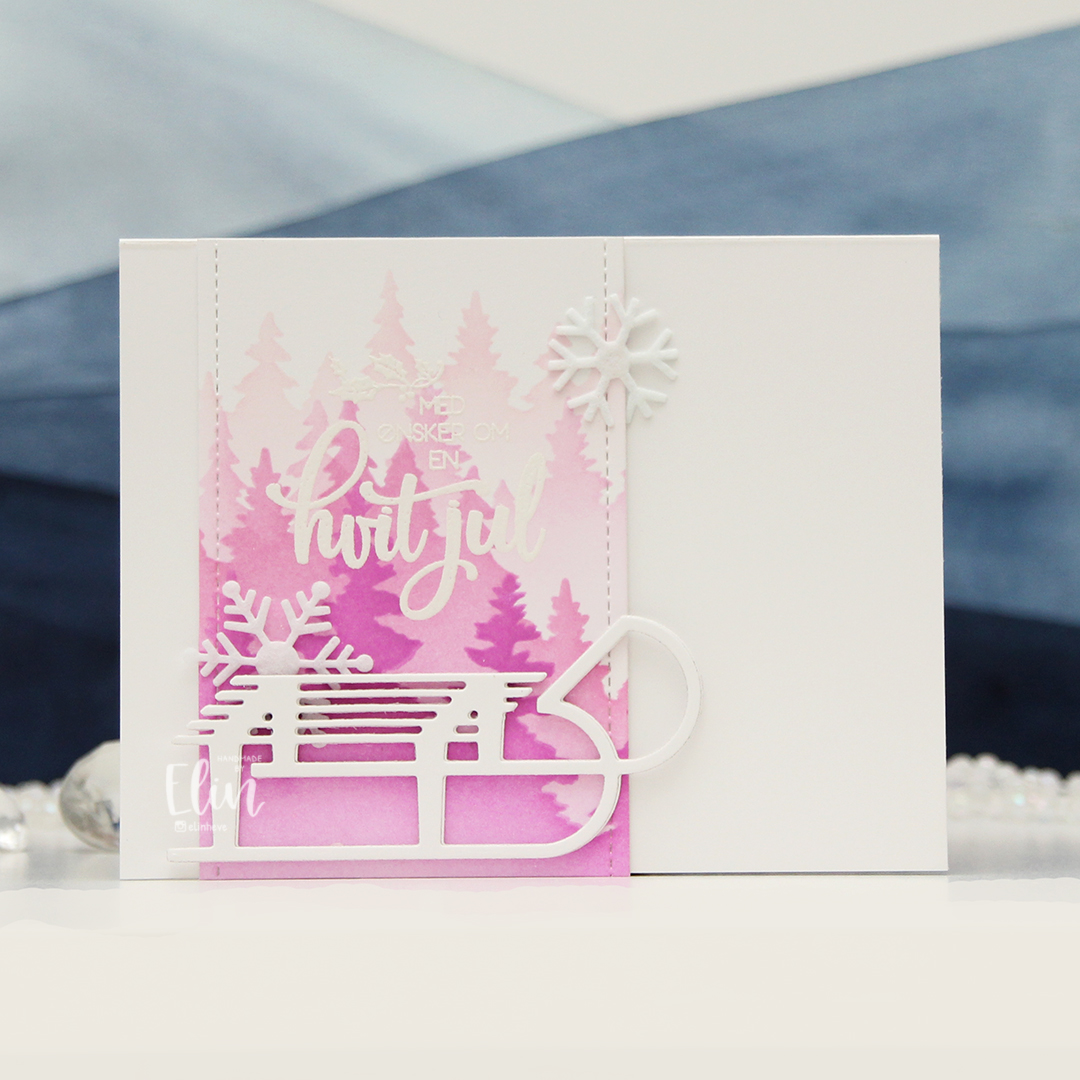 I started by ink blending trees in pink onto white cardstock. I used the Wintry Forest stencil set from Pinkfresh Studio along with Rose Quartz, Puffy Heart and Purple Wine inks from Altenew. I then stamped a sentiment in the M-428 stamp set from Kort & Godt and heat embossed in white. The heat embossing doesn’t really show up too well in my photos where the trees in the background are pale, but it’s more visible in real life. And if you want more contrast, you could start the blending with a darker color.
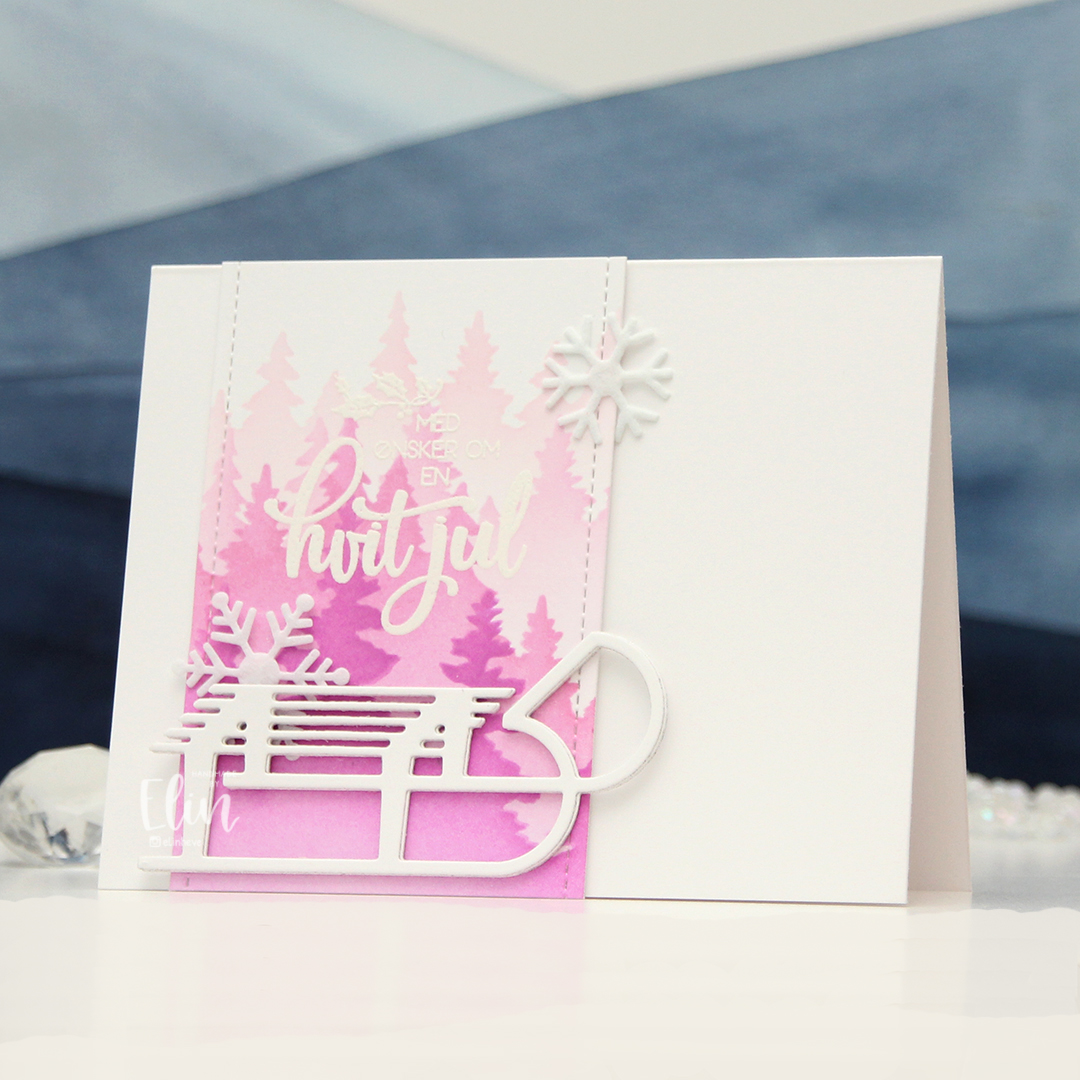 I used a die in the Die 178 set to create the faux stitching on the sides of my ink blended piece. The dies in this set are banner dies, but I did partial die cutting and only used the top half of the die. I added a couple of layers of white cardstock behind it for a little bit of dimension and adhered it to a top fold landscape card base I created from Stamper’s Select White cardstock from Papertrey Ink, which is the cardstock I’ve used throughout.
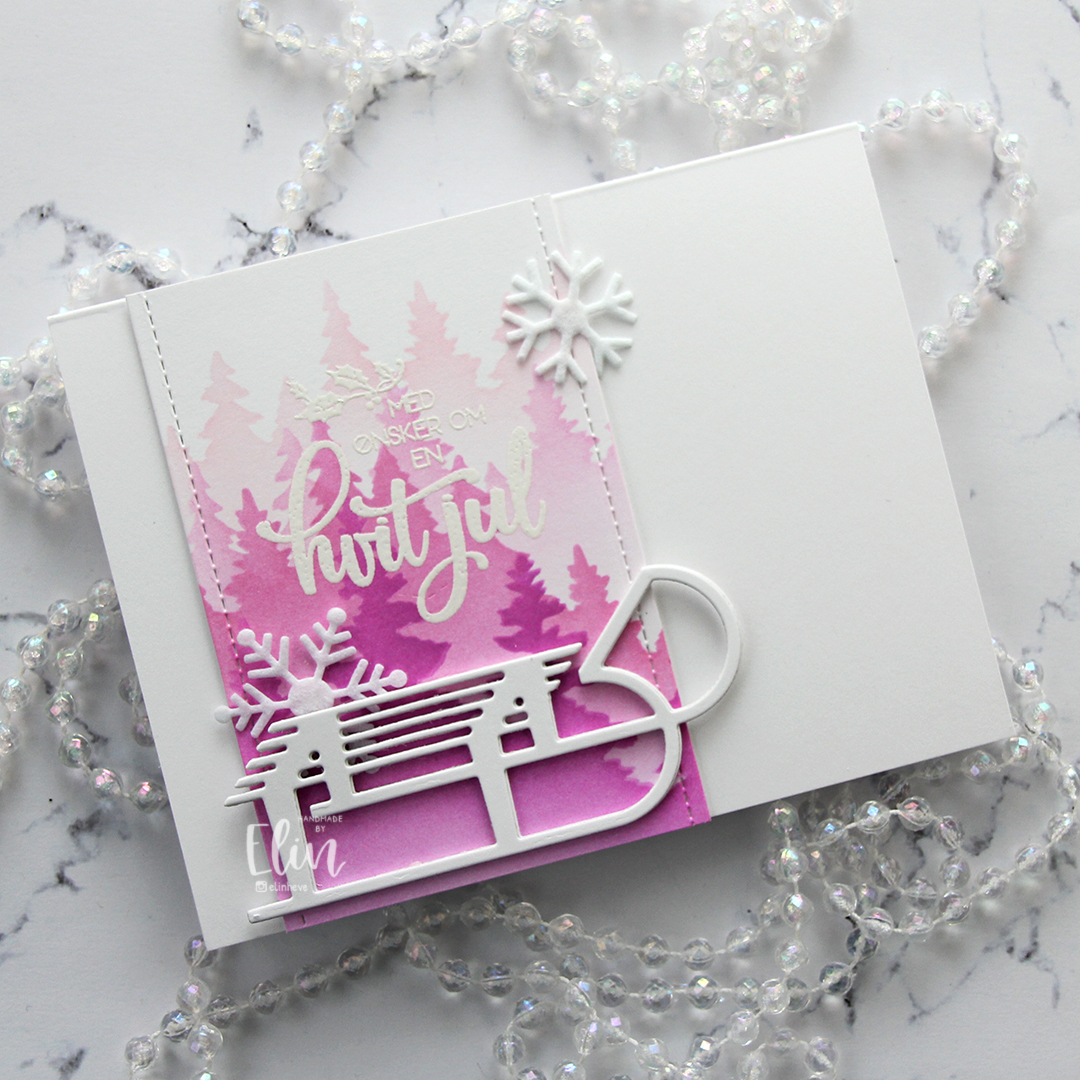 I die cut a sled (Die 321 from Kort & Godt) five times from white cardstock. I stacked them for strength and dimension and adhered my sled to the bottom of my panel, tucking a felt snowflake (ST105) behind it. I added another felt snowflake (ST103) in the top right.
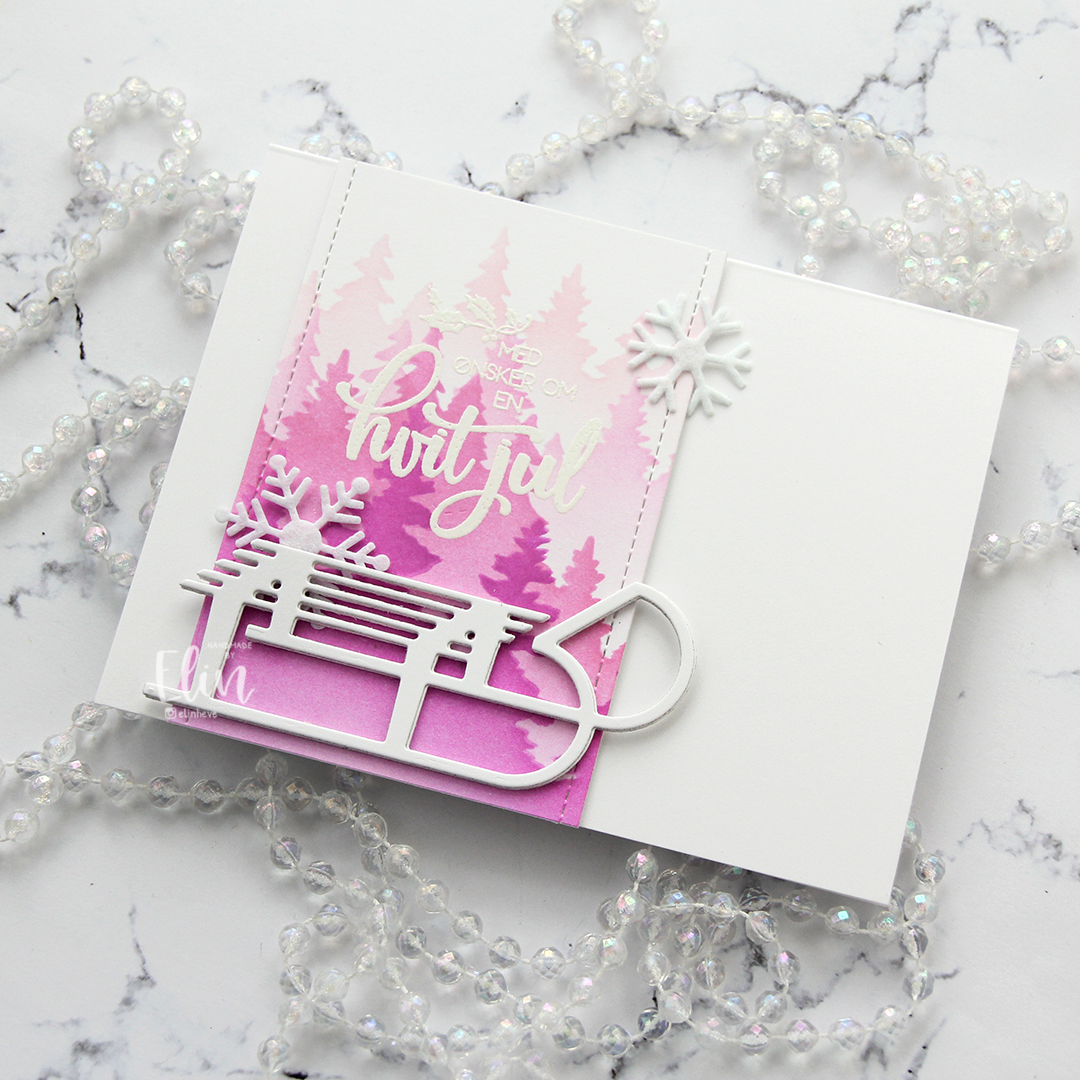 The pink is very unexpected – at least for me. I never thought I’d ink blend pink winter trees, but this was fun! You could easily create this card in lots of other colors too, I wonder what it would look like in blue…
 I started with an A2 side fold card base, used the Watercolor Wash Free Form stencil from My Favorite Things and ink blended softly with Picked Raspberry, Spiced Marmalade and Squeezed Lemonade distress inks. I then layered the Basket weave stencil (also from MFT) on top and ink blended again using the same three colors, this time going in with a heavier hand.
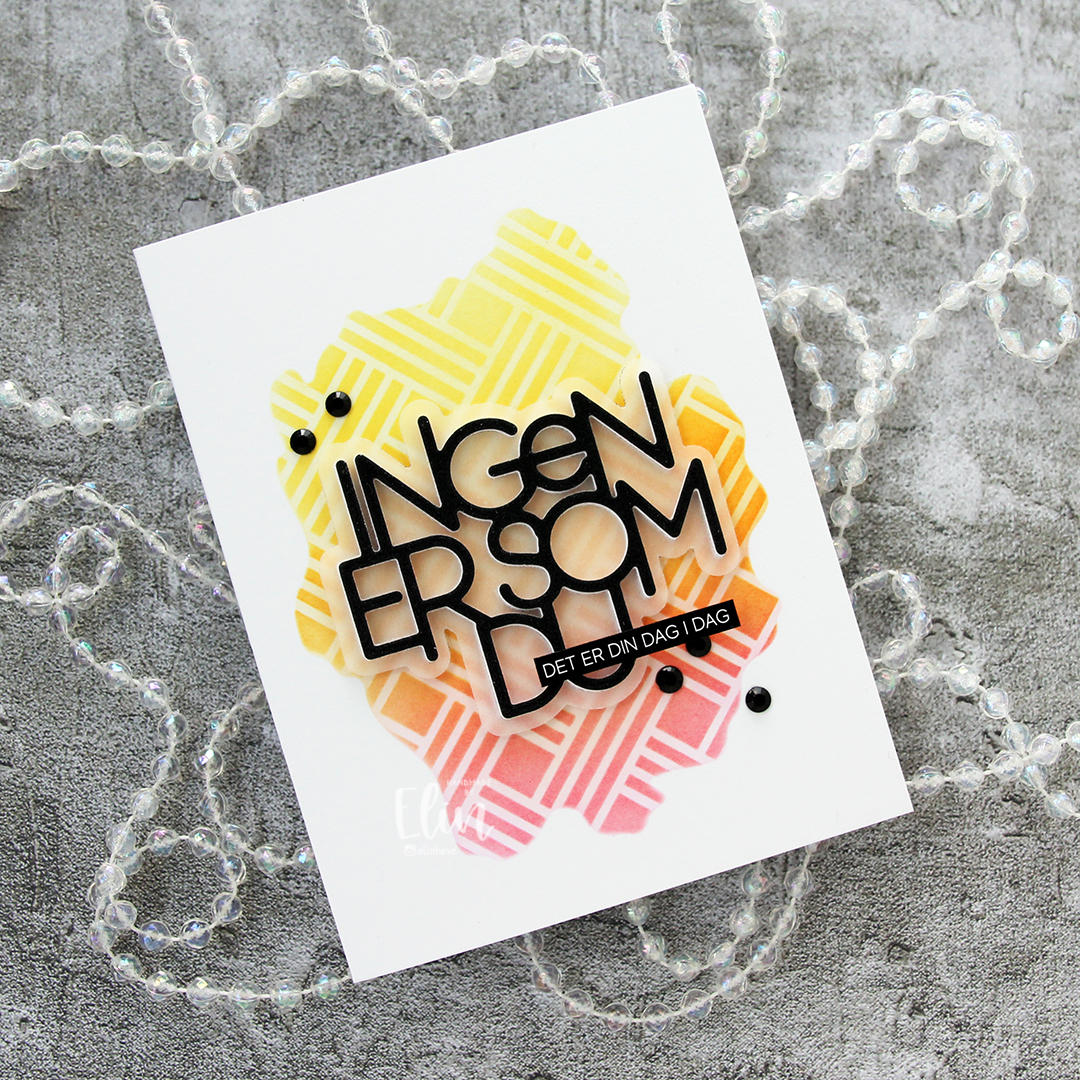 I die cut the Ingen er som du die six times from white cardstock, once from black glitter cardstock and the shadow die once from 40 lb vellum from Bazzill. I usually use a heavyweight vellum, but for this, I wanted some of the ink blending to show through, so a thinner version was the better choice for this particular card.
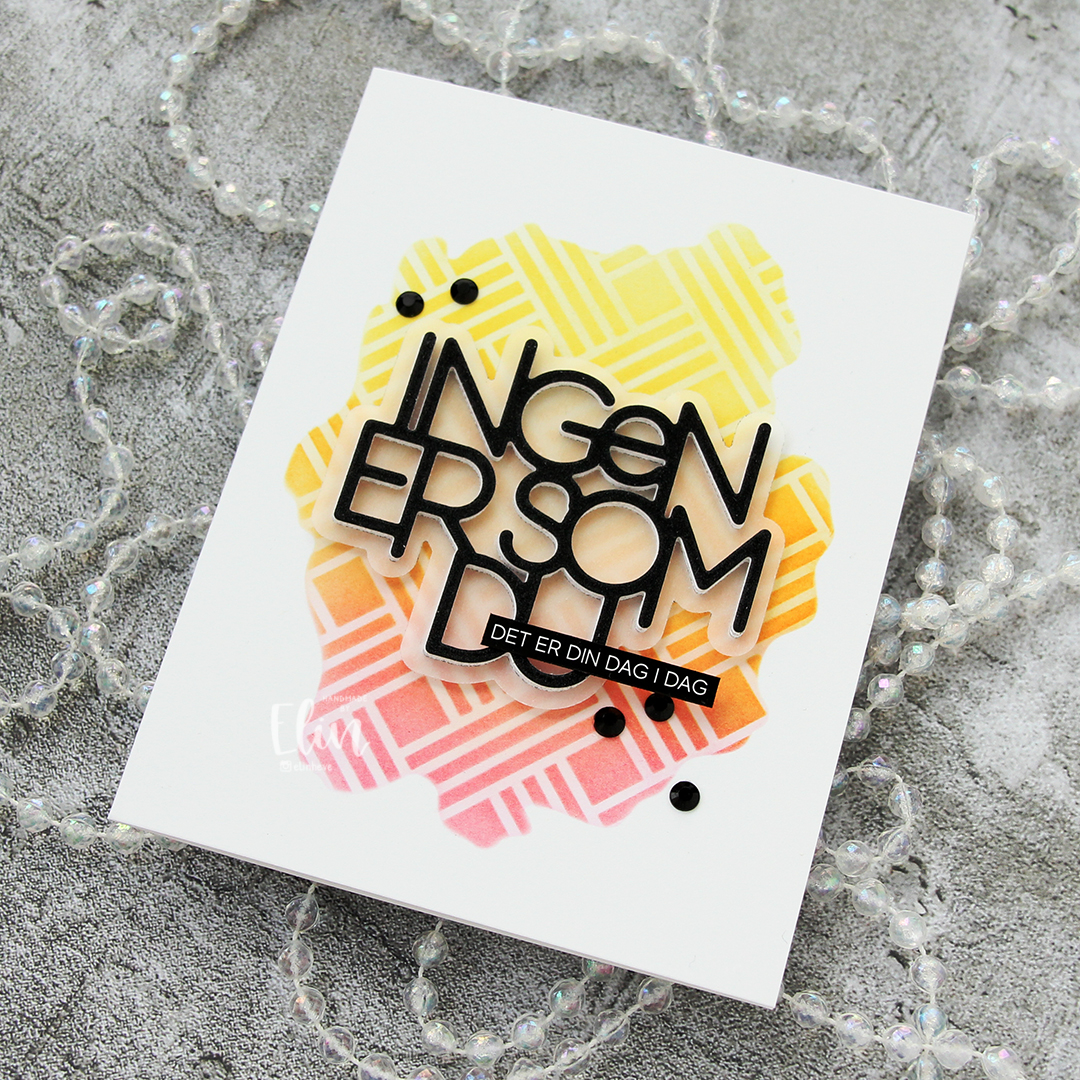 I stacked three of the die cut words, then added the layer of vellum, then the last three white die cuts and finally the black glitter cardstock. It’s a very fine glitter and doesn’t really show up in my photos, sadly.
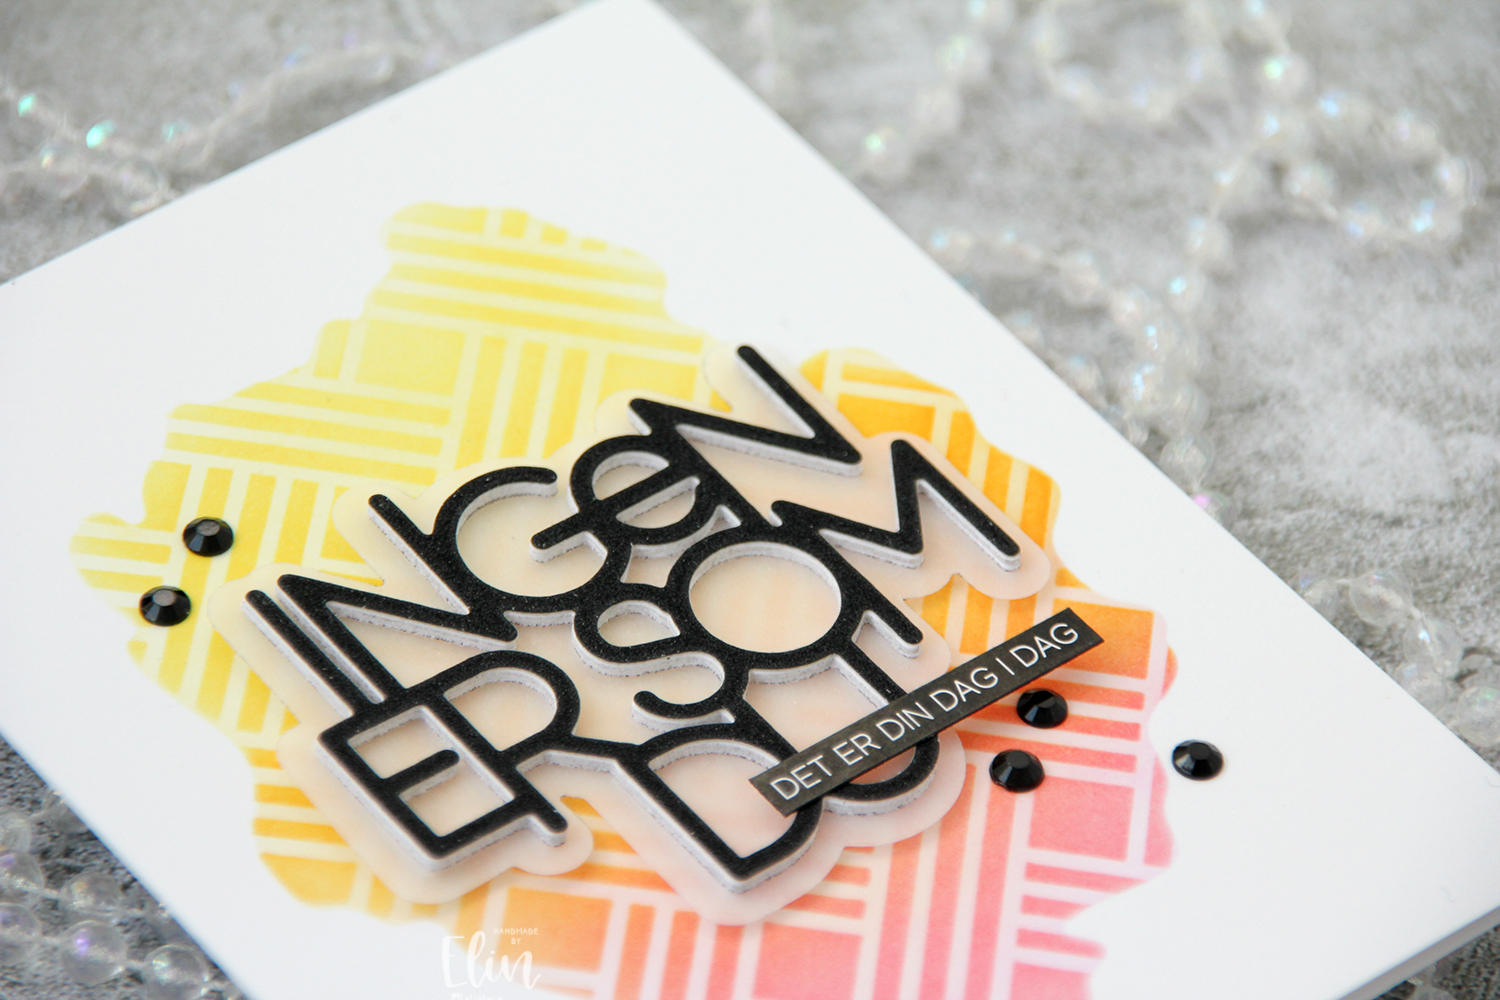 To finish off the card I added a sticker sentiment strip on top of the die cut and finished off with some black jewels.
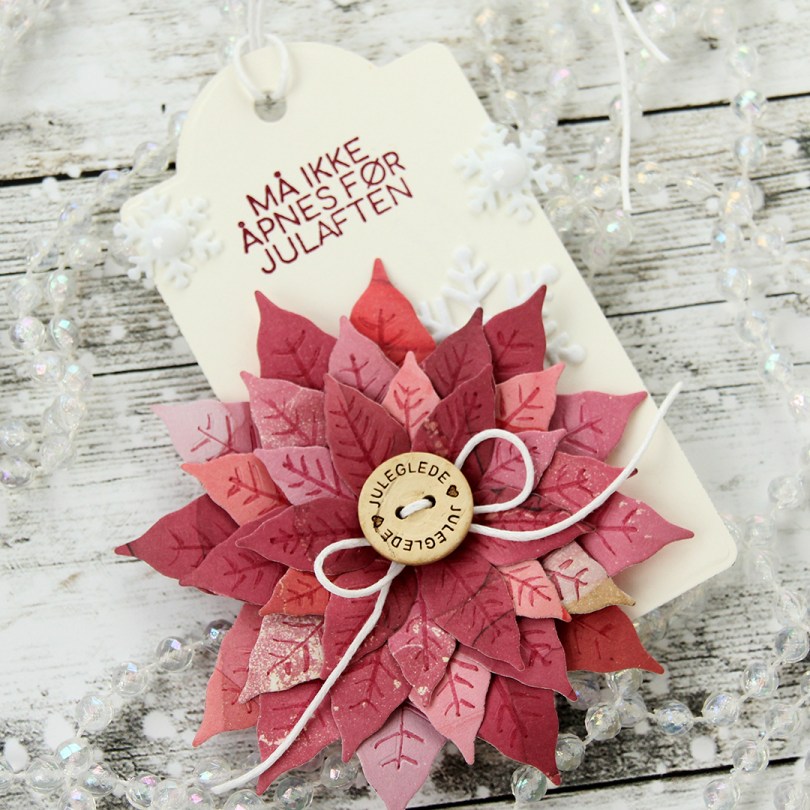
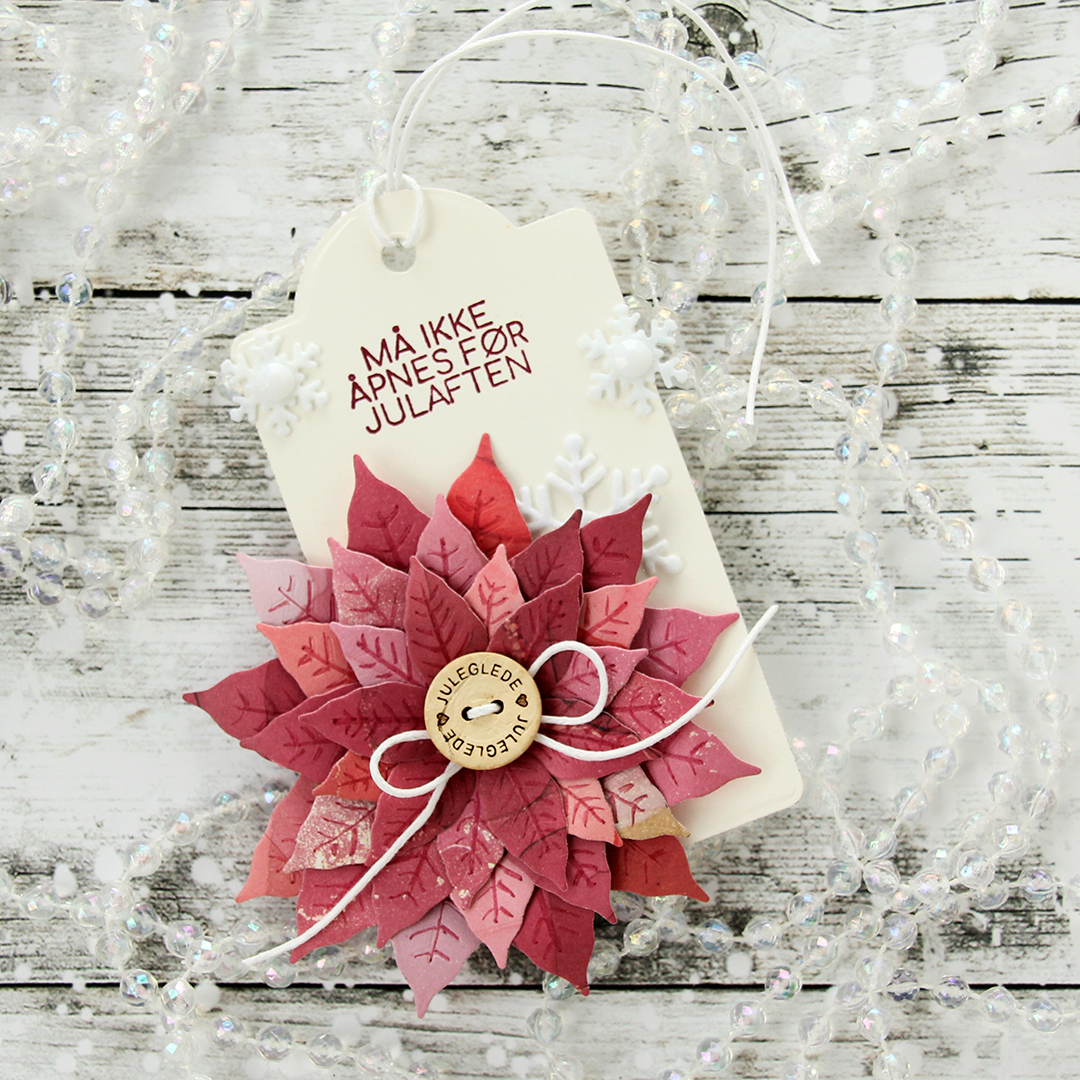 Die 302 Julestjerne creates an awesome poinsettia. I’m not usually one to use flowers on anything holiday related, but this die set has won me over. There’s three dies in the set – one creates a leaf (which I didn’t use on this tag), and then there are two dies that creates two sizes of petals for the actual flower. If you cut both twice you get a nice looking poinsettia. I cut both four times for this very full poinsettia. I used patterned paper from Craft Consortium, and there’s instant variety to the petals, I love it. The dies create indentations for the veiny lines, which I quickly enhanced with a Zig clean color real brush marker in a color that matched (230 Pale Rose).
 I added the flower to a tag I created from cream cardstock. I used Die 211 to create the tag, and stamped a sentiment from M-466 using Scarlet Jewel ink from Papertrey Ink. I adhered snowflakes from ST105 and ST102, before adding a white gem from ST208 to the center of each. I tied string through the loop at the top of the tag and added a KN567 button to the center of the flower, tying a bow behind the button using the same string that I used for the top of the tag (TR-104).
 I knew I wanted to do something fun with the poinsettia die set from Kort & Godt. The die set comes with three dies in three different sizes. If you die cut two of each, you get a poinsettia. There’s also a leaf die in the set. I die cut three leaves and created four of each size of the petals for a very full poinsettia. I used a patterned paper from the Ink Drops – Vivid paper pad from Craft Consortium for everything paper on this card except for the white cardstock. Before assembling my poinsettia, I curled all the leaves back a little so they wouldn’t appear flat. I just used a paint brush handle, anything that you can use to create that curve will work. I put foam squares on the back of the petals at the very back, but adhered the center of the poinsettia directly to the white die cut panel. I also put foam squares on the back of the leaves.
 I die cut the word gledelig four times; once from the patterned paper, three times from white cardstock. I stacked them for dimension, adhering the patterned paper one on top of the others. I stamped and white heat embossed jul to complete the sentiment (the die set with gledelig also has the word jul in it, but it was too big for my card). I used a glue gun to add berries to the center of the flower and embellished with a few white pearls.
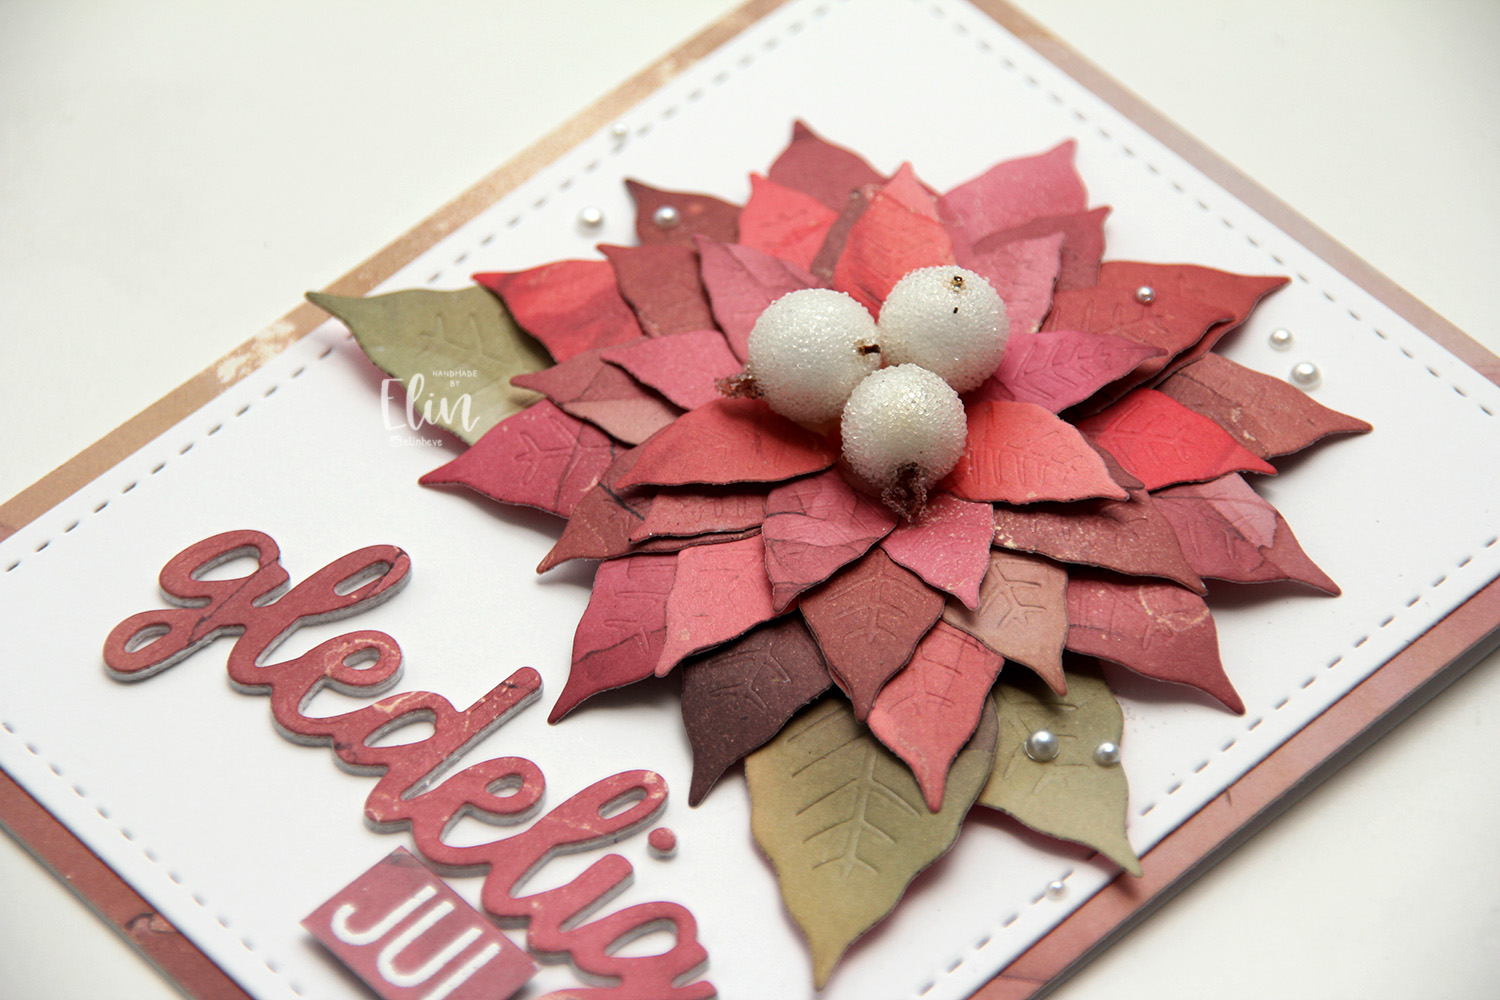 The curved leaves and the berries add a lot of dimension to this card. I love that the dies impress the veins of the leaves and petals into the die cuts.
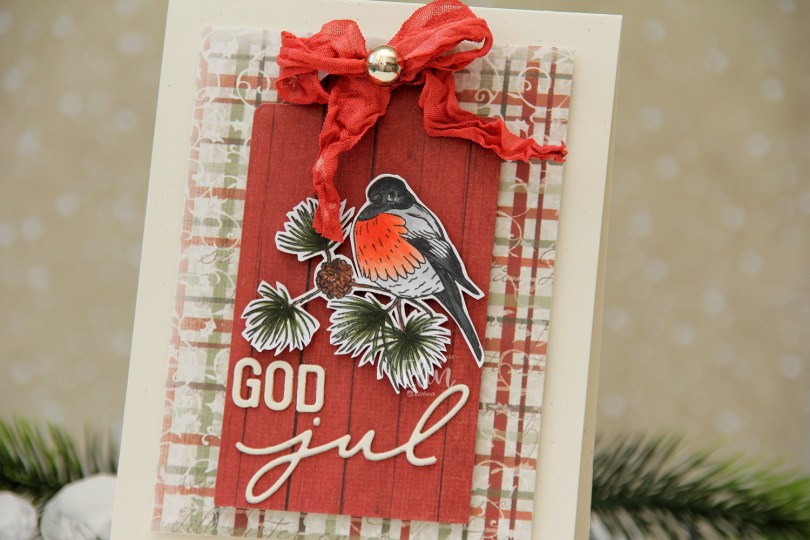
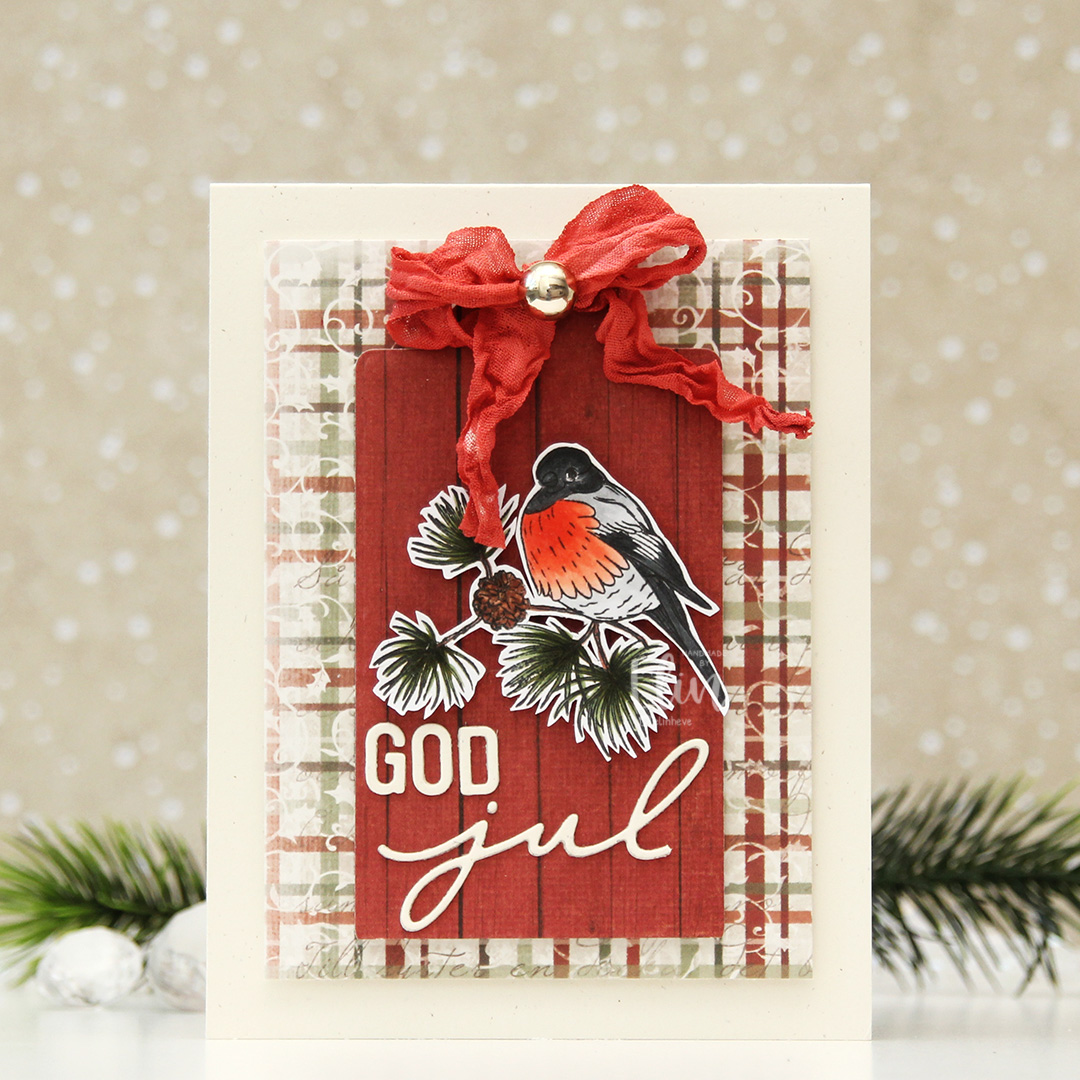 I shared a card a couple of weeks ago with a bullfinch. The stamp set has another bullfinch image, and I decided to put this one to good use too. This time I fussy cut around him, leaving a white trim around the edge. Onto a top fold card base I created from Rustic Cream cardstock from Papertrey Ink, I mounted a piece of patterned paper from Maja Design (Tomten kommer from the Gammaldags Jul collection). From the Christmas Flower sheet from the Wintertime in Swedish Lapland collection from Pion Design, I die cut a tag, added that in the center using foam tape and a bow at the top that I found in my stash.
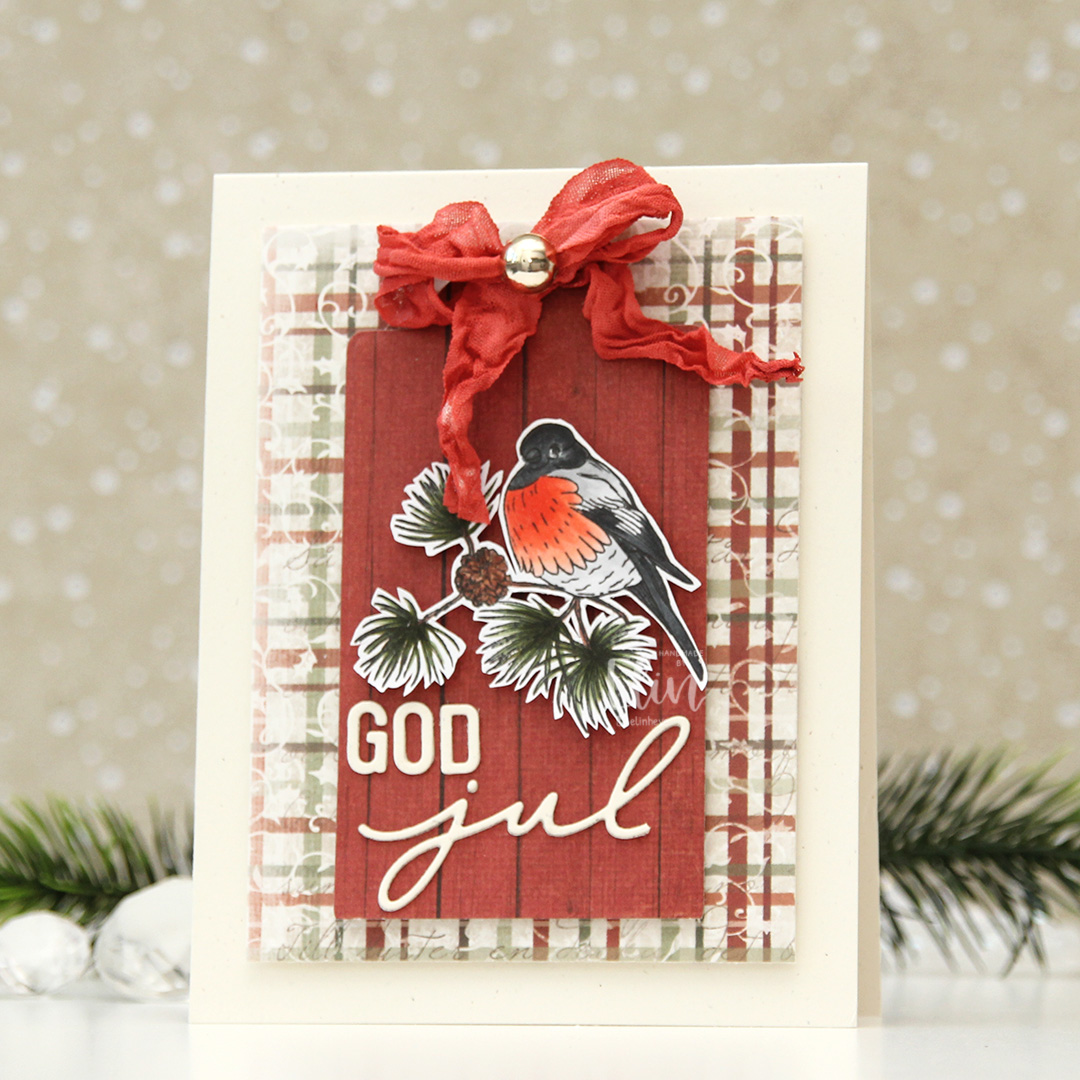 I used a die to create the word jul. The die actually cuts the word juleklem, but I only needed jul for my card and cut the other part off. Using an alphabet die, I die cut the letters to spell god and glued them above jul to complete my sentiment. I added the bullfinch image using foam squares and also added a big gold pearl to the knot on the bow for a little bit of shine to finish my card.
 Simple color palette, and it happens to be the same as the one I used for the previous bullfinch card.
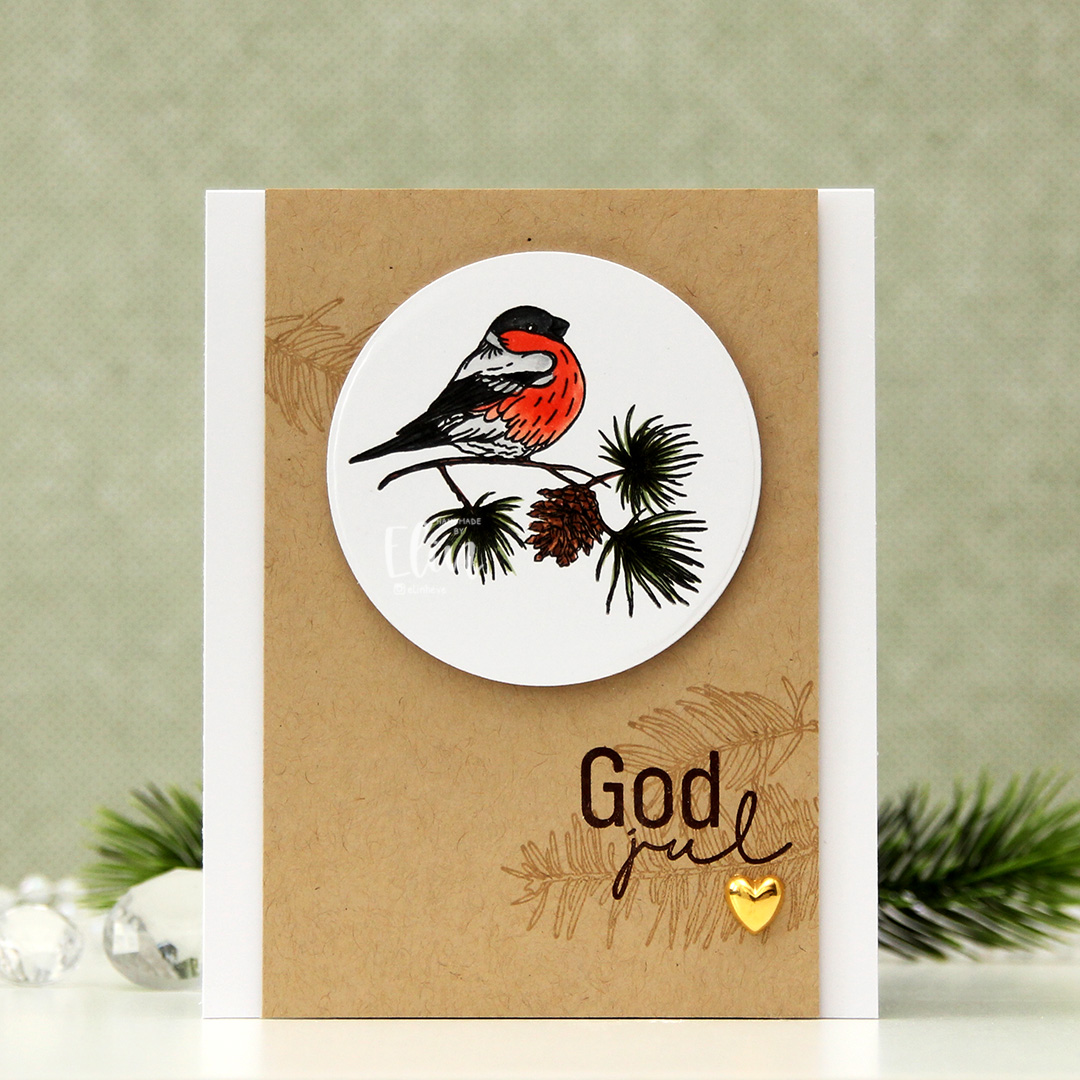 I started by stamping this bird on a piece of X-Press It blending card using Extreme Black ink from My Favorite Things. I colored the bird to look like a bullfinch using my Copics. In this little corner of the world, no bird says Christmas like a bullfinch. Once I finished my coloring, I stamped on top of my initial stamping, this time using Obsidian ink from Altenew to get really crisp lines. I love how crisp this ink is. It’s not compatible with Copics, so I need to stamp after my coloring’s complete, but that’s not a problem with a stamp positioning tool.
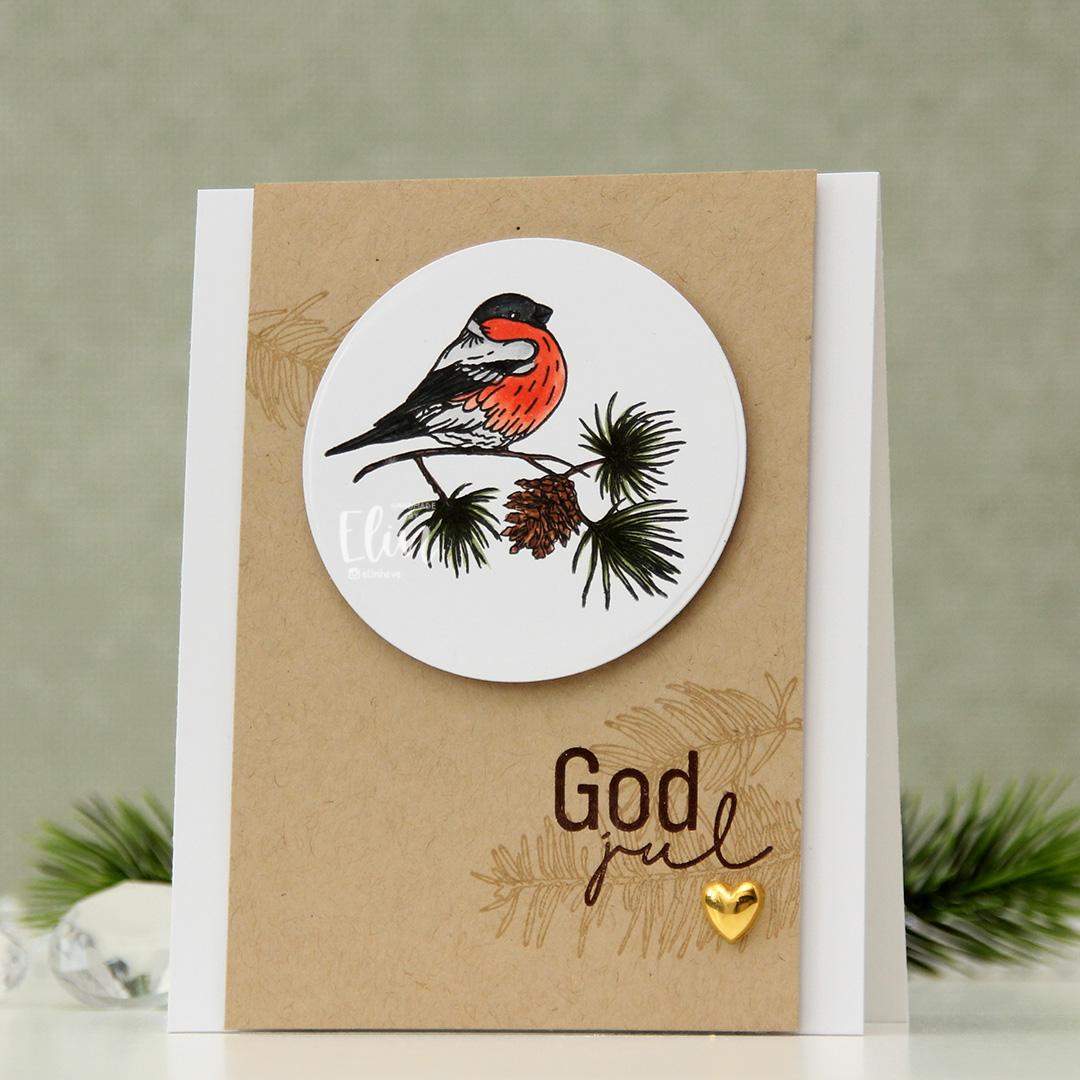 Onto a piece of Classic Kraft cardstock from Papertrey Ink, I stamped a few branches using Classic Kraft ink for a soft backdrop for my sentiment, which I stamped in Dark Chocolate ink, also from Papertrey Ink. I popped up the 3 1/2″ wide kraft panel in the center of a top fold white cardbase using foam tape, added foam tape behind my die cut image and placed it near the top center of the card, before finishing off with a gold heart for a little bit of embellishment.
 Simple color palette for this image.
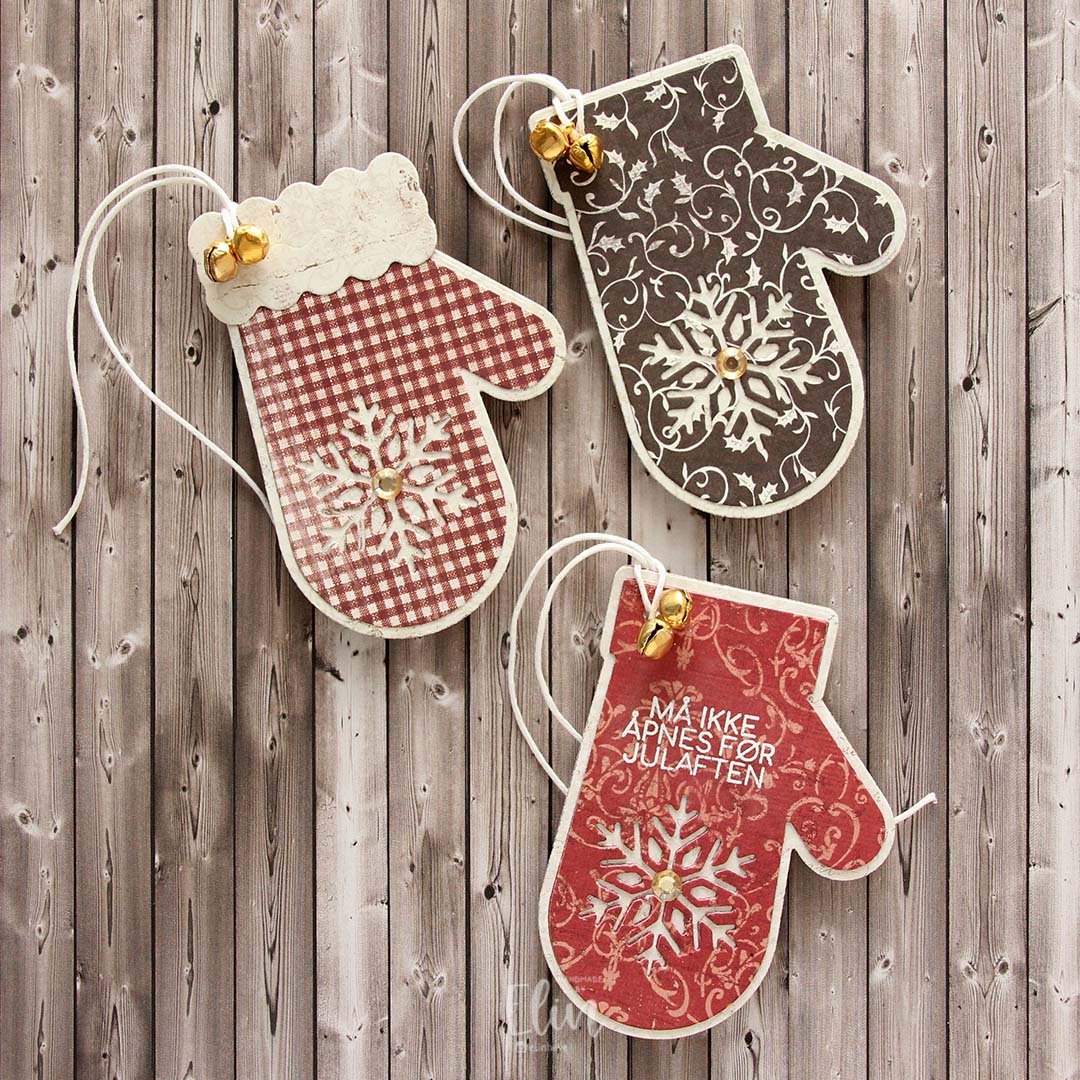 These mitten dies from Kort & Godt are perfect for gift tags. There are three dies in the set: the cuff, a base layer and a top layer. I only used the cuff on one of these, but used the base layer and top layer for all of them.
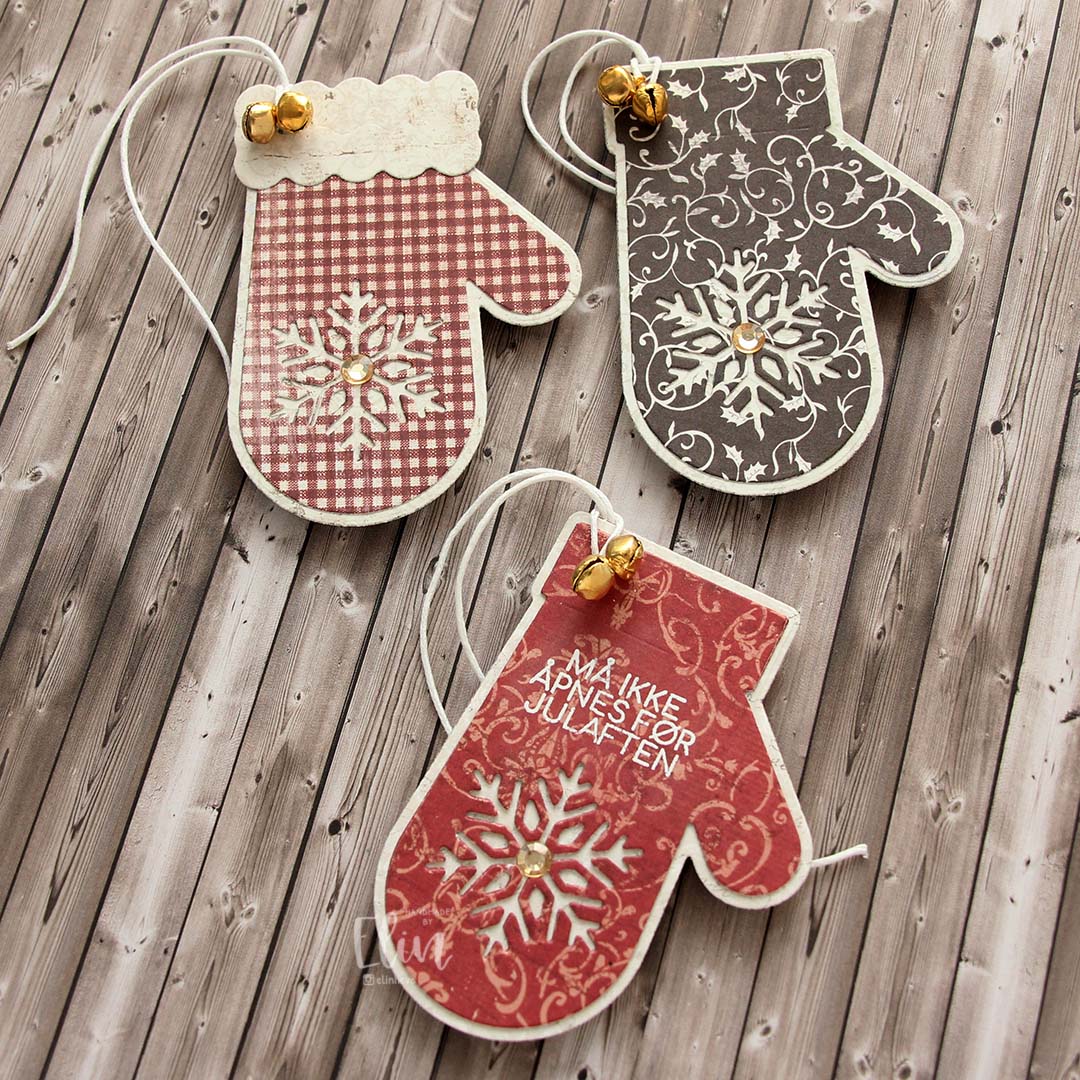 I used scraps of patterned paper from Maja Design for all three of the mittens, stamped and white heat embossed a sentiment on one of them and added a gold gem stone to the center of each of the snowflakes. I also pulled some string through a hole I made at the top left corner and added a couple of bells to each.
 On the back I stamped to and from using ink colors that matched the mittens. I used Dark Chocolate ink from Papertrey Ink for the brown mitten, Scarlet Jewel ink (also from PTI) for the red mittens.