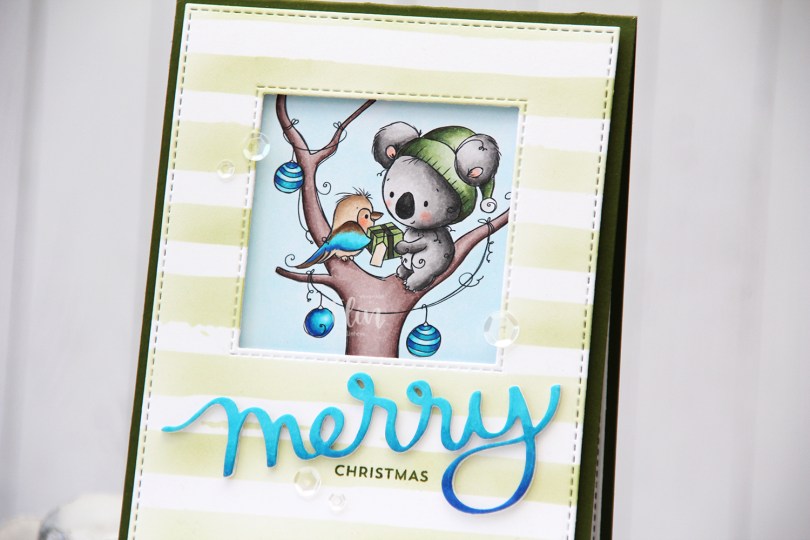
Hi, crafty friends. I have a Christmas card to share today, featuring this adorable kookaburra and koala image from Rachelle Anne Miller. Yes, it’s February, and I’m creating holiday cards. This will be very handy in November, and I won’t have to scramble last minute to get my cards finished in time. Also, it’s definitely still winter here, slippery as an ice rink and no fun outside, so card making is a safer option.
 I colored the cute little scene with Copics and put it aside while I worked on the rest of my card. On a separate piece of X-Press It blending card I blended the same three blueish teal colors that I used for the kookaburra and the ornaments to create an ombré effect, and used the Merry Script die from Mama Elephant to create part of a sentiment that would match my coloring. I added three white die cuts behind it for dimension to make it stand out on my card.
 I used the largest die in the A2 Stitched Rectangles STAX 2 set from My Favorite Things along with the Selfie Square die, also from MFT, and die cut both from a piece of Stamper’s Select White cardstock from Papertrey Ink. I then used the Watercolor Stripes stencil from Altenew and ink blended Jalapeño Popper ink from MFT very softly onto the white cardstock for a subtle background.

For the word christmas I used part of a sentiment from the Itty Bitty Holiday stamp set from MFT and stamped that using Jalapeño Popper ink. It’s hard to believe it’s the same color that I used for the ink blending, right?
 I put foam tape behind my ink blended background and adhered everything to a cardbase I created from Jalapeño Popper cardstock from MFT, before scattering a few sequins from the White Orchid Sequin Mix from Little Things from Lucy’s Cards to finish my card. I used the stencil from Altenew to add a little interest to the envelope, as well.

Simple color palette. A little unusual for a Christmas card, but I really wanted those blues from the kookaburra to stand out.

 I printed my image onto X-Press It blending card and colored the penguins with Copics, before sprinkling on chunky white embossing powder from Stampendous for a snowy look. I then die cut the Mega Snowflake Cover die from Mama Elephant three times; twice from white cardstock, once from Sno Cone cardstock from My Favorite Things. I glued them together and added my penguins to the back, before adhering everything onto a top fold A2 cardbase I created from Stamper’s Select White cardstock from Papertrey Ink.
 To keep the rest of the colors soft, I diecut the letters for HUGS three times from white cardstock using the Sending You Hugs die from MFT. I glued them to the bottom center of my card, and added a secondary sentiment that I stamped and white heat embossed on a strip of Cotton Candy cardstock, also from My Favorite Things. I added two more strips of cardstock behind for dimension and stability, before finishing off the card with a few Sparkling Clear Sequins from Pretty Pink Posh.
 I used probably way more gray markers than I needed to to create these penguins, but sometimes, that’s what I do.
 Isn’t this bunny looking up at the moon and the stars so adorable??? I decided to create a birthday card, and made it very simple with a digital watercolor background, a couple of die cuts and a button. You really don’t need much with images as great as this.
 I colored the bunny and the number with my Copics, before using the largest of the A2 Stitched Rectangles STAX dies from My Favorite Things to create a faux stitch around the edge. From Autumn Rose cardstock from Papertrey Ink, I die cut the word HURRA four times using a die from Kort & Godt. I added my panel to a card base I created from Papertrey Ink Autumn Rose cardstock, added my stacked die cut below the image and used a paint brush with sheer sparkle shimmer spray to add some sparkle to the die cut letters, as well as the moon and the number itself. It doesn’t show up in photos very well, but is very sparkly in real life. I also added a Kort & Godt button that I had in my stash, and my card was finished.
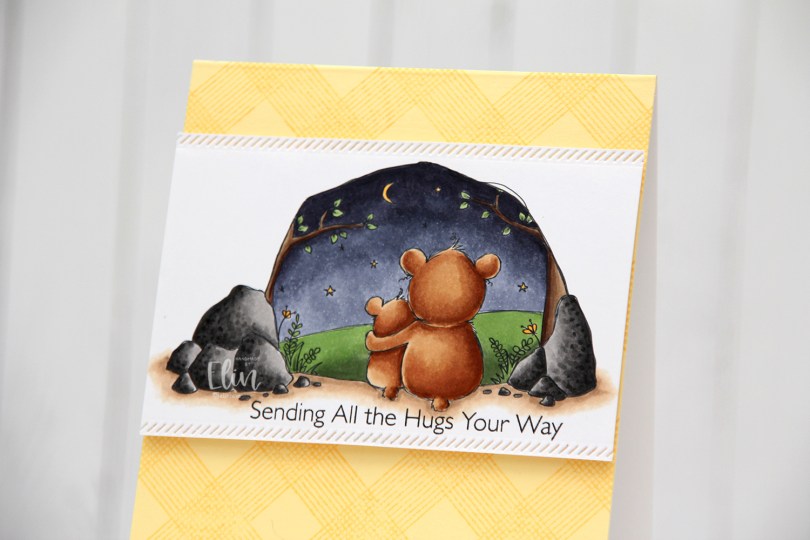
 I wanted the focus to be on the image and kept the rest of the card pretty simple. I stamped a sentiment from the Hugs Make Everything Better stamp set from My Favorite Things directly below my image using Smokey Shadow ink from Papertrey Ink. I wanted something a little bit softer than black, but I did stamp it twice, so maybe I should have used black after all. Close to the sentiment and close to the top of the scene I used one of the Stitched Borders dies from Lawn Fawn to create a decorative edge. I love faux stitching details on my cards, and this diagonal one is a fun change from the ones I normally use.
 Onto a panel of Lemon Tart cardstock from Papertrey Ink, I stamped the All Lined Up Diagonally Background stamp from My Favorite Things using Harvest Gold ink from Papertrey Ink, which is a tiny bit darker than the Lemon Tart. It adds subtle tone on tone interest to the background without distracting from the focal point of the image. I adhered the panel directly to a white top fold card base I created from Stamper’s Select White cardstock from Papertrey Ink and added my image towards the top of the card using foam tape for dimension.
 Simple color palette today. I also used BV27 for the sky, which is a color I’ve made myself.
 I colored the gingerbread cookies with my Copics and used a circle die to turn it into a circle. I die cut another circle from patterned paper from Papirdesign and used a die from the Glassic Snow Globe die set from My Favorite Things to cut a window from the same piece. I stamped and white heat embossed a sentiment from Norsk Stempelblad AS below the window and added a shaker pouch from My Favorite Things that I filled with the Icicle Sequin mix from Hero Arts.
 I die cut another circle from the same patterned paper that I used on the front and white heat embossed a to/from stamp from Norsk Stempelblad AS in the center. After adhering all the pieces together, I cut a hole at the top, reinforcing it with an eyelet before pulling string through. This shaker gift tag can definitely be used as an ornament too, and I’m hoping that’s what will happen.
 Simple image and simple colors for this one.
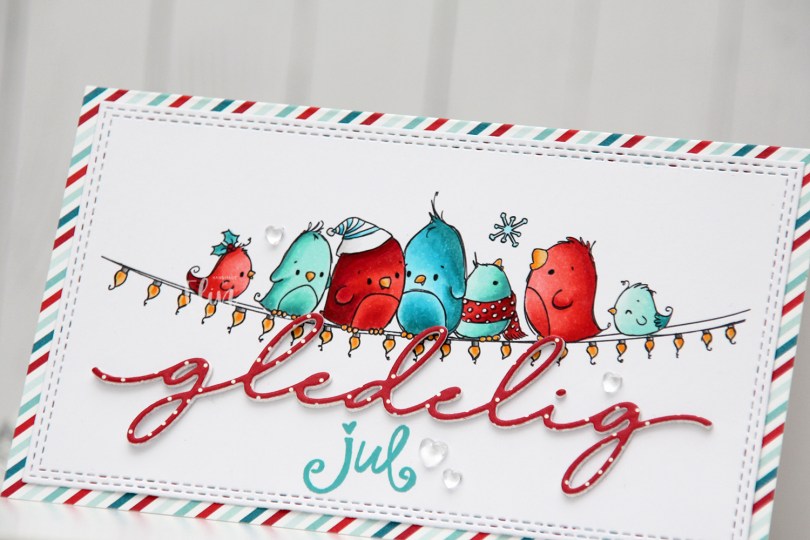
 I printed the image on a piece of X-Press It blending card and colored my birds with Copics in colors that match the Cool Collab paper pad from My Favorite Things, because I really wanted to use it. Red and teal is a color combo I really like, and this paper pad has lots of it. Once my coloring was complete I did some partial die cutting using the largest die in the Slimline Double Stitched Rectangle STAX die set, also from My Favorite Things. It gave me a nice double stitched edge around my colored image.
 I adhered my panel to a card base I covered with one of the papers in the pad, which gave me a nice frame. I also die cut the word gledelig from another piece of paper in the pad, with three white die cuts behind for dimension. I stamped the word jul (stamp set from Norsk Stempelblad AS) below it using a combination of Peacock Feathers Distress Oxide ink and Caribbean Sea ink from My Favorite Things to get the perfect color. To finish off the card I added a few heart droplets from the Crystal Collection Glass mix from Little Things from Lucy’s Cards.
 Simple color palette for this one.
 I started by creating a watercolor background in Photoshop using a png from Lili of the Valley, before I added the Dinosaur Friends on top. No fuss and no masking, I love how easy it is to work with digital files. I printed my critters and background onto X-Press It blending card before I did Copic coloring. I wanted to match my coloring to the colors in the background.
 I used the largest die in the A2 Stitched Rectangles STAX 1 set from My Favorite Things to create a nice finished edge around my coloring, before I did partial die cutting using the Sending Big Hugs die, also from My Favorite Things. I made sure to only die cut the word HUGS from my colored panel, and die cut 3 more from white cardstock. I layered my white die cuts together, adhering the colored piece on top of each letter. I adhered my scene to a side fold cardbase I created from Amethyst Allure cardstock from Papertrey Ink, and puzzled each of the letters into their place.
 The letters are a bit chameleon like. You can’t see them very well from head on, but if you look at them from an angle, they pop into view a lot better. I added a layer of Glossy Accents to the letters so they would shine and stand out a bit more.
 Stacked die cut inlay is a great technique when you want to add a big sentiment without distracting too much from the focal point of the card. This HUGS word is pretty big, but because of the inlay, what you really notice are the colored critters.
 I added some Sparkling Clear sequins from Pretty Pink Posh to finish off the card. These are my favorite sequins; they go with everything, and my stash is running low, so I need to buy a new bag soon. They also last forever, I’ve had mine for years, used them a ton and am only now running low.
 Simple color palette for this one. Those BGs blend effortlessly!
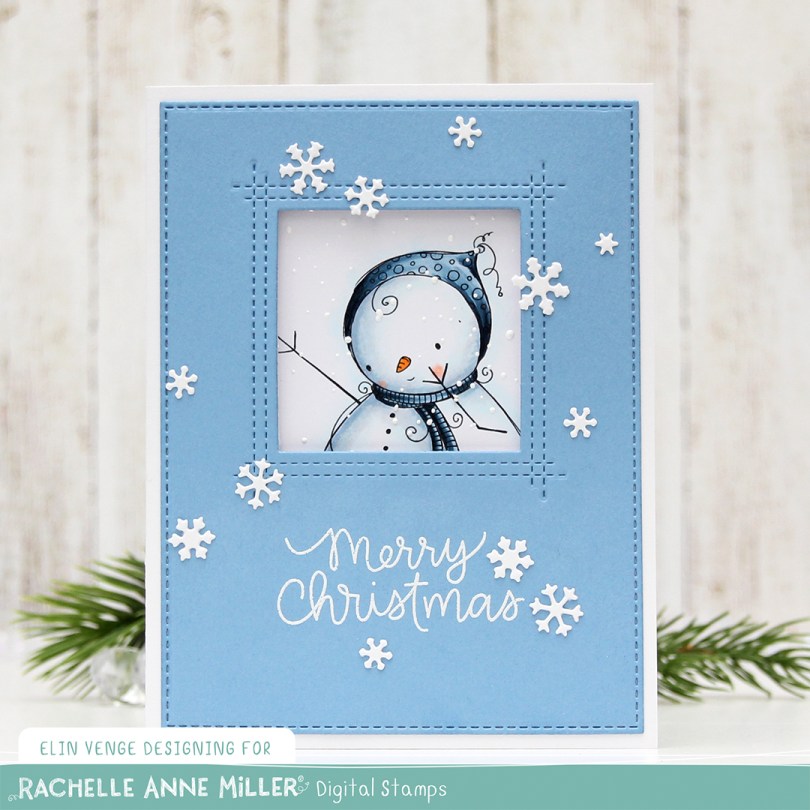
 This cute image is called
  I actually turned this into a trifold card. I used the largest of the A2 Stitched Rectangles STAX 2 dies from My Favorite Things, as well as the Square Peek-a-Boo Window die to die cut from this panel of Lazy Day cardstock, also from My Favorite Things.
 When you open the card, the rest of the image is revealed, and that cute snowman isn’t alone. He has a little friend giving him a present. Below the image I stamped a sentiment from the Holiday Messages stamp set from Mama Elephant using Lazy Day ink from My Favorite Things. This panel is also die cut using that die from the Stitched Rectangles STAX set from MFT. I love these faux stitch rectangle dies, they’re my most used dies by far. I sprinkled on chunky white embossing enamel from Stampendous and heated the panel from the back to melt the granules before adhering it to my card. This opens up to reveal ample space to write a personal message to the recipient.
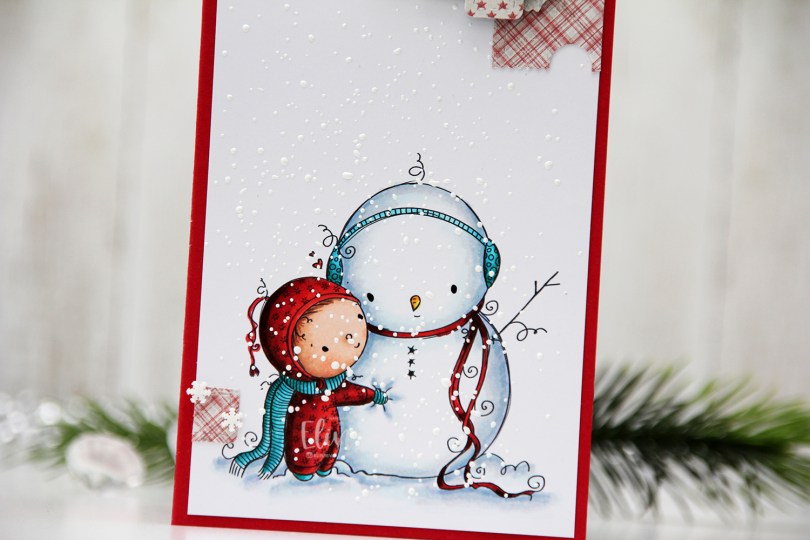

 I don’t often create red Christmas cards, but when I can pair that red with a tealy blue, a light blue or a gray, I can make red work. I printed and colored the image onto a 3 1/4 x 6 1/4″ panel of X-Press It blending card, before sprinkling on lots of chunky white embossing enamel from Stampendous to make my scene extra snowy.
 The patterned papers are all die cut from the 6×6″ Home for the Holidays paper stack from Maja Design. I love their patterns and their colors, and the colors in this stack are SO good, I couldn’t resist.
 Mini slimline cards are fun to make. I really should make my envelopes as I go, but I’m not very consistent with that, I’m afraid, and will have lots of envelopes to create once we get a little closer to Christmas (we’ve got less than 100 days to go, by the way).
 I stamped and white heat embossed a sentiment from the Itty Bitty Holiday stamp set from My Favorite Things onto a scrap piece of patterned paper from that stack from Maja Design, and die cut that with the coordinating Itty Bitty Strips die.
 I added a few snowdrift sprinkles from Little Things from Lucy’s Cards, and the entire panel is adhered onto a card base I made from Wild Cherry cardstock from My Favorite Things. I love their cardstock!
 As usual, I finish with my colors. Not a whole lot for this image.
 I put the penguins on a sheet of ice, made the ice no line and scattered baubles and stars around the ice to create a fun scene.
 I colored in my scene using Copics, die cut my panel using a double stitched rectangle die from My Favorite Things and decided to add a few little details for shine and texture. I added Rock Candy distress glitter to the stars, a dot of black glaze pen in each eye for a little bit of dimension and shine, and I also glued on some additional stars to the tree. The stars are from the Icicle sequin mix from Hero Arts.
 I printed one of the sentiments in the scene creator set onto a piece of Aqua Sky cardstock from Concord & 9th, and die cut that using a die from My Favorite Things. I used the same die to die cut from some Grapefruit cardstock, another beautiful Concord & 9th color, and one that matches perfectly with the baubles I colored.
 Near the sentiment, I added sequins from the White Orchid sequin mix from Little Things from Lucy’s Cards, and that finishes my card.
 I used lots of Copics for the ocean, the sheet of ice and the sky, not that many for everything else.