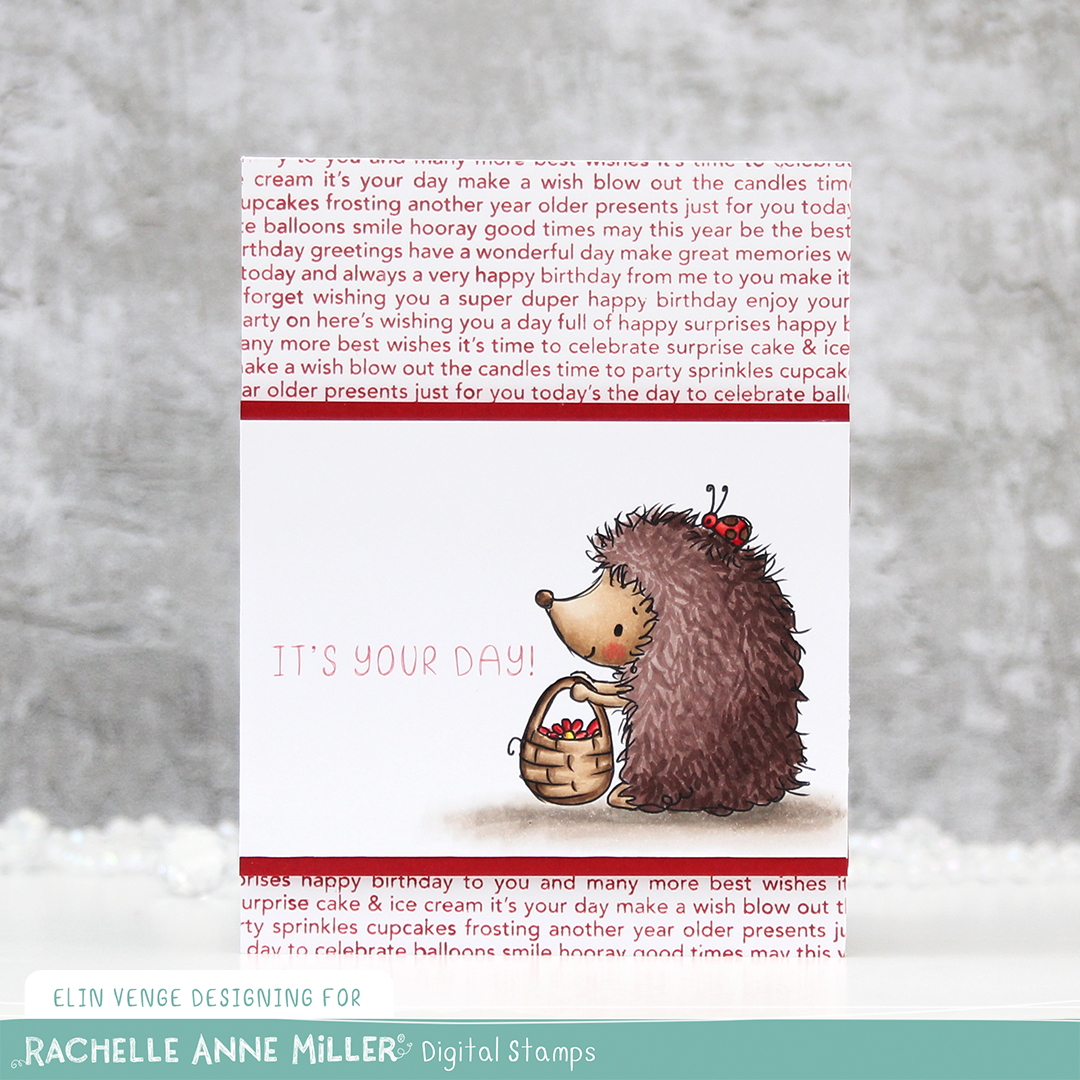
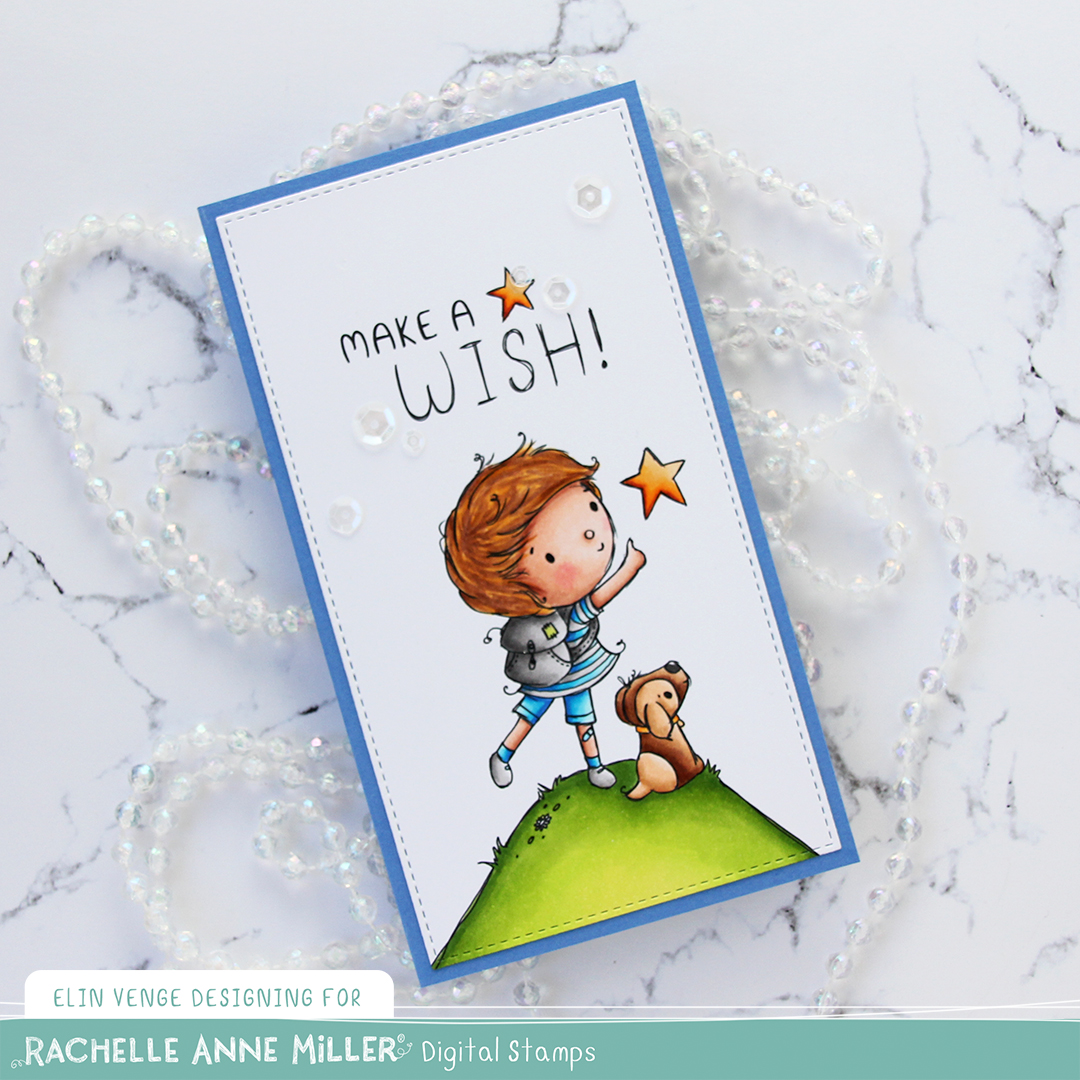
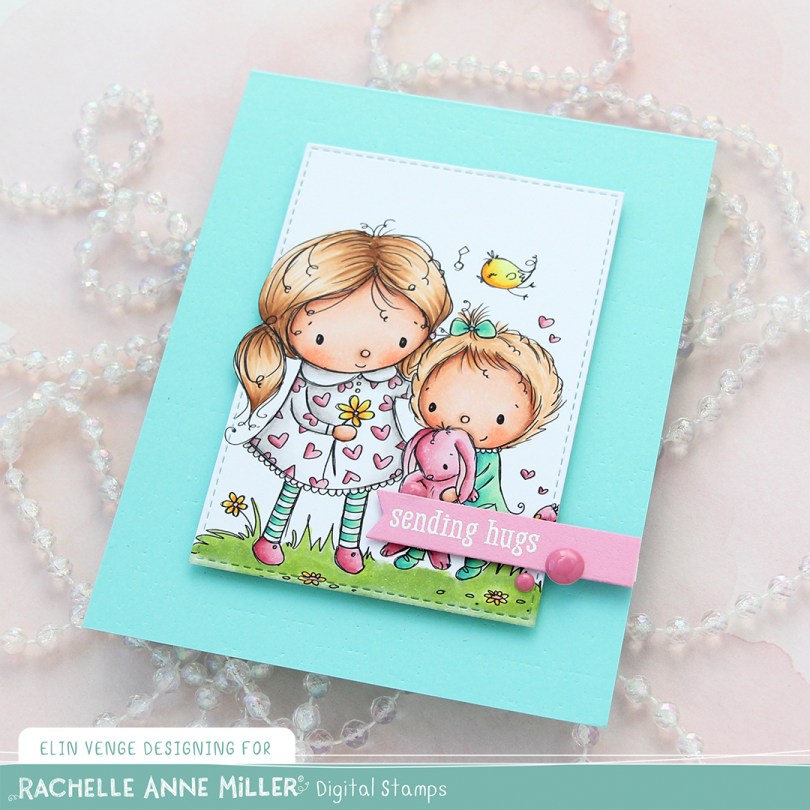
It’s your day {Rachelle Anne Miller Creative Studios}

Hi! Today’s the day for a brand new release over at Rachelle Anne Miller. In the new release, there’s this Garden friends Scene Creator, a set with lots of different images you can put together to create your own little scene. My card took a bit of a turn, and I only have the hedgehog and the sun from the stamp set to share today, but there’s a lot more.

Rachelle Anne Miller Garden friends front rett

I’d initially printed the sun in the top left corner of a 4 1/4 x 5 1/2″ piece of X-Press It blending card, but there was something that didn’t quite work design wise. There was no natural place to put a greeting and I was pretty much out of ideas, so I decided to do a very aggressive crop.

Rachelle Anne Miller Garden friends front skrått

I cut the panel in half, basically, and put the hedgehog on the front of the card and the sun on the inside. This gave me a better place for a greeting too. I printed a sentiment from the stamp set onto my colored piece after I’d colored it. Kind of held my breath while doing it, but it worked out great.

Rachelle Anne Miller Garden friends flatlay rett

I adhered strips of Amarena Cherry cardstock above and below my image, giving it somewhat of a frame and a way to draw the eye to the image.

Rachelle Anne Miller Garden friends flatlay skrått

On a separate piece of X-Press It, I stamped the Happy Birthday background stamp from My Favorite Things in Amarena Cherry ink from MFT, adhered it to a top fold card base and mounted my colored piece with foam tape.

Rachelle Anne Miller Garden friends flatlay høyre

The end result is a very clean looking card. And I used red! I hardly ever use red, so this is a big deal for me.

Rachelle Anne Miller Garden friends innside

I didn’t want the sun going to waste, so I adhered it to the inside of the card. Before doing that, I printed a sentiment next to it and added strips of Lemon Drop cardstock from My Favorite Things above and below. There’s still plenty of room at the bottom to write a personal message.

Rachelle Anne Miller Garden friends Copics

Last, but definitely not least, the colors I used for my image(s).

Let the good times roll {Rachelle Anne Miller Creative Studios}

Hi! I’m sharing a new card with another image from the July release from Rachelle Anne Miller. This is Animal Train. I love those cute little critters hitching a ride behind the locomotive.

Rachelle Anne Miller Animal Train front rett

I feel like I’ve been doing pretty good lately about using lots of different colors, and not stick to the same ones each time. This, however, has made me neglect my favorite blues. I haven’t used them since early May(!) and desperately needed to change that.

Rachelle Anne Miller Animal Train front skrått

I paired my blue with a pinky peach and a soft, pale yellow, and once I added the blue (which was the last thing I colored), I realized that the colors kind of look like the UniSA colors. Not intentional at all; maybe I miss Australia even more than I thought I did.

Rachelle Anne Miller Animal Train flatlay rett

I was going to use Fire Coral cardstock from My Favorite Things for my base and also have some peeking out behind the image, but I put a panel of Coral Crush cardstock on top, which fit most of my coloring better. I decided to use Fire Coral for the banner.

Rachelle Anne Miller Animal Train flatlay skrått

The banner itself is die cut using the Elegant Folded Banner die from My Favorite Things. Onto that I white heat embossed a sentiment from the Pawty Time stamp set, also from MFT. It’s fairly easy to curve clear stamps to fit whatever shape you’re stamping on, and this was a breeze. I used the largest die in the Double Stitched Rectangle STAX die set from My Favorite Things, which was a brand new die set in their July release. I love the STAX dies from MFT, so I was very excited about this set. I finished off the card by adding three sparkling clear sequins from Pretty Pink Posh.

Rachelle Anne Miller Animal Train Copics

Pinks, yellows and blues. And a few neutrals thrown in for good measure. I also used B90, which is a color I’ve made myself. And believe it or not, but I used four different color families for the peach – R, RV, E and YR. Who says you have to stick to one color?

Waving hello {Rachelle Anne Miller Creative Studios}

Hi, there! I have a little pilot to share with you today. This image is from the July release from Rachelle Anne Miller and will be available for purchase on Thursday, along with the other images in the release.

Rachelle Anne Miller Little Pilot front rett

I’ve been using a lot of vibrant colors lately. I think there’s something about the sunshine and the warm temperatures that contribute to happy colors! I’m here for it, fall will be here way too soon anyway. I usually cut against the black lines when I fussy cut, but Rachelle’s images have wonderfully whimsical wispy lines on the outside, and I didn’t want to cut those away. The white border also helps make the plane stand out against the blue background.

Rachelle Anne Miller Little Pilot front skrått

Speaking of backgrounds, I used the Rolling Clouds stencil from My Favorite Things with Lazy Day ink (also MFT) directly onto my card base to create clouds in the background. The card base itself is made from Blue Breeze cardstock from My Favorite Things.

Rachelle Anne Miller Little Pilot flatlay

Using a die in the Slim Film City die set from Mama Elephant, I die cut a skyline from two gray colors of cardstock from My Favorite Things (Gravel Gray and Eiffel Tower). I die cut three layers of the lighter one (Gravel Gray) and stacked them. I die cut two layers of the Eiffel Tower cardstock and stamped and white heat embossed a sentiment from Purple Onion Designs onto the top layer, and adhered these two offset from the lighter gray buildings behind them.

Rachelle anne Miller Little Pilot flatlay angled

I wanted to add a little something extra, and decided to die cut a few clouds from vellum. I love creating vellum clouds, there’s something dreamy about them. I’d adhered my plane using 1 mm foam squares for a little bit of dimension, and by placing my clouds directly onto the plane and the layered cityscape, I get dimension without having to use more foam squares, which can kind of be a pain with vellum, because most things show trough. I put tiny drops of glue in strategic places behind my clouds, anchoring each of the clouds in two spots.

Rachelle Anne Miller Little Pilot flatlay høyre

I thought about adding enamel dots on top, but went with sequins from the White Orchid Sequin mix from Little Things from Lucy’s Cards. These aren’t as distracting from the focal image as enamel dots would have been.

Rachelle Anne Miller Little Pilot Copics

Not a lot of colors for this one.

Make a Wish {Rachelle Anne Miller Creative Studios}

Hi, and happy Monday. I’m starting the week with this very simple mini slimline card, featuring “Make a Wish” from Rachelle Anne Miller, which happens to be an image from the most recent release.

Rachelle Anne Miller Make a Wish flatlay skrå

I colored the image with my Copics and used partial die cutting with a faux stitch rectangle die from My Favorite Things to turn it into a panel that would fit a mini slimline well.

Rachelle Anne Miller Make a Wish flatlay høyre

I adhered my panel onto a card base made out of Something Blue cardstock from My Favorite Things, and finished the card with a few sequins from the White Orchid Sequin mix from Little Things from Lucy’s Cards. Super simple.

Rachelle Anne Miller Make a Wish Copics

Not a whole heap of colors for this one.

Waving hello {Rachelle Anne Miller Creative Studios}

Hi, there! Today I have a sneak peek to share of one of the new images coming from Rachelle Anne Miller later this week. It’s a hot air balloon, and I actually saw one outside my craft room window a couple of weeks ago. They’re not too common around here.

Rachelle Anne Miller hot air balloon front rett

I printed the image on X-Press It blending card, colored it with my Copics and die cut it into a panel using the largest of the dies from the A2 Stitched Rectangles STAX 2 set from My Favorite Things. I adhered it to a card base I made from Wild Wisteria card stock from My Favorite Things and went digging through my stash looking for the perfect sentiment.

Rachelle Anne Miller hot air balloon front skrått

The girl in the basket is definitely waving hello to the little bird on the outside, so I decided to use this sentiment from Purple Onion Designs. I white heat embossed it onto a separate piece of Wild Wisteria card stock, cut it down to a strip with a nice end using the medium size of the fishtail flag frames dies from My Favorite Things and adhered it to my card using 1 mm foam squares. I finished off the card with a few sparkling clear sequins from Pretty Pink Posh.

Rachelle Anne Miller hot air balloon Copics

Not a lot of Copics for this one, this image was quick and easy to color. The first thing I colored was actually the bird using those blues, but once the rest of the image was colored too, he really stood out, so I put some pinkish purple on top of the blue.

You deserve flowers {Rachelle Anne Miller Creative Studios}

Hi, there! I have a super simple card to share today, featuring the Little Fairy image from Rachelle Anne Miller.

Rachelle Anne Miller Little Fairy front skrått

I colored my image with Copics and die cut it using a die from My Favorite Things and adhered it to a top fold card base I made from Bright Buttercup cardstock from Papertrey Ink.

Rachelle Anne Miller Little Fairy flatlay venstre

Using VersaMark ink, I stamped a sentiment from Norsk Stempelblad AS onto a scrap piece of Raspberry Fizz cardstock from Papertrey Ink. I turned it into a strip using one of the dies in the Fishtail Flag Frames die set from My Favorite Things, mounted it on foam tape and adhered it to the card.

Rachelle Anne Miller Little Fairy flatlay høyre

I finished off the card with some white sequins from Little Things from Lucy’s Cards.

Rachelle Anne Miller Little Fairy Copics

As usual, a graphic of the Copics I used.

Welcome to the world {Rachelle Anne Miller Creative Studios}

Hi, there! Today I’m sharing a super simple card (I feel like I always say that), featuring an image (Dinosaur Friends) from Rachelle Anne Miller from the release that’s coming later this week.

Rachelle Anne Miller Dinosaur Friends Velkommen til verden front

I colored the image with my Copics, using the largest of the A2 Stitched rectangles dies from My Favorite Things to turn it into a panel with a nice faux stitch edge. I adhered it to a card base made from Lush Lagoon card stock from My Favorite Things and wanted to keep everything simple and the focus on the image. I did that by adding just a sentiment strip (white heat embossed sentiment from Norsk Stempelblad AS) and a sparkling clear sequins from Pretty Pink Posh.

Rachelle Anne Miller Dinosaur Friends Velkommen til verden Copics

Simple coloring, simple color palette.

You cake my day! {Rachelle Anne Miller Creative Studios}

Hi, there! I have a simple card to share today, featuring the Birthday Cake image from Rachelle Anne Miller.

Rachelle Anne Miller Birthday Cake front rett

I colored up the image with Copics in super bright colors. I used a border die from Lawn Fawn to add faux stitching above and below the image, and put lots of foam tape on the back.

Rachelle Anne Miller Birthday Cake front skrått

I used the quilted backdrop die (also from Lawn Fawn) to die cut from a piece of Raspberry Fizz card stock from Papertrey Ink. The piece I used wasn’t big enough to cover a regular size card front, so I adhered it to a white top fold card base and cut off the excess white, before adding my colored piece on top. The card measures around 5 1/8 x 4″. I added a few clusters of 2 mm and 3 mm pearls from Kort & Godt to the colored panel, a little bit of Lemon divine twine tied in a bow at the fold, and my card was finished. Super simple, right?

Rachelle Anne Miller Birthday Cake Copics

A nice little Copic selection.

Happy birthday {Rachelle Anne Miller Creative Studios}

Hi, there! I have a fairly simple birthday card to share today, featuring the Birthday Owls digital stamp from Rachelle Anne Miller. I thought these two owls holding a birthday banner were so adorable, and one of them even has a flower in her hair…. or… feathers, maybe, owls don’t really have hair, do they?

Rachelle Anne Miller Birthday Owls front rett

I colored the image with my Copics, before using a stitched border die from Lawn Fawn to create the pierced horizontal lines above and below the image.

Rachelle Anne Miller Birthday Owls front skrått

Onto a white card base, I adhered a panel of Sour Apple card stock from My Favorite Things, that I’d die cut using the Isty Bitsy Polka Dot backdrop die from Lawn Fawn. I thought the dots in the background would tie in nicely with the dots on the balloons in the image.

Rachelle Anne Miller Birthday Owls flatlay høyr

I mounted the colored panel onto the front of the card using lots of foam tape for dimension.

Rachelle Anne Miller Birthday Owls flatlay

I thought the card needed just a little bit extra, so I wrapped a piece of Aqua divine twine from Whisker Graphics around the top of my card and tied it in a bow.

Rachelle Anne Miller Birthday Owls Copics

Festive colors for this one, I absolutely loved coloring this image!

A little hello {Rachelle Anne Miller Creative Studios}

Hi, everyone. I’m starting the new week with a new card, featuring the Flower Garden digital stamp from Rachelle Anne Miller.

As usual, I printed the image on X-Press It blending card and colored it in using my Copics. Once done coloring, I took the second largest die in the A2 Stitched Rectangles STAX 2 set from My Favorite Things to turn it into a panel with nice faux stitching along the edges. I mounted it with foam tape onto my card base.

I stamped and white heat embossed a sentiment from InkyWings onto a tiny scrap of Raspberry Fizz card stock from Papertrey Ink. It was so small I barely even cut it smaller before adhering it to my card using Gina K foam tape, which isn’t as thick as the foam tape I used for my colored piece. I added some gems and sequins from the Iced Sherbet mix from Little Things from Lucy’s Cards, and my card was finished.

Colors. Not a lot, but some, with an added confession. I made a very similar card to this about six months back, and I’ve used the exact same colors on this one, except for one. Being a little lazy this time, I didn’t want to redo the entire graphic because of one single marker, so this graphic is one I’ve used before. The only color in there that I didn’t use for this card was E13, simply because I forgot.