
Hi, crafty friends. I’m sharing with you a super simple birthday card today, featuring this dragon eating ice cream from Lili of the Valley. This was the card we gave my nephew for his birthday this week. The first birthday card I ever made was for him for his first birthday. It featured a green dragon which I actually drew myself and colored in using Pantone markers. This week he turned 14, and even though this dragon is a bit childlike, it still feels like a nod back to that first one. Plus, he’s eating ice cream, you can’t go wrong with ice cream, and my nephew loves ice cream, so it was kind of perfect.
 I printed the dragon on a piece of X-Press It blending card and colored him with my Copics, before using the largest die in the A2 Stitched Rectangles STAX 1 die set from My Favorite Things. I covered my card base with a 4 1/4 x 5 1/2″ piece of patterned paper from Kaisercraft (Charmed from the Key to my Heart collection) to match the green. I cut the panel with the dragon at funky angles at the top and left side to create a convex quadrilateral that I mounted on foam tape in the top left corner of the card.
 Using a scrap of patterned paper from the Fremtidsdrømmer collection from Papirdesign, I die cut Gratulerer using the Gratulerer med dagen 3 die set, also from Papirdesign. I die cut an additional 3 layers of white cardstock to glue behind it, but decided that even that wasn’t enough dimension, so I cut tiny slivers of clear foam tape from Rabbit Hole Designs to add to the back of the letters. That did the trick, and it looks like the die cut is floating. I stamped a sub sentiment from the A06 stamp set from Norsk Stempelblad AS onto another piece of the same patterned paper using Jalapeño Popper ink from My Favorite Things, cut it down to a strip, added a couple of white cardstock strips behind it and more of the clear foam tape to make it float, before finishing off the card with a few enamel dots from the Pocketful of Sunshine pack from Altenew.
 Fairly simple color palette, but I went through too many teal colors before I decided on the right one for the straws and the sprinkles.

 The stamp actually comes with all the candles in a row, but for this design I wanted to shake things up a bit. I colored my candles in a bit of a rainbow order and used a lot of candles (I printed the whole row of candles three times). After they were all colored came the fun part: fussy cutting.
 I don’t normally mind fussy cutting, I find it relaxing, but these candles are tiny and there are plenty of them, so it took a while. Well worth it, though. I prefer cutting right against the black lines of the image when I fussy cut, and that’s what I did here, for everything but the wick of the candle, which has a bit of white showing on either side.
 Using clear foam tape, I mounted each of the candles onto a panel I created from Soft Stone cardstock from Papertrey Ink. I then mounted that panel onto my card base, which I created from Stamper’s Select White cardstock, also from PTI. I love the cardstock from Papertrey Ink, it’s my favorite!
 Using the Happy Birthday die from My Favorite Things, I die cut the words three times from True Black cardstock from Papertrey Ink and the shadow twice from 40 lb vellum from Bazzill. I stacked the black cardstock and covered my layered die cut with VersaMark ink, then sprinkling on Super fine detail black embossing powder from Ranger and heat set. I don’t usually use black embossing powder, it tends to create a mess, but to create shiny die cuts like this, it works great. I repeated the embossing process a couple more times to make it extra shiny and glossy and even.
 Before die cutting the vellum, I put a piece of adhesive sheet on the back of one, so I’d be able to glue them together without any adhesive showing. The trick with adhesive and vellum is to have an even layer on the back, whether it’s liquid glue or another type of adhesive. Of course you can add your adhesive in strategic places behind the vellum or put embellishments on top, but I didn’t want to have to think about that for this card, and doubling up the vellum makes it a little less transparent and it stands out more against the colorful candles behind it. I actually didn’t put any embellishments on this, I thought there was enough going on with all the candles and dimension already there.
 Lots of colors for this. Three colors in most of the combos, some use four. Yes, I go overboard, I’m aware 😉
 I colored and fussy cut
  For the background I used the largest die in the Stitched Traditional Tag STAX die set from My Favorite Things and die cut two of these from Blue Breeze cardstock from My Favorite Things, before gluing them back to back. On the back I simply stamped a To/From stamp and on the front, I used the Falling Snow stencil from Simon Says Stamp along with some paste for a subtle snowy effect in the background.
 I used quite a few colors for the fur on the squirrel, but the rest of the colors are pretty basic.
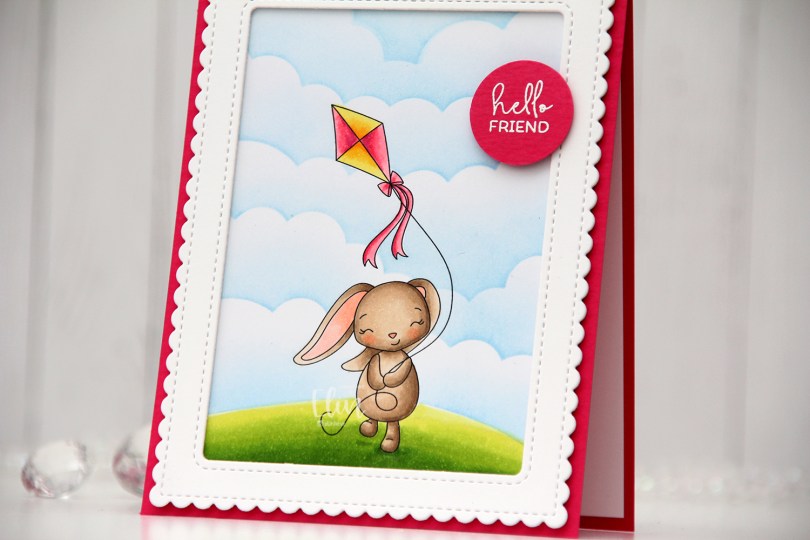
 This image is sooo sweet, I just had to create a card using it. There’s also a butterfly in the image, which I erased before printing, I just wanted the bunny with the kite for this card. I created a very simple grassy hill below her feet and used the Rolling Clouds stencil from My Favorite Things along with Eastern Sky ink from Altenew to create the clouds behind her.
 From Stamper’s Select White cardstock from Papertrey Ink, I die cut three white frames using a die from the Madison Avenue die set from Mama Elephant and stacked them for a dimensional look. I adhered my colored piece to the back of the frame, before adhering everything to a card base I created from Poppin’ Pink cardstock from My Favorite Things. I white heat embossed a sentiment from the Mini Messages stamp set from Mama Elephant onto a separate piece of pink cardstock and used a 1″ circle punch from EK Success to create a quick circle from it. I popped it up on clear foam tape near the top right of the card, and decided not to add any embellishments to this.
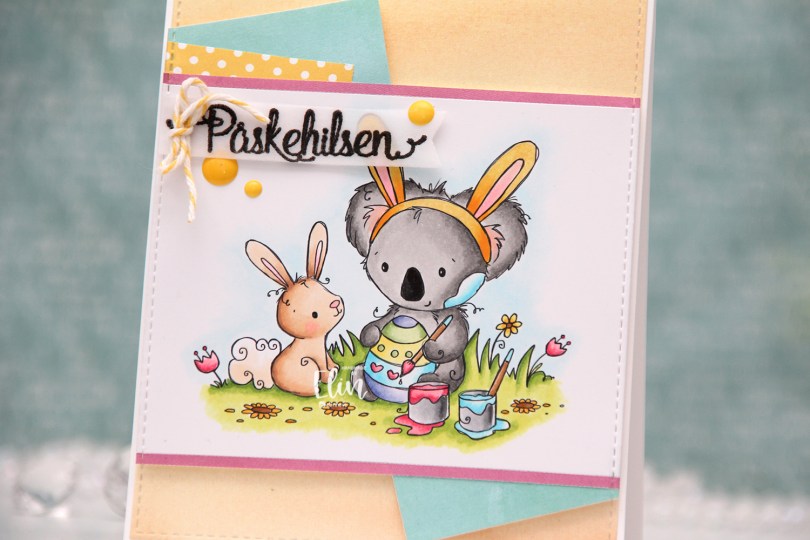
 Isn’t this image the cutest? The koala with the bunny ears painting the egg with the little bunny watching, it’s sooo sweet. I colored this image using a lot more colors than I normally would, but they’re colors that scream spring to me, so I’m all for it, I definitely long for warmer days.
 I put a strip of pink patterned paper from My Favorite Things above and below the image, and added a few more patterned paper pieces (from Lawn Fawn and My Favorite Things) angled behind my colored piece, before die cutting all of them using the A2 Stitched Rectangles STAX 1 die set from My Favorite Things to create that faux stitch look that I love to add to my cards. I used the same die to die cut from yellow patterned paper from Lawn Fawn, adhered that to my card base, then mounted my colored piece on top using foam tape.
 Onto a piece of vellum, I stamped a sentiment from an Easter stamp set from Papirdesign (PD18390 Påske) using VersaFine Onyx Black ink and clear heat embossed it, before die cutting it using one of the dies in the Fishtail Flag Frames die set from My Favorite Things.
 I tied a bow around my sentiment banner using twine from Whisker Graphics in the color Lemon, and then I finished off the card with a few yellow enamel dots from the Pocketful of Sunshine enamel dot collection from Altenew.
 Lots of colors for this one.
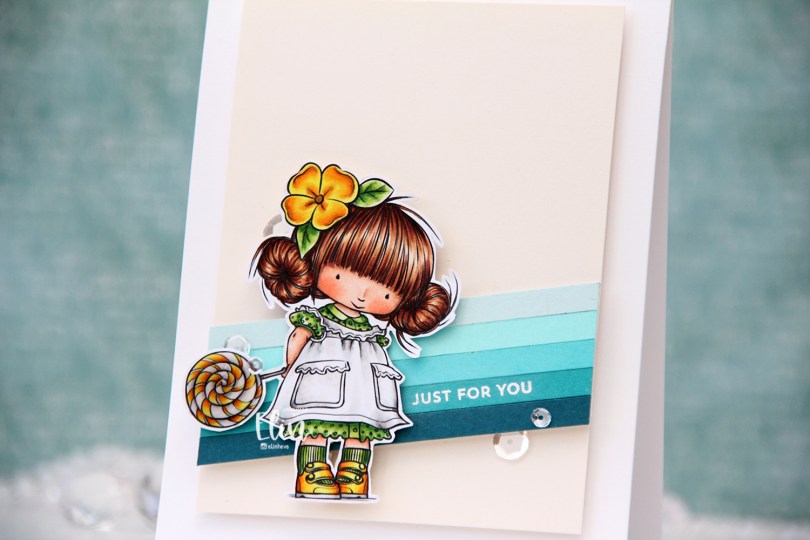
 I went for a green and yellow combo this time, and made her hair dark (I colored her blonde last time). I was going to color her dress in teals, but when I was done with everything else and only had the dress left to color I changed my mind and opted for white. White’s not really white, I used a few grays and the tiniest amount of light blue, but it reads white in the finished coloring. I fussy cut my image leaving a white trim around the edge and put her aside while I worked on the rest of my card.
 I took a page out of
  I adhered my cream panel onto a top fold, white card base using foam tape, before stamping and heat embossing a sentiment from the Itty Bitty Birthday stamp set from My Favorite Things. I thought this particular sentiment would work for many occasions, not just birthdays, and the size was perfect to add to one of my cardstock strips.
 Using even more foam tape I adhered Mona near the bottom left of the card. I love that her dress sticks out right below the sentiment, I really couldn’t have placed the sentiment any better, it’s nestled in perfectly. I put Glossy Accents on the lollipop and a few Sparkling Clear sequins from Pretty Pink Posh here and there to finish the card.
 Here you can see all the dimension. The cream panel is mounted on foam tape, the cardstock stripes are mounted on foam tape, and Mona is mounted on foam tape.
 Quick and easy color palette for this one. I don’t think I went too much overboard with the amount of markers in this one. I won’t mention that I used six colors for her hair 😉
 I actually made this card for my dad, whose birthday was last week. He loves his cakes and desserts, and has a stationary bike that he works on on almost daily (while watching police car chases on YouTube; no joke), and I thought this image would be perfect for him, with the little bear on his bike and the cupcake trailing behind. I colored the image with my Copics and used the Stitched Mini Slimline STAX die set from My Favorite Things to turn it into a panel that would fit nicely on a mini slimline card. I then die cut the letters to spell HURRA three times from Jalapeño Popper cardstock from My Favorite Things and stacked them for a dimensional look, before deciding that the green was too dark. I didn’t want to start over, so I using the same dies (the Connected die set from My Favorite Things), I cut an additional layer from Parsley cardstock from Concord & 9th and glued that on top of the dark green. I like the lighter green better.
 I adhered my panel to a card base I created from Blueberry cardstock from My Favorite Things. I added Glossy Accents to the hearts in the image, stamped a sentiment from the A06 stamp set from Norsk Stempelblad AS using Jalapeño Popper ink from My Favorite Things and added a few more strips of cardstock behind it for dimension. I finished off the card with a couple of enamel dots from Papirdesign.
 I probably used way more colors than I really needed for this card. Three colors for that cherry is kind of ridiculous, it’s not that big, but that’s kind of what I do – I really love my Copics.
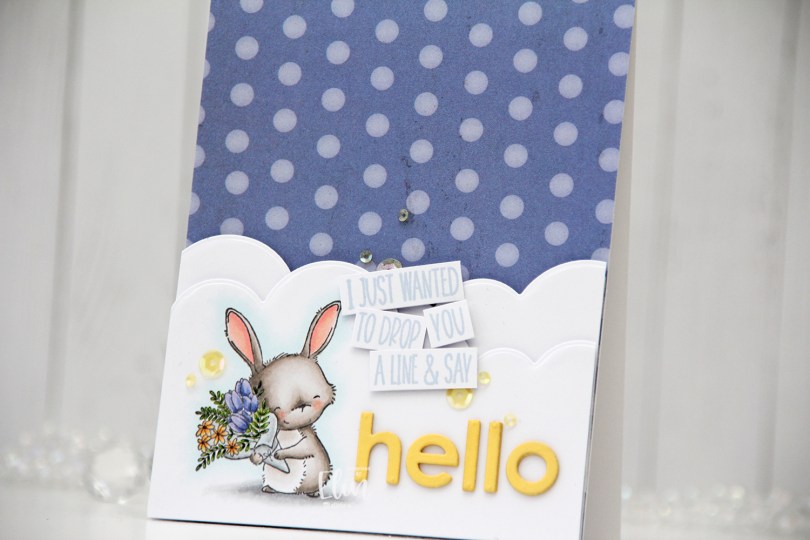
 I stamped the image using Extreme Black ink from My Favorite Things, before coloring with my Copics. I love love love the way rubber stamps stamp even the thinnest lines. It’s great for details, and Stacey Yacula’s illustration style gets to shine. Her line work is very delicate, which pairs so well with rubber stamping, because you’re able to easily stamp all the little details.
 I used a die in the Slim Card Basics die set from Mama Elephant to create a cloud border above my stamped and colored image, and used the same die on a separate piece of cardstock. I found a scrap piece of patterned paper from Scenic Route that I added to my card base, then added my cloud pieces on top using foam tape.
 I used two sentiments from the
  Using the lower case Parker alphabet die set from Memory Box, I die cut each letter three times from Harvest Gold cardstock from Papertrey Ink to spell the word hello. I stacked my die cuts and adhered them to the right of Junie using liquid glue.
 To finish the card I added a few yellow sequins from Little Things from Lucy’s Cards. These are actually from the Candy Corn mix; a Halloween mix with orange, yellow and clear sequins and gems which even has a few tiny ghosts made from acetate thrown in. It’s a fun mix.
 Simple color palette for this one.
 I colored the scene in using Copics. A couple of my browns went sticky during my coloring, and refilling them (which usually does the trick, markers tend to go sticky when they’re low on ink) didn’t work, so I replaced the nibs and they’re behaving a little bit better now.
 Using Classic Kraft cardstock from Papertrey Ink, I die cut the largest of the Wood frame infinity dies from Hero Arts and put two additional layers behind it for dimension. The die actually cuts a frame that is slightly larger than the size of an A2 card, so I created a custom sized card to fit the frame. I glued the frame to my scene, stamped a sentiment from the Småtekster stamp set from Norsk Stempelblad AS onto Cornflower cardstock from My Favorite Things and heat embossed it in white, before using a die from the Tag Builder Blueprints 6 die set from My Favorite Things to turn it into a nice strip with a flag end. I adhered it to the frame and added 3 sequins from the White Orchid sequin mix from Little Things from Lucy’s Cards to finish.
 Very simple color palette. Since I had to color it twice I’m glad it wasn’t more involved 🙂

 I wanted a little bit of subtle interest to my background, and used the Garden Lattice dies from Honey Bee and die cut both the base and the top die (these are sold separately) twice from Stamper’s Select White cardstock from Papertrey Ink. By doubling up on each of the die cuts, I get lots of dimension.
 I also die cut the word hugs from the Sending Big Hugs die from My Favorite Things. I die cut two layers from white cardstock and three layers from purple (Winter Wisteria from Papertrey Ink). The purple didn’t match my coloring, so I added BV02 to the top layer, that did the trick. I stamped my sub sentiment from the Bitty Thanks & Gratitude stamp set from My Favorite Things using Grapesicle ink, also from My Favorite Things, and adhered the strip directly to the diecut HUGS word.
 I finished off the card by adding a few veneer butterflies, I thought they paired well with the butterfly on the bunny’s nose. The butterflies are from Wycinanka, and I added two Kort & Godt pearls to the center of each of the butterflies to form the body, and that finishes the card.
 Simple, yet happy color palette for this card.