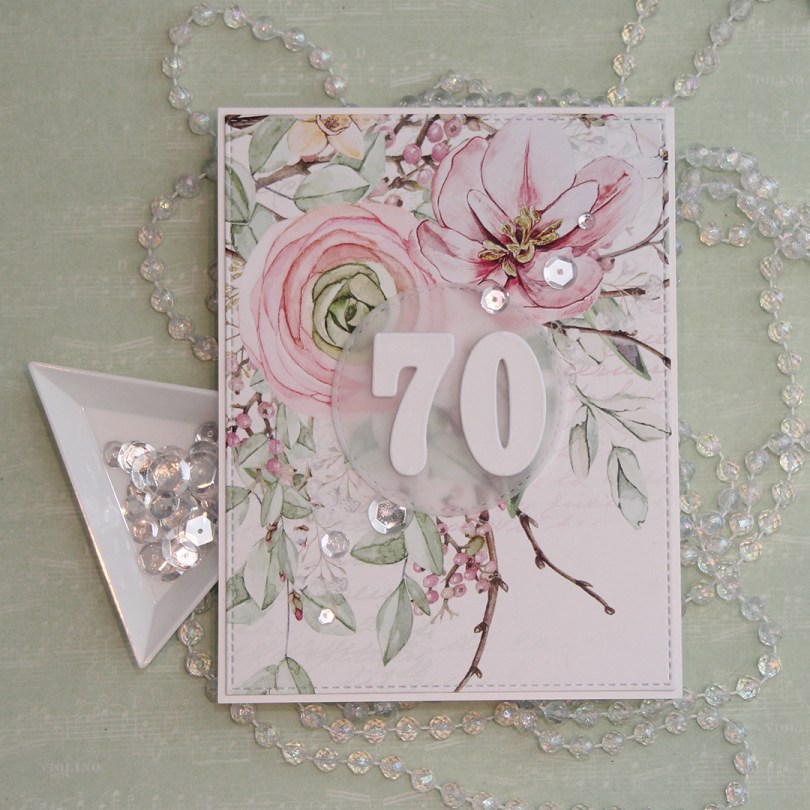
Hi, everyone! My second blog post for today, and it totally shows on my card that I’m longing for spring. Fall is definitely in the air, and I’m feeling colder and colder and colder. I don’t like it one bit! I do, however, like the florals in the Spring collection from P13. These are gorgeous patterned paper, and they’ve got such pretty imagery that I don’t want to cover too much of it up. The paper I used for this card is Spring #05.
 For this card, I used the largest die in the Stitched Rectangles STAX 2 set from My Favorite Things. You can find set 1 here. The dies are a little bit smaller in set 1, but the shape’s the same. I have both sets, I just prefer the 1/16″ border I get by using the largest die in set 2.
 I glued my die cut panel onto a cardbase made from Stamper’s Select White cardstock from Papertrey Ink. I die cut a circle from vellum using a circle die from the Stitched Circle STAX set, also from My Favorite Things. It matches nicely with the stitching around the edge of my floral panel.
 I also die cut a bunch of numbers using a die set from Papirdesign. I made most of them from white card stock, but the top numbers from a piece of that same patterned paper. It might not look like patterned paper, but there’s a lot of white space on this sheet, and I used some of that for my numbers. It makes the whites match, which I really love. I put a 3 layers of my numbers underneath the vellum, and the remaining four layers on top. It makes the vellum stand out a bit from the background, which makes the number show up a little better and not get lost in that busy background.
 I finished off the card by gluing on some sparkling clear sequins from Pretty Pink Posh.

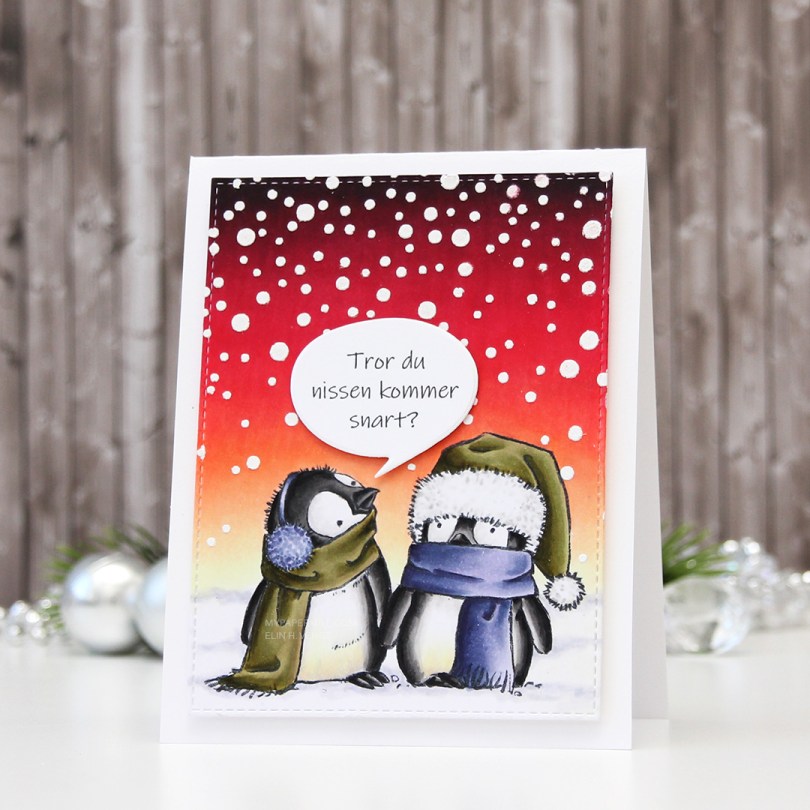
 As usual, I colored my image in with my Copic before die cutting it down to a panel using a stitched reclangle die from My Favorite Things. I glued it to a card base I made from Stormy Sky cardstock from Papertrey Ink, also a gorgeous color, and it matches my coloring pretty well.
 I didn’t want to do too much to distract from my coloring, so I die cut a God jul (Merry Christmas) sentiment using a die from Papirdesign and that same color cardstock as my base, and glued that next to the little girl. I didn’t even stack several die cuts on top of each other like I normally would.
 I finished my card by gluing on some diamonds from the Glass mix in the Crystal Collection from Little Things from Lucy’s Cards.
 Those last six colors in this graphic? All the colors I used to create the red scarf (I only used E08 for the red on the bird).
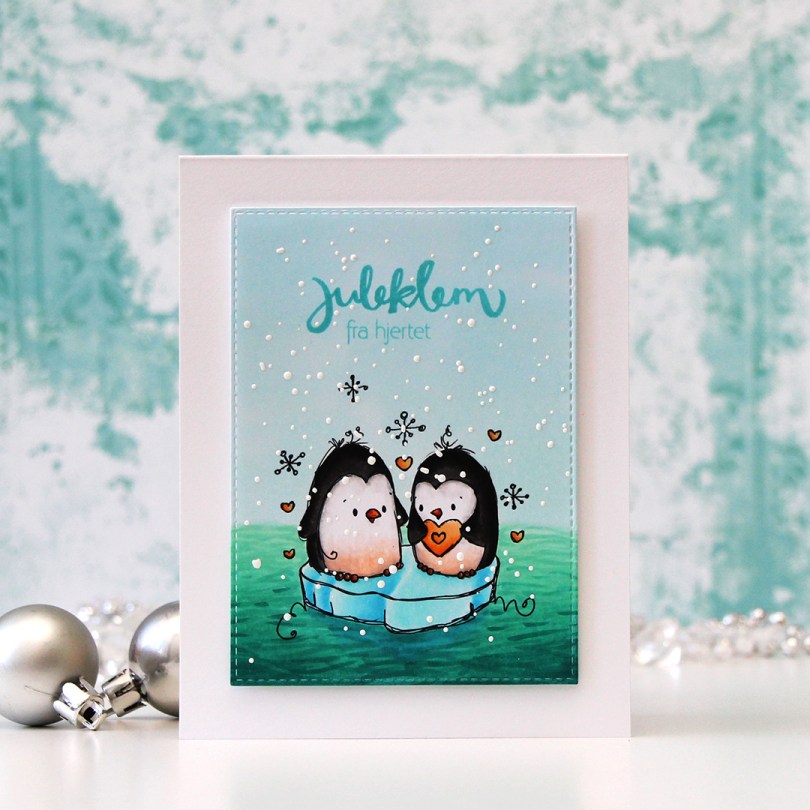
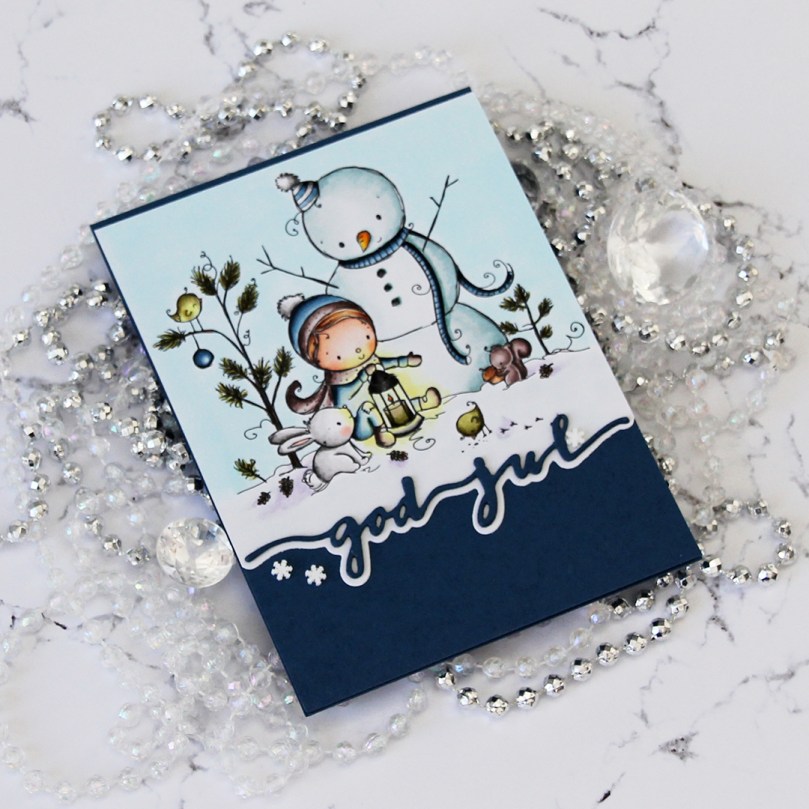
 This is the
  I colored in the image using my Copics. I don’t think I’ve ever colored ocean before, and I was genuinely surprised by how easy it was. I even a little hint of blue to the ocean beneath the ice, giving the illusion of something more under water. 9/10 of an iceberg is under water, after all. It may seem weird that I chose yellow hearts for a Christmas card, but I have a very specific recipient in mind for this card, and she loves yellow 😉
 I die cut my panel using the third largest die in the Stitched Rectangles STAX 2 set from My Favorite Things and stamped a sentiment that I made from two different Norsk Stempelblad AS stamp sets using Simon Says Stamp Audrey Blue ink. I sprinkled on some chunky white embossing enamel from Stampendous and heated it from behind, melting the granules. The last thing to do was add lots of foam tape to the back and attach it to my white card base. Couldn’t get much simpler than this, really.
 Lots of blue and blue green Copics used on this image. Oh, and grays, quite a few of those, as well.
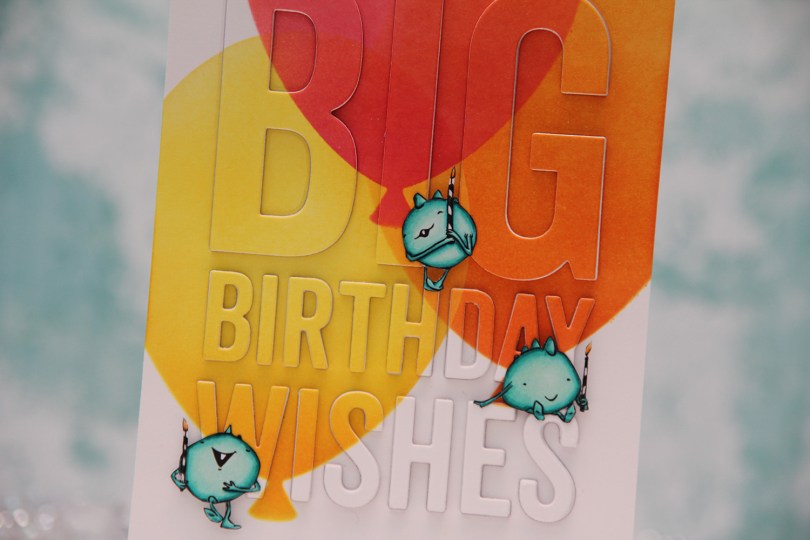

 I needed to make a quick card last night, and decided to color up three of the small monsters from the Cupcake Monster set from Mo Manning (I have
  When my little monsters were all colored in with my Copics, I pulled out the Big Balloon stencil from My Favorite Things along with four different colors of distress ink. I created three balloons that overlap. All the balloons are ink blended using two colors. The yellow one is Squeezed Lemonade with Spiced Marmalade toward the base of the balloon, the orange one is Spiced Marmalade with Worn Lipstick at the base, and the top one is Worn Lipstick with Picked Raspberry at the base.
 I die cut the Big Birthday Wishes die from My Favorite Things five times from Stamper’s Select White card stock from Papertrey Ink, as well as from the blended piece, which is also Stamper’s Select White. It’s my favorite white card stock, I haven’t found one that’s more white than this, and it’s also wonderfully sturdy at 110 lb. I did a layered inlay, then fussy cut my monsters and placed them strategically on my card. I love that the top one looks like he’s balancing on the top of the H, and the one on the right is leaning on the E while dangling his feet from the top of the S.
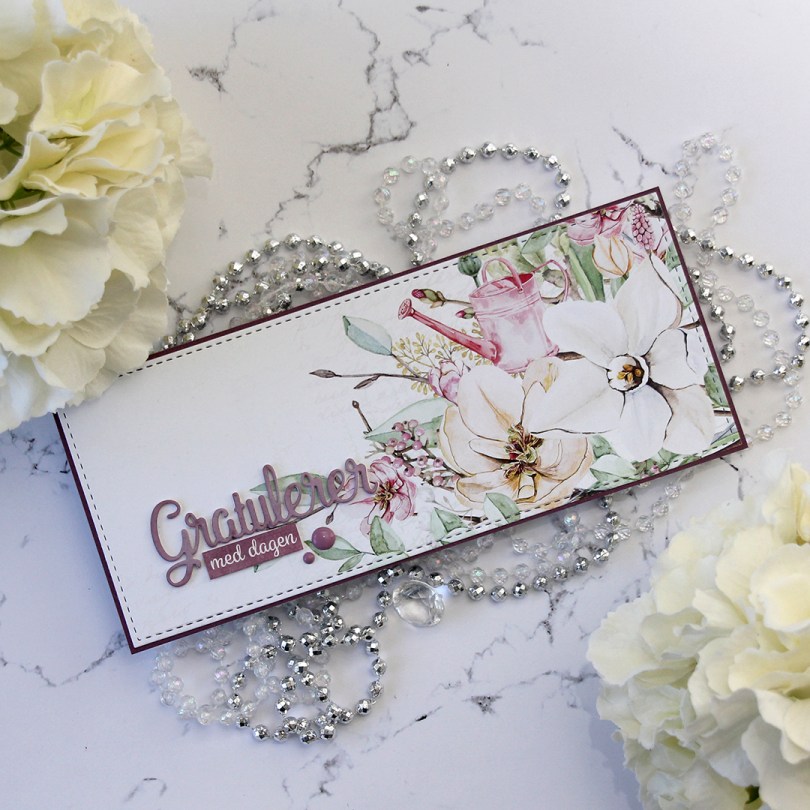
 This image was part of the Christmas release from Lili of the Valley that came out a few weeks ago, you can find the stamp


 I colored my image with Copics on X-Press It blending card and added
  I put a piece of patterned paper from the Party Patterns paper pad from My Favorite Things on the card front, and mounted the image on foam tape. Lots of foam tape, I was not shy!
 I stamped and white heat embossed a


