I’ve got a couple of super simple slimline cards to share today.
 This first one might not even technically be a proper slimline card. It’s about 7-3/4 x 3-3/4″. I’ve used beautiful patterned paper from P13 for both my cards. I wanted the paper to be the hero, so I didn’t do too much to it. The sheet I used for this card is #06 from the Spring collection from P13. That tiny bit of green with the heat embossed sub sentiment is from #04.
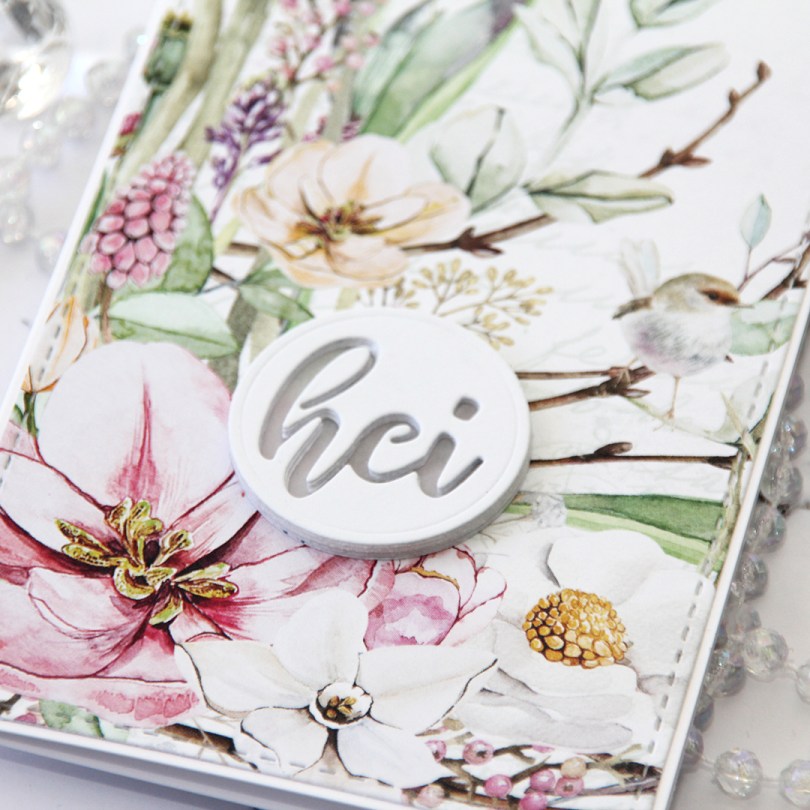
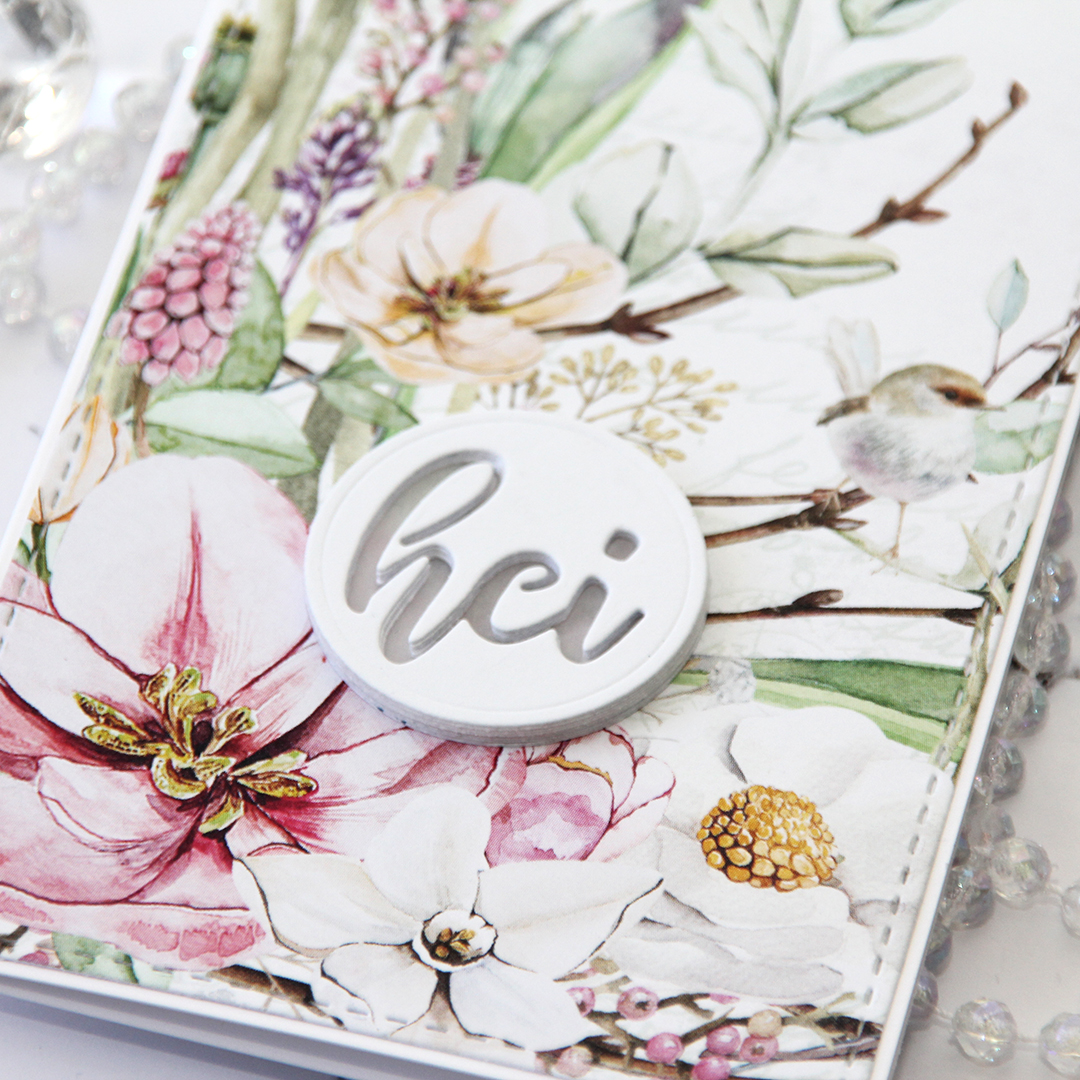
 I used a faux stitch slimline die from Pinkfresh Studio to die cut my panel and a die from Papirdesign for the sentiment. I die cut five layers from white cardstock that I stacked and one layer from the patterned paper that I glued on top. There are plenty of open areas in the center of these sheets of patterned paper, die cutting from those makes my white match. I stamped a sub sentiment from Papirdesign onto that little bit of green paper and heat embossed using Super Fine Detail embossing powder from Ranger before finishing off my card with a couple of sequins from the Mint Gold mix from Little Things from Lucy’s Cards.
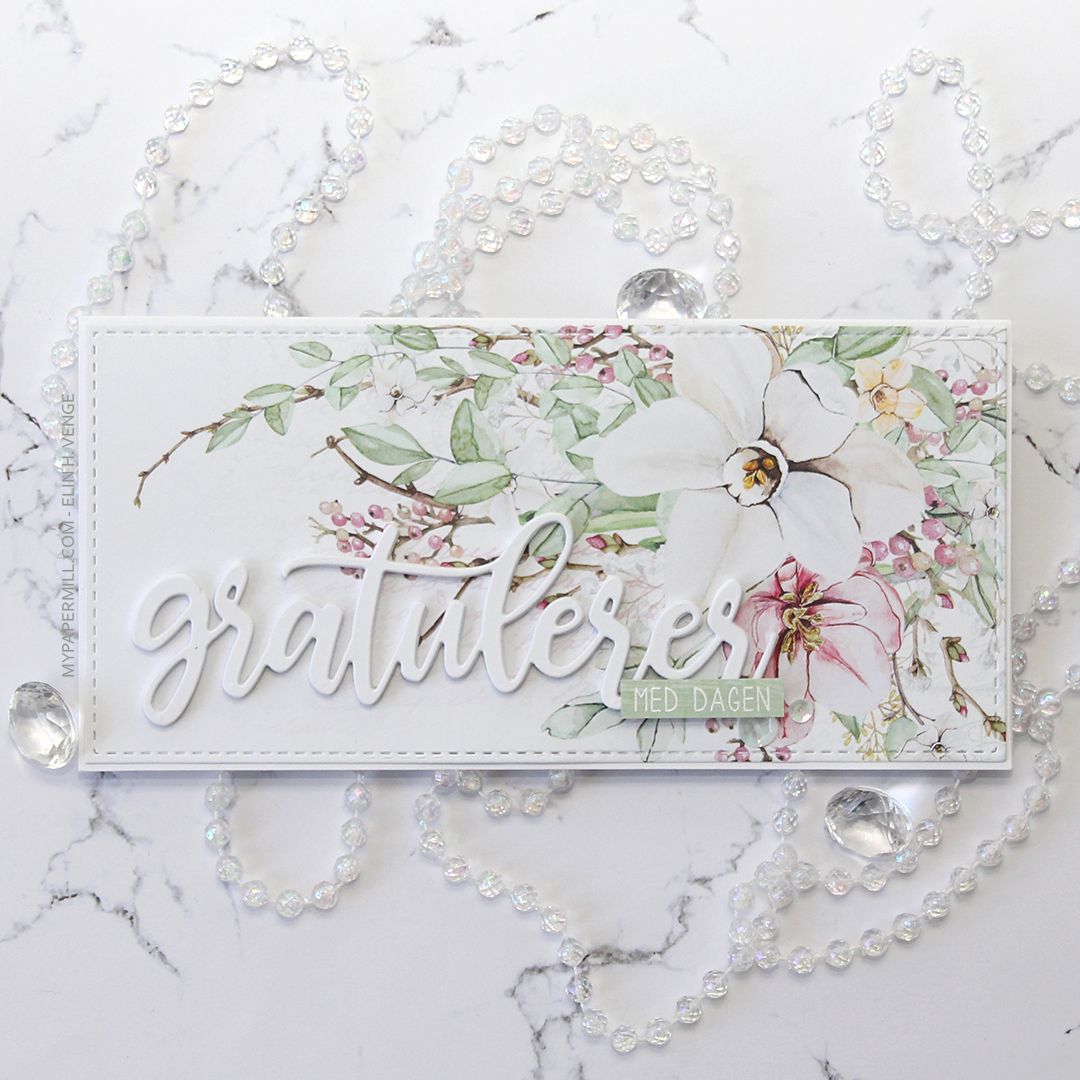
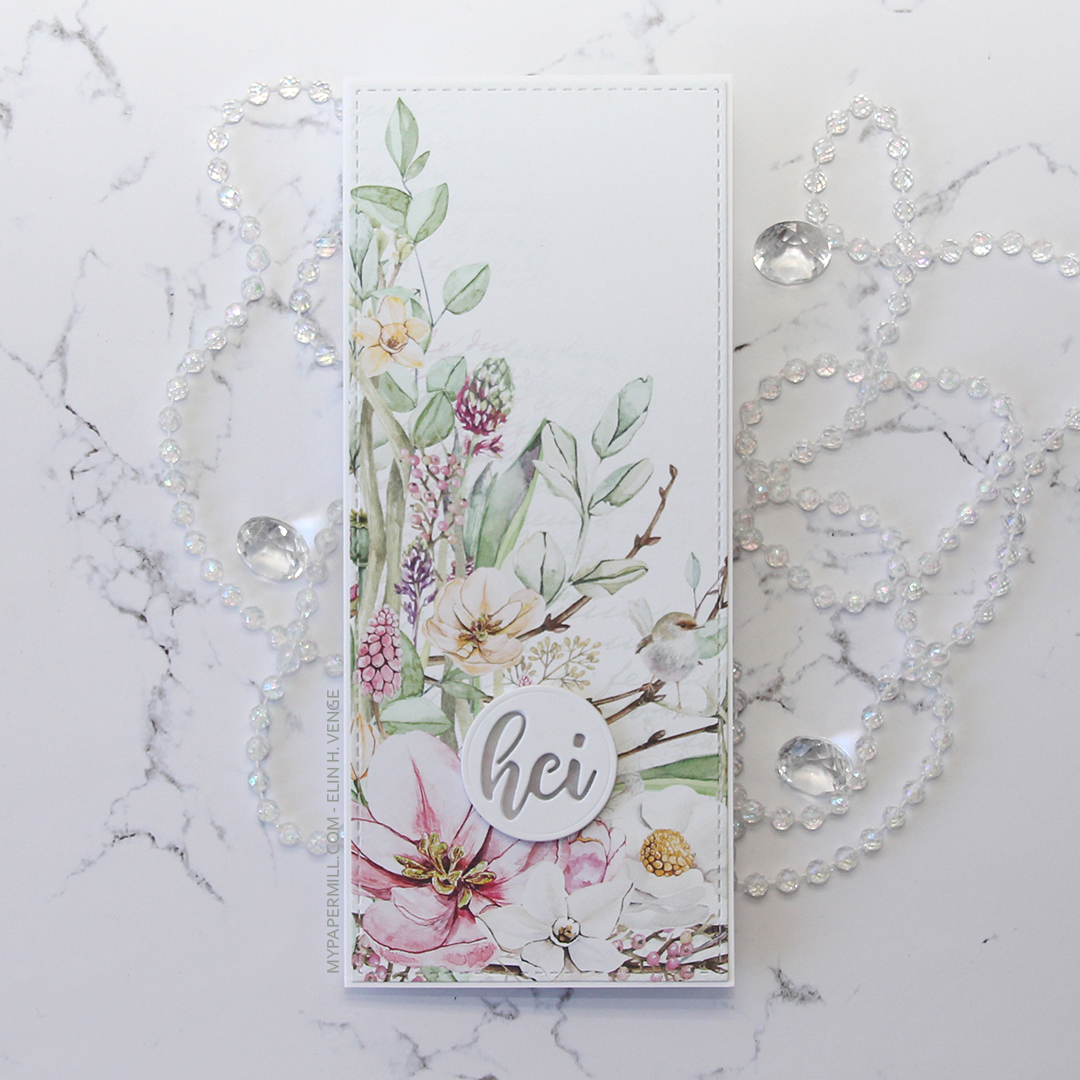 My second card uses a different part of that same sheet of patterned paper, as well as the same slimline die from Pinkfresh Studio. The sentiment is even die cut using a die from the same set as the sentiment on my first card.
 On this one I have four layers stacked on top of each other, then a vellum circle, then another four layers of the negative word die, making this sentiment really stand out as a statement on my card.
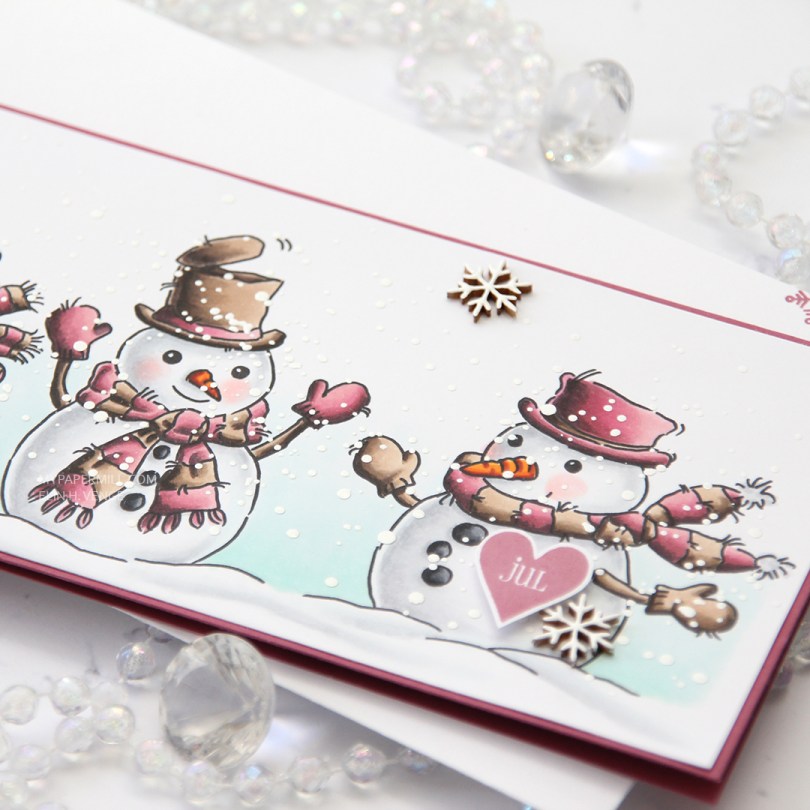
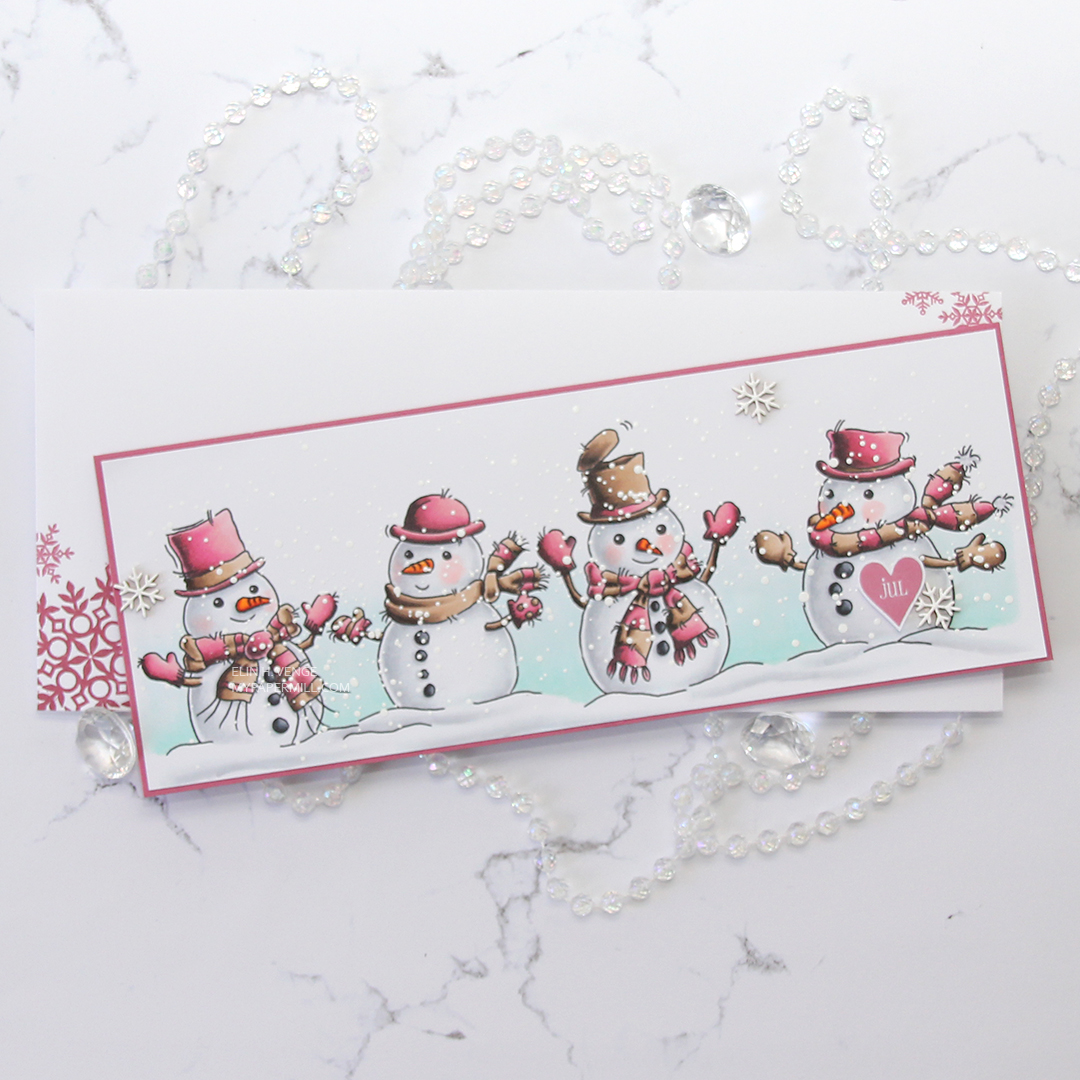 This color palette is definitely not the norm for me, but I was surprised at how much I like it. I think the secret was finding a pink combo I liked that wasn’t a screaming hot pink, and that also had a bit of contrast within it. Even better – my pink color combo matches the Autumn Rose color from Papertrey Ink, so I created my cardbase from a sheet of Autumn Rose cardstock and even stamped a few snowflakes from an old Simon Says Stamp stamp set (Holiday Envelope Sentiments) on the envelope using Autumn Rose ink. The envelope itself is a Deluxe white slimline envelope from My Favorite Things.
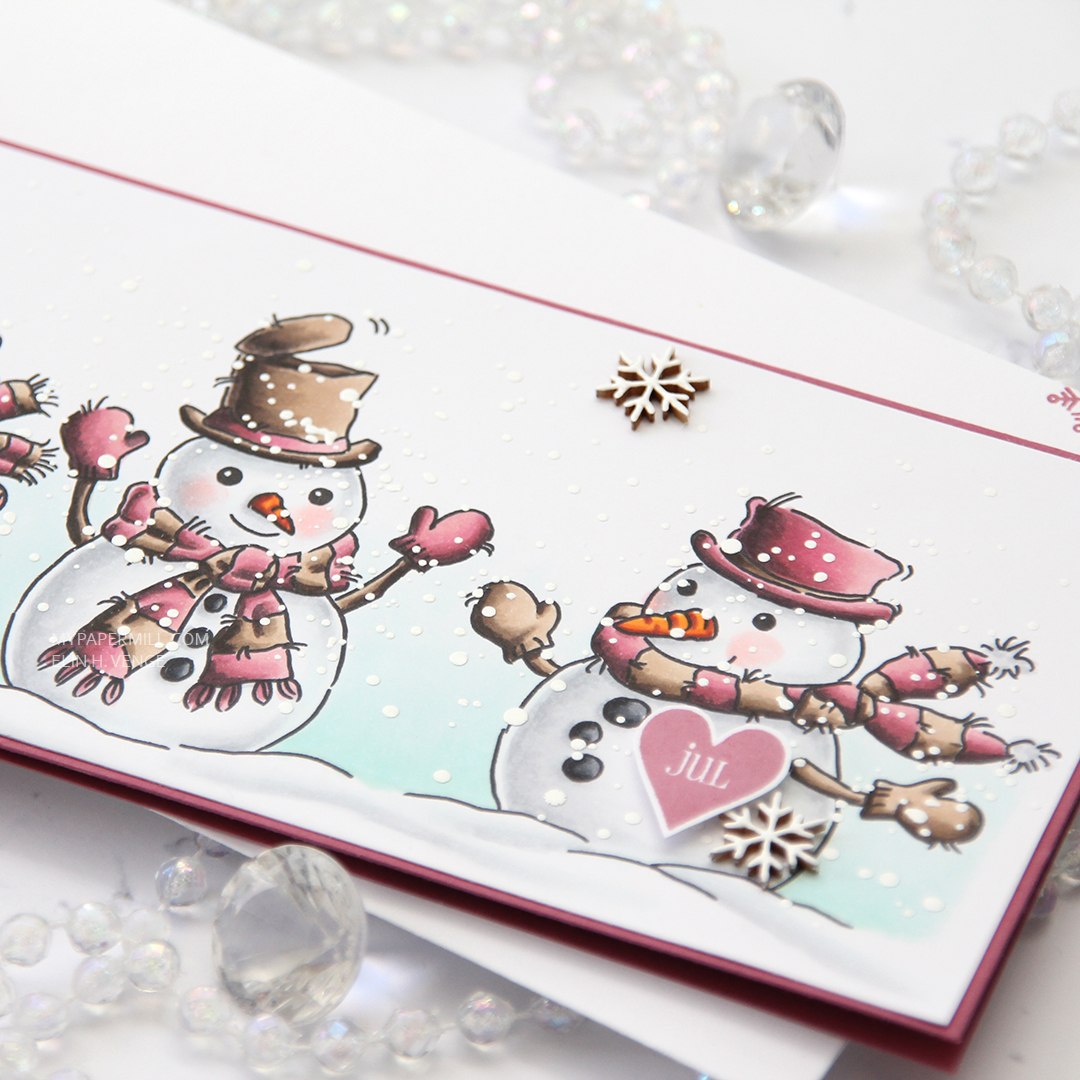 After coloring all my snowmen with Copics, I added a sprinkling of chunky white embossing enamel from Stampendous and heated my panel from the back until all the granules had melted. It warped quite a bit, so I ran the panel through my Gemini Jr without any dies, just sandwiching the panel between my cutting plates. That took care of the warping, and I could continue by gluing the panel of snowmen to the cardbase, before popping up a Norsk Stempelblad AS heart sentiment that I stamped using Autumn Rose ink. I also added a few Crafty Moly snowflakes that I covered in three layers of white embossing powder.
 RV99, R56, RV34 and RV32 – who would have guessed that it made such a pretty pink? Not me, that’s for sure, but I’m glad I stumbled upon this combo.
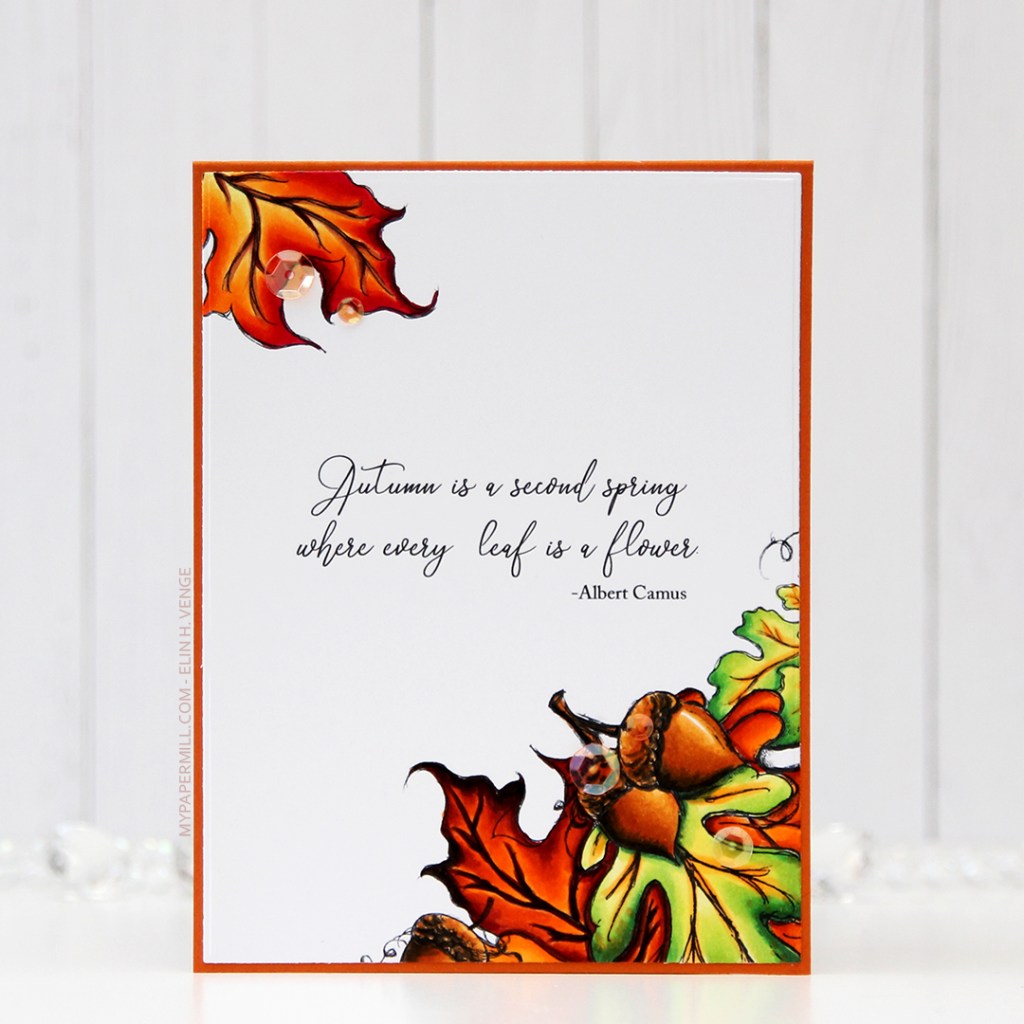 The stamp set comes with this quote, and many others. The quote comes with the name centered, but I wanted it right aligned, so I did some minor tweaking in Photoshop before I printed.
 I die cut my panel using a rectangle die from Waffle Flower and added it to a card base made from Canyon Clay cardstock from Papertrey Ink. This card is slightly smaller than my regular A2 cards, it measures 4 x 5-1/4″.
 I added a few orange sequins (and one clear) from the Candy Corn sequins mix from Little Things from Lucy’s Cards, and my card was complete.
 For something so simple, I used quite a few Copics.
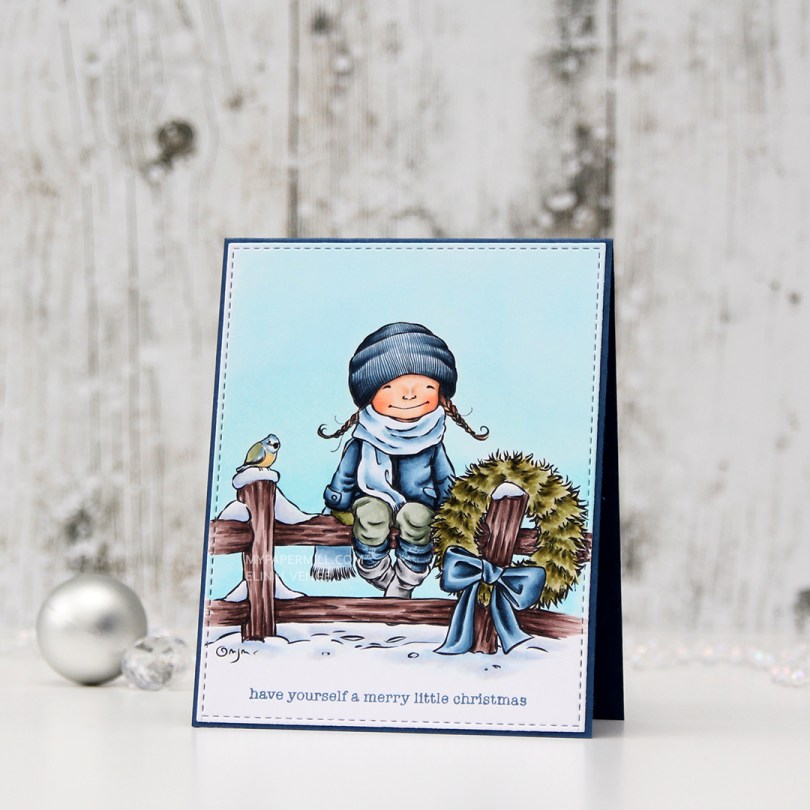
 I love this
  I felt like I’ve colored up far too many red Christmas images lately, so I didn’t want even a hint of red on this one. The blue bow totally works, I think, the same is true of the blue, green and hint of yellow on the bird that I tried to color up like a Eurasian Blue Tit. I die cut my image using a stitched rectangle die from My Favorite Things.
 I glued my panel onto a cardbase made from Enchanted Evening cardstock from Papertrey Ink, and stamped a sentiment from the Holiday Messages stamp set from Mama Elephant using Enchanted Evening ink, and my card was complete. I didn’t add any embellishments to this, I wanted the image to shine.
 Speaking of the image, here are the colors I used. I also used B90, which is a color I’ve made myself, on her scarf.
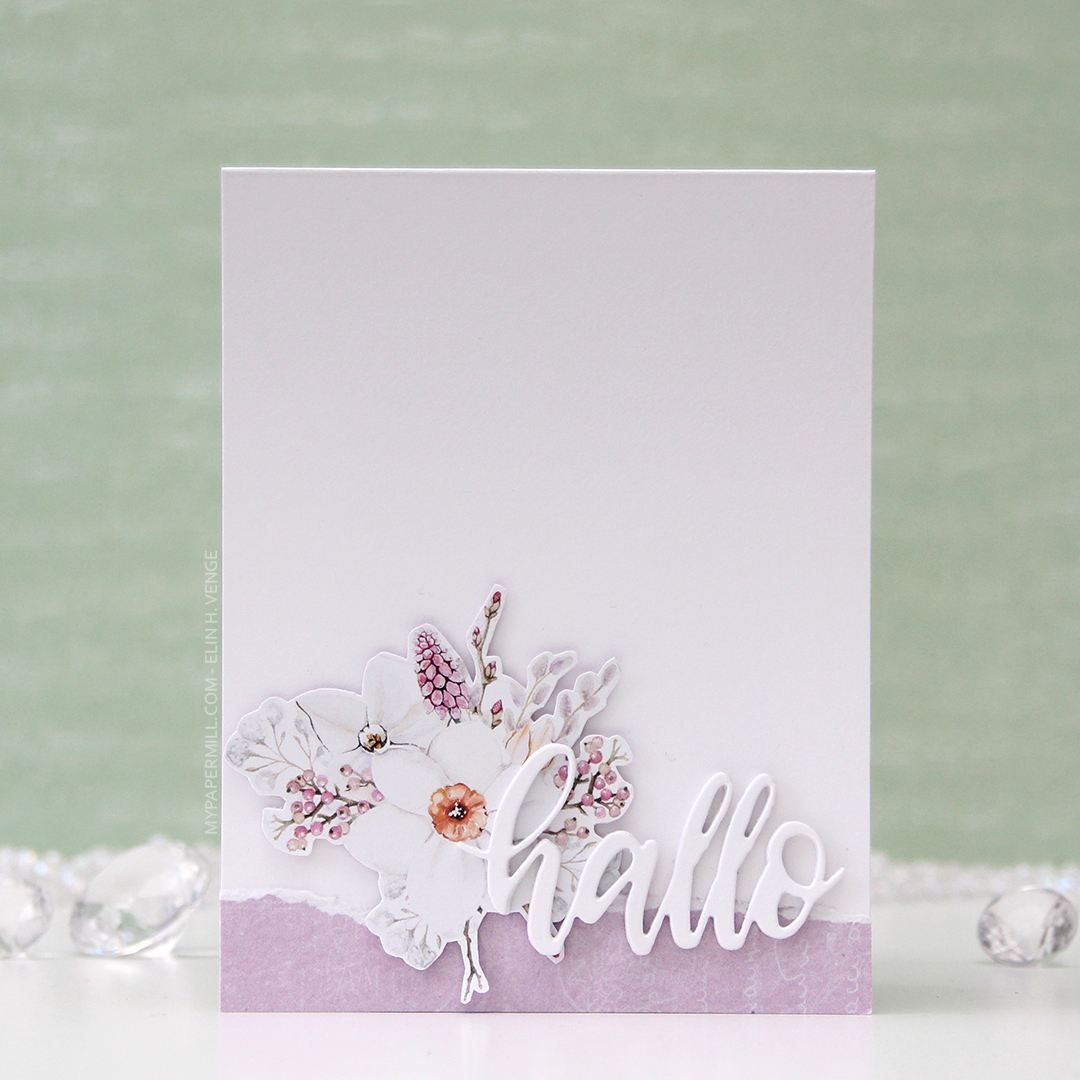 Let’s talk for a minute about P13. They’re a Polish company, and they make beautiful, thick patterned paper. That’s really all you need to know, because it’s all I know. When I say thick, I mean thick. I don’t know their exact weight, but it’s close to card stock weight! I’m telling you, these are wonderful. They’re double sided, and the little strip you see at the bottom here with the torn edge is the back of that very same sheet (
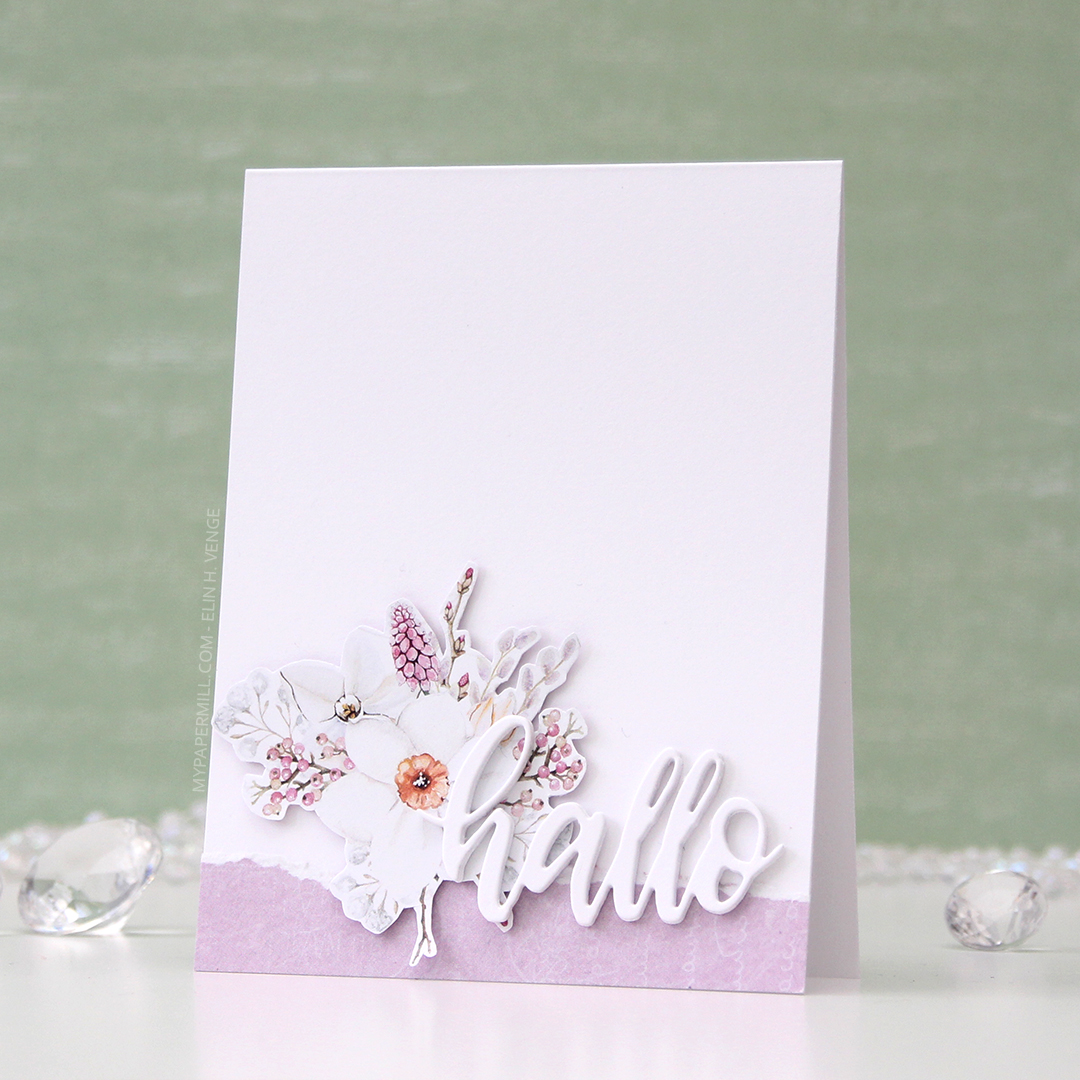
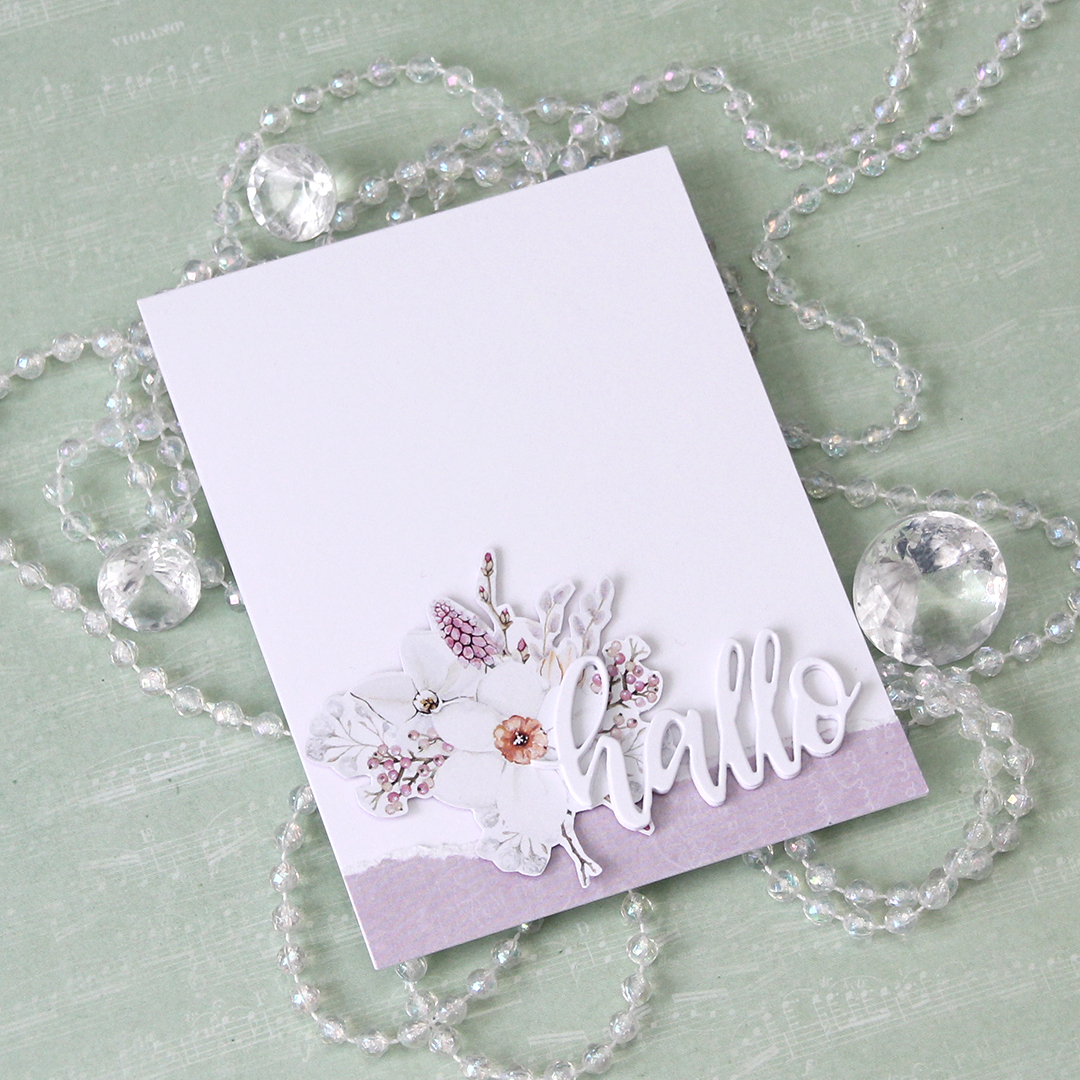 I have tons of floral clusters left over from the patterned paper, and one of the wonderful things about the P13 papers is that the design isn’t repetitive. This specific sheet of patterned paper had plenty of florals on the front, but they were all a little different, which means creating different cards from them will be a breeze.
 I colored in my little scene using more Copics, die cut that using the same die, then fussy cut around the trees, snow and house. I added a sprinkling of snow by heat embossing chunky white embossing enamel on both panels. I glued my blue background to a cardbase I made from Pure Poppy cardstock from Papertrey Ink and added the rest of the scene on top using 1 mm foam squares – lots of them! I added a stacked die cut sentiment using a die from the So Many Snowmen die set from Mama Elephant and my card was done.
 I didn’t use too many colors on this, and most of these were actually used on the sky and the snow.
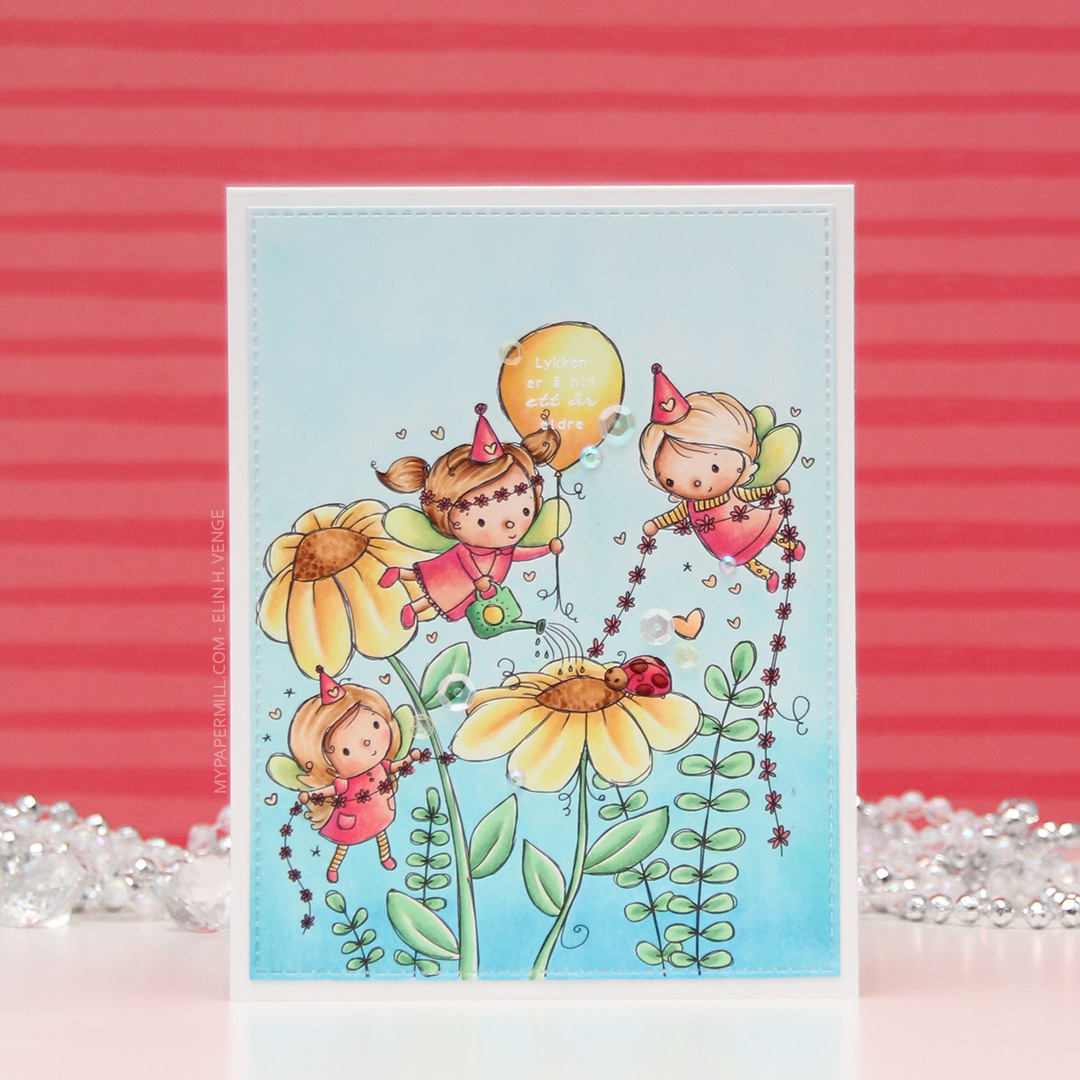 I wanted a soft color palette for my card, so I have no colors that are really dark in this image. The darkest marker I used is E57, and it’s contained to the hair on one of the fairies, the flower centers and the ladybug.
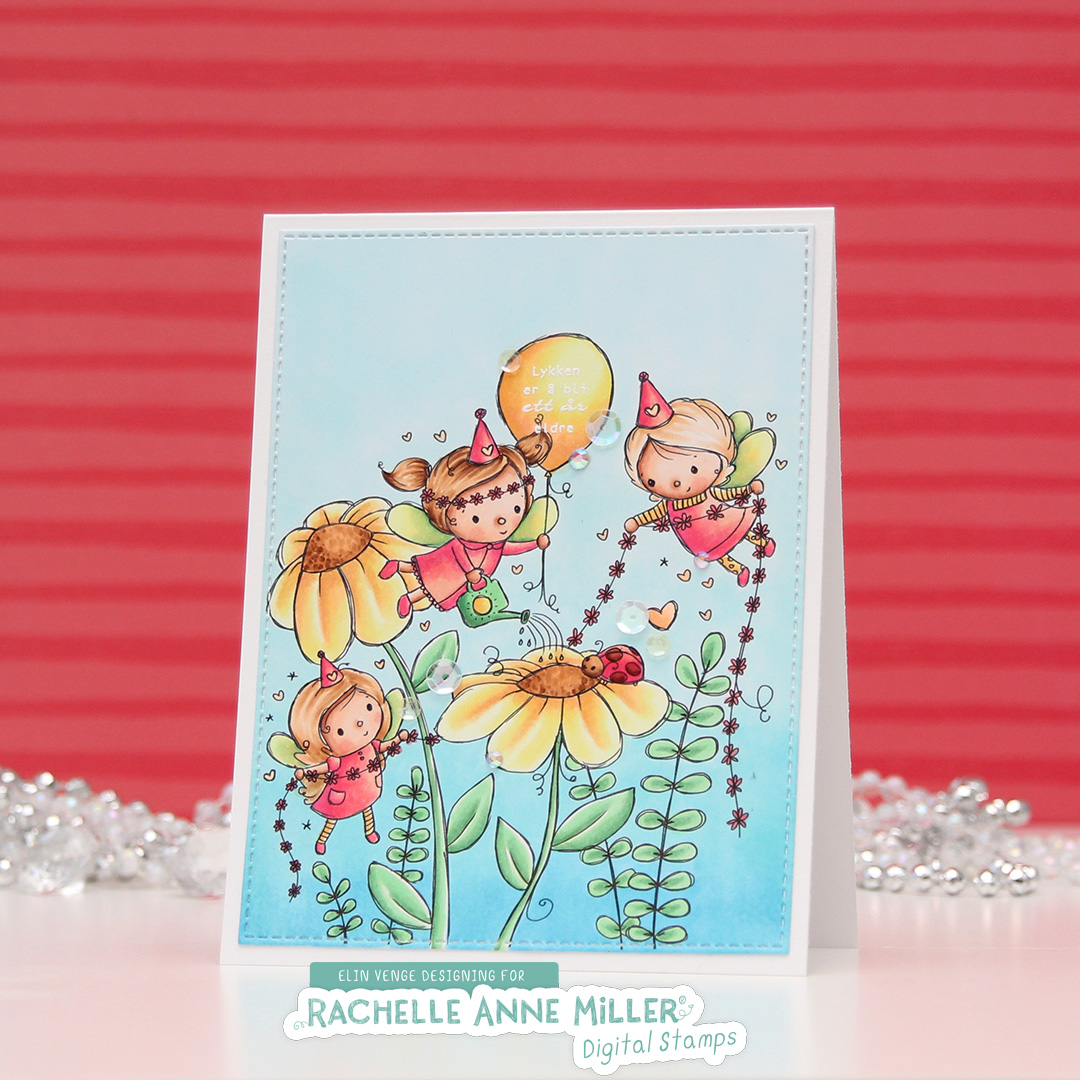 Once I’d colored the entire panel, I took the largest of the dies from the Stitched Rectangles STAX 1 set from My Favorite Things to turn it into a panel and create a nice border on the front of my card. I knew from the start that I wanted my sentiment inside the balloon, but I couldn’t decide on white or black. I thought the white might not pop enough against the yellow balloon, but I also knew that the end of the pigtail on the fairy would mess with any black stamping, making the letter illegible. In the end, I went with the white, but you can hardly see it in the photos against that lightest yellow. I might go in with a water brush and the refill for the darkest color I used on the balloon to darken it up later. I don’t want to ruin the nibs of my markers by touching the embossing, but refill and water brush with a little bit of blender solution will work without ruining anything.
 I finished my card by adding some groupings of sequins and Jewels from Little Things from Lucy’s Cards. I used the Iced Sherbet mix for this card.
 Last, but certainly not least, are the colors I used for my image.
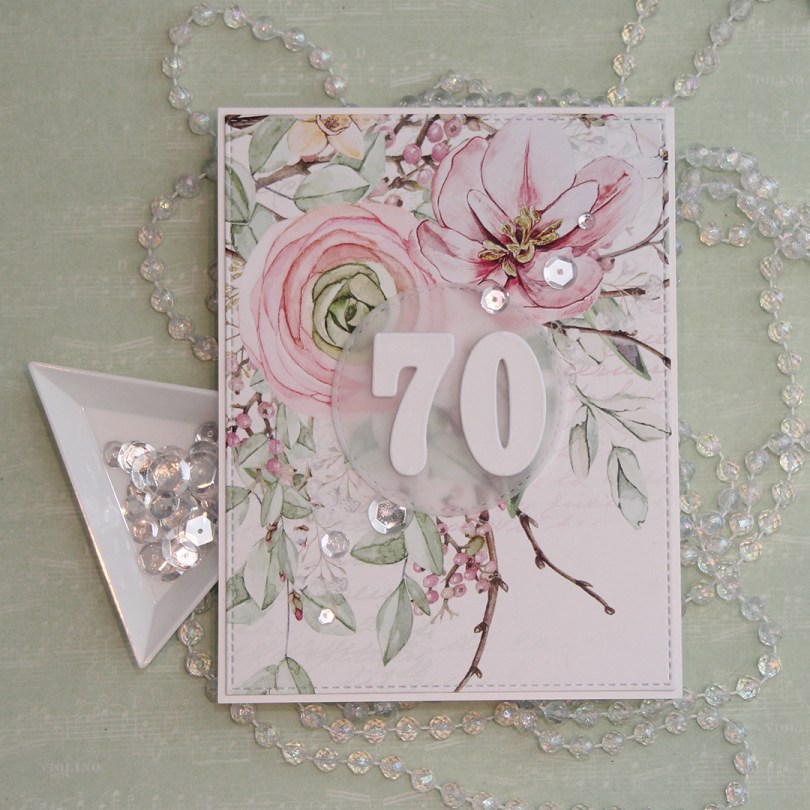
 For this card, I used the largest die in the Stitched Rectangles STAX 2 set from My Favorite Things. You can find set 1
  I glued my die cut panel onto a cardbase made from Stamper’s Select White cardstock from Papertrey Ink. I die cut a circle from vellum using a circle die from the Stitched Circle STAX set, also from My Favorite Things. It matches nicely with the stitching around the edge of my floral panel.
 I also die cut a bunch of numbers using a die set from Papirdesign. I made most of them from white card stock, but the top numbers from a piece of that same patterned paper. It might not look like patterned paper, but there’s a lot of white space on this sheet, and I used some of that for my numbers. It makes the whites match, which I really love. I put a 3 layers of my numbers underneath the vellum, and the remaining four layers on top. It makes the vellum stand out a bit from the background, which makes the number show up a little better and not get lost in that busy background.
 I finished off the card by gluing on some sparkling clear sequins from Pretty Pink Posh.
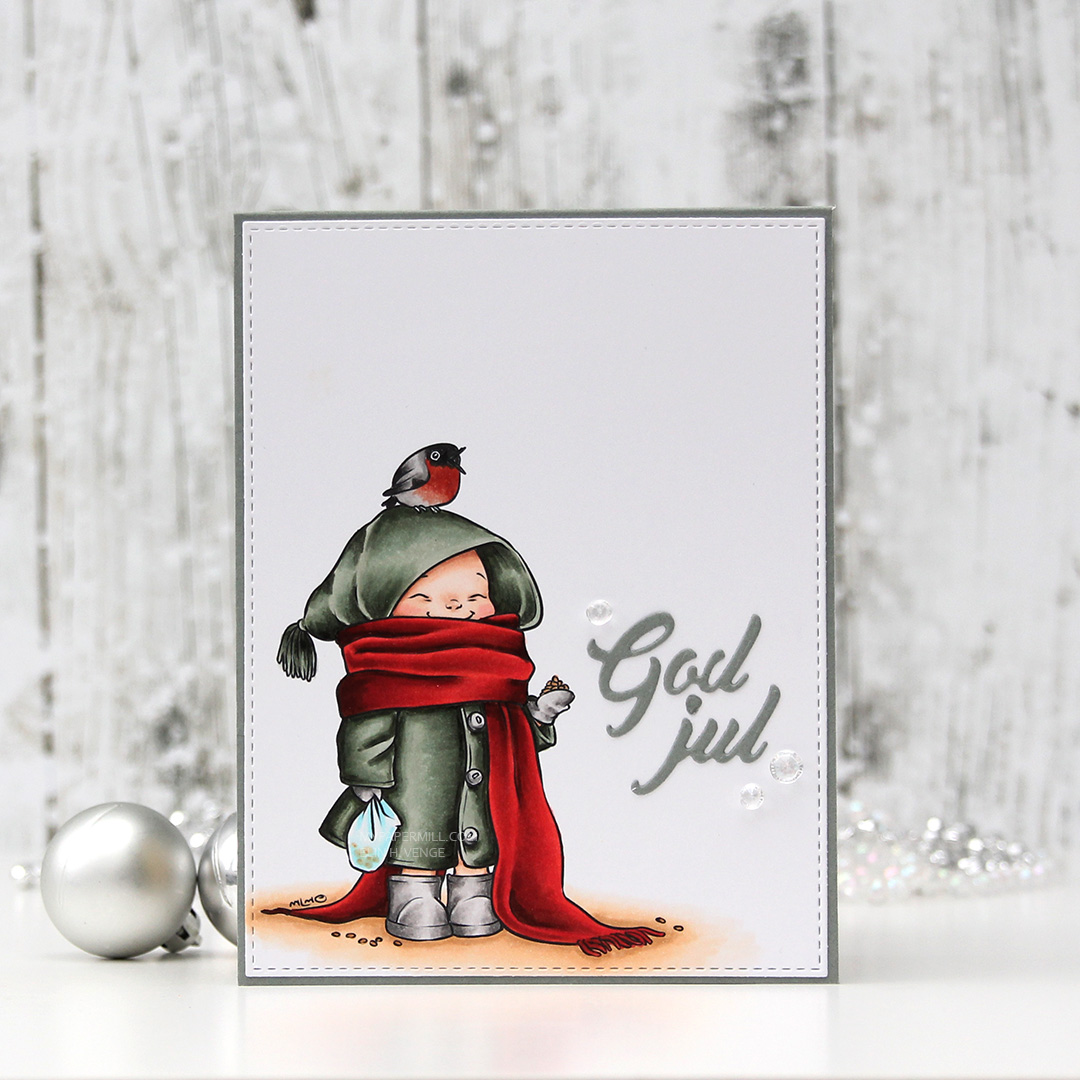 As usual, I colored my image in with my Copic before die cutting it down to a panel using a stitched reclangle die from My Favorite Things. I glued it to a card base I made from Stormy Sky cardstock from Papertrey Ink, also a gorgeous color, and it matches my coloring pretty well.
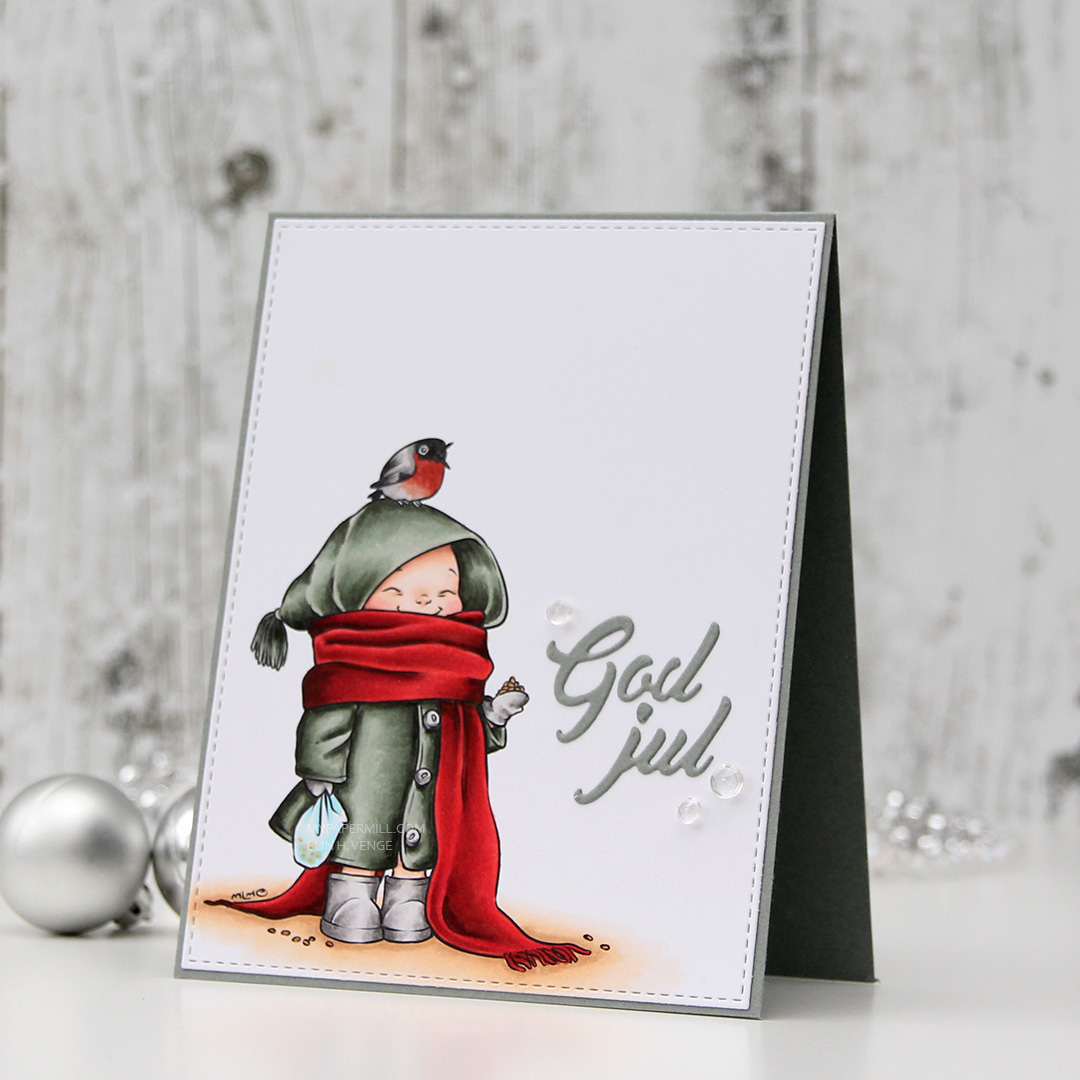 I didn’t want to do too much to distract from my coloring, so I die cut a God jul (Merry Christmas) sentiment using a die from Papirdesign and that same color cardstock as my base, and glued that next to the little girl. I didn’t even stack several die cuts on top of each other like I normally would.
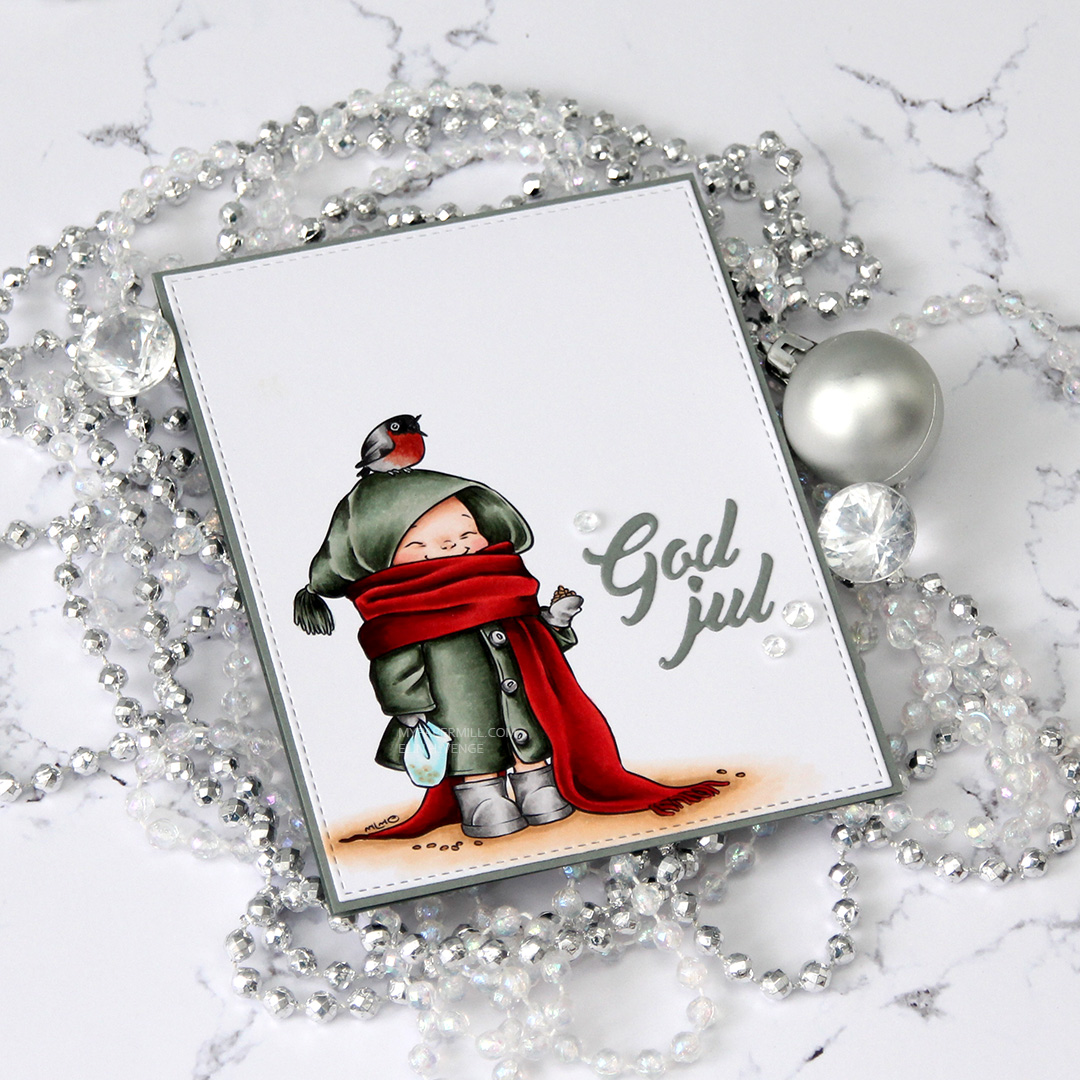 I finished my card by gluing on some diamonds from the Glass mix in the Crystal Collection from Little Things from Lucy’s Cards.
 Those last six colors in this graphic? All the colors I used to create the red scarf (I only used E08 for the red on the bird).
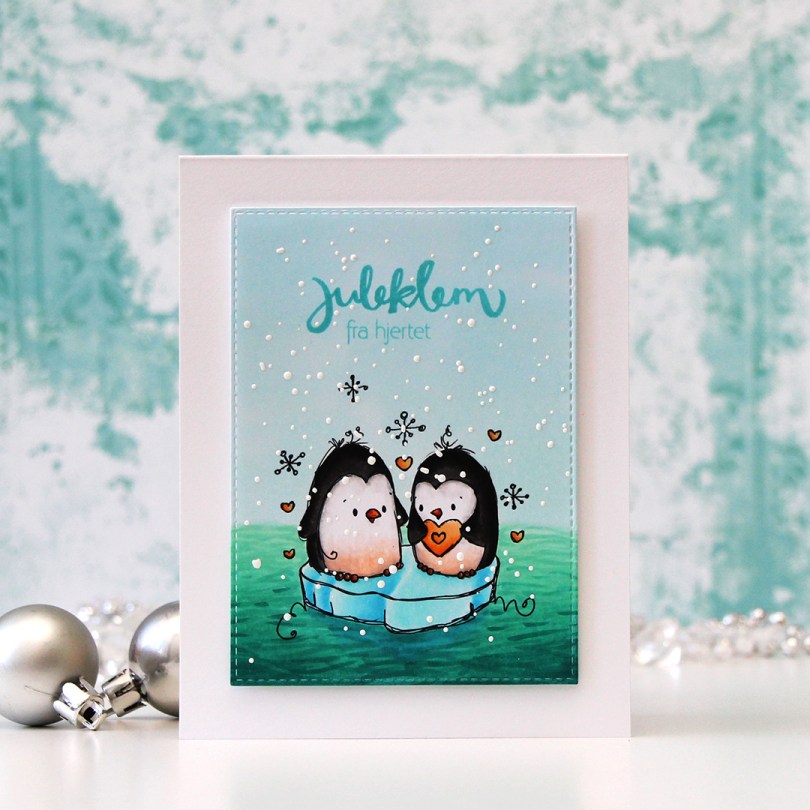
 This is the
 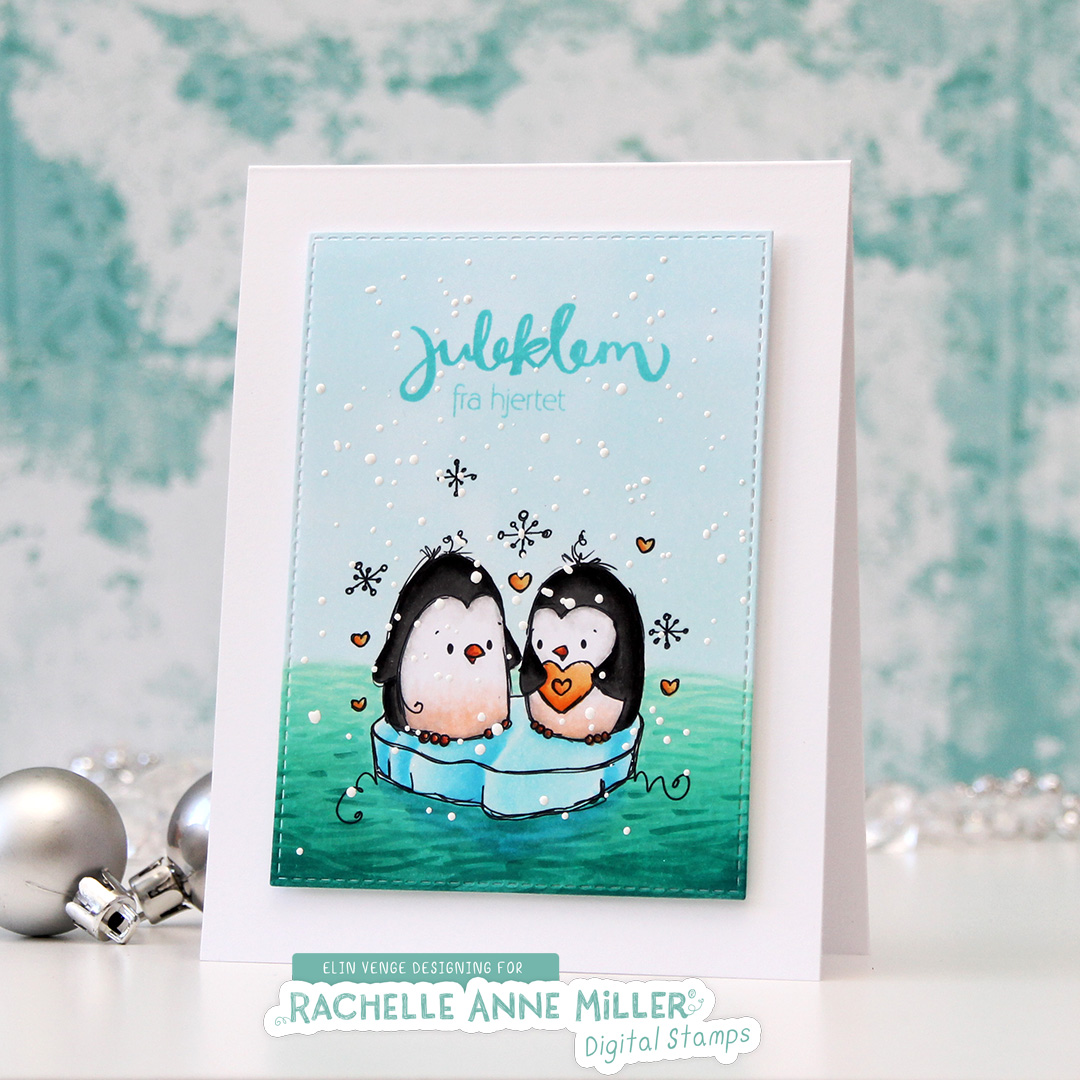 I colored in the image using my Copics. I don’t think I’ve ever colored ocean before, and I was genuinely surprised by how easy it was. I even a little hint of blue to the ocean beneath the ice, giving the illusion of something more under water. 9/10 of an iceberg is under water, after all. It may seem weird that I chose yellow hearts for a Christmas card, but I have a very specific recipient in mind for this card, and she loves yellow 😉
 I die cut my panel using the third largest die in the Stitched Rectangles STAX 2 set from My Favorite Things and stamped a sentiment that I made from two different Norsk Stempelblad AS stamp sets using Simon Says Stamp Audrey Blue ink. I sprinkled on some chunky white embossing enamel from Stampendous and heated it from behind, melting the granules. The last thing to do was add lots of foam tape to the back and attach it to my white card base. Couldn’t get much simpler than this, really.
 Lots of blue and blue green Copics used on this image. Oh, and grays, quite a few of those, as well.