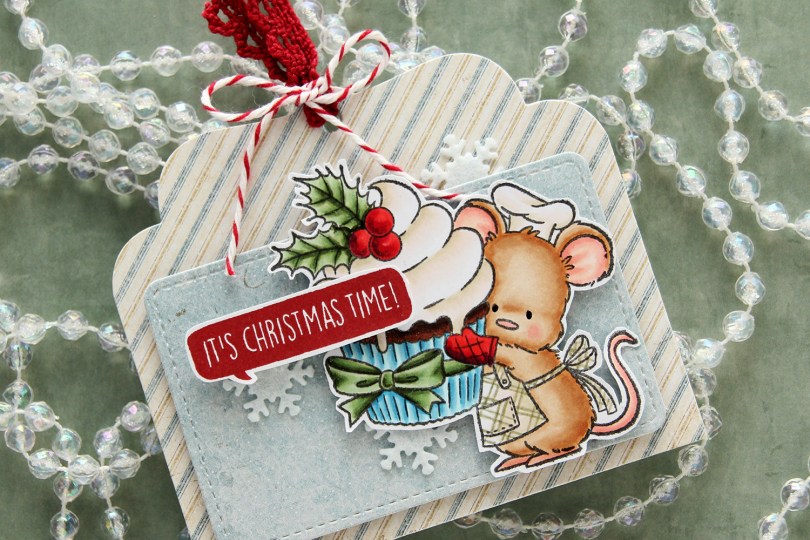
Hi, crafty friends! It’s the first Sunday of Advent, and I have a fun gift tag to share today featuring the adorable Baking Fun image from Purple Onion Designs, illustrated by Pei – I’m such a big fan of her illustrations!! I did a lot of baking last year for Christmas – SO many different types of Christmas cookies and sweets. This year, I haven’t even started yet. I have a few favorites I might end up making, I haven’t decided yet. Anyway, back to the gift tag.
 I colored up the cute little mouse with Copics, adding a plaid pattern to the apron using a Zig watercolor brush marker (No. 98 Pale Dawn Gray), before fussy cutting the image leaving a white border. I used the Gift Pocket Tag die set from Mama Elephant to die cut from patterned paper from the Christmas Nostalgia collection from Maja Design to create my tag. I mounted the smaller piece with foam squares and did the same with the cute little mouse.
 I stamped a sentiment from the Holiday Blurbs I stamp set from Purple Onion Designs using Amarena Cherry ink from My Favorite Things, fussy cut leaving a white border and mounted it on top of my image, doubling up on the foam squares on the left half. I tucked a few felt snowflakes from Kort & Godt under my element, added a bit of black glaze pen to the eyes and tied ribbon and twine at the top of the tag to finish.
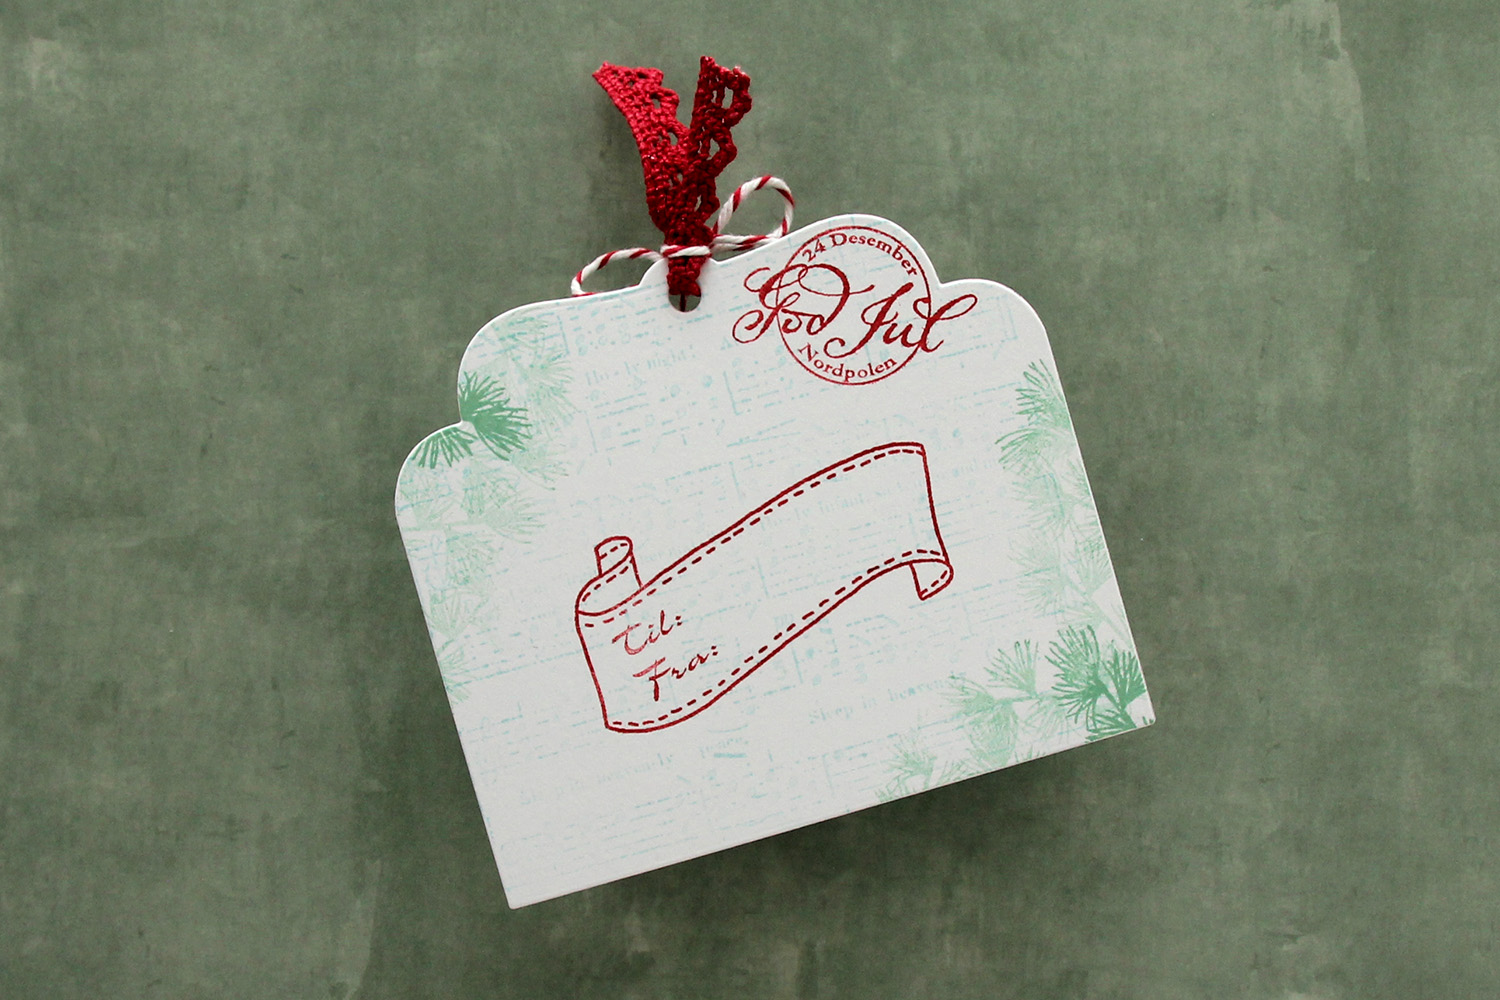 I die cut the tag a second time from white cardstock and did quite a bit of stamping on it. I used second generation stamping of an old sheet music stamp from Magnolia using Powder ink from Concord & 9th – I wanted it to be very soft. The sheet music is actually for Silent Night, making it extra Christmas-y – not that you can really tell. I used first and second generation stamping of a branch from a Mathia Design stamp set using Eucalyptus ink from Concord & 9th to add a little something to the corners. I stamped a postmark stamp from Ladybug & Friends, as well as a to/from stamp from Norsk Stempelblad AS using Amarena Cherry ink from My Favorite Things. I don’t think Ladybug & Friends is in business anymore. Neither is Norsk Stempelblad, but I love their stamps and can’t bring myself to stop using them.
![]() I didn’t use too many colors on this one.
I didn’t use too many colors on this one.
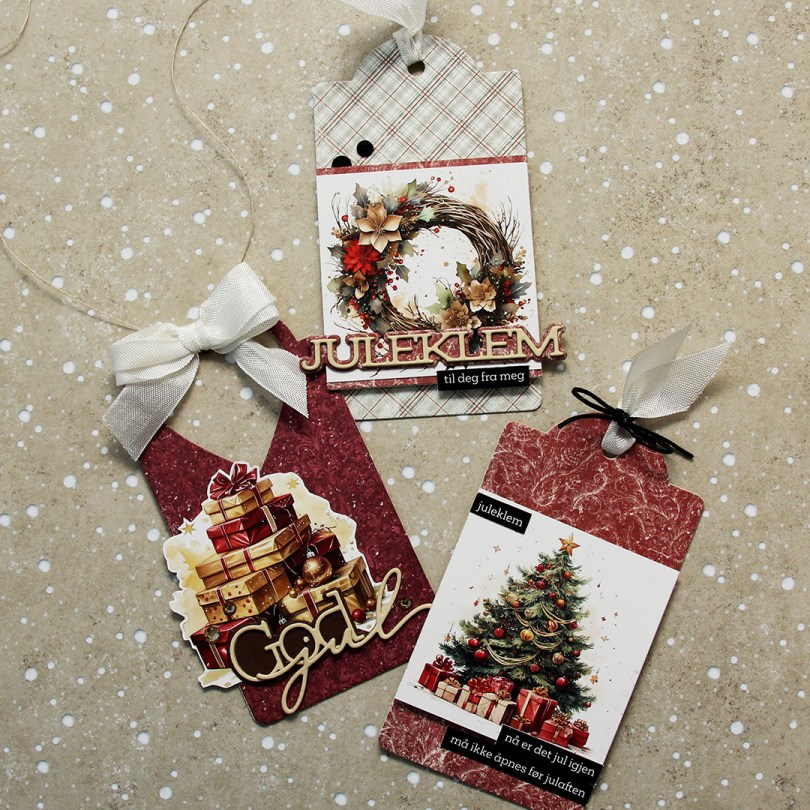
 Kort & Godt just released image sheet with a Christmas theme. There are 11 different image sheets to choose from, and somehow, I started with one of the red ones. I don’t know how that happened when there are gorgeous blue and green ones to choose from, but I don’t always do things that make sense.
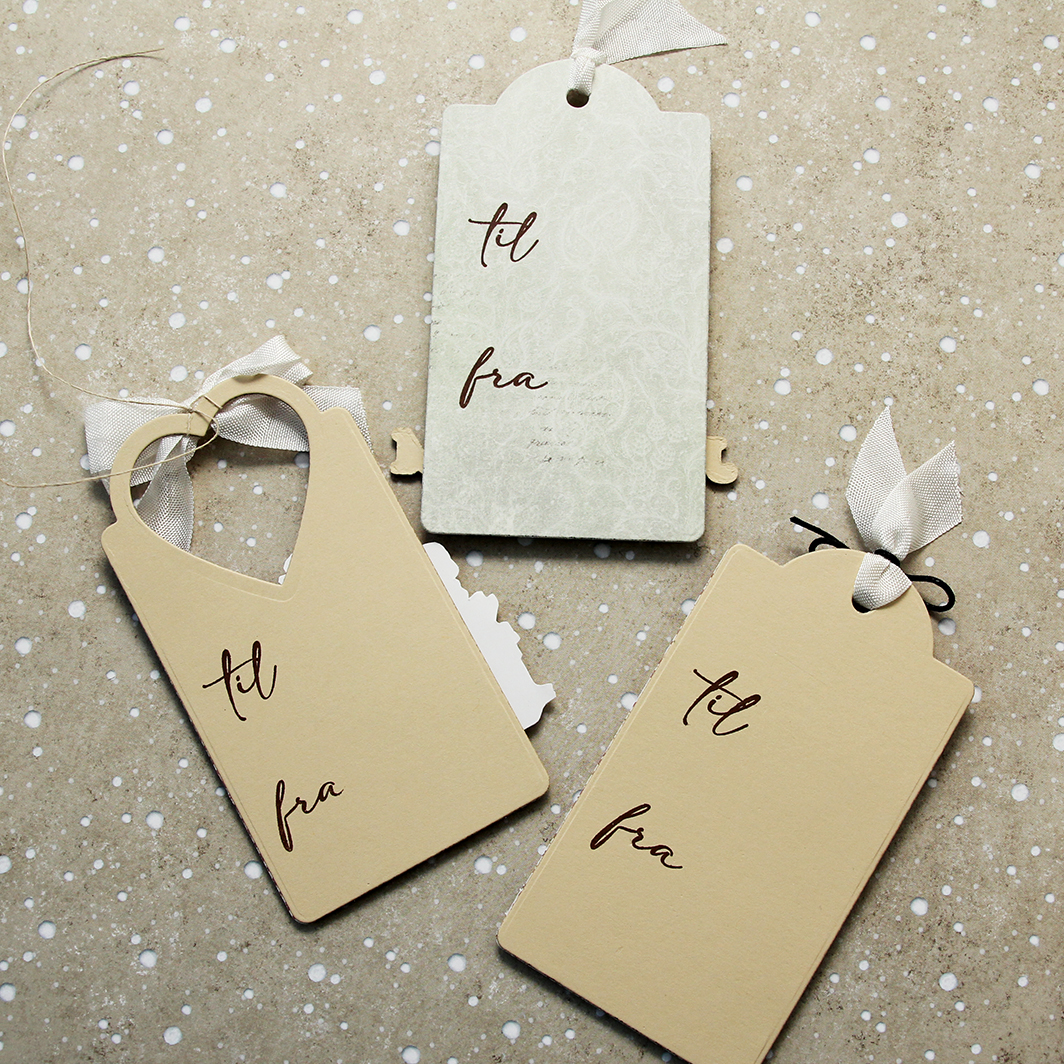 I stamped til/fra on the back of each of the tags using Dark Chocolate ink from Papertrey Ink. The stamps are from M-466.
 I colored the cute mouse and the tree with Copics, before fussing cutting them. I left a white trim around the edge to make it a little easier on myself, that mouse is small and I didn’t want to accidentally cut off his tail. Onto Stamper’s Select White cardstock from Papertrey Ink, I ink blended trees using the Wintry Forest stencil set from Pinkfresh Studio along with Polar Bear, Icy Water and Winter Lake inks from Altenew. I used the largest die in the Stitch. Trad. Tag STAX die set from My Favorite Things to turn it into a tag and sprinkled on chunky white embossing enamel from Stampendous, which I melted from the back for a snowy look.
 I mounted Pippin and the Christmas Tree to the tag using foam tape. I stamped a sentiment from the
  I used a reinforcer die from the Fold-up Tags die set from MFT to add strength to the hole at the top of the tag, added a couple of Snowdrift Sprinkles from Little Things from Lucy’s Cards, as well as some blue satin ribbon, a piece of Blueberry Divine Twine, a thin string and a snowflake charm to the top of the tag for a finished look.
 Simple color palette for this one. I didn’t even go overboard with the snow on the tree.
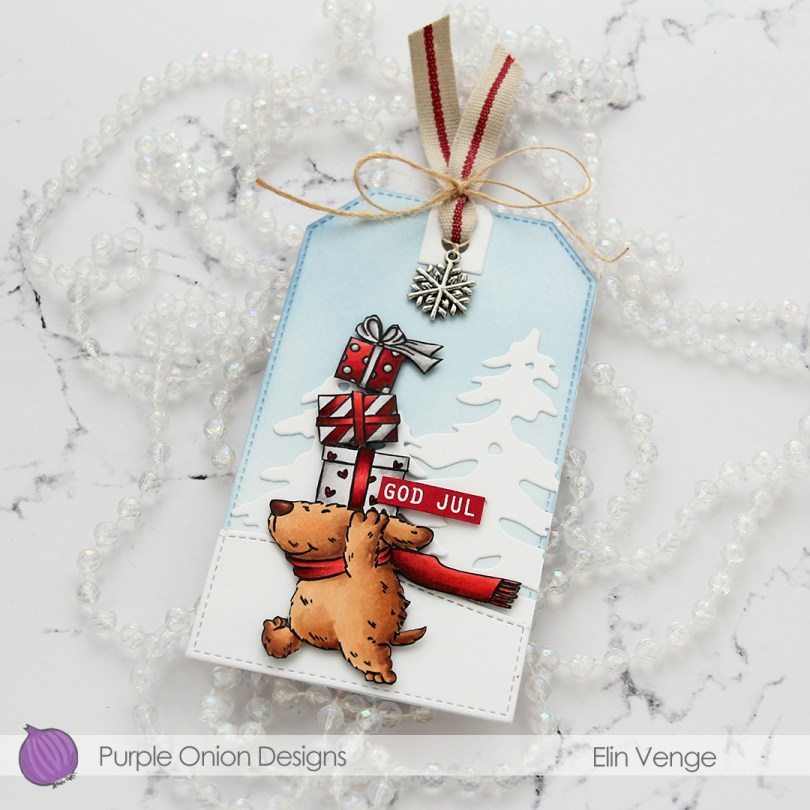
 I stamped the image with Extreme Black ink from My Favorite Things, colored it with Copics, then stamped again, this time using Obsidian ink from Altenew for crips, dark lines. I decided to fussy cut right against the stamped lines, and put this cute dog to the side while I worked on the rest of the tag.
 I die cut a tag from white cardstock using the Stitched Trad. Tag STAX die set from My Favorite Things, before using Polar Bear, Icy Water and Winter Lake inks from Altenew to ink blend a soft blue sky. I die cut a couple of trees using the silhouette snow trees from Mama Elephant and adhered them on top of my ink blending. I used a die in the Stitched Hillside Borders die set from Lawn Fawn to create the faux stitch hill, then used the tag die again to die cut the bottom part and adhered it to the tag also.
 I added my dog using foam squares. stamped and white heat embossed a sentiment from the Julehilsen stamp set from Norsk Stempelblad AS onto Wild Cherry cardstock from My Favorite Things, before trimming it down and adding it with foam squares to the tag. I die cut a reinforcement piece from white cardstock using a die in the Fold-up Tags die set from My Favorite Things and adhered it to the top, before threading some ribbon through and adding a charm. I used some May Arts Natural Twine to tie a bow to secure everything.
 On the back of the tag, I stamped the Til/Fra frame from Norsk Stempelblad AS using Obsidian ink from Altenew. I used Dark Chocolate and Classic Kraft inks from Papertrey Ink to stamp the images that make up the background. The stamps are from North Star Design, Inkido and Ladybug and Friends. I believe none of these companies are still in business, but I love these particular stamps and use them regardless.
 Simple color palette for this one. No wonder, as it’s essentially just brown, gray and red.
 Shari Bresciani’s cast of characters is so fun and quirky. Michele at Purple Onion Designs is very good at finding illustrators with a distinct style. The left tag features
  For both of my tags, I used the Wintry Forest stencil set from Pinkfresh Studio to create my background of blue trees. I used Polar Bear, Icy Water and Winter Lake inks from Altenew to create my trees, die cut my panel into tags using the Stitched Trad. Tag STAX die set from My Favorite Things, then sprinkled on Chunky White embossing enamel from Stampendous which I melted from the back for a snowy look.
 I love the expression on Scruffy’s face! This tree originally has a star on top, but I wanted Starla to add the star to the tree, so I cut off the star from the top and colored the cone shaped part of the star in green, so it looks like it’s the actual tree, even though the even curved line is a telltale sign that it’s not. I don’t think many people will notice, and even less will care.
 I stamped the sentiment using two ink colors from My Favorite Things: Jalapeño Popper and Sour Apple. I would have preferred a green tone with more blue in it, but I don’t have that in the ink formulation that’s best for this kind of mostly solid stamping. I find that the squishy ink pads that have become popular in recent years do better with this kind of stamping than the old firm felt pad type ink pads.
 Close to the sentiment, I added pearls from the Party Girl mix from Little Things from Lucy’s Cards. I was tempted to add lots of pearls in different colors to the tree too, to act as baubles, but opted not to.
 I threaded some satin ribbon through the tag hole and tied it with a piece of Natural twine from May Arts. I also added a couple of gold bells from my stash, I love tags that make that jingle sound.
 Lots of colors for this, even though I felt like I didn’t use too many.
 It’s Carrie’s turn. She goes so well with this snowman, you could almost think they’re one stamp and not two. I don’t mind when things hang off the edge of my cards or, in this case, tags. Will the ears and the branch get bent once this tag is on a present under the tree? Possibly. But I don’t mind, because I feel it adds to the design. If I had cut off the ears and branch to make everything fit inside the dimensions of the tag, this tag wouldn’t be as fun.
 For this one, I stamped the sentiment in Amarena Cherry ink from My Favorite Things. It matches her scarf nicely.
 I managed to get something sticky in the middle of Carrie. There was no way to remove it, so I was very strategic about the placement of the clay snowflakes I added. They’re Snowdrift sprinkles from Little Things from Lucy’s Cards, and I love them.
 I threaded ribbon through the hole at the top of the tag, tied a bow around it using more of that Natural Twine from May Arts and added a couple of gold bells to the top. Different kind of bell than on the green tag, but they still make that wonderful sound.
 Lots of Copics for this one too. I just can’t help myself.
 For the back of the tags, I stamped To/From from the B06 stamp set from Norsk Stempelblad AS using Obsidian ink from Altenew. The remaining stamps are stamped in Classic Kraft and Dark Chocolate inks from Papertrey Ink. For some of it, I used second generation stamping. The circle stamp with 24.12 in the center and the tree stamp are both from Inkido. The little snowflakes are from North Star Design, the smaller circle stamp with God jul in the center is from Ladybug & Friends. Unless I’m mistaken, none of these companies are still in business. It’s kind of sad, but I’m very glad I have these stamps!
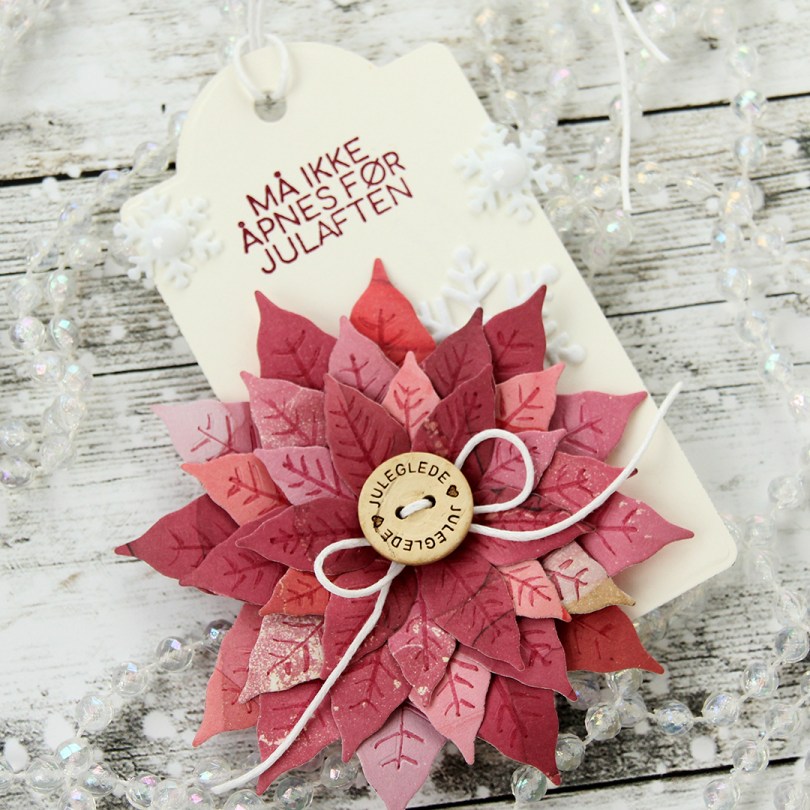
 Die 302 Julestjerne creates an awesome poinsettia. I’m not usually one to use flowers on anything holiday related, but this die set has won me over. There’s three dies in the set – one creates a leaf (which I didn’t use on this tag), and then there are two dies that creates two sizes of petals for the actual flower. If you cut both twice you get a nice looking poinsettia. I cut both four times for this very full poinsettia. I used patterned paper from Craft Consortium, and there’s instant variety to the petals, I love it. The dies create indentations for the veiny lines, which I quickly enhanced with a Zig clean color real brush marker in a color that matched (230 Pale Rose).
 I added the flower to a tag I created from cream cardstock. I used Die 211 to create the tag, and stamped a sentiment from M-466 using Scarlet Jewel ink from Papertrey Ink. I adhered snowflakes from ST105 and ST102, before adding a white gem from ST208 to the center of each. I tied string through the loop at the top of the tag and added a KN567 button to the center of the flower, tying a bow behind the button using the same string that I used for the top of the tag (TR-104).
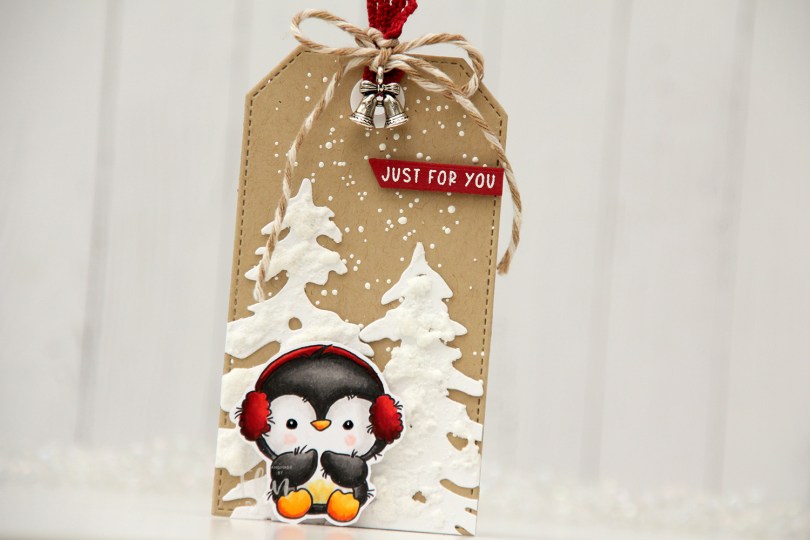
 I colored him with Copics and fussy cut him leaving a white trim around the edges. This particular image would be easy to cut up against the lines, but the wispy lines so characteristic of Lili of the Valley images would be lost, so I opted for the white border. I put black glaze pen in his eyes for shine, and then a dot of white using a 05 Gelly Roll, and put him aside while I worked on the rest of my tag.
 I used a die from the Stitched Traditional Tag STAX die set from My Favorite Things to die cut from Classic Kraft cardstock from Papertrey Ink. I sprinkled Chunky White embossing enamel from Stampendous on top and melted it from behind for a snowy background look.
 I used the Silhouette Snow Trees die set from Mama Elephant to die cut trees from Stamper’s Select White cardstock from Papertrey Ink, before I added some snowy texture to them using a Snow Pen from Rayher.
 I stamped and white heat embossed Just for you from the
  I used some ribbon and twine from my stash, as well as a charm, to finish off the front of this tag. The ribbon, banner and the penguin’s earmuffs create a visual triangle of red elements on this otherwise very neutral tag.
 I die cut the same tag from white cardstock to use on the back. I added a couple of kraft colored branches that I die cut with the Pine Branches die set from Craft Emotions, as well as a to/from from the Tag Builder Blueprints 6 die set from My Favorite Things.
 Meet
Meet  I paired them with sentiments from the
  There are some differences between these. Kale is stamped and colored on the tag, while Flo is fussy cut and popped up. I used similar techniques for the background, but kept a lot of the same elements across both tags.
 For Kale, I masked him off and ink blended around him using Coral Bliss and Pink Pearl inks from Altenew, as well as Scattered Straw Distress ink. I used the largest die in the Stitched Traditional Tag STAX set from My Favorite Things to turn him into a tag and then used the Falling Snow stencil from Simon Says Stamp with Light & Fluffy Modeling Paste from The Crafter’s Workshop to create snow coming down. I used Snowfall Grit-Paste from Ranger at the bottom of the tag and sprinkled on Rock Candy distress glitter before the paste dried. I then added a snowflake charm and some ribbon at the top of the tag and tied it together with Cotton Candy twine from Whisker Graphics.
 On the back of the tag I did soft ink blending using the same colors and stamped a to/from stamp from the B06 stamp set from Norsk Stempelblad AS using Coral Bliss ink from Altenew.
 Not a lot of colors used for this adorable bunny.
 I used the same tag die, stencil, paste and inks for blending on this tag, but decided to add a little extra. I die cut the Silhouette Snow Trees from Mama Elephant from Stamper’s Select White cardstock from Papertrey Ink, and on the trees I added Grit-Paste and Rock Candy Distress Glitter.
 I let the trees dry, used liquid glue to adhere them to the tag and added Flo on top using foam tape.
 I also used foam tape on the back of the speech bubble and used ribbon, a snowflake charm and some twine at the top for this one too.
 Another stamp from the B06 stamp set from Norsk Stempelblad AS on the back of this one.
 I used very bright colors for Flo.
 These mitten dies from Kort & Godt are perfect for gift tags. There are three dies in the set: the cuff, a base layer and a top layer. I only used the cuff on one of these, but used the base layer and top layer for all of them.
 I used scraps of patterned paper from Maja Design for all three of the mittens, stamped and white heat embossed a sentiment on one of them and added a gold gem stone to the center of each of the snowflakes. I also pulled some string through a hole I made at the top left corner and added a couple of bells to each.
 On the back I stamped to and from using ink colors that matched the mittens. I used Dark Chocolate ink from Papertrey Ink for the brown mitten, Scarlet Jewel ink (also from PTI) for the red mittens.
 I colored my snowman with Copics and fussy cut him leaving a thin white border. I put him aside while I worked on the rest of the tag. Onto some white cardstock (Stamper’s Select White from Papertrey Ink), I ink blended distress inks in the colors Picked Raspberry, Spiced Marmalade and Scattered Straw for a soft background. I then used a die set from Hero Arts (Snowflake and Ornament) to die cut the ornament from my background and the snowflake circle twice from white cardstock. I adhered the two white die cuts together for a smidge of dimension, before adhering them to the base.
 I mounted the snowman on foam tape and white heat embossed a sentiment from Norsk Stempelblad AS onto a strip of Enchanted Evening cardstock from Papertrey Ink, mounted that on foam tape and added diamonds from Kort & Godt to the centers of the snowflakes, before finishing off the tag with a piece of ribbon, some thread and a couple of bells from UiT Hobby.
 Super simple color palette for this one.