
Hi, crafty friends. I’m sharing a fun birthday card today, featuring a few images from Purple Onion Designs. Dotty is as adorable as all of Stacey Yacula’s other critters, I just love her illustration style so much. This particular mouse has her arms out, making her the perfect choice if you want her holding something. I chose the balloons from the Balloon Trio & Streamer set, making sure the knot holding all the balloons together is in her hands. I stamped both the balloons and the cute little mouse using Extreme Black ink from My Favorite Things, and stamped The Perfect Spot behind them using Fadeout ink from Inkon3.
 I colored the scene with Copics, then used The Perfect Spot again to stamp on white cardstock (Stamper’s Select White from Papertrey Ink, my favorite white cardstock), this time using Memento Espresso Truffle ink. I wanted this to be more visible than the background without being stark black, and this color is perfect. I then die cut the white panel using two dies: a rectangle die from Waffle Flower to make it smaller and the Watercolor Wash Free Form die from My Favorite Things to create a window.
 I added foam tape on the back of my white panel for dimension and lined up the stamped lines on the two panels as best as I could, before adding my double panel to a card base I created from Soft Stone cardstock from Papertrey Ink. I then stamped a sentiment from the Everyday Blurbs stamp set using Picked Raspberry Distress Oxide ink, fussy cut around it leaving a thin white border and mounted it on foam tape. To finish off the card I used a Gelly Roll 05 to create white dots on the pink balloon.
 Fairly simple color palette for this one. I also used B90, which is a color I’ve made myself.
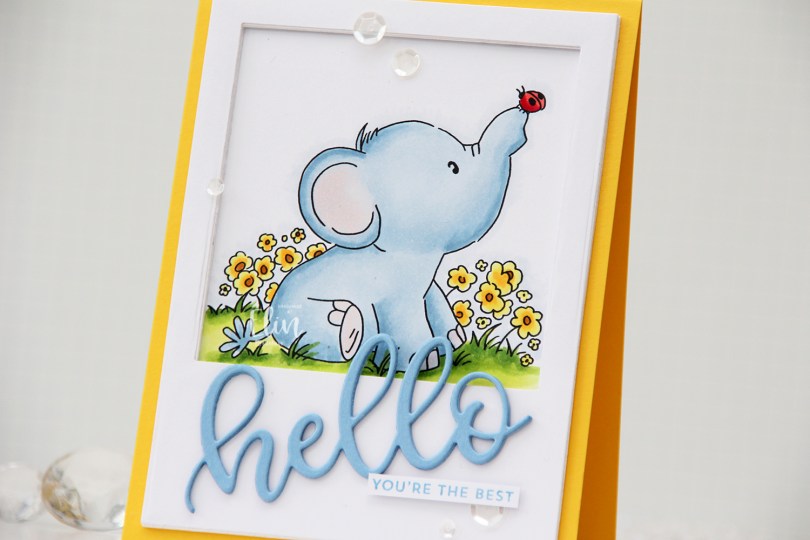
 Once I colored the first of these elephant stamps blue, I just couldn’t stop, so here’s another blue one for you. I chose a very similar color palette to what I’ve used for my other cards with this set, but this time, I opted for a yellow card, creating a top fold card base from Bright Buttercup cardstock from Papertrey Ink.
 I colored the image with Copics, and created a large polaroid frame using a rectangle die from Waffle Flower, as well as a square die from Lifestyle Crafts. I taped the two dies together and die cut several layers of white cardstock that I stacked for a dimensional look. I love dimension on my cards. I used the Sweet hello die from My Favorite Things to die cut three layers of Periwinkle cardstock from Hero Arts, which I also stacked. I added the die cut at an angle and paired it with a sub sentiment from the Itty Bitty Basics stamp set from My Favorite Things, stamped in Blue Yonder ink, also from My Favorite Things. I finished off the card with a visual triangle of sequins from the White Orchid sequin mix from Little Things from Lucy’s Cards.
 Like I said initially: similar color palette to the ones I’ve used for the previous elephant cards. I also used B90, which is a color I’ve created myself.
 This
This  I colored my image with Copics, stamped a sentiment from Mathia Design using Ocean Tides ink from Papertrey Ink, before die cutting a bunch of white snowflakes from the same cardstock (X-Press It blending card) that I use to color on, so my whites would match. I used the Snowflake Confetti fancy die from Hero Arts, along with the CR1335 die from Marianne Design to die cut all my snowflakes. Both these dies cut lots of snowflakes at once, and the snowflakes are fairly small, making them ideal for a background like this. I adhered lots of snowflakes above the penguin’s head, then used a rectangle die from Waffle Flower to die cut my panel. I mounted it on foam tape onto a card base I created from Ocean Tides cardstock from Papertrey Ink, and my card was complete. Another Christmas card done for 2023.
 I printed the image near the bottom left of my panel and colored it up with my Copics, before trimming off a little bit on one side. I used the Slimline Cloud Edges stencil from My Favorite Things, along with Eastern Sky ink from Altenew, to softly ink blend the clouds in the background.
 I stamped a couple of sentiments from the Bitty Birthday Wishes stamp set from My Favorite Things using Obsidian ink from Altenew. I adhered my panel directly to an A2 card base I created from Periwinkle cardstock from Hero Arts. I then used a scripty die from Mama Elephant to die cut the word wishes four times from Amarena Cherry cardstock from My Favorite Things. I stacked them together and added the word to the card, nestled in between the stamped sentiments, before finishing off the card with a few sequins from the White Orchid sequin mix from Little Things from Lucy’s Cards.
 Some vivid colors for this one.
 Lili of the Valley critters are among the cutest in the stamping world, and I just couldn’t resist these bunnies carrying a big cake. I colored the image with Copics, before die cutting it using the largest die in the A2 Stitched Rectangle STAX die set from My Favorite Things. I adhered the panel to a card base I created from Autumn Rose cardstock from Papertrey Ink.
 I used my Quickie Glue pen on the flames and sprinkled on Rock Candy distress glitter for added sparkle. Using foam tape, I popped up a sticker sentiment from Kort & Godt before finishing off the card with sequins from the White Orchid Sequin mix from Little Things from Lucy’s Cards.
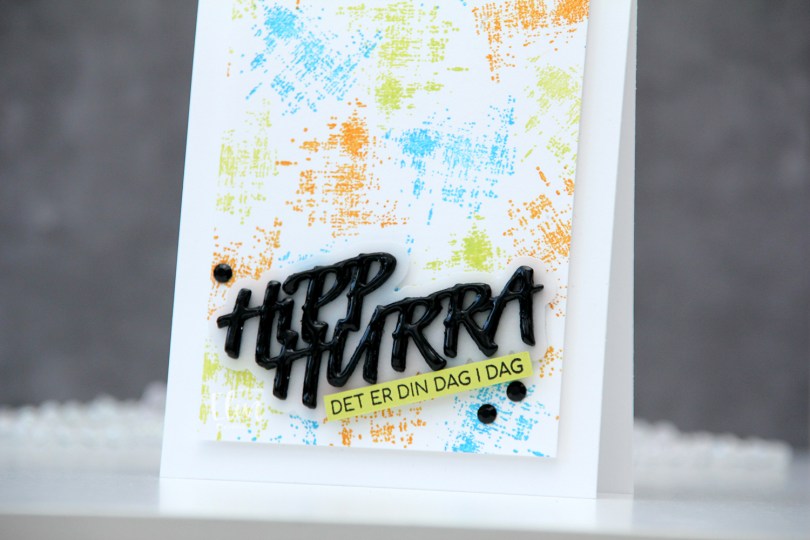
 I started by creating a colorful background. Using one of the stamps in the M479 stamp set, I stamped repeatedly across the background using Distress Oxide inks in the colors Salty Ocean and Twisted Citron, as well as regular Distress ink in Spiced Marmalade. I cut the panel down to be 3 1/2 x 4 7/8″ and mounted it to a white top fold card base using foam tape.
 Using the DIE294 die set, I die cut 8 layers of the words from True Black cardstock from Papertrey Ink and one shadow layer using heavyweight translucent vellum from My Favorite Things. I stacked three of the black layers, added the vellum layer on top and then the last five black layers. I even added a coat of Nuvo Crystal Drops in the Ebony Black color to the top layer for extra dimension and shine. On a piece of Limeade Ice cardstock from Papertrey Ink, I stamped a sentiment from the M458 stamp set using Obsidian ink from Altenew, before adhering both the stacked die cut and my stamped sentiment strip at an angle, before finishing off the card with a couple of crystals (BE107). And that’s a wrap for my first DT card for Kort & Godt – I can’t wait to play more, and hope this inspired you.
 I colored and fussy cut the sloth, colored in the party hat and fussy cut that, before putting both pieces aside while I worked on the rest of my card. I created a card base from Blue Breeze cardstock from My Favorite Things and created a wall for the sloth to hang onto using Stamper’s Select White cardstock from Papertrey Ink. To create a bit of texture to the wall, I stamped the Touch of Texture background stamp from My Favorite Things using Soft Stone ink from Papertrey Ink. It’s subtle, but still adds a little bit of interest.
 I stamped a sentiment from the Anything-but-Basic Birthday Wishes stamp set from My Favorite Things using Obsidian ink from Altenew, before adding the wall to the card base with 1 mm foam squares. I added the sloth using foam tape and finished off the card with a few Starry Sky Ombré Glitter Drops from Pinkfresh Studio. I also added a dot of Black Glaze pen to his eyes for a bit of shine and dimension, which is easy to see in real life, but tricky to photograph.
 This was initially a very muted, very simple color palette. Let’s just say things changed when I decided to add the party hat 🙂
 I stamped and colored my images, before fussy cutting them, leaving a bit of a white border around them all. I put my colored pieces aside and started working on the rest of the card. I decided to do a bit of ink blending with the Paint Strokes stencil from My Favorite Things. I thought the brush strokes would be good for a background for my colored images.
 I started out with Coral Bliss and Pink Pearl inks from Altenew for the pink, but wanted a little more oomph and went over them with Picked Raspberry and Worn Lipstick distress inks, which gave it the pink I wanted. On the orange paint stroke, I only used Spiced Marmalade distress ink, and for the yellow, I chose Mustard Seed and Squeezed Lemonade distress inks. I then stamped a sentiment from the
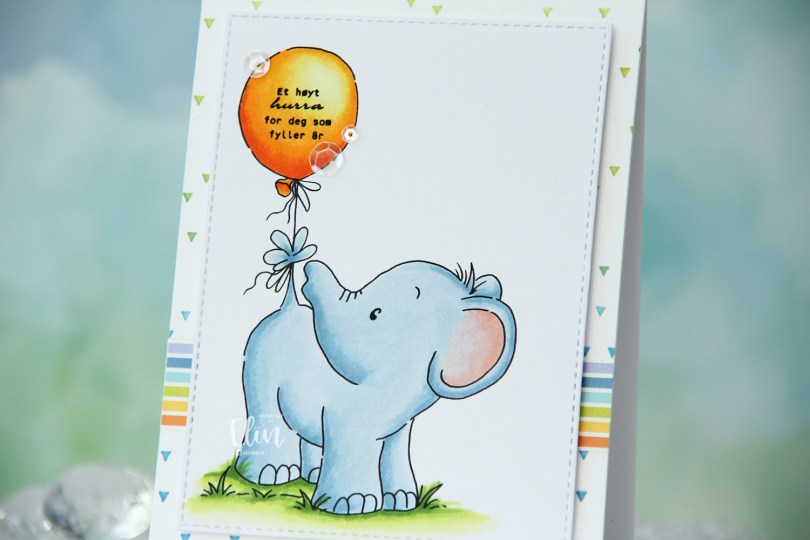
 I colored the elephant with Copics, stamped a Norsk Stempelblad AS sentiment inside the balloon using Altenew Obsidian ink, then used a die from the A2 Stitched Rectangle STAX 1 set from My Favorite Things to turn it into a panel with that nice faux stitch line that I use a lot on my cards. In my stash I had a white card base with a stamped background (the Scattered Triangles Background stamp from My Favorite Things, stamped with Sour Apple and Blue Yonder inks, also from My Favorite Things) on the front that I decided to also make use of. The colors match my elephant nicely. I was actually planning on using this card base for my
  On top of my scattered triangle background, I adhered a strip of a patterned paper from the Party Patterns paper pad from My Favorite Things, mounted my colored panel using foam tape and embellished near the sentiment using the White Orchid Sequin mix from Little Things from Lucy’s Cards.
 Simple card means simple color palette.
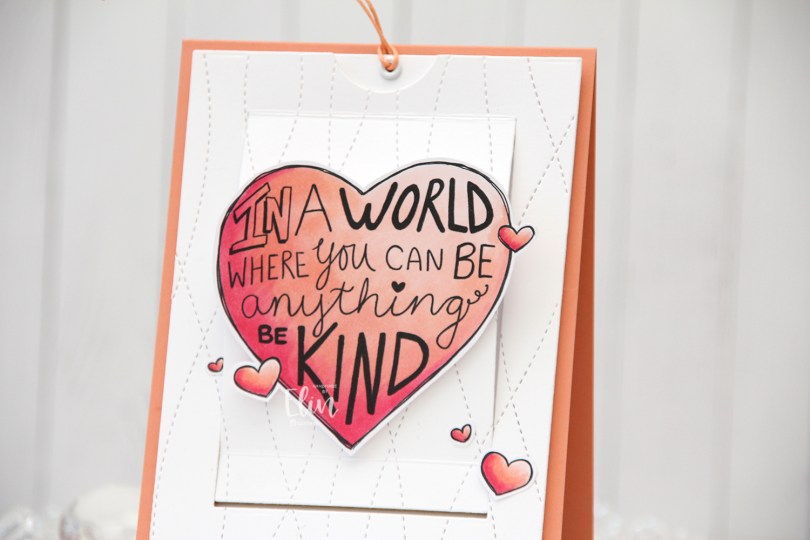
 As you might be able to tell from the front, this isn’t a regular card. It’s a slider card. At first I wasn’t sure how to turn this particular stamp into a card, but then I had a lightbulb moment and realized it was perfect for a slider card.
 I colored the images with Copics, did some fussy cutting leaving a think white border and put my pieces aside while I worked on the rest of the card.
 When you pull on the string at the top, these mice from the Be Kind stamp are revealed. Nice little surprise there, huh? The slider mechanism itself is made using the Slider Surprise die set from My Favorite Things, but you could easily do this on your own, it’s not difficult. They’re straight cut lines and just a few score lines.
 I wanted a little texture to my white cardstock, and used the Stitched Ripple Backdrop die from Lawn Fawn, which creates these faux stitch lines across the panel. In hindsight, I realize I probably should have dry embossed it only and not die cut it, because where the stitched lines intersect with the die cut edge of the part that folds up, it kind of snags a little. It’s not a huge deal, but it’s enough to make me think simply dry embossing would have been enough.
 In the opening, I added a piece of Gold Foil Pinstripe washi tape from Altenew for the mice to have a little bit of a grounding element, then adhered the mice using liquid glue. The top die cut panel is mounted on foam tape, and everything adhered to a top fold card base I created from Melon Berry cardstock from Papertrey Ink.
 Probably the simplest color palette I’ve ever used on a card.