Hi, crafty friends! It’s the third Thursday of the month, which means it’s #getcrackingonchristmas. This is an initiative from Jenn Shurkus to get us creating holiday cards all year instead of having to scramble last minute to get them done in November and December. This lets us use our holiday products, try out new things and enjoy the process! My card today features an adorable Christmas bear from a digi stamp set from Amanda Jayne Designs, as well as some other goodies.
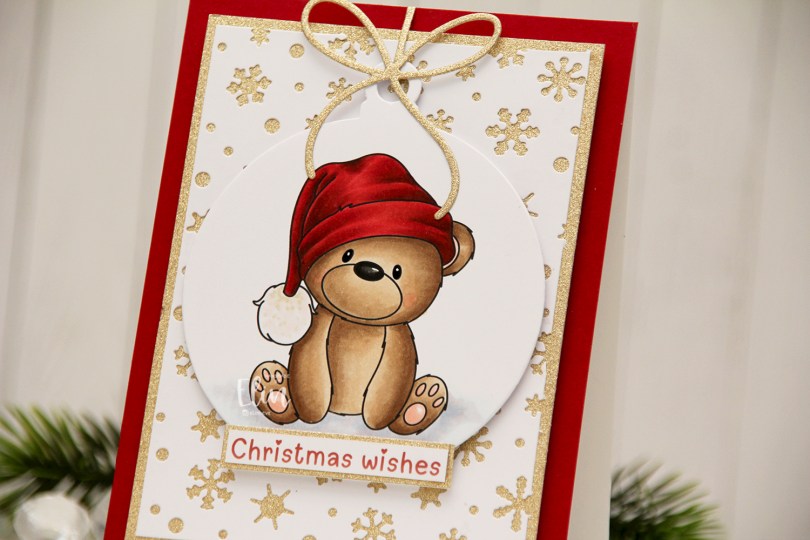
 I colored the bear with Copics and used the Snowflakes and Ornament die set from Hero Arts to turn him into a Christmas ornament. Isn’t he adorable with his head tilted to the side? I covered the card base with a piece of Cranberry cardstock from Concord & 9th. This is the perfect Christmas red, and it goes really well with the colors on his hat, as well as the color I chose for the sentiment, which is also from Amanda Jayne Designs.

I used the Snowflake Confetti Fancy Die from Hero Arts to create a white background of snowflakes. I cut the panel down and adhered it to a piece of gold glitter cardstock from Kort & Godt Hobby, giving shine and sparkle to the snowflake openings. I mounted my gold cardstock to the center of the card using foam tape and added my colored bear ornament with more foam tape – there’s a lot of dimension going on here. I used the Gift bows dies from Kristina Werner to add a gold glitter bow to the top of the ornament. I also used a little bit of the gold glitter cardstock to mat the sentiment, which I adhered directly to the ornament to finish the card.
![]() For such a simple image, I sure used a lot of Copics.
For such a simple image, I sure used a lot of Copics.
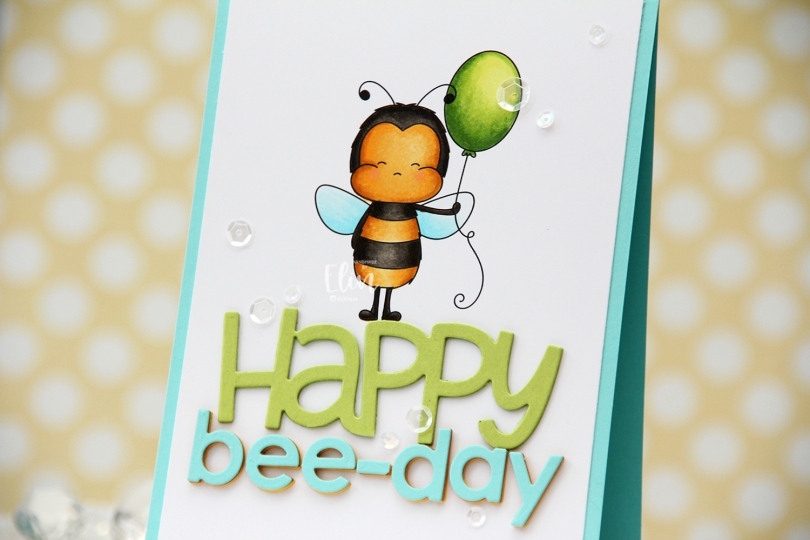
 I knew I wanted a large sentiment for this card, so I printed the bee pretty much top center of a quarter sheet of X-Press It blending card, which is my preferred cardstock for Copic coloring. I’ve been using it since 2012, and in my mind, there’s no better cardstock for Copics, so it’s pretty much all I use. I colored the image with my Copics and cut off a little bit on each side of the panel before adhering it to a top fold card base I created from Summer Splash cardstock from My Favorite Things.
 I die cut HAPPY from the Big Happy Holidays die from Mama Elephant three times from Sour Apple cardstock from My Favorite Things, stacked them for a dimensional look and adhered the stacked die cut right beneath the bee’s feet. Using the Parker alphabet die set from Memory Box, I die cut the letters to spell bee-day, using an exclamation point that I trimmed down a little to create a hyphen. This word is actually multi-colored. That was not my intention, but I wasn’t happy with the color I chose initially, which was Bright Buttercup from Papertrey Ink. It’s a great color, but it wasn’t the right yellow to match my colored bee. On top of three die cuts of that, I added a layer of Honey Nut cardstock, also from Papertrey Ink. It matched my bee, but it was a little too brown for my taste, and my card felt sad. I didn’t want a sad birthday card, so I topped it with a layer of Summer Splash cardstock from My Favorite Things, which is what I used for the card base. I was much happier with this, and it matches the wings nicely.
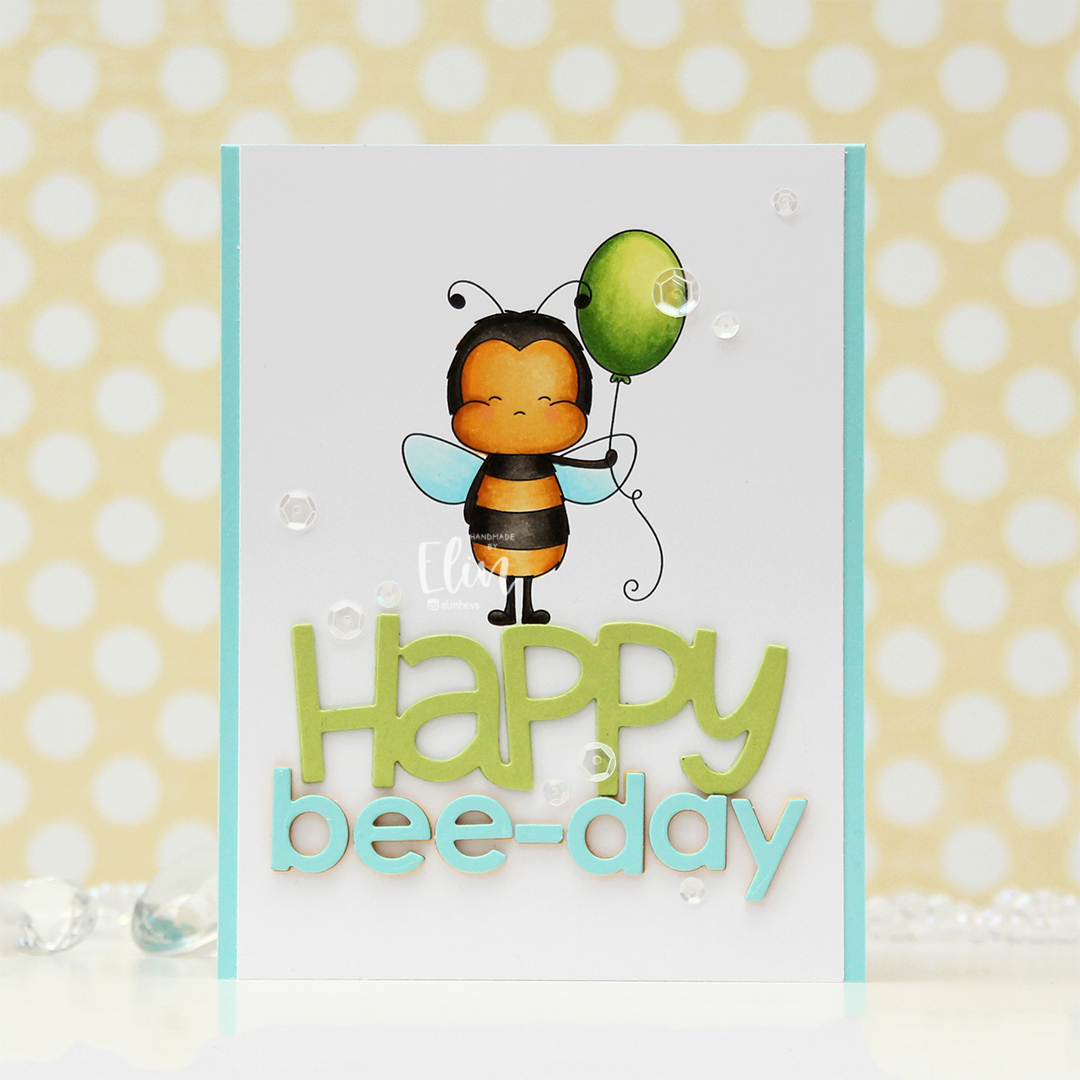
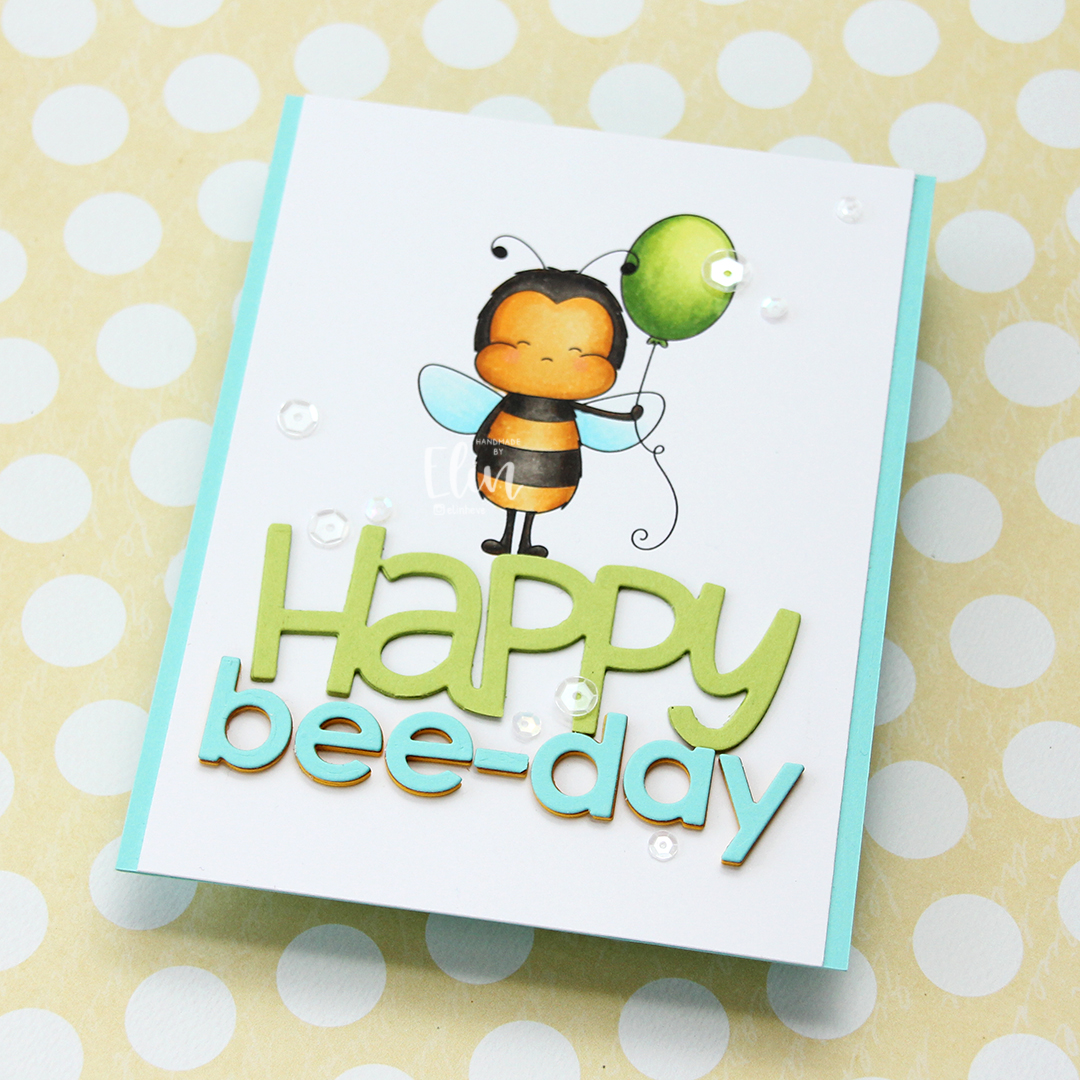 To finish off the card I added a few sequins from the Starry Night mix from Little Things from Lucy’s Cards. Here you can also see the multi-colored letters in the word bee-day, which adds another layer of interest to this fairly simple card.
 Simple color palette for this one.
 I colored the image and fussy cut, leaving a bit of a white trim around the edge, before putting it aside while I worked on the rest of my card. Onto a top fold white card base, I ink blended Scattered Straw Distress ink in a gradient from the bottom, fading into white. I wanted a little more oomph and went in just at the bottom with Mustard Seed, which is a little bit darker. I used the Sweet hello die from My Favorite Things to die cut hello four times from white cardstock, which I stacked for dimension.
 Onto a piece of Berry Sorbet cardstock from Papertrey Ink, I stamped and white heat embossed a sentiment from the Pristine Peonies stamp set from Altenew. I cut it down to a strip, added a few additional strips behind it and started assembling my card. I put foam tape on the back of the image and adhered it so a little bit of it hangs off the edge, adhered my stacked hello die cut partly on top of the pot, partly directly on the card base, and then the sentiment strip on top of the die cut. I like when it’s all connected like this, it makes for a more cohesive design than if I were to add the sentiment strip below the hello. To finish off, I added a few sequins here and there from the White Orchid Sequin mix from Little Things from Lucy’s Cards.
 Simple color palette for this one.
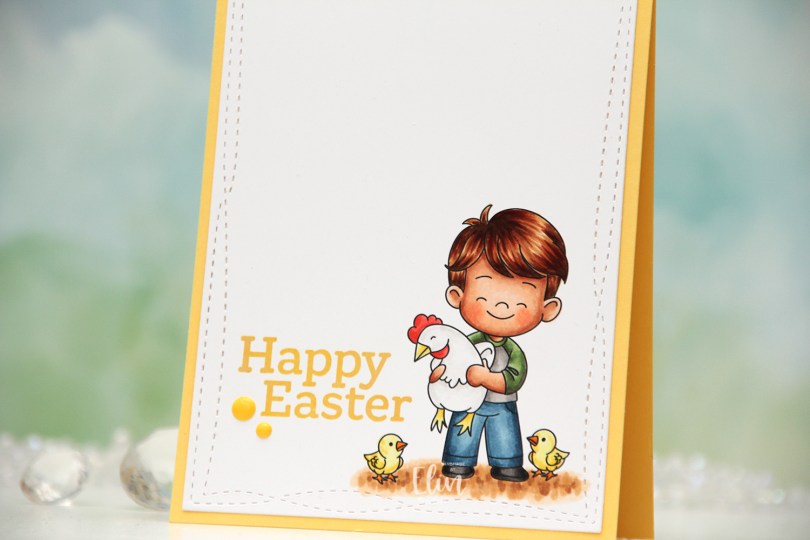
 I colored the image with my Copics and used the largest die in the Wonky Stitched Rectangle STAX die set from My Favorite Things to create a little bit of interest to the edge. I adhered my panel onto a top fold card base I created from Harvest Gold cardstock from Papertrey Ink.
 The sentiment is from the Sweet Easter stamp set from Sweet November Stamps. It’s actually a single line stamp, but I wanted a staggered look and cut the two words apart. You could also mask if you don’t want to cut your stamps, but I promise they don’t cry, and it’s easy to put the two halves back together as originally intended. I used Fossilized Amber Distress Oxide ink, stamping Easter first, then nestling in Happy above it, before finishing the card off with a couple of enamel dots from the Pocketful of Sunshine pack from Altenew.
 I used quite a few Copics for this, even though the card is very simple.
 I used the second largest die in the Watercolor Rectangle STAX die set from My Favorite Things to turn my colored piece into a panel with a fun edge. I added some layers of cardstock behind it and adhered it to a top fold card base I created from Berry Sorbet cardstock from Papertrey Ink.
 I used the Sweet Hello die from My Favorite Things to create my sentiment. I die cut four from white cardstock and one from Grapefruit cardstock from Concord & 9th and adhered them all together for a stacked, dimensional look. I stamped and white heat embossed a sub sentiment from the IWCL2017005 English stamp set from InkyWings on a strip of Berry Sorbet cardstock and added it to my die cut sentiment, making sure to put a few layers of cardstock behind it on the part that overhangs. I added a few sequins from the White Orchid Sequin Mix from Little Things from Lucy’s Cards, and put a dot of black Glaze pen from Sakura on the squirrel’s eye for a little bit of shine and dimension to finish off the card.
 I used a lot of colors for this simple image.
 I colored the image with my Copics and stamped love you from the Mini Messages stamp set from Mama Elephant using Berry Sorbet ink from Papertrey Ink, before using the panel die in the Blueprints 27 die set from My Favorite Things to cut it out and give it a nice scalloped edge with a faux stitch line on the inside.
 Onto a top fold white card base, I adhered a piece of blue patterned paper from the Watercolor Brights 6×6″ paper pad from My Favorite Things. I added a few layers of cardstock behind my large panel for a little bit of lift and adhered it to the card front, before finishing off simply with a few pearls from the Glossy Porcelain Mix from Little Things from Lucy’s Cards. Oh, and I also used a black glaze pen from Sakura to add a black dot to each of the eyes. This makes the eyes pop, and it adds shine and a little bit of dimension in real life, which you can’t really tell from the photo.
 I had my penguins colored, fussy cut and ready to go. I rummaged through my Christmas themed patterned paper scraps and found a piece from Papirdesign and one from Maja Design that were just big enough to die cut a snowflake from. This snowflake is the Stitched Snowflake Frame from Lawn Fawn that came out last year. I added a white die cut circle to the back of the opening that the die creates and stamped a to/from stamp on the back.
 I added the penguin using foam squares and also a white heat embossed sentiment strip. The sentiment is from the Jul stamp set from Norsk Stempelblad. I stamped and white heat embossed a bunch at once on a scrap piece of blue cardstock from Maja Design. I added my strip using foam squares and finished off the tag with a few sequins from the Igloo mix from Little Things from Lucy’s Cards and a bow I tied to the top using Divine Twine in the color Blueberry.
 I used the same setup for the second tag, only switching out the sentiment and using pearls instead of sequins. They’re from the same mix from Lucy, though.
 I love using 1 mm foam squares. It adds a little bit of raised dimension to something that is very simple, and the bow adds a little bit of texture.
 Simple color palette for these two (and the other two penguins that are still lost somewhere in my craft room).
 I colored the penguins with Copics and fussy cut them all, leaving a white border around the edge. I used the Fold-Up Tags from My Favorite Things to die cut four tags from the Hvite juleblomster patterned paper from the Gledelig Jul collection from Papirdesign before I adhered each penguin to each of the tags using 1 mm foam squares.
 I stamped and white heat embossed several sentiments from the Jul stamp set from Norsk Stempelblad AS onto Classic Kraft cardstock from Papertrey Ink. I also die cut reinforcements for the tags from the same cardstock, and some tiny snowflakes from white cardstock (also from PTI) using the Snowflake Confetti Fancy die from Hero Arts. I mounted the sentiment strips on foam squares, adhered the snowflakes using liquid glue and added a 2 mm white pearl from Kort & Godt to the center of each of the snowflakes. I used natural twine from May Arts through the reinforcements and threaded two gold bells to each piece of twine before securing the twine to the tags.
 On the back of the tags I stamped to/from labels from the B06 stamp set from Norsk Stempelblad AS using Dark Chocolate Ink from Papertrey Ink. I stamped the labels before adding the reinforcements. In hindsight, I wish I’d kept the stamps in my MISTI and restamped after the reinforcements were glued on, so the label would be continuous on the back, but I didn’t think of it as I was creating. I’ll try to remember for my next batch of tags.
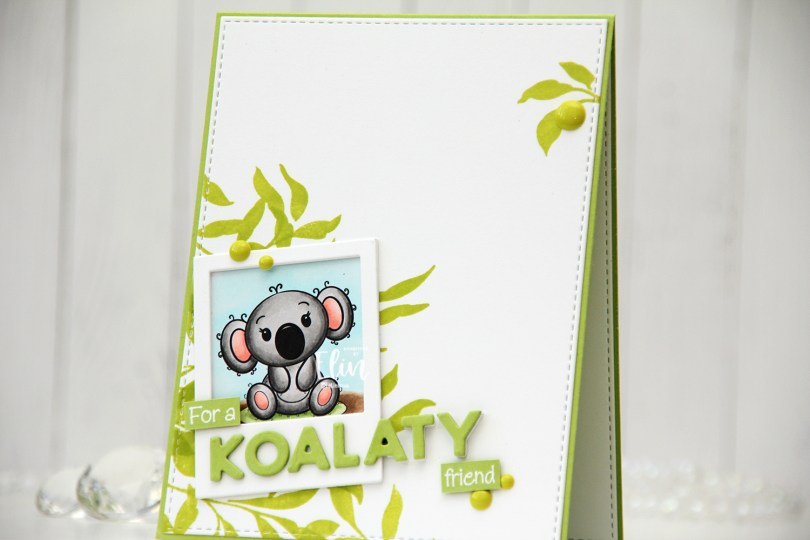
 This koala was so quick and easy to color. If you’re new to coloring, or enjoy coloring but don’t want to spend an eternity coloring one image, I’d recommend her images. They’re not super detailed, which makes them easy and fast to color.
 I decided to put my colored koala in a polaroid frame, and used the largest of the dies in the Precious Polaroids die set from My Favorite Things to die cut three times from white cardstock for a stacked look on top of the cute koala.
 I created a top fold A2 card base using Green Parakeet cardstock from Papertrey Ink. Onto the left bottom corner of a piece of Stamper’s Select White cardstock from Papertrey Ink, I stamped some leaves from the Leaf Clusters stamp set from Altenew, using Limelight ink from My Favorite Things. This is a much more vibrant, yellowy green than what you’ll find in eucalyptus leaves, but I wasn’t going for realism with this card and happen to like the bright green – it really pops. I made sure to stamp a large enough area that some of the leaves would be visible around the polaroid frame with my koala. I also stamped the smallest leaf cluster in the Altenew stamp set near the top right corner for a little bit of balance and die cut the white panel using the largest die in the A2 Stitched Rectangles STAX 1 set from My Favorite Things.
 I wanted a punny koala themed sentiment on my card, and the word koalaty (quality) came to mind. I needed something to use with it, and dug through my sentiment sets for one with the word friend in it. A sentiment in a stamp set from InkyWings was perfect, it said For a sweet friend. I stamped it in VersaMark ink and white heat embossed it using Super fine detail embossing powder from Ranger. I cut the sentiment down to a strip, removed the word sweet and had the perfect start and finish to my punny sentiment. Using the Connected alphabet die set from My Favorite Things, I die cut the letters to spell koalaty three times from Green Parakeet cardstock and stacked them for a dimensional look. I die cut an additional three white ones for the letters that hang off the polaroid (ATY) and glued these behind the green ones so the letters would all be flush on the card. I also added some additional layers of cardstock behind the white heat embossed strips for that little bit of added dimension, before finishing off the card with a few enamel dots from Papirdesign.
 The dimension is more visible in this photo, I love adding dimension to my cards. Dimension is life 😉 I cut the layered up white A in half, because only half the letter hangs off the edge. The letters that have the white die cuts behind them kind of look like they’re floating on the card.
 Super simple color palette for this one.