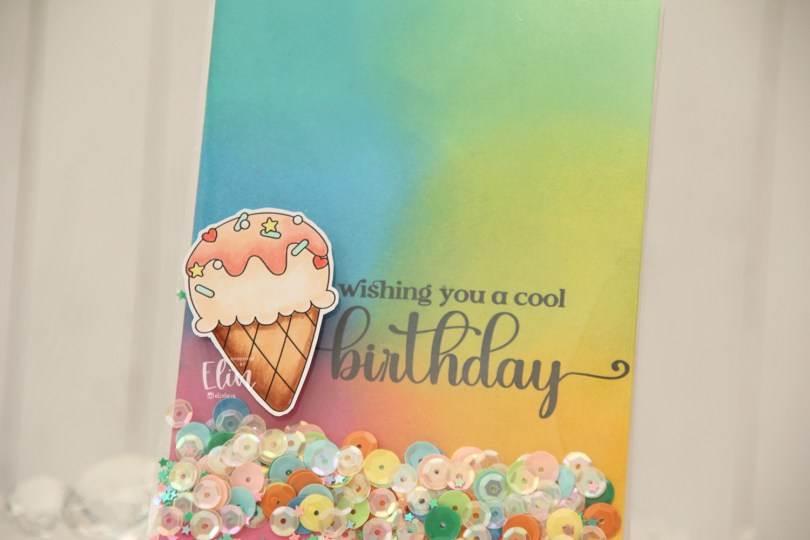
Hi, crafty friends. I’ve got a fun, festive full shaker card to share with you today, and this ice cream from the Ice Cream Critters digi stamp set from Streamside Studios.
 Everyone loves ice cream, right? I colored up this one using my Copics, and fussy cut around it leaving a thin white border. The border makes it stand out against the colorful ink blended background.
 Speaking of backgrounds – I ink blended Distress Oxide Inks (Peacock Feathers, Cracked Pistachio, Twisted Citron, Fossilized Amber, Picked Raspberry and Salty Ocean) across a quarter sheet of Stamper’s Select White cardstock from Papertrey Ink. I heat set the panel to make sure it was dry, before running it through my printer to add the sentiment.
 The large stamp storage pockets from Avery Elle are 5 1/2″ wide, making them perfect for full A2 size shaker cards. I cut slivers off the panel to make it go in a little easier, then turned it on its side and put it at the bottom of the storage pocket. I cut the pocket down to about 5″, scored at the 4 1/4″ mark and folded it over. I actually cut the back of the storage pocket at the 4 1/4″ point to make it easier to fold. I cut the corners of the remaining flap, filled the pocket with sequins and confetti and glued the pocket shut on the back, before adhering it to a top fold card base I created from Stamper’s Select White cardstock from Papertrey Ink.
 I added the ice cream on top of the shaker pocket using foam tape, and that finishes the card. The sequins and confetti I used are a mix of different brands. The opaque ones are from Studio Calico, and I’ve probably had them for almost 10 years, the same with the iridescent cream colored sequins. Those are from UiT Hobby, and the little star confetti is from Søstrene Grene, they’ve also been in my stash for many years.
 Simple color palette for this one.

 I stamped three of the little penguins using Extreme Black ink from My Favorite Things, colored them all in using my Copics, then restamped using Obsidian ink from Altenew, which is a pigment ink that stamps extra crisp and extra dark to bring the details of the linework back in.
 Onto a separate piece of cardstock, I stamped a sentiment from the Mini messages stamp set from Mama Elephant using Hunter Green ink from Altenew.
 Using the Circle Frames die from Avery Elle, I die cut the openings from Evergreen cardstock from Concord & 9th. I also die cut a few panels from white cardstock to layer behind the green, so my penguins would be recessed a little bit.
 Using the Snowflake Confetti Fancy die from Hero Arts, I die cut a bunch of snowflakes from white cardstock (Stamper’s Select White from Papertrey Ink, which I also used for my card base) that I adhered around my circle openings to draw the eyes in toward those cute penguins and the sentiment. Easy peasy card, right?
 Quick and easy peasy to color too.
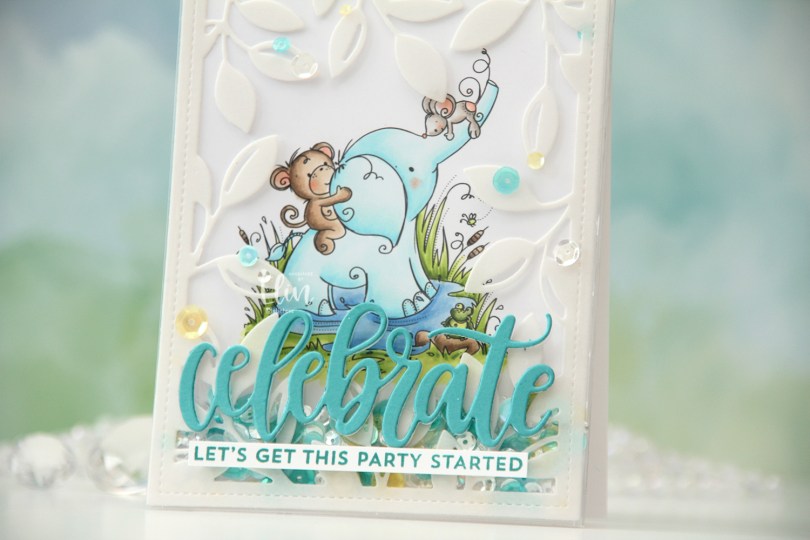
 I actually decided to create a shaker card this time. I colored in the
  I put an adhesive sheet from Altenew on the back of a piece of heavyweight translucent vellum from My Favorite Things, before using the Leafy Cover die from Mama Elephant to die cut a frame to put on my card front. I cut off a couple of leaves where I thought they covered up too much of the image and adhered the rest directly onto the bottom of a large stamp storage pocket from Avery Elle. The storage pocket was just wide enough for my colored panel to fit when I turned it 90 degrees. I trimmed off a tiny bit of my panel (1/16″) so it would be less snug in the pocket, and cut off a couple of inches from the top of the pocket. This way I could put the panel inside the pocket, and there would only be one side of the pocket that needed to be sealed once my shaker bits were in place.
 I adhered my shaker pocket to a top fold card base I created from Stamper’s Select White cardstock from Papertrey Ink. I die cut the sentiment using the Celebrate die from My Favorite Things. I used Caribbean Sea cardstock from My Favorite Things for the top layer and a few layers from white cardstock behind it for dimension. I also stamped a sentiment from the Bitty Birthday Wishes stamp set from My Favorite Things onto white cardstock using Caribbean Sea ink, also from My Favorite Things, turned it into a strip and placed it directly underneath the die cut word. To finish the card, I adhered some sequins from the Seashore mix from Little Things from Lucy’s Cards, as well as from the Seaglass mix from Simon Says Stamp. These two mixes work really well together, and they’re also what I used to fill my shaker.
 Speaking of, here they are. Full shaker cards are fun, and I’d say they’re a lot easier to create than regular shaker cards, where you need to create dimension for the shaker bits to shake around.
 The storage pocket works so well as a shaker pouch, and because of it, it gives everything a bit of a lift off the card. It looks like the vellum and the die cut sentiment both float on top, even though they’re both adhered directly to the pocket.
 Jeg har fargelagt rådyrene med Copics, klippet dem ut og satt dem på en base svertet med Papertrey Ink Aqua Mist blekk. Jeg har strødd litt Shabby White embossingpulver fra Stampendous over og smeltet til snøfnugg. Jeg stanset ut en tynn ring med mosegummi og lagde en shakerboks med litt acetat som vindu, en diecut laget med en Memory Box die og noen paljetter og diamanter.
 Her syns det at paljettene og diamantene er løse inni shakerpanelet. Jeg har ikke brukt så mange paljetter og diamanter, men jeg syns det er nok, det er ikke mye som skal til. På bakgrunnen har jeg brukt en stensil fra Simon Says Stamp og embossingpaste. Det rødstripete mønsteret kommer fra et digitalt mønsterark.