Hi, crafty friends. It’s the third Thursday of the month, which means it’s time to Get Cracking on Christmas. This is a series Jenn Shurkus created years ago. By creating holiday cards every month, there’s less stress when we reach the end of the year, because a bunch of cards are already ready to go. Also, stamp companies seem to have their best releases right when it’s crunch time for holiday cards. Get Cracking on Christmas is a great opportunity to use those holiday products that you love, but haven’t yet had a chance to use.
 I actually created two cards this time. No Copic coloring on these, which is rare for me. I bought the Wreaths and Mulled Wine stamp set from Ciao Bella last year, but didn’t have time to use it. Get Cracking to the rescue. I took one of the wreaths in the stamp set, stamped it in VersaMark ink onto watercolor paper (I used Fabriano Artistico Extra White 140 lb hot pressed paper for this) and created two similar, yet different cards.
 For this blue one I used Iridescent Sparkle embossing powder from JudiKins for my heat embossing. I used Prussian Blue paint from my Mijello Mission Gold watercolor set and watered it down quite a bit to get the light blue I was after. I used a 3/4″ flat brush across the surface, and the heat embossing resisted the watercolor I put on top. I love the edges of watercolor, so I just walked away and let this air dry, I didn’t want to mess with it.
 Using a more concentrated paint of the the same color, I did a flat wash on a scrap piece of watercolor paper that was big enough for me to die cut. I used the Merry Script die from Mama Elephant and die cut three layers of white and one layer from my painted blue piece and stacked them for dimension. I also white heat embossed part of a sentiment from the Itty Bitty Holiday stamp set from My Favorite Things and nestled that in below the merry using some clear foam tape.
 I could fiddle with placement of embellishments all day long. Color, size, I wanted everything to be just right, and wound up using a combination of the Igloo mix from Little Things from Lucy’s Cards (pearls and iridescent sparkle sequins), the Crystal Collection – Glass mix, also from Little Things from Lucy’s Cards (clear jewels), and a few blue diamonds from Kort & Godt to fill in the rest.
 I used a die from Waffle Flower to create a rectangle from the watercolored piece and mounted in on foam tape on a card base I created from Spring Rain cardstock from Papertrey Ink. It’s no secret that I love blue for Christmas cards, and I thought this soft background with the wreath and the embellishments was a nice combo.
 For my second card I used the same wreath stamp that I stamped in VersaMark ink. This time I embossed it in silver, painted the background with Van Dyke Green (also watered down quite a bit) and flipped the panel upside down to have the snowflake in the bottom right “corner” of the wreath instead of the top left.
 I used the same Waffle Flower die to create my rectangle from the watercolor piece and was a little unsure of what to do for a card base. I didn’t have any green cardstocks that matched my watercoloring, and I didn’t feel like pulling my paints back out to create a green wash that I could use (although that would have been pretty). I rummaged through my silver cardstocks, but none of them matched the silver heat embossing very well, so I wound up creating my own using the same silver embossing powder that I used for the wreath. I squished my VersaMark pad onto the edges of a 4 1/4 x 5 1/2″ piece of white cardstock, sprinkled on the embossing powder and repeated the process until the embossing was even and covered everything. I adhered my embossed panel onto a white top fold card base and mounted my watercolor cardstock on top using foam tape.
 Using the Hjerte 3 die set from Papirdesign, I die cut the words God jul three times and stacked them for a dimensional look. I made sure to cut the top layer from the watercolor paper I’d already used so that the whites would match. I adhered my die cut words to the center of the wreath using liquid glue.
 To finish off the card I added Kort & Godt diamonds in three different sizes in clusters around the wreath. They act as little berries and add a little bit of sparkle and shine.
 I made quite a few green Christmas cards last year. It’s a color that’s growing on me, and this Van Dyke Green from Mijello is the most perfect green ever.
 I had so much fun creating these cards. They’re very different from what I usually create, that might be part of the reason why. The simplicity of this design makes it easy to mass produce, too, if that’s your jam. Break out your embossing powders, different colors of paint and go to town.

 I printed the image onto X-Press It blending card and colored it with my Copics, going for a couple of different purple combos – one dark for the snowman’s hat and scarf, another for the cute little bird. I chose a deep pink combo for the present and the bird’s accessories to bring in another color. I die cut my panel using a rectangle die from Waffle Flower, then went in with a snowflake stencil from Ciao Bella and some Lilac ink from Concord & 9th. I then added VersaMark on top and sprinkled on Iridescent Sparkle embossing powder from JudiKins to turn the snowflakes sparkly once the powder melted.
 I stamped a sentiment from the Julehilsen stamp set from byCino using Autumn Rose ink from Papertrey Ink. The sentiment translates to “Express delivery from the North Pole” and was the perfect size for my chosen placement. I adhered a quarter sheet of Autumn Rose cardstock from Papertrey Ink onto a white card base and mounted the colored panel in the center, before finishing off with sequins and raindrops from the She’s So Lovely mix from Little Things from Lucy’s Cards.
 Lots of purple. I can do hard things (using purple is HARD).
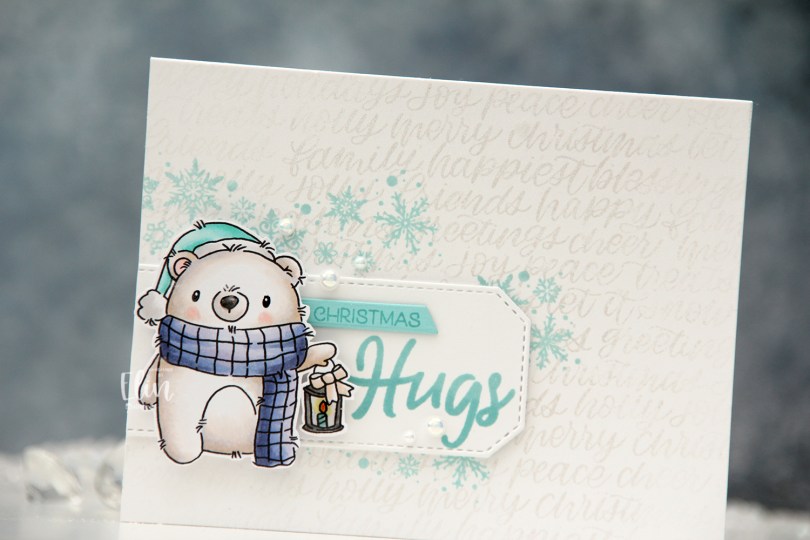
 Isn’t he cute holding his little lantern? I went very untraditional with my aqua/purple combo, but I think it works. Onto a top fold landscape A2 card base I created from Stamper’s Select White cardstock from Papertrey Ink, I stamped the Hand-Lettered Holiday background stamp from Simon Says Stamp using VersaMark ink. I then brushed Perfect Pearls powder on top for a shiny, but subtle effect. I stamped the snowflakes from the Wreath & Mulled Wine stamp set from Ciao Bella on top using Sno Cone ink from My Favorite Things.
 I die cut a white tag using a die from the Stitched Trad. Tag STAX die set from My Favorite Things and stamped the word Hugs from the
 As usual, I use way more colors than I anticipate going in.
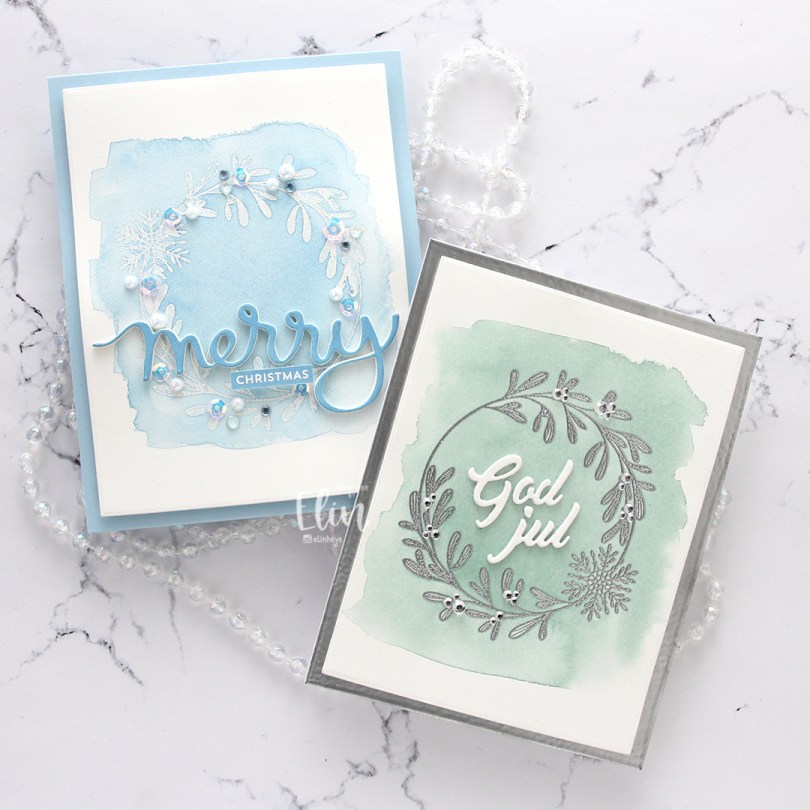

 These snowmen from the
  I have lots of layers on these, and used a whole bunch of Christmas scraps from old collections by Pion Design, as well as some sentiment stamps and other stamps from Inkido and Norsk Stempelblad AS.
 More scraps on the back. I love this way of creating, and I hope to do more of it this year!
 The process for creating this one was identical to the first ones I shared in
  There’s lots of texture and visual interest on this tag because of all the layers of paper, the foam tape to add dimension and the stenciled background. The accessories on the snowman are in a brighter green color than everything else on the tag, which still makes him stand out against the other elements.
 For the back of the tag I used a couple of stamps from Inkido, as well as more of the white heat embossed sentiments from Norsk Stempelblad that I created lots of in one of my compartmental crafty sessions. These tags were heaps of fun to put together like this.
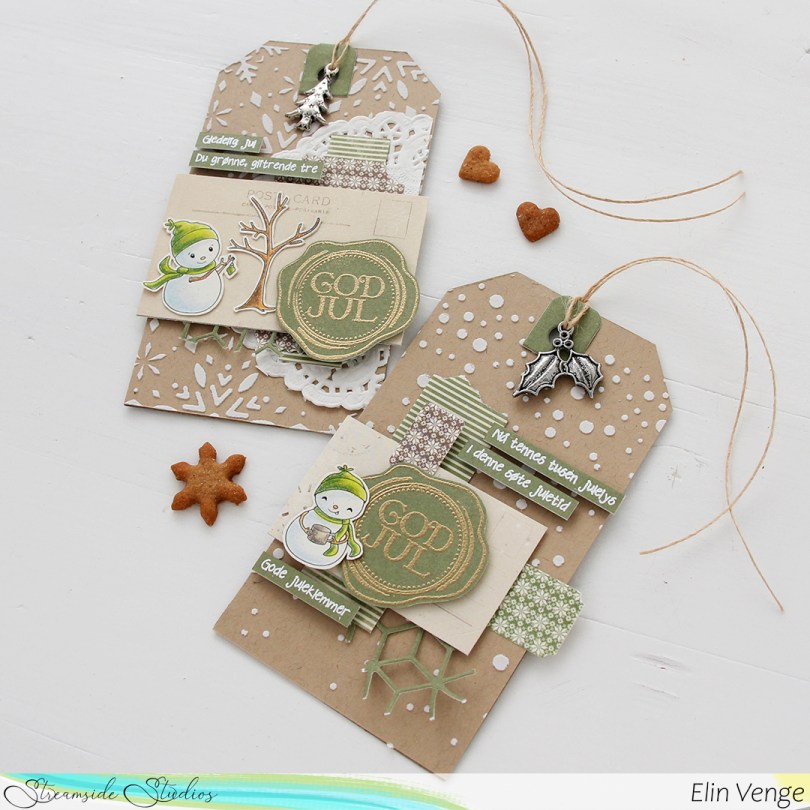
 For these tags (I’ll have more to share later), I did compartmental crafting. Tim Holtz always raves about this, but I usually sit down and create my cards from start to finish in one sitting. Actually, that’s not entirely true, I do prefer coloring one day and making the rest of the card another day. Coloring takes a while, and once I’m done with that, I’m not really in actual making and assembly mode.
 For the back of the tags I used a tag die from My Favorite Things to die cut from more of that Classic Kraft cardstock from Papertrey Ink. I die cut a bunch of tags in one session, so I’d have many to do at once when I did the actual assembly. I stamped an older Inkido stamp using Jalapeño Popper ink from My Favorite Things, and even did some second generation stamping. I also used a couple of stamps from the Distressed Patterns stamp set from MFT to add additional spatter beyond the 24.12 stamp. I used more of the scraps I die cut and cut with my trimmer, and stamped a to/from stamp from Inkido onto scraps of Pion Design patterned paper using Dark Chocolate ink from Papertrey Ink. First generation stamping on one, second generation on the other for a softer look. It was fun to break out acrylic blocks to use with my stamps again, I use my Misti for pretty much everything, but this didn’t have to be perfect or straight, so I just played and had fun!