
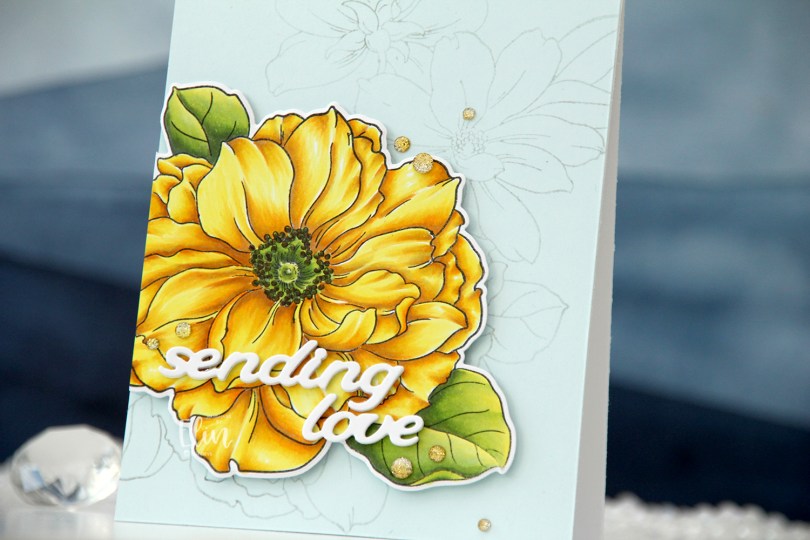
Hi, crafty friends. Fall is here, but I’m not a fan, so I’m holding on to summer for dear life with today’s card, which happens to be a floral one I created for Papiria using the Blooming Delight Build-a-Garden bundle from Altenew. It includes a stamp set, coordinating die set and coordinating layering stencils, as well as a small blender brush.
 I started by stamping the large floral image using Obsidian ink from Altenew. This is a very crisp, dark black pigment ink, so I heat set it before moving on to avoid the risk of the ink smearing. I used the stencils to color them in with Fresh dye inks from Altenew. I used the Sun-Kissed Delights collection for the yellow, the Blushberry Bliss collection for the pink and the Jade Dreams collection for the green. I left out the darkest shade in each of the color families, and opted for Wheat and Nutmeg inks from Concord & 9th for the center of the yellow flower.
 Once the image was properly inked, I used a die from the die set to cut out the image. I put foam tape on the back before adhering it to a top fold landscape card base I created from Stamper’s Select White cardstock from Papertrey Ink, which is the same cardstock I used for the flowers. I trimmed off the small bits that were hanging over the edge of the card base.
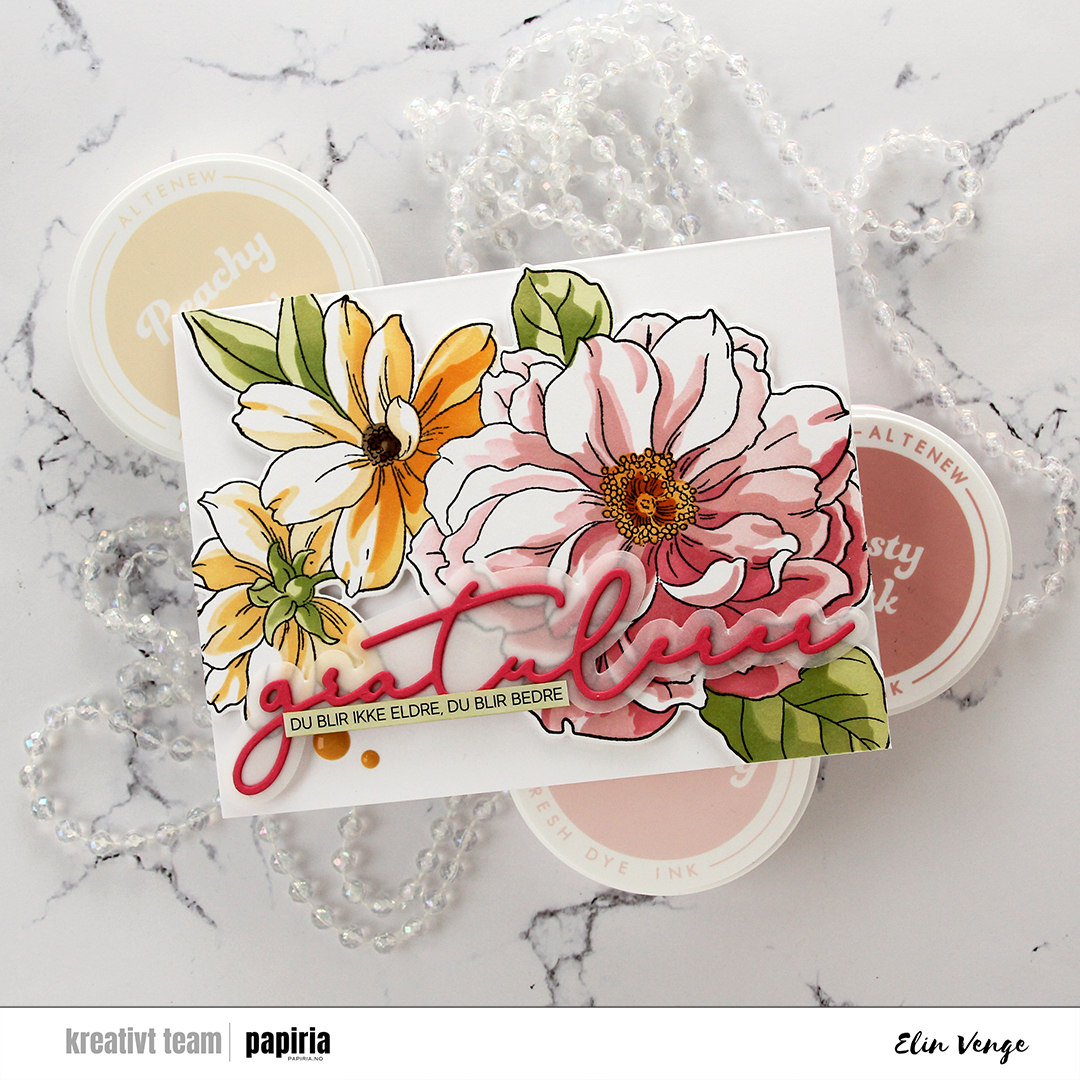 Using a die set from Kort & Godt, I cut the word gratulerer a few times from Honeysuckle cardstock from Concord & 9th, and the shadow layer from 40 lb vellum. I stacked two of the pink on top of the shadow and another two behind the shadow, giving it a little bit of lift off the flowers.
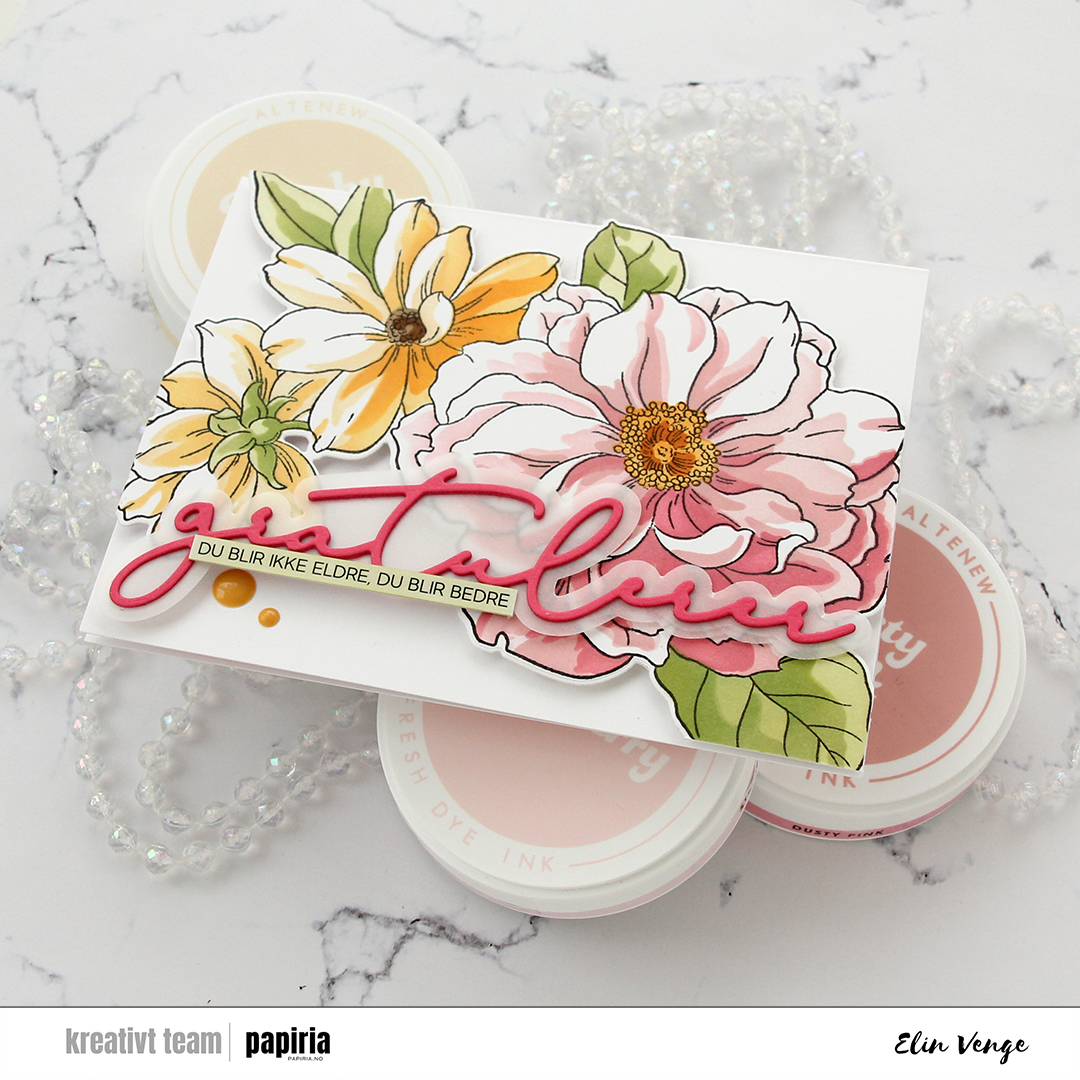 I used a sentiment sticker strip from Kort & Godt for the sub sentiment. The sticker was originally white, but I ink blended with Misty Sage, which is the second lightest color in the Jade Dreams family of fresh dye inks from Altenew. I then trimmed it down to be a little bit narrower and adhered it to the word die cut, before finishing off the card with a couple of enamel dots from the Fall Harvest pack from Altenew.

 I used the igloo with the peeking penguin and only added one small penguin for this simple card. I didn’t even use the entire igloo, I like the look of the design coming in from the side like this. I colored the image with Copics and used a die in the Additional A2 Layers die set from Waffle Flower to turn it into a nice panel and adhered it to a top fold card base I created from Peacock cardstock from Concord & 9th.
 Using the Hooray Script die from Mama Elephant, I cut three die cut layers from Watermelon cardstock from Concord & 9th, which I stacked for a little bit of dimension. I white heat embossed a sentiment from the Birthday messages stamp set from Mama Elephant on a strip of Peacock cardstock. I added a few more layers of cardstock behind it and adhered it below the die cut part of the greeting, before finishing off the card with a few sequins from the Ice Water mix from Little Things from Lucy’s Cards.
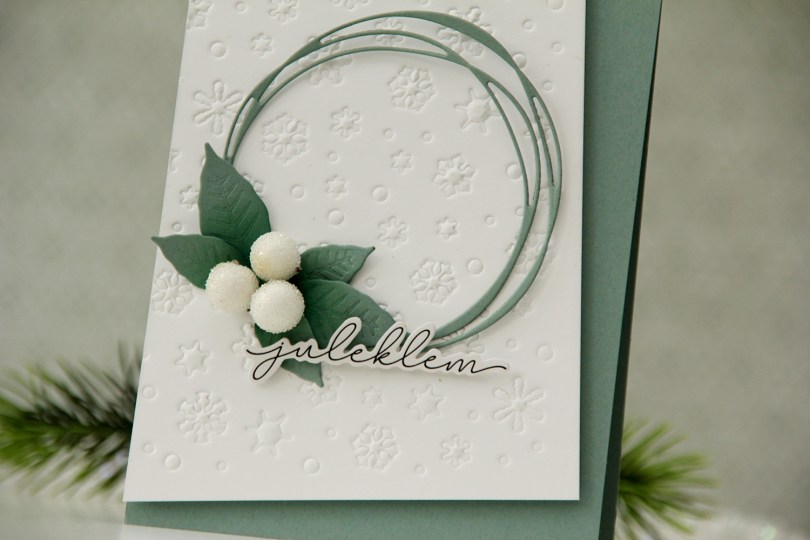
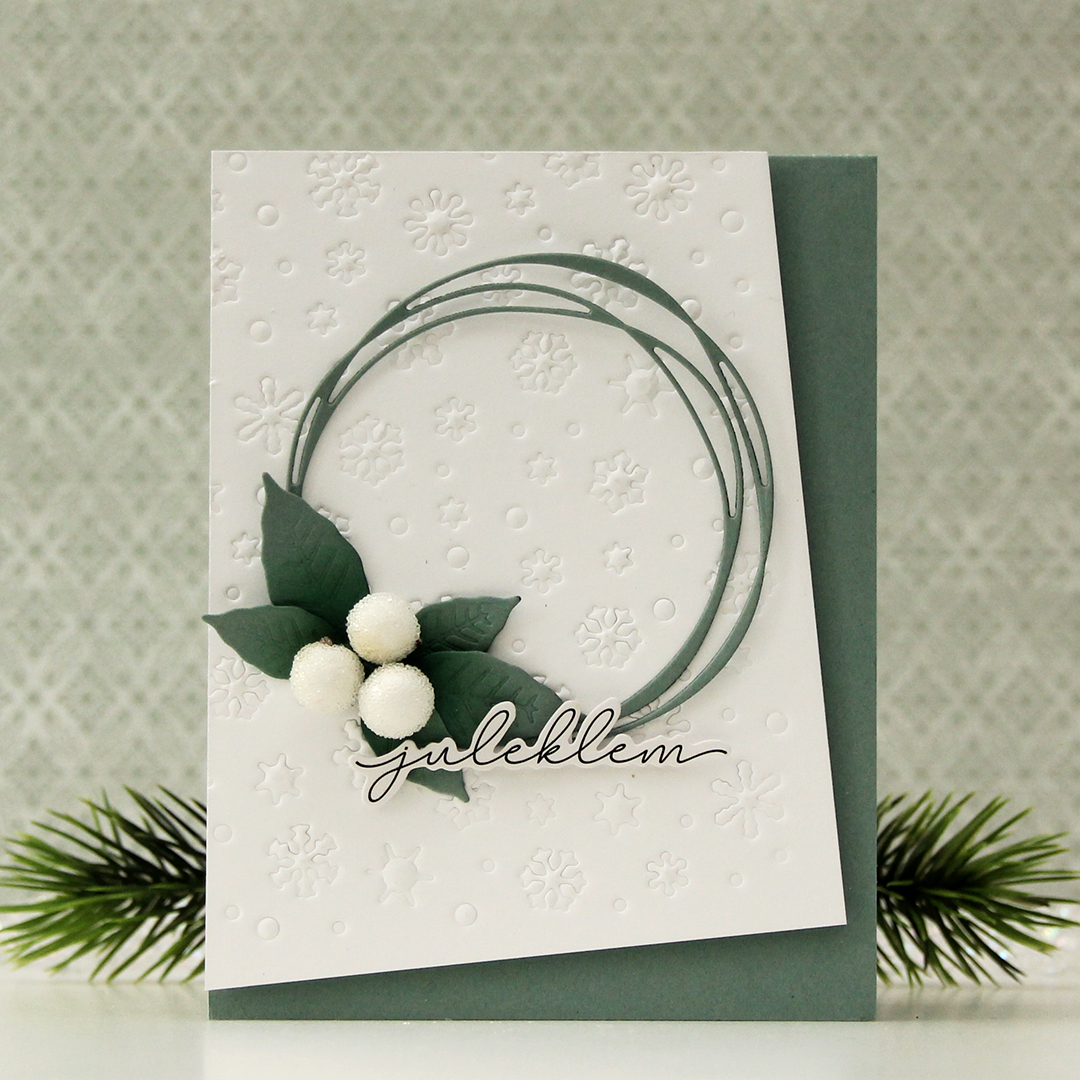 I had a dry embossed white panel in my stash I thought I’d put to good use (I used the Snowflake Confetti fancy die from Hero Arts with an embossing mat to create this texture).
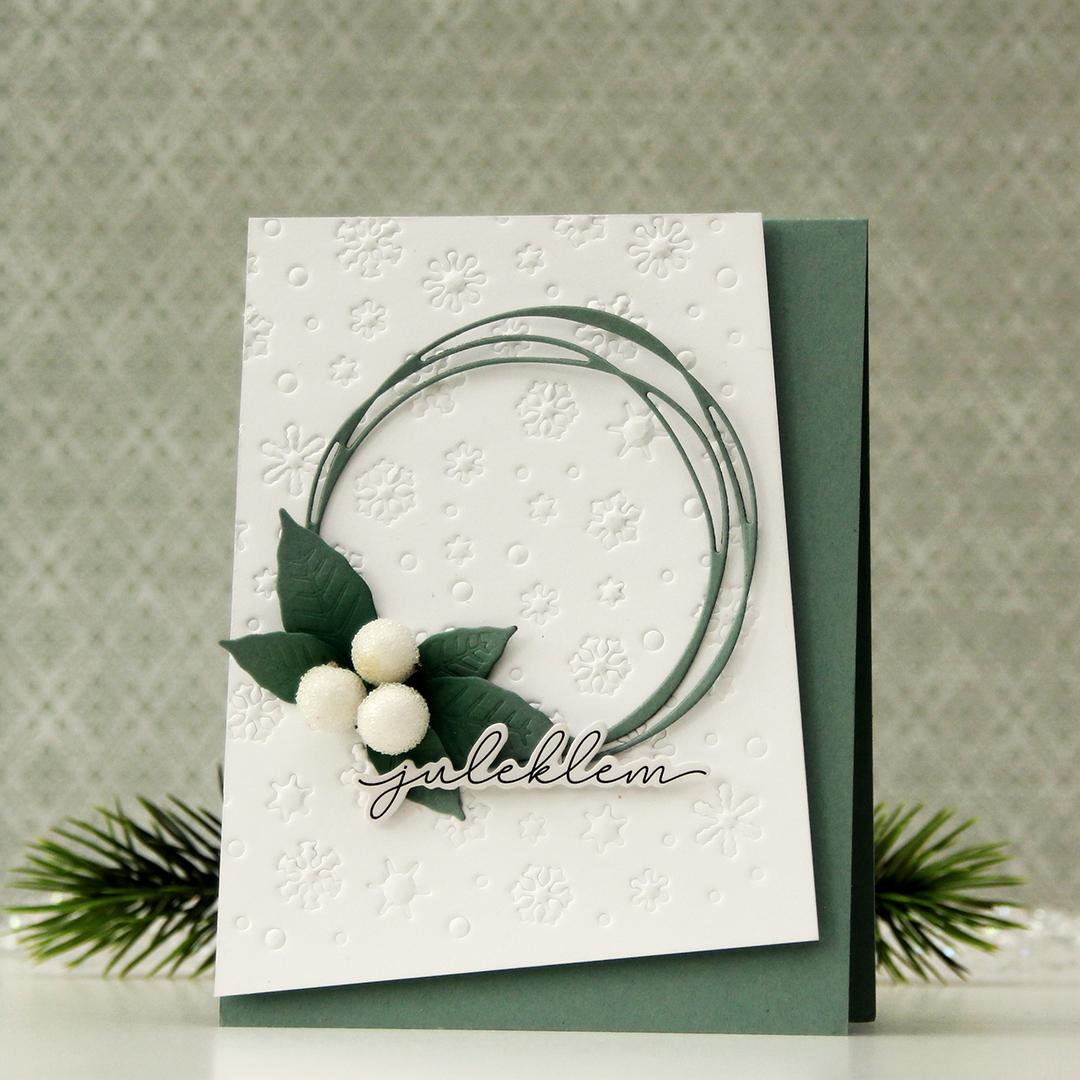 I die cut a scribbled circle and a couple of layers of a poinsettia from Ocean Tides cardstock from Papertrey Ink. I used the same color cardstock to create my card base and mounted my white panel at an angle to create a dynamic design.
 I adhered the circle with a tiny bit of glue where my leaves would cover it, making the rest of the circle float above the rest.
 I cut apart the poinsettia petals to use as leaves and inked over them with Eucalyptus and Rainforest inks from Concord & 9th. I adhered the large ones with a bit of foam behind each leaf for dimension, but glued the smaller ones straight down at the base of the leaves.
 Using liquid glue, I added three large berries to the center of my leaf arrangement before finishing off with a sticker, which I put slivers of foam on the back of for even more lift. I like that it kind of floats above the rest.


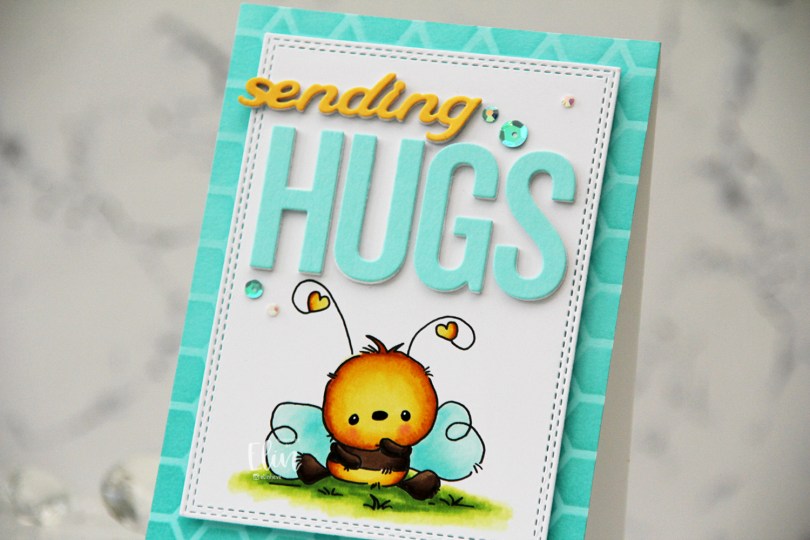
 I stamped the bee on X-Press It blending card and colored it with Copics, before I used a die in the A2 Double Stitched Rectangle STAX die set from My Favorite Things to create a faux stitch border.
 Onto a panel of Aqua Sky cardstock from Concord & 9th, I ink blended Aqua Sky ink through the Geometric Mosaic stencil from My Favorite Things and adhered the panel to a white card base I created from Stamper’s Select White cardstock from Papertrey Ink, then mounted the panel with the bee in the center using foam tape.
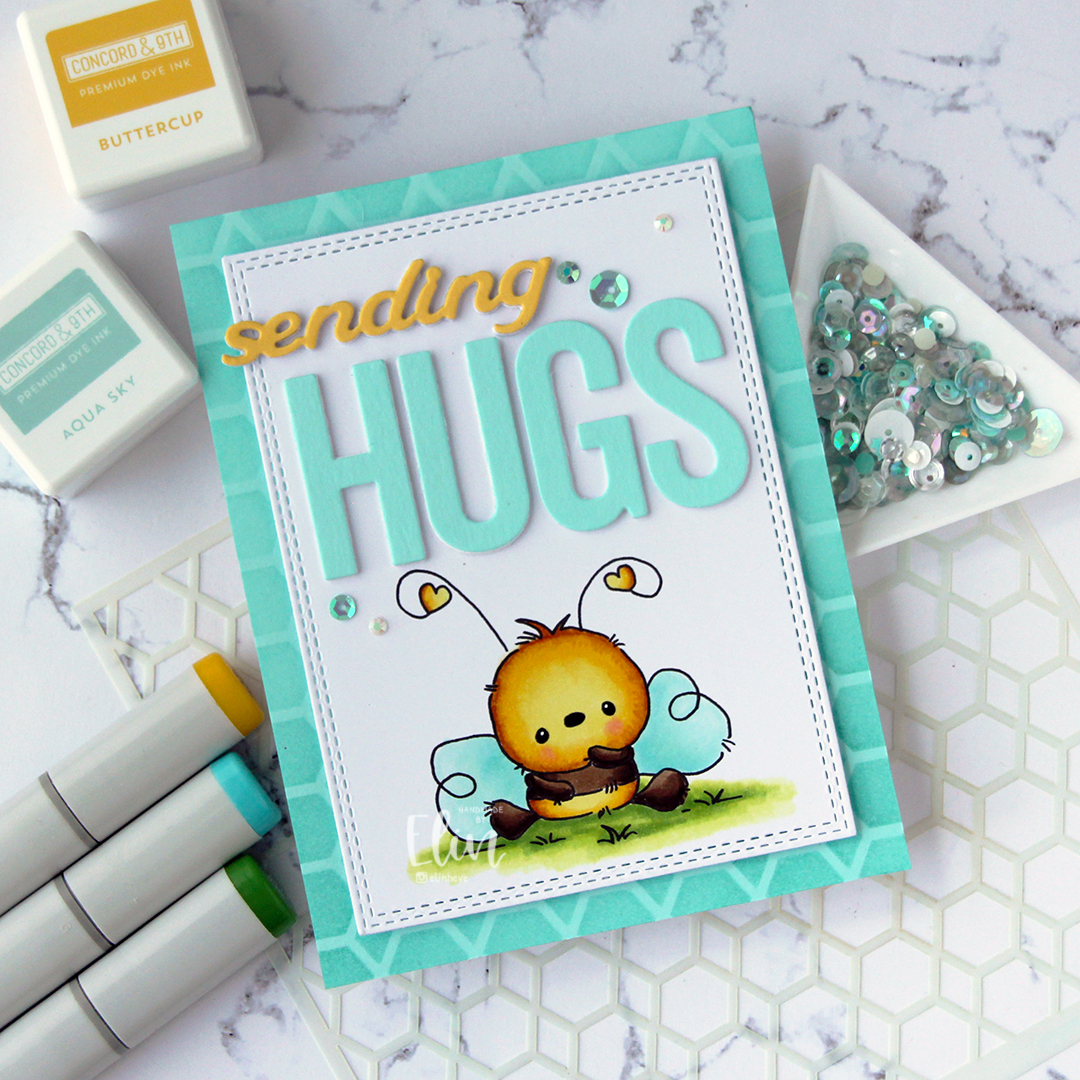 I used the Sending You Hugs die from My Favorite Things to die cut the word HUGS four times. I die cut three white, one from Aqua Sky cardstock and stacked them for dimension. I used the same technique on the sending die from the Blooming Delight die set from Altenew, but switching out the color for the top die cut to Buttercup cardstock from Concord & 9th. I adhered the letters for HUGS above the bee, and the stacked sending above that, letting the s hang from the edge of the panel to break the line in the design.
 I used sequins and gems from the Urban Chic mix from Little Things from Lucy’s Cards to embellish, and I also used my trusted black glaze pen/white Gelly Roll 05 combo for the eyes to give them a little dimension and shine.
 Simple color palette for this one.
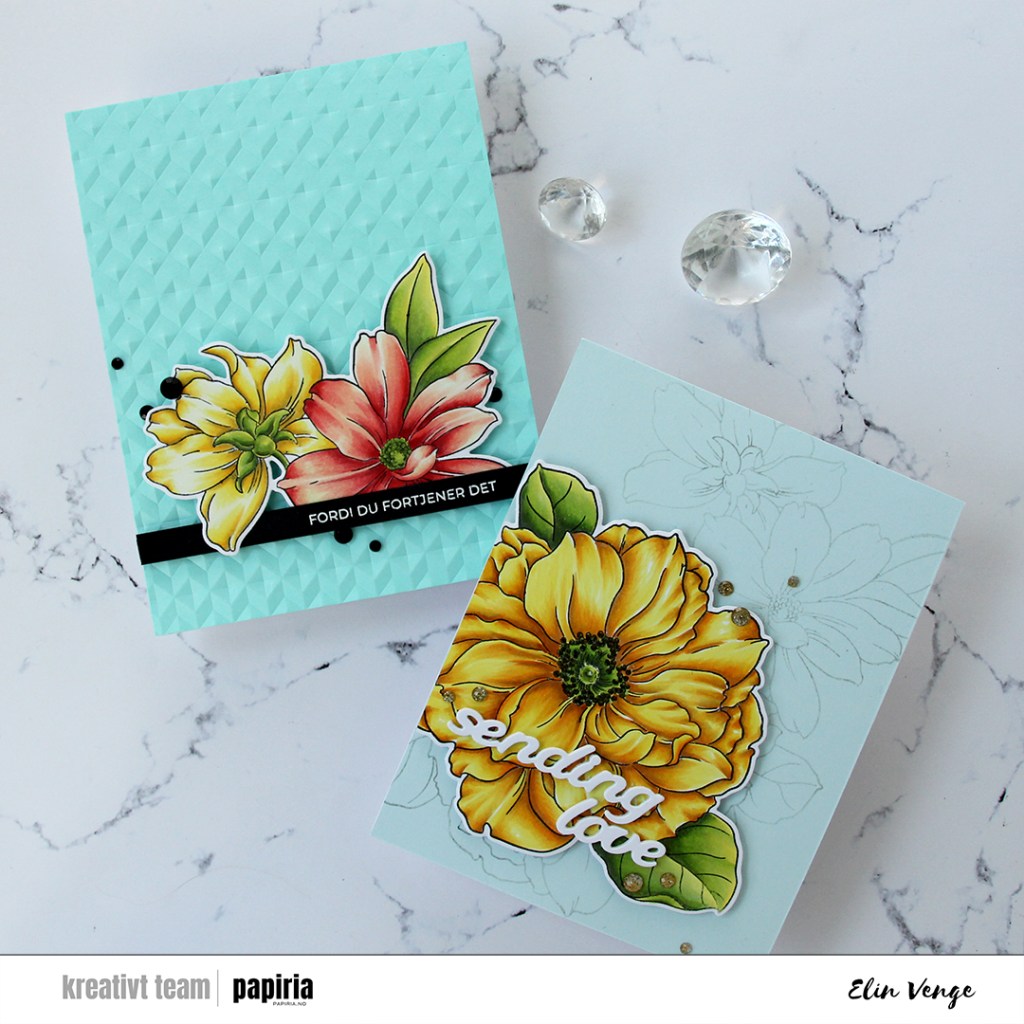
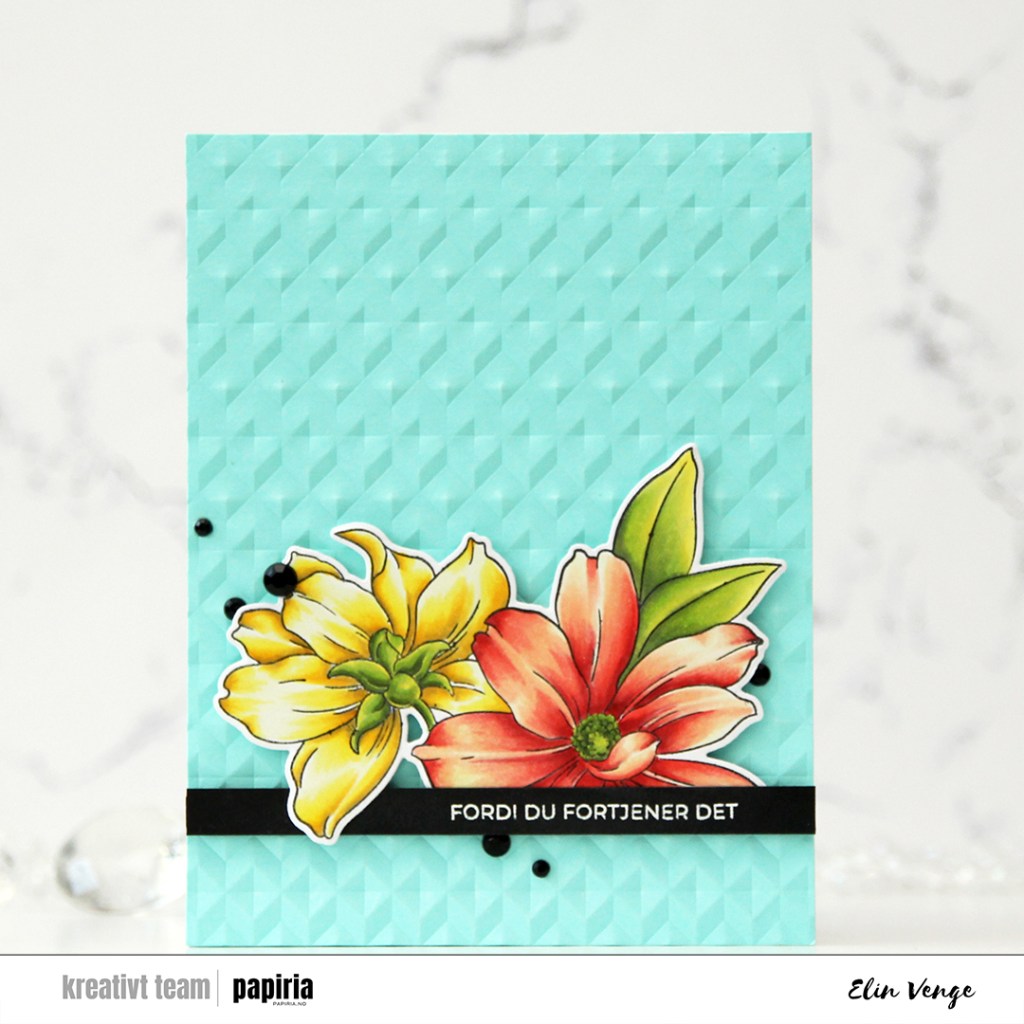
 I colored the image with my Copics, before using the Notebook Edge die from My Favorite Things to create a fun border at the bottom. I used a black glaze pen to add shine and dimension to their eyes, then went in with a Gelly Roll 05 once the black was dry. I fussy cut around the image, and the stems of the sunflowers actually dictated the width of this card, which only measures about 3 1/4 x 4 3/4″. If you include the flowers hanging off the edge, it’s a little wider than 4 1/4″, so I might need to put it in a larger envelope.
 I used the Raised Sentiments 3D embossing folder from Altenew on a piece of Harbor cardstock from Concord & 9th to create a little interest in the background, cut it down and adhered it to a top fold white card base. I mounted my colored piece on top using foam tape, I’m a big fan of dimension on cards.
 I die cut one of the dies from the Blooming Delight die set from Altenew from True Black cardstock from Papertrey Ink. I cut five, put two together, and stacked the remaining three, so I had two somewhat dimensional die cuts. I die cut the shadow layer from Heavyweight Translucent Vellum from My Favorite Things, adhered the stack with 3 behind it and the stack with the 2 on top. This creates a nice shadow around the shadow die without the use of foam tape.
 I white heat embossed a sentiment from the Pristine Peonies stamp set from Altenew, cut it down to a strip, added a few more strips behind it for dimension and adhered it below my die cut to complete the sentiment (the stamp actually says
  Fairly soft color palette for this one.
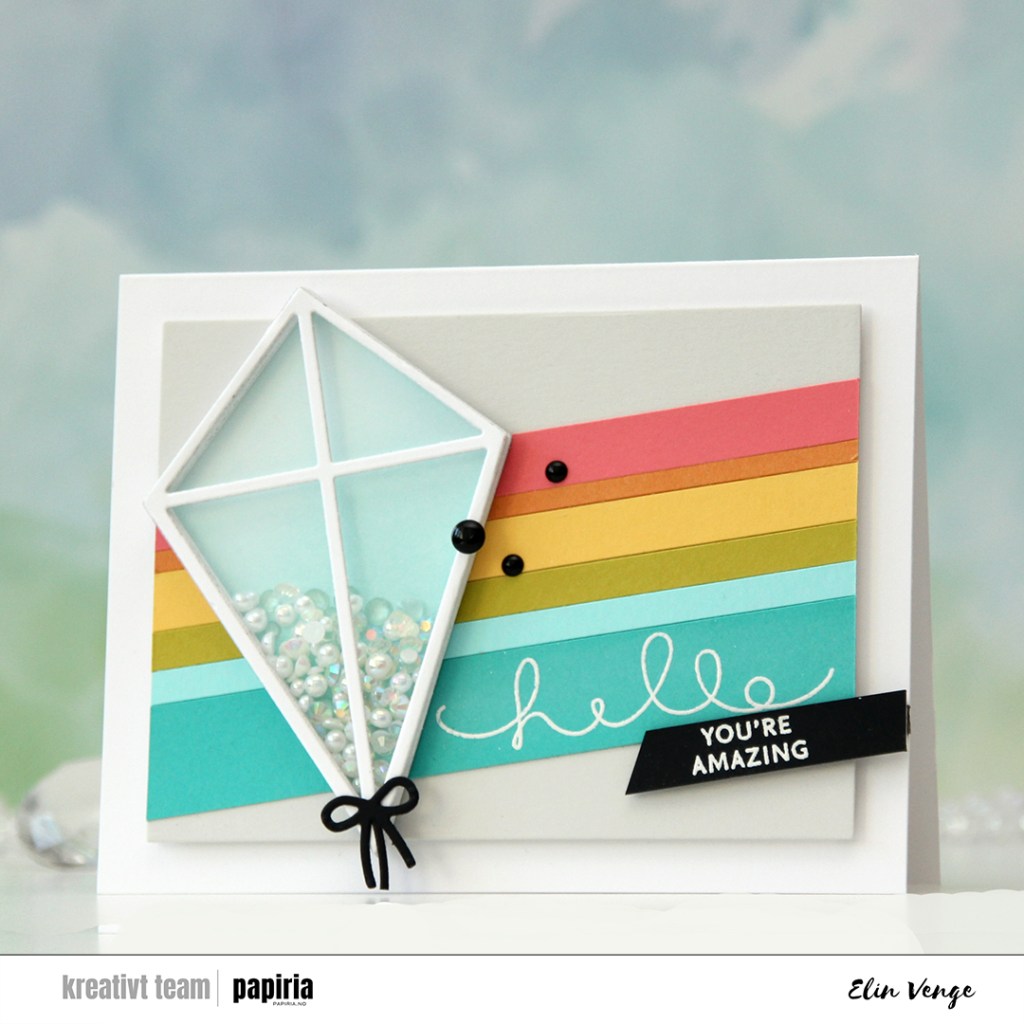
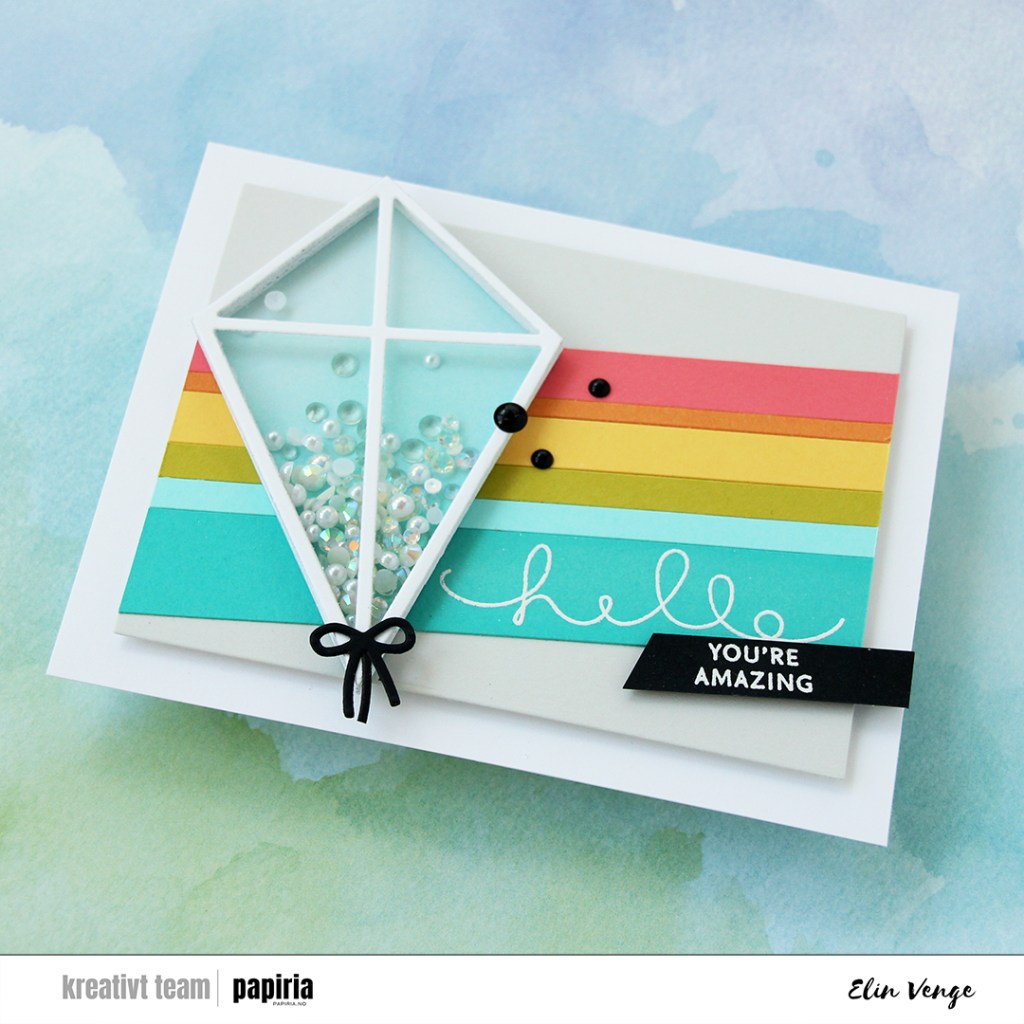
 I printed my image on X-Press It blending card and colored it with Copics. I chose a soft blue green for the balloon itself, and vibrant colors for the florals to make them pop. Using the largest die in the Blueprints 27 die set from My Favorite Things, I turned my image into a panel with a nice scalloped border with faux stitching, put lots of foam tape on the back and mounted it to a card base I covered with a quarter sheet of Wildberry cardstock from Concord & 9th.
 I die cut hello from the Blooming Delight die set from Altenew four times from white cardstock and once from Wildberry cardstock, stacked all the layers together and adhered my sentiment, before finishing with a few opal gems from Spellbinders.
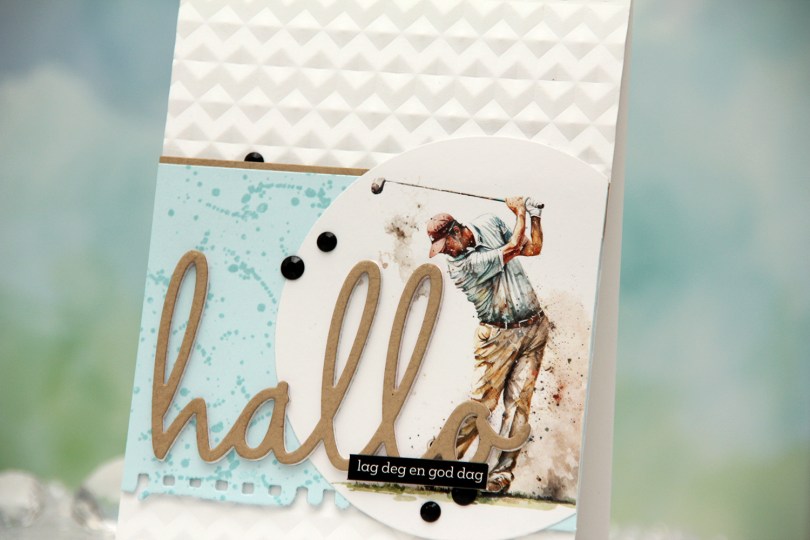
 I die cut my golfer using a basic circle die and decided to use the colors in the image for the elements of my card. This is always a good idea if you want a cohesive design. I die cut a torn paper edge from Powder cardstock from Concord & 9th, before stamping a small background stamp repeatedly across the panel using Powder ink. The image has spatters on it, and I figured this would mimic that. The tone on tone stamping creates a little bit of interest to the blue cardstock without being too distracting. I adhered a strip of Wheat cardstock, also from C9, to the top of the blue panel to give it a more defined edge against the white card base, before adding a couple of layers of cardstock behind it for dimension. I adhered it to a top fold card base I dry embossed using the Angled Mosaic embossing folder from Altenew. This creates a bit of textures and adds interest without distracting.
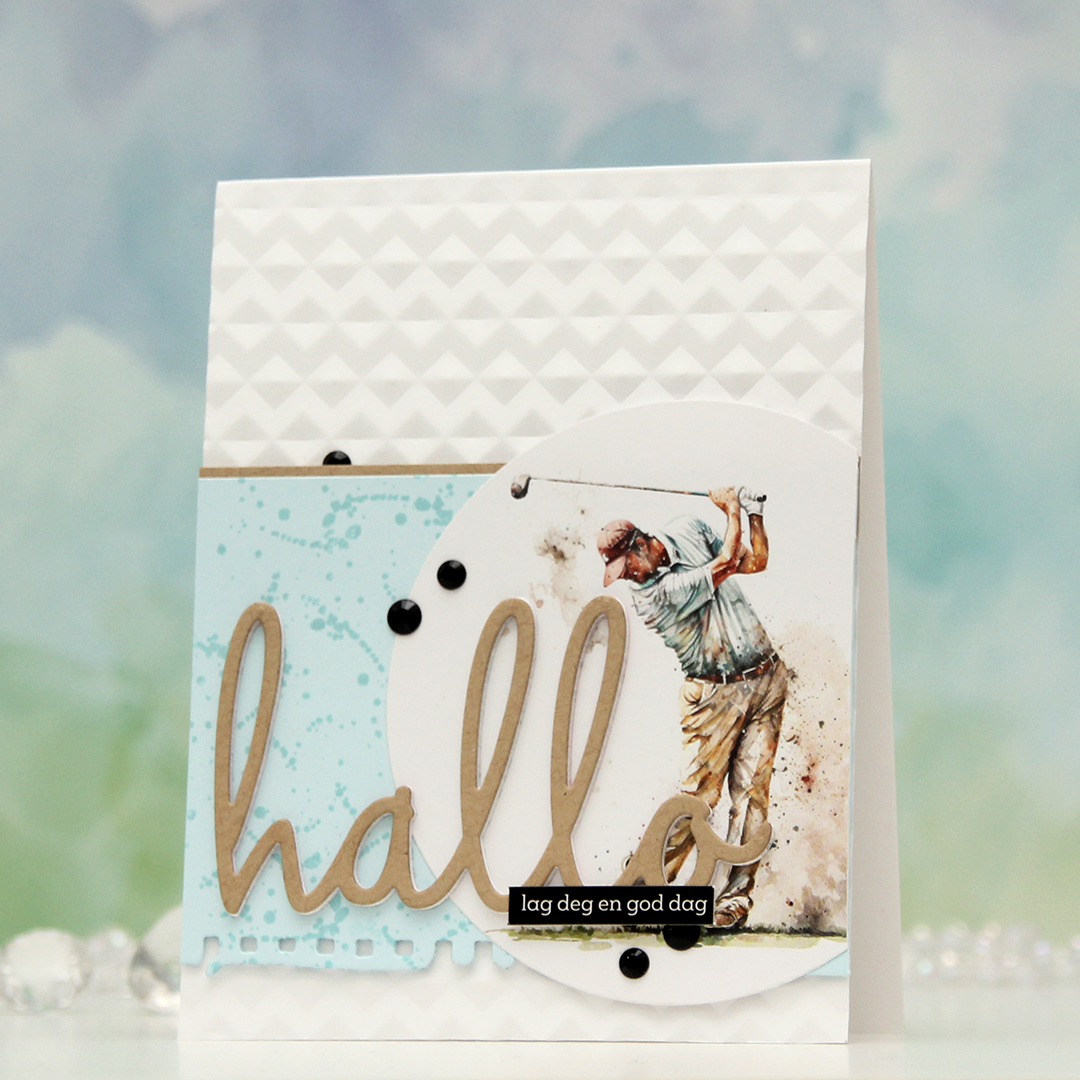 I glued my circle onto the blue cardstock, lopped off the excess and adhered a stacked die cut word on top. I die cut three layers from white cardstock and one from Wheat cardstock. To finish off the card, I added a black sentiment sticker strip and a few black crystals in different sizes.
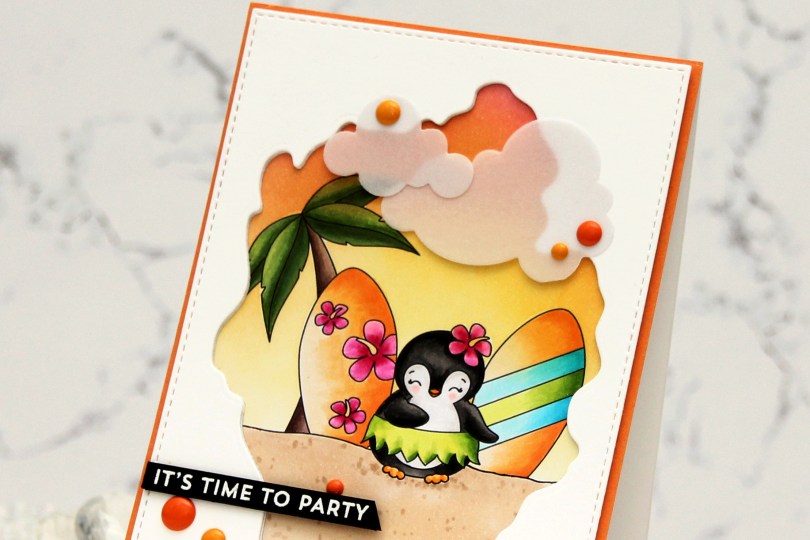
 I created my little scene with the palm tree, a couple of surfboards and a penguin. I can never resist a penguin, and this one has a hula skirt – I was sold! I colored my scene with Copics, and the plan I had initially went out the window. I was going to color the base of the surfboards in a light yellow, almost white, but then I came up with this soft orange combo and totally changed everything else to fit. Instead of a soft blue sky, I ink blended a sunset using Honeysuckle, Clementine and Buttercup inks from Concord and 9th. I then used the largest die in the A2 Stitched Rectangle STAX 1 set from My Favorite Things, along with the Watercolor Wash Free Form die, also from MFT, to create a rectangular panel with a fun window. I die cut a couple more to stack behind the front panel to create a little bit of dimension, before adhering it all to my colored image.
 I adhered a quarter sheet of Clementine cardstock from Concord & 9th directly to a top fold card base and glued my scene in the center. This created a bit of an orange border around the image. I then die cut Cloud 1 & 2 from Papertrey Ink out of Heavyweight Translucent vellum from My Favorite Things. I love die cut vellum clouds. This vellum is super thick, so the glue I put behind it doesn’t even show through, but I still placed enamel dots strategically on top. Old habit, I guess. These enamel dots are actually from a Halloween pack from Papirdesign. Onto a piece of True Black cardstock from Papertrey Ink, I stamped and white heat embossed a sentiment from the Bitty Birthday Wishes stamp set from My Favorite Things. I cut it down to a strip, added a couple of extra layers of cardstock behind it and adhered it to my card.
 I used quite a few Copics for this one.