
Hi, crafty friends. I have a sweet bee card to share today, featuring the bees in the Spring Squishies digi stamp set from Streamside Studios.

I colored the bees with my Copics, fussy cut them and put them aside while I worked on the rest of the card. Using the Simply hexagons cover die from Pinkfresh Studio, I die cut hexagons from a subtle dotted patterned paper from Waffle Flower, and I added two white die cuts behind each for dimension, before adhering them to the card.

I die cut the letters to spell bee from Berry Sorbet cardstock from Papertrey. ink using the Parker alphabet die set from Memory Box. I stacked four of each letter for dimension and added them to the card in a wonky fashion to introduce a little playfulness to the card. I stamped and white heat embossed HAPPY on a strip of Mushroom cardstock from Concord & 9th, added a few extra strips behind it for dimension. I added the bees using foam squares for a little bit of lift and finished off the card with a few gems and a heart from the Strawberry Champagne mix from Streamside Studios.
 Very simple color palette for this one.
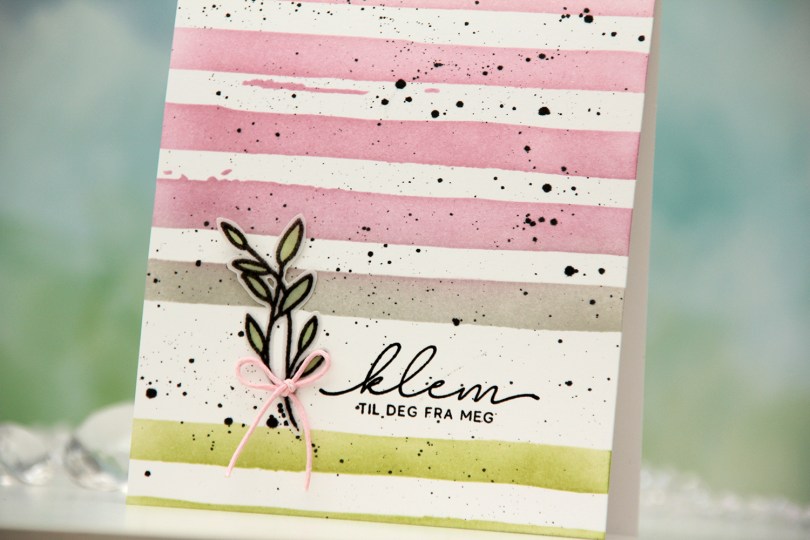
 I started by stamping and heat embossing the sentiment directly on the card base, which I created from Stamper’s Select White cardstock from Papertrey Ink. I stamped in Obsidian ink from Altenew and used clear embossing powder from Ranger. This is my preferred way to get a black embossing, as black embossing powder is tricky to work with. Once the sentiment was in place, I used the Watercolor Stripes stencil from Altenew and masked off the stripe that showed the sentiment through the opening. I ink blended using Avocado, Cobblestone, Briar Rose and Carnation inks from Concord & 9th, as well as Pink Crystal Fresh dye ink from Altenew.
 I wanted some black splatters on my card and used a size 4 paint brush with My Favorite Things Extreme Black reinker to get those black spots. I may have gone a little overboard, but I still like it. I stamped and heat embossed onto vellum a leaf image from the same stamp set as the sentiment, fussy cut it and colored the leaves from the back using my YG25 Copic marker. The vellum is heavyweight translucent vellum from My Favorite Things. I adhered the vellum piece to my card and finished off with a pink bow.
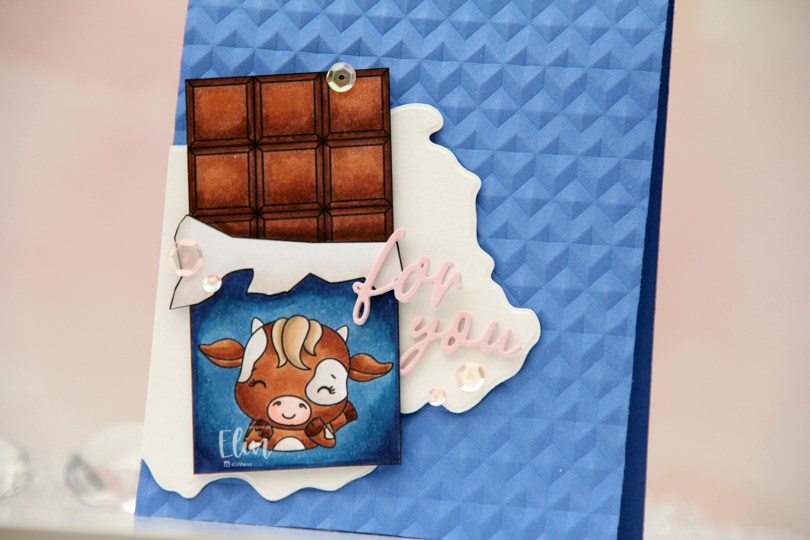
 I colored my chocolate bar with Copics and fussy cut right up against the black stamp lines. Most of these lines are straight, which made it super easy to use a steel ruler and a craft knife to get precise cuts.
 The Stratos cow is a very happy blue card, so it’s not entirely the same, but I don’t think it’s too much of a stretch with the blue wrapper and the cow on the card.
 I created the card base from Something Blue cardstock from My Favorite Things. I used the Angled Mosaic 3D embossing folder from Altenew to give it some texture and interest.
 I used the Watercolor Wash Free Form die from My Favorite Things and die cut from white cardstock. I think the free form makes it look like spilled milk, and it was the perfect grounding element for the chocolate.
 I used the Sweet Sentiments die set from Altenew to die cut the sentiment. I stacked four die cuts of each word for strength and dimension, the top one from Ballet Slipper cardstock from Concord & 9th, added the sentiment to the card and finished off with a few sequins from the She’s So Lovely mix from Little Things from Lucy’s Cards.
 Simple color palette.
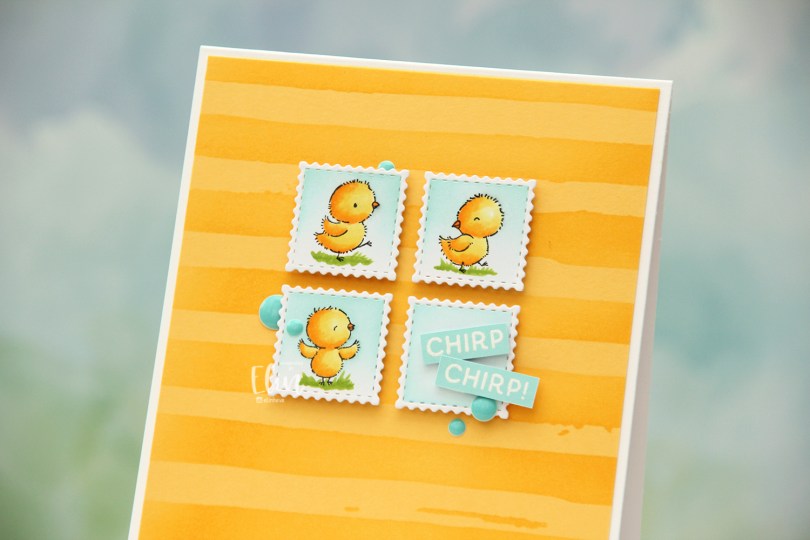
 These little chicks are so cute. And since they’re so small, they’re very easy to color. I did quick Copic coloring, before using the 1″ square die in the Postage Collage die set from Waffle Flower to cut them out. I then quickly scribbled on some grass so they’d have something to stand on, then masked off the chicks and the outer perimeter of each postage stamp, before ink blending the sky using Aqua Sky ink from Concord & 9th.
 Onto a panel of Buttercup cardstock from Concord & 9th, I ink blended with the same ink color using the Watercolor Stripes stencil from Altenew. I cut the panel down slightly, and adhered it to a card base I created from Stamper’s Select White cardstock from Papertrey Ink.
 I mounted my postage stamp chicks in the top center of the card, and also an additional fourth square that I ink blended in the same way. I stamped and white heat embossed a sentiment from the Easter bunnies stamp set from Simon Hurley Create and ink blended over the top using more of that Aqua Sky ink from Concord & 9th. I cut the sentiment into two small strips and mounted them on foam tape on the top of the bottom right square, angling them for a playful look, before finishing the card with a few enamel dots from the Cool Summer Night pack from Altenew.
 I love the dimension behind these postage stamps, it looks like these chicks are floating.
 Super simple color palette for this one.
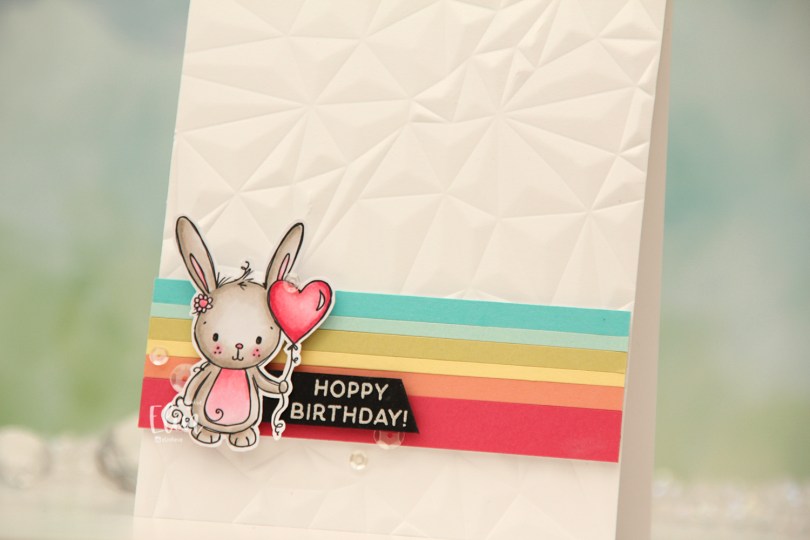
 I colored the bunny with my Copics (I actually only used 6 Copics for this card) and fussy cut around it, leaving a white trim to prefer the whispy lines and squiggles that are so characteristic of Rachelle’s images. I created a card base from Stamper’s Select White cardstock from Papertrey Ink and ran it through my die cutting machine with the Crystal Distortion embossing folder from Simon Says Stamp to create some texture.
 Onto a piece of scrap paper, I adhered strips of solid colored cardstock. I didn’t measure, they’re all different widths for a playful look. The colors are (bottom to top) Honeysuckle and Grapefruit, both from Concord & 9th, and then Lemon Tart, Spring Moss, Aqua Mist and Hawaiian Shores, all from Papertrey Ink. I put a few layers of cardstock behind my strips and adhered them near the bottom of the card. I stamped and white heat embossed a sentiment from the Easter bunnies stamp set from Simon Hurley onto a piece of True Black cardstock from Papertrey Ink, cut it down to a strip and used a craft knife (I don’t trust scissors) to create the angle at the end. I glued the piece left of the sentiment to the back of the bunny, put 2mm foam squares behind everything and adhered it on top of the colored strips, before finishing off with a few sequins from the White Orchid Sequin mix from Little Things from Lucy’s Cards.
 Color palettes don’t get much simpler than this.
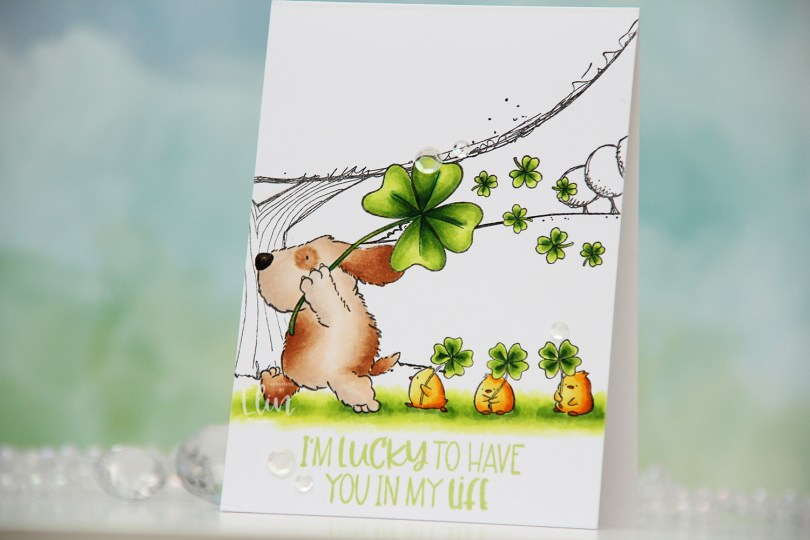
 I didn’t want to use Flappy and his little friends on their own, so I decided to create a mask and stamp
  Once my coloring was complete, I stamped a sentiment from the coordinating
  I used a mixture of brown and gray for Flappy’s fur, and an obscene amount of colors for the green.
 I used the second largest die in the Watercolor Rectangle STAX die set from My Favorite Things to turn my colored piece into a panel with a fun edge. I added some layers of cardstock behind it and adhered it to a top fold card base I created from Berry Sorbet cardstock from Papertrey Ink.
 I used the Sweet Hello die from My Favorite Things to create my sentiment. I die cut four from white cardstock and one from Grapefruit cardstock from Concord & 9th and adhered them all together for a stacked, dimensional look. I stamped and white heat embossed a sub sentiment from the IWCL2017005 English stamp set from InkyWings on a strip of Berry Sorbet cardstock and added it to my die cut sentiment, making sure to put a few layers of cardstock behind it on the part that overhangs. I added a few sequins from the White Orchid Sequin Mix from Little Things from Lucy’s Cards, and put a dot of black Glaze pen from Sakura on the squirrel’s eye for a little bit of shine and dimension to finish off the card.
 I used a lot of colors for this simple image.
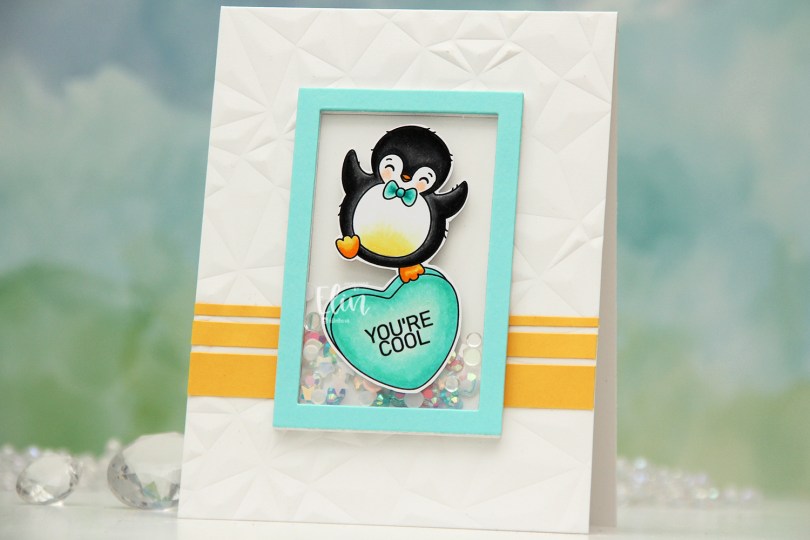
 I colored the penguin on the heart with Copics. You know me, I can’t resist a penguin stamp. I fussy cut around him, leaving a white trim around the edge and put him to the side while I worked on the rest of the card. I used the Crystal Distortion embossing folder from Simon Says Stamp to create some interest and texture to my card base, which I created from Stamper’s Select White cardstock from Papertrey Ink. I cut strips of Buttercup cardstock from Concord & 9th and added them towards the bottom of my card.
 I die cut a frame from the Classic Rectangle Frames die set from My Favorite Things several times from white cardstock (I think I have six or seven layers) and stacked them to create my shaker well, adding one of the centers back in to create a smooth back for my shaker well. I added a mix of the
 I colored the cow with Copics, before fussing cutting it, leaving a white trim around the edge. Onto a top fold fold card base, I ink blended blue inks from Altenew (Winter Lake, Icy Water and Polar Bear) through the Geometric Landscape stencil, also from Altenew, before stamping a Happy Birthday background stamp from My Favorite Things on top, using the darker two of the inks I used for the blending. I also used the stencil in the top right corner and used what was left on my ink blender brush for a soft look.
 I added Light & Fluffy modeling paste from The Crafters Workshop through the Tiny Clouds stencil from My Favorite Things. I wanted dimension to my clouds and put down a very thick layer of the paste. While that dried I worked on the rest of the card. I die cut four polaroid framed using the Precious Polaroids die set from My Favorite Things and stacked them for dimension. Onto Grapefruit cardstock from Concord & 9th, I stamped and white heat embossed three sentiments from the Bitty Birthday Wishes stamp set from My Favorite Things and cut them all down to strips, adding a few extra layers of cardstock behind each for dimension. I adhered the polaroid frame to my card base at an angle, glued the cow on top, added my sentiment strips and finished off with sequins and gems from the
  Super simple and very neutral color palette for this one.
 I colored up
  I stamped a sentiment from InkyWings using Pink Pearl ink from Altenew. The stamp actually has the word hugs in it too, but I opted for a die cut hugs, using the Sweet Sentiments die set from Altenew. I die cut four from Grapefruit cardstock and stacked them together for a dimensional look.
 I finished off with a couple of heart droplets from Little Things from Lucy’s Cards.
 Fairly simple color palette for this one.