
Hi, crafty friends. I’m sharing a fun winter card today featuring Tofu, Flappy & Mousy Fun in the Snow, which is a stamp from last year’s holiday collection of Pei’s images from Purple Onion Designs.
 This is one of those super simple cards. I stamped the image using Extreme Black ink from My Favorite Things and masked it before stamping the Winter Trees background in Fadeout ink from Inkon3 for a no line look in the background. I colored in my scene using Copics, before using one of the dies in the Additional A2 Layers die set from Waffle Flower to cut it down slightly.
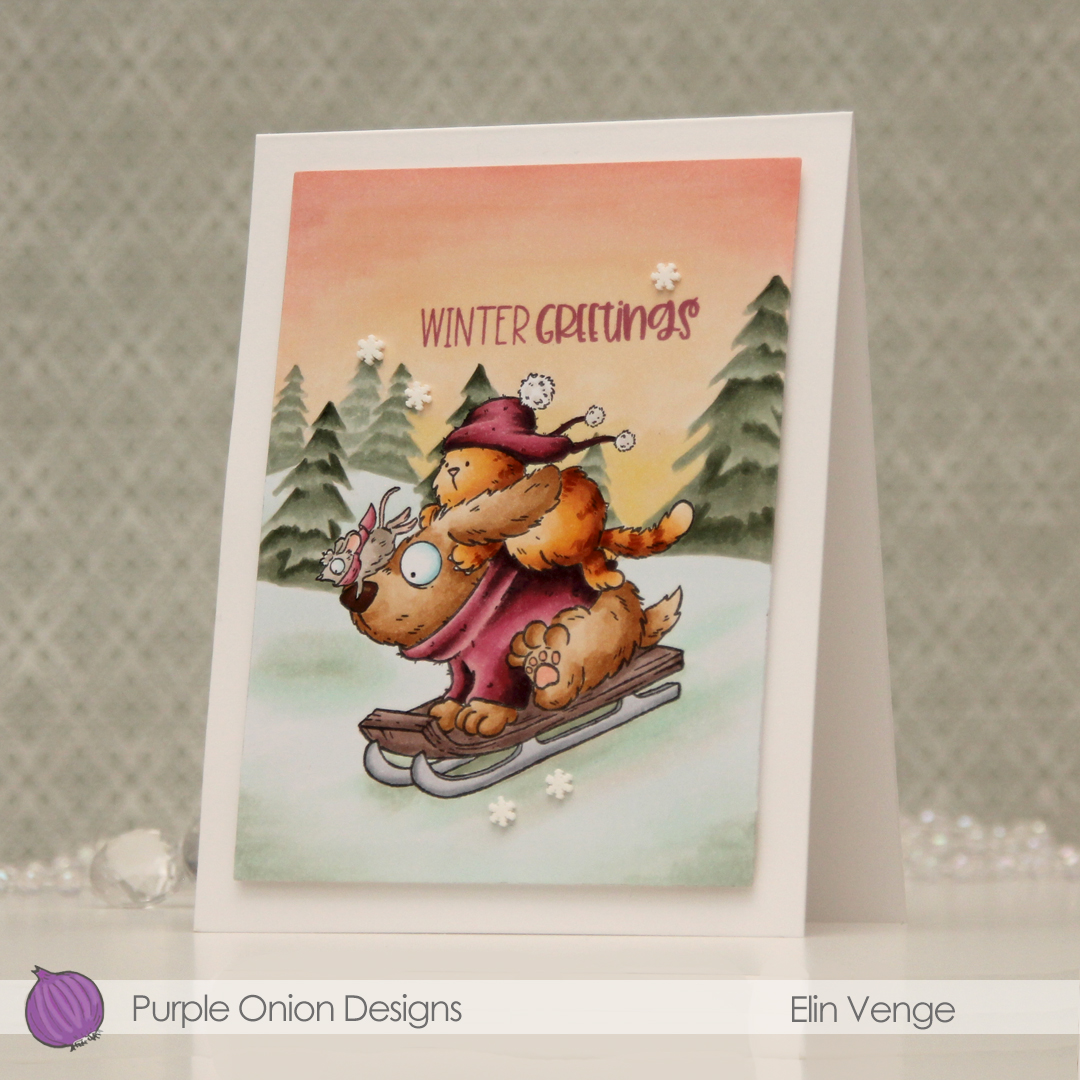 I stamped a sentiment from the Holiday Time Sentiment Set using Autumn Rose ink from Papertrey Ink, mounted my panel in the center of a top fold card base using foam tape and finished off with a few snowdrift sprinkles from Little Things from Lucy’s Cards. I love these sprinkles!!
 I stuck to a pretty limited color palette, I feel, but there’s still a lot of markers.

Today’s the last day of the annual holiday sale over at Purple Onion Designs, so this is a gentle reminder to head over there, fill your cart with stamps at 25 % off, and check out.

 I made a
  I created a shaped card using the Nesting Frames 8 die set from Lifestyle Crafts, and used a few sizes of this die for the patterned paper panels on my card, which are all created from the Vintage Spring Basics collection from Maja Design. I die cut a white doily using the English Tea Party die from Cheery Lynn, mounted it in the center of the card and added my circles on top. I die cut the letters to spell the boy’s name using Die 304 from Kort & Godt and adhered them to a strip I die cut with the Essential Stitched Sentiment Strips die set from My Favorite Things. I added some Studio Calico veneer stars to embellish and a button from Kort & Godt that I put on top of a bow I created from Chalk White seam binding which I’d colored with Copic B95 and B91. This took me back – I used to color seam binding with Copics to match my card sooo often back in the day, and it honestly made me a little nostalgic doing this.
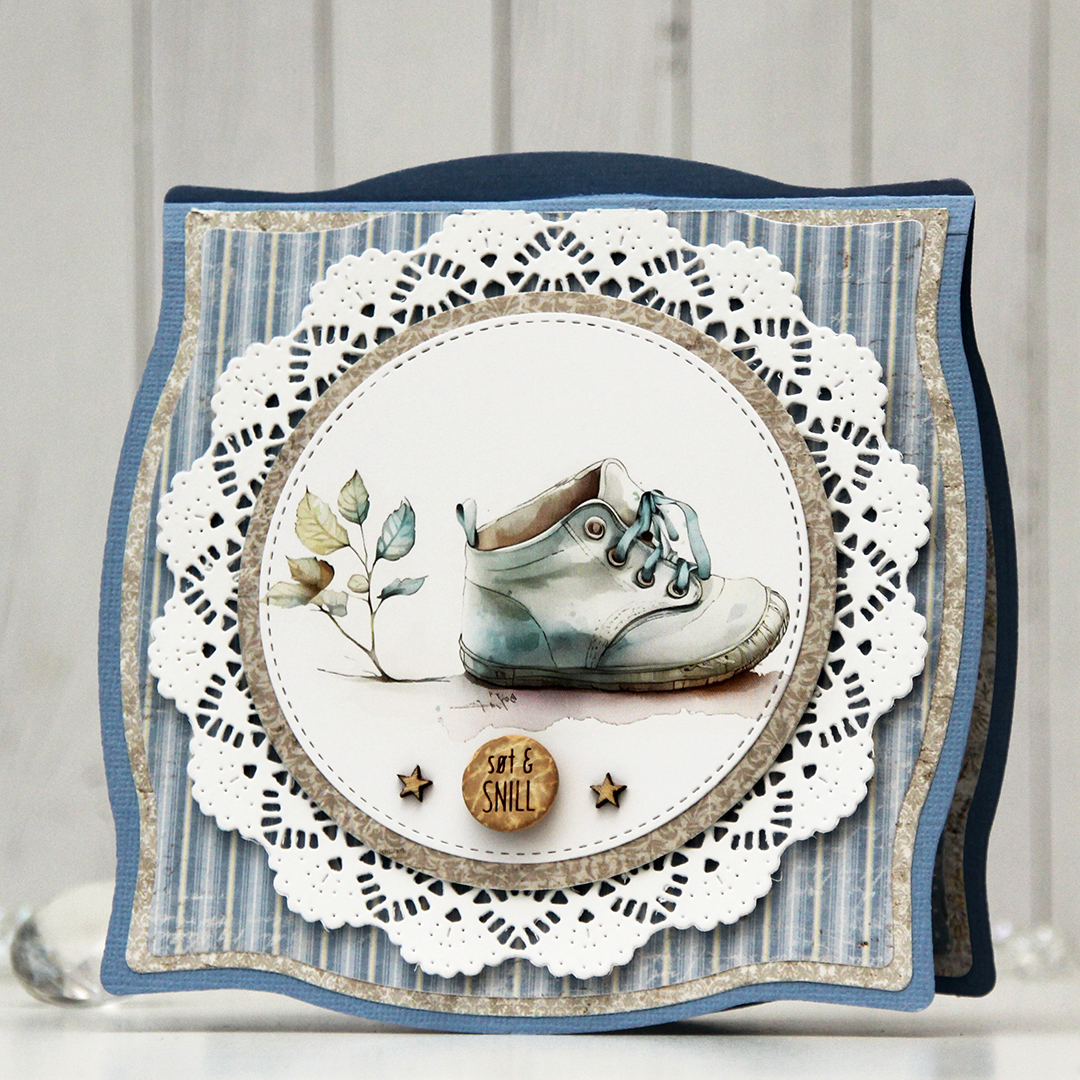 The insides of the card have the same basic layout as the front, just different patterns, and I left the stitched circles plain white for the personal message. On the back of the card, I die cut a pre printed image from Kort & Godt, found another button and added a star on each side of it to finish.
 Very limited color palette for this one, there wasn’t much to color.
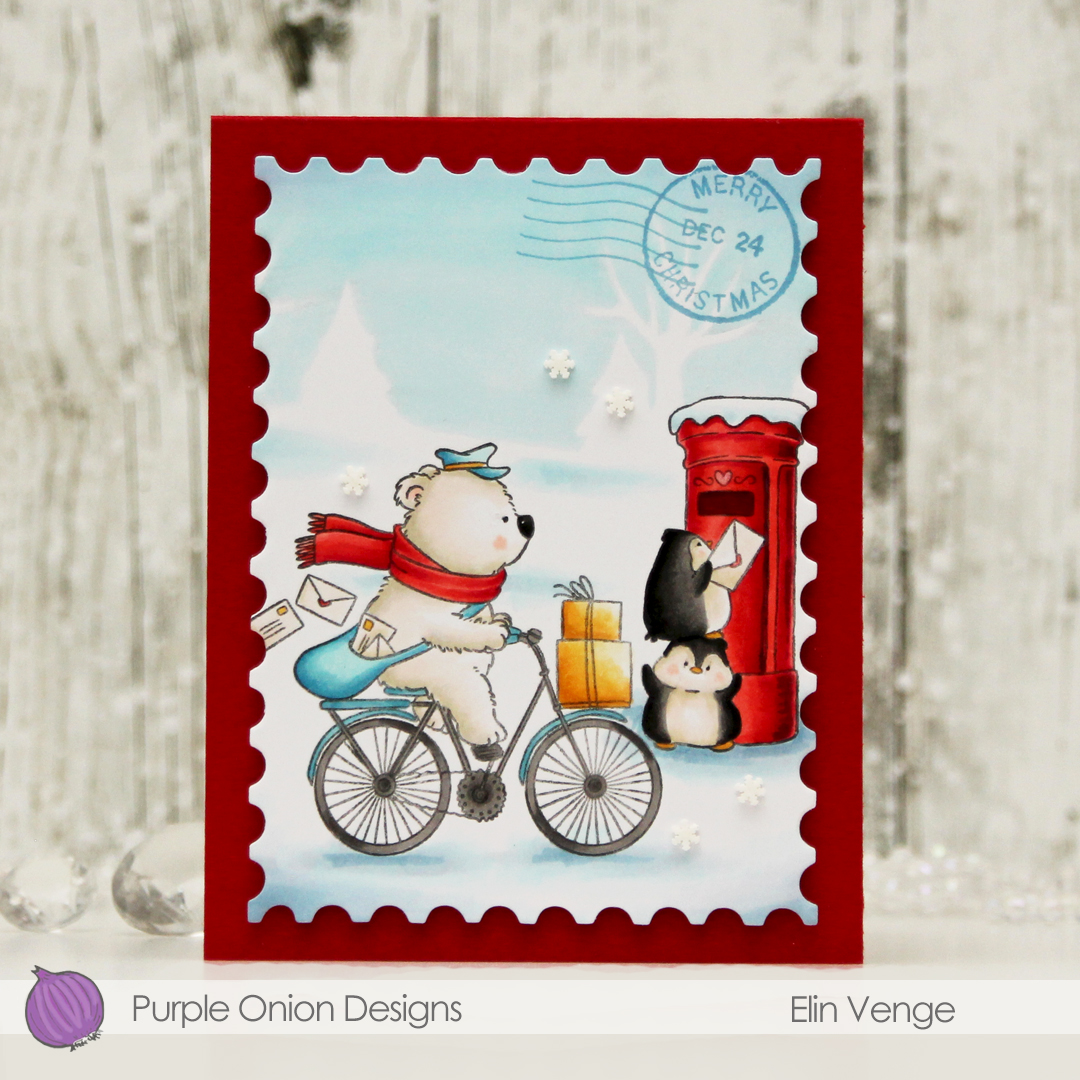 I suggest you put this image in your cart, it’s so awesome. I colored it with my Copics, adding an actual no line horizon behind my critters to complete the wintry scene, before using a die from the Nesting Postage Stamps infinity die set from Hero Arts to turn it into a huge postage stamp. I then used the
  I created a top fold card base from Pure Poppy cardstock from Papertrey Ink, mounted my large postage stamp using lots of foam tape and adhered a few Snowdrift sprinkles from Little Things from Lucy’s Cards to finish.
 I actually used red markers for red this time, with a little bit of B14 where I wanted it to be darker than R29 can create on its own. I usually use earth tones for red, this was a fun change.
 I took a quick look at the colors I’ve focused on recently to try to choose something different and opted for this blue green combo. I colored the image with Copics and added a horizon in the distance with a few trees scattered about.
 I made sure not to add to many trees so there would be room for the sentiment, which I stamped in Oceanside ink from Concord & 9th. The sentiment itself is from the Snøstorm stamp set from byCino. I die cut my panel using the lartest die in the A2 Stitched Rectangle STAX 1 set from My Favorite Things, before I sprinkled on chunky white embossing enamel from Stampendous. I made sure that none of the granules covered the sentiment or the eyes of the polar bears before melting the powder from the back.
 I adhered my panel to a card base I’d covered with a quarter sheet of Oceanside cardstock from Concord & 9th. This is actually a side fold card. I usually make top fold cards, but I didn’t have any landscape oriented card bases on hand and didn’t feel like breaking open a new pack of cardstock. Long live lazy crafting, right?
 Very cool color palette for this one.
 I printed the image onto X-Press It blending card and colored it with my Copics, going for a couple of different purple combos – one dark for the snowman’s hat and scarf, another for the cute little bird. I chose a deep pink combo for the present and the bird’s accessories to bring in another color. I die cut my panel using a rectangle die from Waffle Flower, then went in with a snowflake stencil from Ciao Bella and some Lilac ink from Concord & 9th. I then added VersaMark on top and sprinkled on Iridescent Sparkle embossing powder from JudiKins to turn the snowflakes sparkly once the powder melted.
 I stamped a sentiment from the Julehilsen stamp set from byCino using Autumn Rose ink from Papertrey Ink. The sentiment translates to “Express delivery from the North Pole” and was the perfect size for my chosen placement. I adhered a quarter sheet of Autumn Rose cardstock from Papertrey Ink onto a white card base and mounted the colored panel in the center, before finishing off with sequins and raindrops from the She’s So Lovely mix from Little Things from Lucy’s Cards.
 Lots of purple. I can do hard things (using purple is HARD).
 I colored my cutie with Copics and made sure to color enough on the sky and the ground beneath him so I could die cut my panel with a circle die. I used a black glaze pen to get some shine into his eyes, and once the black was dry, I added a dot of white Gelly Roll 05. I die cut a white ornament using the Snowflakes and Ornament die set from Hero Arts, and glued my colored panel on top, before working on the rest of the card.
 For my background, I used the Magic Snow Cover die from Mama Elephant to die cut from Powder cardstock from Concord & 9th. I adhered that to a top fold white card base and glued my ornament in the center with a couple of layers of cardstock behind it for a little bit of dimension. I die cut a sentiment from white cardstock using the Jolly Holiday Greetings die set from Concord & 9th. I die cut the back from Champagne cardstock, also from Concord & 9th and added the complete sentiment to my card with a little dimension behind it, before finishing off with a die cut bow in the same cardstock color, die cut using the Gift Bows die set from Kristina Werner.
 Simple palette for this one.
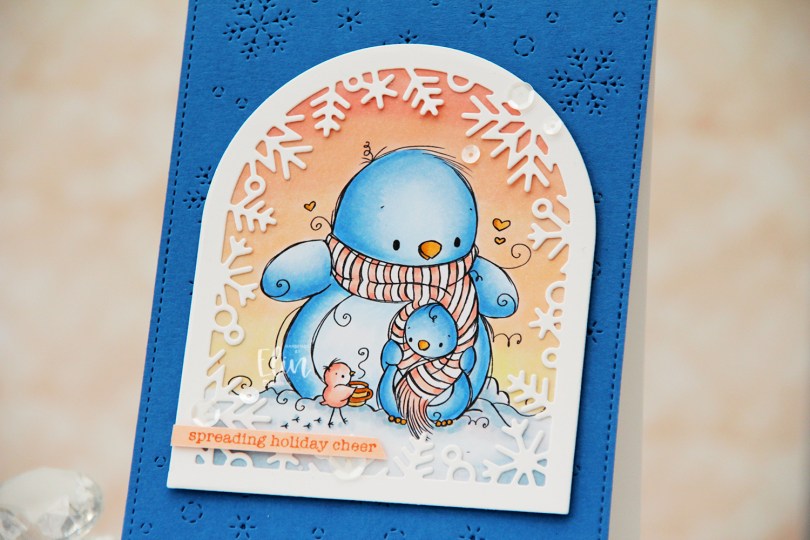
 I printed the image onto X-Press It blending card and colored it with my Copics, creating a soft winter sunset behind the cute penguins. From white cardstock (Stamper’s Select White from Papertrey Ink), I die cut a frame using the Winter Wonderland window die from Lawn Fawn and adhered it to my colored piece.
 I used the Magic Snow Cover die from Mama Elephant to create texture and interest to a piece of Cornflower cardstock from My Favorite Things, which I adhered to my top fold card base. I added some dimension behind my winter wonderland window and adhered it in the center of the card. I stamped a sentiment from the Holiday messages stamp set from Mama Elephant onto Nectar cardstock from Concord & 9th using Grapefruit ink, also from Concord & 9th, cut it down to a strip and added it to my frame with a couple of extra layers of cardstock behind it for dimension, before finishing off with sequins from the Ivory Sequin mix from Little Things from Lucy’s Cards.
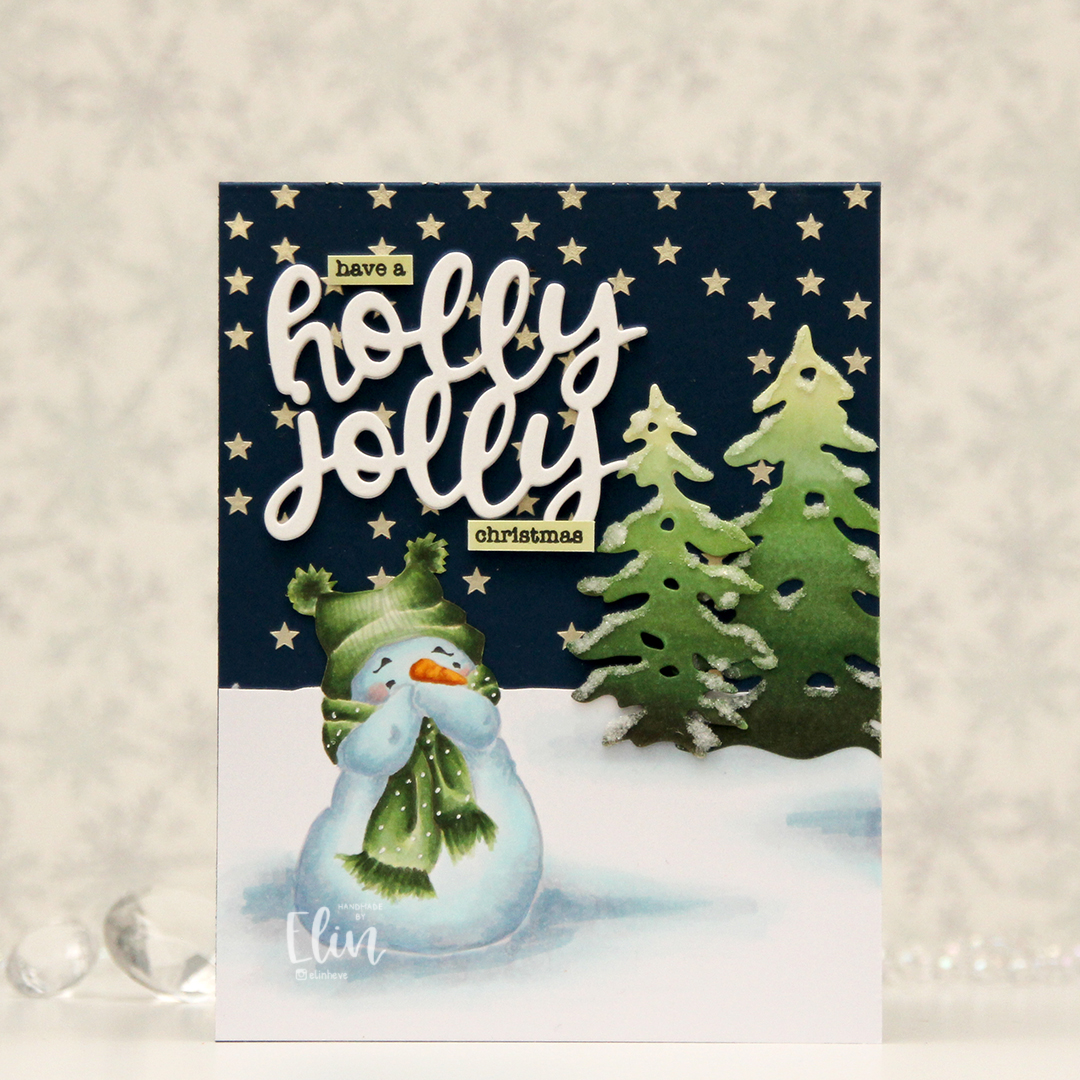 I love coloring this image in noline versions. I usually print with his eyes and eyebrows in a dark brown and the rest of him in a super light grey. I kept the snow on the ground around him this time, and cut away the part of the panel that above my imagined horizon line. I created stars in the sky by using solar paste from Simon Hurley (in the golden hour color) through the Falling stars stencil from Simon Says Stamp onto the front of an A2 card base I created from After midnight cardstock from My Favorite Things.
 Once the stars were dry, I adhered my panel with my snowman, adding die cut trees a little bit below the horizon line. I created the trees by coloring a scrap piece of X-Press It using the same green markers I used for the image, before die cutting them using the Silhouette Snow Trees die set from Mama Elephant. I finished off the trees with some liquid glue and Rock Candy distress glitter for a sparkly, snowy look. For a sentiment I die cut the words holly jolly from the Jolly Holiday greeting die set from Concord & 9th five times from white cardstock and adhered them all together for a stacked, dimensional look and completed the greetings with some small words from the Holiday messages stamp set from Mama Elephant that I stamped in Obsidian ink from Altenew onto pieces of cardstock I colored with the lightest of the green markers I used for the snowman and the trees.
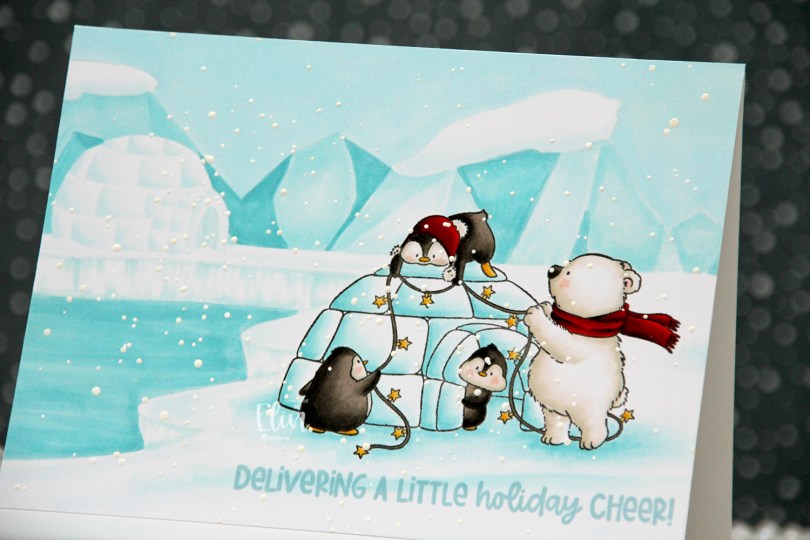
 I originally planned on creating a regular portrait oriented A2 card with this image, but I had this idea of another igloo in the distance, and it kind of evolved from there. I don’t usually create my own backgrounds for cards (I like background stamps that do all the work for me), but I had a blast with this one. Keeping the colors to a minimum certainly helped. I only used five Copics for the entire background.
 Once the background and the actual stamped image were both colored in, I stamped a sentiment from the
  Limited color palette for such a large card.
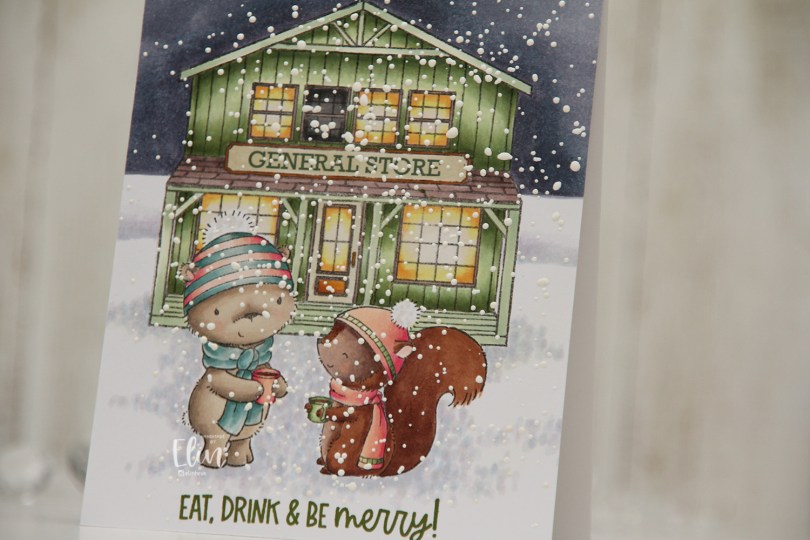
 Meet
Meet  Once everything was colored in, I stamped Santa’s Silhouette using Obsidian ink from Altenew. This is a pigment ink, which doesn’t really play well with Copics, so it’s best to use it once the coloring’s complete. I then stamped a sentiment from the Home for the Holidays sentiment set using Jalapeño Popper ink from My Favorite Things, before I sprinkled on chunky white embossing enamel from Stampendous, which I melted from the back for a textured snow look. I adhered my panel to a top fold card base and my card was complete.
 I used a lot of Copics for this scene. A lot.