Hi, everyone! I’ve got a new Christmas card to share today, featuring some awesome images from Purple Onion Designs.
 It’s no secret that I’m a fan of penguins and polar bears, and even though their habitats are on opposite sides of the globe, they’ve come together for this card. I mean look at them; that cute cub with a scarf and hat and that penguin sitting on a present with a candy cane in his hand – just too cute to pass up.
 The little polar bear’s name is Icicle, and the penguin’s name is Merry, I love that these characters actually have names! I put Merry on a sled, masked everything and stamped the frozen pond horizon behind my cute critters using fadeout ink from Inkon3.
 Here’s a bit of a closeup. I swear the bear has some color, even though he looks very one dimensional here. I stamped a sentiment from the Holiday Blurbs II set in blue ink, fussy cut that with a thin white border and popped it up on the front of my card, making it look like the penguin is wishing you a merry Christmas.
 Once I finished my coloring, I took the largest of my A2 Stitched Rectangle STAX dies from My Favorite Things to create a nice edge on my scene. I sprinkled on chunky white embossing enamel from Stampendous, heating the panel from the back until the granules melted. I glued my panel straight onto a top folding card base I made out of Papertrey Ink Blueberry Sky cardstock.

I wish you could feel the texture of the embossing powder once it’s melted. It’s raised, and kind of like braille, it’s really cool. The Gina K foam tape adds a little lift to the speech bubble, but doesn’t add too much bulk, I love it.
 The Purple Onion Designs holiday sale starts today and lasts till the end of next week. 25 % off rubber stamps is a really good deal, and nothing stamps better than rubber stamps, I love them so much!
I still haven’t redone my template for the Copic graphic I usually share, I’m hoping to have time to do it next week, I know there are people relying on it to choose colors!
 I decided to go for a version in gray and green, and used a die from Papirdesign to create a scallop heart for the front of my gift tag. I stamped a sentiment from Norsk Stempelblad AS using Ripe Avocado ink from Papertrey Ink.
 I diecut a regular tag shape from patterned paper from Maja Design using a die from My Favorite Things and glued the scalloped heart to the regular tag.
 For the back of the tag I die cut the regular tag shape again from that same patterned paper as the one for the front, as well as a second scalloped heart from white cardstock. I used the same green ink as I did on the front to stamp the To/From stamp from Norsk Stempelblad AS.
 Not a lot of Copics used for this one, but it’s a small image.
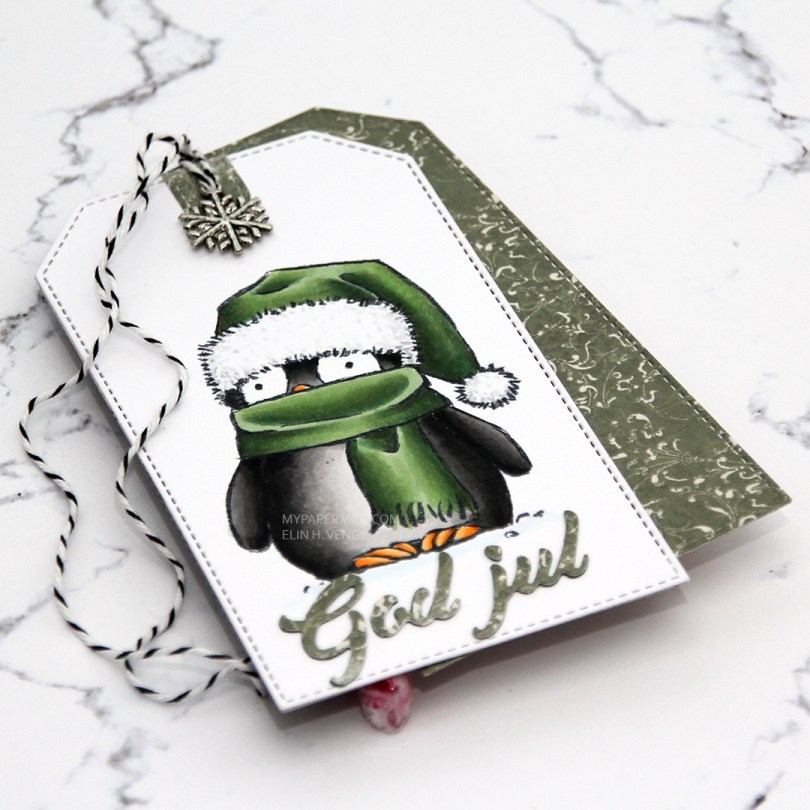
 This is a simple one. I colored
  On the back of the tag I die cut an additional two tags from patterned paper from Maja Design and stamped a To/From stamp from Norsk Stempelblad AS using Olive Twist ink from Papertrey Ink. I used a couple of strips of patterned paper to get a candy cane in there, as well.
 I added some twine through the top of the tag and even a snowflake charm, but let the rest be very simple. I’m hoping this penguin will put a smile on my sister’s face, she loves penguins, and this one is going to her and her husband.
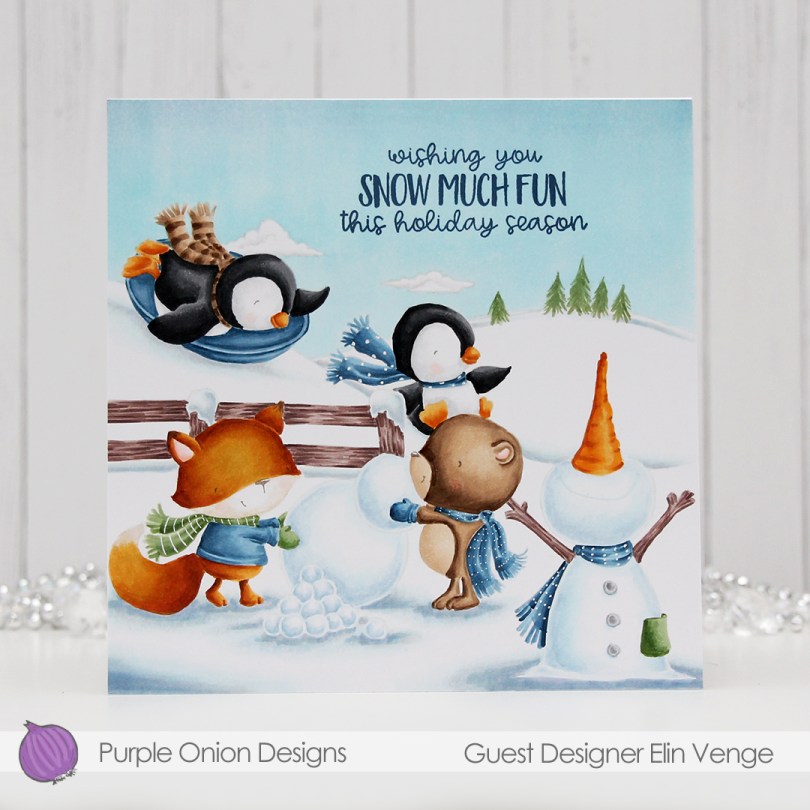

 I love the no line look, and it’s really no more difficult than coloring with lines. In a way, it’s actually easier, because no one can tell if you went outside the lines a bit! I used a white gelly roll pen to add back in some details in the various scarves.


 Here are the
  Here’s
  I stamped a sentiment from the


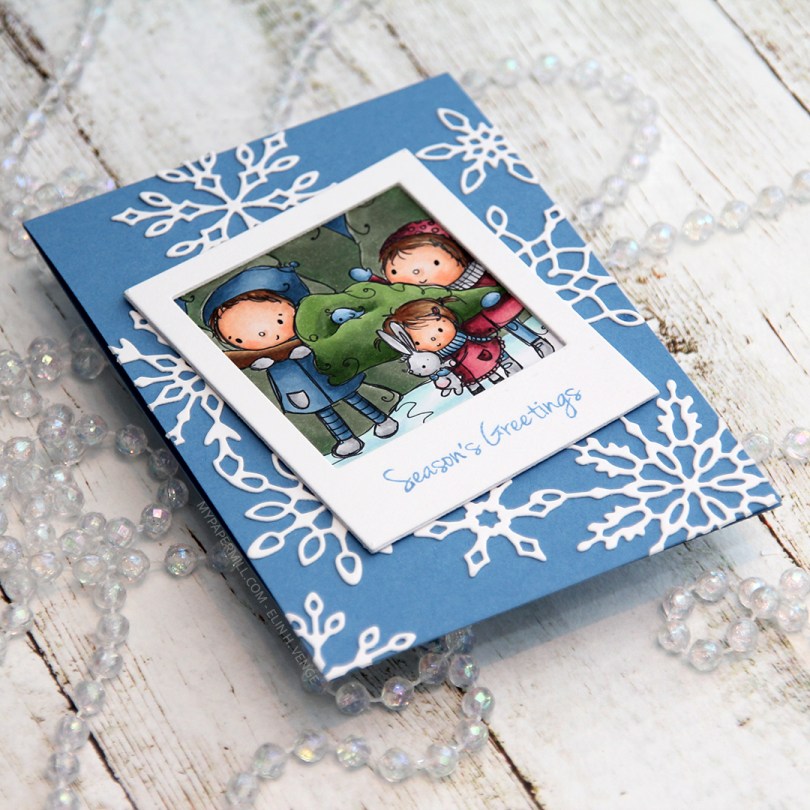
 I colored up just a portion of the image and made it into a polaroid by using a polaroid frame die from My Favorite Things that I love. I die cut the frame three times from white cardstock and glued them together for a stacked look.
 I decided to stamp a sentiment onto the polaroid frame using Blueberry Sky ink from Papertrey Ink. The sentiment is from a stamp set from Inky Wings.
 I decided to put my polaroid frame on a blue card base. This blue cardstock is Blueberry Sky from Papertrey Ink, the same color as the stamped sentiment. I used an old snowflake frame die from Memory Box that I diecut from white cardstock.
 I cut down my card base to make a 4 bar card. I like the smaller size, but don’t make too many cards this size, so I thought I’d change things up a bit. Once again, I have no graphic to show what Copics I used, but hopefully I’ll have my template remade in a few days.
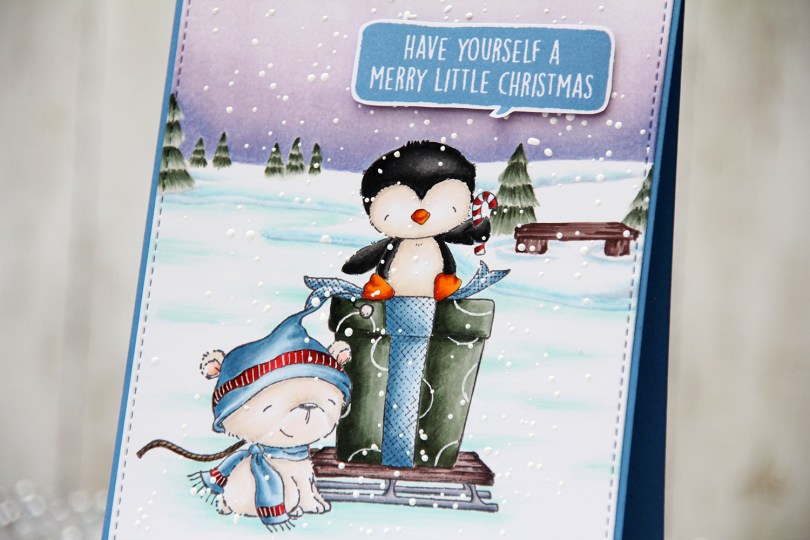
 I had a leftover piece from a card I made earlier this year, so the dark blue base and the
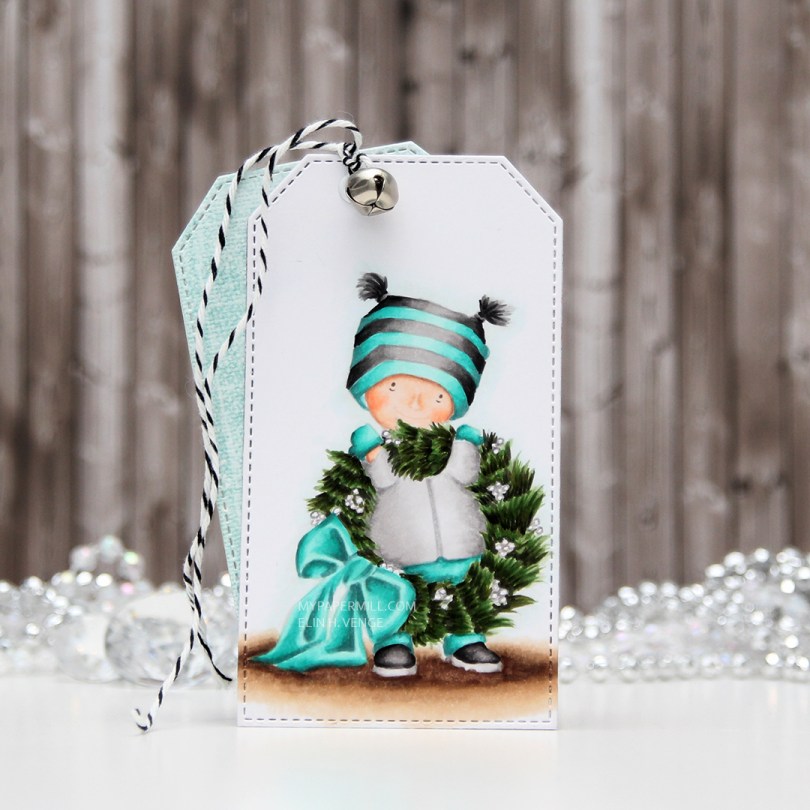
 I decided to go for a teal and gray color combo today, and white berries on the wreath instead of red ones. I just used a gray colored pencil to trace around the outline of the berries, everything else is noline colored using Copics. I used a stitched tag die from My Favorite Things to create the actual tag.
 I diecut a couple of pieces of scraps of patterned paper using the same die. I chose Julbukett from the Fröjdefull Jul collection from Maja Design and Good Cheer from the Christmas Magic collection from Fancy Pants Designs, which happens to be a collection from 2009, I have a lot of patterned paper. I stamped a to/from stamp from Norsk Stempelblad AS using Hawaiian Shores ink from Papertrey Ink straight onto the patterned paper. I made a hole at the top, added an eyelet, some twine and a bell, and my tag was done.
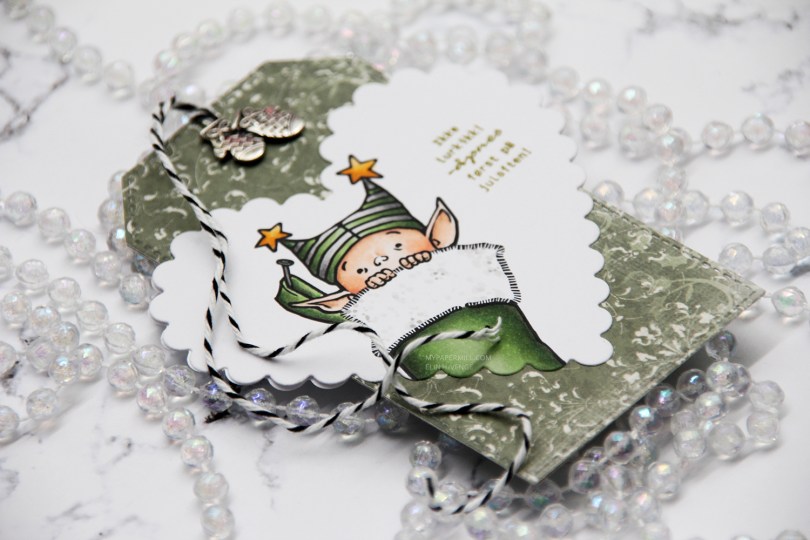
 I wanted my cluster with the sentiment to be more to the right than to the left, so I flipped my image in Photoshop to make the boy and the dog look to the right instead of the left, it fit my card better. It’s one of the great advantages of digital stamps.
 Once I’d colored in my image, I used my favorite faux stitch rectangle die from My Favorite Things to turn my colored piece into a panel for the front of my card. I added about half a tiny paper doily from Doodlebug Design, and some die cut scraps of Maja Design patterned paper, before adding a green strip with a word (Christmas hug) from Papirdesign using foam tape.
 I added another little piece of the green patterned paper from Maja Design towards the bottom of the left hand side and glued on a few snowdrift sprinkles from Little Things from Lucy’s Cards, before adhering everything to a card base I made out of Soft Stone cardstock from Papertrey Ink. Easy peasy, lemon squeezy, right?
 I tried to limit the amount of Copics I used on the snow for this one. Only five (plus the blender) isn’t too shabby.