Hi, there! Another Wednesday’s come around, which means another Mo Manning creation. Today, I actually have a Christmas card to share. Christmas is only 8 months away, time will fly.
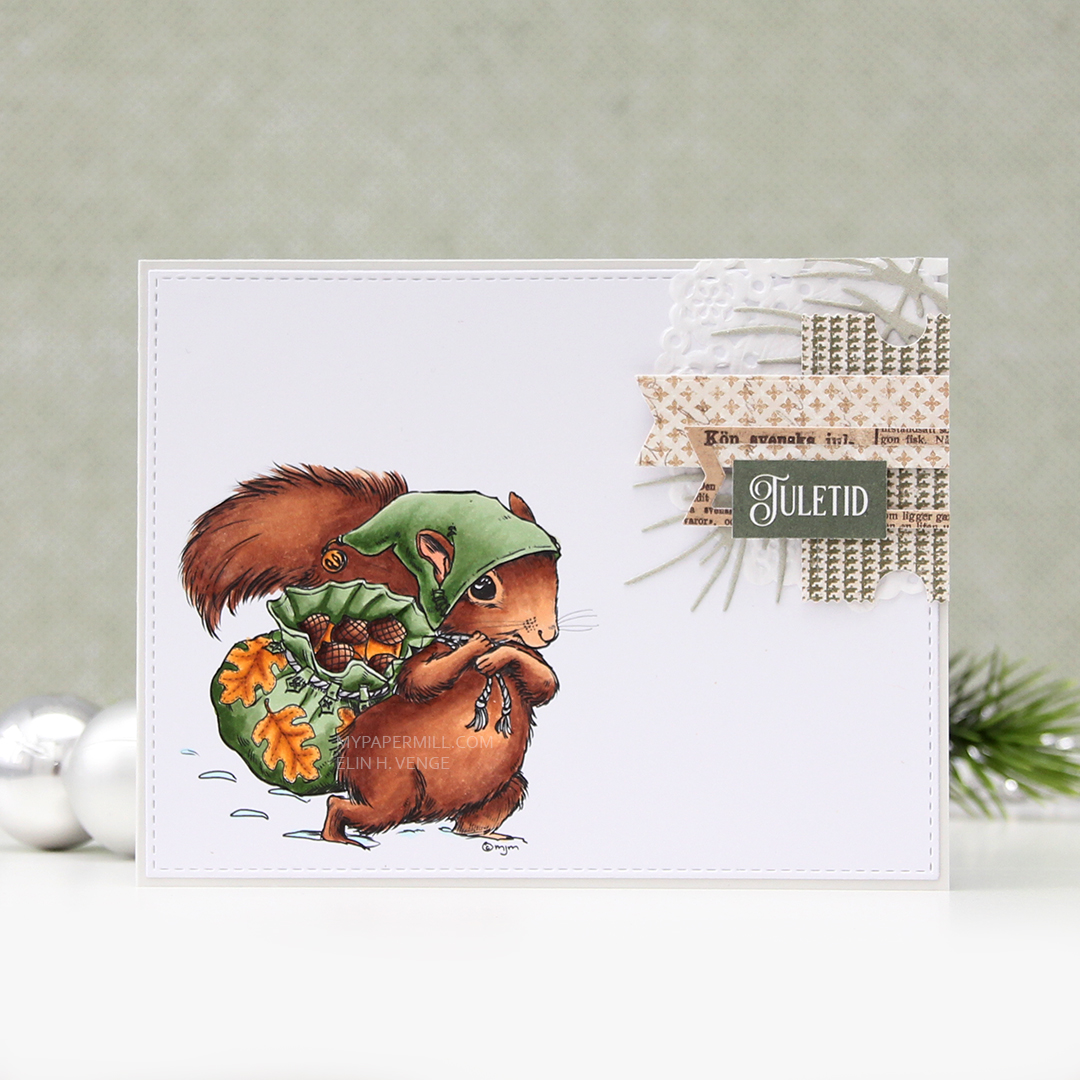
I’m getting close to the end of the alphabet of my previously unused images from Mo Manning. I have close to 400 digital stamps from Mo, and it’s a pretty good feeling to have used nearly all of them. This is Winter Delivery, a cute hatted squirrel carrying a bag of acorns through the snow.

I colored the image with my Copics, before taking out my most used cluster dies and scraps of patterned Christmas paper from Maja Design (and that sentiment strip from Papirdesign) to create a tiny cluster in the top right corner. I used part of a Doodlebug doily at the bottom, a branch die cut with a Papirdesign die, as well as tickets die cut using the Happy Days Ticket Stubs die from XCut (Docrafts) and the Fishtail Flag Frames dies from My Favorite Things. I used another favorite MFT die to die cut the panel with the squirrel, before adding it directly to a side fold landscape card base made out of Soft Stone card stock from Papertrey Ink. I rarely make side fold cards, but I had a piece of card stock already cut to 4 1/4 x 11″, and it made more sense to fold that down the middle rather than pulling out a new sheet to make a top fold card.

Simple color palette today.


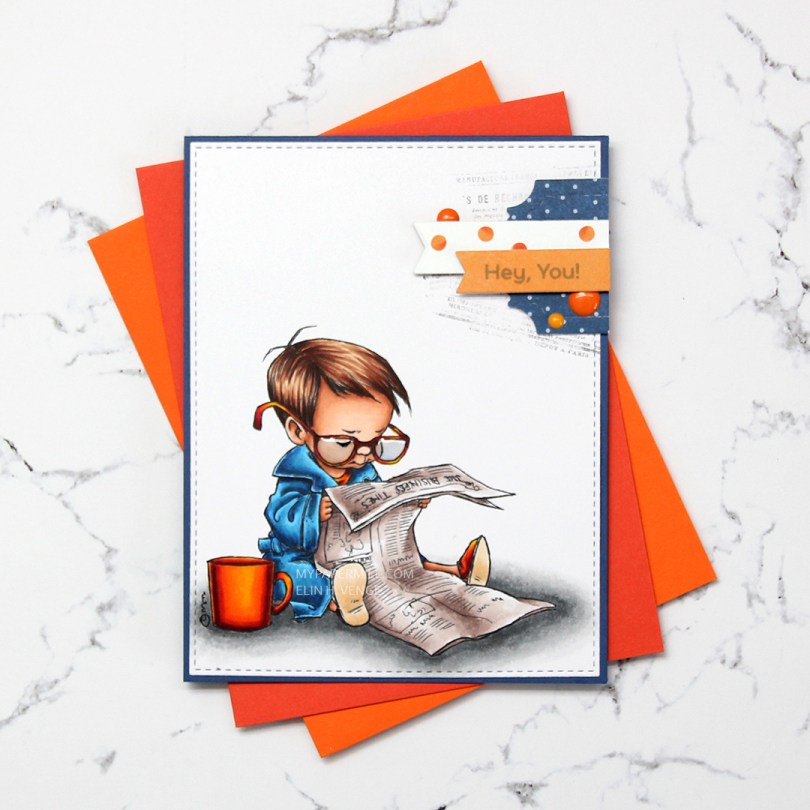
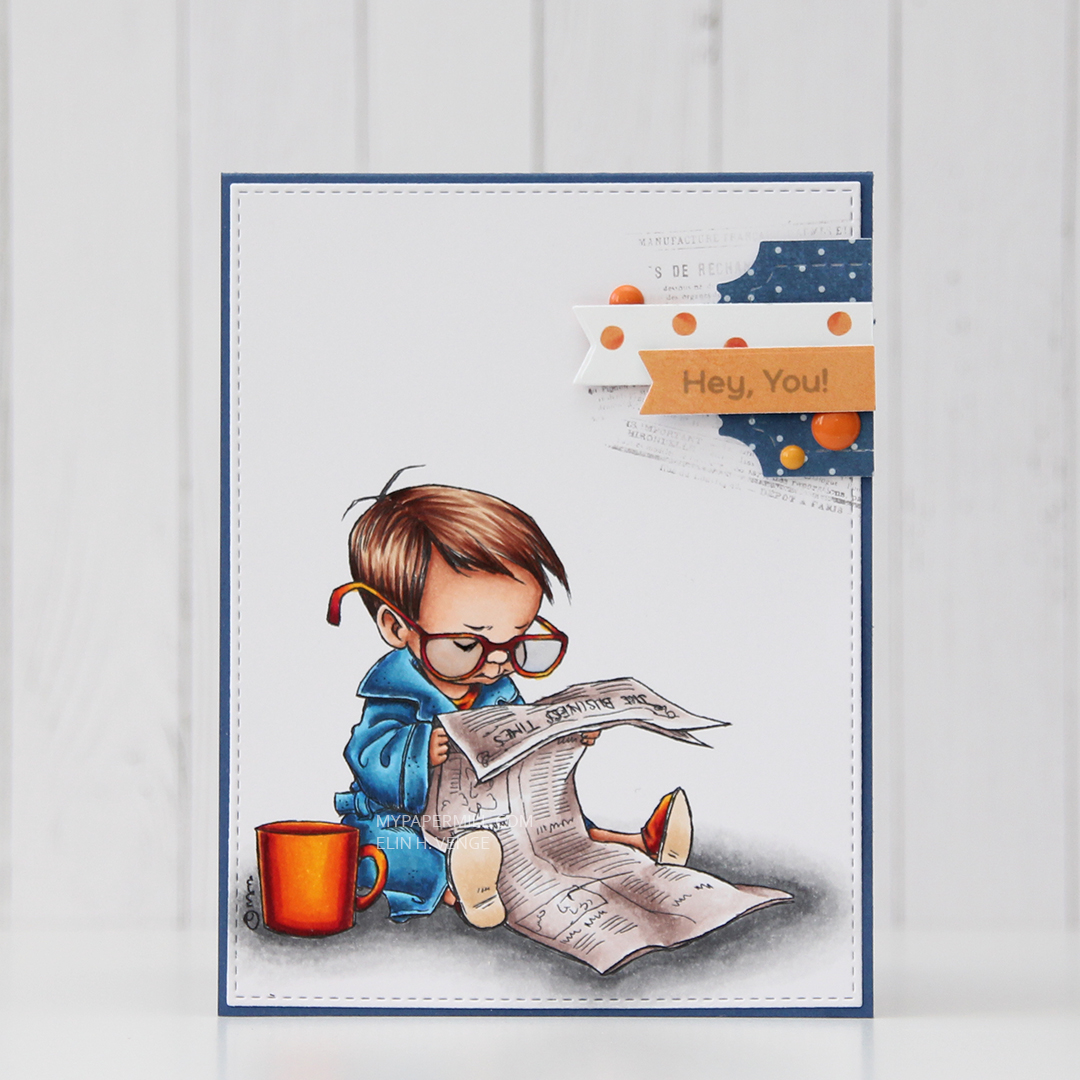 I colored up the boy version of
 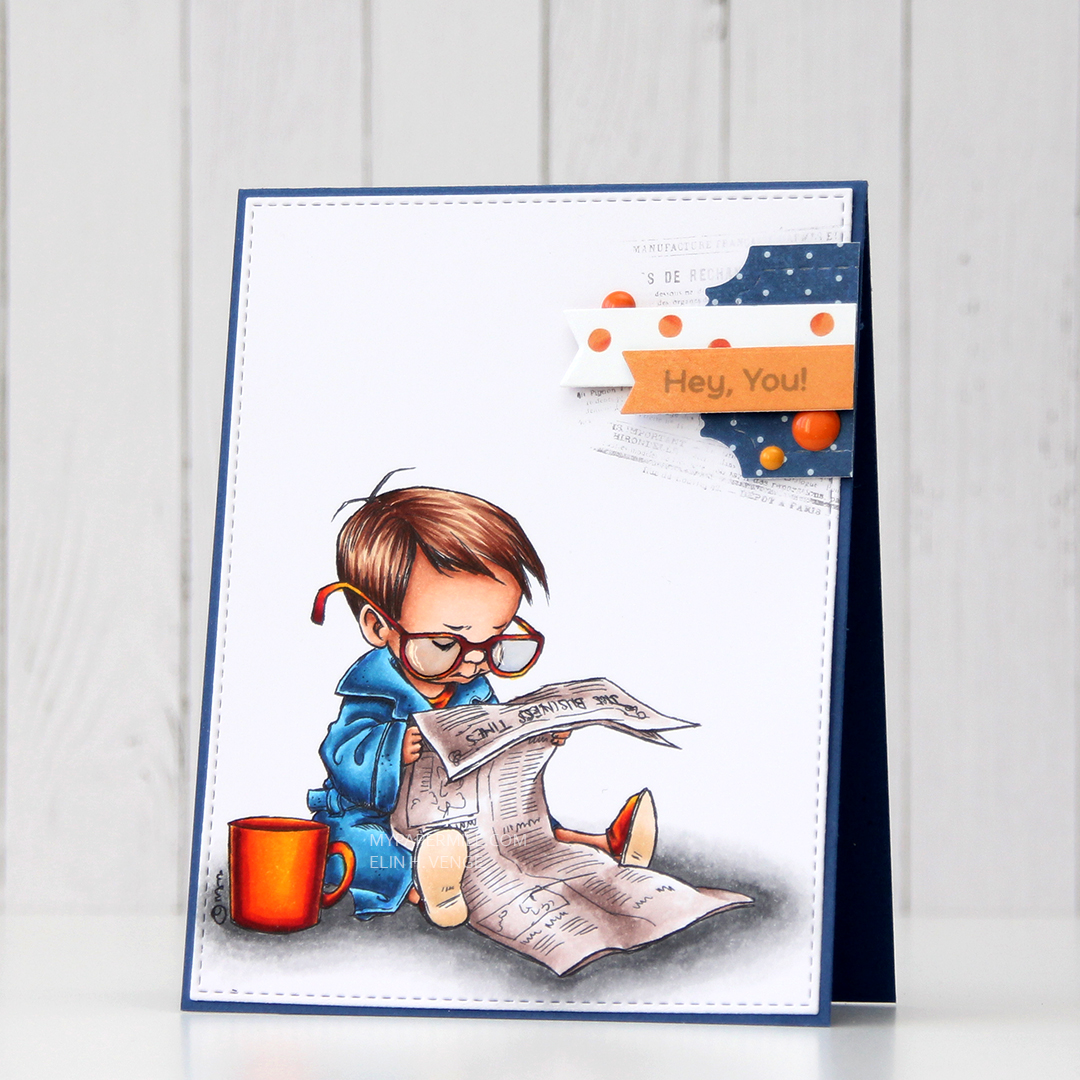 Near the top right corner, I randomly stamped part of an old background stamp from Tim Holtz and Stampers Anonymous. I thought the small text on the stamp would pair well with the newspaper in the image and stamped pieces of it at an angle with Memento Espresso Truffle ink. I didn’t even put the stamp in my Misti or on an acrylic block, I bunched it in my hand and stamped, giving it less of a rigid feel, since the stamping is uneven. I added my colored and stamped panel onto a card base made from Blueberry card stock from My Favorite Things, and a small cluster on top of my stamping.
 I die cut some patterned paper scraps with a couple of dies from XCut and My Favorite Things to create my cluster. The blue piece is from Papirdesign, the other two from the Happy Birthday collection from P13. I stamped a sentiment from the Bitty Bears stamp set from My Favorite Things onto the orange banner using Hero Arts Soft Granite ink. I finished off with three enamel dots from Papirdesign and added Glossy Accents to the boy’s glasses.
 Not a huge amount of colors. For the soles of his slippers I actually used the two lightest colors that I used for his hair (E31 and 30).
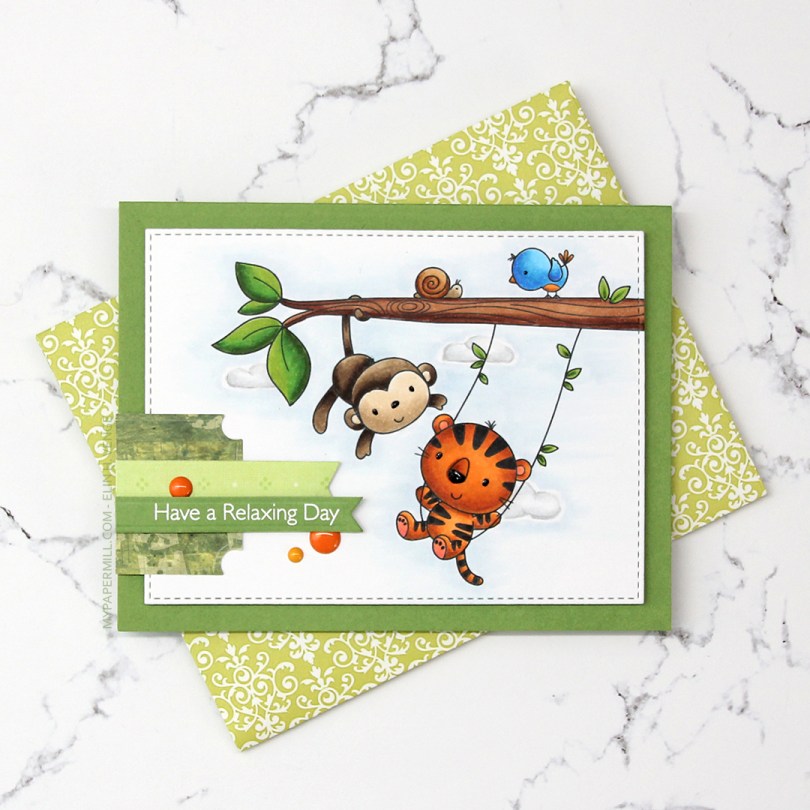
 I colored the image with Copics and die cut it using the second largest die in the A2 Stitched Rectangles STAX 2 set from My Favorite Things, before adding it to a card base made from Gumdrop Green Heavyweight card stock, also from MFT, using lots and lots of foam tape. I used a black Glaze pen to add some dimension and shine to their eyes and noses.
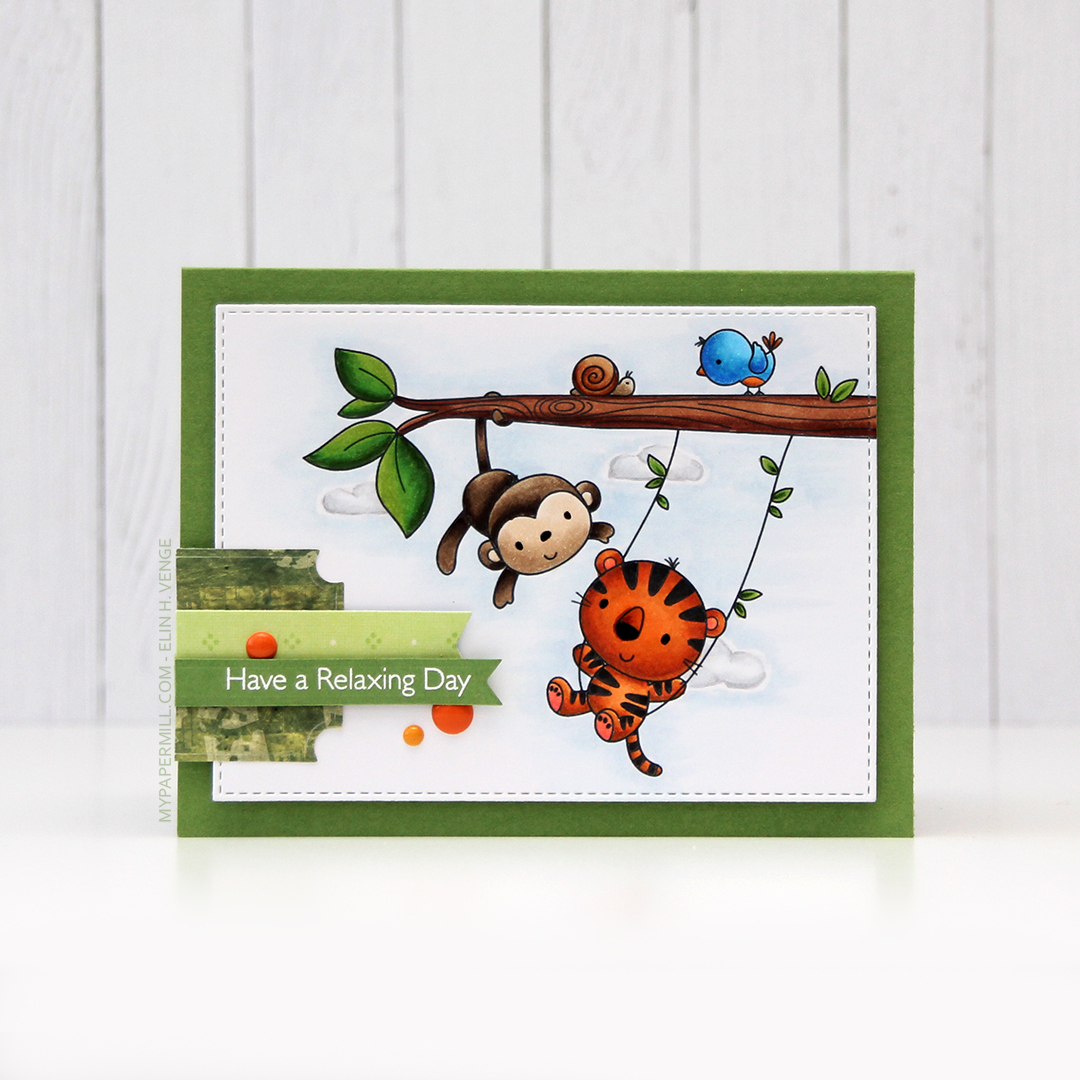 I’m one of those people that use patterned paper on my cards. I don’t use lots, and I pretty much always use them for small clusters, but my ancient stash of patterned paper is shrinking ever so slightly with each card. I have a tub of die cut patterned paper scraps on my desk, and rummage through it to find the perfect pieces for my clusters. The dark green patterned paper I used here is actually from 2005, which was years before I started making cards. I stamped one of the sentiments from the Always Bring a Smile stamp set from My Favorite Things onto a separate piece of Gumdrop Green card stock and die cut it using one of the dies in the Slimline Starter die set. I finished off my card with a few enamel dots from Papirdesign to match the tiger and the details on the bird.
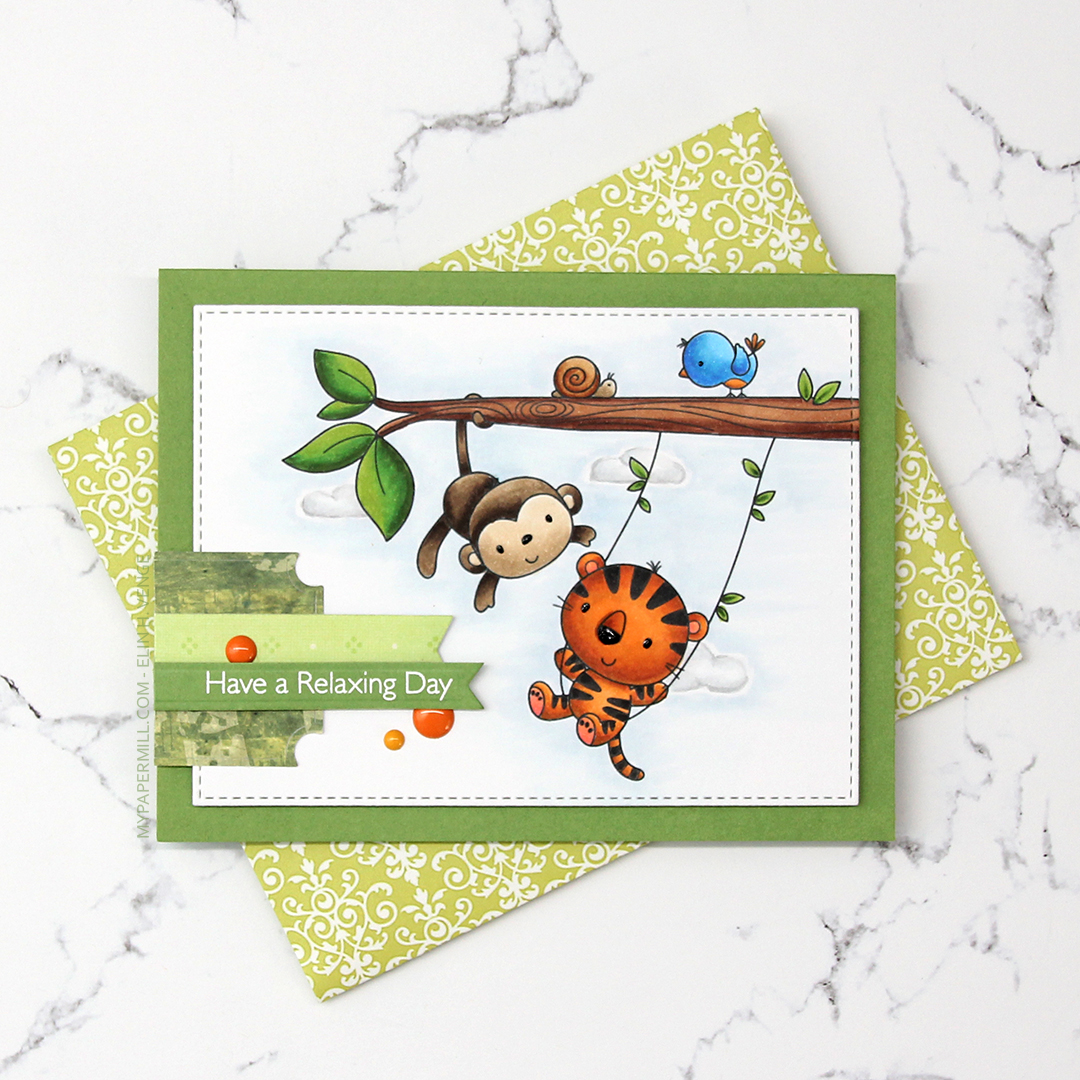 Another great use of patterned paper is envelopes. I’ve nearly run out of colored envelopes for A2 cards, and I’m definitely out of white ones, but larger scraps of patterned paper are perfect for creating one of a kind envelopes. I used the A2 V flap envelope dies from Simon Says Stamp on this piece of patterned paper from 3ndypapir. Another old one, this paper’s from 2010.
 Lots of bright colors used for this one. I also used B40, which is a color I’ve created myself.
 I adhered everything to my die cut panel, some directly, and some with a couple of more layers of paper behind them for added dimension. I added a couple of veneer snowflakes from Crafty Moly that I’d already white heat embossed with three layers of super detail embossing powder from Ranger. I used a piece of the strip of 12×12″ paper that has the barcode on it from Papirdesign. Their barcode strips are awesome. One side has the barcode and all the information, the other side of the strip actually has a design on it, so nothing needs to go to waste.
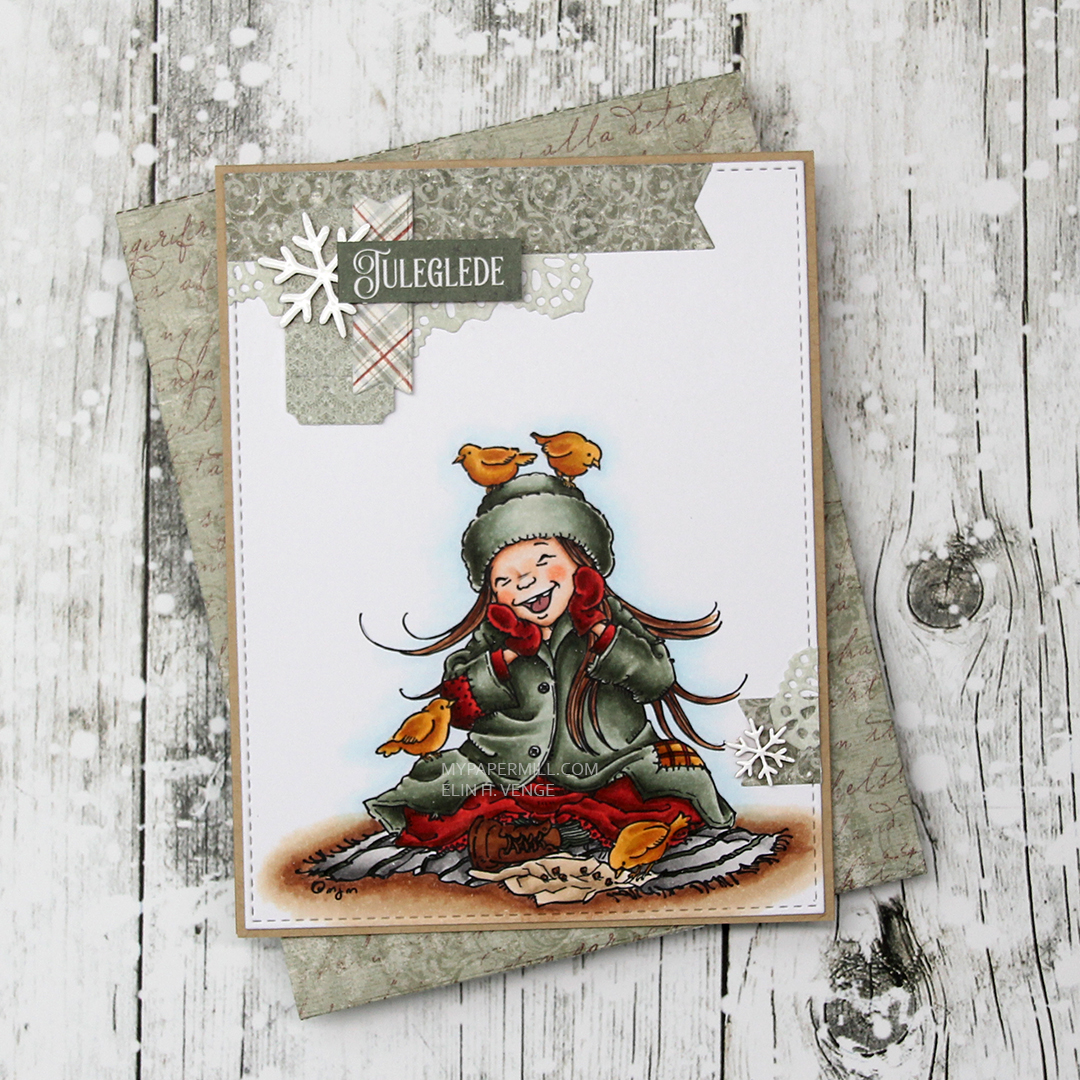 I adhered everything onto a card base I made from Classic Kraft card stock from Papertrey Ink. I didn’t have any colored envelopes to match (and I’ve run out of white envelopes for A2 sized cards), so I used the A2 V Flap Envelope dies from Simon Says Stamp to create an envelope from some larger scraps of Maja Design patterned paper.
 As usual, I leave you with the Copics I used. In addition to B0000 and the blender, I also used B90, which is a color I’ve made myself, for the sky.
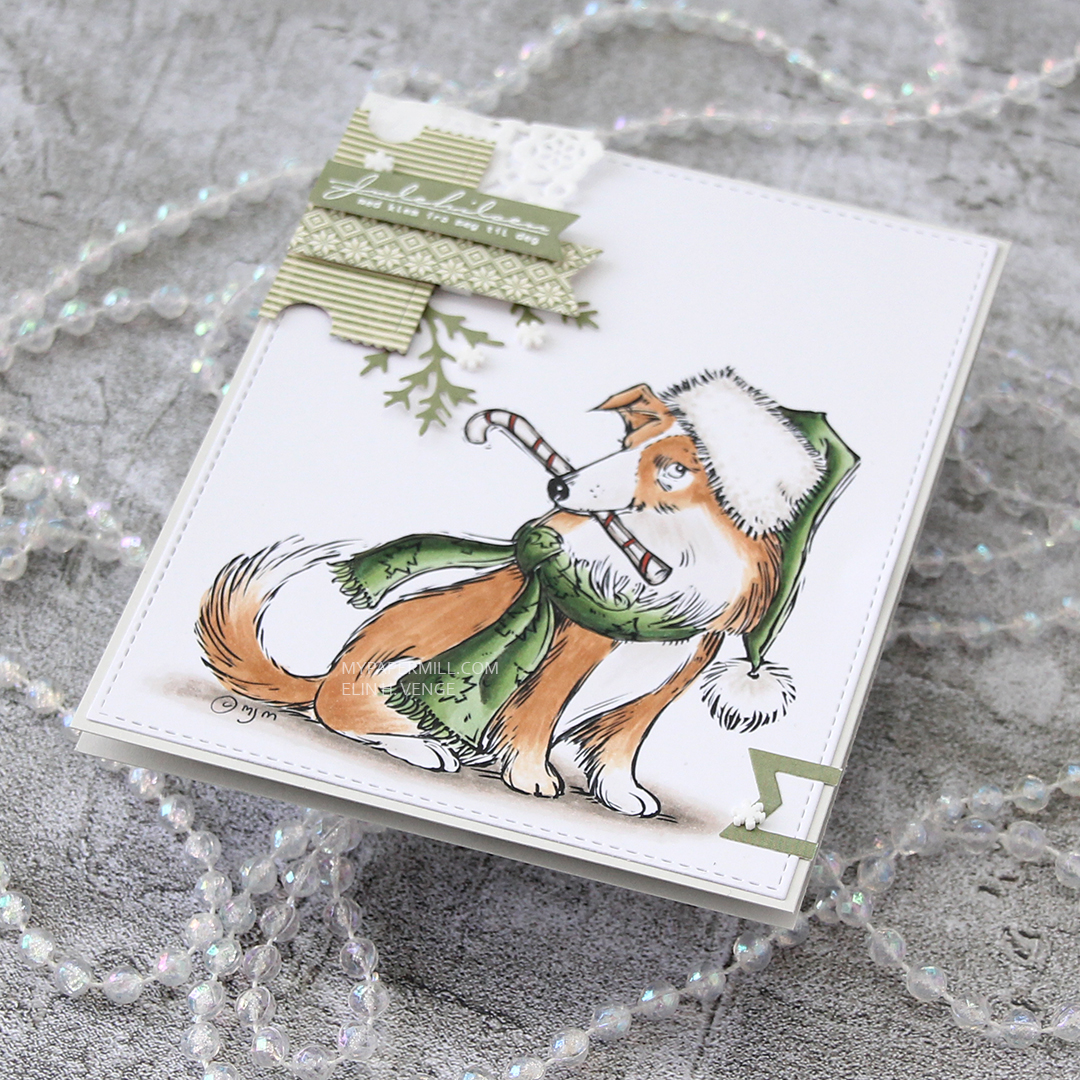
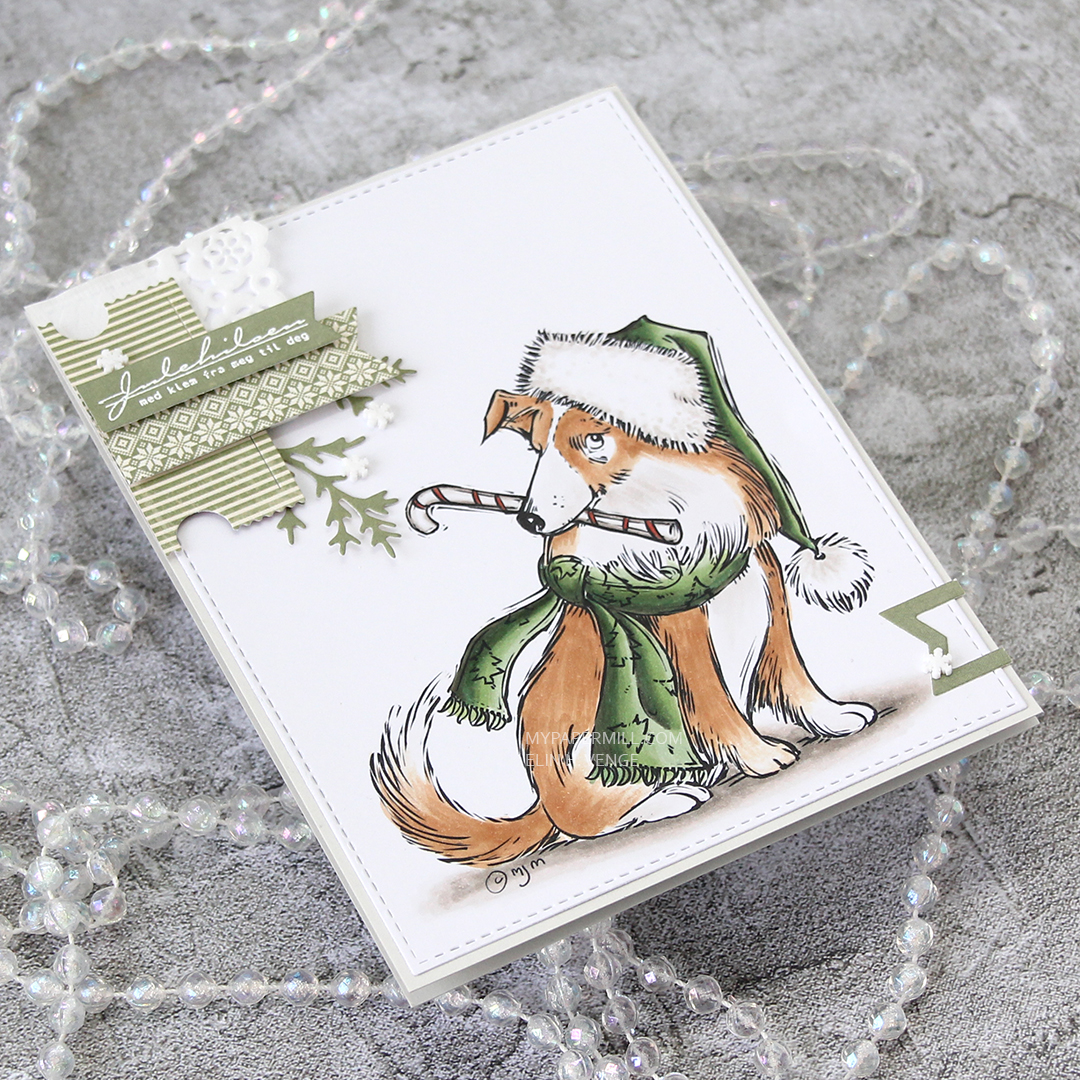
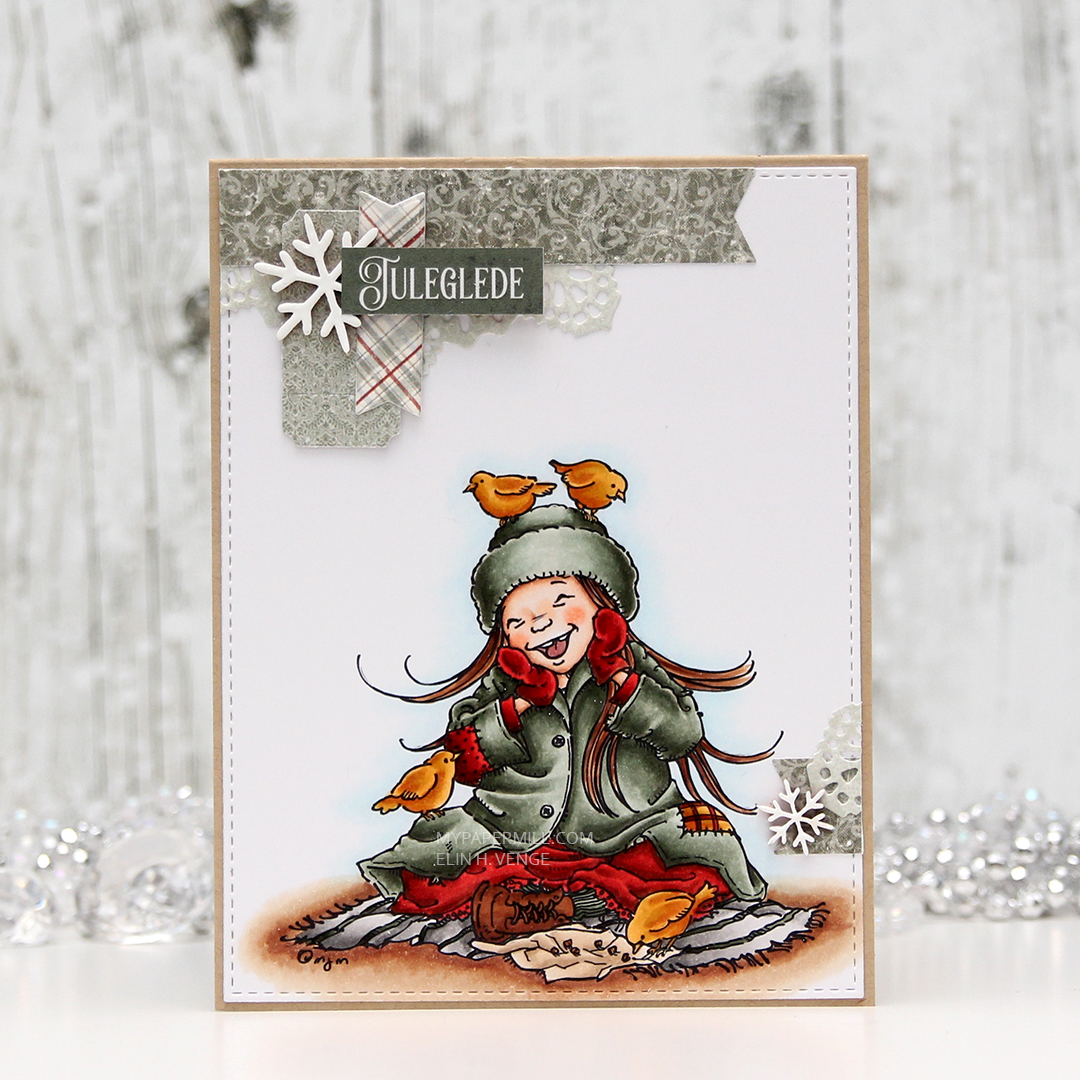
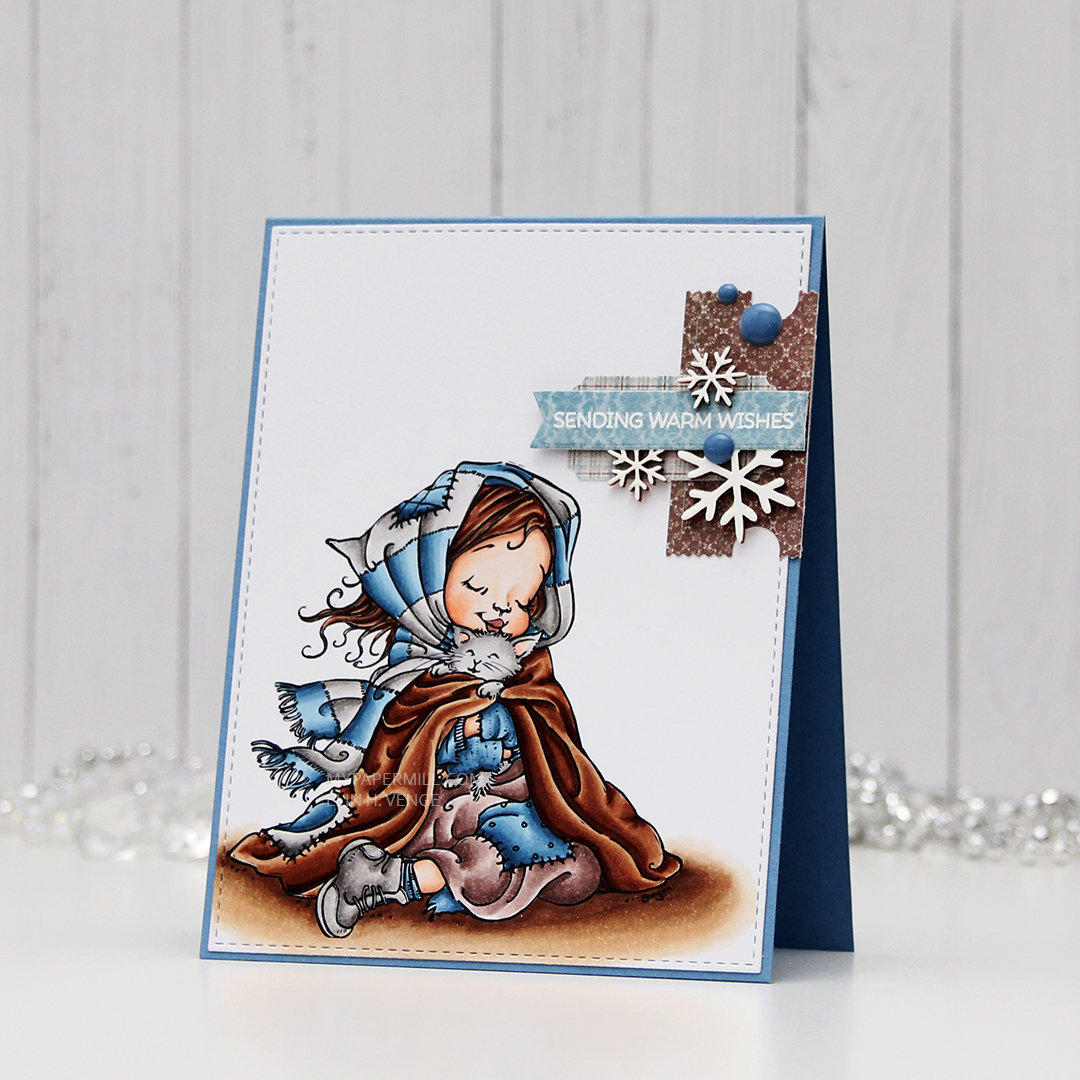 I realized I hadn’t done my signature cluster in quite some time, so I found a few scraps of patterned paper from the Home for the holidays collection from Maja Design and die cut a couple of tickets from the scraps using my Happy Days Ticket Stubs die from XCut. I adhered them to the top right of the card and cut off the excess, before white heat embossing a couple of snowflakes from Crafty Moly. I white heat embossed part of a sentiment from the Oh penguin tree stamp set from Mama Elephant onto a scrap piece of blue patterned paper, before die cutting it into a banner using one of the fishtail flag frames dies from My Favorite Things. I added that to my cluster with a little bit of dimension behind it, glued a snowflake on top and finished off the card with three blue enamel dots from Papirdesign.
 Kind of a muted color palette for this one. I tried to keep it to a minimum, because there’s a lot going on in that image, and I didn’t want the end result to feel cluttered.
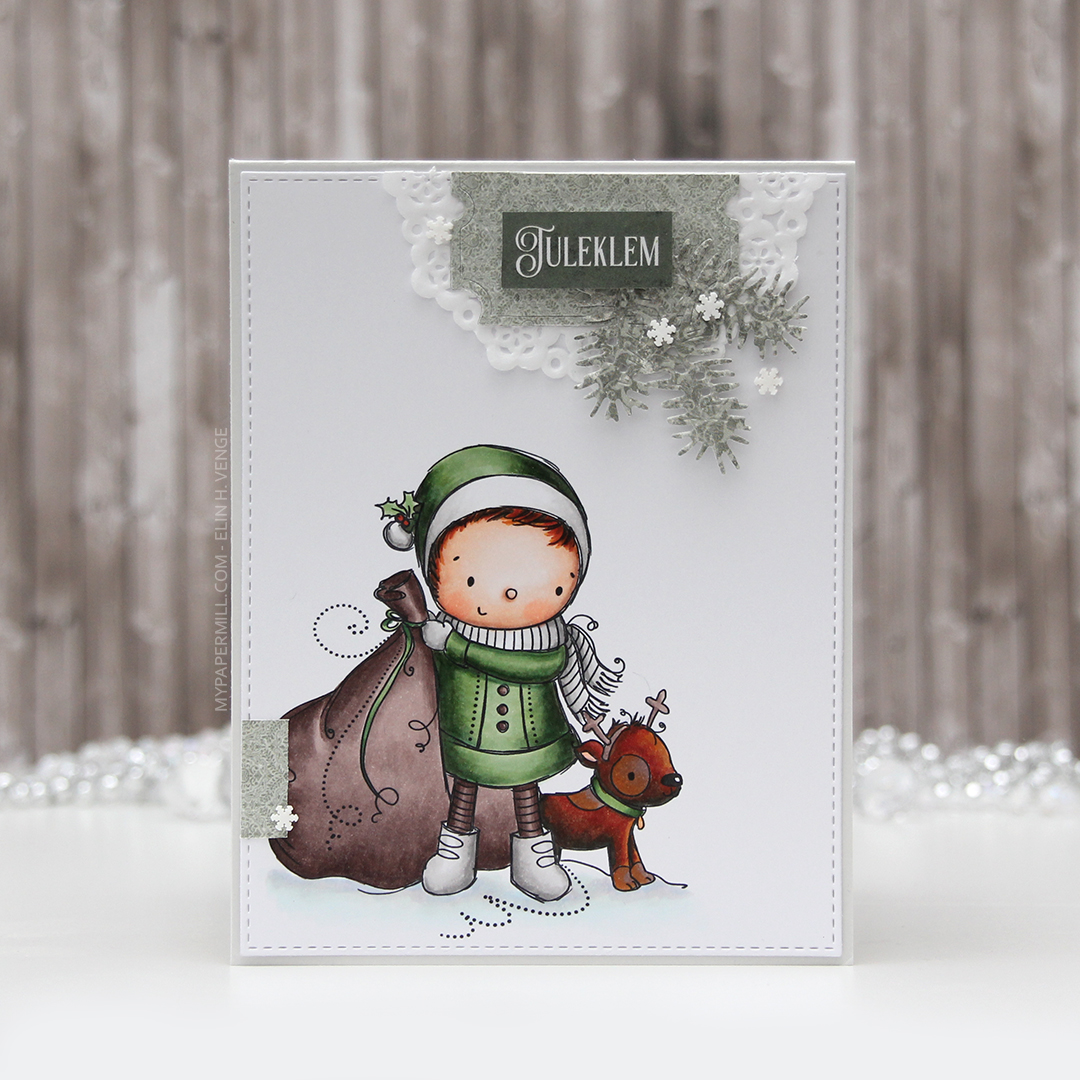 I wanted my cluster with the sentiment to be more to the right than to the left, so I flipped my image in Photoshop to make the boy and the dog look to the right instead of the left, it fit my card better. It’s one of the great advantages of digital stamps.
 Once I’d colored in my image, I used my favorite faux stitch rectangle die from My Favorite Things to turn my colored piece into a panel for the front of my card. I added about half a tiny paper doily from Doodlebug Design, and some die cut scraps of Maja Design patterned paper, before adding a green strip with a word (Christmas hug) from Papirdesign using foam tape.
 I added another little piece of the green patterned paper from Maja Design towards the bottom of the left hand side and glued on a few snowdrift sprinkles from Little Things from Lucy’s Cards, before adhering everything to a card base I made out of Soft Stone cardstock from Papertrey Ink. Easy peasy, lemon squeezy, right?
 I tried to limit the amount of Copics I used on the snow for this one. Only five (plus the blender) isn’t too shabby.
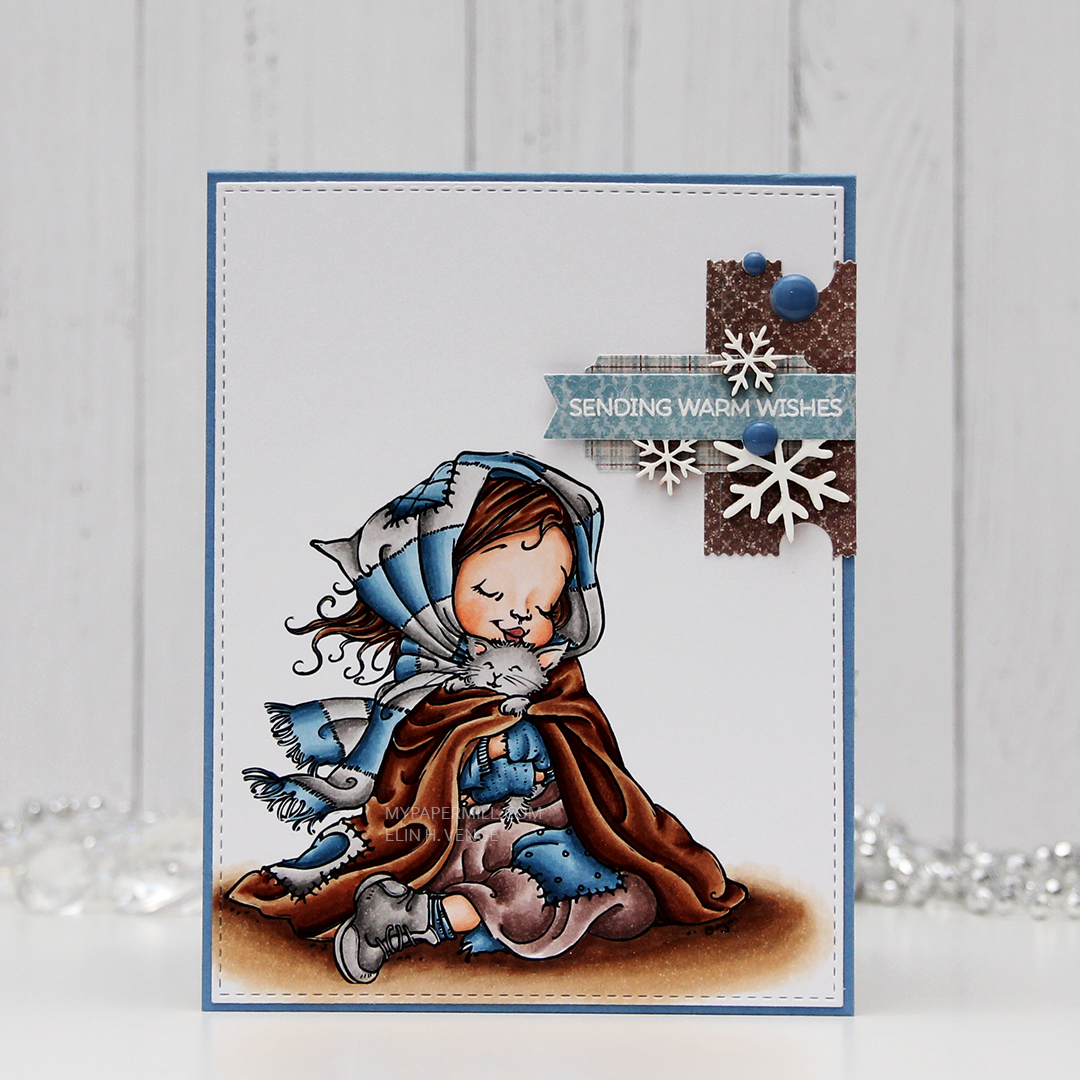
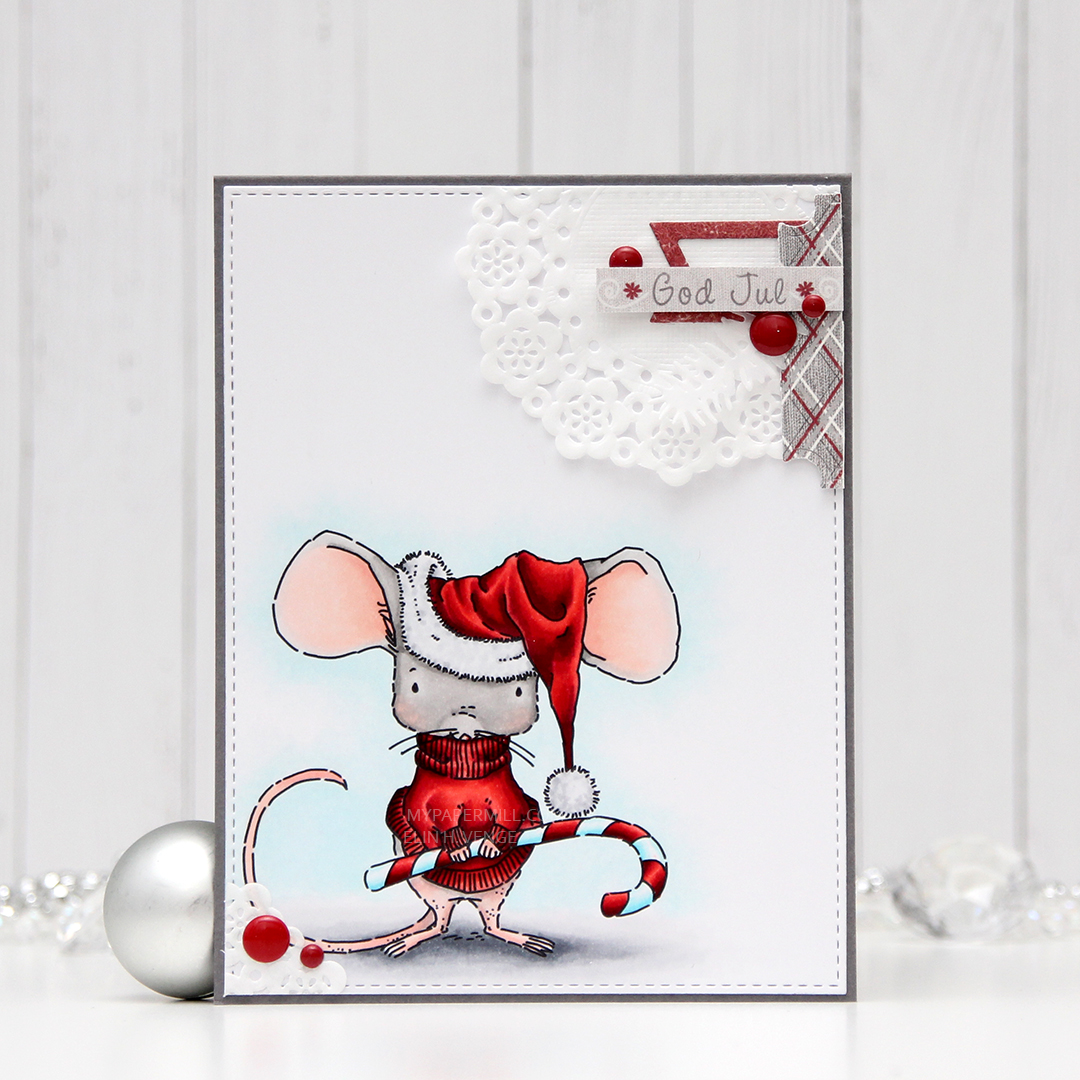 I used a very bright red for the hat and sweater on the mouse, and the only color that really goes with it, in my opinion, is gray. I found some red and gray die cut scraps from a couple of Maja Design collections (Fröjdefull Jul and Joyous Winterdays) and made a little mini cluster in the top right corner.
 I started with a mini paper doily from Doodlebug Design, added a red fishtail flag frame die cut with a die from My Favorite Things, then a piece of a ticket die cut with a Docrafts die. I used some 1 mm foam squares for that. I added my sentiment at the end, which is from one of those strips at the bottom of the 12×12″ papers that you usually cut off. Maja Design has always had some kind of pattern on the back of theirs, which means that nothing needs to go to waste. This one was perfect in gray with a hint of red, and I used 1 mm foam squares to add it. I even doubled up on the foam on the left hand side of it.
 I added some red enamel dots from Papirdesign to finish it off, and glued a leftover piece of the doily to the bottom left corner and an additional two dots. I added my panel to a top folding card base I made from Gravel Gray card stock from My Favorite Things.
 This was a very simple image to color, so obviously I didn’t use a lot of colors.


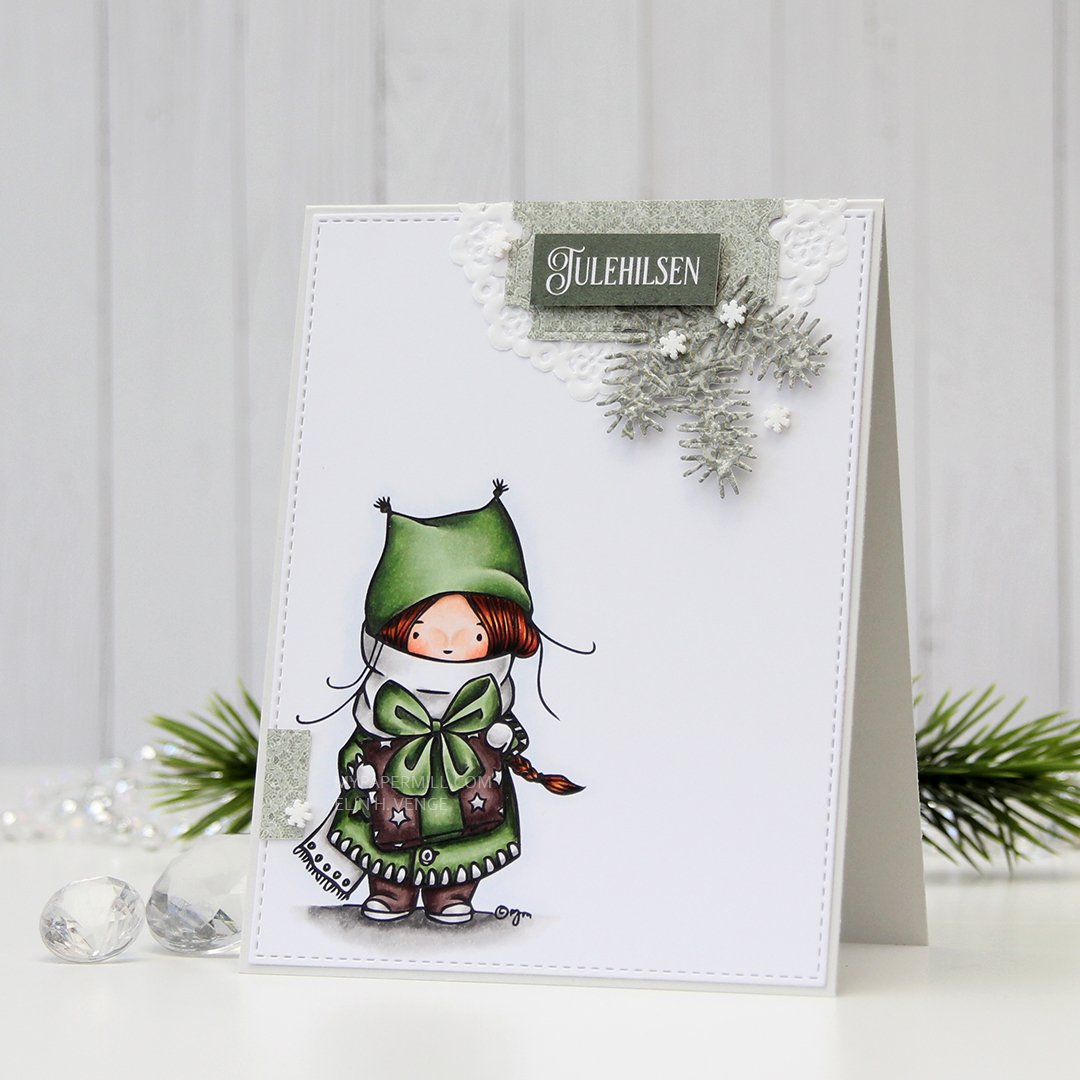 I colored up
  I used the largest of the faux stitch rectangle dies from My Favorite Things to create a nice edge for my panel. I mounted it to a cardbase I made from Soft Stone cardstock from Papertrey Ink.
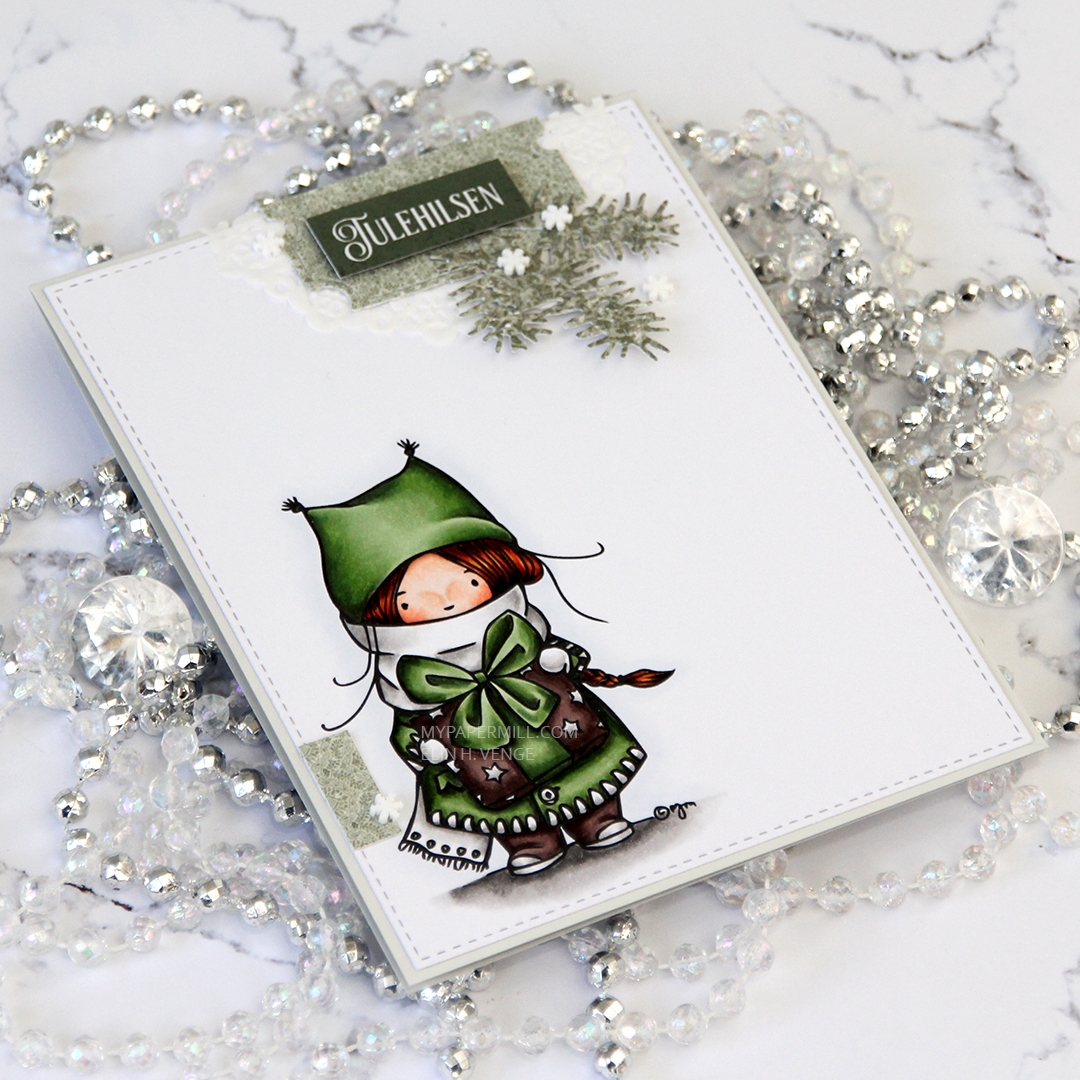 I dug through my scrap stash of Christmas themed patterned paper and got really lucky with part of a diecut ticket and some pine branches.
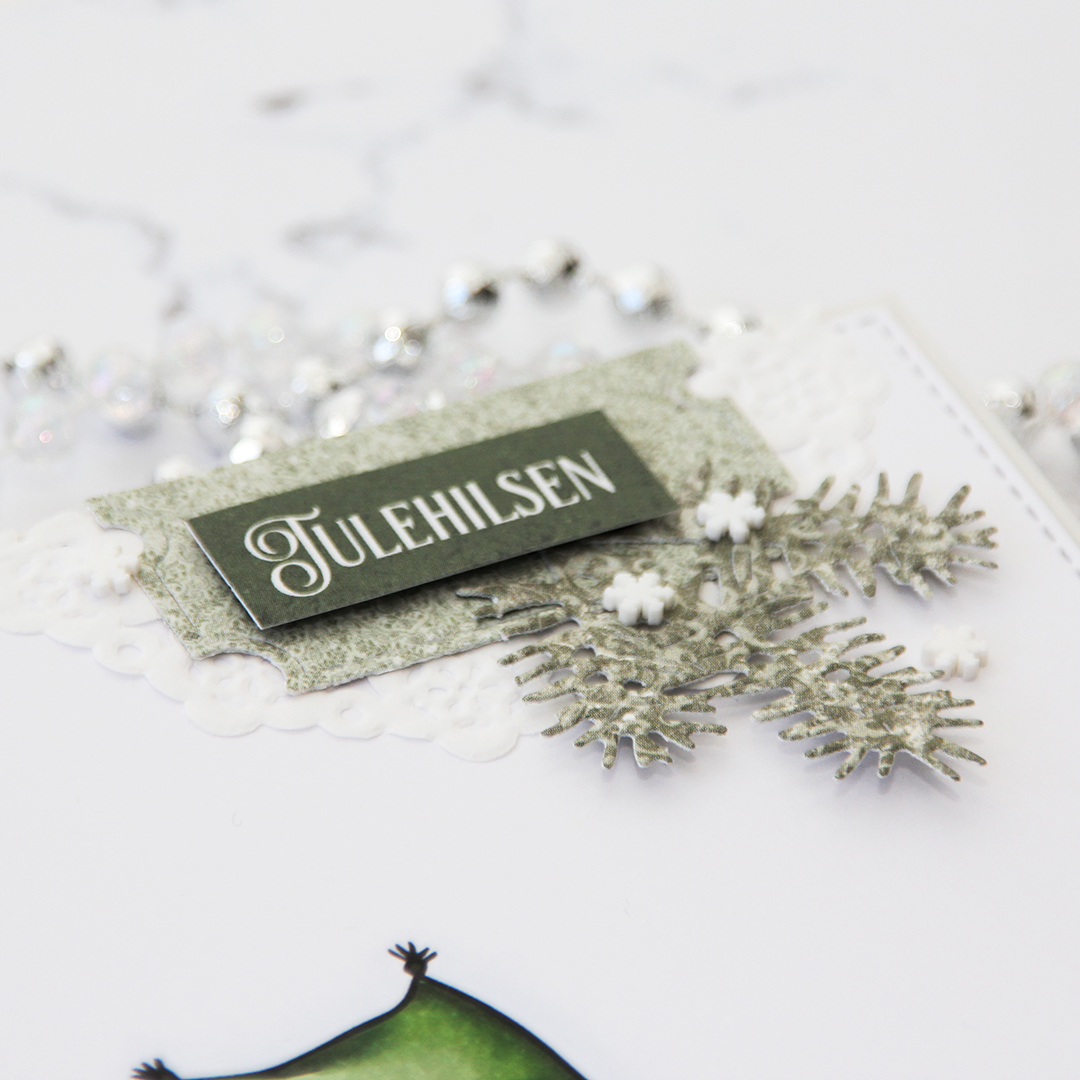 I made a little cluster starting with half a Doodlebug mini paper doily, then the partial ticket stub and the pine branches. I found a fitting sentiment on the bottom of a piece of patterned paper from Papirdesign, so I cut that bit out and added foam tape behind it. I finished the card with a few snowflake sprinkles from Little Things from Lucy’s Cards.