Hi, everyone!
I’ve got a clean and simple card to share today, featuring some very colorful pots of cacti from Streamside Studios.
 “Elin goes overboard with coloring” is a common theme around here, and I used 50 Copic colors to create this little scene. I wanted to keep the focus on the colorful image, so I used a stitched rectangle die from My Favorite Things to diecut my panel and mounted it on Smokey Shadow cardstock from Papertrey Ink. I added a couple of pieces of a mini doily from Doodlebug to opposite corners to soften the look a little bit, before popping up a sentiment from the stamp set onto black foam tape from Gina K.
 All I did for embellishments was add a couple of sparkling clear sequins from Pretty Pink Posh, and my card was complete.
 These are 49 of the 50 Copics I used to color my image. I also used BG71, which is a color I’ve made myself.

 I colored up
  I used the largest of the faux stitch rectangle dies from My Favorite Things to create a nice edge for my panel. I mounted it to a cardbase I made from Soft Stone cardstock from Papertrey Ink.
 I dug through my scrap stash of Christmas themed patterned paper and got really lucky with part of a diecut ticket and some pine branches.
 I made a little cluster starting with half a Doodlebug mini paper doily, then the partial ticket stub and the pine branches. I found a fitting sentiment on the bottom of a piece of patterned paper from Papirdesign, so I cut that bit out and added foam tape behind it. I finished the card with a few snowflake sprinkles from Little Things from Lucy’s Cards.

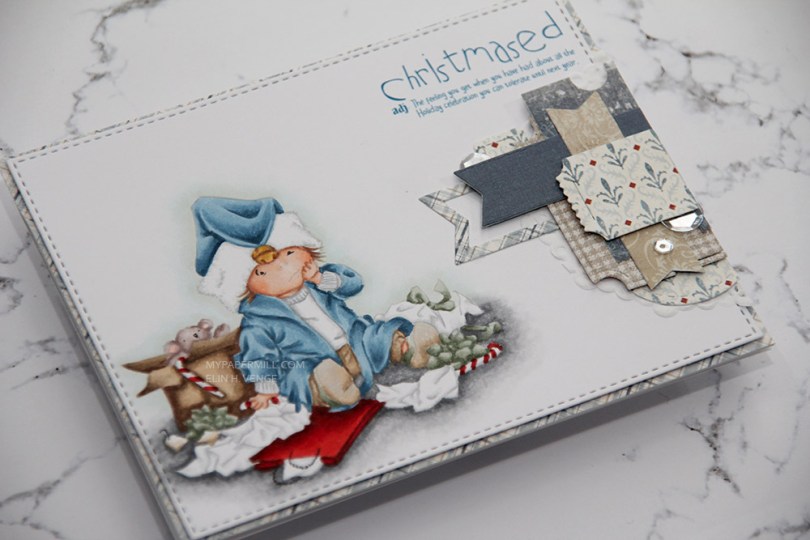
 I diecut the panel with the image using the largest of the faux stitch rectangle dies from My Favorite Things. I glued it straight to a cardbase I created from Soft Stone cardstock from Papertrey Ink.
 I added half a Doodlebug Nini doily, some diecut scraps of patterned paper (Papirdesign and Basic Grey, btw) and a white heat embossed Inky Wings sentiment on Papertrey Ink Autumn Rose cardstock. A few raindrops from Little Things from Lucy’s Cards, and my card was finished.
 I colored up
  This type of card has become my signature card style. I haven’t however, used those Doodlebug mini doilies in a while, so it was good to pull out half of one (a little less than half, actually) for this card. I used the Fishtail Flag Frames dies from My Favorite Things to diecut a couple of banners from yellow scraps of patterned paper. The bottom one is from My Mind’s Eye, the top one from Papirdesign. I also diecut the sentiment strip after stamping and heat embossing a sentiment from an old Papertrey Ink stamp set on that piece of Hawaiian Shores cardstock, also from Papertrey Ink. I added to more layers of cardstock behind my sentiment to make it a little more dimensional.
 The last little piece of business was adding some enamel dots. I hardly ever make cards without enamel dots or sequins, and I tend to always place them near the sentiment, it draws in the eyes. Nice little trick for’ya.
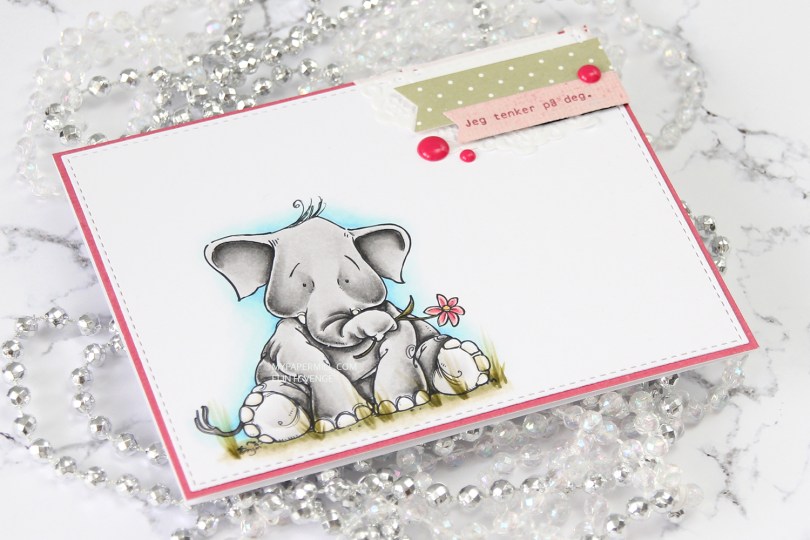
 This is another one that I’ve colored for Kathy Racoosin’s 30 day coloring challenge. I’m getting better at putting my colored images to use. I colored this one for day 13 of the challenge back in March, so this cute little elephant hasn’t had to wait too long.
 I used the largest of the dies in a faux stitched rectangle die set from My Favorite Things to create my panel and glued it onto a scrap piece of patterned paper from Pion Design that I’d already cut to fit the size of my card. I added a cluster in the top right corner, I’ve got part of a Doodlebug doily, a couple of patterned paper banners (also diecut with dies from My Favorite Things) and a few enamel dots from My Mind’s Eye.
 That light pink paper is from the same paper collection from Pion Design as the darker pink (Vintage Garden collection), and the green one with the dots is from Inkido. I stamped a Norsk Stempelblad AS sentiment using Autumn Rose ink from Papertrey Ink, and that finishes my card.
 Lots of greys, greens and even blues for this one, even if the card mostly reads as pink. 3
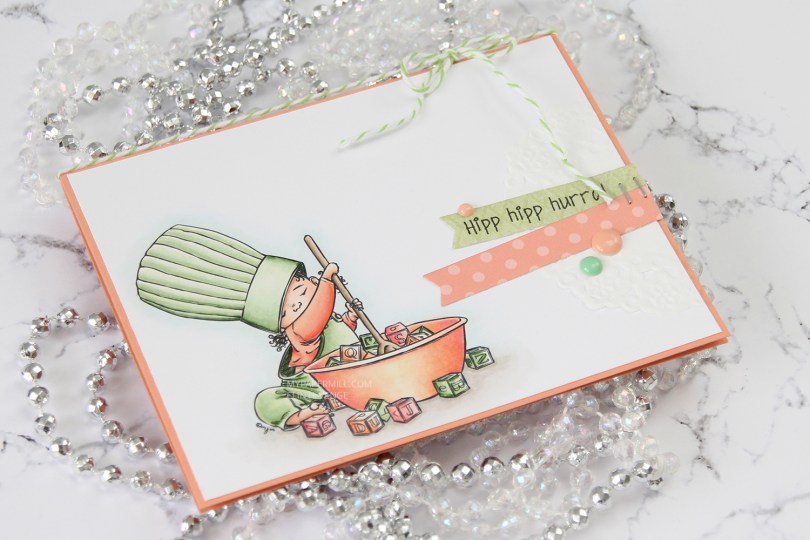
 I printed my image onto X-Press It blending card towards the bottom left corner of a quarter sheet. I colored it in with my Copics, before trimming it down to 5 3/8 x 4 1/8″. I wanted the Melon Berry cardbase from Papertrey Ink to show around the edges, and this size panel creates the perfect 1/16″ border on all four sides.
 If you’ve seen a card or two from me previously, you’ll no doubt know that I’m a fan of adding clusters on my cards. They vary in size and some are simpler than others, but they tend to have three things in common: a piece of a paper doily, fishtail banners and enamel dots or sequins. I also usually put my elements on straight, but this time I went for a less rigid look. I went through my patterned paper scraps and found a green piece from the Vintage Garden collection by Pion Design and diecut it using a fishtail flag frame die from My Favorite Things. I thought I’d have to go for just a piece of cardstock for the other banner, but then I remembered that I have a paper pack from Sunny Studio with pastel colors, and one of them fit perfectly.
 I stamped a Norsk Stempelblad AS sentiment onto the green banner using My Favorite Things Extreme Black ink and stapled the two banners together before gluing them onto the card. I added a string of Green Apple divine twine to the top of the card and a few My Mind’s Eye enamel dots to finish it off. In real life, the green dot looks closer to the greens I used in my image. Photos sometimes lie.

 I printed
  I’m no stranger to adding clusters on my cards, so I pulled out half a paper doily from Doodlebug Design, more scraps of Maja Design patterned paper (the Vintage Summer Basics and Vintage Autumn Basics collections) and diecut a couple of banners using the Fishtail Flag Frames die set from My Favorite Things. I also stamped and white heat embossed a Norsk Stempelblad AS sentiment, before punching it out using my 1″ circle punch from EK Success. I added a pebble on top for an extra bit of dimension.
 I also added some sequins (from the Ice Water mix) and a couple of heart shaped drops (from the Crystal Collection – Glass mix) from Little Things from Lucy’s Cards, and my card was done.
 This is one of Mo’s birthday fairies. Her name is Dee, and you can find it in the store
  I diecut my panel using the largest of the faux stitch rectangle dies from My Favorite Things. I think it’s the perfect size as it creates a 1/16″ border when I add it to my cardbase. The color scheme might not be typical of me, but the layout definitely is. I added half a mini paper doily from Doodlebug Design, diecut some scraps of pink patterned paper to go with my image using another favorite MFT die set (Fishtail Flag Frames) and stamped a Norsk Stempelblad AS birthday sentiment using Papertrey Ink Hibiscus Burst ink. The ink matches the cardstock, which is also Hibiscus Burst from Papertrey Ink.
 I added my banners using foam tape and embellished very simply with some sequins from Pretty Pink Posh. I even used my scissors on one to cut a little bit off and tucked it underneath that sentiment banner. Laura Bassen would be proud, haha.
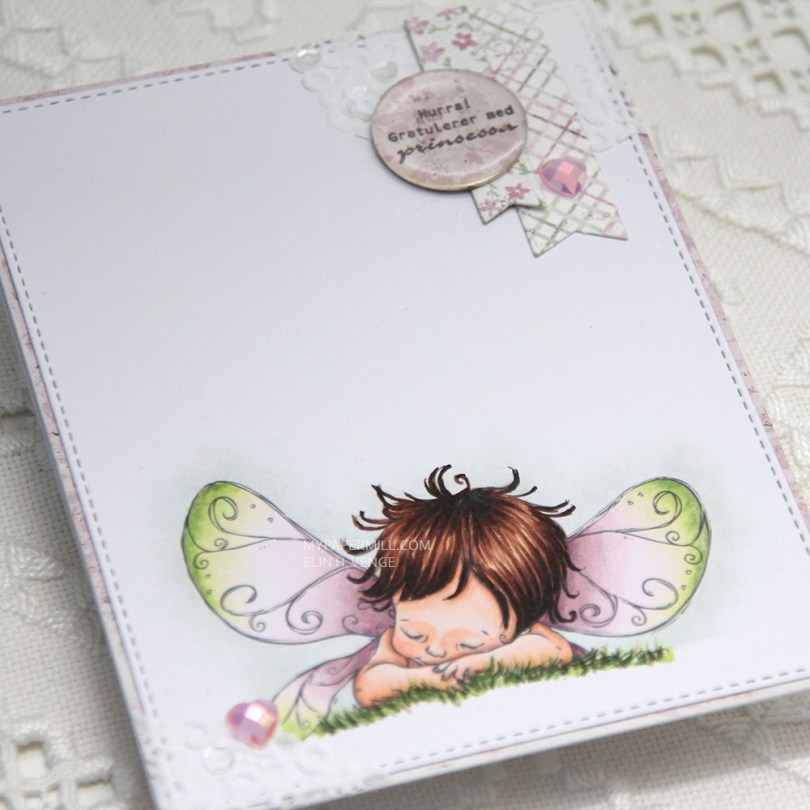
 I printed my image on a piece of X-Press It cut down to 4 1/4 x 5 1/2″. I colored my image with my Copics and used the largest of the stitched rectangle dies from My Favorite Things to cut it slightly smaller.
 I’m also doing my best this year to use scraps of patterned paper. I have a basket of scraps that I’ve cut down to card front sizes, and I realized pink is the color I have the most of, which was the reason for my color choice today. I found a pink scrap in the basket that I wanted to use, colored my image in matching colors and took a bit of a dive into my smaller scraps to find pieces to use for my cluster. The circle with the sentiment is actually cut from the center of the patterned paper I used on the front of this card, which is a scrap from the Vintage Summer Basics collection from Maja Design. The diecut banners are from the Sofiero collection, the colors were perfect for this card.
 I used part of a Doodlebug mini paper doily in the top right corner as a base for my small cluster. I had a tiny bit left over and glued in the opposite corner. I embellished very simply with a couple of hearts from the Rosy Glow mix from Little Things from Lucy’s Cards and sequins from the White Orchid Sequin mix, also from Little Things from Lucy’s Cards. I added an epoxy pebble to the sentiment circle for a little bit of extra dimension and interest.
 I colored my image before diecutting it with the largest of the dies in a stitched rectangle set from My Favorite Things.
 I love the little sentiment that comes with the image. I printed it, along with my image, from Photoshop, making sure that the color would be close my blue Copics. The color of the sentiment is actually B99, which I didn’t end up using to color my little guy.
 Lots of little details in this image, requiring the use of lots of colors!