
It’s Christmas!!! Dinner and lots of presents opened yesterday, and a new card today. A simple one this time too, featuring Little Elf Kippa from Mo Manning.
 I’m still working through my Christmas images with no line coloring, and I adore this one, she’s so cute balancing those baubles!! Baubles are fun to color too, so all in all, this was a joy to make.
 I ran out of my favorite white cardstock while working on my Christmas cards, so I had to get creative with card bases and patterned paper before I got a new shipment! For this one I used Olive cardstock from Simon Says Stamp, it matches perfectly with the greens in the patterned paper from Maja Design and my coloring.
 I diecut the panel with my little elf using the larges of the faux stitch rectangle dies from My Favorite Things and glued it straight to a piece of Maja Design patterned paper the same size as my card base. I added a piece of a Doodlebug Design mini doily and a couple of banners made from patterned paper scraps. I diecut both banners with dies from the Fishtail Flag Frames set from My Favorite Things, stamped a Huldra designstudio sentiment on one of them and white heat embossed it. As a last finishing touch, I added a few crystal to draw the eye to the sentiment.
 The banner with the sentiment is mounted with 1 mm foam tape, everything else is glued flat, making this a card that will have no trouble going through the mail.
 I managed to include BG90 twice in my little Copic chart, maybe I shouldn’t make my charts when it’s way past bed time??
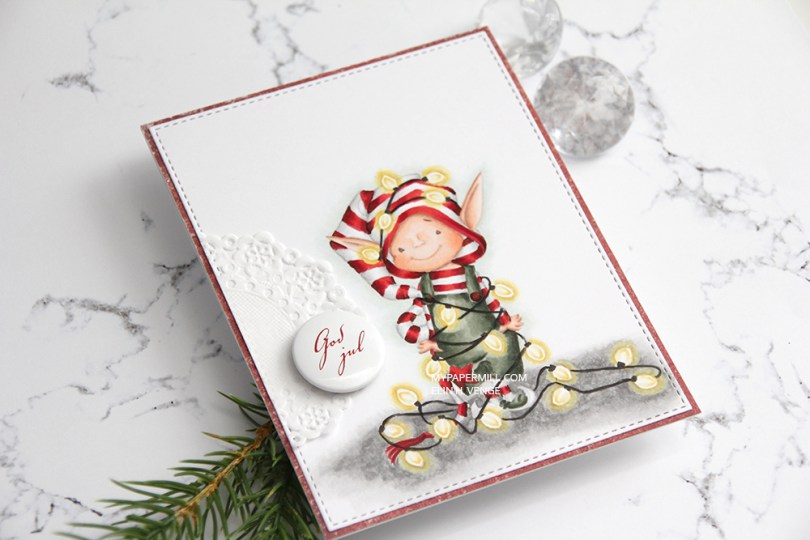
 I went for a no lines version, which is my preferred Copic technique, it makes the image come to life much more than a black lined version ever could.
 I die cut my colored piece with a faux stitch rectangle die from My Favorite Things. I added a red piece of Maja Design patterned paper to my card front and glued my elf panel on top, effectively creating a 1/16″ red frame around my image.
 I wanted to keep the focus on the cute little elf. The best way to do that is to keep it super simple and subtle. I added a piece of a Doodlebug Design mini doily before gluing on a Papirdesign button that says Merry Christmas in Norwegian. That’s it.
 This is a pretty mail friendly card, the only thing that adds a little bulk is that button, everything else is glued on without any dimension.
 I try being good at showing the Copics I used, but sometimes I forget. This time I didn’t.
 I used the largest of the dies from the Stitched Rectangles STAX 2 set from My Favorite Things to diecut the panel with my little guy, just for some subtle detail.
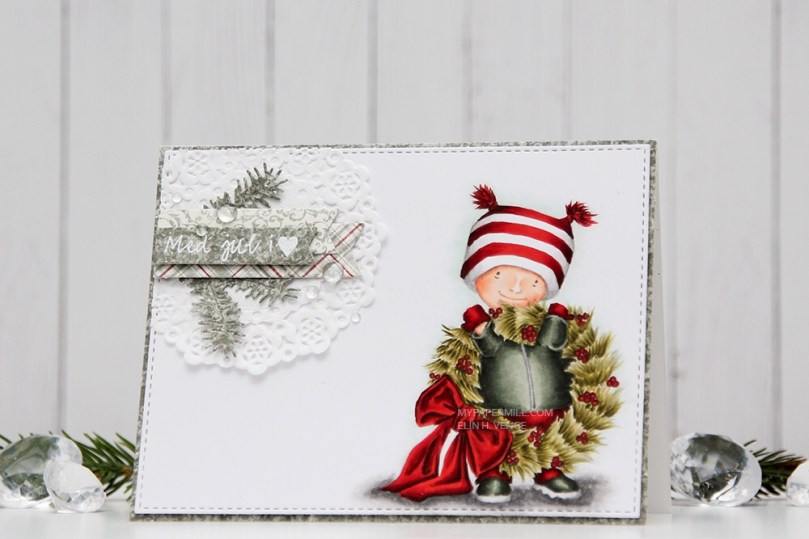 I covered the front of my card panel with a green piece of patterned paper and mounted my faux stitches colored panel with some low foam tape.
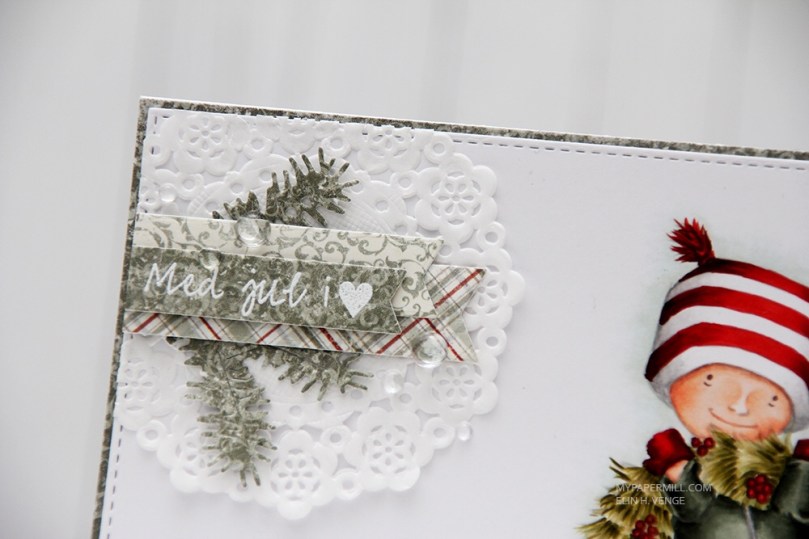 In the top left corner I made a very typical Elin cluster. I started with a Doodlebug Design mini doily for some softness, and made sure I didn’t glue it down completely. The little lift you get by not glueing it down is just enough. I diecut a few branches from that green patterned paper with a couple of CraftEmotions dies, a few banners with a die set from My Favorite Things and stamped a sentiment from Norsk Stempelblad AS that I white heat embossed. I finished with a few raindrops from Little Things from Lucy’s Cards.
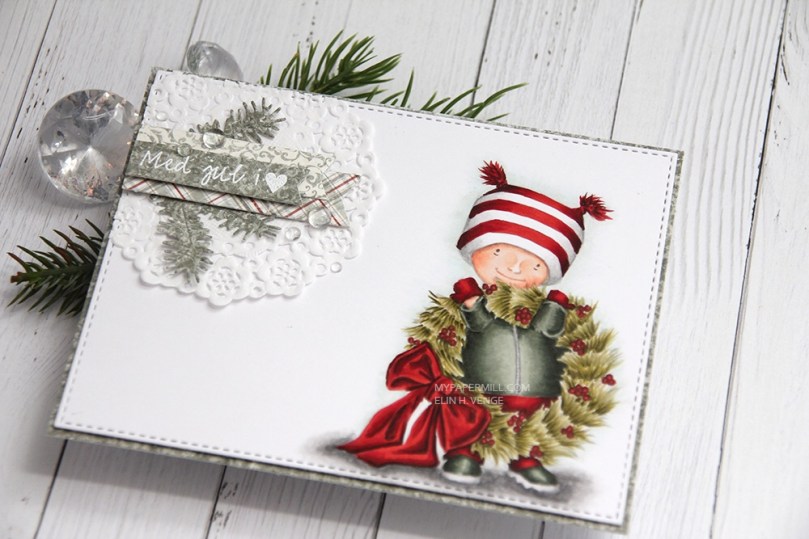 Mostly green and white, with a little hint of red. I’m not a huge fan of red for Christmas, but the combo of this deep brown based red and this grayish, blueish green works for me.

 I put together the floating presents and the image itself from Mo Manning’s
  I used a stitched rectangle die from My Favorite Things to cut out my panel, glued it to a Hawaiian Shores cardbase from Papertrey Ink and added a simple cluster with a sentiment. The cluster is made from a Doodlebug doily, a pink Maja Design monochrome banner, a scrap of yellow patterned paper from Papirdesign and a sentiment banner made using a scrap of patterned paper from Studio Light. I realized after I’d glued my banners on that I hadn’t cut my sentiment banner on the one end like I normally do, so my banners are a little longer than normal, but once I realized they were already glued down, and I was not about to start over. I added a few clear crystals from Little Cards by Lucy, and that’s my card for today.
 Lots of colors used on this one, even though it might not look like it.
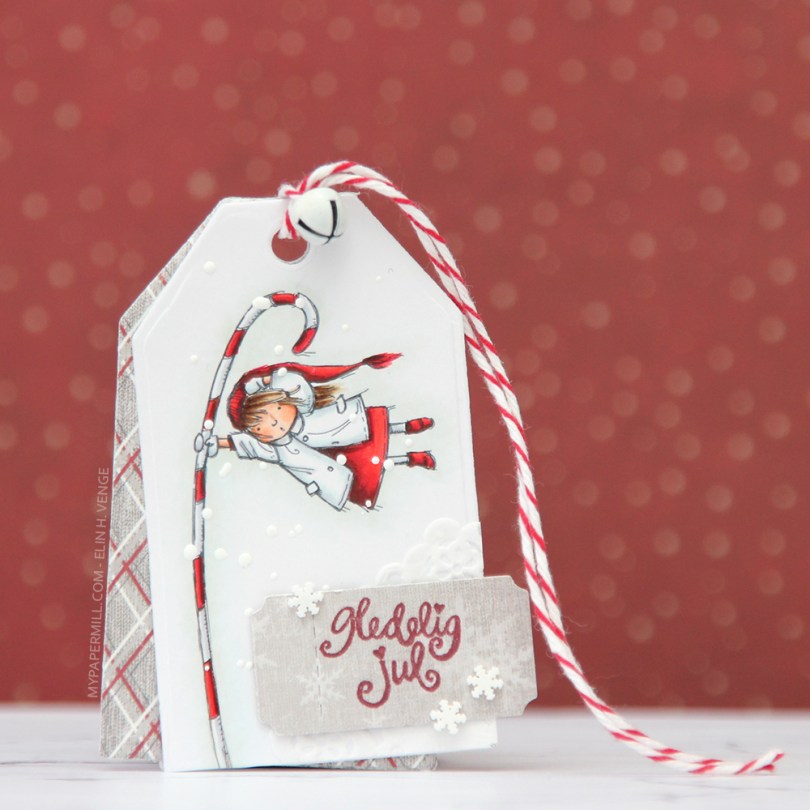
 I’ve made a tag for a Christmas present with the adorable
  I added snow with chunky white embossing powder, glued on the corner of a small paper doily and a diecut ticket stub from patterned paper on top of that with some 1 mm foam tape. I stamped a tiny Norsk Stempelblad AS sentiment with Scarlet Jewel ink from Papertrey Ink and decided to also add a few snowdrift sprinkles by Little Things from Lucy’s Cards. I love these tiny white clay snowflakes.
 Gift tags, by nature, need space for names. I stamped another Norsk Stempelblad AS stamp on another patterned paper ticket stub and mounted it to the back my tag using more of that 1 mm foam tape.
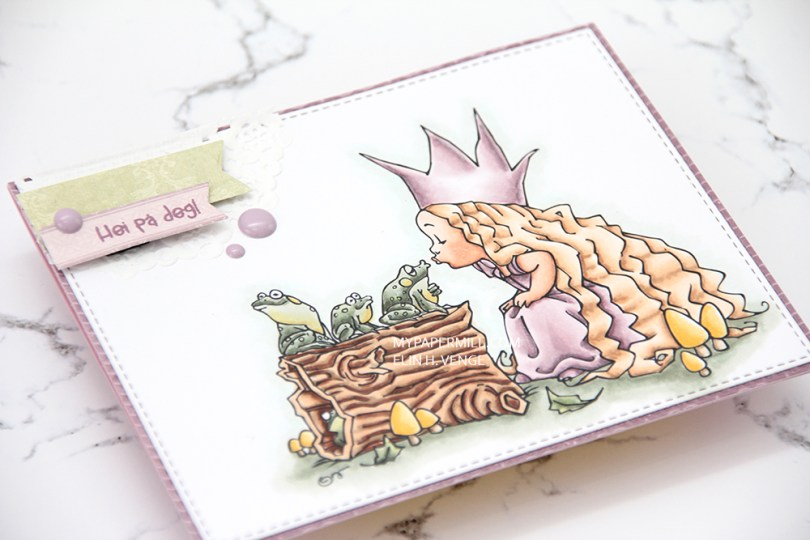
 I’m back! I’m slowly getting back to this paper crafting thing after fracturing my shoulder in April. And now that I’ve started, I’m finding inspiration everywhere. From stamp sets that aren’t my style, from patterned paper that’s not my style, from color combinations in sequin mixes, I just hope it will translate once I actually get around to playing with paper and making stuff.
 I’m rusty, there’s no doubt about that. So rusty, in fact, that I die cut the purple patterned paper behind my main panel instead of the main panel. The result is a slightly smaller card, and hopefully I’ll die cut the right pieces next time. I used Mo’s
  I love the line of frogs waiting to kiss the princess, and the frog peeking out from inside the hollow log is such a great detail!
 I added a piece of a small Doodlebug paper doily in the top left corner, along with some scraps of patterned paper by Pion design that I die cut using a couple of banner dies from My Favorite Things. Stamped a Huldra Designstudio sentiment in Memento Sweet Plum ink on one of the banners, and popped both banners up using foam squares. A few Papirdesign enamel dots, and my card is finished.
 I love how the patterned papers from both Papirdesign and Pion Design match both the soft coloring I did on the image and those purple Papirdesign enamel dots.
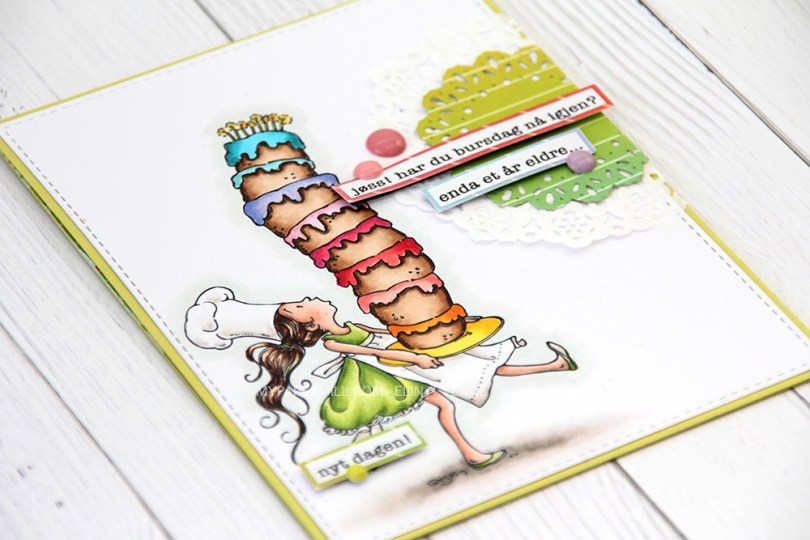
 I wanted a very colorful cake, but had a hard time deciding what color her dress should be (and subsequently what color cardbase I needed). I went with a really bright green. It really is super bright. A Granny Smith apple is pale in comparison, this green is so vivid!
  I recently spent a crafty weekend with some really good crafty friends. I borrowed a die from one of them and a few sentiment strips from another.
 I wanted to use enamel dots that matched the colors of the patterned paper matted behind the sentiment strips. The purple one matches better in real life, purple is a color that’s really hard to get right in photographs.
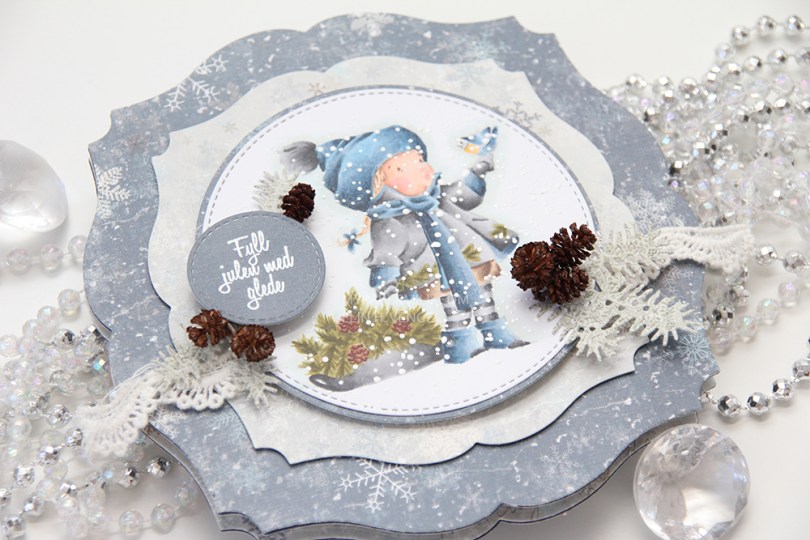
 I printed my image with a low opacity setting in Photoshop and did no line coloring with my Copics. I added chunky white embossing enamel for that wintery, snowy feel.
 The card itself is made by diecutting Maja Design patterned papers from last year’s Christmas collection, using a set of dies from GoKreate. The sentiment from Norsk Stempeblad AS is heat embossed, and I added tiny little cones I’ve picked myself.
 The insde has the same patterned papers, another Norsk Stempelblad AS sentiment stamped in Papertrey Ink Enchanted Evening ink, as well as some heat embossed Huldra designstudio snowflakes, and a Crafty Moly veneer snowflake that I also heat embossed.
 I did the same thing for the back of the card. Sentiment, heat embossed snowflakes and veneer snowflakes for that extra little bit of dimension.
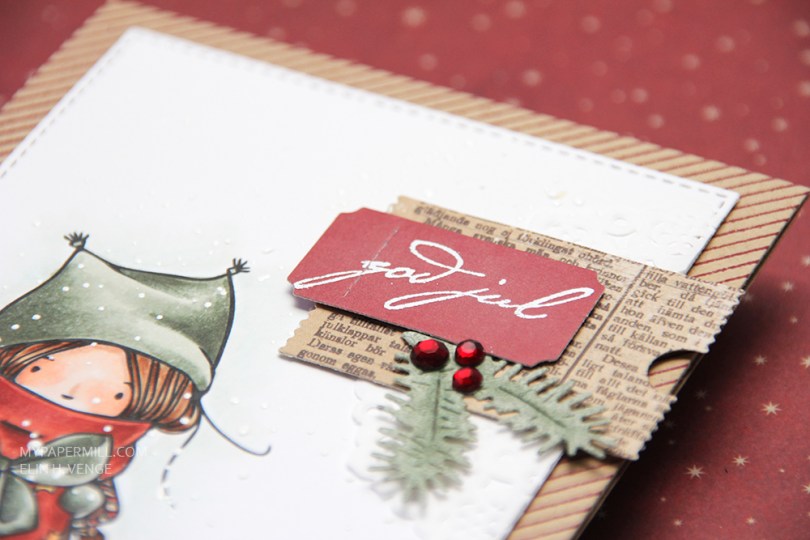
 I chose muted colors with lots of grays in them, diecut my colored panel with a stitched rectangle die from My Favorite Things and sprinkled on chunky white embossing enamel from Stampendous which I heat embossed. It gives the look of falling snow, which I really love for Christmas cards. No pattern, completely random, which really is how snow falls in real life.
 I added my panel to my card base using dimensional adhesive without too much dimension. The card base is Classic Kraft cardstock from Papertrey Ink. I stamped a pinstripe stamp from Altenew across it in Scarlet Jewel ink, also from Papertrey Ink.
 I tend to add little embellishment clusters on my simple cards, and this one is no different. Part of a mini doily from Doodlebug, some patterned paper diecut with a Docrafts die, a ticket with a white heat embossed sentiment from Papirdesign, and diecut pine branches from patterned paper. I added three Papirdesign crystals as a finishing touch.
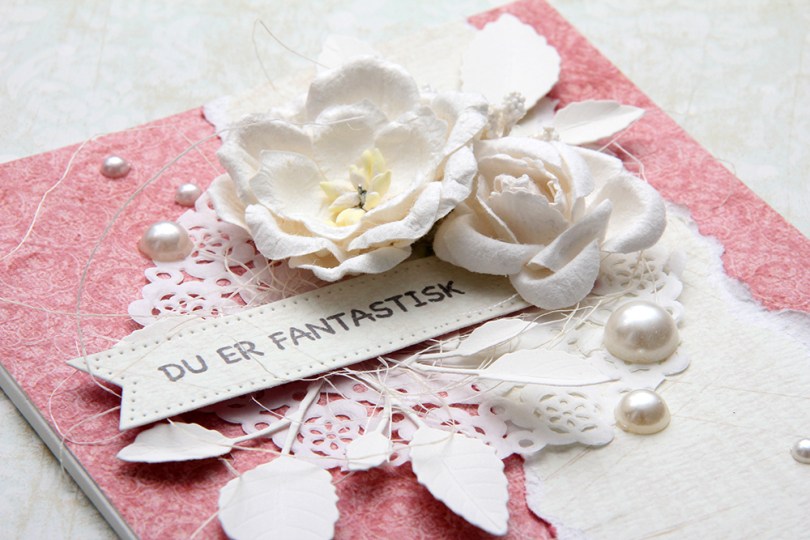
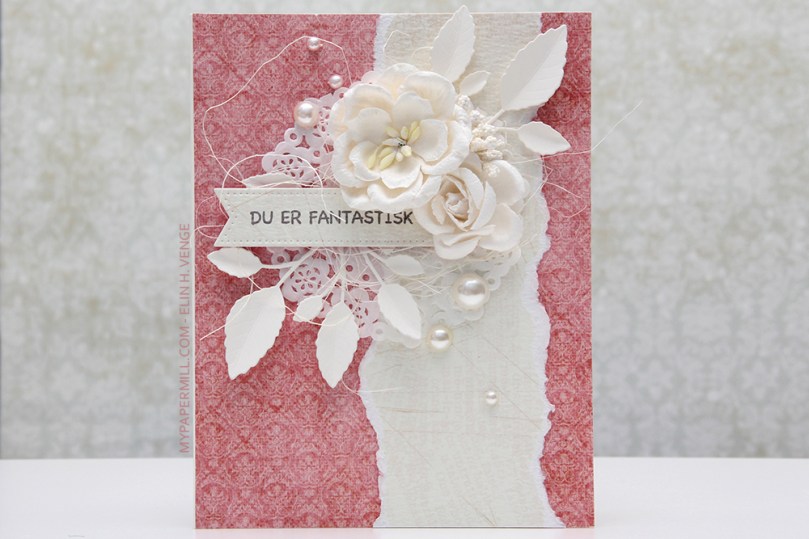 Kortet ble laget da vi hadde en DT-helg i Ett trykk hjemme hos Annie høsten 2016. Og det er på en måte et lite samarbeidsprosjekt, selv om jeg lagde kortet selv (med Camilla som selskap i de sene kveldstimer, resten av teamet hadde gått og lagt seg). Mønsterarkene kommer fra Åshild, blomstene fra Elsi og Camilla, perler fra Camilla, sisal fra Annie, dies fra Cathrine og tekststempel fra Elsi. Kakeservietten var min egen (og muligens også noen av perlene, det er så lenge siden at jeg ikke husker helt). Det var pyntebærene også.
 Det ene mønsterarket er revet i kantene og limt oppå det andre. Banneret har jeg satt på 3D-puter helt i kanten, og innerst under blomstene er det limt rett på kakeservietten.
 Et lite nærbilde. Ved å lime kun stilkenden av bladene innunder banneret får bladene litt 3D-effekt og gir liv til kortet. Det revne mønsterarket og sisalen bidrar også til at kortet virker løst og ledig og ikke så stramt.