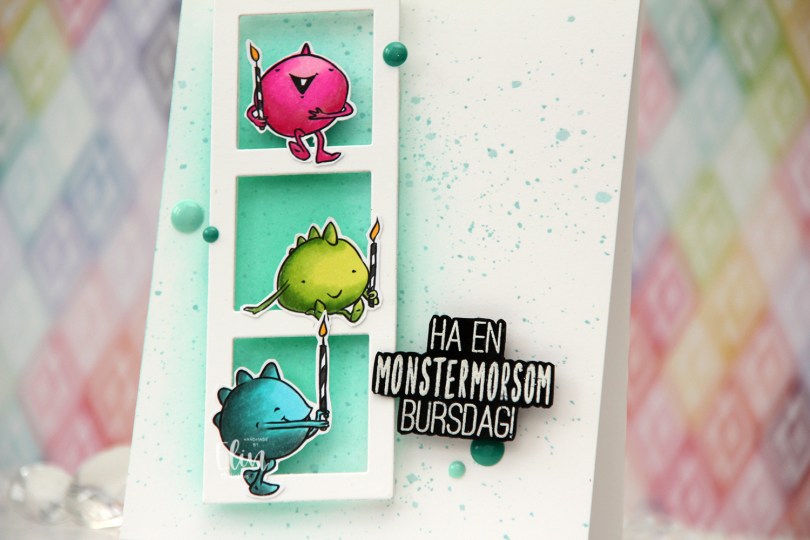
Hi, crafty friends. I have a fun birthday card to share today featuring some cute monsters. These monsters are from the Cupcake Monster set from Mo’s Digital Pencil. The set has a big cupcake monster and seven small monsters, and I chose three of the smaller ones for this card.
 I colored the monsters on X-Press It blending card using my Copics, then fussy cut them all, before putting them aside while I worked on the rest of my card.
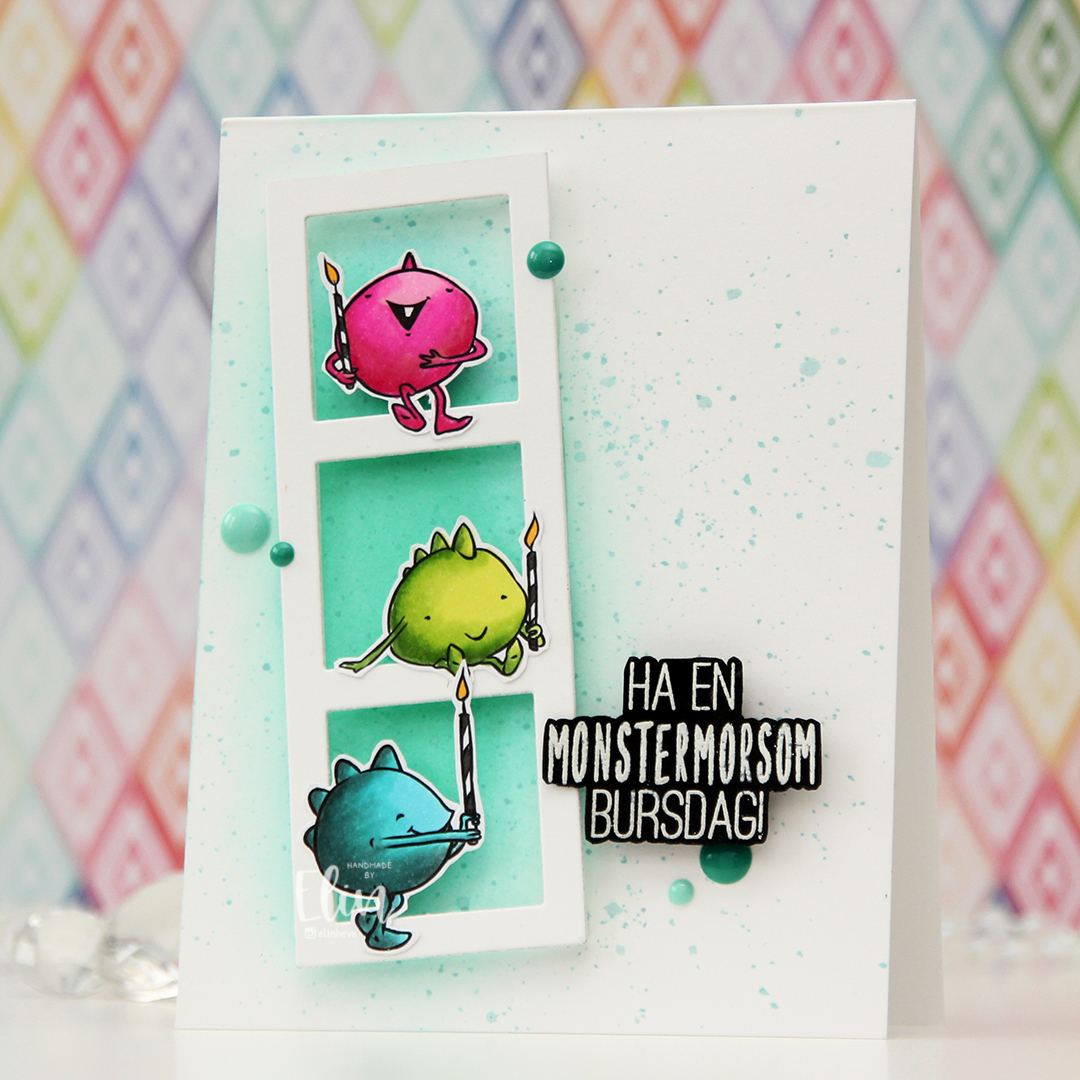 Onto a top fold card base I created from Stamper’s Select White cardstock from Papertrey Ink, I ink blended a section left of center using Volcano Lake ink from Altenew, then added splatter with some watered down Caribbean Sea ink from My Favorite Things. It adds a little bit of interest to what is a pretty plain background.
 I used the Photo Booth Strip die from My Favorite Things to create my little frame. The die leaves a thicker border at the bottom, but I snipped off the bottom bit to make the border even on all sides. I die cut it twice for strength, then decided to add Crystal Clear Double Thick foam tape from The Rabbit Hole Designs on the back. This creates a lot of dimension, and it also gives an airy effect that you don’t achieve by stacking die cuts (which was my original plan). I added my frame at an angle on top of the ink blending, then put the monsters on the frame.
 I white heat embossed a sentiment from Huldra Designstudio onto a piece of True Black cardstock from Papertrey Ink. I fussy cut around it and used the same foam tape on the back of this to pop it up, before finishing off the card with a few enamel dots from the Sea Shore mix from Altenew, which matches my blended background perfectly. So does the envelope I used, which is also Volcano Lake from Altenew.
 Fun color palette for this one.

 I colored the image with Copics, and after a couple of cards recently with very muted, vintage colors, I went super bright with this one. I love penguins done with BGs instead of grays, it’s like they’re happier, somehow.
 I stamped and white heat embossed a sentiment from Huldra Designstudio directly onto my card base, which I made from Oceanside cardstock from Concord and 9th.
 Above and below the colored panel, I added strips of patterned paper from the Party Patterns paper pad from My Favorite Things, before mounting it all on foam tape for dimension. I finished off the card with enamel dots. The bright green ones are from Papirdesign, the teal and yellow ones from the Cool Summer Nights and Pocketful of Sunshine packs from Altenew. The Papirdesign ones have more dimension to them than the ones from Altenew, which creates a little more variety.
 By using an untraditional color palette and a non holiday sentiment (winter hug), this image can be used for more than just Christmas. I’m thinking this would make a great wintery birthday card.
 Fun colors used for this one!
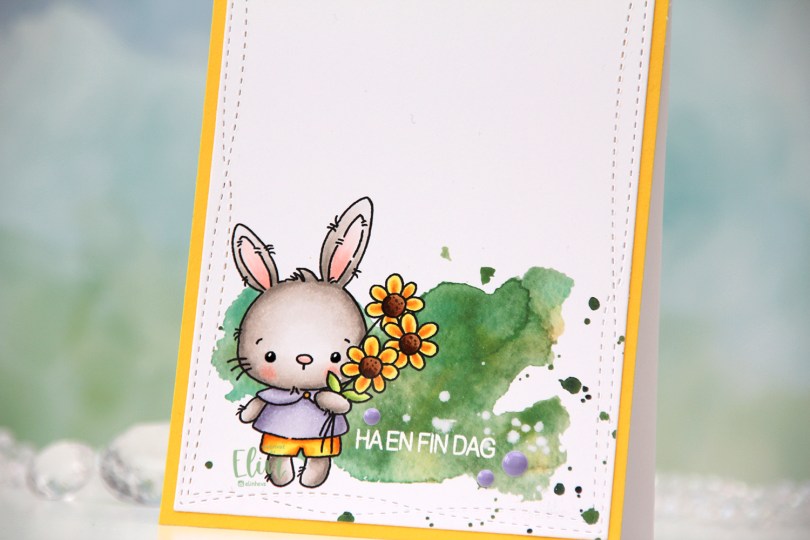
 How adorable is this little bunny holding a bouquet of flowers? I definitely used spring colors for this, and even went complementary with my Copics. I’m not really a fan of complementary colors, so I tend to stay away from them, but it worked for this card. Adding the green watercolor in the background helps too, that way the purple and yellow aren’t competing as much for the attention.
 I die cut my finished panel using the largest die in the Wonky Stitched Rectangle STAX set from My Favorite Things. I then stamped and white heat embossed a sentiment from Huldra Designstudio right onto the green watercolor.
 I adhered the panel onto a piece of Bright Buttercup cardstock from Papertrey Ink, and adhered that to a top fold white card base, also created using Papertrey Ink cardstock. They have the best cardstock!
 To finish the card I added a few enamel dots from the Enchanted Garden pack from Altenew, and created shine and a tiny bit of dimension to the bunny’s eyes by first using a black glaze pen, then a white Gelly Roll 05 once the black was dry.
 The eyes really shine. I love adding these tiny details, especially on cards that are this simple.
 I colored the image with Copics, die cut the word HURRA from my panel using a die from Kort & Godt and the largest die in the A2 Stitched Rectangles STAX 2 set from My Favorite Things for the faux stitching to frame the image. I printed a second image to put behind, so the ball of yarn is continuous throughout the word.
 I adhered my panel to an A2 card base I created from Berry Sorbet cardstock from Papertrey Ink. Onto a strip of the same color cardstock, I stamped and white heat embossed a sentiment from Huldra Designstudio, added a couple of additional layers of cardstock behind it for dimension and embellished with a couple of sequins from Pretty Pink Posh to finish the card.
 Another Wednesday, and another Mo Manning creation. I’m trying to be better at using all the different images I have from Mo’s Digital Pencil, and I’ve kind of started at the beginning of the alphabet when coloring up previously unused images. I colored up this one for Kathy Racoosin’s 30 day coloring challenge back in June 2018, so it’s about time
  This isn’t exactly the easiest image to add to a card. I decided to stamp and heat emboss a couple of sentiments from a Huldra designstudio stamp set. The top one says Good luck… and the bottom one says “with new challenges”, which I thought was very fitting with the image. That red cardstock is Pure Poppy from Papertrey Ink, and I added foam tape behind both strips to create a little bit of dimension.
 I added the colored image to the center of the card front and a strip of Kaisercraft patterned paper (P214 Periwinkle) on either side. I topped everything off with a few blue enamel dots from Papirdesign.
 Det er ingen tvil om at jeg liker å lage enkle kort, men mine enkle kort er ofte ikke så enkle som man skulle tro ved første øyekast. Dette er et sånt kort. Jeg startet med å stemple monstrene fra
  Jeg lagde bakgrunnen ved å maskere alle fire kantene, før jeg gikk inn med forskjellige farger Distress Ink med
  Mer pirkearbeid. Jeg stanset ut en
  Til slutt gjensto kun å lime fast monstrene med 3D-puter og å få på en hilsen. Jeg stemplet og embosset en
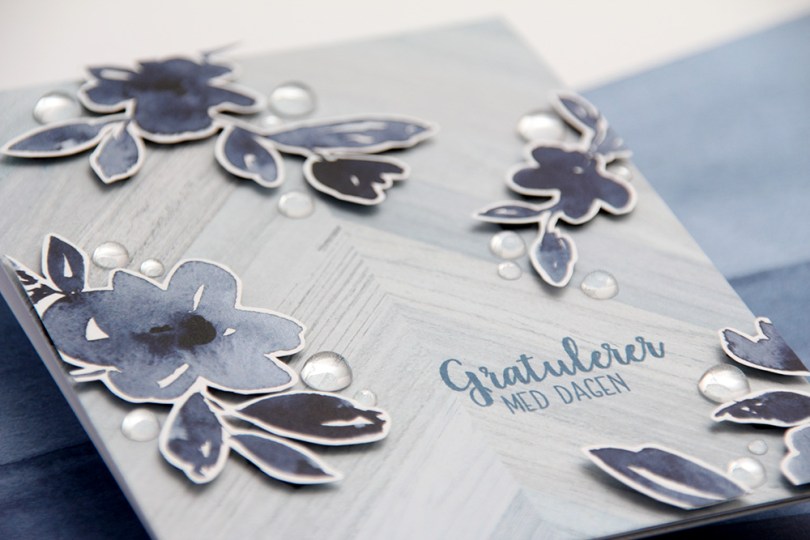
 Utrolig nok er det faktisk kun ett mønsterark som er brukt på dette kortet. Den lysere, mer diskrete bakgrunnen er nemlig baksiden av mønsterarket med alle blomstene.
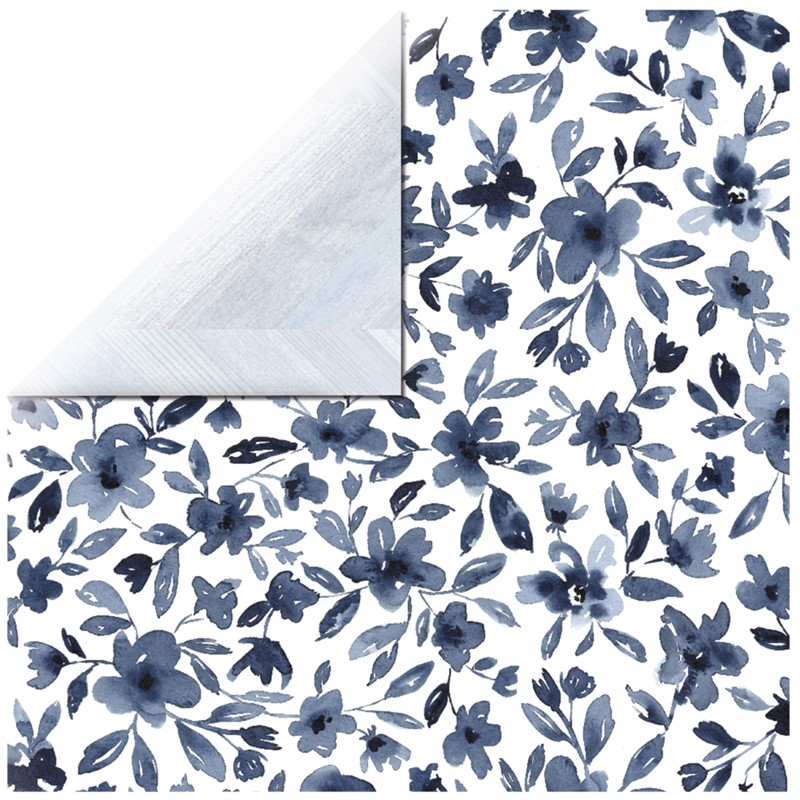 Jeg bestemte meg for å klippe rundt noen av blomstene og bruke dem som elementer på kortet mitt. Vanligvis liker jeg å klippe helt til kanten, men stilkene på disse blomstene er ganske spinkle, så jeg syns det var best med en hvit kant rundt for å spare meg for mye trøbbel.
 Jeg satte lave 3D-puter bak blomstene mine og monterte dem der jeg ville ha dem på kortet. Nede i det høyre hjørnet ser du også at jeg har brukt det jeg hadde til overs på innsiden, der har jeg riktignok kun limt det rett på uten 3D-puter bak, med en tynn strimmel av det lyseblå tvers over nederst på innsiden. Tekststempelet på fronten kommer fra Fleksitekstplaten til Huldra designstudio og er stemplet med Papertrey Ink Enchanted Evening blekk. Den er egentlig ganske mørk, men mulig jeg burde ha gått for en farge som er enda mørkere, jeg syns den ser litt blass ut mot det mørkeste i blomstene.
 Her syns det godt at blomstene sitter litt opp fra fronten av kortet. Jeg har brukt svarte 3D-puter, syns de ofte er bedre å bruke enn hvite, de er nemlig mindre synlige fra siden.
 Til slutt limte jeg på raindrops fra Little Things from Lucy’s Cards i forskjellige størrelser rundt blomstene mine. Vanligvis setter jeg småpynt som dette rundt teksten, to under og en over, men her har jeg fokusert på blomstene istedenfor. Pynten gjør at øynene dras mot blomstene, og gratulerer-teksten blir mer som et bakgrunnselement.
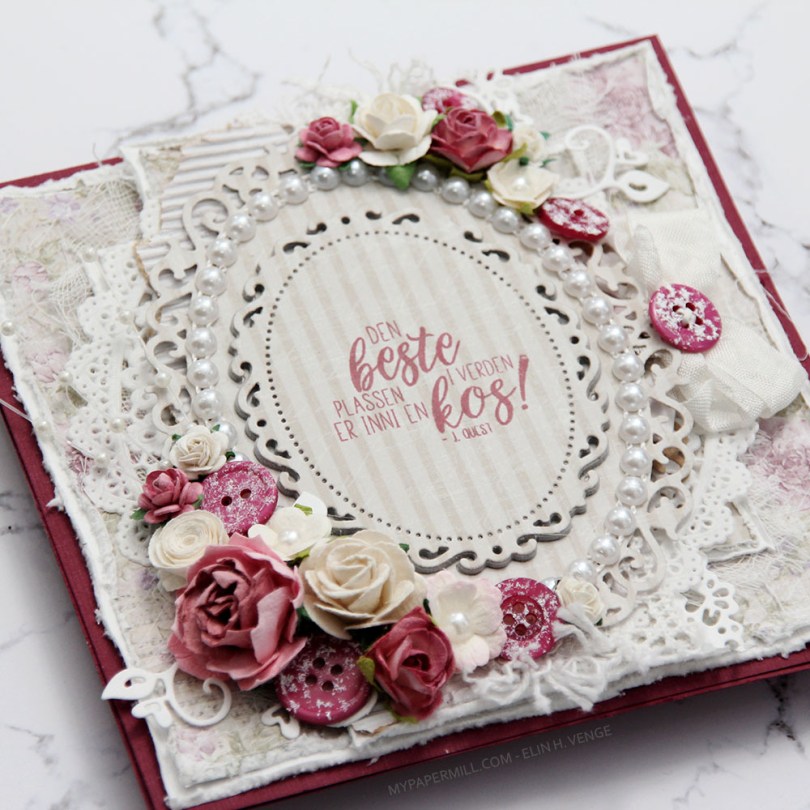
 Jeg var innom Hobbykunst i januar og fikk en utfordring om å bruke et
  Teksten er et stempel fra
  Kortet ble ikke veldig postgangvennlig, det er ganske tykt, selv om jeg kun har pyntet forsiden. Det var nemlig ikke nok igjen av arket til å bruke inni og bak. Sløyfen med knapp sitter fast i en tag som er under hovedpanelet. Teksten på tagen er også et Huldra-stempel. Hvilket kan du se i Hobbykunst-butikken, der er nemlig kortet.
 Jeg stemplet blomsterstempler fra Larger Than Life-settet til Papertrey Ink rett på kortbasen med rosafargene som er i Rose Petal-settet med stempelputer fra Altenew (fargene Cosmic Berry, Purple Wine, Puffy Heart og Rose Quartz).
 Jeg stanset ut et hvitt panel med juksesøm ved hjelp av en die fra My Favorite Things, og stanset ut et vindu fra dette panelet, også med en die fra My Favorite Things. Til slutt stemplet jeg en tekst fra Huldra designstudio med en av fargene jeg brukte på blomstene mine, limte hele panelet på kortets front med 3D-teip og kortet var ferdig. Enkelt, ikke sant?
 I’m still working through my Christmas images with no line coloring, and I adore this one, she’s so cute balancing those baubles!! Baubles are fun to color too, so all in all, this was a joy to make.
 I ran out of my favorite white cardstock while working on my Christmas cards, so I had to get creative with card bases and patterned paper before I got a new shipment! For this one I used Olive cardstock from Simon Says Stamp, it matches perfectly with the greens in the patterned paper from Maja Design and my coloring.
 I diecut the panel with my little elf using the larges of the faux stitch rectangle dies from My Favorite Things and glued it straight to a piece of Maja Design patterned paper the same size as my card base. I added a piece of a Doodlebug Design mini doily and a couple of banners made from patterned paper scraps. I diecut both banners with dies from the Fishtail Flag Frames set from My Favorite Things, stamped a Huldra designstudio sentiment on one of them and white heat embossed it. As a last finishing touch, I added a few crystal to draw the eye to the sentiment.
 The banner with the sentiment is mounted with 1 mm foam tape, everything else is glued flat, making this a card that will have no trouble going through the mail.
 I managed to include BG90 twice in my little Copic chart, maybe I shouldn’t make my charts when it’s way past bed time??