
Hi, crafty friends. There’s a brand new Halloween release out today from Rachelle Anne Miller. Four different images in Rachelle’s adorable signature style. I wanted to create a card with the Trick or Treat Mouse, but I managed to sneak in one of the ghosts from Ghost Greetings too. I really wanted to add something extra to my scene, and vellum ghosts seemed like the natural choice.
 I colored the trick or treat mouse with Copics, and adhered my panel of X-Press It blending card to a top fold white card base I created from Stamper’s Select White cardstock from Papertrey Ink. I used the Boo! stamp from the Itty Bitty Boos stamp set from My Favorite Things to stamp here and there around the scene, with Limelight ink from My Favorite Things, using second generation stamping for a couple of them for a softer look.
 I added a couple of pieces of orange dotted patterned paper from Waffle Flower above and below the image. I put foam tape on the back for dimension.
 I printed the ghosts on Heavyweight Translucent vellum from My Favorite Things and colored softly with Copics on the back of each of them. Colors don’t really blend on vellum, so you don’t need to be precise. You also need darker colors than you want to end up with, because the colors don’t show through all that well. I fussy cut the ghosts leaving a border around the edge and adhered two of the ghosts directly onto the orange patterned paper, using a little bit of liquid glue, before strategically placing enamel dots from Papirdesign on top, so the glue wouldn’t show through.
 I used the Happy die from the Hand-Lettered Happy Birthday dies from My Favorite Things to create my sentiment. I stacked four white die cuts, adhered the last ghost to the y and added a fifth die cut on top. The top layer sparkles in the right light. I used a sheer shimmer craft spray from Imagine, but it doesn’t really show up in photos. It’s subtle in real life too. To finish off my sentiment I white heat embossed another sentiment from the Itty Bitty Boos stamp set from My Favorite Things, this time onto Gravel Gray cardstock from My Favorite Things. I cut it down to a strip, added a few layers behind it for strength and dimension and adhered it to the die cut word, and my card was finished.
 I used quite a few Copics for this card.

 I colored my scene with Copics on X-Press It cardstock and fussy cut right up against the black lines. This image has very simple outlines, making fussy cutting a cinch.
 I covered the entire colored panel with sheer sparkle craft spray from Imagine, it adds so much sparkle, which unfortunately is hard to capture in photos. It’s there in real life, though, trust me. I glued my colored piece onto a thicker white cardstock, both for a bit of stability and to hide the back of the colored panel. Copics bleed through to the back (you want that, it’s actually a sign that you’re using a good cardstock for Copic coloring), and I usually add my panels to card bases, but this one was different. I scored the white cardstock at the bottom and glued the back flap to the back bottom of an A2 card base I created from Lovely Lady cardstock from Papertrey Ink. With hidden magnets between the layers of the card, it stays shut and doesn’t fall open.
 You can see some of the shimmer in this photo, a couple of big droplets fell on the mushroom and the rainbow. I added pearls from the Igloo mix from Little Things from Lucy’s Cards for the mushroom, and used a black glaze pen from Sakura to make the eyes stand out.
 Lots of Copics for this one.
 Isn’t this bunny looking up at the moon and the stars so adorable??? I decided to create a birthday card, and made it very simple with a digital watercolor background, a couple of die cuts and a button. You really don’t need much with images as great as this.
 I colored the bunny and the number with my Copics, before using the largest of the A2 Stitched Rectangles STAX dies from My Favorite Things to create a faux stitch around the edge. From Autumn Rose cardstock from Papertrey Ink, I die cut the word HURRA four times using a die from Kort & Godt. I added my panel to a card base I created from Papertrey Ink Autumn Rose cardstock, added my stacked die cut below the image and used a paint brush with sheer sparkle shimmer spray to add some sparkle to the die cut letters, as well as the moon and the number itself. It doesn’t show up in photos very well, but is very sparkly in real life. I also added a Kort & Godt button that I had in my stash, and my card was finished.
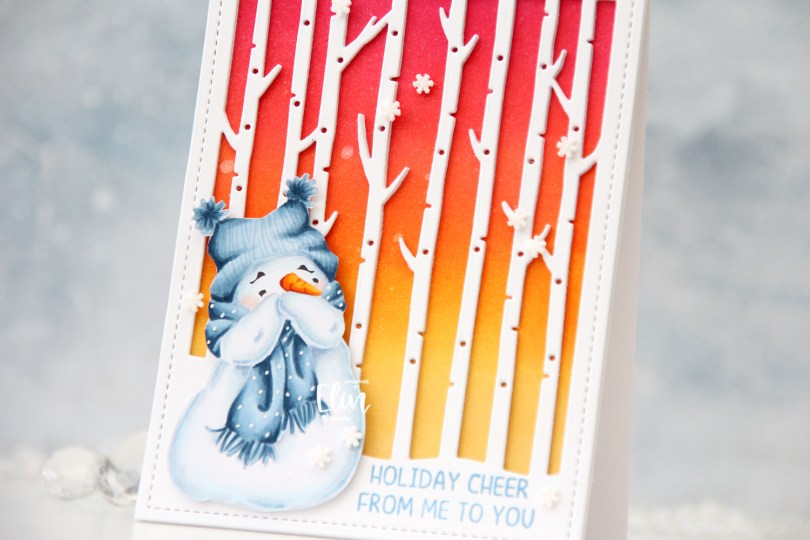
 I opted for some no line coloring this time, keeping his eyes and eyebrows a dark brown before printing. I used my favorite blues and fussy cut him once he was all colored up.
 Directly onto the cardbase I ink blended Distress Ink in the colors Picked Raspberry, Worn Lipstick, Spiced Marmalade and Scattered Straw to create an intense winter time sunset and create some contrast between the cool colors of the snowman and the background. I misted it generously with a sparkle shimmer spray which catches the light nicely when you tilt it, but it doesn’t really show up in my photos (except for a couple of bigger drops). I wanted to ink blend directly onto the cardbase because I knew I was putting lots of layers of die cut cardstock on top, and I didn’t want the card to be too front heavy.
 Speaking of die cut cardstock. I used the Winter Forest Cover die from Mama Elephant to die cut three layers of white cardstock and glued them together for dimension, before adhering the stacked die cuts to the card base.
 I stamped a sentiment from last year’s Stamptember collaboration set from Mama Elephant and Simon Says Stamp using Lazy Day ink from My Favorite Things. I love this blue color!!
 I fussy cut my snowman and adhered him using 1 mm foam squares, before finishing off the card with a few snowdrift sprinkles from Little Things from Lucy’s Cards.
 Very few colors used for this one. B93 and 91 are used both for the snow and for the scarf and hat.


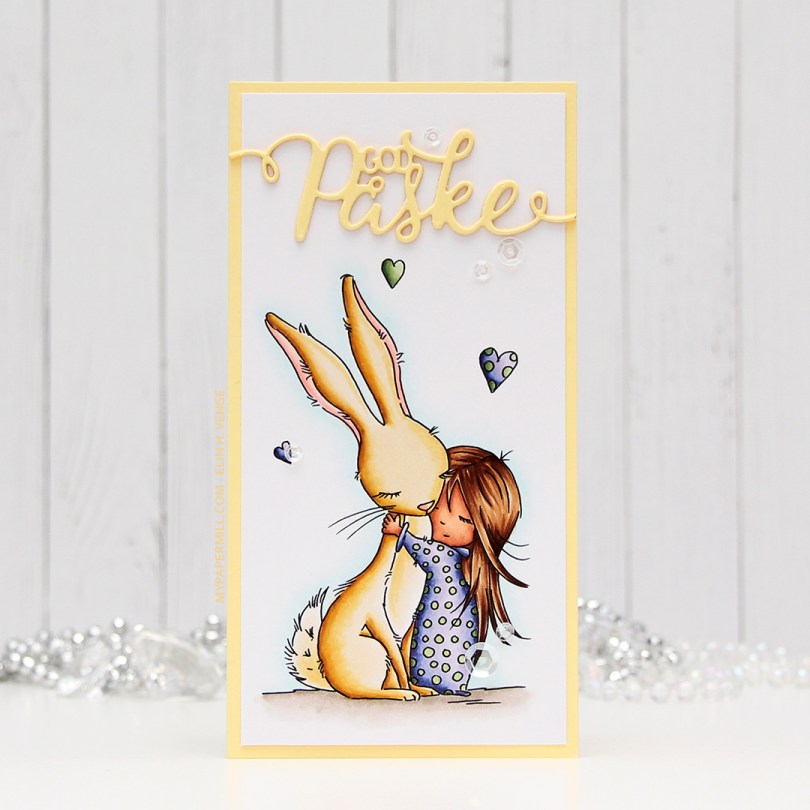
 I wanted a soft look to this, but at the same time, I also wanted to change things up a bit. I went with a darker skin tone than I normally do, and I really wanted a soft yellow bunny. I printed the image onto a piece of X-Press It blending card cut to 3×6″ for a mini slimline card. I adhered it to a card base I made from Lemon Tart card stock from Papertrey Ink with a 1/8″ border. I used the same color card stock to die cut “God påske” (Happy Easter in Norwegian) using a die from Papirdesign. I stacked three die cuts on top of each other and used a sparkle shimmer spray from Imagine to add lots of shimmer to the die cut. It has a really nice shimmer in real life, even though you can’t see it in the photo. To finish off the card I added a few sequins from the White Orchid sequin mix from Little Things from Lucy’s Cards.
 Part of me can’t believe I used five different greens for this one, but that tiny green heart? They all fit in there!
 After coloring the image, I used a die from the nested stitched doily set from Cottage Cuts to turn my colored piece into a circle with some nice detailing along the edge. I die cut two more from white cardstock and added them to the back for a little bit more strength and stability.
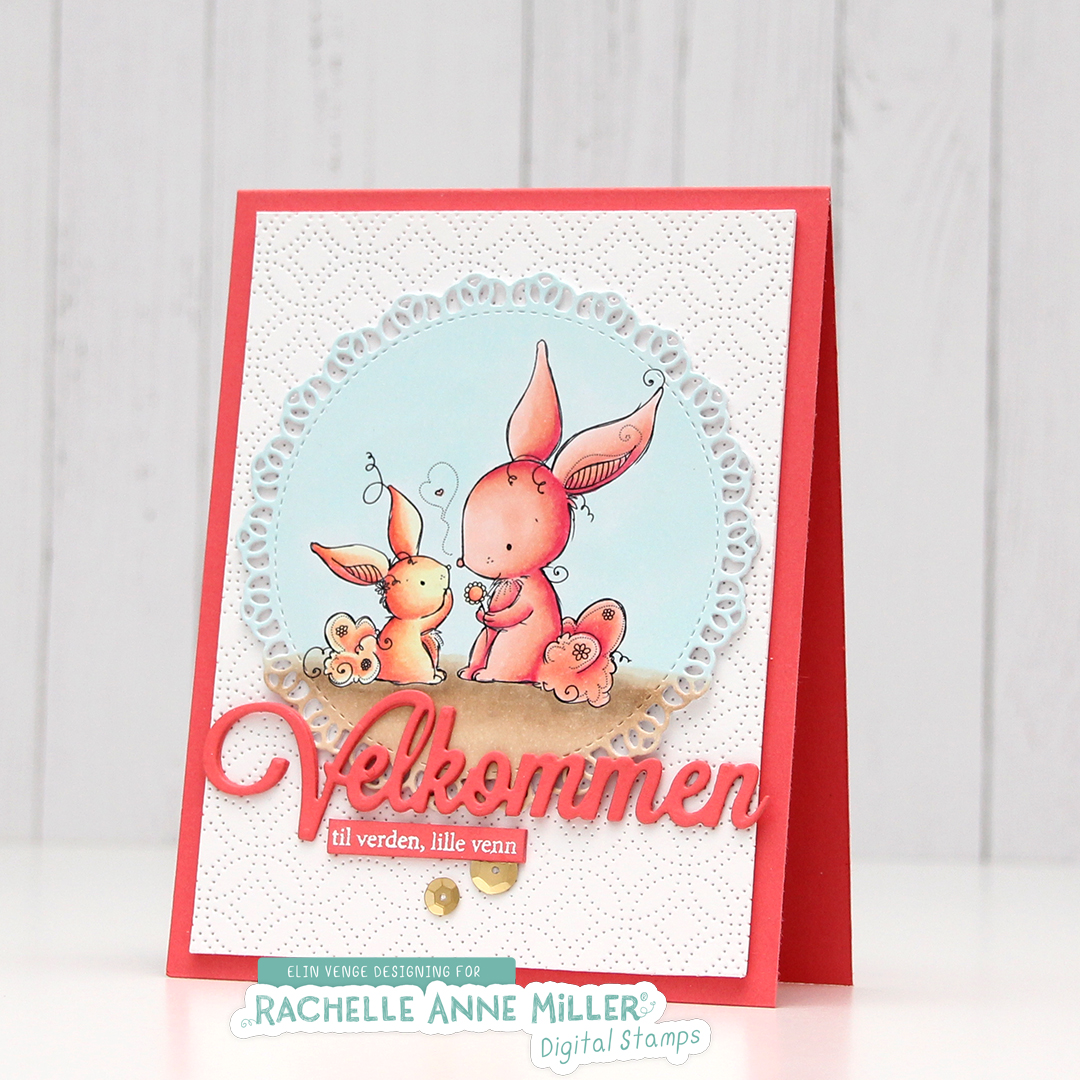 Using the Detail Ringlet Plate from Simon Says Stamp, I created a white panel with subtle texture. I wanted something that wasn’t too plain while at the same time not being too distracting from the image. I cut down four more pieces of white card stock, added them to the back of the die cut one and adhered it to a card base I made from Berry Sorbet card stock from Papertrey Ink.
 A stacked die cut sentiment (die from Papirdesign) and a heat embossed sub sentiment from Norsk Stempelblad AS were added to the front, and finally a couple of matte gold sequins from Little Things From Lucy’s Cards. Before adhering it to the card, I used a shimmer spray on my colored piece, you can sort of see it in this photo, but it’s a lot more sparkly in person.

 I had trouble deciding whether to make a card for a baby girl or for a baby boy, so I decided to go somewhat neutral with a combo of yellow and green. I colored the image with my Copics, added a clear coat of glitter on the green areas using a Wink of Stella glitter brush.
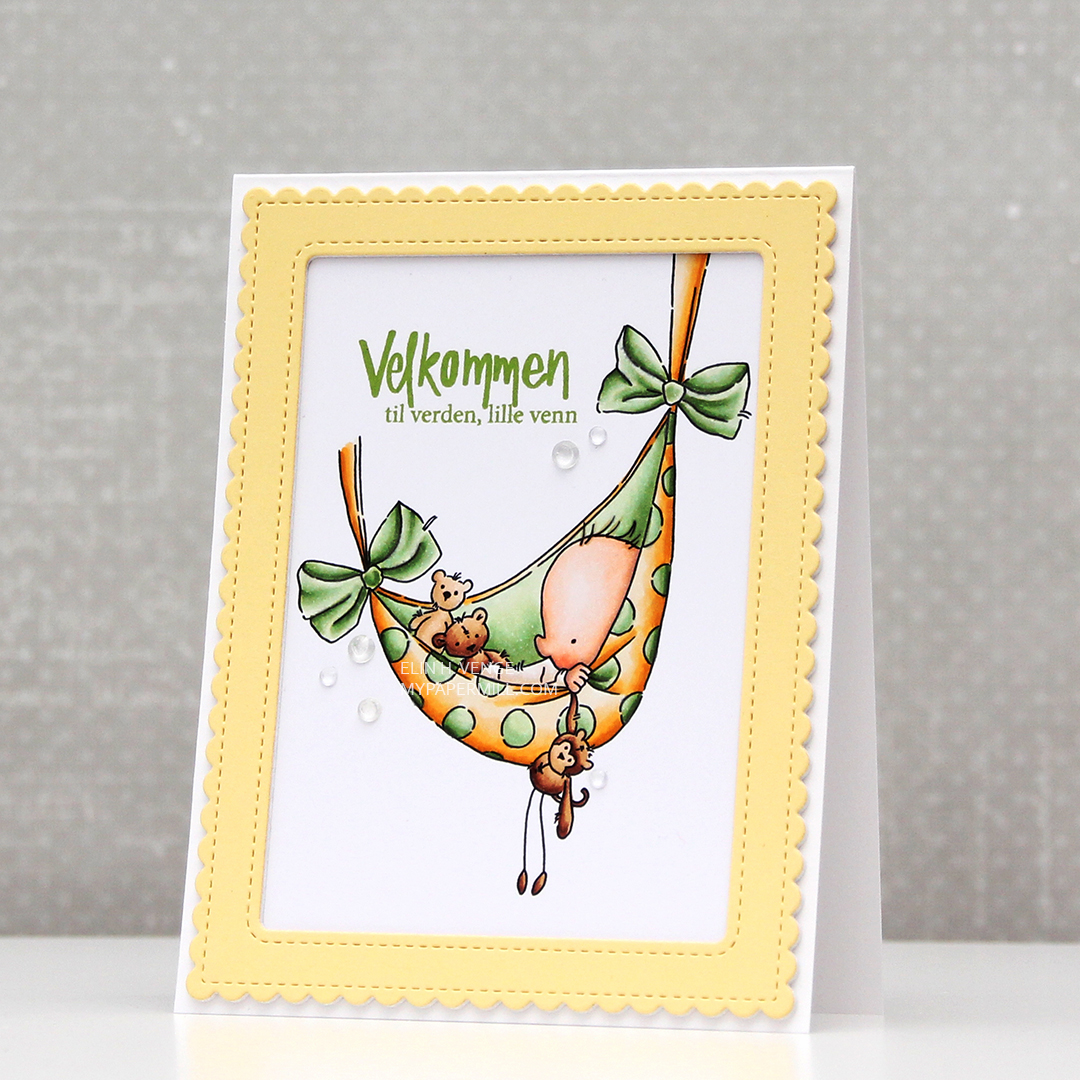 I stamped a sentiment from Norsk Stempelblad AS using Fresh Leaf ink from Altenew, and decided to even add some clear crystals of various sizes from the Crystal Collection from Little Things from Lucy’s Cards.
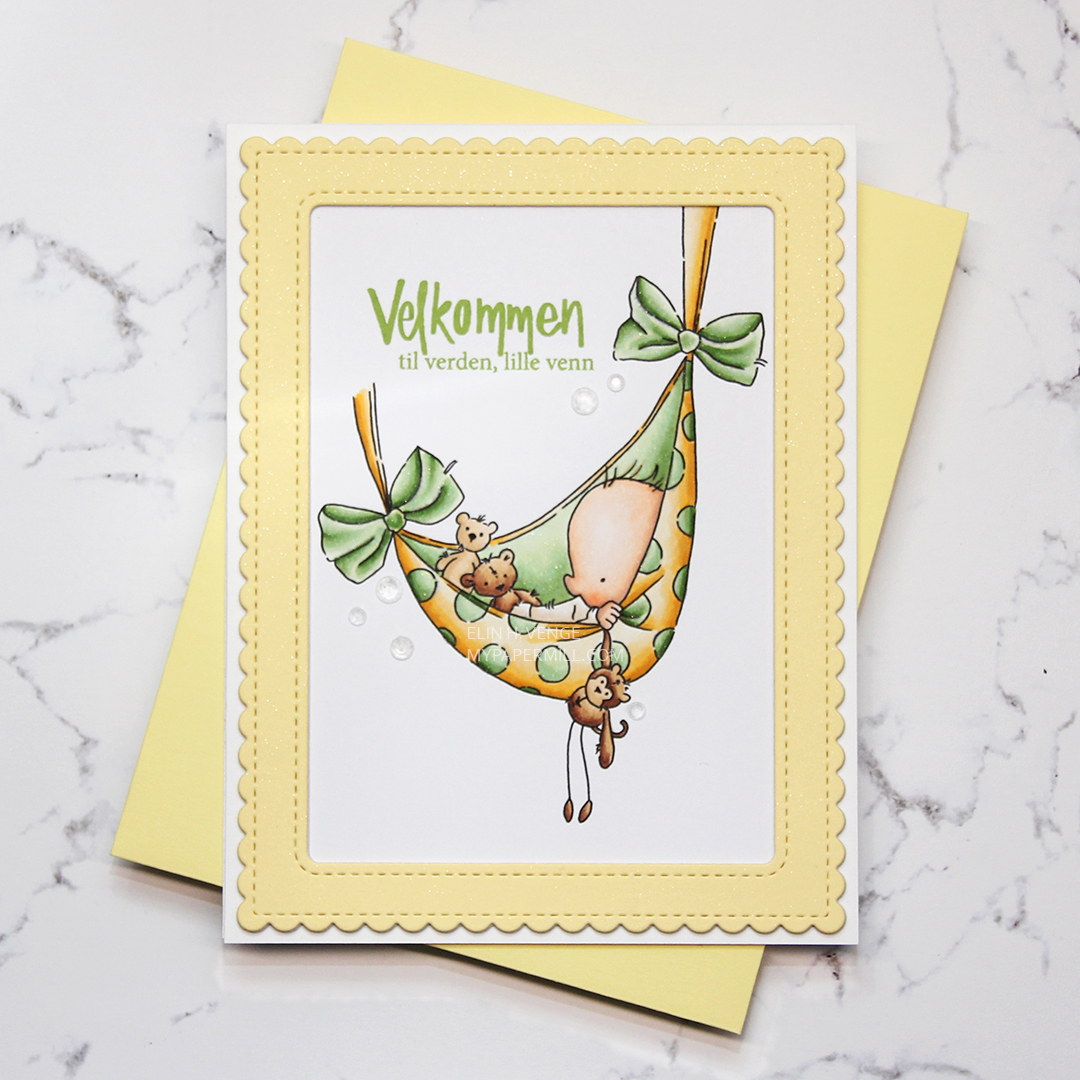 I used a frame die from Mama Elephant and die cut 3 frames; two from white card stock and one from Lemon Tart card stock from Papertrey Ink, which is a very nice soft yellow. I glued all three frames together for a stacked look and spritzed the frame with a sheer shimmer spray from Imagine, before adhering the frame onto the colored piece, and then onto a white card base. I paired it with a Lemon Chiffon envelope from My Favorite Things. It’s not a perfect match, but it’s close enough.
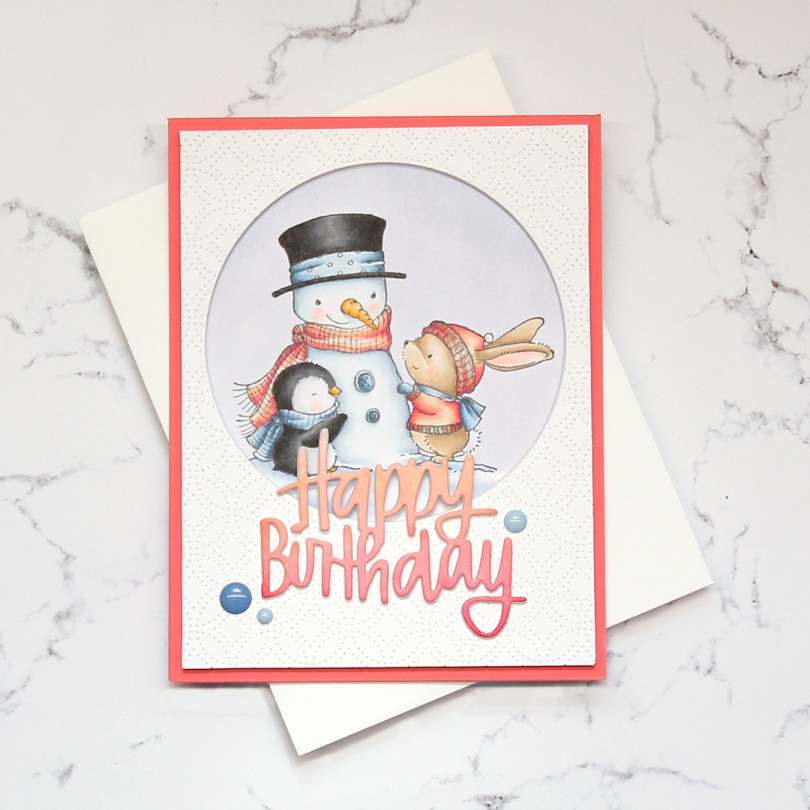
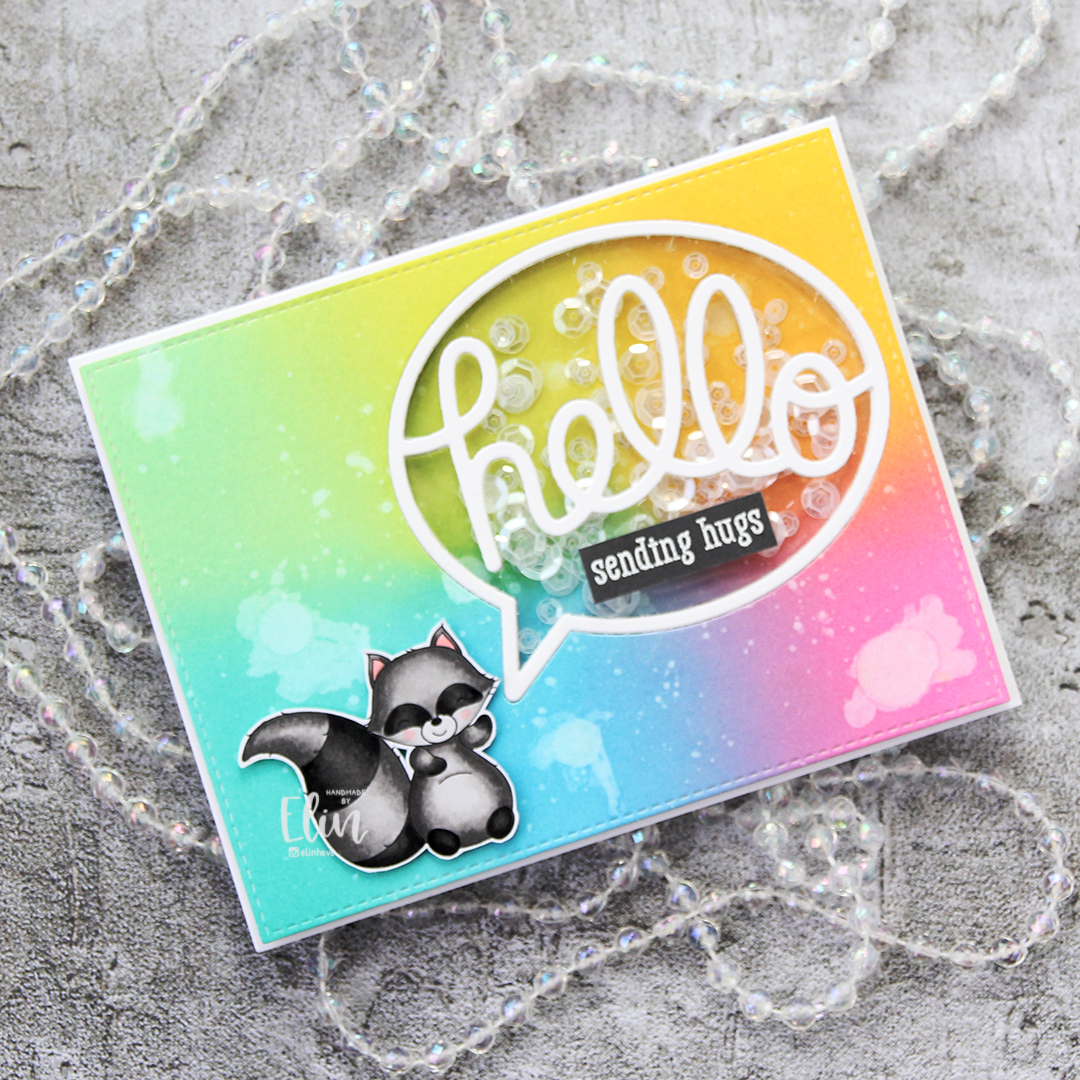
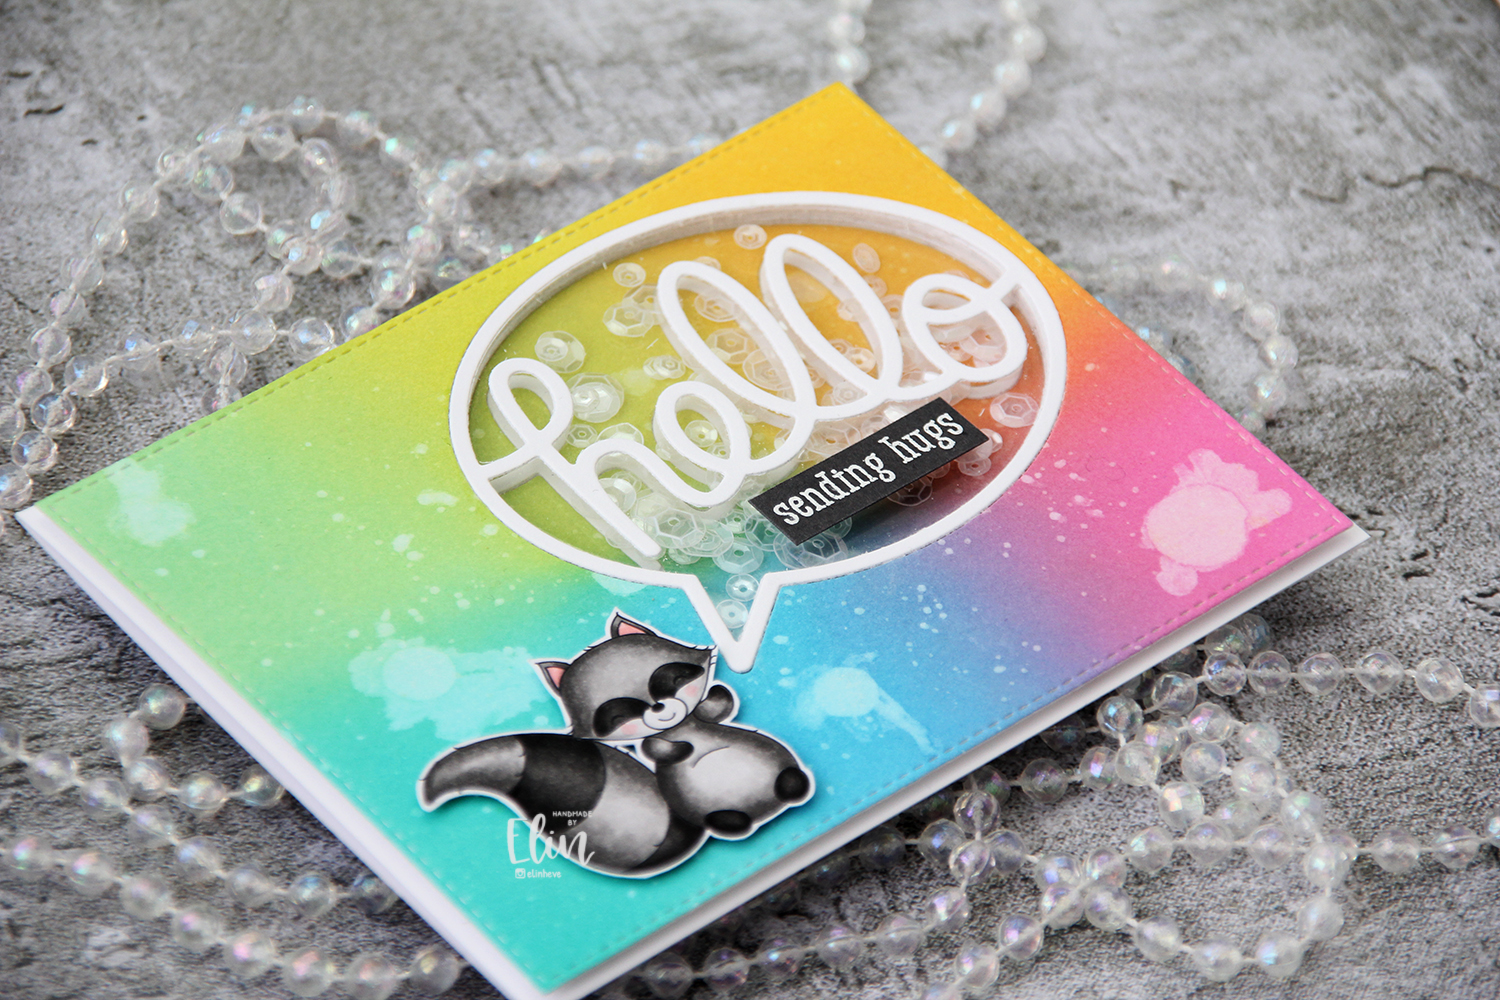
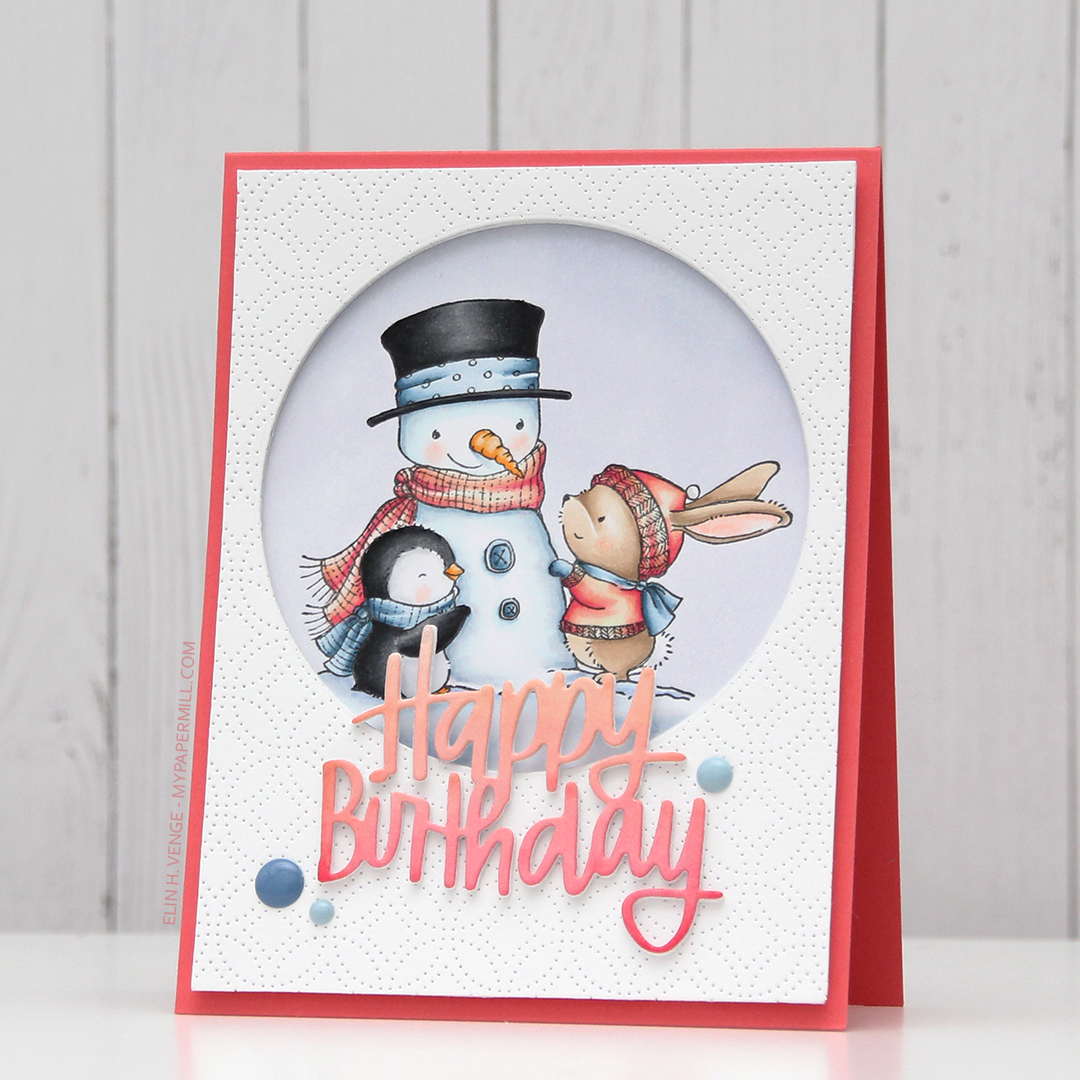 I started by coloring my image. I had a rough idea of what I wanted to do when I started, so I lightly traced a circle and colored everything inside. Using a peachy pink combo with the fairly light blue helps sell the idea of this not being a holiday card.
 Once the image was all colored up, I took the same die that I’d used to trace my coloring area to die cut circle windows in four panels of white card stock, before adhering them together for a dimensional look, making sure the window was in the same spot on each of them. I used the Detail Ringlet Plate from Simon Says Stamp to die cut from another piece of white card stock. Lining up the circle once more, I die cut a window from this layer, trimmed 1/8″ off from each side and added it to the stack of die cuts I already had. I glued the colored piece behind the window, and adhered everything onto a card base made out of Berry Sorbet card stock from Papertrey Ink.
 Using the Happy Birthday Brush Script die from Simon Says Stamp, I die cut three pieces from white card stock and one from a piece of X-Press It that I’d colored with the same peachy pink Copic combo that I used on my image. I glued all four pieces together for a dimensional look, and used a shimmer spray on top for some sparkle, before adhering the stacked die cut to the front of the card, before adding a few blue enamel dots from Papirdesign as a finishing touch. I didn’t have a colored envelope to match, so I used a white one from My Favorite Things instead.
 Not a whole lot of colors for this one. I have, however, used quite a few colors to color in the snow. B41 was used for the sky, but the rest of those light blues, the BV20 and the BG0000 were all used for the snow, as well as the blender. For the sky I also used B40, which is a color I’ve made myself.
 I colored the penguins with Copics and used the coordinating die to die cut this cute little waddle for the front of my card.
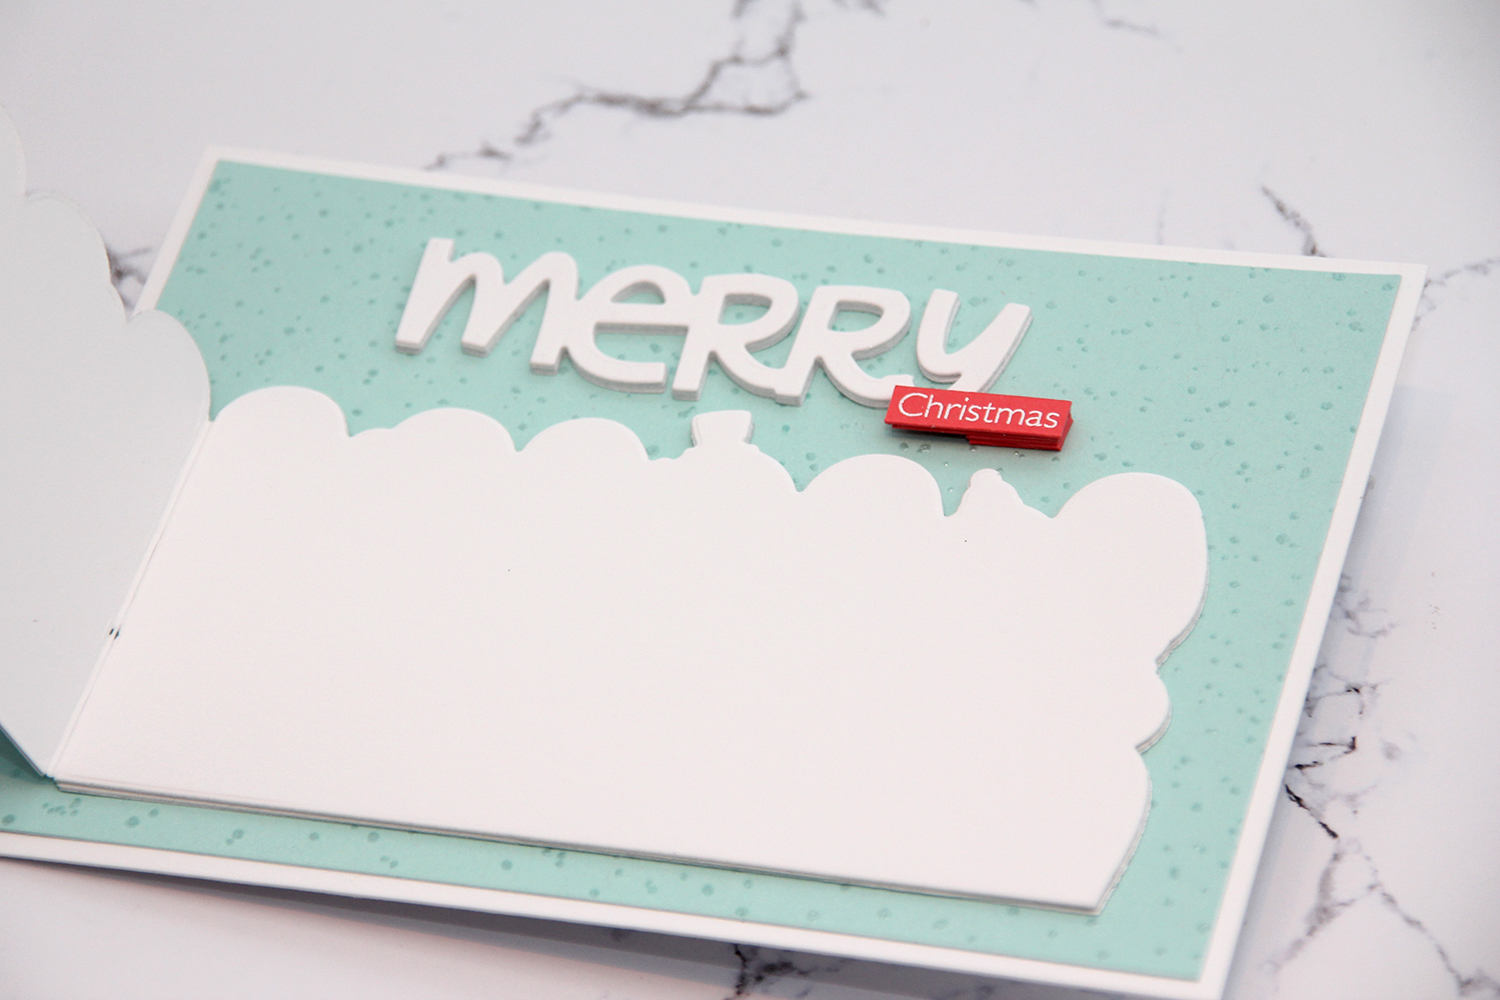 The waddle of penguins actually opens up so you can write a personal message on the inside, and there’s a few more die cuts under there for dimension and a little bit of stability.
 I glued my penguins to a panel made from Aqua Mist card stock from Papertrey Ink. I used the Paint Splatter background stamp from My Favorite Things with VersaMark ink, poured White Satin Pearl embossing powder from Hero Arts on top and heat embossed it. I know the stamp is supposed to be paint splatter, but I think it looks like snow, which makes the stamp even more versatile, and it’s a great way to add some subtle interest to a background. I added the Aqua Mist panel onto a slightly larger panel of Stamper’s Select White cardstock from Papertrey Ink.
 The Penguin’s Waddle die set comes with a big word die “Oh so merry”. I die cut it several times from white cardstock, cut the “oh so” away to use just merry on my card and spritzed some sparkly sheer shimmer spray on top, which you can kind of see in this photo if you look closely. I stamped and white heat embossed the word Christmas from the Christmas Cheer stamp set from My Favorite Things onto Berry Sorbet cardstock from Papertrey Ink, then used my Cut-align ruler from Misti to make sure I’d cut the little strip straight. In this photo you can also see the shine in the penguins’ eyes. I added a little bit of black glaze pen to the eyes, and also a little bit of clear Wink of Stella to certain elements.
