Hi, crafty friends. A while back, Amanda from Amanda Jayne Designs reached out to me, asking if I would like to color up a couple of her stamps. I’m not one to turn down an offer to do some coloring, so I of course said yes, and she sent me a couple of her digital stamps. Fast forward a couple of months (things have been hectic around here), and I’ve turned her Kali Koala image into a completed card.
 This koala was so quick and easy to color. If you’re new to coloring, or enjoy coloring but don’t want to spend an eternity coloring one image, I’d recommend her images. They’re not super detailed, which makes them easy and fast to color.
 I decided to put my colored koala in a polaroid frame, and used the largest of the dies in the Precious Polaroids die set from My Favorite Things to die cut three times from white cardstock for a stacked look on top of the cute koala.
 I created a top fold A2 card base using Green Parakeet cardstock from Papertrey Ink. Onto the left bottom corner of a piece of Stamper’s Select White cardstock from Papertrey Ink, I stamped some leaves from the Leaf Clusters stamp set from Altenew, using Limelight ink from My Favorite Things. This is a much more vibrant, yellowy green than what you’ll find in eucalyptus leaves, but I wasn’t going for realism with this card and happen to like the bright green – it really pops. I made sure to stamp a large enough area that some of the leaves would be visible around the polaroid frame with my koala. I also stamped the smallest leaf cluster in the Altenew stamp set near the top right corner for a little bit of balance and die cut the white panel using the largest die in the A2 Stitched Rectangles STAX 1 set from My Favorite Things.
 I wanted a punny koala themed sentiment on my card, and the word koalaty (quality) came to mind. I needed something to use with it, and dug through my sentiment sets for one with the word friend in it. A sentiment in a stamp set from InkyWings was perfect, it said For a sweet friend. I stamped it in VersaMark ink and white heat embossed it using Super fine detail embossing powder from Ranger. I cut the sentiment down to a strip, removed the word sweet and had the perfect start and finish to my punny sentiment. Using the Connected alphabet die set from My Favorite Things, I die cut the letters to spell koalaty three times from Green Parakeet cardstock and stacked them for a dimensional look. I die cut an additional three white ones for the letters that hang off the polaroid (ATY) and glued these behind the green ones so the letters would all be flush on the card. I also added some additional layers of cardstock behind the white heat embossed strips for that little bit of added dimension, before finishing off the card with a few enamel dots from Papirdesign.
 The dimension is more visible in this photo, I love adding dimension to my cards. Dimension is life 😉 I cut the layered up white A in half, because only half the letter hangs off the edge. The letters that have the white die cuts behind them kind of look like they’re floating on the card.
 Super simple color palette for this one.

 I colored up Love, Brownie Bear for my first card, I just couldn’t resist the wings and bee costume on this cute bear. I added some grass under his feet, die cut the panel using the second largest die in the Additional A2 Layers die set from Waffle Flower and adhered it to a card base I created from Grapefruit cardstock from Concord & 9th.
 I stamped a sentiment from InkyWings using Pink Pearl ink from Altenew. The stamp actually has the word hugs in it too, but I opted for a die cut hugs, using the Sweet Sentiments die set from Altenew. I die cut four from Grapefruit cardstock and stacked them together for a dimensional look.
 I finished off with a couple of heart droplets from Little Things from Lucy’s Cards.
 Fairly simple color palette for this one.
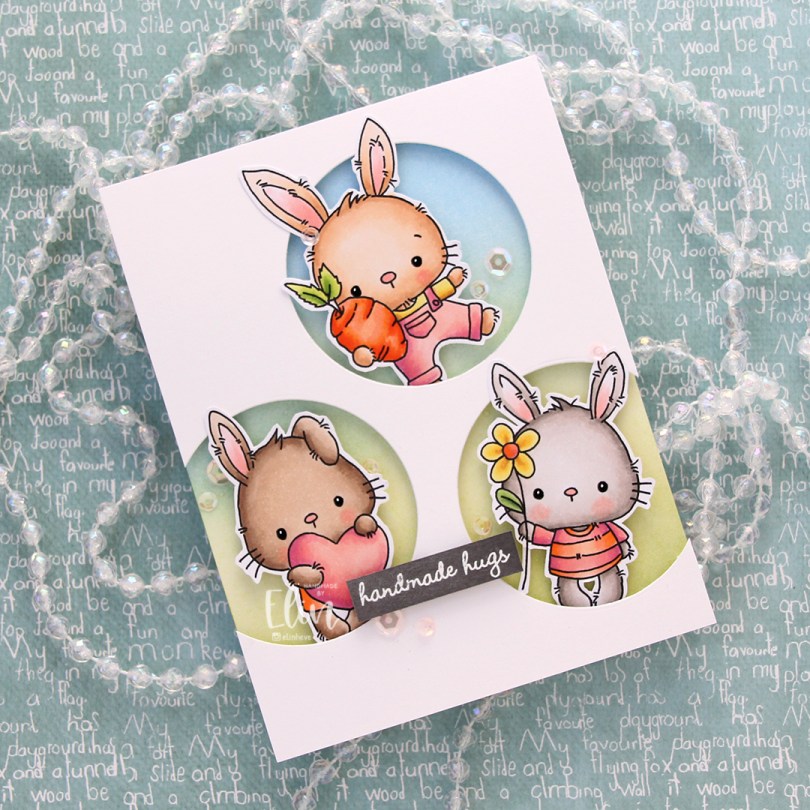
 These guys are from the
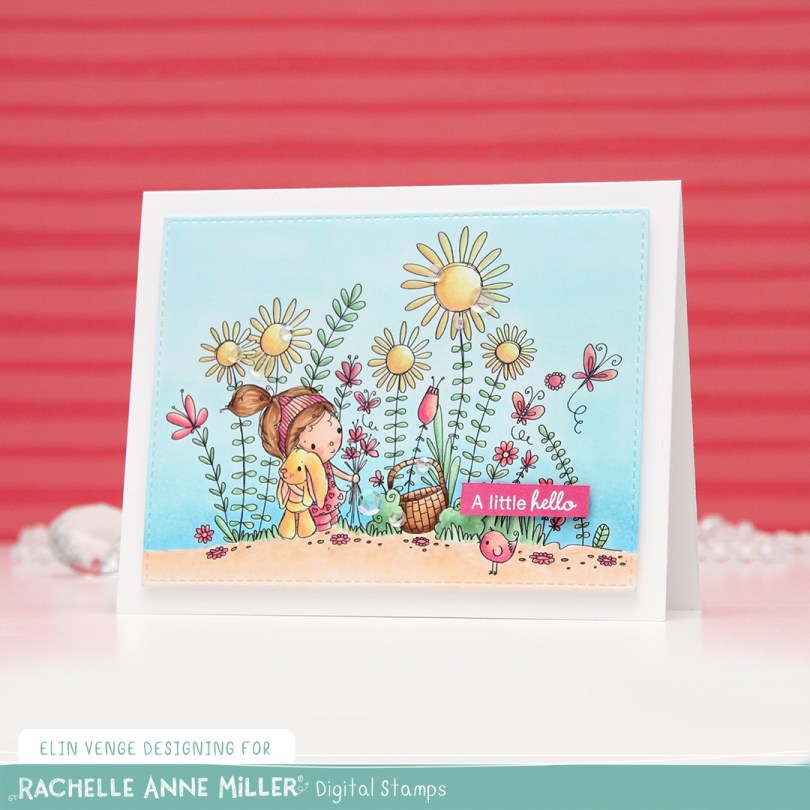
  Onto the card base, I ink blended Fresh Leaf and Eastern Sky inks from Altenew to create a soft background that went from green to blue. I then added splatters of my sheer shimmer spray from Imagine. It’s not really visible in the photos, but in real life it adds a bit of sparkle.
 I die cut three circle openings in a quarter piece of white cardstock and mounted it with foam tape to the card base.
 I added foam tape to the back of my critters, popping each of them into the circle openings. I stamped and white heat embossed a sentiment from InkyWings onto a piece of Mushroom cardstock from Concord & 9th, mounted it on foam tape and added it to the card.
 To finish off the card I added sequins from the Rosy Glow mix from Little Things from Lucy’s Cards.
 Such a simple color palette for this one. Aside from the colors of the fur, which differ for each bunny, I used the same colors throughout.
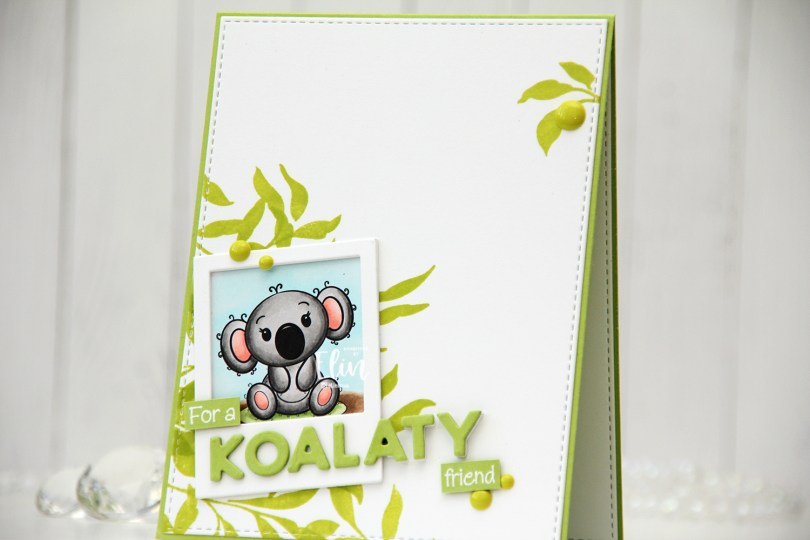
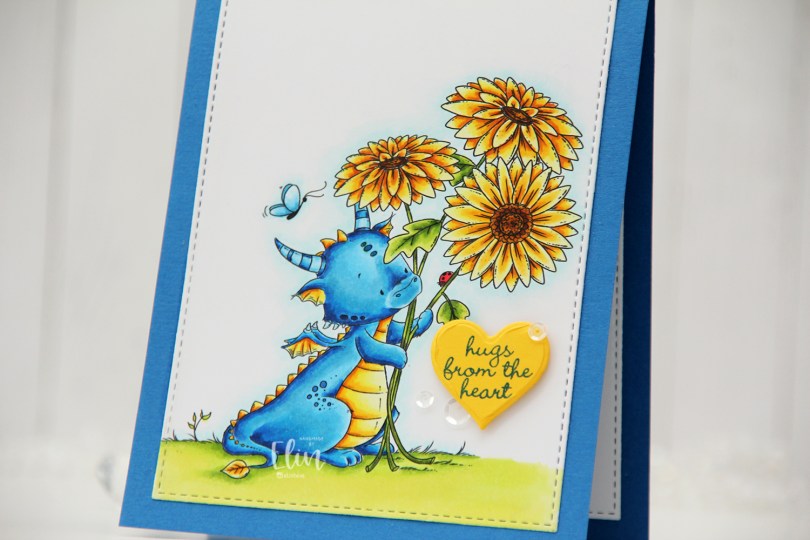
 It’s no secret that I’m a fan of Lee’s Dragons, and this one holding sunflowers was begging for a blue/yellow combo. Once I’d colored the image with Copics, I used the second largest die in the A2 Stitched Rectangles STAX 1 die set from My Favorite Things to give the panel a nice finishing edge. I adhered it to a card base I created from Cornflower cardstock, also from MFT.
 I die cut a heart from Bright Buttercup cardstock from Papertrey Ink and stamped a sentiment from an Inky Wings stamp set in the center using Cornflower ink from My Favorite Things. I added the heart using foam tape and then a few sequins from the White Orchid Sequin Mix from Little Things from Lucy’s Cards to finish off this simple card.
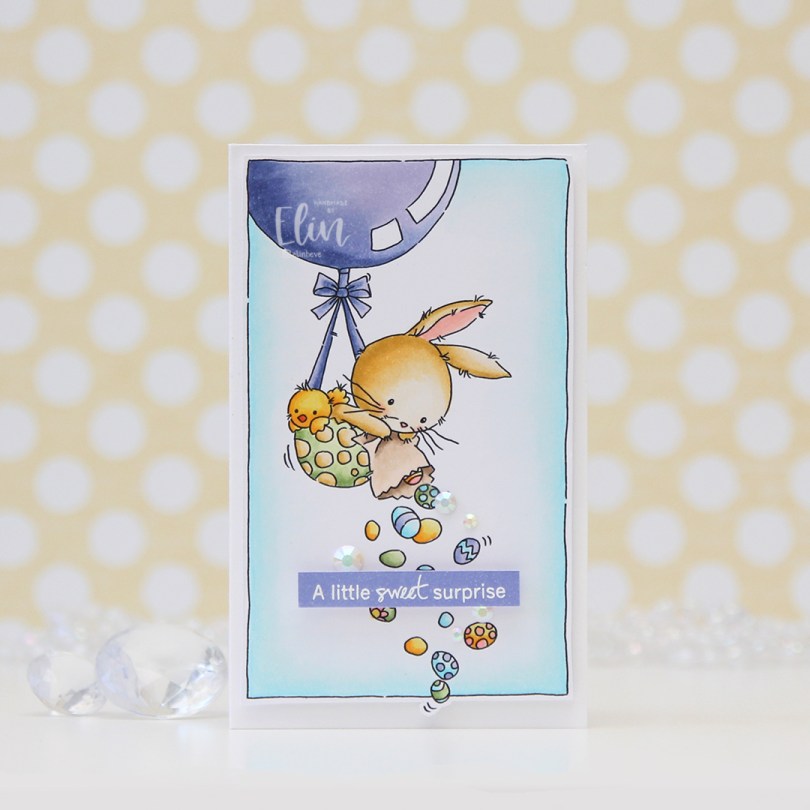
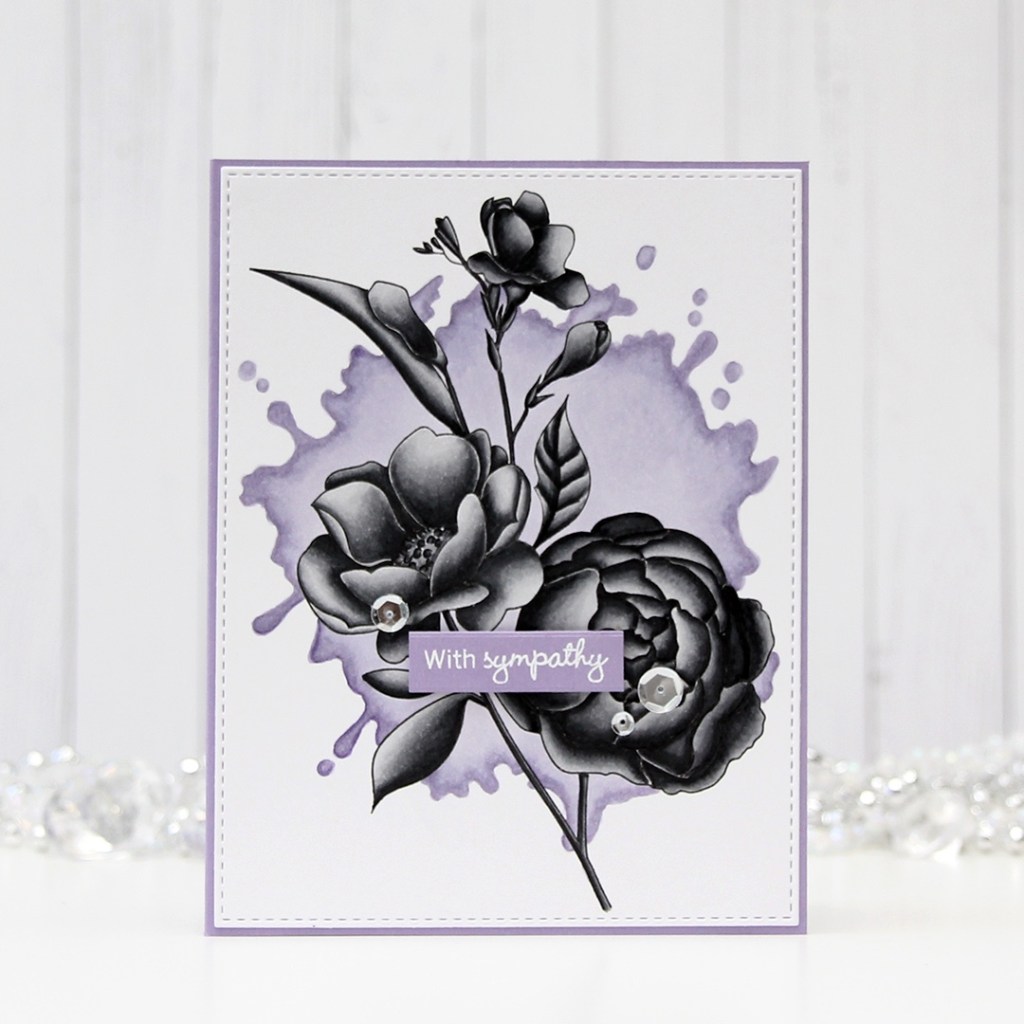
 I colored the image with Copics and fussy cut it, leaving a white border. The frame that’s part of the image makes fussy cutting super easy, the only thing sticking out is one small egg at the bottom. I mounted my panel on a card base I created from Stamper’s Select White cardstock from Papertrey Ink. This card is on the smaller side, it measures 3 x 4 7/8″.
 I colored a separate piece of X-Press It blending card with one of the purples I used for the image. I made sure it was dry before I stamped and white heat embossed a sentiment from the IWCL2017005 English stamp set from InkyWings. I popped it up the colored piece for even more dimension, using Double Thick Crystal Clear foam tape from The Rabbit Hole Designs.
 I added a few Pearl White Crystals from Pretty Pink Posh between all the eggs for a little bit of embellishment.
 A simple card, but the dimension adds some interest. The clear foam tape makes the sentiment look like it’s floating above the card.


 As usual, I printed the image on X-Press It blending card and colored it in using my Copics. Once done coloring, I took the second largest die in the A2 Stitched Rectangles STAX 2 set from My Favorite Things to turn it into a panel with nice faux stitching along the edges. I mounted it with foam tape onto my card base.
 I stamped and white heat embossed a sentiment from InkyWings onto a tiny scrap of Raspberry Fizz card stock from Papertrey Ink. It was so small I barely even cut it smaller before adhering it to my card using Gina K foam tape, which isn’t as thick as the foam tape I used for my colored piece. I added some gems and sequins from the Iced Sherbet mix from Little Things from Lucy’s Cards, and my card was finished.
 Colors. Not a lot, but some, with an added confession. I made a very similar card to this about six months back, and I’ve used the exact same colors on this one, except for one. Being a little lazy this time, I didn’t want to redo the entire graphic because of one single marker, so this graphic is one I’ve used before. The only color in there that I didn’t use for this card was E13, simply because I forgot.
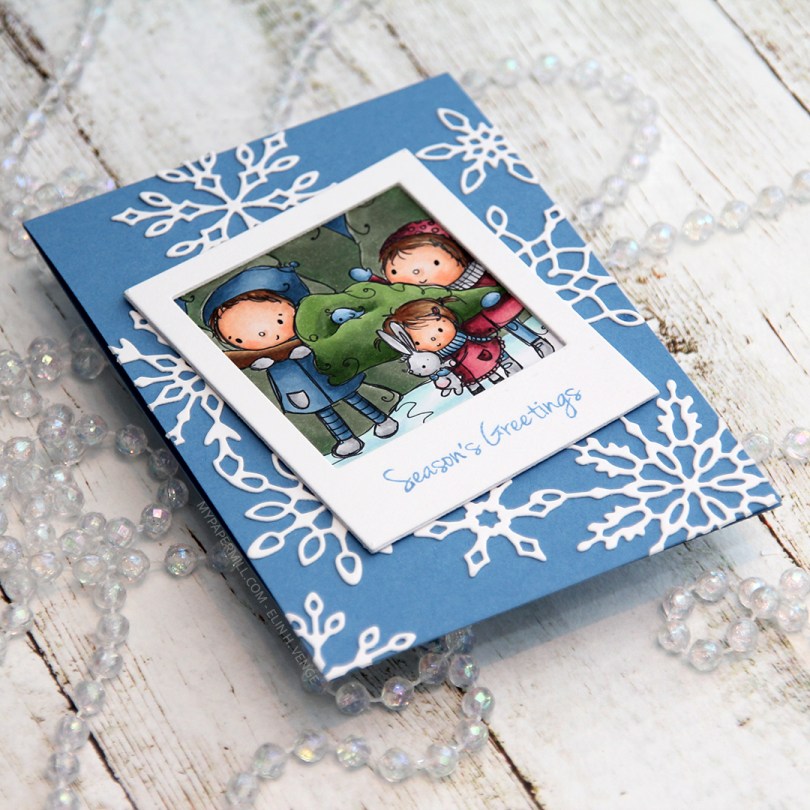
 I colored up just a portion of the image and made it into a polaroid by using a polaroid frame die from My Favorite Things that I love. I die cut the frame three times from white cardstock and glued them together for a stacked look.
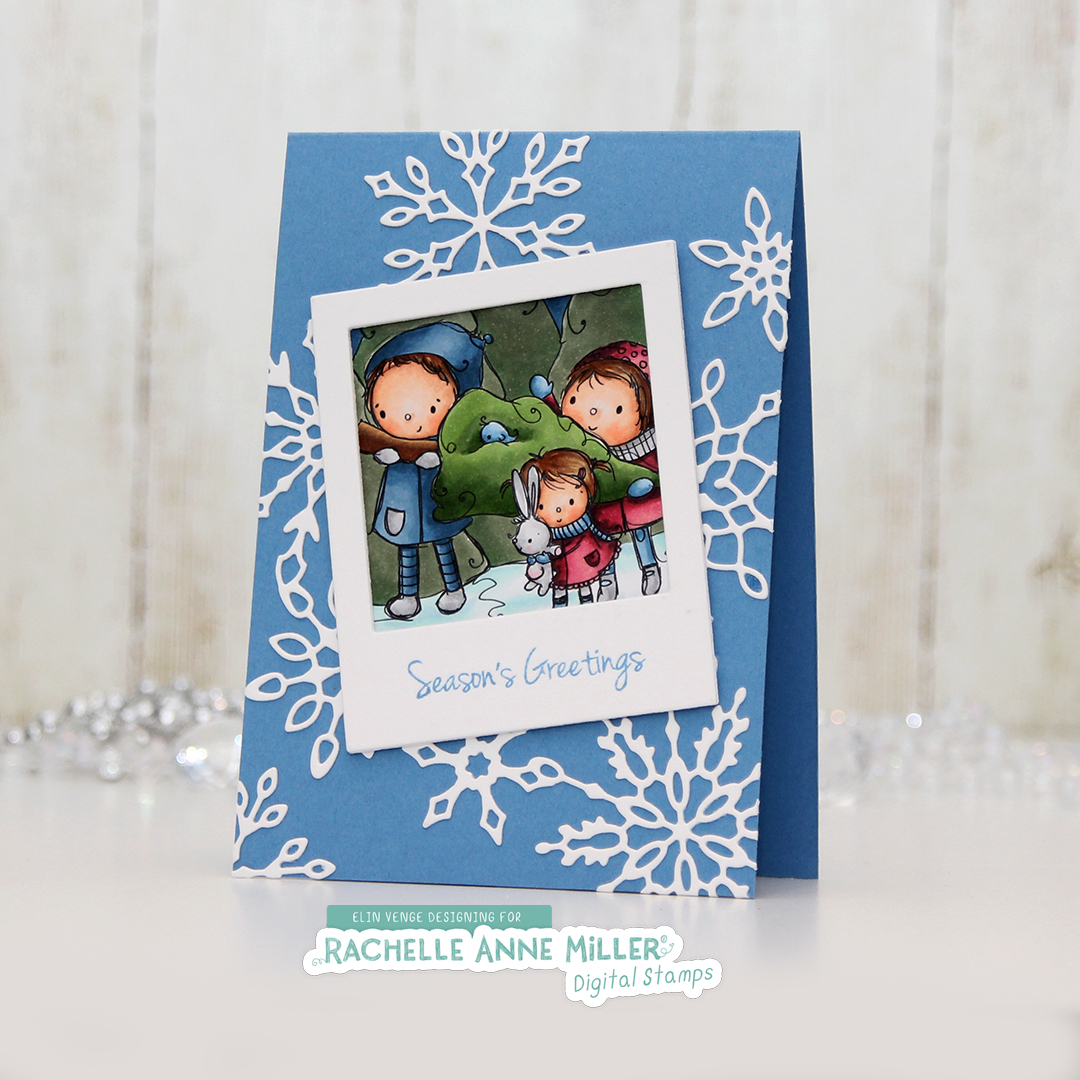 I decided to stamp a sentiment onto the polaroid frame using Blueberry Sky ink from Papertrey Ink. The sentiment is from a stamp set from Inky Wings.
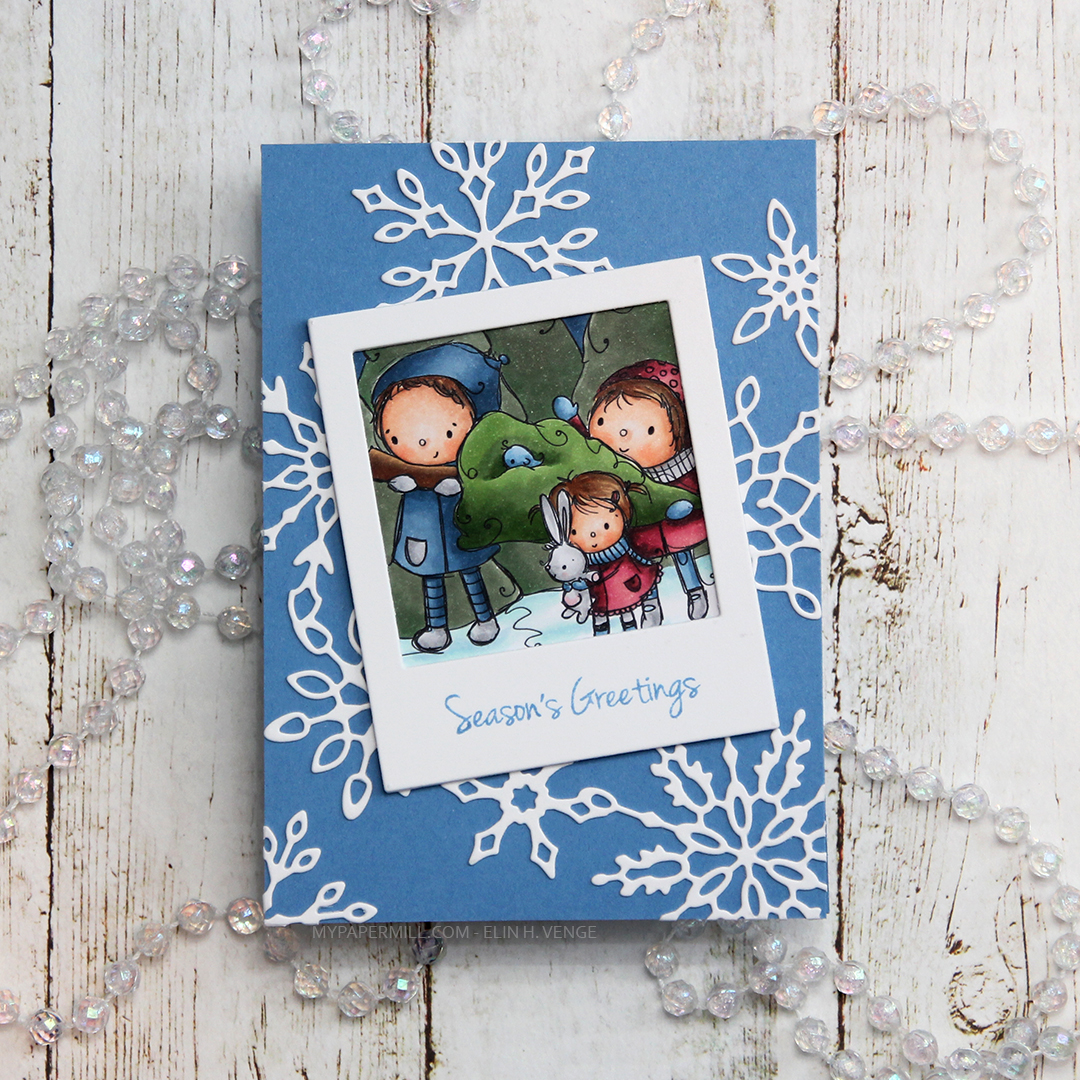 I decided to put my polaroid frame on a blue card base. This blue cardstock is Blueberry Sky from Papertrey Ink, the same color as the stamped sentiment. I used an old snowflake frame die from Memory Box that I diecut from white cardstock.
 I cut down my card base to make a 4 bar card. I like the smaller size, but don’t make too many cards this size, so I thought I’d change things up a bit. Once again, I have no graphic to show what Copics I used, but hopefully I’ll have my template remade in a few days.


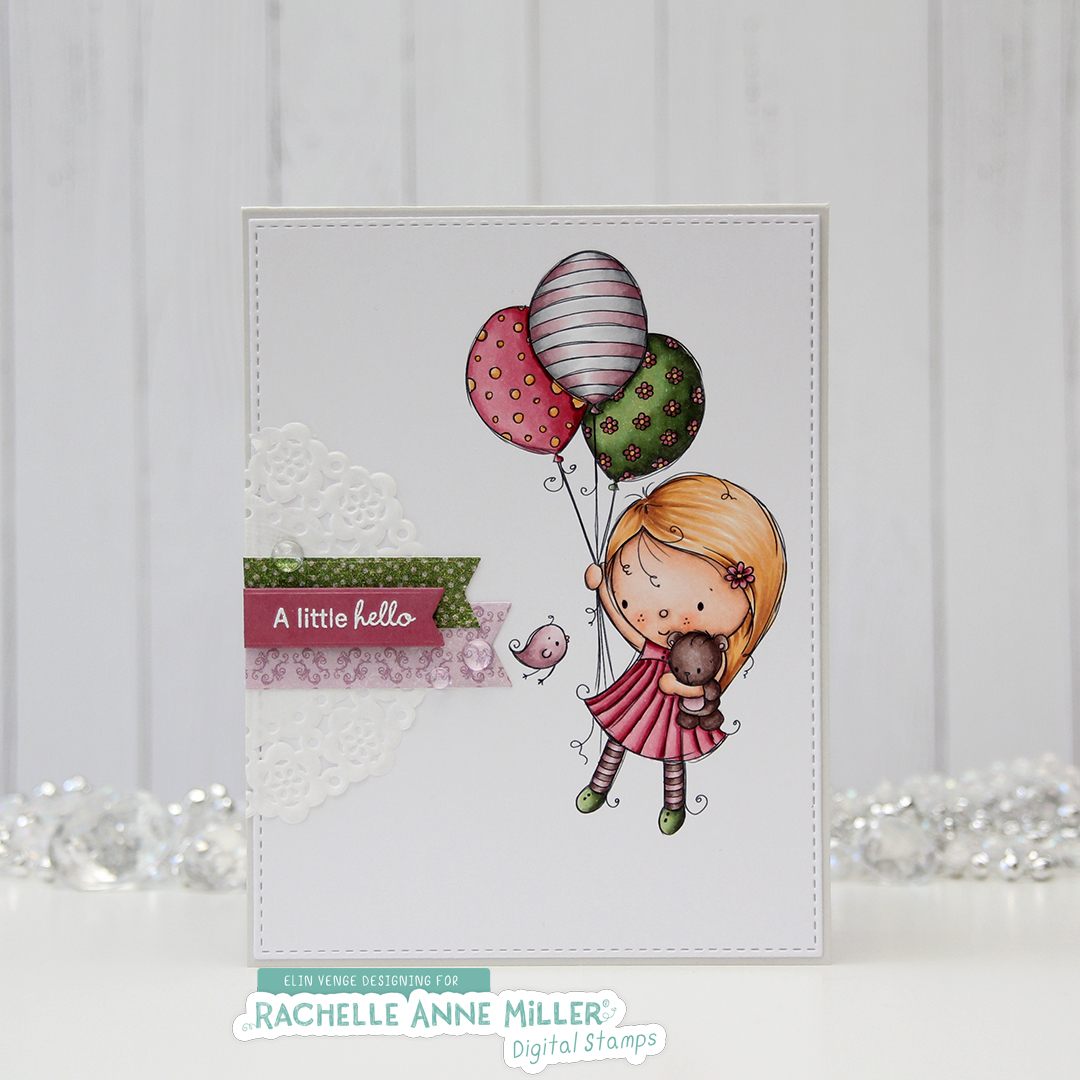
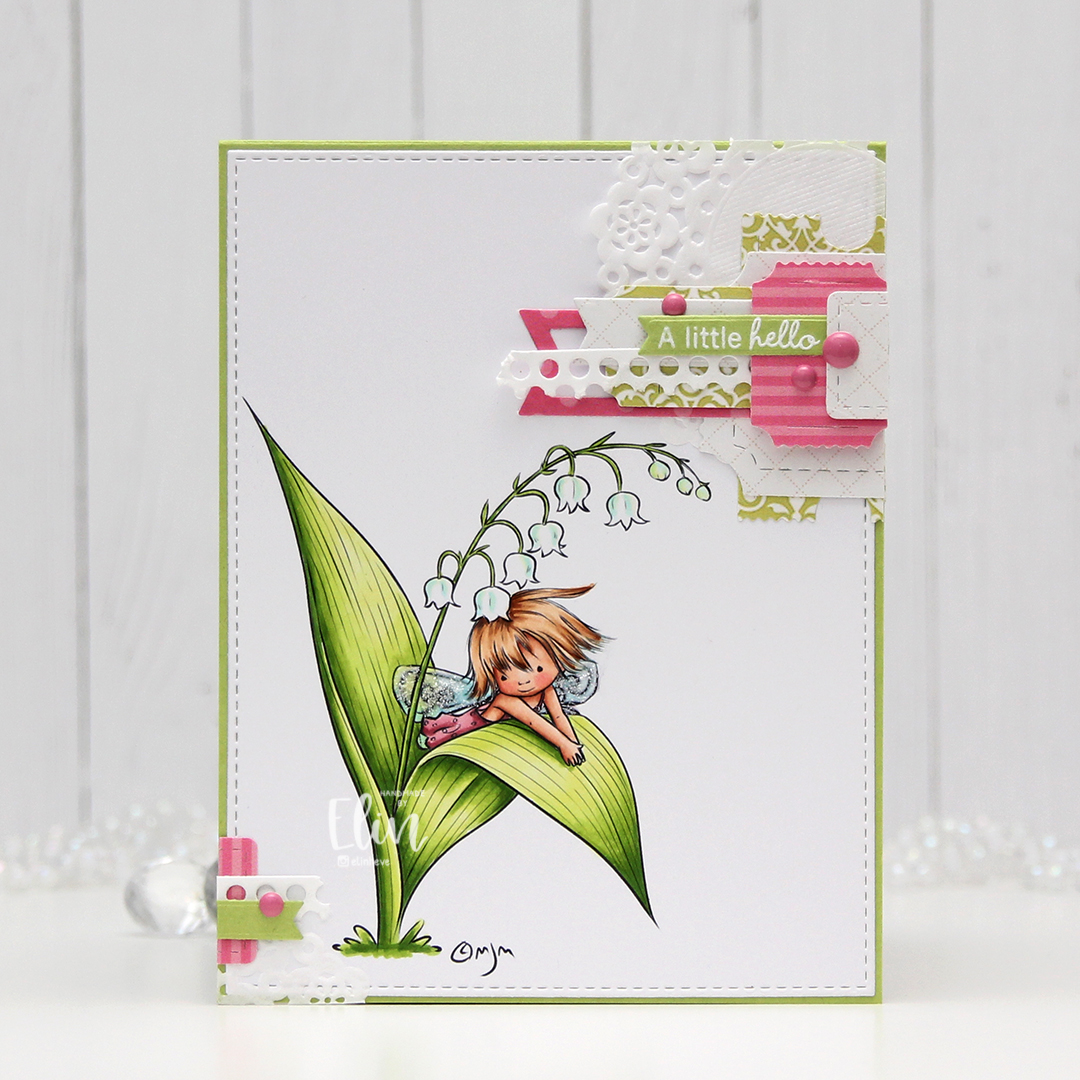
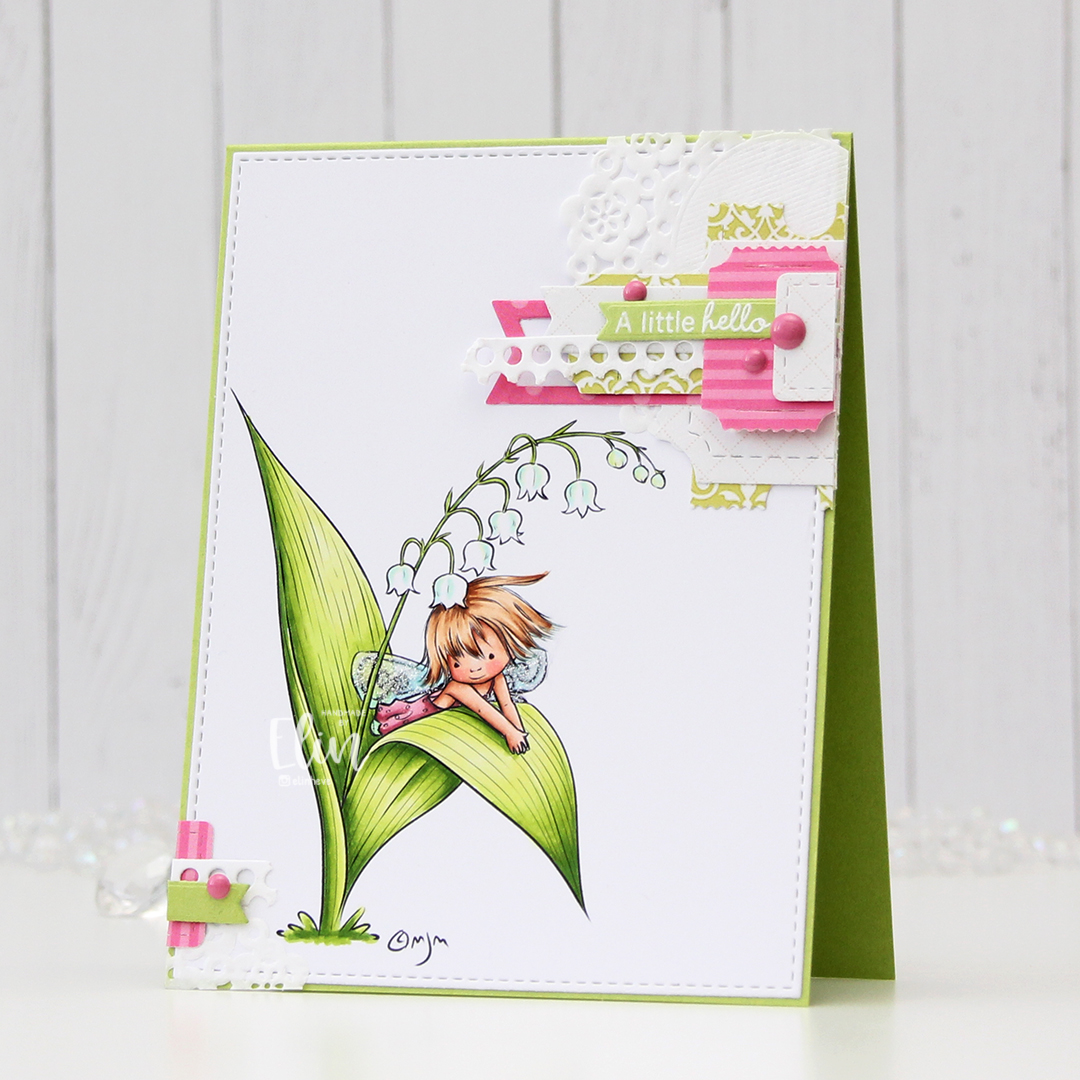
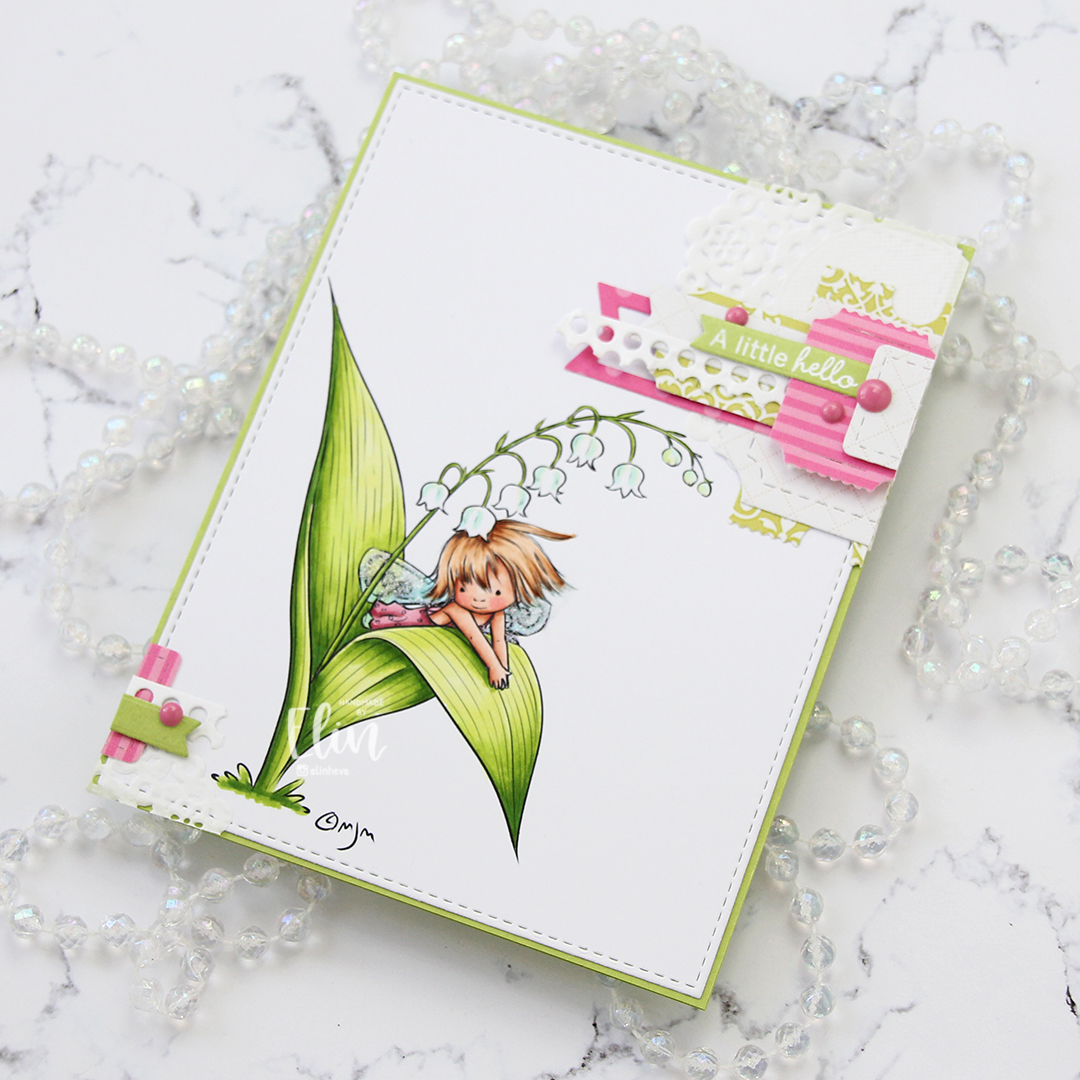
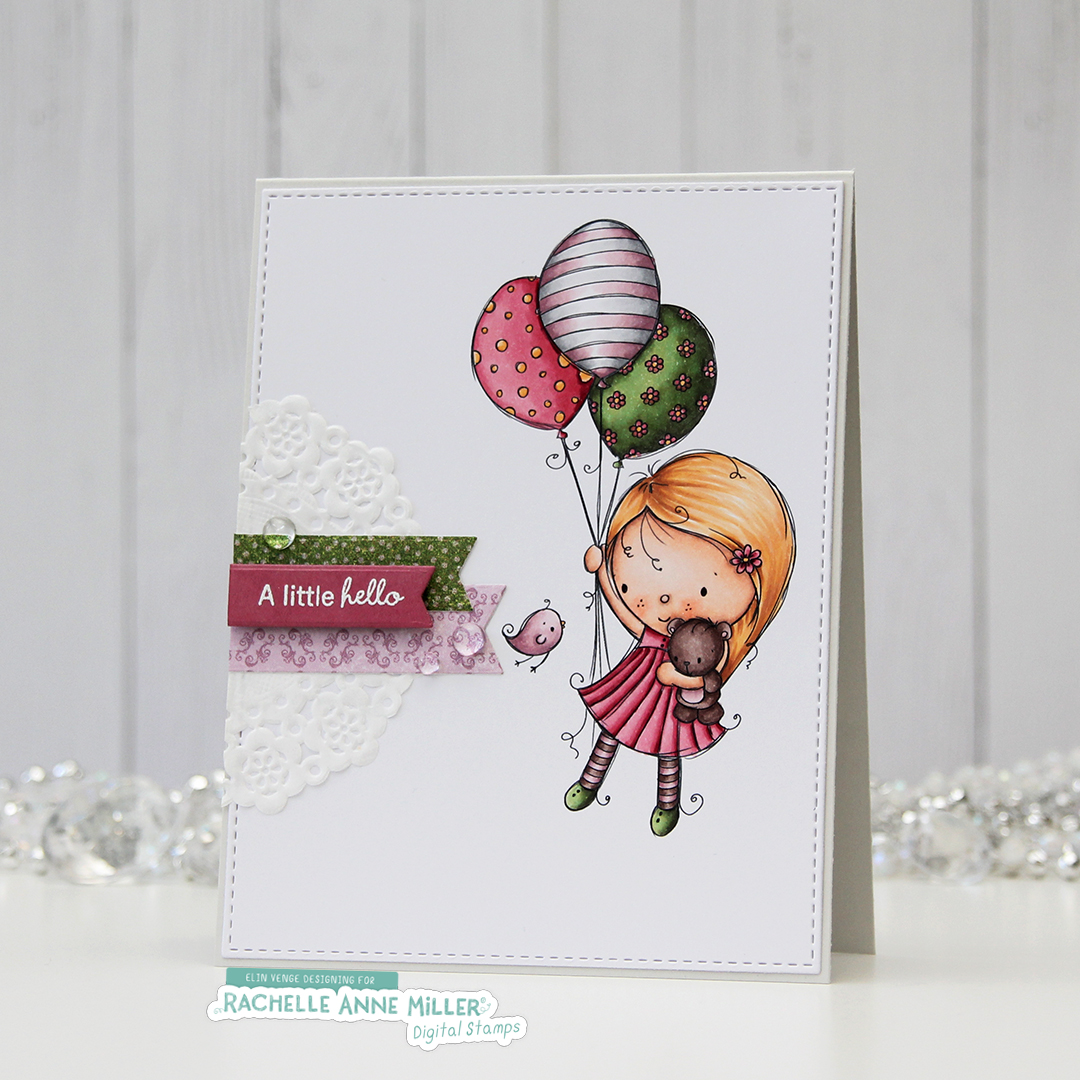 I diecut the panel with the image using the largest of the faux stitch rectangle dies from My Favorite Things. I glued it straight to a cardbase I created from Soft Stone cardstock from Papertrey Ink.
 I added half a Doodlebug Nini doily, some diecut scraps of patterned paper (Papirdesign and Basic Grey, btw) and a white heat embossed Inky Wings sentiment on Papertrey Ink Autumn Rose cardstock. A few raindrops from Little Things from Lucy’s Cards, and my card was finished.