
Hi, crafty friends. I’m back today with another confirmation card made for the Kort & Godt gallery blog. This might be my last one for 2024, it’s definitely the last one for the spring confirmation season. There might be some coming for the fall season, I just don’t know yet.
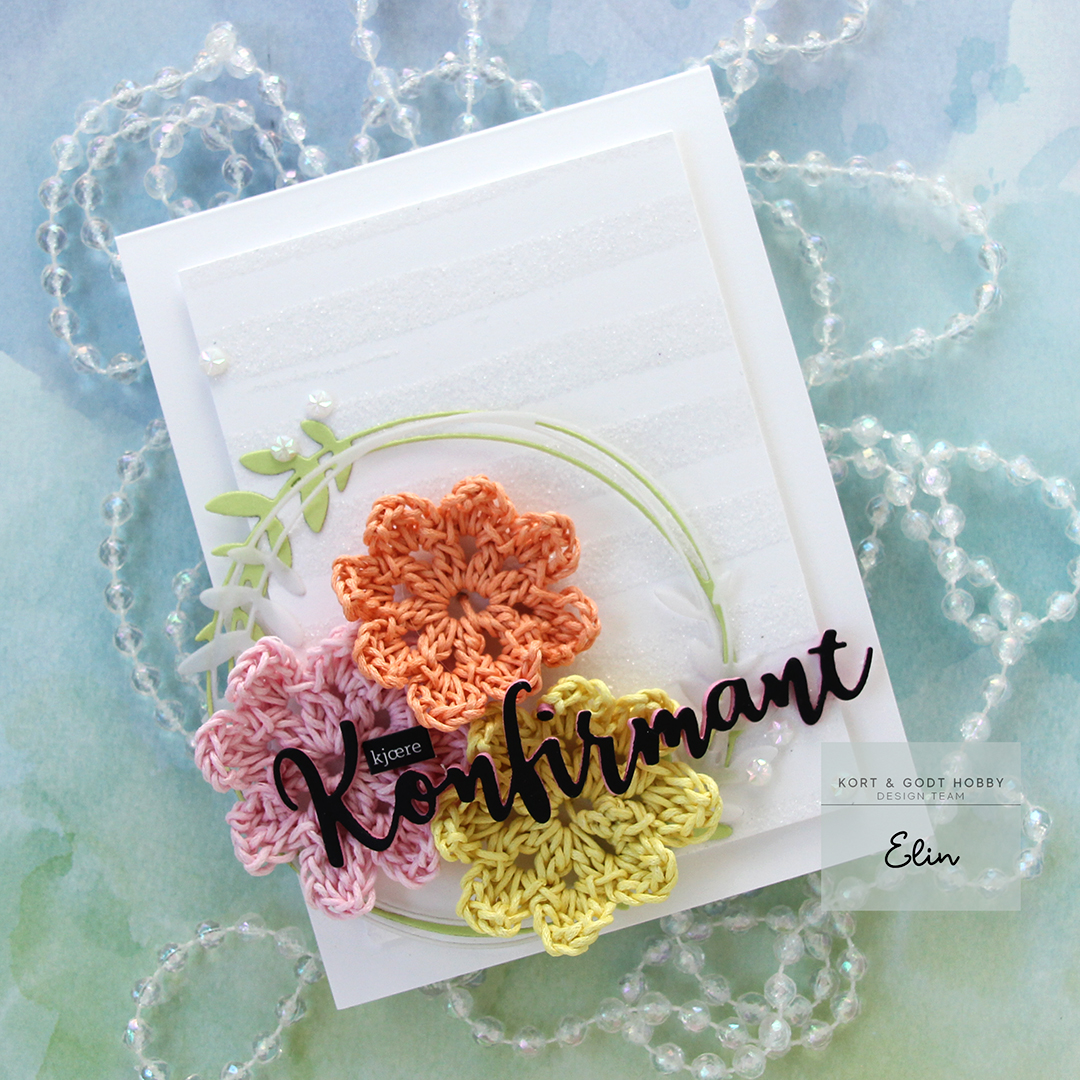
 This card started out with me playing with the cotton thread from Kort & Godt. I wanted to something with it besides tying it in bows, and crocheting came to mind. I crocheted three flowers in different colors, and that was my starting point. I created a subtle background using the Watercolor Stripes stencil from Altenew with VersaMark ink, Sticky embossing powder and Distress Glitter in the Rock Candy color. This gives a soft tone on tone sparkle on the white cardstock and doesn’t distract too much from the flowers. I thread the flowers through to the back of the panel, used some tape to hold the thread down on the back and mounted it using foam tape onto a top fold white card base.
 I die cut the leaf circle die twice; once from vellum (I used Heavyweight translucent vellum from My Favorite Things), and once from Sprout cardstock from Concord & 9th. I offset them a bit, and used small amounts of liquid glue to adhere them to the card. I also die cut Konfirmant a few times from pink cardstock and adhered them together for a stacked, dimensional look. Once I added my die cut to the card, however, it got lost, so I die cut a layer from black cardstock from Papertrey Ink and glued that on top. That did the trick. I used a sentiment sticker to complete the sentiment and added some faceted pearls as a finishing touch.
 This was a fun way to use the cotton thread, and I still have heaps more!
Kort & Godt products used:
Die 268 (Konfirmant)
Die 345 (Circle with leaves)
ST1017 (Word sticker “kjære”)
TR-121 (yellow thread)
TR-107 (peach thread)
TR-108 (pink thread)
ST178 (faceted pearls)
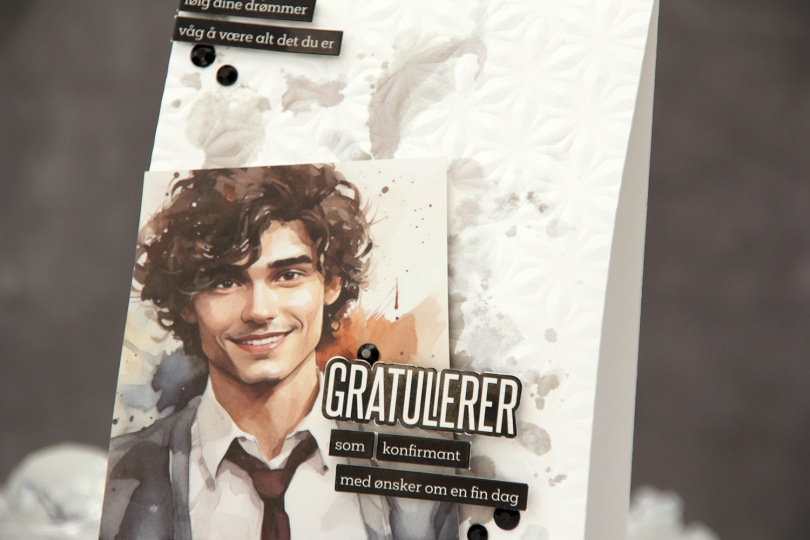
 I started by choosing an image to be the focal point of my card. I ink smooshed Gravel Gray and Eiffel Tower inks from My Favorite Things onto the background to mimic the background in the photo. This adds a little bit of interest to the background without being too distracting. I also used the Kaleidoscope embossing folder from Simon Says Stamp on the card base for added texture.
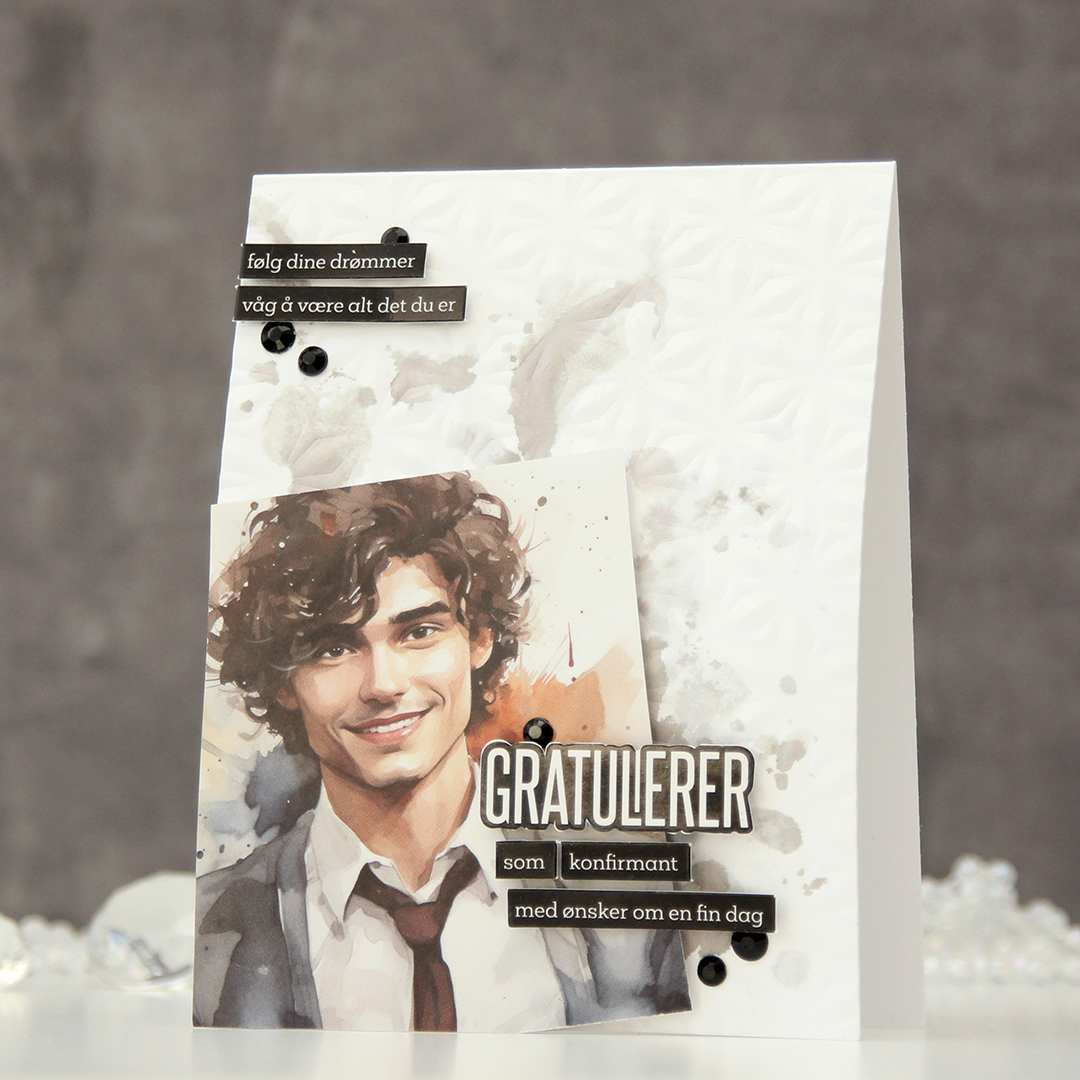 I placed the image at an angle in the bottom left corner of the card and cut off the excess hanging off the side and the bottom. I decided to mount it on foam tape for a little more interest, then used pre printed stickers to add my sentiments. I love these things, they make adding sentiments soooo easy. I put foam squares on the back of these for even more lift off the card base – dimension is life, after all. I used black gems to frame the sentiments as a finishing touch.
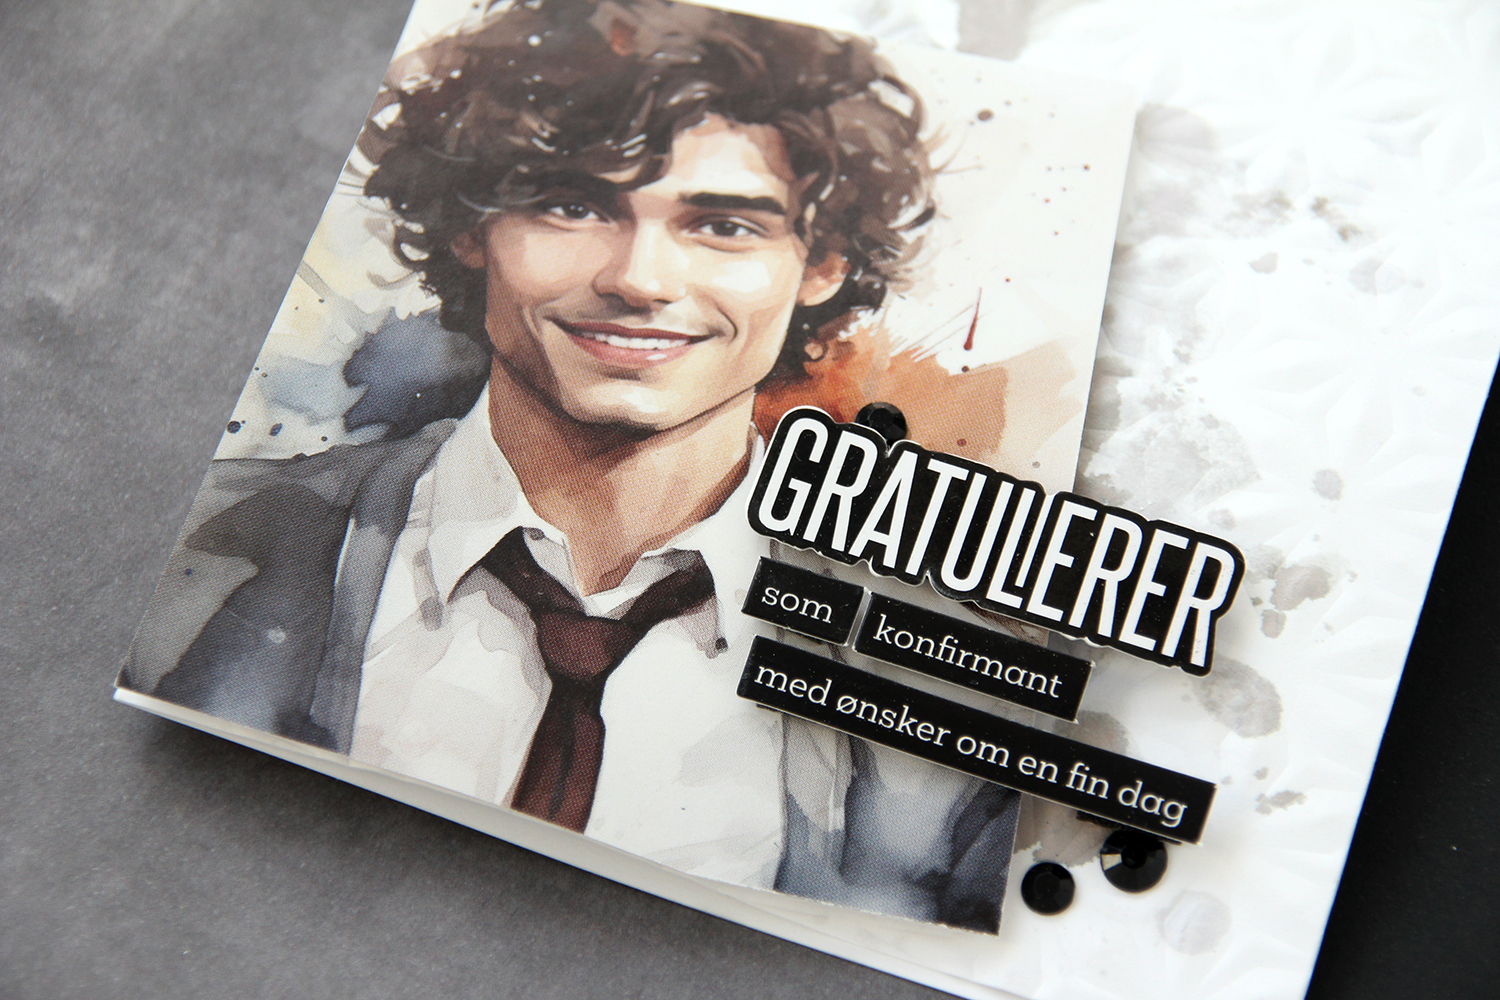 Dimension really is life!
 I die cut the word konfirmant and the individual letters for the recipient’s name in white cardstock and adhered them to a black envelope. The black and white ties in with the card nicely.
 I stamped one of the images in the stamp set using black ink and used the coordinating layering stencils to color it in. It’s no secret I’m a fan of Copic coloring, but this was soooo much faster, and maybe it’s okay to cheat a little once in a while. I used the Dried Petals set of inks for the pink in the flowers and the Forest Trail set for the green. For the yellow I used Sunflower and Buttercup inks from Concord & 9th, as I don’t have yellow inks from Altenew.
 I created a card base from Sno Cone cardstock from My Favorite Things and used the Angled Mosaic 3D embossing folder from Altenew to add some texture and interest. I mounted my flowers in the bottom center using foam tape, then added a black sentiment sticker strip from Kort & Godt with a couple of layers of cardstock behind it for a little bit of lift, before finishing off the card with Sparkle & Shine ombré glitter drops from Pinkfresh Studio.
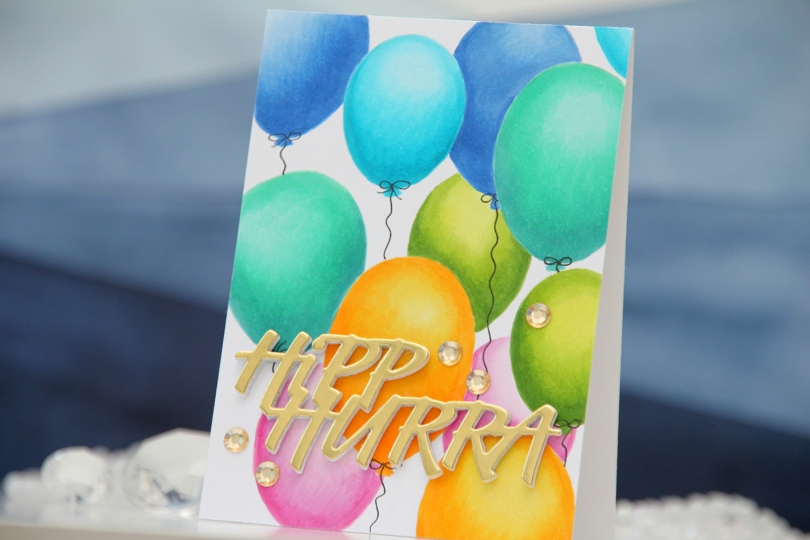
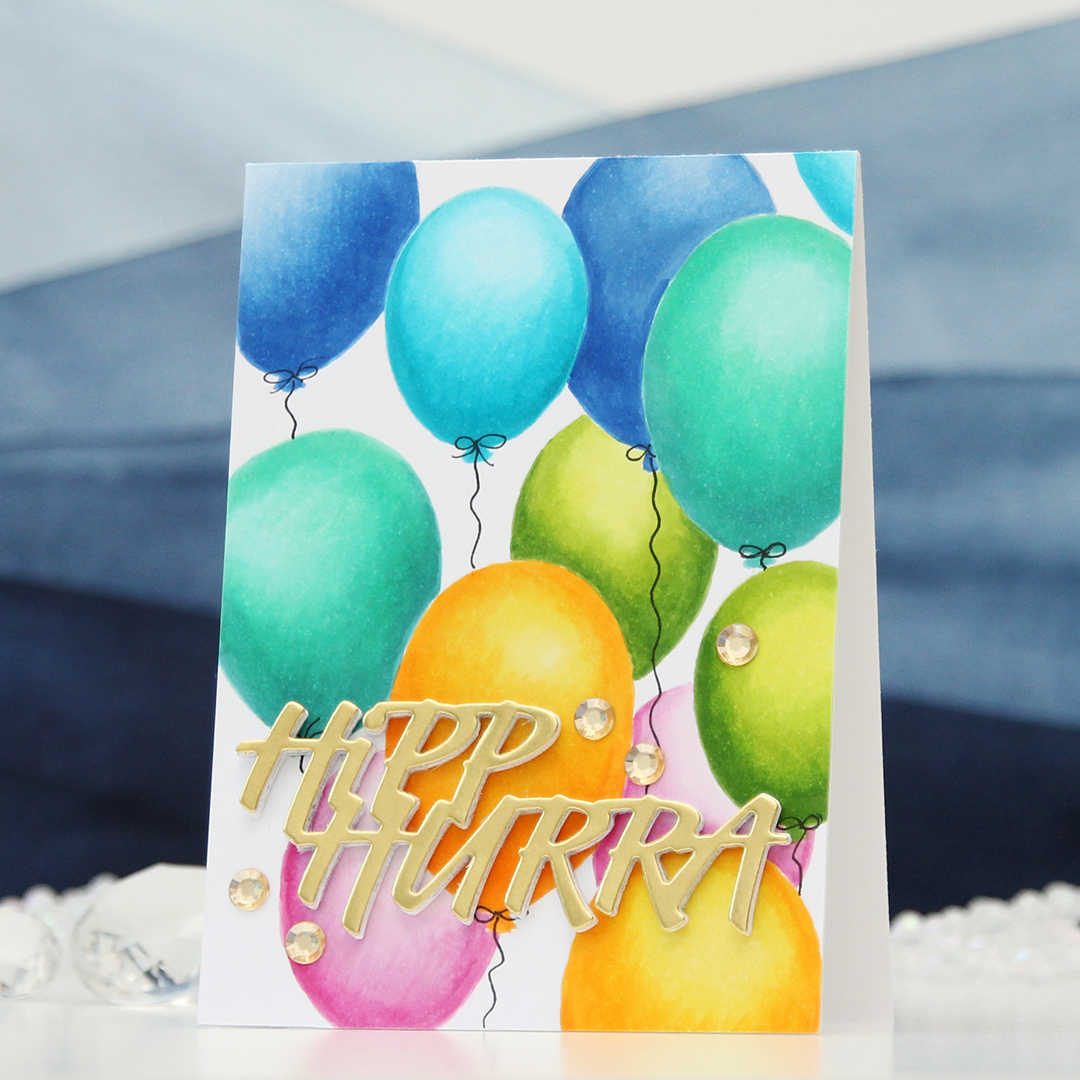 I started by drawing the balloons for my background with a 0.3 mm mechanical pencil. I erased most of the pencil lines before coloring, as Copic will trap pencil, making it impossible to erase after coloring. I wanted a no line look for these, and the half erased lines were enough for me to see where to add my Copics. Balloons are actually pretty easy to draw, it’s basically an upside down egg. If you don’t want to draw yourself, there are lots of balloon stencils on the market that you can use as a guide, or even a die cut balloon that you trace. I colored in my balloons, two of each color, added the panel to a top fold 4 bar card base I created from white cardstock and drew in balloon strings using a 0.35 Copic multiliner.
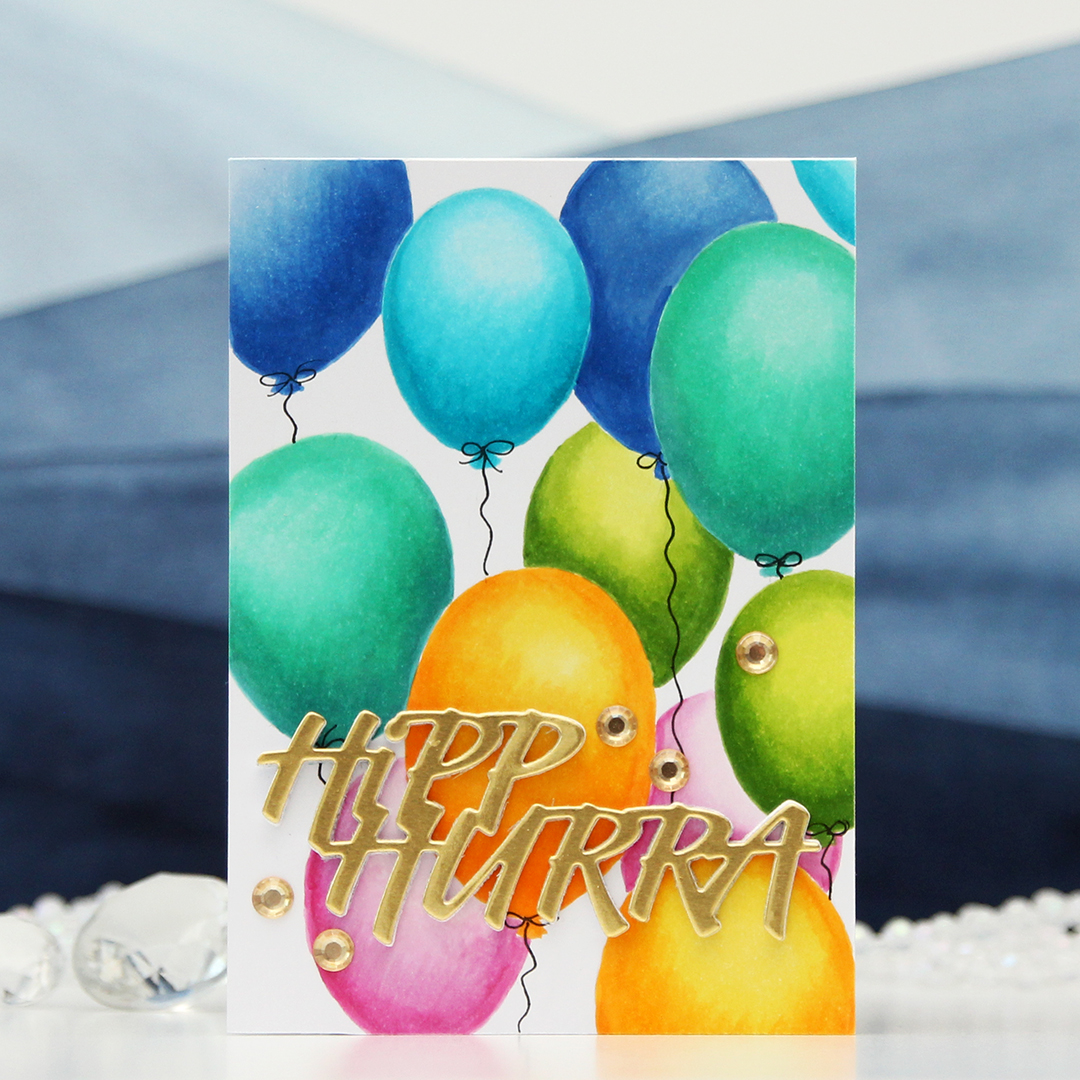 For a sentiment, I die cut the Hipp hurra die from Kort & Godt five times and stacked them for a dimensional look. I cut four from white cardstock and one from gold shine cardstock and topped the stack with that. I added some gems from the ST210 pack of gems to finish.
 Once I had enough images to cover a background, I printed it onto X-Press It blending card and chose a few Copics to color in the images. I went with flat color for most of these, only adding dimension in the coloring of the balloons.
 I cut my panel down and mounted it onto a top fold card base I created from Vintage Cream cardstock from Papertrey Ink. I die cut the sentiment using the Happy Birthday Brush Script die set from Simon Says Stamp, using Heavyweight Translucent Vellum from My Favorite Things for the shadow layer and black glitter cardstock from Kort & Godt for the words themselves, backed with a few layers of plain black cardstock (True Black from Papertrey Ink) for dimension. Behind the vellum, I die cut the word dies from a few layers of white cardstock to make the vellum “float” above the images.
 I adhered the greeting in the top center of the card and added enamel dots from the Forest Trail pack of enamel dots from Altenew to finish. I paired the card with a Sour Apple envelope from My Favorite Things.
 Just a few Copics for this one.
 The weather’s finally improving, and things grow greener and greener with every passing day, so I thought a floral background would be perfect for this card. I die cut masking paper using the Lenten Rose mini slimline die from Crafty Meraki. I had to do quite a bit of puzzle piecing of the masking paper to ink up the different sections in different colors, but I think the end result is worth it. The colors I used are all from Concord & 9th, they are Wildberry, Sweet Pea, Sunflower and Harbor.
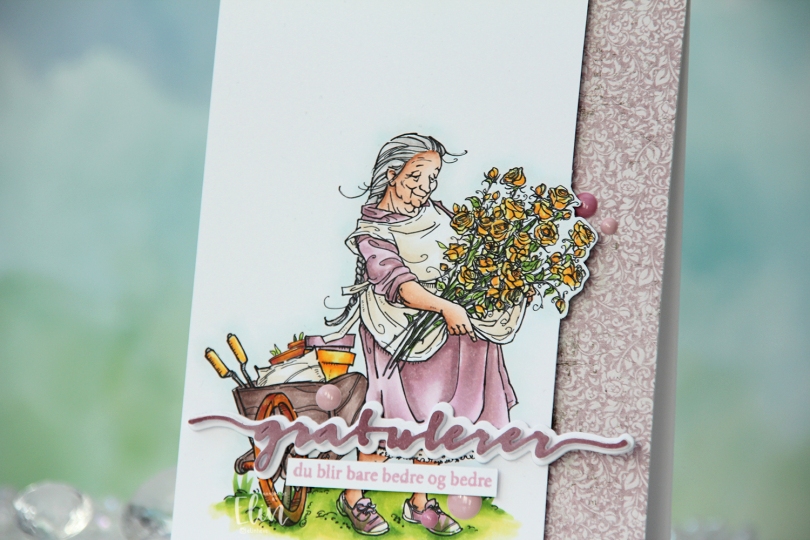
 I printed the image on X-Press It blending card and colored it with my Copics. I pulled out my RV90 series, which I used to use a lot ages ago, but haven’t really used much in recent years.
 Once my coloring was complete, I decided to cut off quite a bit on the right hand side of the panel, which meant doing some fussy cutting around the flowers. I don’t mind fussy cutting, and cutting on the border like this makes for a more dynamic design. Along the right hand side of a top fold card base, I adhered a scrap strip of patterned paper from the Vintage Romance collection from Maja Design, then popped my colored panel on the left.
 I die cut the Gratulerer 6 die from Papirdesign a few times. I die cut the shadow layer in white, then a few stacked of the word, before finishing off with a colored one. I actually colored this one with Copics on the scrap I cut off the panel. This is a neat trick if you want your colors to match, but don’t have the right cardstock color. I stamped a sentiment from the A06 stamp set from Norsk Stempelblad AS using Briar Rose ink from Concord & 9th, cut it down to a strip and adhered it below the die cut, adding a few strips of cardstock behind it for dimension. I finished off the card with a few enamel does from the Shades of Purple pack from Altenew.
 Using patterned paper from Craft Consortium along with a stamp, die and a few sentiment sticker strips from Kort & Godt, I created an envelope to match.
 I started by ink blending directly on the card base. I used the Window Panes stencil from My Favorite Things, and Scattered Straw and Mustard Seed Distress inks.
 I stamped the image and sentiment using Obsidian ink from Altenew and did some very light pencil coloring using my Prismacolor Premier pencils. I used Goldenrod (1034), Yellow Ochre (942) and Cream (914) for the yellow, and Olivegreen (911) and Limepeel (1005) for the green. I decided not to add embellishments, so this is truly a one layer card, as everything is done on the card base itself.
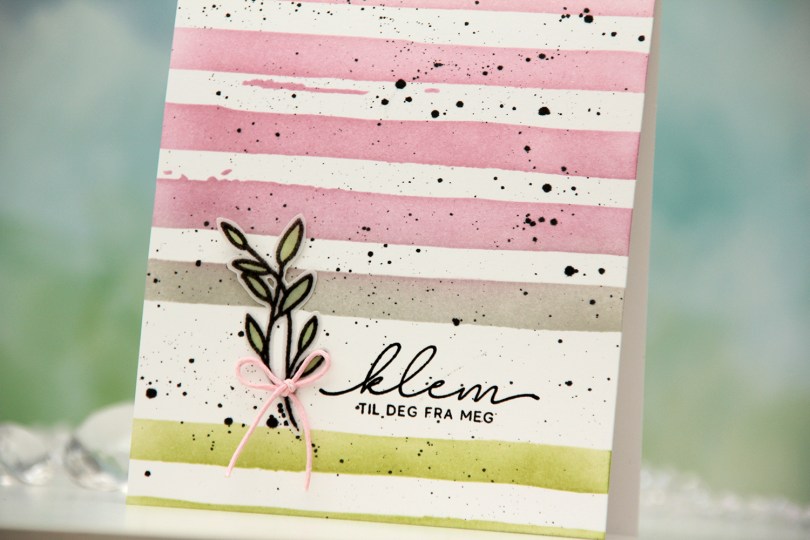
 I started by stamping and heat embossing the sentiment directly on the card base, which I created from Stamper’s Select White cardstock from Papertrey Ink. I stamped in Obsidian ink from Altenew and used clear embossing powder from Ranger. This is my preferred way to get a black embossing, as black embossing powder is tricky to work with. Once the sentiment was in place, I used the Watercolor Stripes stencil from Altenew and masked off the stripe that showed the sentiment through the opening. I ink blended using Avocado, Cobblestone, Briar Rose and Carnation inks from Concord & 9th, as well as Pink Crystal Fresh dye ink from Altenew.
 I wanted some black splatters on my card and used a size 4 paint brush with My Favorite Things Extreme Black reinker to get those black spots. I may have gone a little overboard, but I still like it. I stamped and heat embossed onto vellum a leaf image from the same stamp set as the sentiment, fussy cut it and colored the leaves from the back using my YG25 Copic marker. The vellum is heavyweight translucent vellum from My Favorite Things. I adhered the vellum piece to my card and finished off with a pink bow.
 I die cut the image into a circle and put lots of foam tape on the back. I created a card base from Periwinkle cardstock from Hero Arts, and used the Angled Mosaic 3D embossing folder from Altenew to create some fun texture.
 I added the circle to the top center, die cut the word klem (hug) three times from Something Blue cardstock from My Favorite Things, stacked the three for dimension and adhered the top of the letters to the bottom of the circle. This creates a shadow on the bottom half of the letters that I wouldn’t get if I had created additional layers and adhered the die cut directly on the card base. Because the die cut is three layers thick, it won’t get squished in the mail even though it’s floating. I added a sentiment sticker strip on top of the die cut and finished off with a couple of faceted pearls.