Hi, crafty friends, and happy new year! I thought it was about time I created something besides holiday cards, so today’s card is a very colorful, very happy birthday card, featuring a new die set from Kort & Godt.
 I used the Big Balloons stencil from My Favorite Things and did a rainbow of balloons going across the card. Each balloon is a gradient color, from dark at the bottom right, to a lot lighter at the top left. I used sooooo many ink colors to achieve this look.
Blue balloon: Azurite and Ultramarine – both from Altenew
Turquoise balloon: Starlight, Tide Blue, Turquoise – all from Altenew
Green balloon: Shadow Creek, Grass Field – both from Altenew
Yellow balloon: Distress Ink Mustard Seed, Distress Ink Squeezed Lemonade
Orange balloon: Simon Says Stamp Orange Peel, Distress Ink Spiced Marmalade
Red balloon: Heart Beat, Coral Bliss, Pink Pearl – all from Altenew
Pink balloon: My Favorite Things Poppin’ Pink, Distress Ink Picked Raspberry
Purple balloon: Deep Iris, Lavender Fields, Soft Lilac – all from Altenew
Once all the balloons were done, I drew string using a 0.35 black Copic multiliner.
 I die cut the word bursdag from Gold Shine cardstock from My Favorite Things. This is a very dainty die cut, so I chose to put double sided adhesive (I used a sheet from Altenew) on the back of the cardstock before die cutting, which made everything easy once it came to assembly. I die cut the shadow layer from True Black cardstock from Papertrey Ink and used black foam tape to pop it up in the center of my card. I used some sticker strips to fill out my sentiment, and added those using foam tape as well, before finishing off with a little gold bling.
Kort & Godt products used:
Die 346 – Du har jo bursdag
ST1002 – Sentiment strip stickers
ST174 – Gold bling
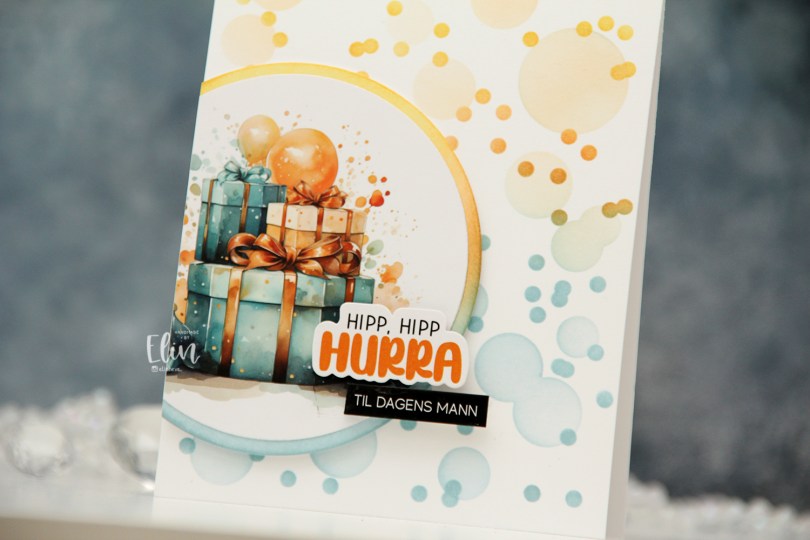

 I mounted my circles on foam tape, cut off the excess, then added a couple of pre cut stickers to finish off the card. I love these stickers!
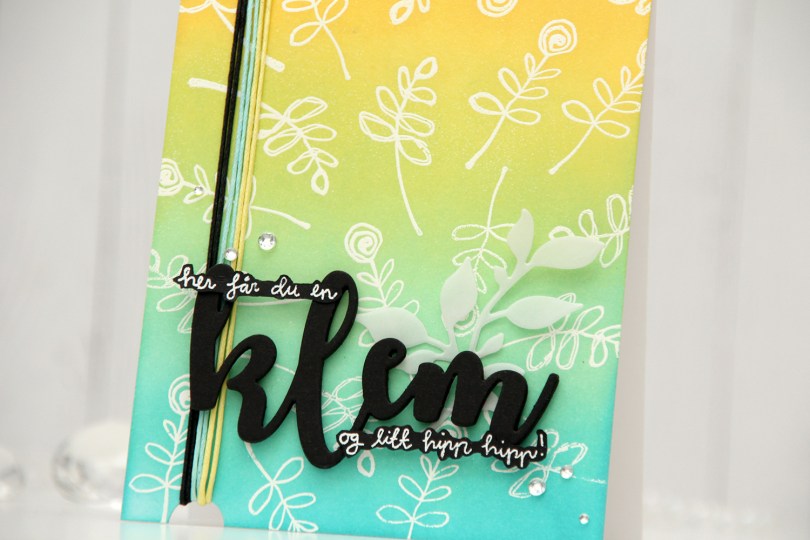
 I started with an A2 top fold white card base. I stamped and white heat embossed two stamps repeatedly across the background, before ink blending on top with Distress Oxide inks. From bottom to top, I used Peacock Feathers, Cracked Pistachio, Twisted Citron and Fossilized Amber. I die cut klem four times from True Black cardstock from Papertrey Ink and stamped and heat embossed coordinating sentiments. I figured they’d be too tall if I cut them down to regular sentiment strips, so I fussy cut around them. So far, so good, right? Yeah, that’s when I hopped on the struggle bus. I figured the sentiment on its own was a bit meh against the background, and it wasn’t exactly revolutionary. Also, the first part of the sentiment was floating on its own, which I also didn’t like too much.
 I used a leaf die to cut some leaves from vellum (Heavyweight Translucent Vellum from My Favorite Things), hoping that would work. It helped, but the first part of the sentiment was still floating. I needed an anchor point. I tried adding some thread on the side. Better already. I decided to cut a half circle notch from the bottom and top of the card for the thread to be looped around. Two strands each of three colors that matched the card. I was quite happy with that and decided to add the die cut word, and also adhered the stamped pieces of the sentiment on top of the die cut. Instant anchor points, and the first part of the sentiment was no longer floating on its own. I finished off with diamonds that framed the sentiment, and felt like it all ended up as a cohesive design in the end, even if it took me a while to get there.
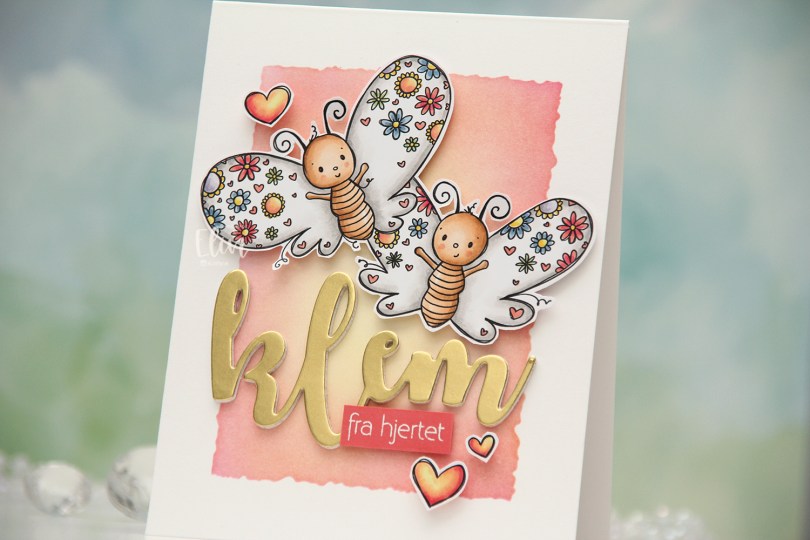
 I colored the butterflies (and the three hearts that are part of the image) with Copics and fussy cut them, leaving a thin white trim around the edge. Onto a top fold card base I created from Stamper’s Select White cardstock from Papertrey Ink, I ink blended the center of the card, using the Watercolor Rectangle stencil from My Favorite Things and various inks (Distress Ink Picked Raspberry, Distress Ink Worn Lipstick, Altenew Pink Pearl, Distress Ink Scattered Straw). I went with pink on the edge and yellow in the center to mimic the colors in the hearts.
 I die cut the word klem (hug) four times from white cardstock and once from Gold Shine cardstock from My Favorite Things, and stacked them for a layered look. I added foam tape to the back of my butterflies, adhered them top center on the card and put the stacked klem below them. I also added a sub sentiment from Norsk Stempelblad AS that I white heat embossed on a piece of Berry Sorbet cardstock from Papertrey Ink. I put a few layers of cardstock behind it for dimension and added it to the card, partly on top of the die cut, before embellishing with the colored hearts to finish.
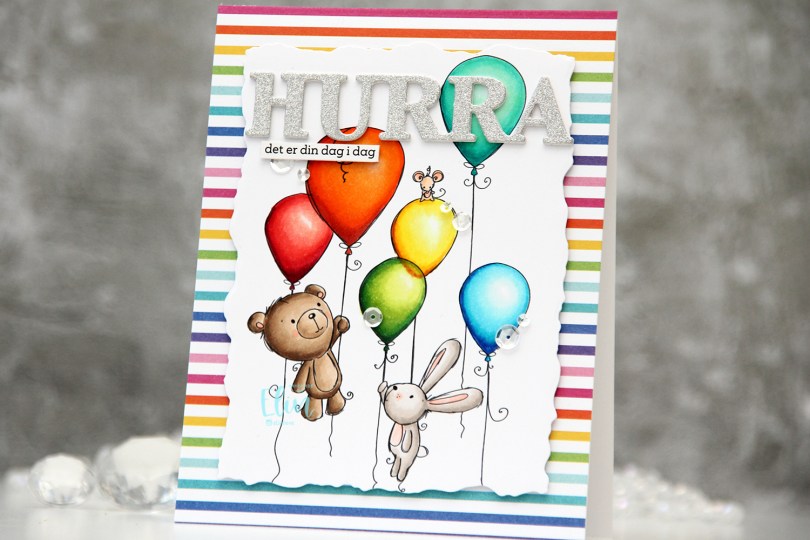
 I colored my image with (a lot of) Copics, before using the second largest die in the Watercolor Rectangle STAX die set from My Favorite Things to cut it out. Onto a top fold white card base, I adhered a piece of patterned paper from the Rainbow Love paper pad from My Favorite Things. I added some dimension behind my colored panel and adhered it in the center of the card.
 Using a die from Kort & Godt, I die cut three layers of the word HURRA; twice from white cardstock, and once from silver glitter cardstock from Kort & Godt. I stacked the three and adhered my layered die cut near the top of the card. I added a sentiment sticker strip, which I also popped up, before finishing off the card with sequins from the Seaglass mix from Simon Says Stamp.
 I used way more colors than normal for this card, and probably a few more than I technically needed. I probably could have skipped a couple of colors on the orange balloon, as well as on the teal balloon.
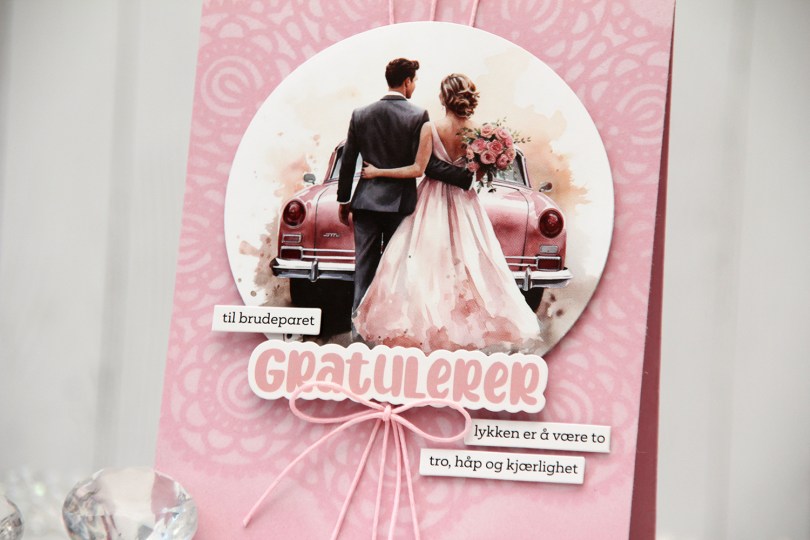
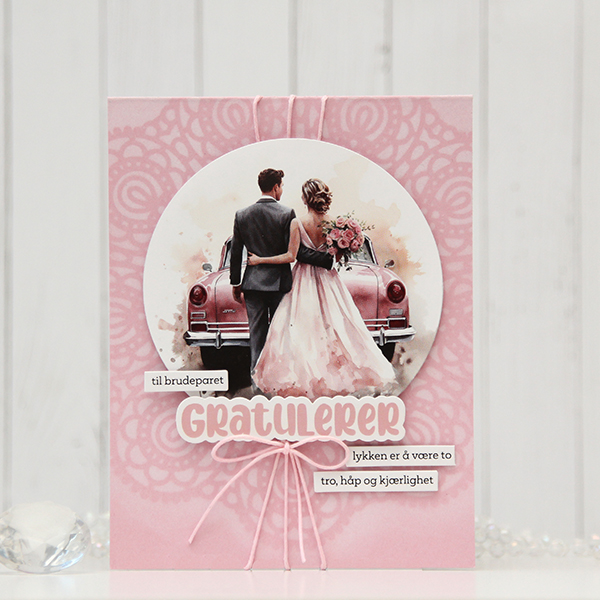 I used the Circular Lace stencil from Simon Says Stamp and ink blended white hybrid ink from Papertrey Ink onto the card base, which I created from Lavender Moon cardstock, also from Papertrey Ink.
 I used pink thread to create a little bit of texture on the background. I created three holes at the top center of the card to loop my thread through and tied a bow. I die cut the image using a circle die, added foam tape to the back and adhered it to my threaded background, before adding a “Gratulerer” sticker using a few foam squares for additional lift. I also did the same with a few sticker sentiment strips, and my card was complete.


 I printed the image onto X-Press It blending card and colored it with Copics. I went with a grayish green/muted pink combo, which is one I often use for holiday cards. I’m not a fan of bright red and green together, but this works for me. Once colored, I used a die from the Wonky Stitched Rectangle STAX set from My Favorite Things for a fun faux stitch look on the edges. I adhered my panel to a top fold card base I created from Autumn Rose cardstock from Papertrey Ink, which is a nice match with my pink coloring.
 I used a fairly simple color combo, but it’s still a lot of Copics, I never can seem to rein it in.
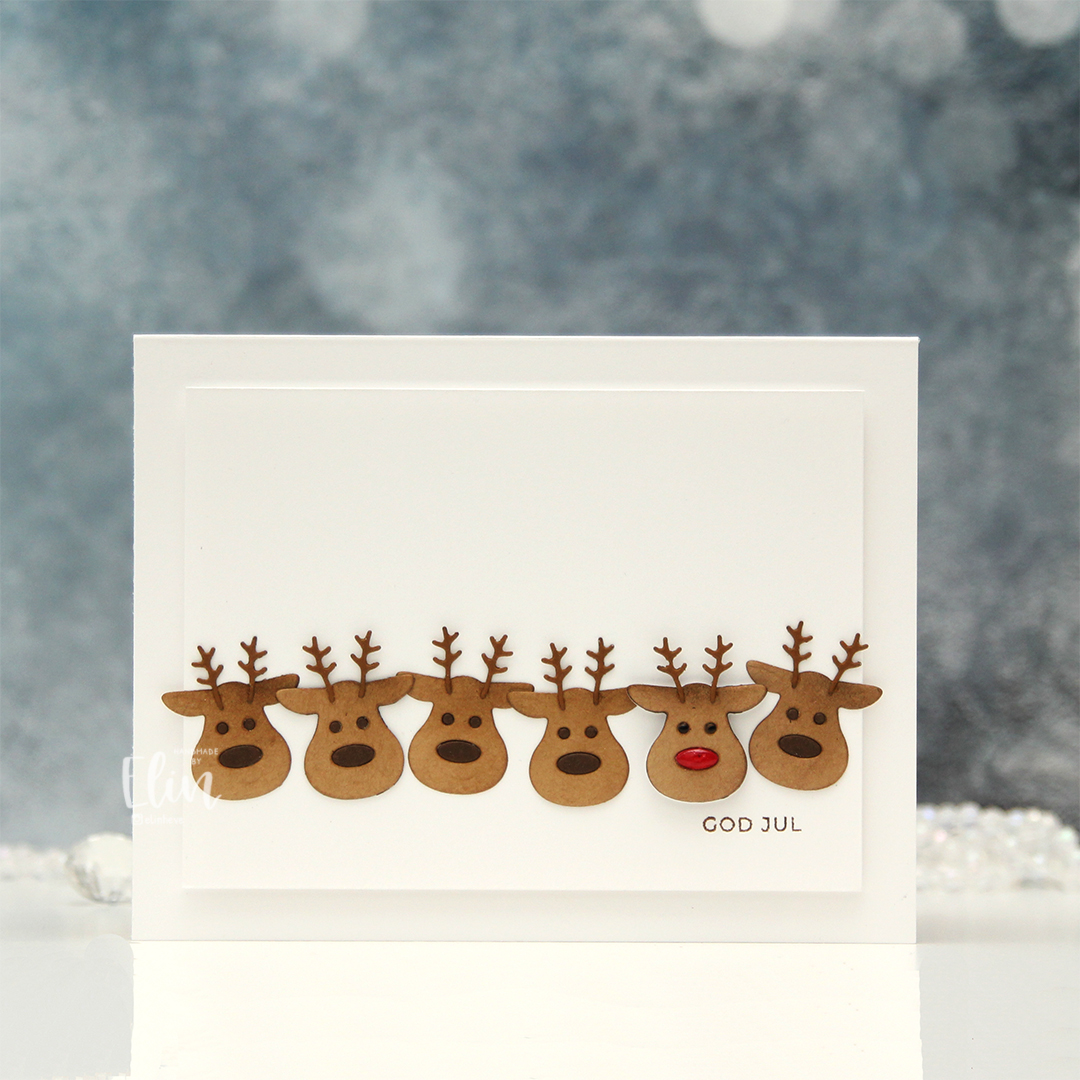 I die cut the reindeer from several colors of colored cardstock. I used Cocoa Nibs from Papertrey Ink for the antlers, Amarena Cherry from My Favorite Things for the red nose, Milk Chocolate from My Favorite Things for eyes and the remaining noses, as well as Kraft from Bazzill. I would have preferred Classic Kraft from Papertrey Ink, as it’s a heavier weight cardstock, but I’ve run out, and the Bazzill kraft worked just fine.
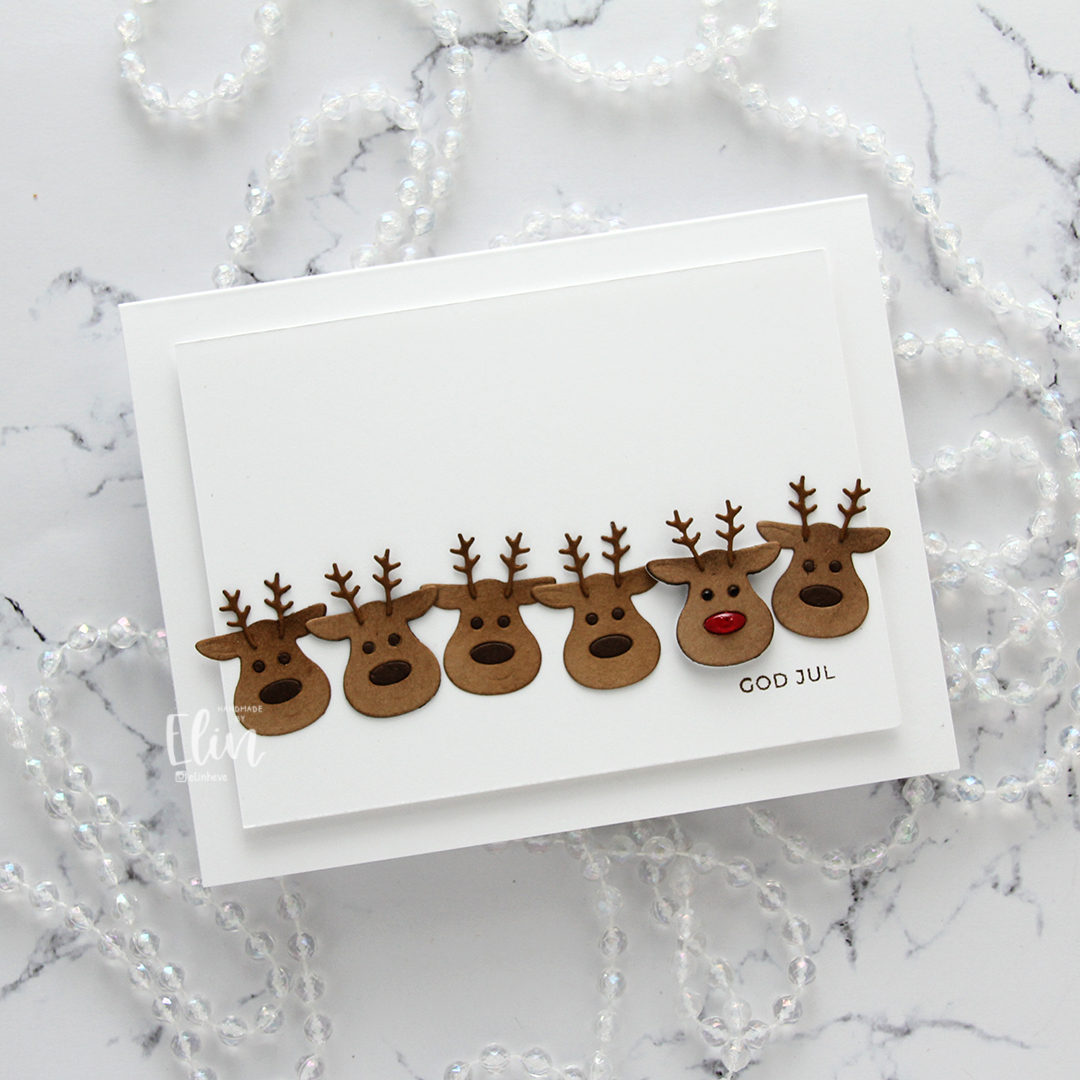 I mounted a white panel onto my top fold landscape card base and adhered the reindeer in a line. A couple of them have additional layers of cardstock behind them for a tiny bit of dimension, Rudolf has lots of layers behind him, as well as shine to his nose. I added a very thick coat of Glossy Accents, and I also added black Glaze to his eyes for shine and dimension. I stamped GOD JUL using Milk Chocolate ink from My Favorite Things.
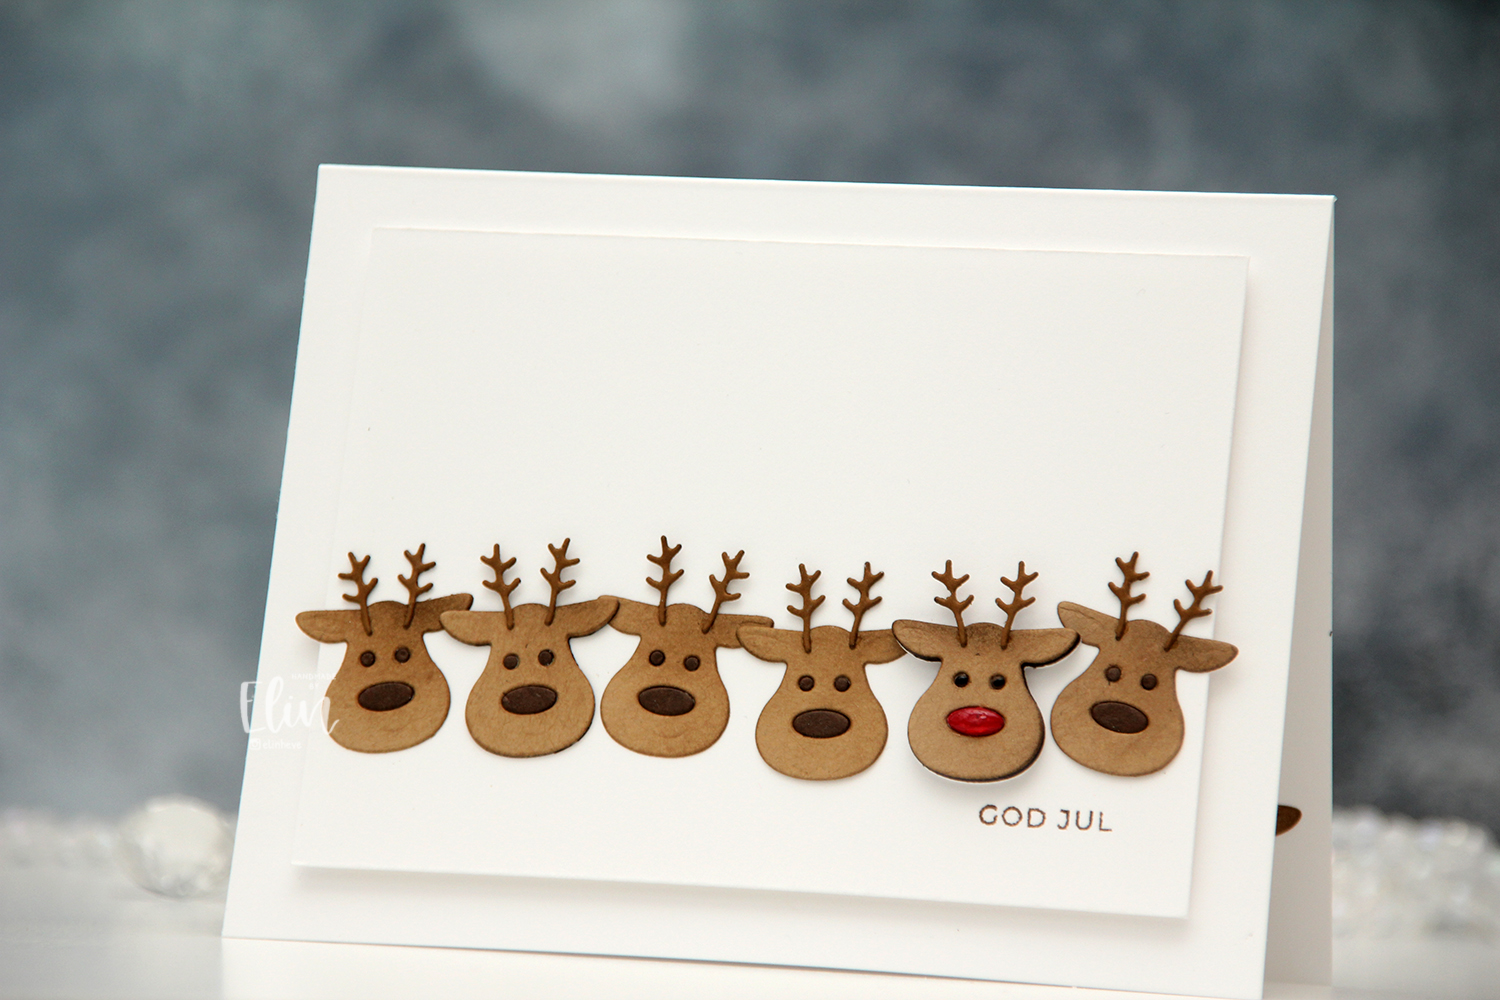 I had an extra reindeer that I decided to add to the inside of the card, you can see his ear peeking out in this photo.
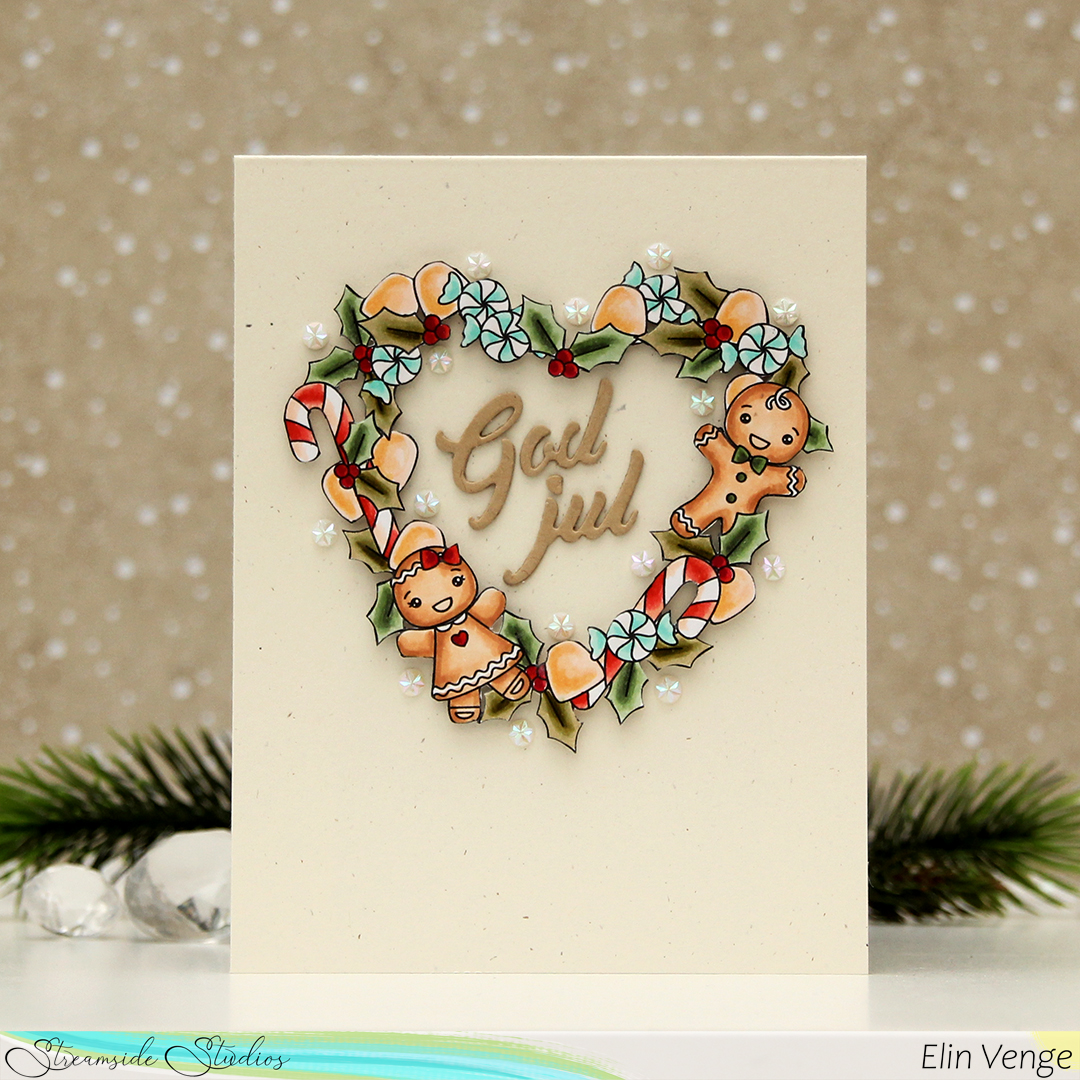 I tend to choose fairly bright color combos, but this time, I wanted to shake things up with a more vintage vibe and used a very different color palette.
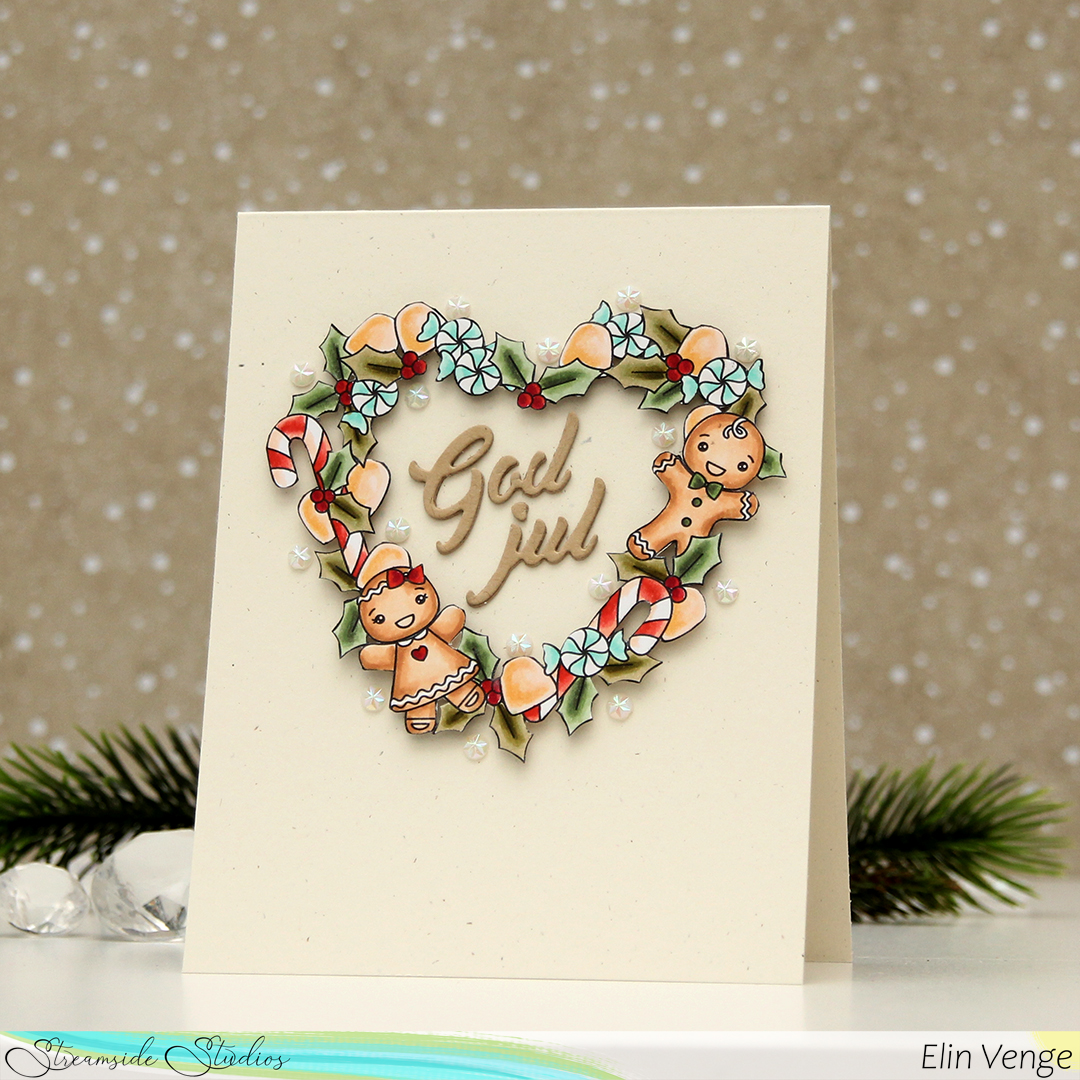 I colored the wreath, then fussy cut right up against the black stamped lines in the image. I added foam tape to the back and mounted it to a top fold A2 card base i created from Rustic Cream cardstock from Papertrey Ink.
 I die cut the sentiment from Classic Kraft cardstock from Papertrey Ink using a die from Papirdesign. I stacked three die cuts for a little dimension and adhered the letters at a bit of an angle inside the heart wreath, before finishing off with a few faceted pearls from Kort & Godt.
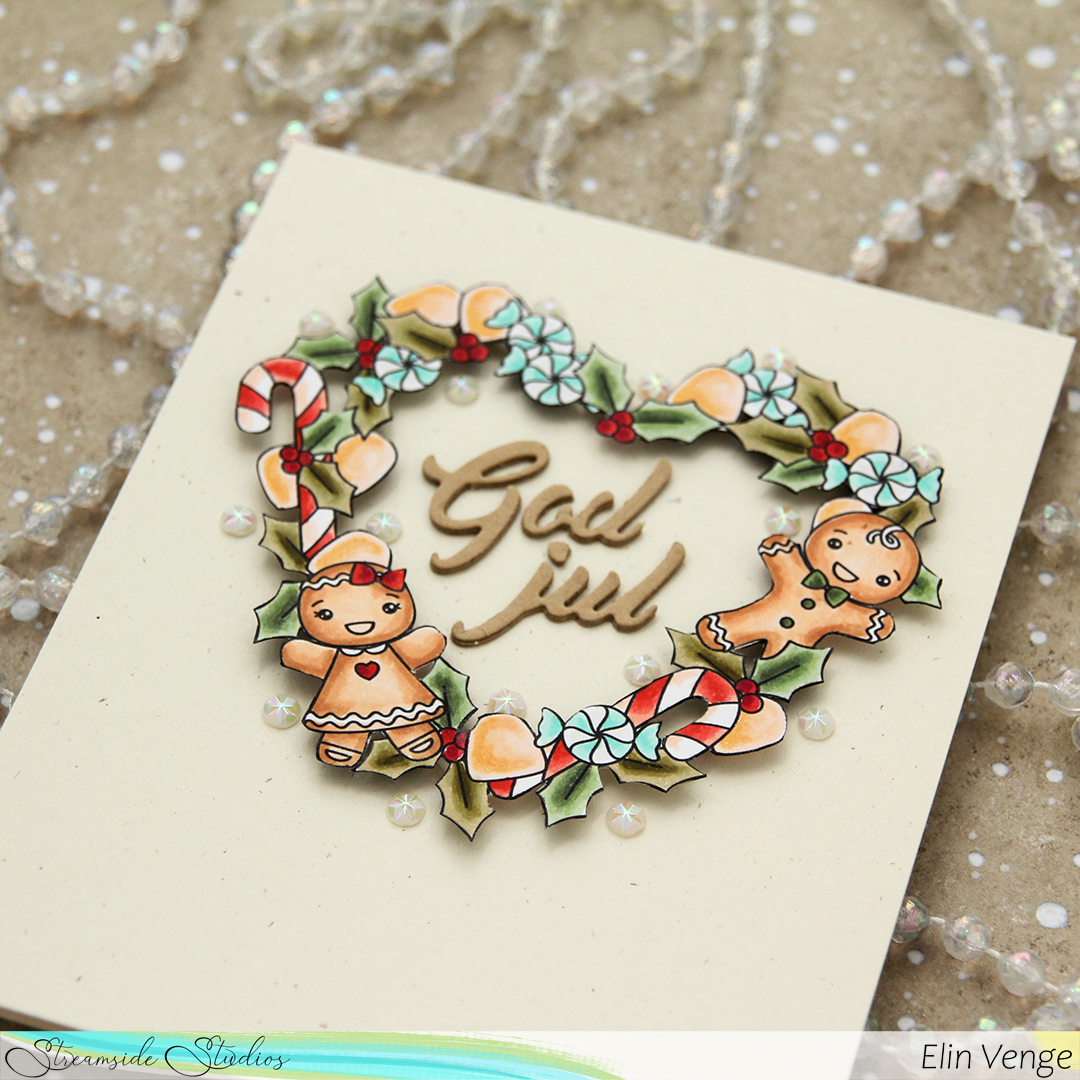 The foam tape on the back of the wreath makes it look like it’s floating above the card front.
 Vintage color scheme!