Hi, crafty friends! Today is Mother’s Day in Norway, and I probably should have thought ahead enough to make a Mother’s Day card to share today, but I’m not always a good thinkaheader and have a birthday card to share instead. My design is pretty generic, though, and it would be easy to swap out “birthday” for “Mother’s Day”. I even think the color scheme is perfect for mother’s day.

So many things went wrong in the creation of this card, but I fixed/covered up most of my mistakes and I’m pretty happy with the end result. I started by stamping birthday from the All the birthdays stamp set from Concord & 9th onto an A6 panel of Stamper’s Select White cardstock from Papertrey Ink, as well as onto a piece of Nectar cardstock from Concord & 9th that was large enough to cover the shaker area. I didn’t want to stamp it directly onto the card base, that would have made it harder to line up. More on that later. So far, so good, right? I then die cut the HAPPY from the Happy Birthday words dies from Kristina Werner into my white panel, and kept the counters of the A and the Ps to put back in later. Things were still going according to plan. There’s a small asterisk looking stamp in the All the birthdays stamp set. I wanted to stamp that randomly across my white panel and pulled out an acrylic block. We used to stamp with acrylic blocks all the time before the Misti was invented. I’m not a ding dong, surely, I’m capable of stamping this tiny stamp a few times with an acrylic block without messing up, right? Turns out I AM a ding dong and royally messed up on the Eucalyptus colored asterisk above the A and P. Pretty much in the middle of the card, isn’t that typical? I knew I was going to add sequins, and I could strategically place one to cover up my boo boo. I cut off 3/16″ on all sides to allow the card base color to work as a frame once the card was complete.

I then adhered a piece of acetate behind my letters, glued the counters (interior pieces of the letters) back in onto the acetate, flipped the panel over and added tons of foam tape around the shaker window pretty close to the window, even putting tiny strips behind the counters of the Ps, before putting a few sequins from Altenew into the shaker well before sealing it shut with another piece of acetate. I made sure to add the sequins the right side up. That was not a good idea, but I didn’t realize at the time and adhered my shaker piece onto the stamped piece of Nectar cardstock to line up the stamping on the two pieces. The problem with the sequins all facing the same way is that once they shook around, they clumped together like stacks and were pretty much impossible to separate by flicking the card. The other mistake? Adding the foam tape so close to the letters and behind the counters, my sequins didn’t really have a chance to move much. I had adhered everything to the card base at this point.
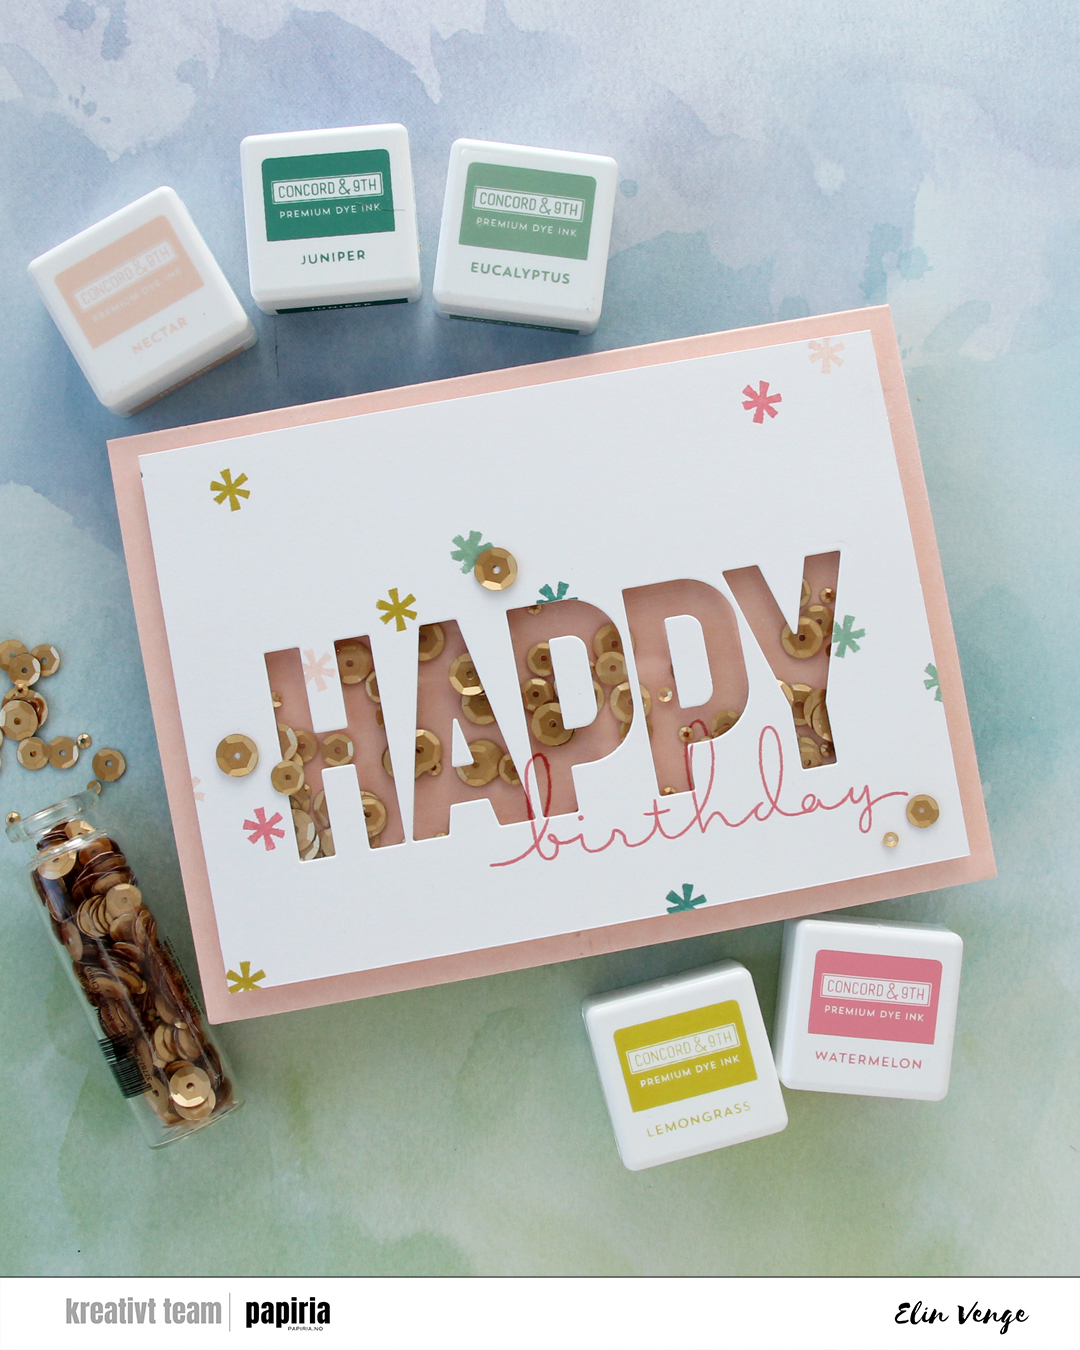
I’m not shy with glue when adhering things, but I was able to slide a thin 6″ steel ruler under my shaker panel and basically used it as a saw to cut it away from the card base, cutting horizontally so I would preserve the card base as well as I could. I didn’t have another sheet of Nectar cardstock to create a new A6 card base, so this was the way to fix it. I then pulled off the nectar piece with the stamping, then the back acetate piece, which took with it a few of the small pieces of foam tape that were in the way anyway, and then I emptied out the sequins, made sure there were no sticky pieces left behind, put sequins back into the now rectangular shaker window, this time randomly with some upside down and some right side up – and I added way more sequins too, before sealing it shut with a new piece of acetate. The piece of Nectar cardstock I’d stamped on initially had crease lines after being pulled off, so I had to restamp birthday on a new piece of Nectar. Evidently, I didn’t put the stamp into the Misti the same way as I had the first time, because the new stamping wouldn’t really line up with the old stamping – part of the nature of photopolymer stamps, they’re soft and can be curved. The loops on the b and h don’t perfectly line up with the stamping on the white panel the way they initially did, but this is me embracing imperfection, I wasn’t redoing the white panel too.
 I adhered my shaker panel to the card base and cut a couple of additional white panels to put on the inside of the card. This means I have a white panel to write my personal message, the card is a little sturdier because it’s now thicker, and the piece I adhered on the back of the front covers up the fact that I could actually see through parts of the card base after my little sawing earlier. Not shy about glue, remember? Yeah, the glue does its job, and I tore parts of it down to almost printer paper thickness. I added sequins to the front of the card (one covering up my stamping mishap) and I was done. At least I thought so… I was happy with the card, but then noticed as I was writing up the blog post for Papiria that the counter of the second P had slipped a little and wasn’t in the right spot anymore. It was bugging me. It was *really* bugging me, so I peeled it off, die cut a new one that I adhered in the right spot and took a couple of new photos. You can still see the droopy counter in the first two photos here, but that’s my card. I got there in the end.
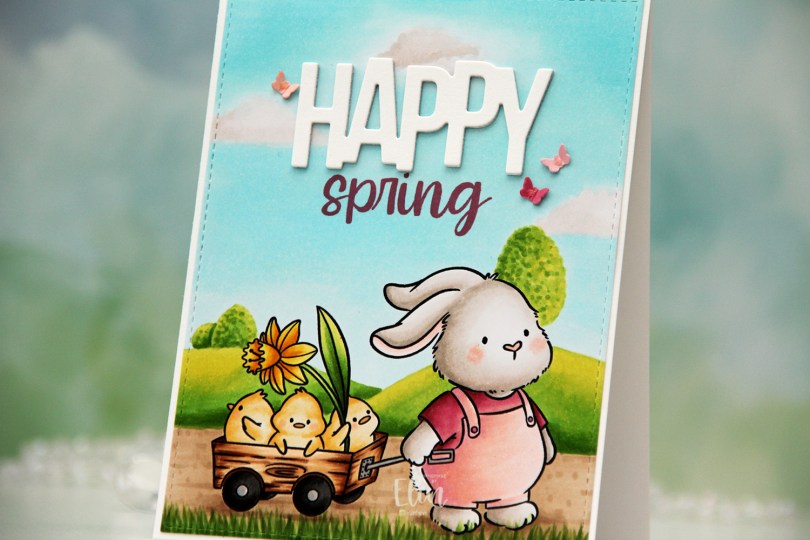
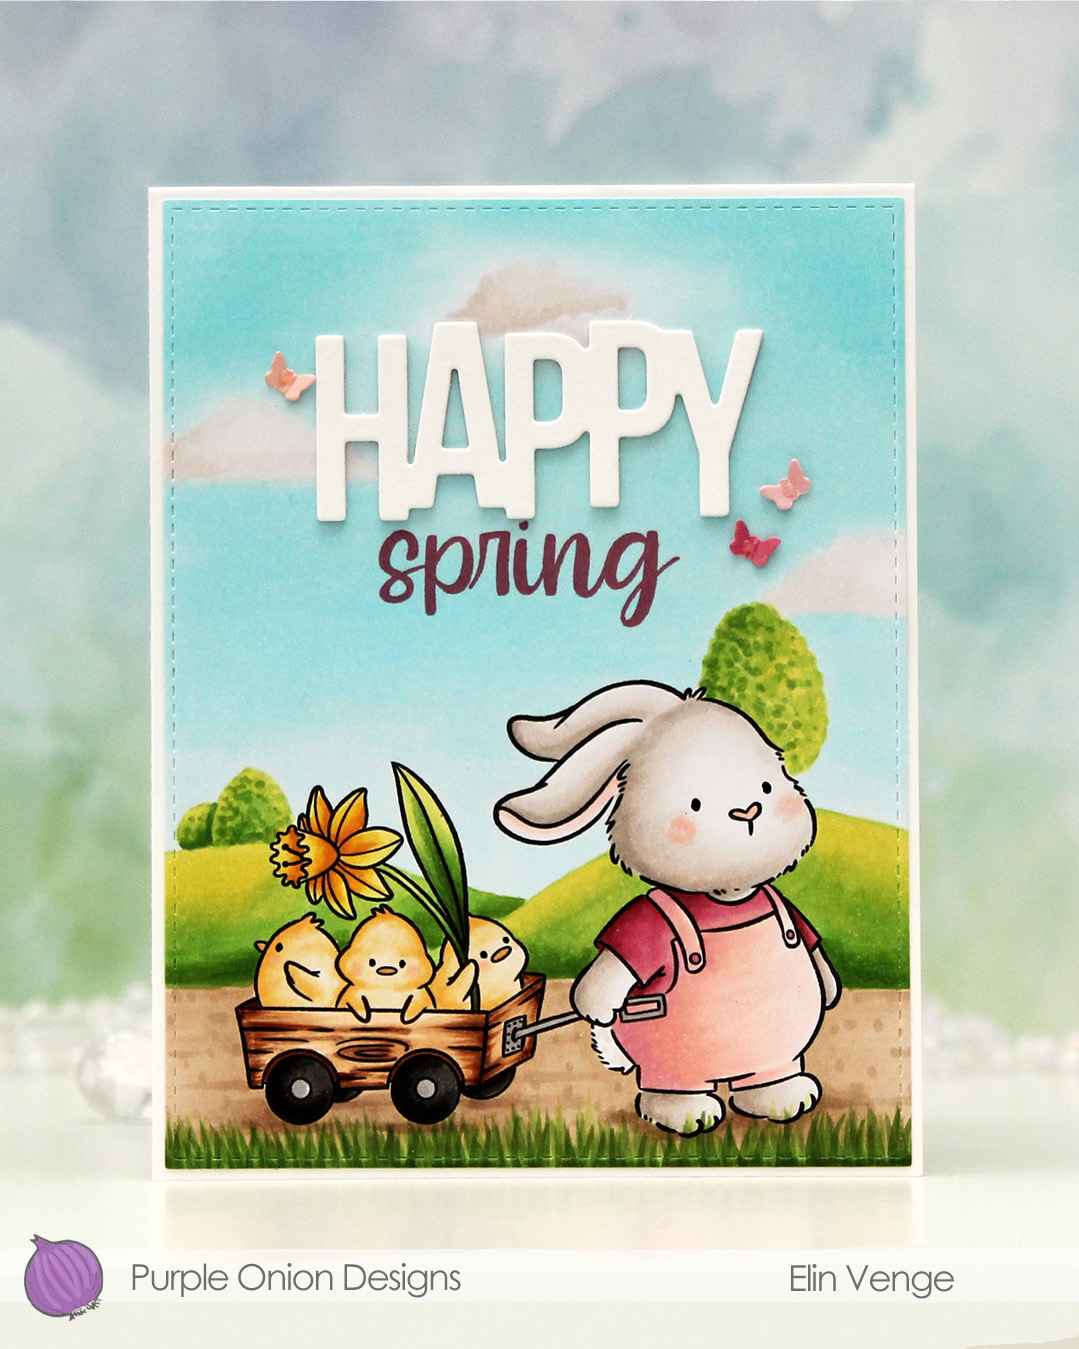 I colored the image with Copics, adding a simple free hand background of a couple of hills with a few trees, a path for the bunny to walk on and some blades of grass in front. My original plan wasn’t a scene at all, I had planned to add a big Happy Easter die cut, but changed my mind and added the hills and sky instead. I think this looks better than what I had planned.
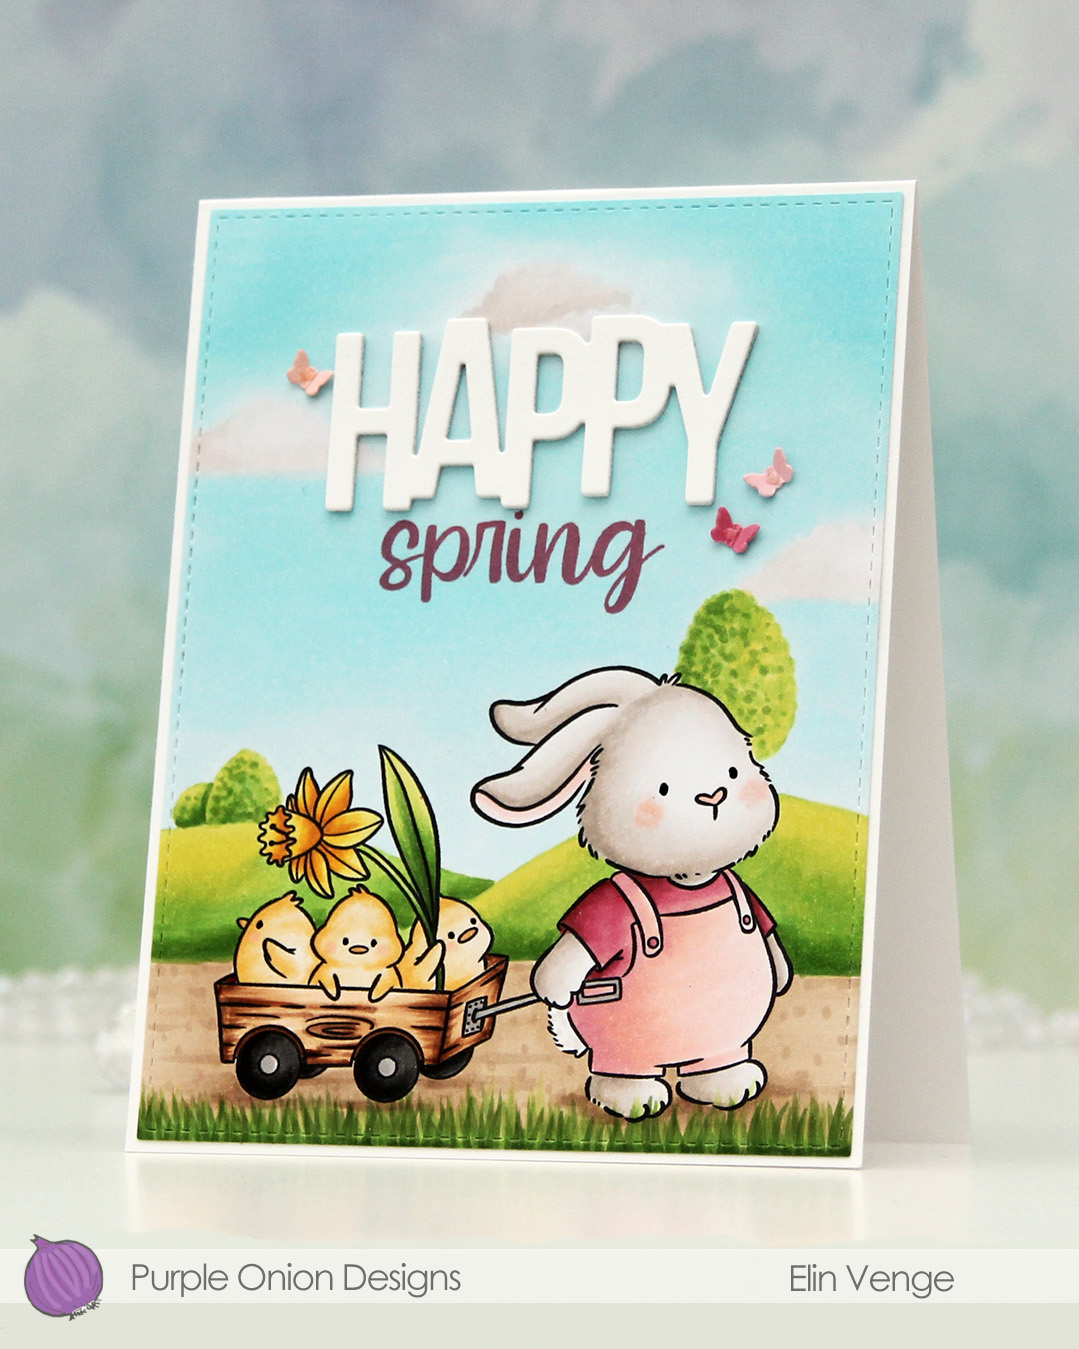 I used the largest die in the A2 Stitched Rectangles STAX 1 set from My Favorite Things to create a little bit of interest along the perimeter of my panel. I stamped the word spring from the Happy hello sentiment set using Autumn Rose ink from Papertrey Ink to match the bunny’s shirt. I also used a Glaze pen from Sakura to create some shine (and a tiny bit of texture) to the eyes.
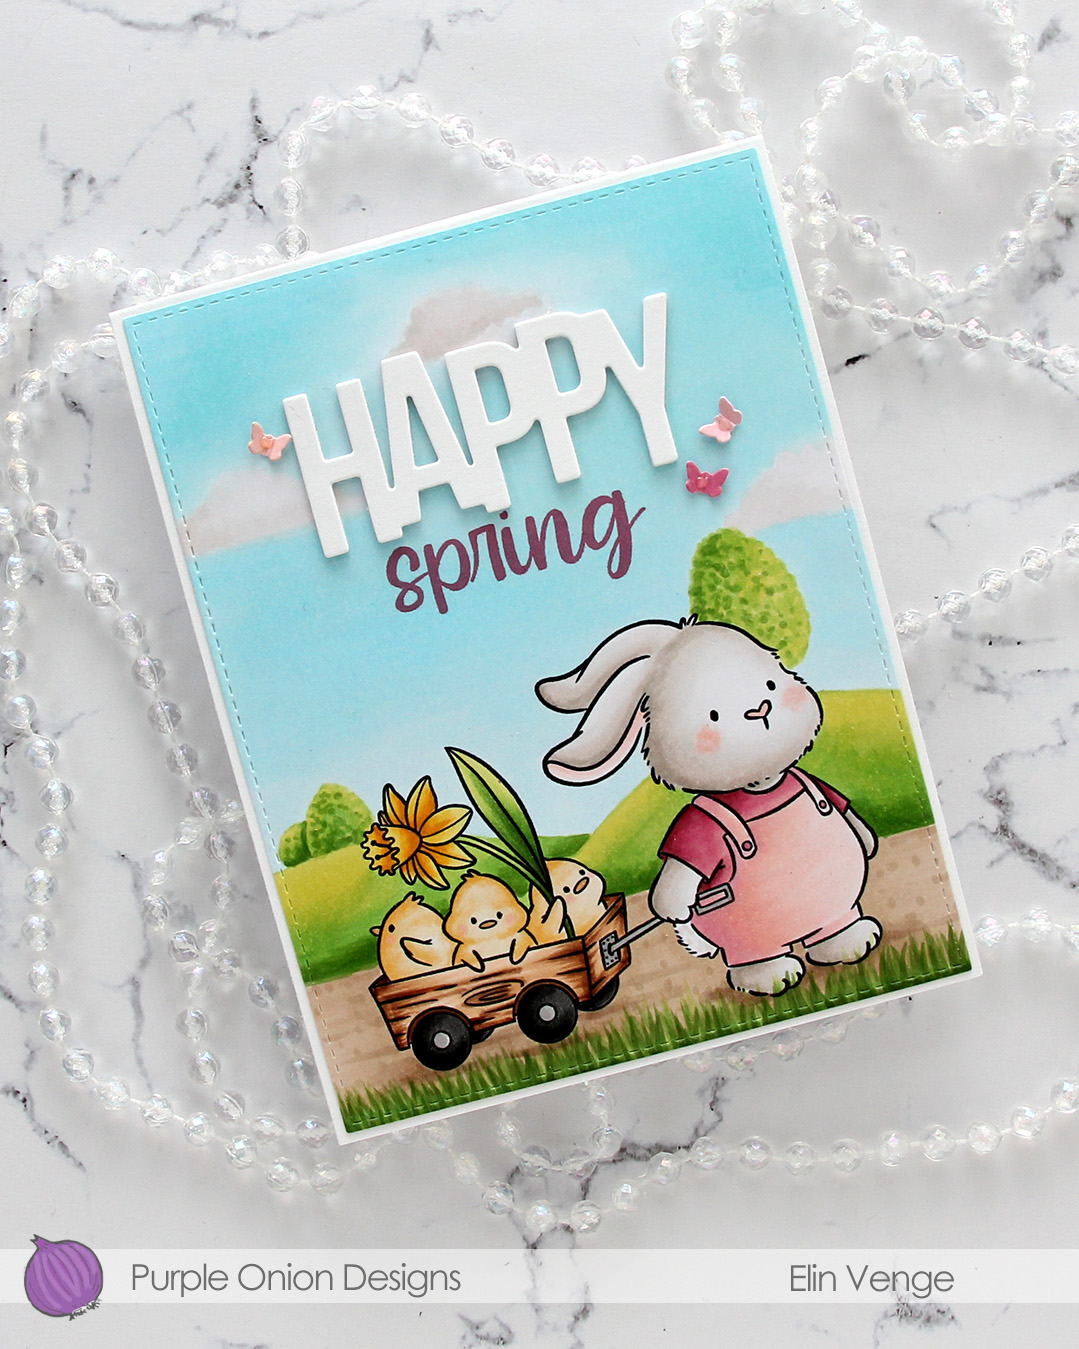 I die cut the word HAPPY from the Birthday Script die set from Kristina Werner three times from Stamper’s Select White cardstock from Papertrey Ink (the same cardstock that I used for my card base, I love this cardstock) and stacked them. I adhered my stacked word above the stamped spring to complete my sentiment.
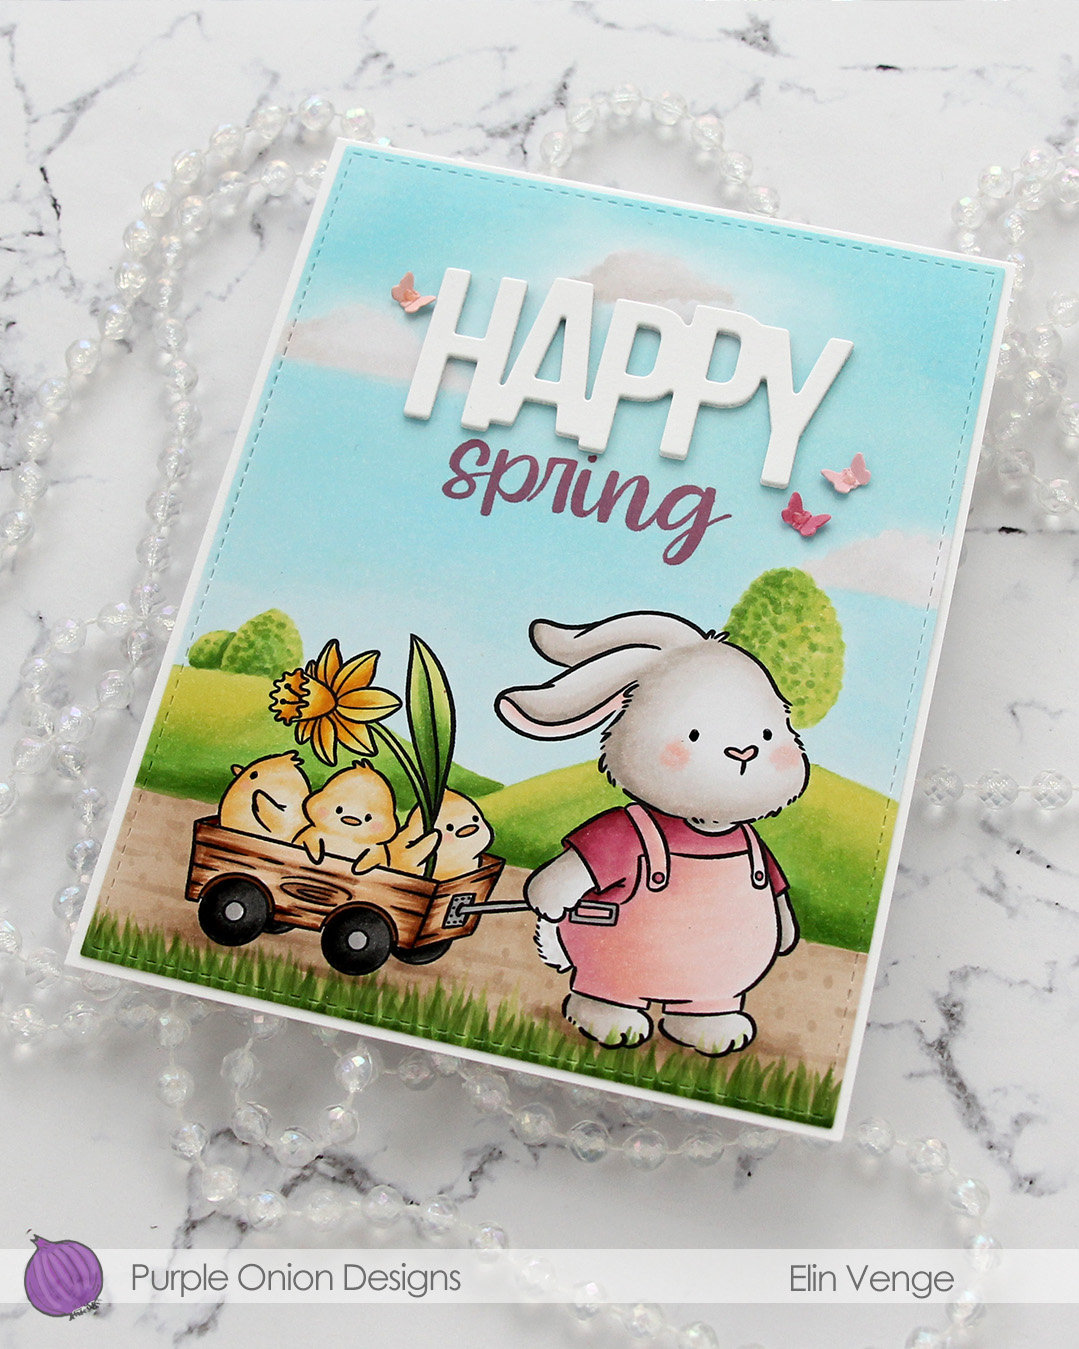 I decided to die cut tiny butterflies to use for embellishment. I didn’t have any cardstock in the color I wanted, so I colored scraps of X-Press It blending card with the same colors I used for the bunny’s outfit, before using the butterflies die from the Greenhouse Greetings die set from Concord & 9th (it’s a die set from the 2024 C9 summer camp). I scored my tiny butterflies down the body, adhered each of them with a tiny bit of glue and added Rosewater Jewel Drops from Tonic on the bodies of the butterflies to finish.

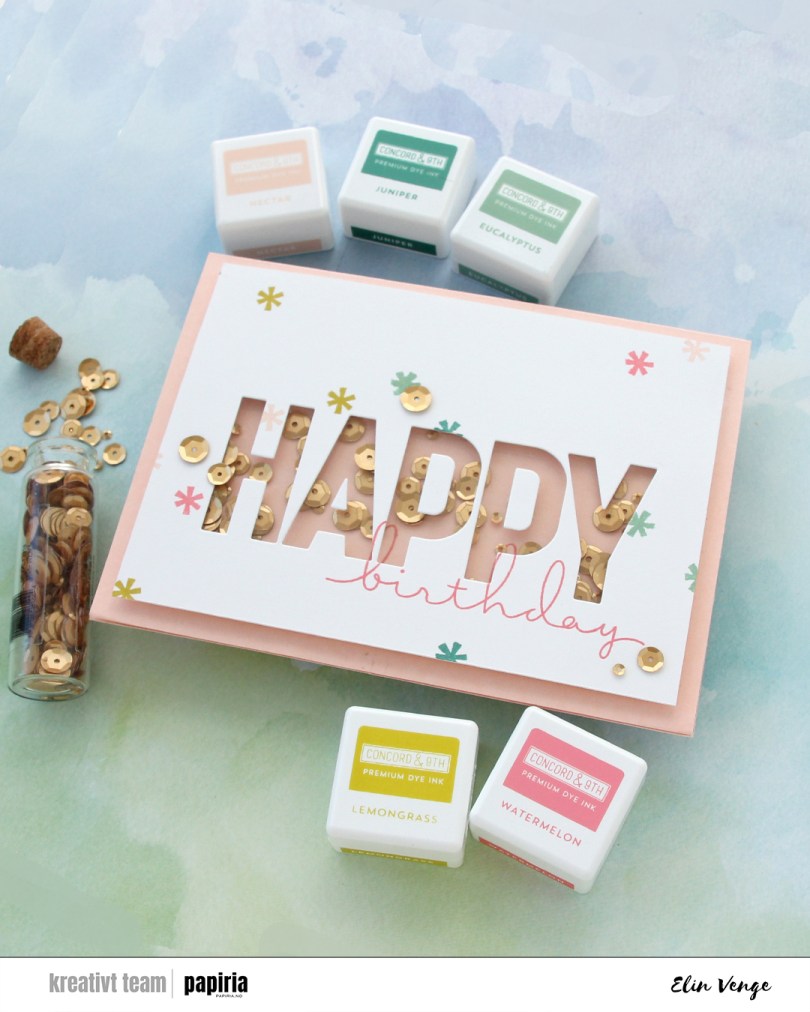
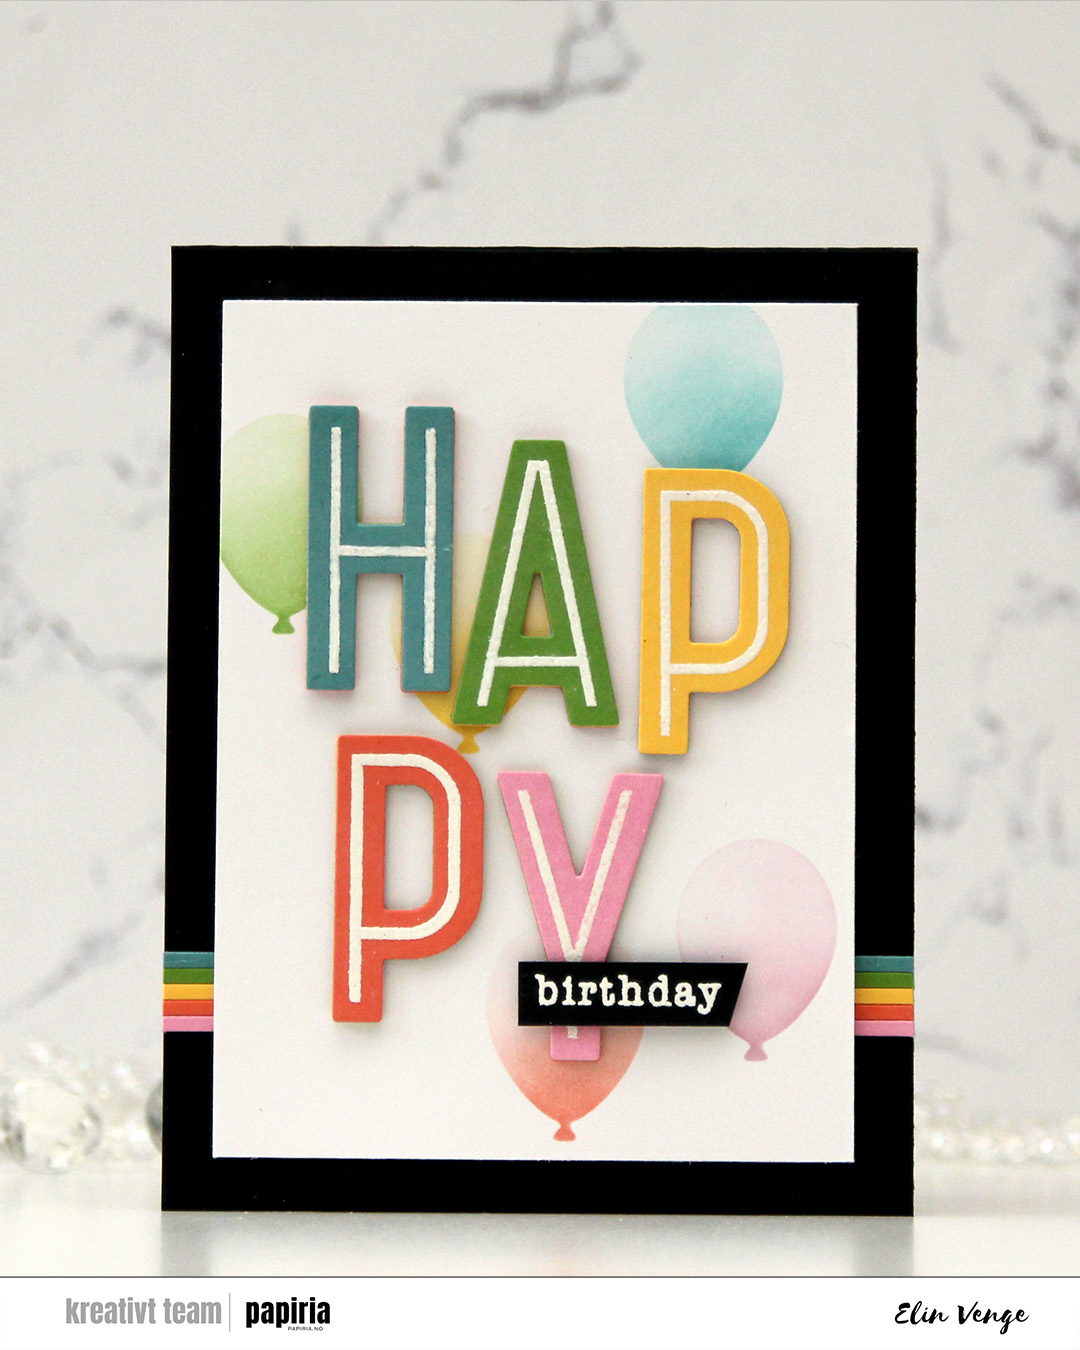 I started by stamping the word happy from the Happy Birthday Words stamp set from Kristina Werner onto five different colors of cardstock from Concord & 9th. I used Lakefront, Parsley, Buttercup, Sorbet and Carnation. I heat embossed them all with white embossing powder from Ranger and stacked the letters for dimension, choosing a different color on top for each. This gives a bit of a rainbow look from the side.
 I cut a white panel to 3 1/2 x 4 7/8″ and used the Balloon Party stencil from My Favorite Things to add ink blended balloons in the background. I used the same ink colors as my cardstock colors for the letters, and added a gradient on each of the balloons, concentrating the color on the base of the balloon, then fading as you go up the balloon. I adhered my letters staggered onto the stenciled background.
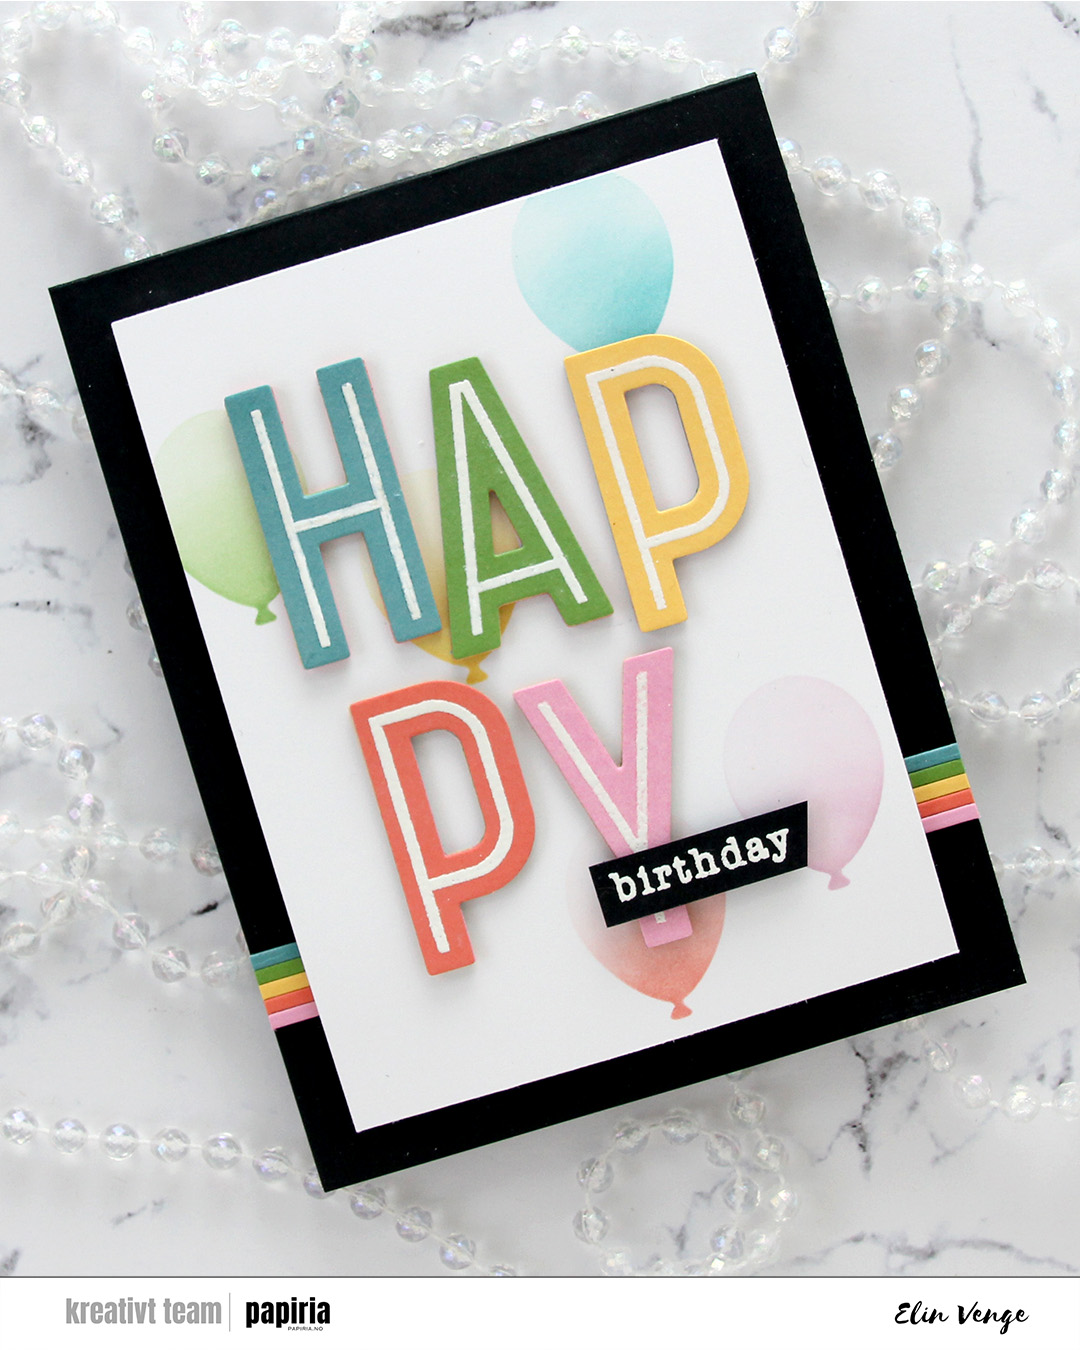 I stamped and white heat embossed the word birthday from the All the birthdays stamp set from Concord & 9th onto a scrap of Black cardstock. I added a few extra layers of cardstock behind it, before adhering it near the bottom of the pink Y.
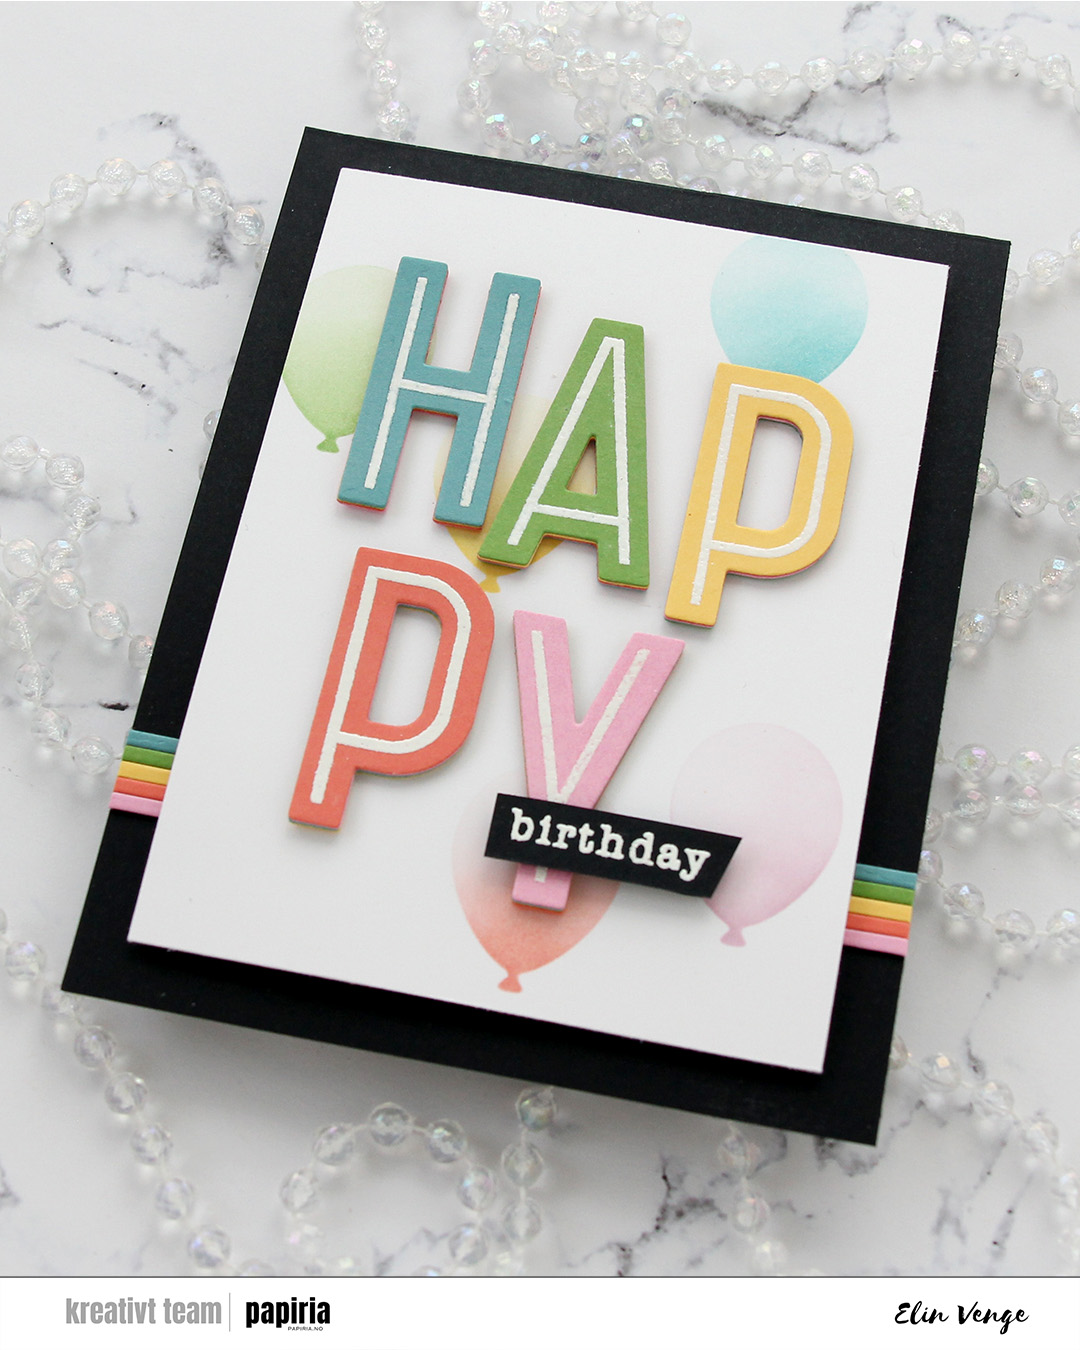 I cut slivers of the same colors of cardstock to create some interest on the card base. I like the beveled edge you get from die cutting as apposed to using a trimmer, which is why I used one of the frames in the A2 Thin Frames die set from Kristina Werner for this. I put a scrap of each color cardstock along the sides of the die for a bit of selective die cutting. It was then super easy to butt the strips up against each other. I adhered the strips horizontally across the card base, added foam tape to my panel and adhered it in the center of the card.
 This all started with patterned paper from Maja Design and the Sleigh full of cheer dies from Concord & 9th. Die cutting presents like this is a great way to use scraps. I used the Christmas Nostalgia collection for this. I’m a sucker for anything blue, so I wanted a dark-ish blue at the bottom, a lighter blue at the top and a contrast in the center. You could do this with any color, even plain cardstock. There are actually some images in the coordinating stamp set that will allow you to add patterns to your die cuts using just ink, but I opted for the patterned paper version here. I die cut the bow, the ribbon for the presents and the sleigh using champagne foil cardstock from Concord & 9th and added those for a touch of shine. The sleigh itself is a few layers thick to make it stand out against the background, and I did some ink blending on the seat using Wheat ink to make it stand out even more, as I have the same cardstock color for the seat as my background.
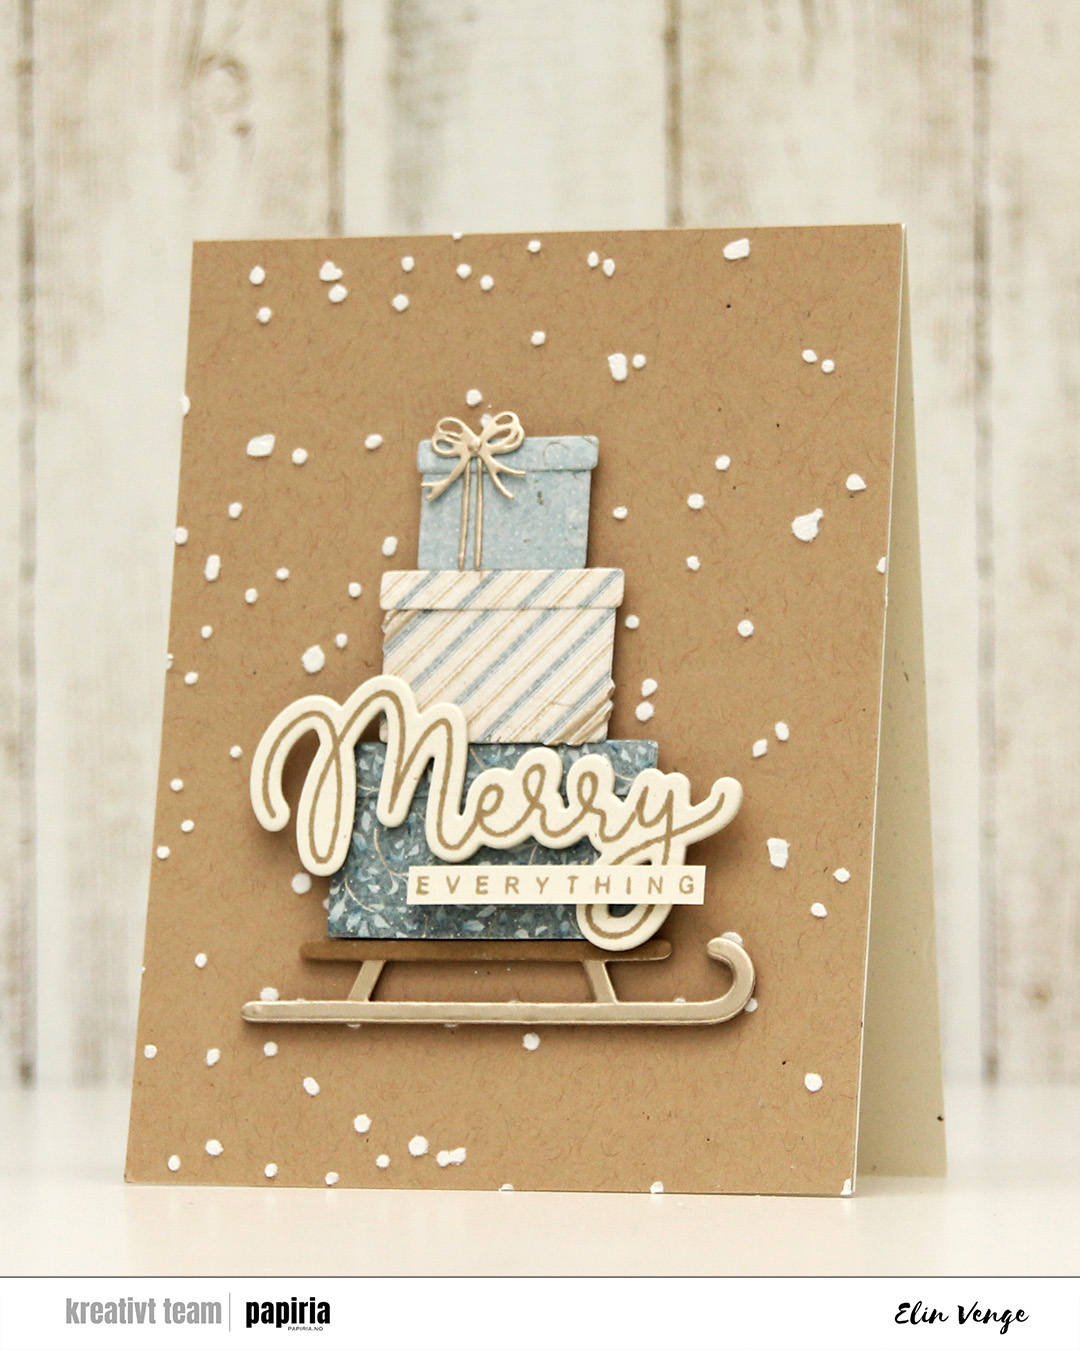 Speaking of backgrounds – I used one of the stencils in the Splatter Textures stencil set from Kristina Werner on a panel of Wheat cardstock from Concord & 9th. I added Altenew embossing paste through the openings and sprinkled on rock candy distress glitter while the paste was still wet. It’s important to clean your stencils quickly when using paste, or you’ll have a really hard time making it come off. Nobody wants to clean, but when dealing with pastes, you need to. I stamped my sentiment from the Joyful and merry stamp set from Kristina Werner using Wheat ink on Rustic Cream cardstock from Papertrey Ink. I used the coordinating die set to cut out my merry, and added another three die cuts on the back for dimension. I cut down everything to a nice strip, added another strip on the back for strength and adhered the sentiment to the largest present to finish the card.
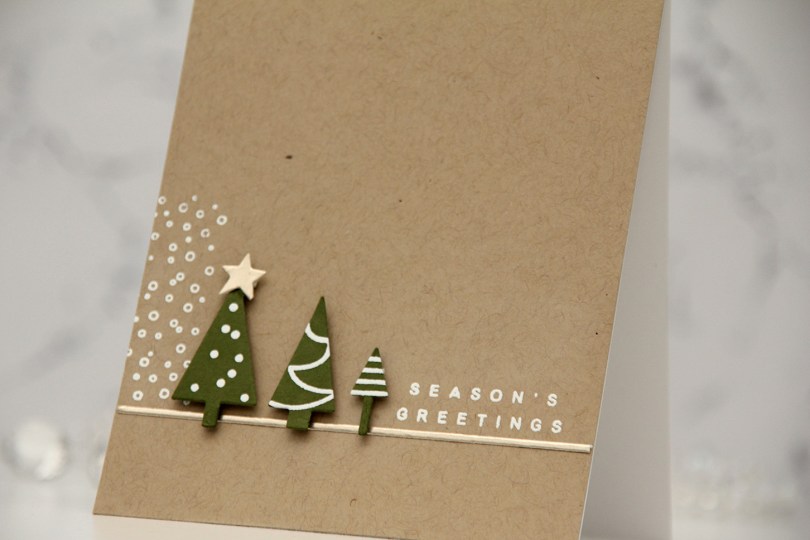
 I started by stamping the little decorations on the trees with VersaMark ink onto Artichoke cardstock from Concord & 9th, before heat embossing with white embossing powder from Ranger. I then used the coordinating tree die to cut out my trees. I added foam tape to the back and put the trees aside while I worked on the rest of the card.
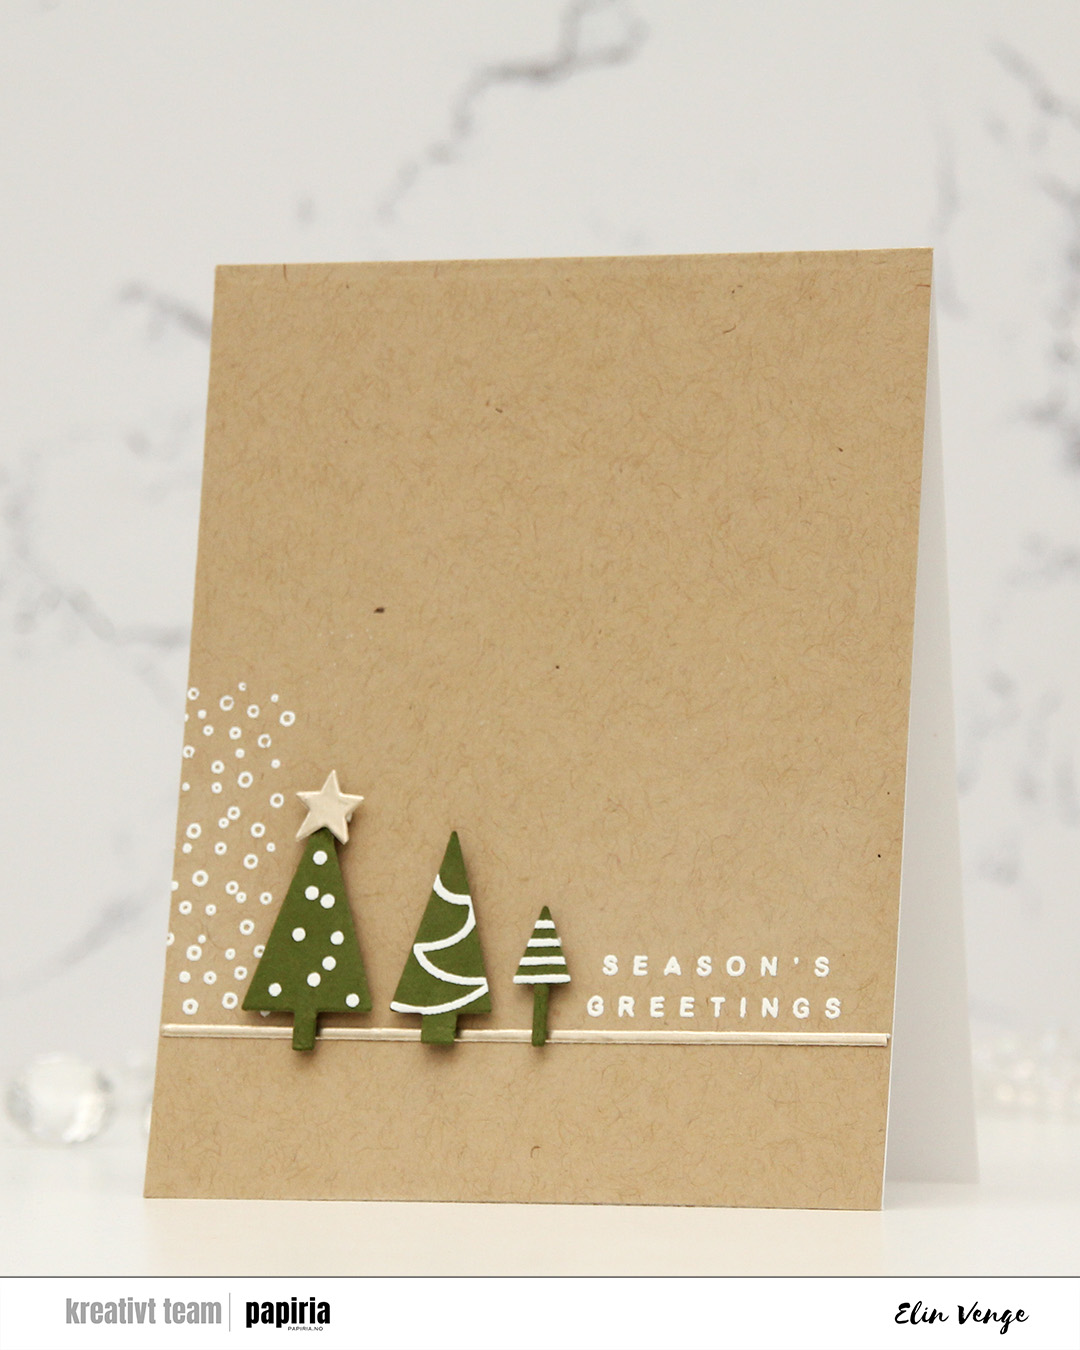 Onto a panel of Wheat cardstock from C9, I stamped and white heat embossed the snow flurries from the Sleigh full of cheer stamp set from C9, as well as a sentiment from the Joyful and merry stamp set from Kristina Werner. I used one of the dies in her Gift bows die set to cut a thin strip of Champagne cardstock from C9, which I adhered below the snow flurries and sentiment. I also die cut a star from the same cardstock using a die in the Yuletide Lane die set from Concord & 9th. I mounted my trees to the card and added the champagne star on top of the tallest tree to finish.
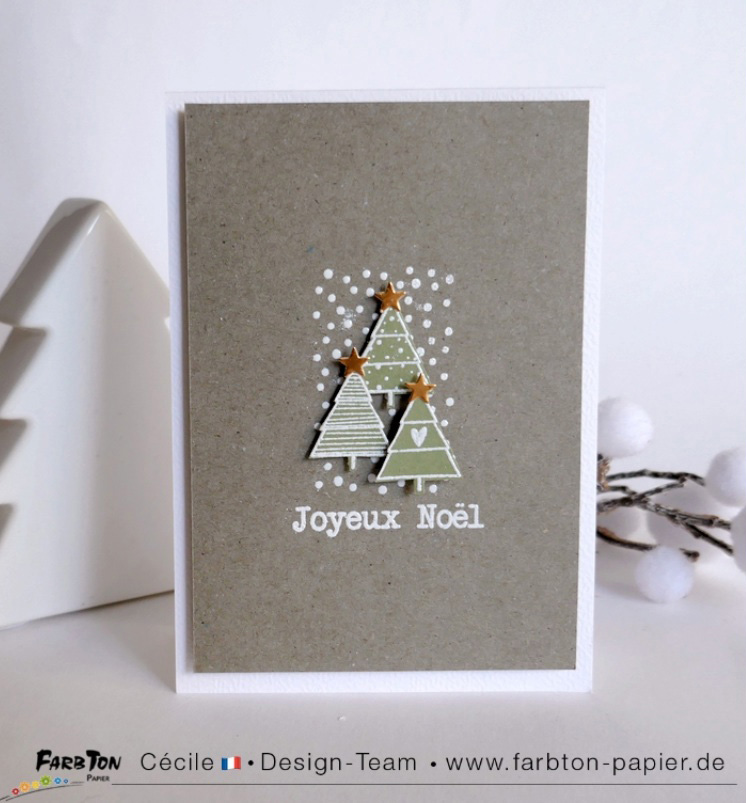 This was my inspiration for my card. Very clean and simple with lots of white space and the snow flurries in the background to ground the trees. It’s an awesome card!
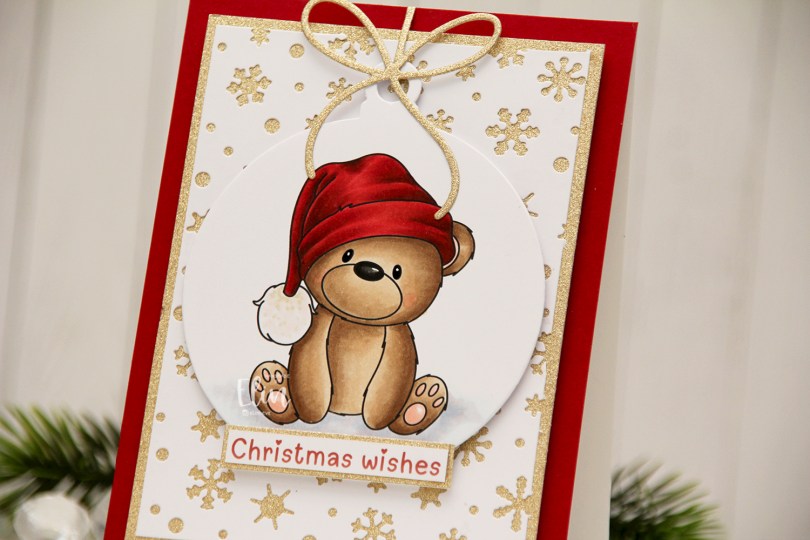
 I colored the bear with Copics and used the Snowflakes and Ornament die set from Hero Arts to turn him into a Christmas ornament. Isn’t he adorable with his head tilted to the side? I covered the card base with a piece of Cranberry cardstock from Concord & 9th. This is the perfect Christmas red, and it goes really well with the colors on his hat, as well as the color I chose for the

 I started with a panel of white cardstock (Stamper’s Select White from Papertrey Ink) that I cut down slightly from a quarter sheet. I used a couple of dies from Papirdesign to do a dry emboss on my cardstock. I covered a white top fold card base with a quarter sheet of Harbor cardstock from Concord & 9th and layered my white dry embossed panel on top.
 I die cut the banner pieces in the Joyful Season die set from Concord & 9th from Harbor and Powder cardstock, before stamping a sentiment from the Merry Greetings builder stamp set from Kristina Werner onto the banner pieces using Harbor ink. I assembled the banner and added a few layers of cardstock behind it for dimension. I die cut a tree and a snowflake from the same dies that I used for my dry emboss background, both from Powder cardstock. I stacked two of each and glued them on top of its actual position in the embossed background, before finishing off with Opal gems from Spellbinders. Very simple.
 I colored my cutie with Copics and made sure to color enough on the sky and the ground beneath him so I could die cut my panel with a circle die. I used a black glaze pen to get some shine into his eyes, and once the black was dry, I added a dot of white Gelly Roll 05. I die cut a white ornament using the Snowflakes and Ornament die set from Hero Arts, and glued my colored panel on top, before working on the rest of the card.
 For my background, I used the Magic Snow Cover die from Mama Elephant to die cut from Powder cardstock from Concord & 9th. I adhered that to a top fold white card base and glued my ornament in the center with a couple of layers of cardstock behind it for a little bit of dimension. I die cut a sentiment from white cardstock using the Jolly Holiday Greetings die set from Concord & 9th. I die cut the back from Champagne cardstock, also from Concord & 9th and added the complete sentiment to my card with a little dimension behind it, before finishing off with a die cut bow in the same cardstock color, die cut using the Gift Bows die set from Kristina Werner.
 Simple palette for this one.
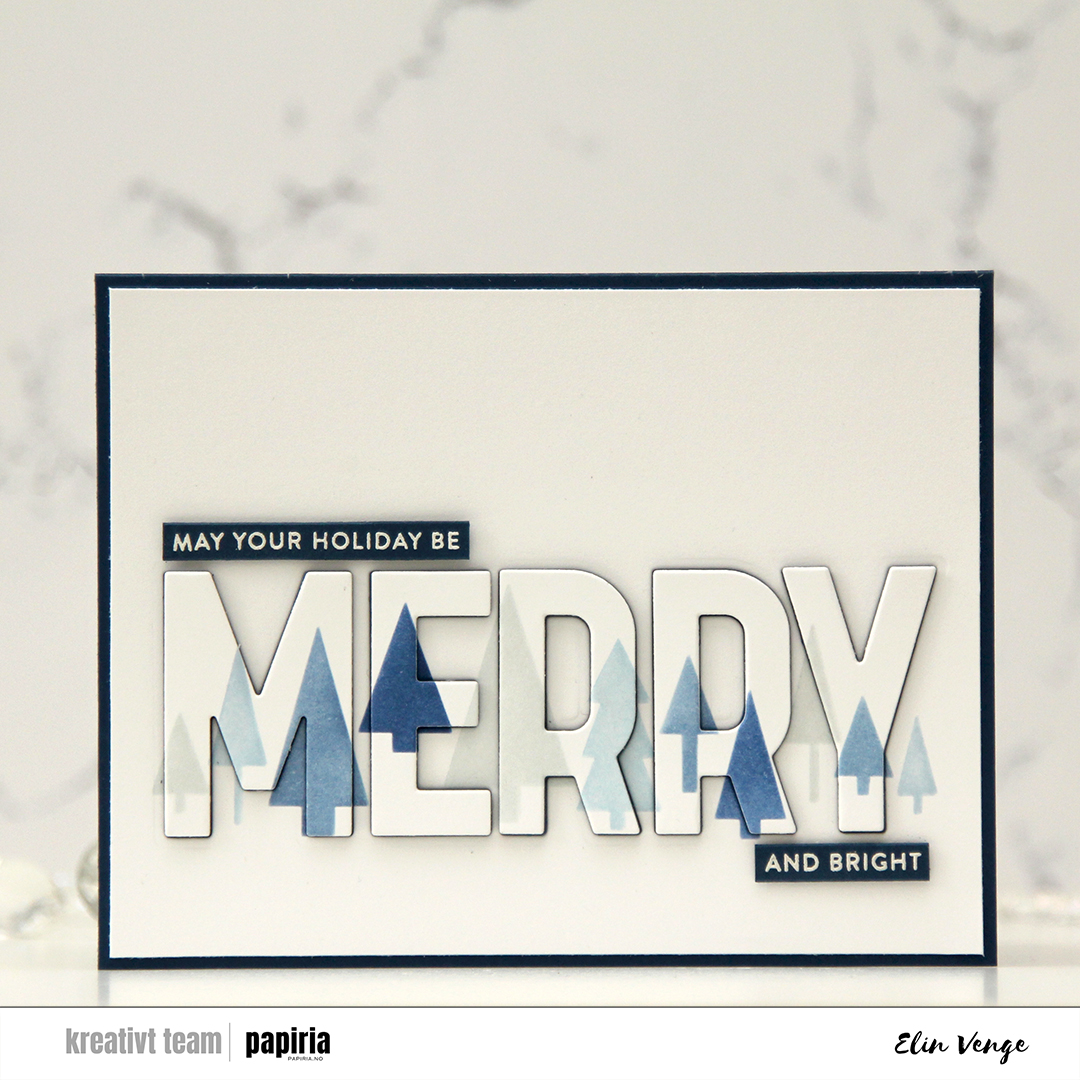 I wanted to create a blue Christmas card. Blue’s my jam, and I had this idea as soon as I saw the release. I started with the Merry Trees stencil set, which is a set of two stencils that creates a line of trees. Each of the stencils has two “layers”, and if you layer all four you have the full line of trees in up to four colors. I used the Northern Shore family of Fresh dye inks from Altenew for my stenciling, it’s a great blue family of inks.
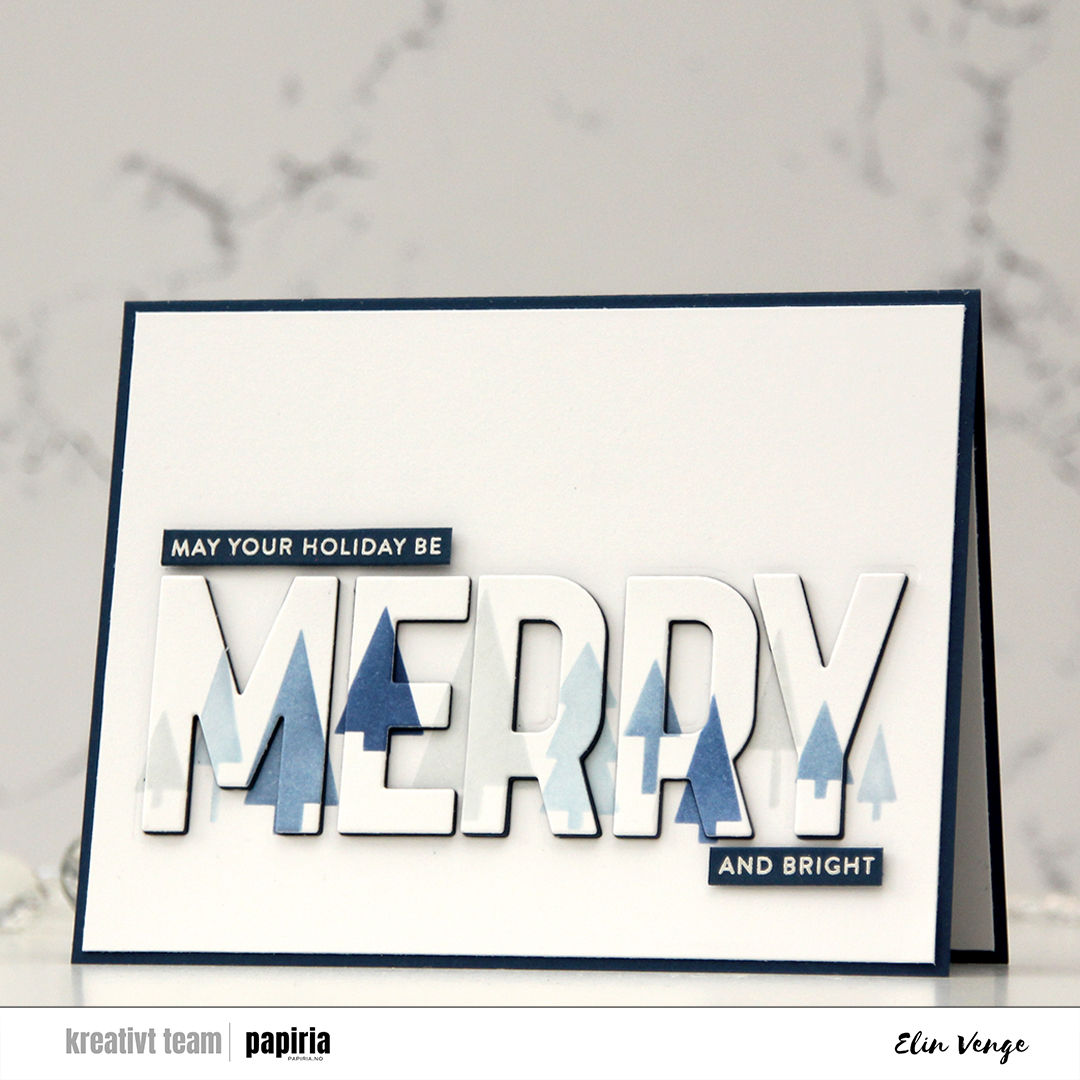 Using the Merry Trees die set, I took the big MERRY die and die cut it straight out of my ink blended trees. I also die cut an additional four layers of using After Midnight cardstock from My Favorite Things. I cut off a little on each side of the white panel, adhered it to a card base in that same dark blue color and puzzle pieced the letters back in. The fact that they’re stacked with a dark color makes the word easier to read than if I’d used white to stack.
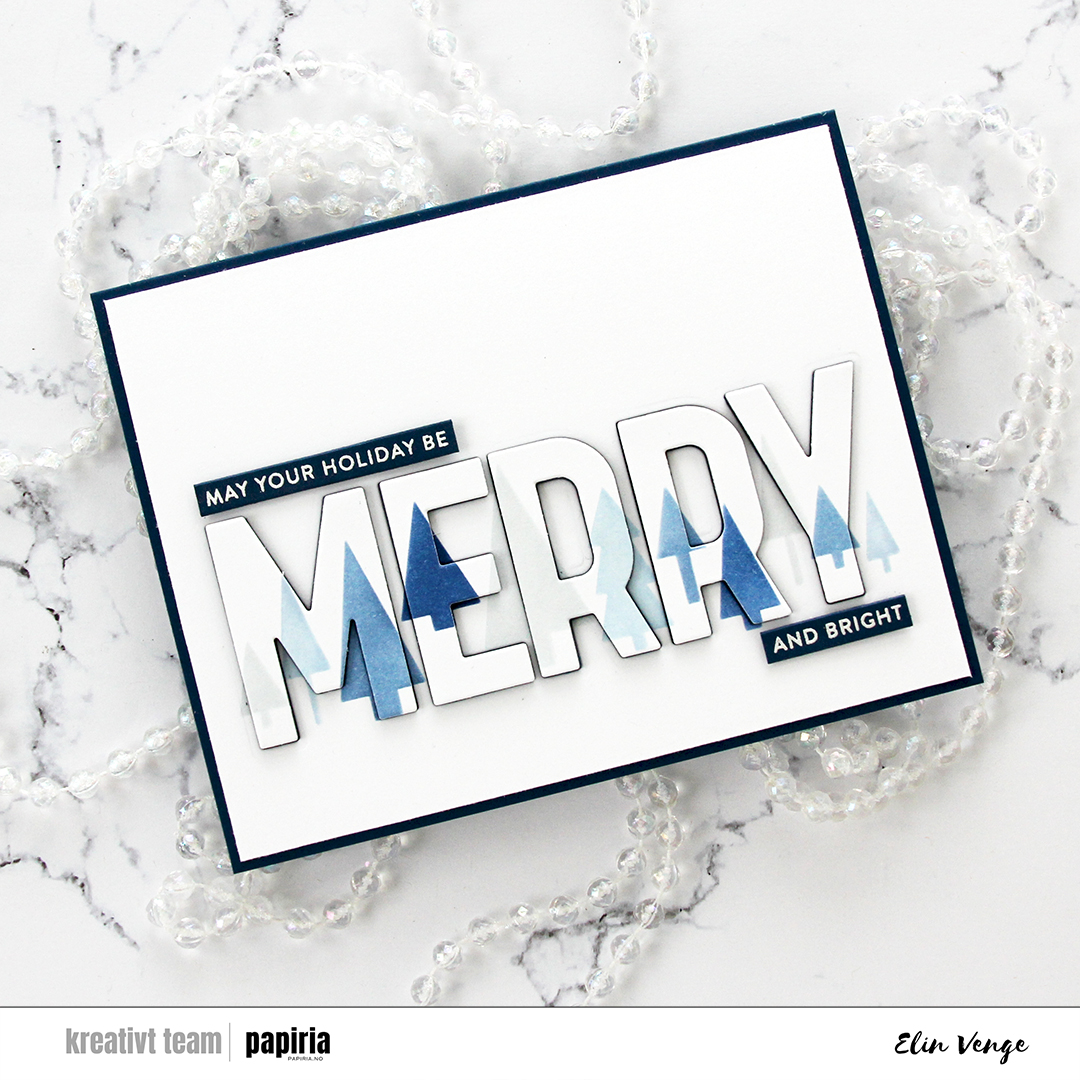 I white heat embossed a couple of sentiments from the Merry Greetings builder stamp set onto After midnight cardstock and cut them down to sentiment strips using the Merry Greetings builder die set. I usually use a steel ruler and craft knife to create my sentiment strips, but there’s something about the roundness of the edge that you get by using a die. I added a few more strips of cardstock behind each of the sentiment strips for dimension and placed them above and below the die cut MERRY to complete the sentiment.
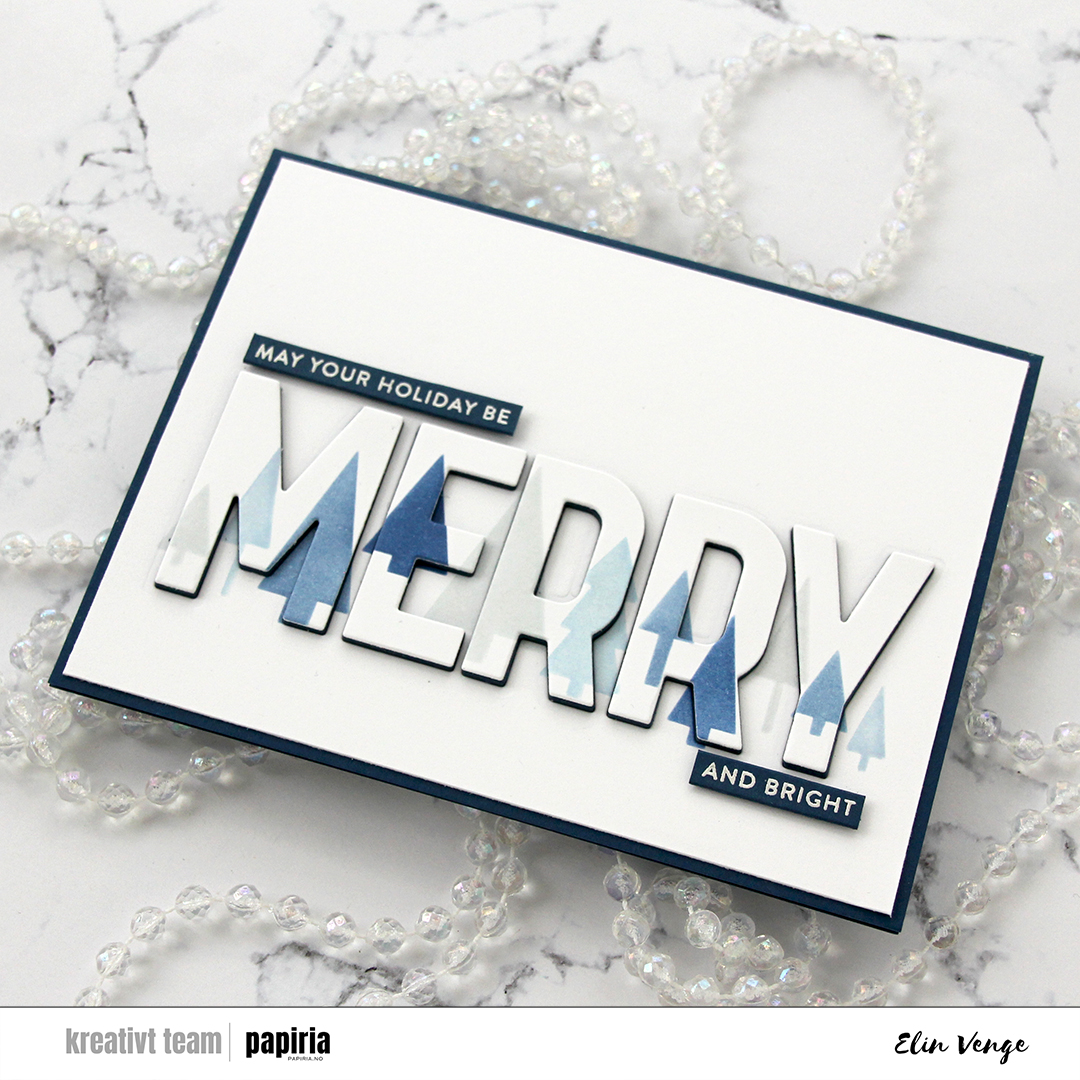 I decided not to use any embellishments on this card. Sometimes I feel like the colors and cardstock do all the work for me, and I love how this one turned out.
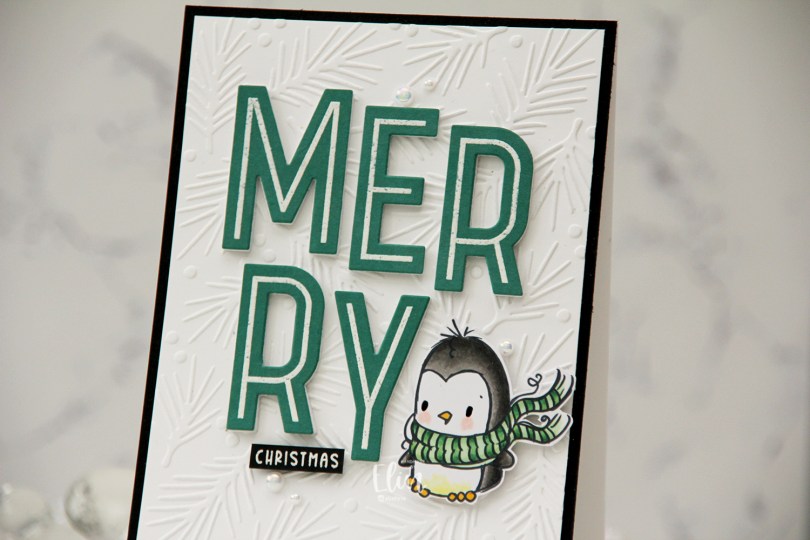
 I colored my penguin with Copics, fussy cut him and used a black Glaze pen to add shine to his eyes, before putting him aside while I worked on the rest of my card.
 I really wanted to use the big MERRY greeting in the Merry Trees stamp set from Kristina Werner. I love her cleanly designed products, they’re right up my alley, and this greeting makes a statement. I stamped with VersaMark onto Juniper cardstock from Concord & 9th, before sprinkling on super fine detail embossing powder from Ranger, which I then heat set. I die cut an additional four layers of the letters from white cardstock and stacked them with the green on top.
 I used the Berries & Boughs embossing folder from Concord & 9th to create a little bit of interest to the background. I trimmed my white dry embossed panel slightly and adhered it to a black cardstock panel that I adhered to a top fold white card base. I arranged my merry letters on the front of the card, added my penguin with foam tape and also added a white on black heat embossed sub sentiment from the Christmas Greetings stamp set from Lili of the Valley.
 I added a few pearls from the Glossy Porcelain mix from Little Things from Lucy’s Cards to finish. I love how I was able to turn this cute party penguin into a holiday penguin, and I’m kind of liking the untraditional Christmas palette of green and black.