Hi, crafty friends! Is it too early to think about Christmas cards? I know there are lots of people who don’t like creating holiday cards this time of year, and I totally get it. I, myself, am an all year Christmas card maker. My problem for the past couple of years hasn’t been creating the cards, but getting them in the mail. I’ll try to be better this year, we could all use the extra joy that fun mail brings, right? If I want to send cards, I also need to create some, and this Peeking Reindeer from Mo Manning was so cute, I couldn’t resist. It was the November 2025 freebie over on her Patreon.
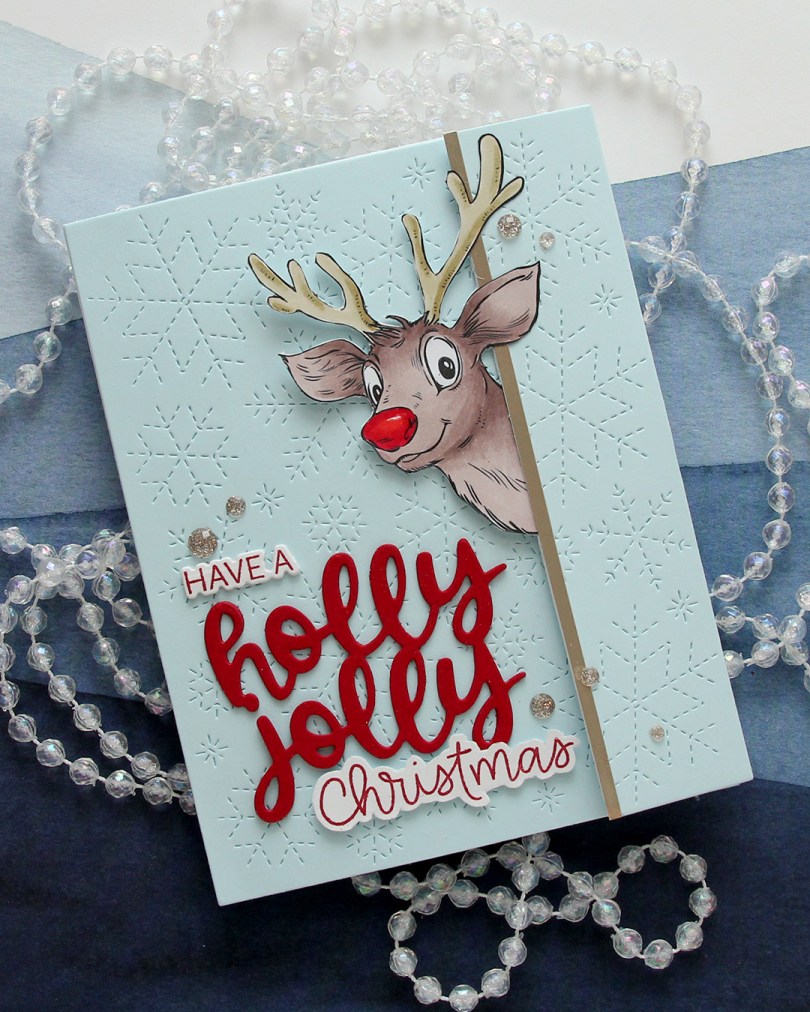
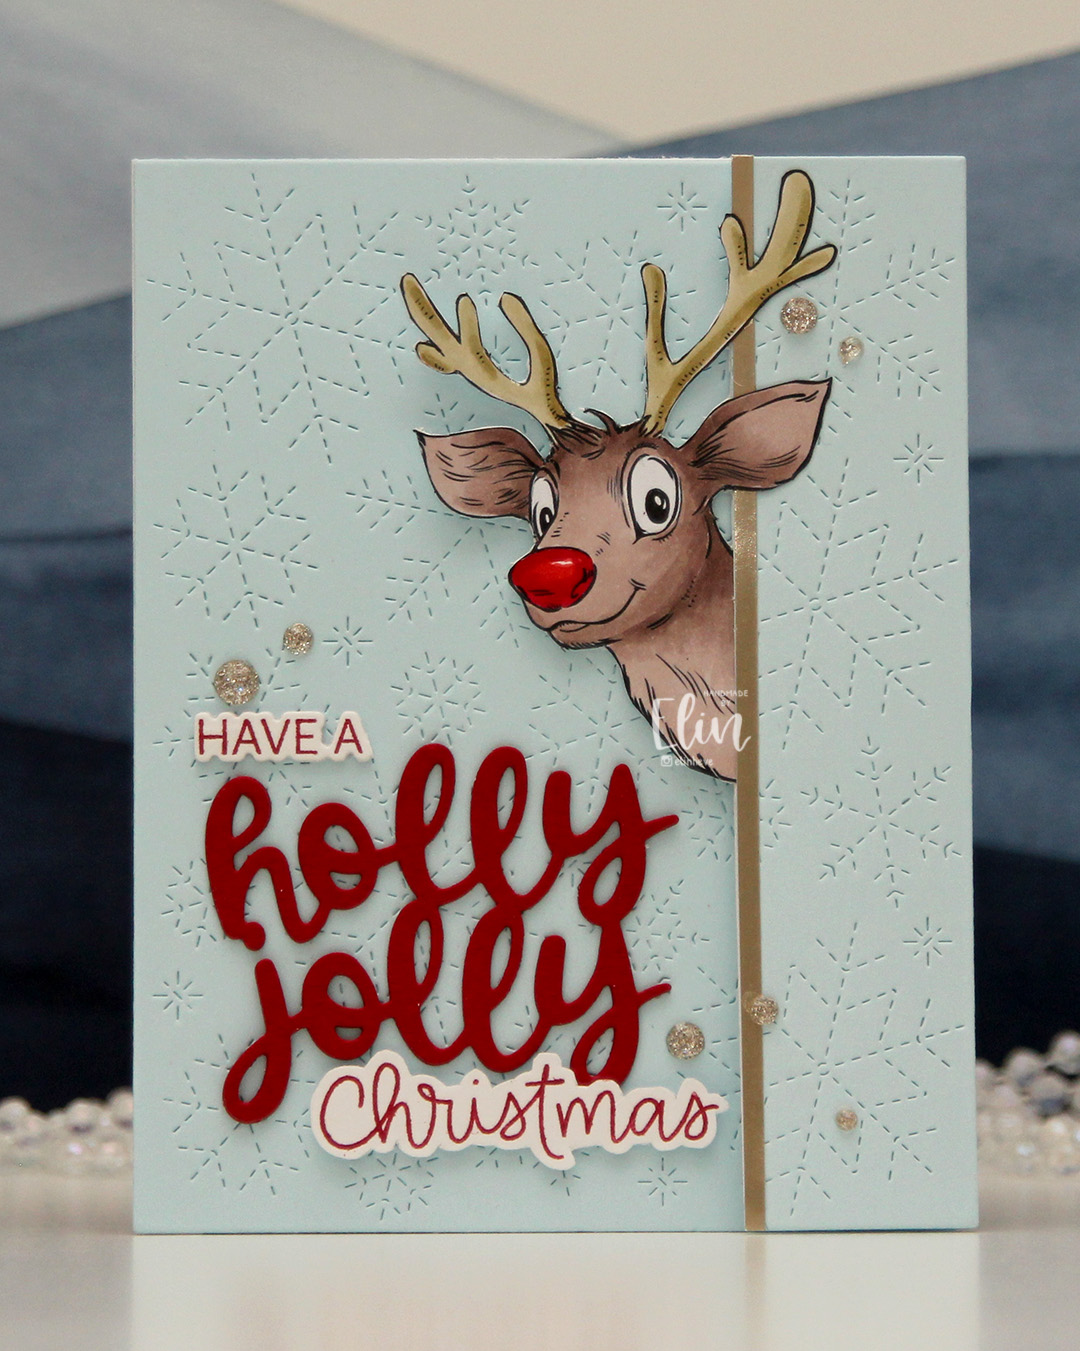 I created a tri fold card this time, with the reindeer peeking out from one of the folds. I couldn’t resist a red Rudolph nose, even if that makes my card inaccurate in its reindeer portrayal. Only female reindeer have antlers in the winter, so this is technically a female reindeer. It’s not like a red nosed reindeer is all that believable to begin with, so I guess it doesn’t really matter, it’s just a fun little tidbit.
 For the blue background, I used Powder cardstock from Concord & 9th. I used the Stitched Snowflake Backdrop die from Lawn Fawn to create some interest in the background. I die cut the a sentiment from the Jolly Holiday Greetings die set from Concord & 9th using Cranberry cardstock, also from C9. I stacked three layers, stamped part of a sentiment (have a) from the Christmas Wishes stamp set from My Favorite Things and the word Christmas from the Scripty Xmas stamp set from Mama Elephant, both in Cranberry ink. I die cut the have a with the coordinating die and fussy cut around the Christmas (there’s no coordinating die for this set), and put the three parts together to form a complete sentiment.
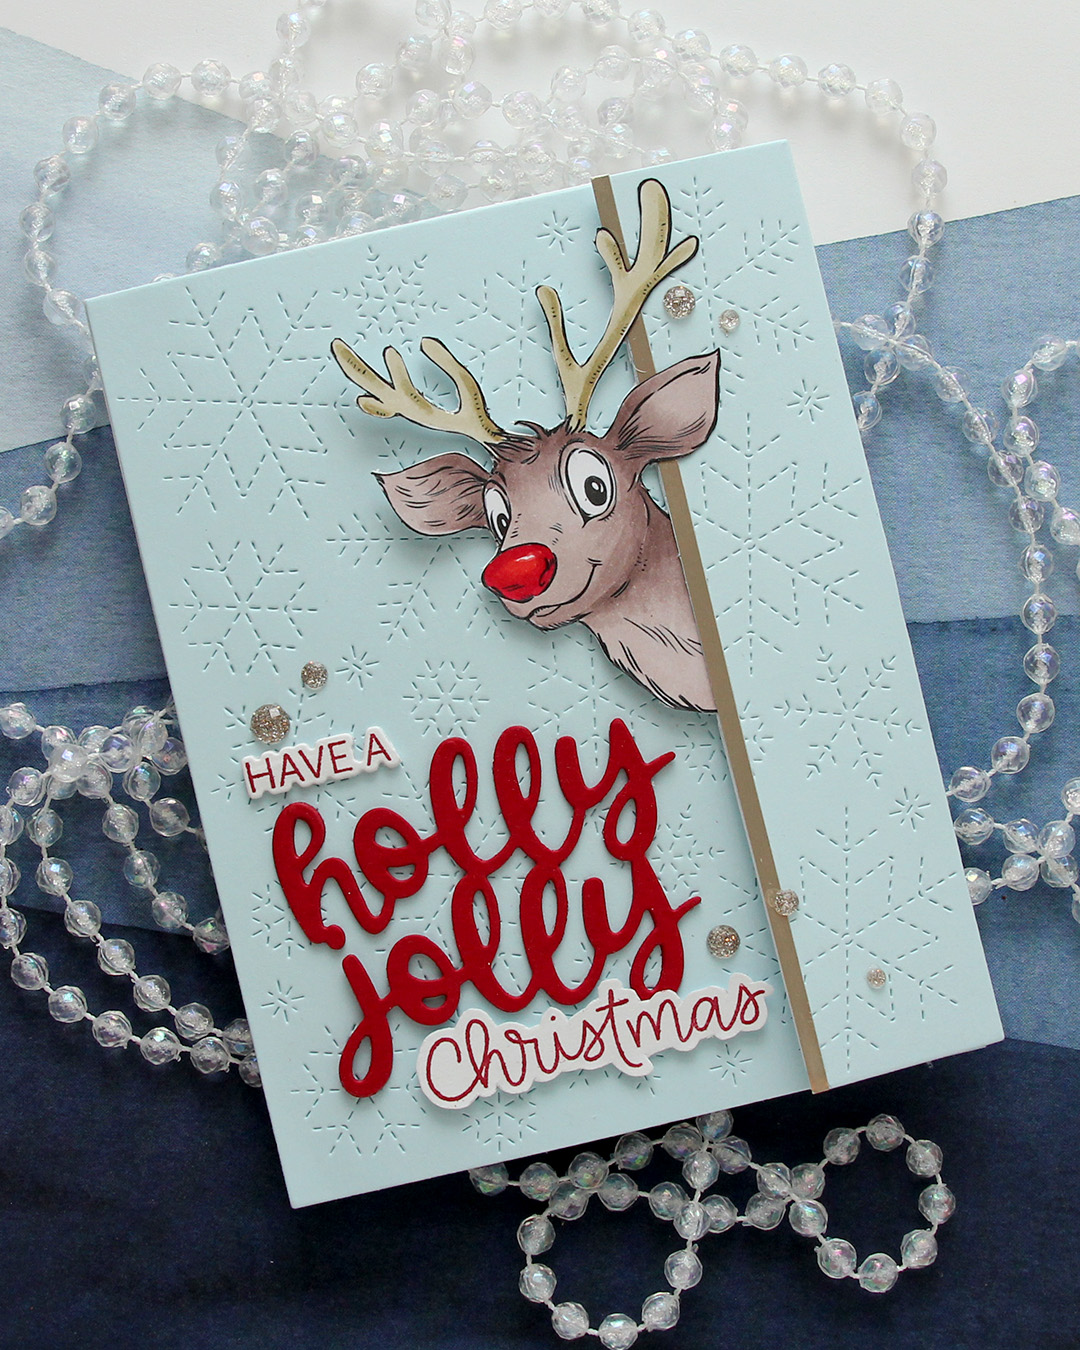
 I added a strip of Champagne cardstock from C9 to the edge where Rudolph (not really Rudolph) is peeking out, to emphasize the edge of the panel that opens. I scattered a few Champagne glitter drops from Pinkfresh Studio for a little bit of embellishment.
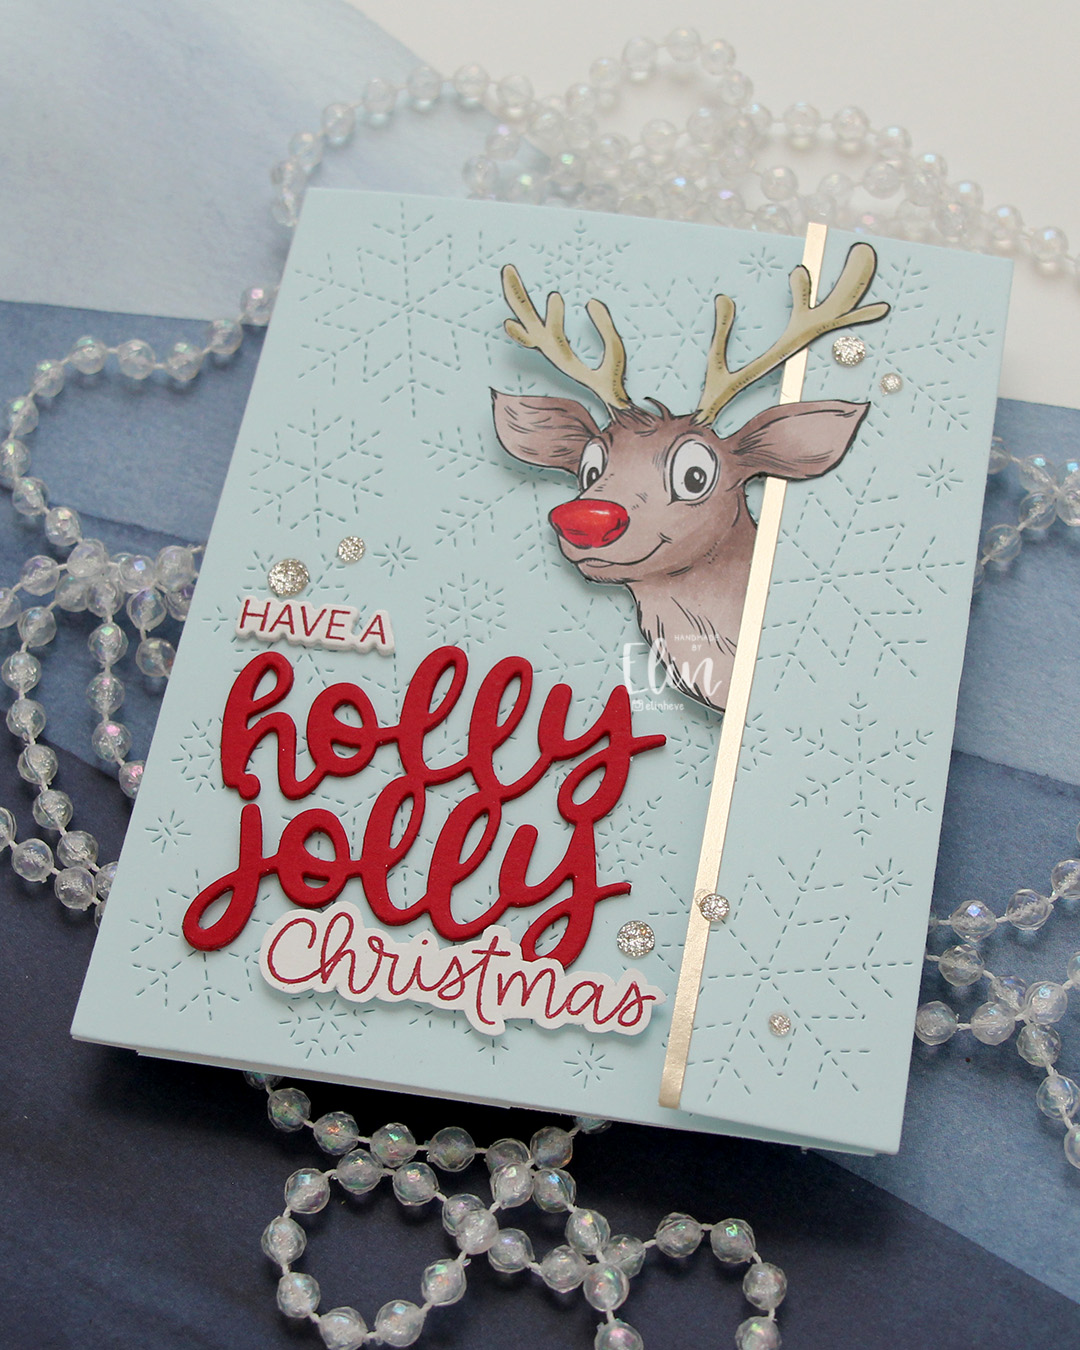
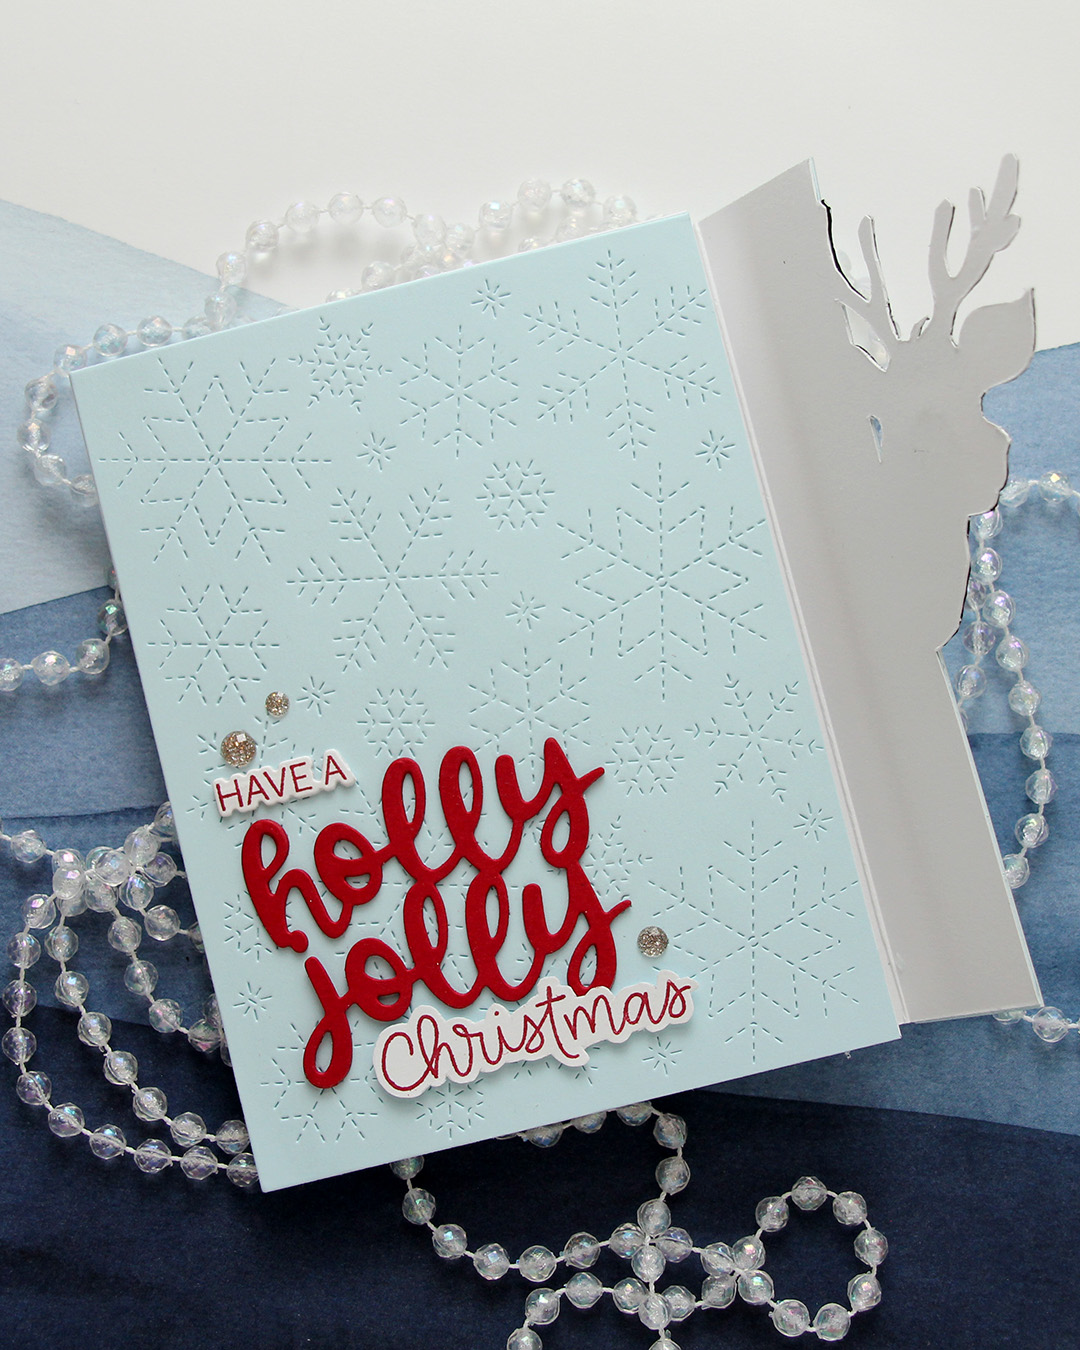 When you lift the flap with Rudolph (not Rudolph), you’re left with a regular side folding card. I’ve hidden magnets so Rudolph (not Rudolph) keeps the flap closed until it’s time to open the card.
 This one has a super simple color combo, there’s was very little coloring to do on Rudolph (not Rudolph).
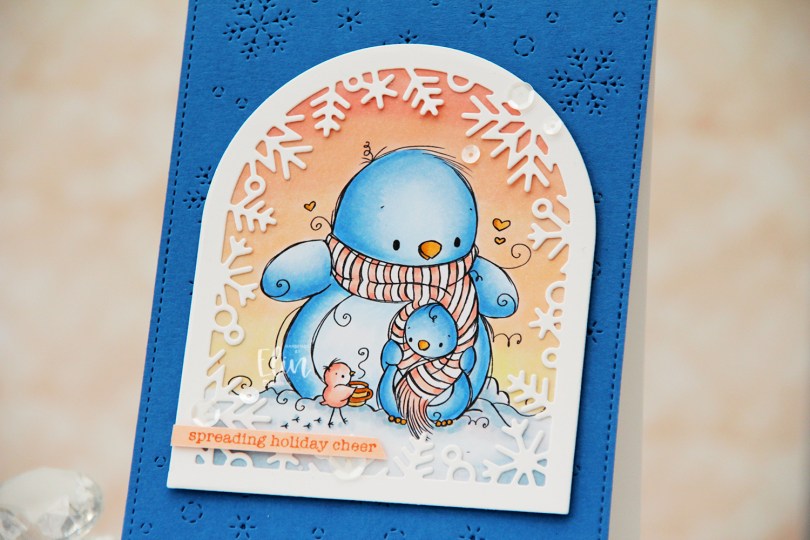
 I printed the image onto X-Press It blending card and colored it with my Copics, creating a soft winter sunset behind the cute penguins. From white cardstock (Stamper’s Select White from Papertrey Ink), I die cut a frame using the Winter Wonderland window die from Lawn Fawn and adhered it to my colored piece.
 I used the Magic Snow Cover die from Mama Elephant to create texture and interest to a piece of Cornflower cardstock from My Favorite Things, which I adhered to my top fold card base. I added some dimension behind my winter wonderland window and adhered it in the center of the card. I stamped a sentiment from the Holiday messages stamp set from Mama Elephant onto Nectar cardstock from Concord & 9th using Grapefruit ink, also from Concord & 9th, cut it down to a strip and added it to my frame with a couple of extra layers of cardstock behind it for dimension, before finishing off with sequins from the Ivory Sequin mix from Little Things from Lucy’s Cards.
 I started with the Snowfall Backdrop Landscape die from Lawn Fawn, which I die cut from white cardstock (Stamper’s Select White from Papertrey Ink). I did a bit of ink blending with Fresh Dye inks from Altenew, using Arctic Mountain, Winter Lake and Icy Water inks going from top to bottom for a gradient effect.
 I used the Snøkrystall ramme 2 die from Papirdesign to cut my border of trees and snowflakes. This die set actually has two borders – one that cuts out the trees and snowflakes I used here, and the other one does snowflakes and stars. I thought the trees went well with my snowfall backdrop, which is why I opted for that.
 I trimmed down my snowfall backdrop, adhered it to a white cardbase and layered my die cut border on top, before adding a sentiment that I created with the Juleklem die from Kort & Godt. I cut two layers from the same white cardstock I’ve used throughout the card and one layer from an ink blended piece using the same inks that i used for the sky for a very clean look. This card is so simple, and you could easily mass produce this if you wanted to. I only make one offs, but it’s totally up to you.
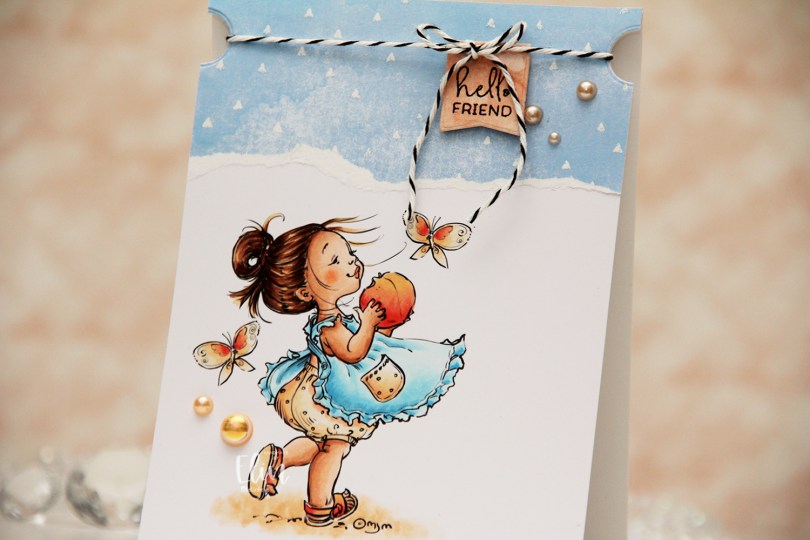
 I colored her up with my Copics and kept the panel intact this time. No die cutting, no nothing. I adhered it directly to a top fold A2 card base and put a torn piece of patterned paper at the top. The paper is from the Watercolor Wishes pad from Lawn Fawn, and I white heat embossed triangles onto it to create a little more interest, using the Scattered Triangles Background stamp from My Favorite Things.
 I used a small circle die to create notches near the top of the card. I stamped a sentiment from the Mini messages stamp set from Mama Elephant using Obsidian ink from Altenew onto a piece of patterned paper from the Watercolor Wash Brights paper pad from My Favorite Things, and die cut it with one of the dies in the Blueprints 27 die set from My Favorite Things. I put foam tape on the back and adhered it to my card, before adding some black twine to the card, tying it in a bow at the top of the die cut. The notches help keep the twine in place. I finished off with a few pearls from the Meadow mix from Little Things from Lucy’s Cards.
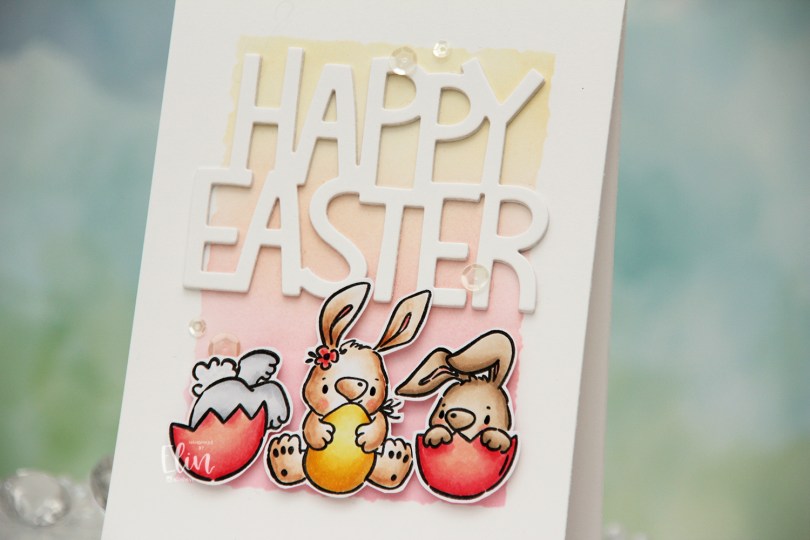
 The Easter Bunnies stamp set from Simon Hurley was the perfect one to teach with. It’s a stamp set with lots of images to choose from. They’re all small, easy to color and very beginner friendly, as there aren’t any big areas to fill in. Once colored, we fussy cut the bunnies. There’s a coordinating die set for this stamp set, but these are pretty easy to fussy cut.
 I did some simple ink blending on the background. I used the Watercolor Rectangle stencil from My Favorite Things and ink blended from the bottom to the top using Worn Lipstick distress ink, Pink Pearl ink from Altenew and Scattered Straw distress ink. These colors went well with the Copics I used for the bunnies, and it creates a little bit of interest to the background. I used the Giant Happy Easter die from Lawn Fawn and die cut that four times from white cardstock, before gluing them all together for a stacked look. I adhered the sentiment in the top center of the card, mounted the bunnies on foam tape and added a few sequins from the White Orchid Sequin mix from Little Things from Lucy’s Cards. I also used a black Glaze pen for the eyes, which the attendees really enjoyed, as it creates a little bit of dimension and shine very quickly and easily.
 I colored up the penguins with my Copics and fussy cut them right up against the black lines. These are very simple shapes and easy to fussy cut. I put the penguins aside while I worked on the rest of my card. Onto a card base I created from Blue Breeze cardstock from My Favorite Things, I stamped tiny snowflakes from North Star Design using Spring Rain ink from Papertrey Ink for a subtle tone on tone look. This is super subtle, my ink pad needed reinking, but I went with it and didn’t reink until after the project was complete, I didn’t want to stop half way.
 I used the Stitched Snowflake Backdrops die from Lawn Fawn to create an impressed snowflake pattern on a piece of Stamper’s Select White cardstock from Papertrey Ink. I added a few extra layers of cardstock behind it and adhered it to the card base. Using the Postage Collage Die and coloring stencil from Waffle Flower, I created postage stamps for my penguins to sit on. I stamped the snowflakes on these as well, and ink blended a little in from the edges to define them a tiny bit. It’s still subtle, I hadn’t reinked my ink pad at this point. I added dimension behind each of the postage stamps, adhered them to the card and mounted the penguins on top. I used the Hjerte 3 die set from Papirdesign to die cut my sentiment from Berry Sorbet cardstock from Papertrey Ink. I die cut four and stacked them together for a dimensional look, before adding a
  Simple coloring for simple images.
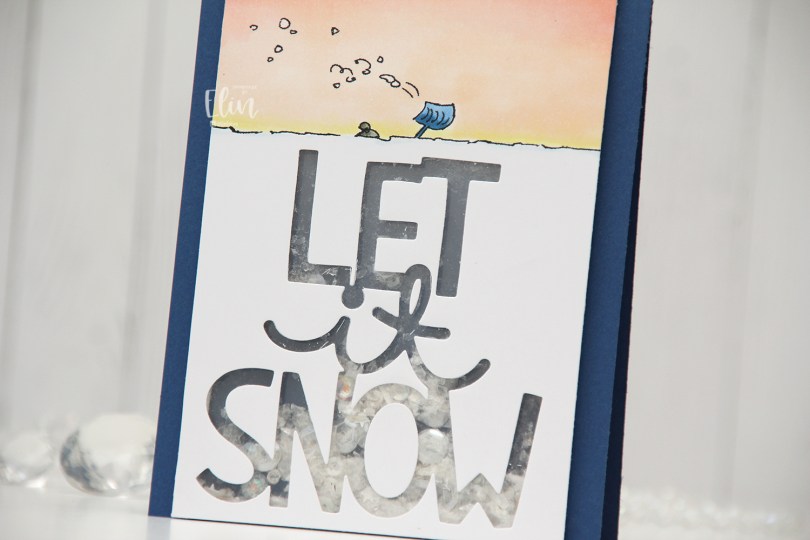
 I really don’t want the sentiment to come true right now, I don’t remember there ever coming this much snow in the city in such a short time, and I’d very much like to not have to walk to work tomorrow. I saw plenty of people out with their shovels today when I walked home, their cars were snowed in, their driveways were full of snow and they could barely open their front doors. It’s winter, we get it, but it’s enough now, we don’t need more snow.
 I’m done venting. I think. I was originally planning on adding a stacked die cut where all the snow is, but then I came up with the idea of a shaker card instead. It’s kind of like the little person under the beanie is trapped inside the shaker with all the shaker bits, which I thought was a fun concept.
 I used the Giant Let It Snow die from Lawn Fawn, covered my window with acetate and filled my shaker well with Distress Mica Flakes, a little bit of Rock Candy Distress Glitter and a small pile of embellishments from the Starry Night mix from Little Things from Lucy’s Cards.
 I added my shaker panel to a top fold card base I created from Blueberry cardstock from My Favorite Things and decided not to add anything else.
 Very simple color palette for this one.
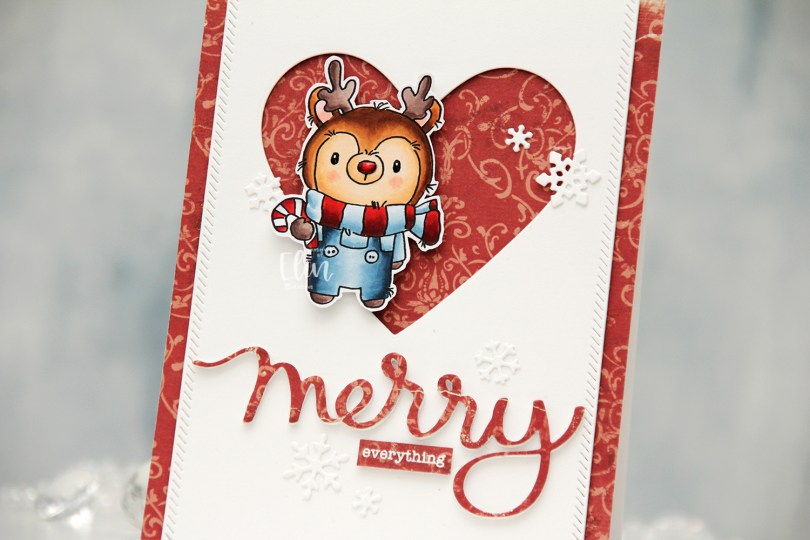
 I colored my reindeer with Copics, added black Glaze to his eyes for shine, a white dot on top with a Gelly Roll 05 once the black was dry and also a thick layer of Glossy Accents to his nose for dimension as well as shine. I fussy cut him leaving a white border and proceeded to work on the rest of my card.
 I covered a card base with the Julhälsningar sheet from the Vintage Winter collection from Maja Design. This has a little bit of pattern to it, but not so much that it’s too distracting. I created a window in a white panel using a heart die from Papirdesign, then used one of the dies in the Stitched Borders die set from Lawn Fawn to create a little bit of interest to the sides, before adhering the panel with foam tape to the center of the card front.
 Using the Merry Script die from Mama Elephant, I die cut three layers from white cardstock and one from the patterned paper to adhere on top. I stacked the four together and adhered my die cut to the card. I white heat embossed a sub sentiment from the Holiday messages stamp set from Mama Elephant onto a scrap piece of patterned paper and trimmed it down to a strip, before I added a few layers of cardstock behind it for dimension and adhered it below my die cut word.
 I mounted the reindeer on foam tape offset in the heart opening and added die cut snow flakes here and there. Some I created with the Snowflake Confetti Fancy die from Hero Arts, some are made with the Stitched Let It Snow Circle Frame die set from Memory Box, which includes a die that cuts three individual snowflakes (which is what I used).
 This card has a lot of texture and dimension, and the shine on Rudolph’s nose is the perfect detail to draw attention to him!
 I had a plan for this one even before I started coloring. Things changed as I was creating, but I still love the end result. I colored the little girl and fussy cut her, leaving a thin white trim around the hat and no trim at all around her mittens. I used The Stitched Snowflake Frame die from Lawn Fawn to create my large snowflake frame. I die cut four from white cardstock that I stacked for dimension and one from Soft Stone cardstock from Papertrey Ink that I adhered behind the white ones, you can see the gray peeking out from the points on the snowflake. The die also cuts a circle inside the frame. It has the same faux stitching as the snowflake, but I wanted a plain circle for this and used a circle die to cut a circle that was slightly larger than the frame opening. Inside the circle, I sprinkled on chunky white embossing enamel from Stampendous and melted the granules from the back for a snowy look. I put foam tape on the back of the girl and added her to the opening in the frame.
 Using the Stitched Snowflake Backdrop die from Lawn Fawn, I created some texture to a plain white panel. The die actually cuts a panel that covers an A2 card, but I wanted a bit of a border on mine and pulled out the A2 Stitched Rectangle STAX 2 die set from My Favorite Things to get it a little bit smaller. I adhered it to a panel of Cornflower cardstock from My Favorite Things, which I then adhered to a top fold card base I created from Stamper’s Select White cardstock from Papertrey Ink.
 I adhered the snowflake frame at the top center of the card and created a stacked die cut merry using the Merry Script die from Mama Elephant. There are four white layers topped with one in Soft Stone. I stamped and white heat embossed a sentiment from the Holiday messages stamp set from Mama Elephant onto a scrap of the blue card I used previously. I cut it down to a strip and added four small cardstock strips behind it for dimension, before I nestled it in with the die cut and finished off with a couple of pearls from the Glossy Porcelain mix from Little Things from Lucy’s Cards.
 There’s quite a bit of dimension on this card. I love dimension!!
 I tried to limit the amount of marker colors for this one. Did I succeed? Up to you 🙂
 I did a lot of masking for this card, using two stamp sets from the recent release. I’ve got the
  I colored them all with Copics, added black glaze to their eyes for shine, then a dot of white Gelly Roll 05 once the black was dry. I fussy cut my “tree”, added foam tape to the back and mounted it on a card base I created from Blue Breeze cardstock from My Favorite Things.
 I used the Stitched Snowflake Backdrop die from Lawn Fawn to create some texture on the card base. This card measures 5 x 7 1/4″, so I had to get creative with the die, because it’s a standard A2 size die. I love the subtle texture in the background.
 I used a die from Kort & Godt to create my sentiment (Christmas hug in Norwegian). I stacked four die cuts from white cardstock and adhered the top of the word to the bottom of my critter tree. I used Starry Sky ombré glitter drops from Pinkfresh Studio to finish off. I love the sparkle and shine to these.