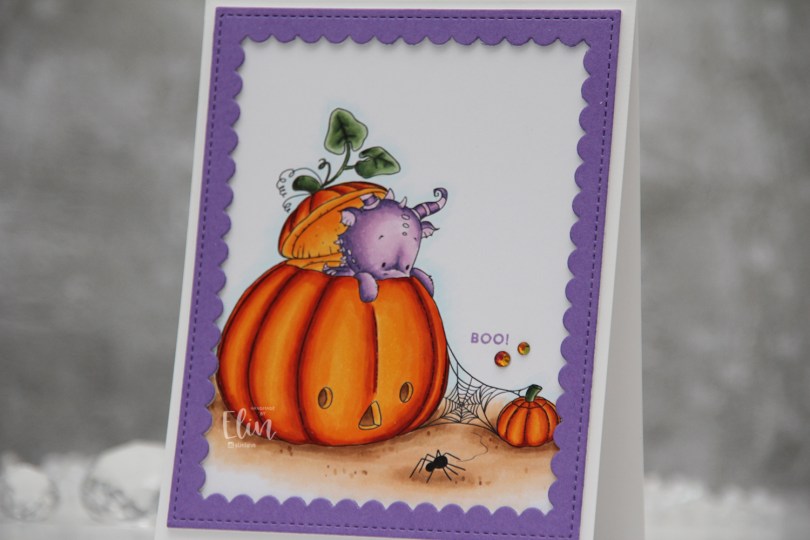
Hi, crafty friends. I’m back with another Halloween card. I don’t make many Halloween cards, and the few that I do make are more on the cutesy side than the scary one. This little Dragon Scared of Spider image from Lee Holland Designs definitely fits my kind of Halloween card. I’m not sure who’s really scaring who in this stamp, the spider is running away, after all.
 Halloween isn’t really a big thing in Norway, but this image was so cute I just couldn’t resist. I colored up the ground, pumpkins and leaves before asking my “twin” Liz for a color suggestion for the actual dragon, thinking in my mind “please don’t say purple”. What did she choose? It was inevitable, I knew she’d say purple, she even said which purples to use. I actually think he’s cute in purple, and I don’t think I’ve colored one of Lee’s dragons purple before, so I guess it was about time.
 Once I finished coloring, I embraced the purple, stamping the Boo! sentiment from the Itty Bitty Boos stamp set from My Favorite Things using Deep Iris ink from Altenew. I then die cut the largest frame in the Scallop Frames die set from Pretty Pink Posh from Amethyst Allure cardstock from Papertrey Ink, adding two additional white die cuts behind it for dimension.
 The outside dimensions of the die cut frame are 4 x 5″, so I cut 1/4″ off the height of my card base, making it 4 1/4 x 5 1/4″ instead of the normal A2 size to get an even white border on the outside of it.
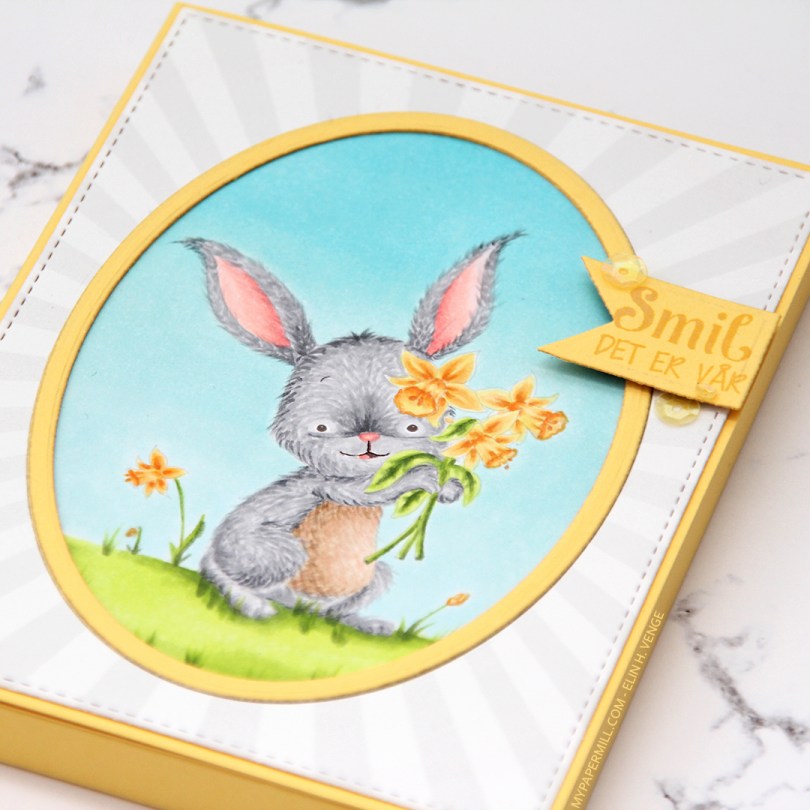
 The sentiment is tiny, and to draw the eye to it I decided to add a couple of gems. These are from the Meraki Sparkle Red Illusion jar. They’re color changing glass rhinestones, and this color was perfect for this card.
 If you look at the various photos in this post, you’ll see that these rhinestones appear to have different colors depending on how the light hits them, it’s a really cool effect. In this photo, you can also see the dimension added by using stacked die cuts.
 Fairly simple color palette for this card. It was a pretty quick image to color too!

 I printed the image with a 10% opacity onto X-Press It blending card before coloring. Whenever I want to color things that are supposed to look close to white (ice, snow, polar bears +++), I prefer doing a no line version. To me, there’s something very distracting about black lines on an image that’s supposed to look white, so I prefer the softer no line version. I colored the image with Copics, starting with the sky, then ocean, ice floe, polar bear and finally the penguin and his little scarf. I prefer doing the black towards the end, it’s just good practice to avoid getting it into nearby areas where you don’t want it.
 Once I finished the coloring, I die cut the panel using the second largest die in the A2 Stitched Rectangles STAX 1 set from My Favorite Things, before mounting it on foam tape onto a white card base I created from white cardstock from Papertrey Ink. I die cut the word klem (hug) twice from white cardstock using a die from Kort & Godt. It’s actually a Christmas die that says juleklem (Christmas hug), but by using only the latter part of the word, I have a completely different use for the die, which I love. That’s the whole card, I decided not to add any embellishments, I wanted to keep the focus on the image.
 Loooots of Copics for this deceptively simple scene.
 This is
  I stamped a sentiment from the Scripty Bday stamp set from Mama Elephant using Fossilized Amber Distress Oxide ink, then trimmed my panel down slightly and mounted it using foam tape onto a top fold card base I created from Green Parakeet cardstock from Papertrey Ink.
 I finished the card by adhering some sequins and a gem from the Seashore mix from Little Things from Lucy’s Cards.
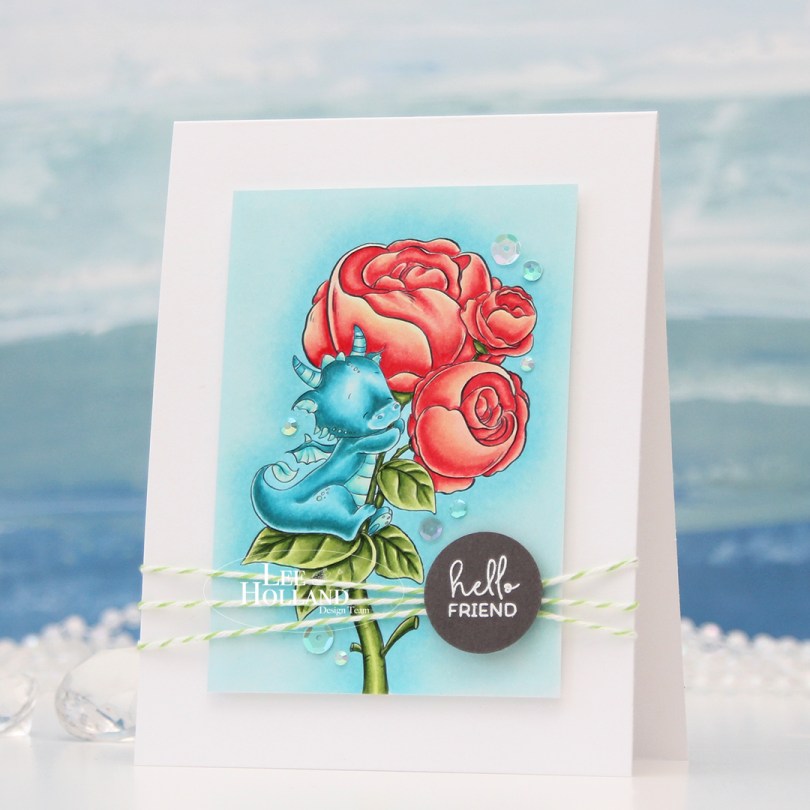
 I printed the image onto X-Press It blending card and colored it with my Copics, before trimming it down. I mounted it on foam tape to a top fold white card base I created from Stamper’s Select White cardstock from Papertrey Ink.
 I felt the need to add a design element that would break the rigidity of the rectangular panels, and decided to add some twine going across. I wrapped Green Apple Divine Twine around the card front three times and tied a knot. The green goes well with the green in the image.
 Onto a piece of Eiffel Tower cardstock from My Favorite Things, I stamped and white heat embossed a sentiment from the Mini messages stamp set from Mama Elephant, before using a 1″ circle punch from EK Success to create a quick circle from it. I added strategically placed pieces of foam tape on the back of it and adhered it directly onto the knot I had tied on the front of the card.
 To finish off the card, I added sequins and gems from the Urban Chic mix from Little Things from Lucy’s Cards. They’re kind of scattered in a trail going from the bottom left to the top right of the image.
 The card is simple, but has lots of dimension, and that dragon hugging his peonies will always steal the show.
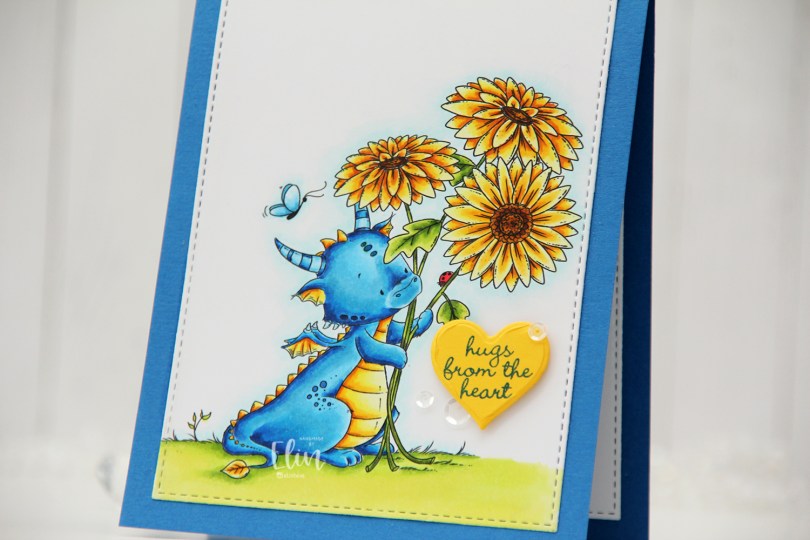
 It’s no secret that I’m a fan of Lee’s Dragons, and this one holding sunflowers was begging for a blue/yellow combo. Once I’d colored the image with Copics, I used the second largest die in the A2 Stitched Rectangles STAX 1 die set from My Favorite Things to give the panel a nice finishing edge. I adhered it to a card base I created from Cornflower cardstock, also from MFT.
 I die cut a heart from Bright Buttercup cardstock from Papertrey Ink and stamped a sentiment from an Inky Wings stamp set in the center using Cornflower ink from My Favorite Things. I added the heart using foam tape and then a few sequins from the White Orchid Sequin Mix from Little Things from Lucy’s Cards to finish off this simple card.
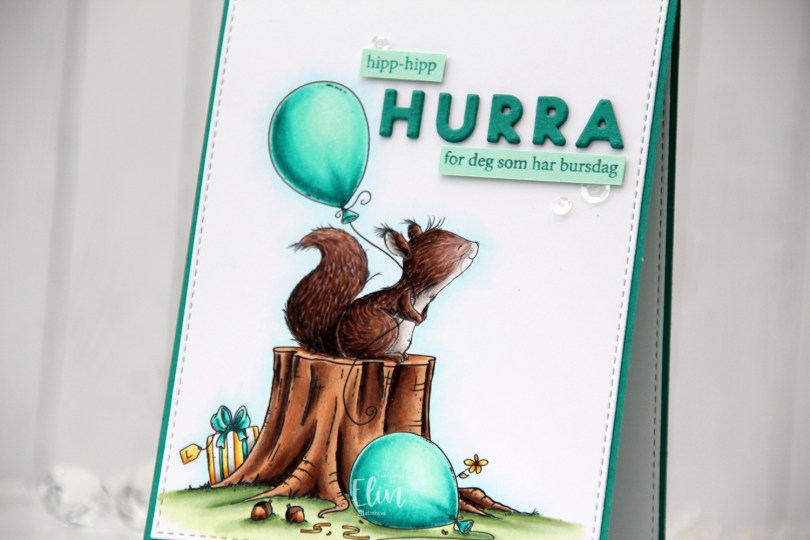
 My first card as a Lee Holland design team member HAD to be a birthday card for the wonderful friend that sent me the link, thereby letting me know that this amazing opportunity even existed.
 I first fell in love with Lee’s images because of his dragons, but all his critters are adorable, and I thought this
  She loves teal, so I knew just what color to use for the balloons. I made sure to print the image towards the bottom left corner of my quarter panel of X-Press It blending card, which is what I use for nearly all my Copic coloring. I used the largest die in the A2 Stitched Rectangles STAX 1 die set from My Favorite Things to give my panel a slight trim and that faux stitch edge I love so much, before adhering it directly to a card base I created from Tropical Teal cardstock from Papertrey Ink.
 I die cut the letters to spell HURRA three times from the same color cardstock using the Connected alphabet die set from My Favorite Things. I stacked them for dimension and stability and adhered them to the right of the top balloon.
 I also stamped a couple of sentiments from the A06 stamp set from Norsk Stempelblad AS onto strips of Sea Glass cardstock from Concord & 9th using Caribbean Sea ink from My Favorite Things. I added a few additional strips behind each and glued them to the card, before finishing off the card with a few sequins from the Seashore mix from Little Things from Lucy’s Cards.
 I used a lot of colors for the coloring of this. I used 16 colors for the squirrel, which is kind of nuts (pun intended).
 For my first card, I chose to feature this adorable image from Lee Holland. Last year, he asked his followers and fans what more we wanted of his dragons (he is known for his dragons, he has lots of different ones), and I suggested one hugging a penguin. He came through big time, and created this image, which I, of course, had to get. I colored it in noline, because I love the look, before sprinkling Chunky White embossing enamel on top and melting the granules from the back of the paper to create that wonderful snowy look.
 I taped a square die inside a rectangle die from Waffle Flower and die cut the two dies four times from Stamper’s Select White cardstock from Papertrey Ink to create a chunky polaroid frame for my little fellas to fit into. By taping the two dies together, they won’t shift and the square opening will be in the same spot for all my diecut pieces. I stacked my diecuts and put the image behind my chunky frame, before adhering it all to a cardbase I created from Stormy Sea cardstock from Papertrey Ink. Using a die from Kort & Godt, I die cut the word klem three times from the same color cardstock. The die actually cuts the word juleklem (Christmas hug in Norwegian), but it’s so big the first part didn’t fit my card, so I just chose the latter half of the word. I stacked three together for dimension, adhered it at an angle to my card, and put a white heat embossed sub sentiment from Norsk Stempelblad AS below. This too, has additional layers of cardstock behind it for dimension. To finish off the card, I die cut a few white snowflakes using dies from Hero Arts and Marianne Design, and I stacked two of each snowflake on top of each other to make them stand out a bit.
 Fairly simple color palette for this image.
 I colored in my image using the no line technique. Before printing, I made all the lines in the image light gray except for the eyes and eyebrows, which I kept black. This is a great trick to color no line without having to worry about drawing things back in with a black pen and potentially getting things wonky and weird. I’ve done that once, starting over isn’t fun, so I’ve learned to get around it.
 I cut my colored piece down using a stitched rectangle die from My Favorite Things. I covered the card base with patterned paper from the Forever Green collection paper pack from ModaScrap and mounted my colored panel onto that using lots of foam tape.
 I cut a couple of strips of patterned paper from that same paper pack from ModaScrap and added them onto my colored panel. Using a green marker, I created a green colored cardstock piece to match my dragon, stamped my Norsk Stempelblad AS sentiment onto it, heat embossed it and used a circle punch to get it to a perfect 1″ circle, before adding an epoxy sticker on top for a little shine and dimension.
 To finish off my card I added a few enamel dots. The brown ones and the white are from Papirdesign, the green ones from Altenew.
 Not a whole heap of colors for this one.
 I played around in Photoshop before printing the image, making the lines in the snow and on the pompom very faint for a no line look, but kept the lines black for the rest of the image. I prefer no line when coloring snow or furry pompoms, but didn’t feel like coloring the entire image in no line. I’ve colored plenty of Lee’s dragons in the past, but this is the first time I’ve opted for a red one. I don’t use reds very often, and I’m super picky with my reds, but this Copic combo (which only includes one red marker) is one that works for me.
 I die cut my finished piece with a double stitch rectangle die from My Favorite Things and adhered it onto a top fold landscape cardbase made out of Amarena Cherry cardstock, also from My Favorite Things. I stamped and white heat embossed a sentiment from Mama Elephant onto Smokey Shadow cardstock from Papertrey Ink, added a few more cardstock strips behind it for dimension and adhered it to my card, finishing off with a few white sequins from Little Things from Lucy’s Cards.
 Plenty of colors for this image. I even used B20, which I’ve made myself. Lots of colors for the snow, lots of colors for the bell, and lots of colors for the red. Even lots of colors for the black ribbon.