
Hi, crafty friends. Today, I’m sharing with you a card featuring Giggling Snowman from Mo Manning. This is one of my all time favorite images from Mo, and if you look closely at the tiny little image next to the header in the tab in your browser, you’ll see it’s the same little guy.
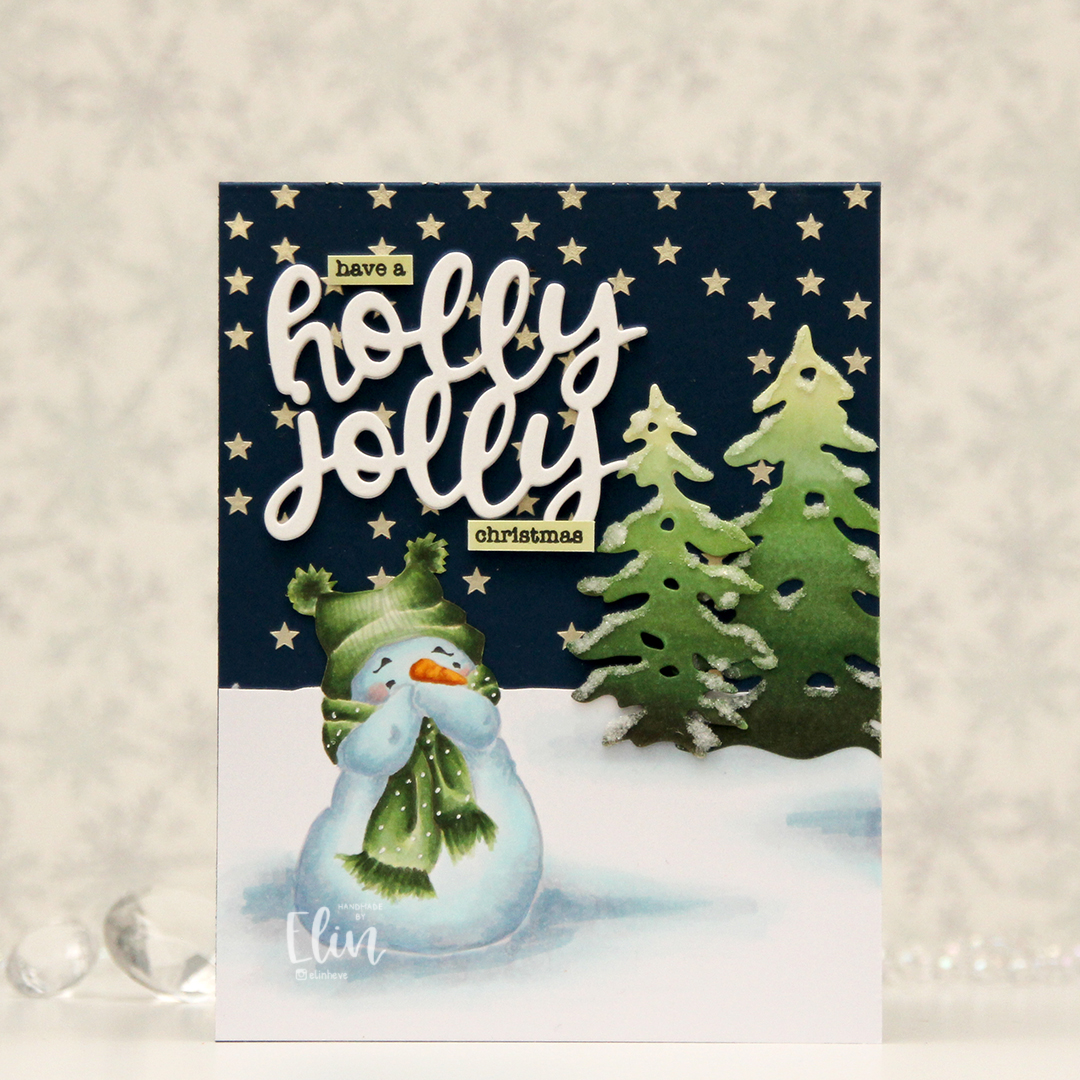 I love coloring this image in noline versions. I usually print with his eyes and eyebrows in a dark brown and the rest of him in a super light grey. I kept the snow on the ground around him this time, and cut away the part of the panel that above my imagined horizon line. I created stars in the sky by using solar paste from Simon Hurley (in the golden hour color) through the Falling stars stencil from Simon Says Stamp onto the front of an A2 card base I created from After midnight cardstock from My Favorite Things.
 Once the stars were dry, I adhered my panel with my snowman, adding die cut trees a little bit below the horizon line. I created the trees by coloring a scrap piece of X-Press It using the same green markers I used for the image, before die cutting them using the Silhouette Snow Trees die set from Mama Elephant. I finished off the trees with some liquid glue and Rock Candy distress glitter for a sparkly, snowy look. For a sentiment I die cut the words holly jolly from the Jolly Holiday greeting die set from Concord & 9th five times from white cardstock and adhered them all together for a stacked, dimensional look and completed the greetings with some small words from the Holiday messages stamp set from Mama Elephant that I stamped in Obsidian ink from Altenew onto pieces of cardstock I colored with the lightest of the green markers I used for the snowman and the trees.
![]() Fairly simple color palette for this one, although I don’t think I’ll ever have a limited color palette for snow, I always choose a lot of colors to create snow.
Fairly simple color palette for this one, although I don’t think I’ll ever have a limited color palette for snow, I always choose a lot of colors to create snow.
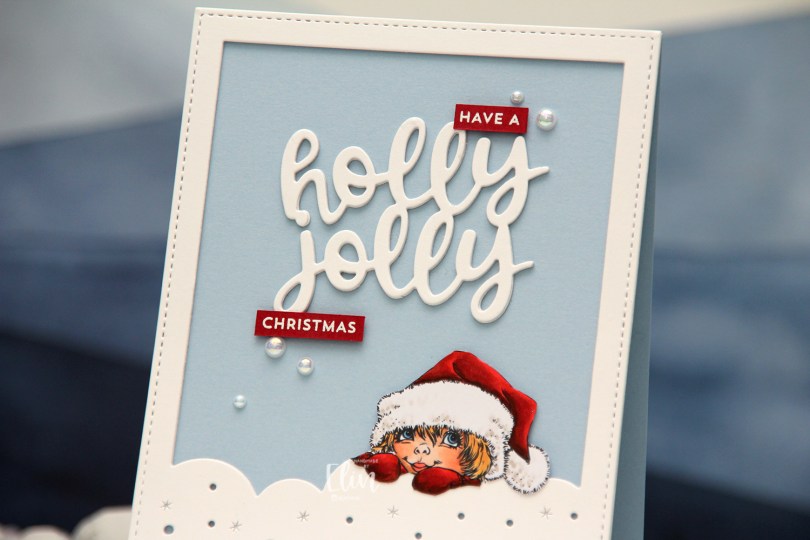
 I colored the image with Copics and fussy cut it. It’s an easy one to fussy cut, so that helps. I die cut a frame from the Mega Snowflake Cover die set from Mama Elephant three times from white cardstock, stacked them and adhered the stack to a card base I created from Blue Breeze cardstock from My Favorite Things, before mounting the image with foam squares.
 I used one of the dies in the Jolly Holiday Greetings die set from Concord & 9th to die cut a few times from white cardstock and stacked those as well. I adhered the stacked die cut to my card base. I stamped and white heat embossed a sentiment from the Itty Bitty Holiday stamp set from My Favorite Things onto Amarena Cherry cardstock from My Favorite Things, cut the sentiment apart and used part of it to complete the sentiment on the card, before finishing off with a few pearls from the Glossy Porcelain mix from Little Things from Lucy’s Cards.
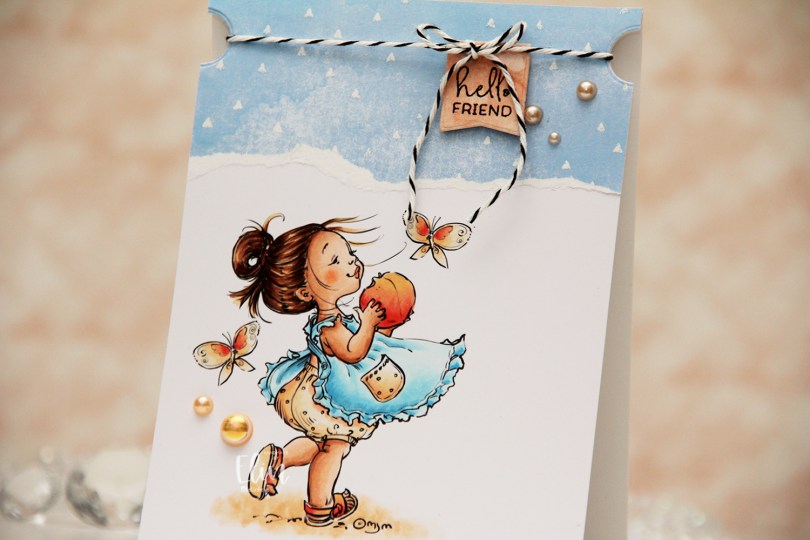
 I colored her up with my Copics and kept the panel intact this time. No die cutting, no nothing. I adhered it directly to a top fold A2 card base and put a torn piece of patterned paper at the top. The paper is from the Watercolor Wishes pad from Lawn Fawn, and I white heat embossed triangles onto it to create a little more interest, using the Scattered Triangles Background stamp from My Favorite Things.
 I used a small circle die to create notches near the top of the card. I stamped a sentiment from the Mini messages stamp set from Mama Elephant using Obsidian ink from Altenew onto a piece of patterned paper from the Watercolor Wash Brights paper pad from My Favorite Things, and die cut it with one of the dies in the Blueprints 27 die set from My Favorite Things. I put foam tape on the back and adhered it to my card, before adding some black twine to the card, tying it in a bow at the top of the die cut. The notches help keep the twine in place. I finished off with a few pearls from the Meadow mix from Little Things from Lucy’s Cards.
 I used the igloo with the peeking penguin and only added one small penguin for this simple card. I didn’t even use the entire igloo, I like the look of the design coming in from the side like this. I colored the image with Copics and used a die in the Additional A2 Layers die set from Waffle Flower to turn it into a nice panel and adhered it to a top fold card base I created from Peacock cardstock from Concord & 9th.
 Using the Hooray Script die from Mama Elephant, I cut three die cut layers from Watermelon cardstock from Concord & 9th, which I stacked for a little bit of dimension. I white heat embossed a sentiment from the Birthday messages stamp set from Mama Elephant on a strip of Peacock cardstock. I added a few more layers of cardstock behind it and adhered it below the die cut part of the greeting, before finishing off the card with a few sequins from the Ice Water mix from Little Things from Lucy’s Cards.
 Enough housekeeping. I colored this cute panda and the bamboo in the background onto X-Press It blending card using Copics, before stamping a small sentiment from the Mini Messages stamp set from Mama Elephant using Obsidian ink from Altenew.
 I adhered my colored piece to a top fold white card base and used the Leafy Cover die from Mama Elephant to die cut a frame from Green Parakeet cardstock from Papertrey Ink. I strategically cut off a few leaves that did too good of a job of hiding my panda, before adhering the frame on top of the image.
 I added a black glaze pen to his eyes and nose, before going in with a Gelly Roll 05 once the black was dry. I love the extra shine and dimension it adds to the image, even if it doesn’t show up in the photos. What does show up, however, is the embellishment mix. This is the Spring Leaves mix from Little Things from Lucy’s Cards. I purposefully underexposed my photo as I was taking the picture to avoid blowing out the light areas during editing. It’s a trick I learned today from Mona Tóth (@mona.toth on Instagram), and it blows my mind that willingly making the photos look dark as you shoot makes them that much better in the end – but it totally works!
 I didn’t use too many Copics for this one.
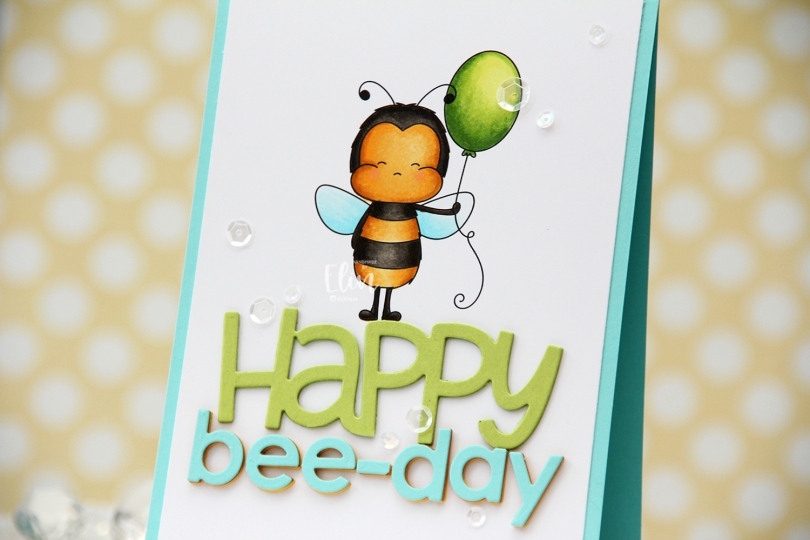
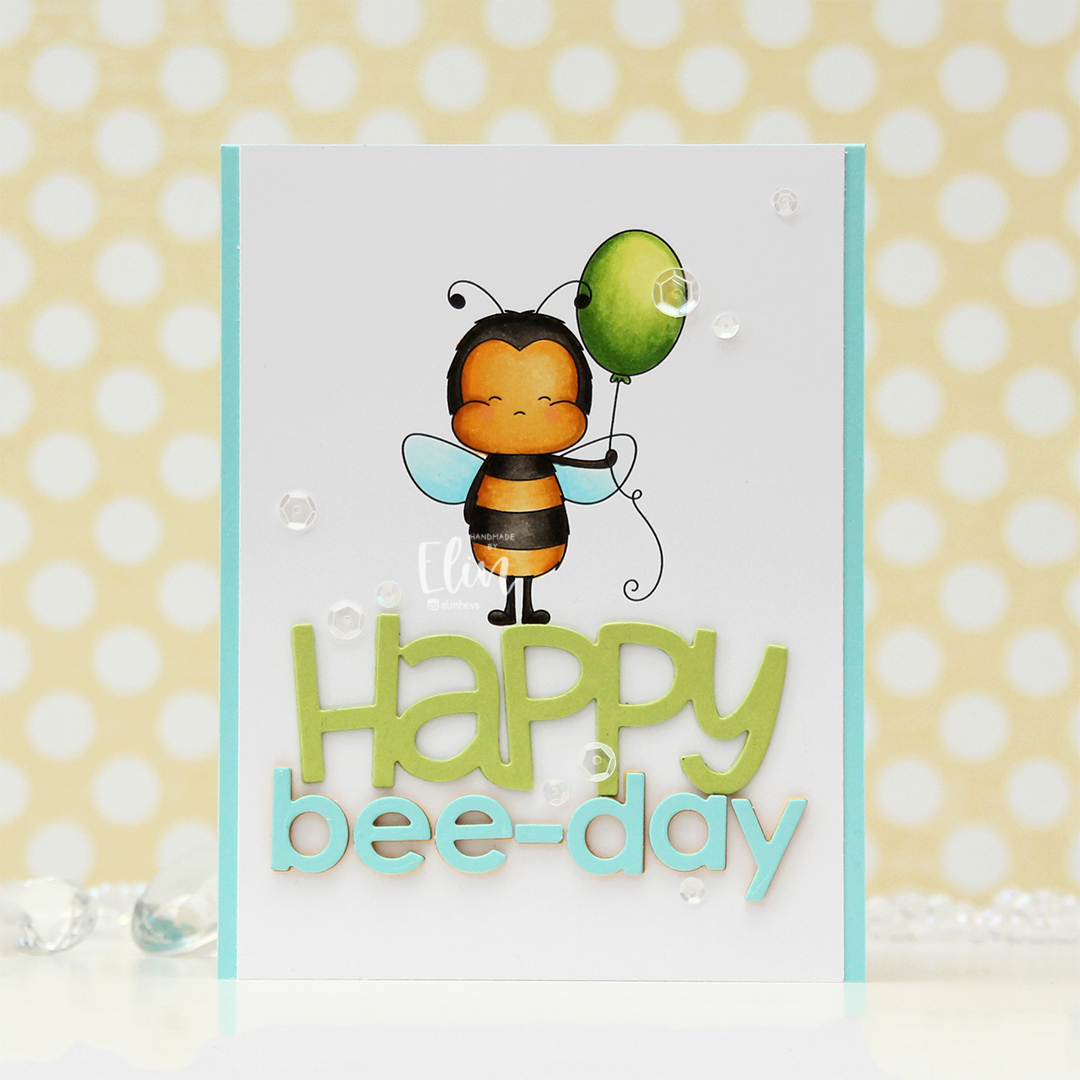 I knew I wanted a large sentiment for this card, so I printed the bee pretty much top center of a quarter sheet of X-Press It blending card, which is my preferred cardstock for Copic coloring. I’ve been using it since 2012, and in my mind, there’s no better cardstock for Copics, so it’s pretty much all I use. I colored the image with my Copics and cut off a little bit on each side of the panel before adhering it to a top fold card base I created from Summer Splash cardstock from My Favorite Things.
 I die cut HAPPY from the Big Happy Holidays die from Mama Elephant three times from Sour Apple cardstock from My Favorite Things, stacked them for a dimensional look and adhered the stacked die cut right beneath the bee’s feet. Using the Parker alphabet die set from Memory Box, I die cut the letters to spell bee-day, using an exclamation point that I trimmed down a little to create a hyphen. This word is actually multi-colored. That was not my intention, but I wasn’t happy with the color I chose initially, which was Bright Buttercup from Papertrey Ink. It’s a great color, but it wasn’t the right yellow to match my colored bee. On top of three die cuts of that, I added a layer of Honey Nut cardstock, also from Papertrey Ink. It matched my bee, but it was a little too brown for my taste, and my card felt sad. I didn’t want a sad birthday card, so I topped it with a layer of Summer Splash cardstock from My Favorite Things, which is what I used for the card base. I was much happier with this, and it matches the wings nicely.
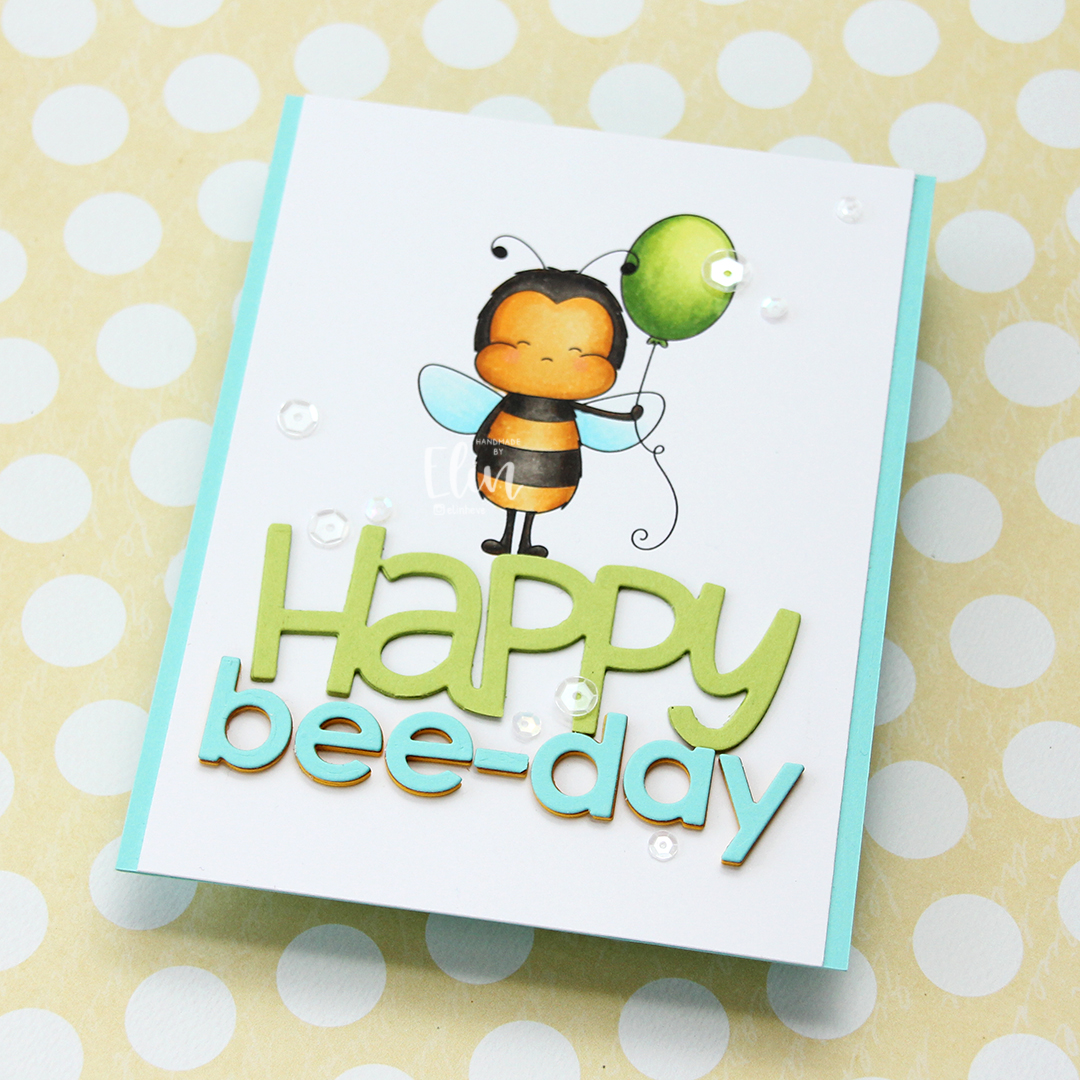 To finish off the card I added a few sequins from the Starry Night mix from Little Things from Lucy’s Cards. Here you can also see the multi-colored letters in the word bee-day, which adds another layer of interest to this fairly simple card.
 Simple color palette for this one.
 I colored the image with my Copics and stamped love you from the Mini Messages stamp set from Mama Elephant using Berry Sorbet ink from Papertrey Ink, before using the panel die in the Blueprints 27 die set from My Favorite Things to cut it out and give it a nice scalloped edge with a faux stitch line on the inside.
 Onto a top fold white card base, I adhered a piece of blue patterned paper from the Watercolor Brights 6×6″ paper pad from My Favorite Things. I added a few layers of cardstock behind my large panel for a little bit of lift and adhered it to the card front, before finishing off simply with a few pearls from the Glossy Porcelain Mix from Little Things from Lucy’s Cards. Oh, and I also used a black glaze pen from Sakura to add a black dot to each of the eyes. This makes the eyes pop, and it adds shine and a little bit of dimension in real life, which you can’t really tell from the photo.
 I colored the image with Copics, then used a die from the Blueprints 27 die set from My Favorite Things to give the panel a nice border around the edge. I added a few layers of cardstock scraps behind the panel for strength and dimension. I created a top fold card base from Lavender Moon cardstock from Papertrey Ink and ink blended from the bottom using Autumn Rose ink, also from Papertrey Ink. This gave my card base a nice ombre effect.
 I used the Big Happy Holidays die from Mama Elephant to die cut four layers from Lavender Moon cardstock. I used the same ink blending trick for the top layer that I used for the card base, ink blending it before I die cut and stacked all four together for a nice, dimensional sentiment. To finish off the card I added a few die cut snowflakes. I used the Snowflake Confetti Fancy die from Hero Arts and CR1335 from Marianne Design to create my snowflakes, and my card was complete.
 I always go overboard when I color snow, even though there was very little of it this time.
 I’ve used this image a few times in the past, but I’ve never colored the penguins blue, which kind of blew my mind when I realized. I decided to remedy that and created soft blue penguins and a corally pink scarf. I cut my panel down to a square, die cut a heart in the center using a die from Papirdesign and mounted the negative onto a square card base I created from Berry Sorbet cardstock from Papertrey Ink.
 Onto my colored heart, I stamped a sentiment from the Mini Messages stamp set from Mama Elephant using Berry Sorbet ink from Papertrey Ink. I adhered the heart to the card front and added a few sequins from the Starry Night mix from Little Things from Lucy’s Cards to finish my card.
 Oh, and before I forget, I used a super simple color palette for this one.
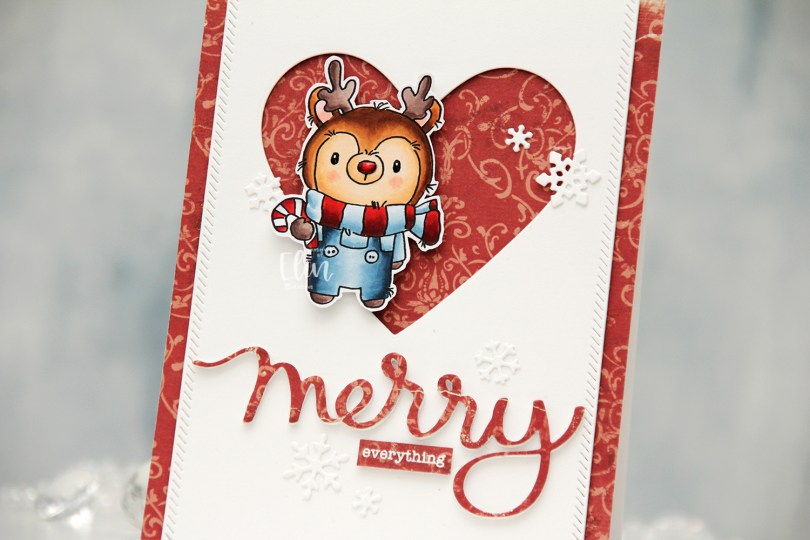
 I colored my reindeer with Copics, added black Glaze to his eyes for shine, a white dot on top with a Gelly Roll 05 once the black was dry and also a thick layer of Glossy Accents to his nose for dimension as well as shine. I fussy cut him leaving a white border and proceeded to work on the rest of my card.
 I covered a card base with the Julhälsningar sheet from the Vintage Winter collection from Maja Design. This has a little bit of pattern to it, but not so much that it’s too distracting. I created a window in a white panel using a heart die from Papirdesign, then used one of the dies in the Stitched Borders die set from Lawn Fawn to create a little bit of interest to the sides, before adhering the panel with foam tape to the center of the card front.
 Using the Merry Script die from Mama Elephant, I die cut three layers from white cardstock and one from the patterned paper to adhere on top. I stacked the four together and adhered my die cut to the card. I white heat embossed a sub sentiment from the Holiday messages stamp set from Mama Elephant onto a scrap piece of patterned paper and trimmed it down to a strip, before I added a few layers of cardstock behind it for dimension and adhered it below my die cut word.
 I mounted the reindeer on foam tape offset in the heart opening and added die cut snow flakes here and there. Some I created with the Snowflake Confetti Fancy die from Hero Arts, some are made with the Stitched Let It Snow Circle Frame die set from Memory Box, which includes a die that cuts three individual snowflakes (which is what I used).
 This card has a lot of texture and dimension, and the shine on Rudolph’s nose is the perfect detail to draw attention to him!