
Hi, everyone! Another Wednesday means another Mo Manning cutie on my blog. This time I’ve turned Two Jill into a belated birthday card. She’s adorable even when upset, so I thought she was perfect for a belated birtday card. Not that I tend to forget birthdays, I’m pretty good at remembering them, so I’m not sure when I’ll get to give this one away, but it’s still nice to have on hand.
 I colored her up on X-Press It blending card with my Copics. It’s been a while, so I don’t recall which Copics I used, but I’m guessing I chose the R80s for the pink and the E40s for the brown.
 I decided to diecut my colored piece using one of the rectangle dies from My Favorite Things with faux stitching. I also ran a white cardstock panel through a We R Memory Keepers embossing folder to give some interest to the background. I glued the dry embossed piece to the pink (Hibiscus Burst cardstock from Papertrey Ink) cardbase, and added my stitched rectangle on top of that with some dimensional adhesive.
 I needed a sentiment that matched my image, so I decided to go with a belated birthday greeting from a Huldra designstudio stamp set. I heat embossed the sentiment on some pink cardstock and diecut it into a banner using a die from My Favorite Things. I added another fishtail banner behind it in brown and popped them both up from the image with some dimensional adhesive.
 Here you can see the dimension, with the stitched rectangle popped up from the background, and the banners popped up from the stitched rectangle. I decided to add a few Papirdesign enamel dots as a finishing touch.

 This card is large, it’s nearly 8 inches wide. Not what I normally do, but I really wanted to use all the birds.
 I stamped a Norsk Stempelblad AS sentiment in blue ink. I actually double stamped to get the right color. I used Salty Ocean Distress Oxide ink for my first stamping, and then Papertrey Ink Blueberry Sky on top. The combination matches the coloring of the images well, but looking at the photos, I’m thinking there’s a possibilty I should have gone with Enchanted Evening, which is the same color as the blue cardstock I used for my cardbase.
 The colors I used for my image. I actually used R39 to deepen my blues, it worked really well for that.
 I’ve colored up
  I diecut some scraps of Maja Design patterned paper from different Christmas collections and added them in a cluster in the top right corner. I’ve got Fröjdefull Jul, Home for the Holidays, and red monochromes from the Joyous Winterdays collection all in a neat little cluster, diecut with dies from Docrafts, Craft Emotions, and My Favorite Things.
 I white heat embossed a Norsk Stempelblad AS heart on one of the diecut pieces, and that’s my card for today.
 I’ll try to be better at including the colors I’ve used, so here they are.
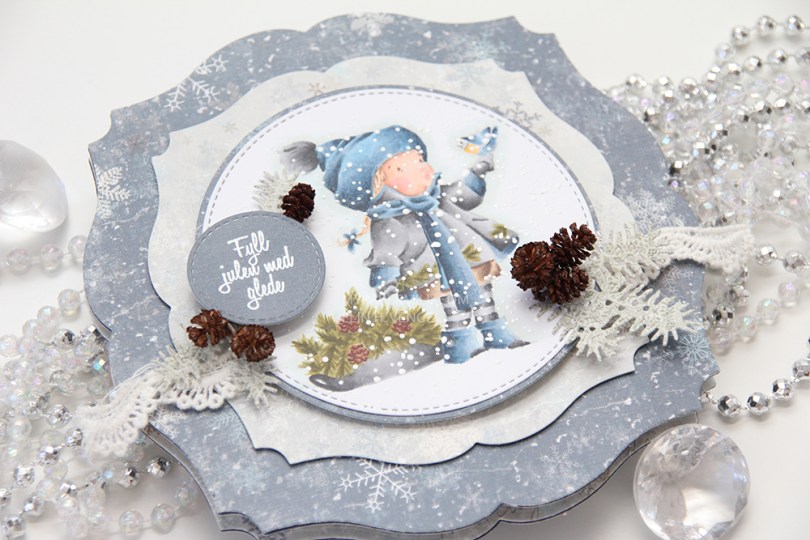
 I printed my image with a low opacity setting in Photoshop and did no line coloring with my Copics. I added chunky white embossing enamel for that wintery, snowy feel.
 The card itself is made by diecutting Maja Design patterned papers from last year’s Christmas collection, using a set of dies from GoKreate. The sentiment from Norsk Stempeblad AS is heat embossed, and I added tiny little cones I’ve picked myself.
 The insde has the same patterned papers, another Norsk Stempelblad AS sentiment stamped in Papertrey Ink Enchanted Evening ink, as well as some heat embossed Huldra designstudio snowflakes, and a Crafty Moly veneer snowflake that I also heat embossed.
 I did the same thing for the back of the card. Sentiment, heat embossed snowflakes and veneer snowflakes for that extra little bit of dimension.
 This card is actually published in the
  I made the cardbase with some Stamper’s Select White cardstock from Papertrey Ink. It’s my favorite white cardstock, nice and thick and bright white. I cut another panel of the same cardstock slightly smaller and diecut a window using a Hero Arts die. I ink blended my cardbase using three colors of blue dye ink; Papertrey Ink Spring Rain, and Stormy Sky and Faded Jeans Distress Ink from Ranger.
 I colored my snowman on X-Press It blending card using Copics (W4, W3, W1, W0, W00, C2, C1, C00, E000, B0000 for snow, B99, B97, B95, B93, B91 for the blue, and YR18, YR12, and Y35 for the carrot), before fussy cutting him and adding him to the left side of my diecut snowflake window.
 I ink blended a couple of strips of cardstock to make it match my blue background inside the circle. When the ink was dry I added a couple of
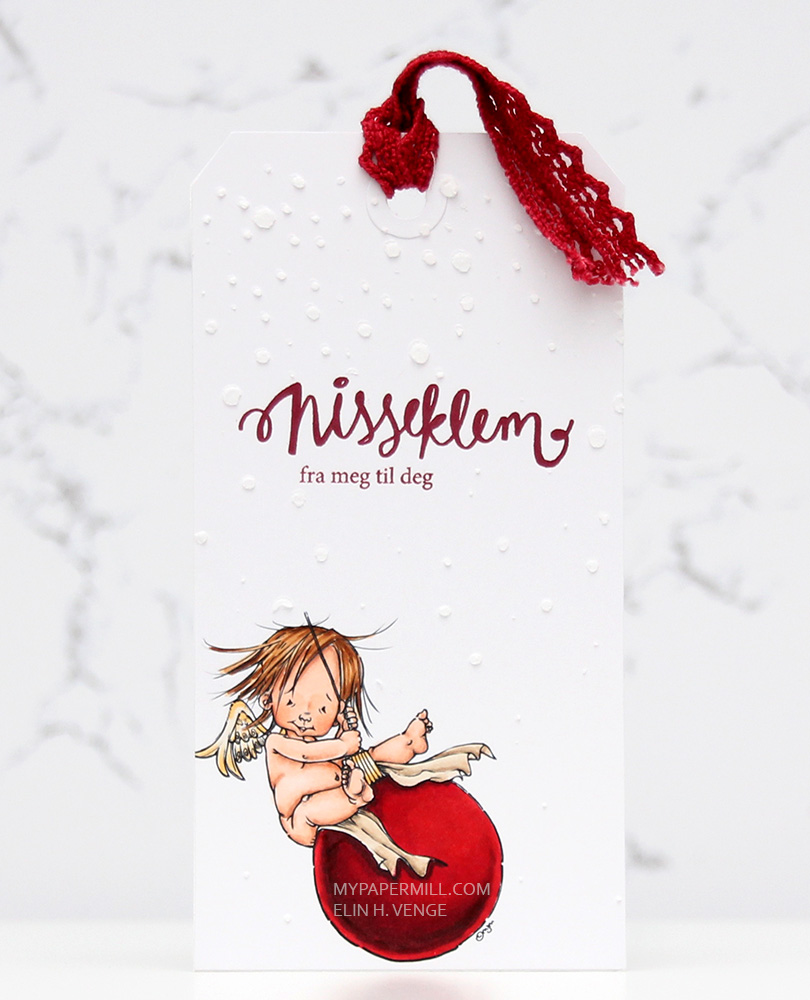
 Jeg fargela motivet med Copics, stanset det ut til en stor tag og maskerte motivet før jeg brukte en stensil og embossingpaste til å lage snøfnugg rundt. Nisseklem fra meg til deg er to sammensatte tekster fra Norsk Stempelblad AS, stemplet med Papertrey Ink Scarlet Jewel blekk. Jeg festet en liten bit rødt bånd i hullet på tagen – enkelt og greit.
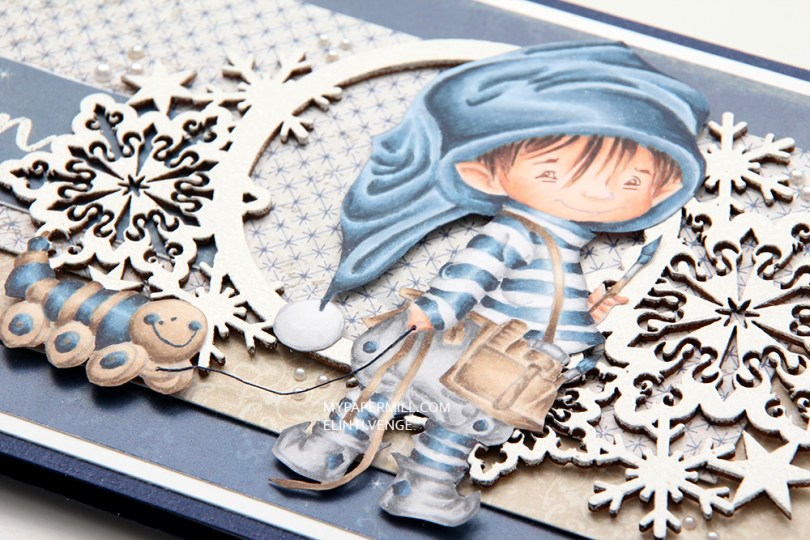
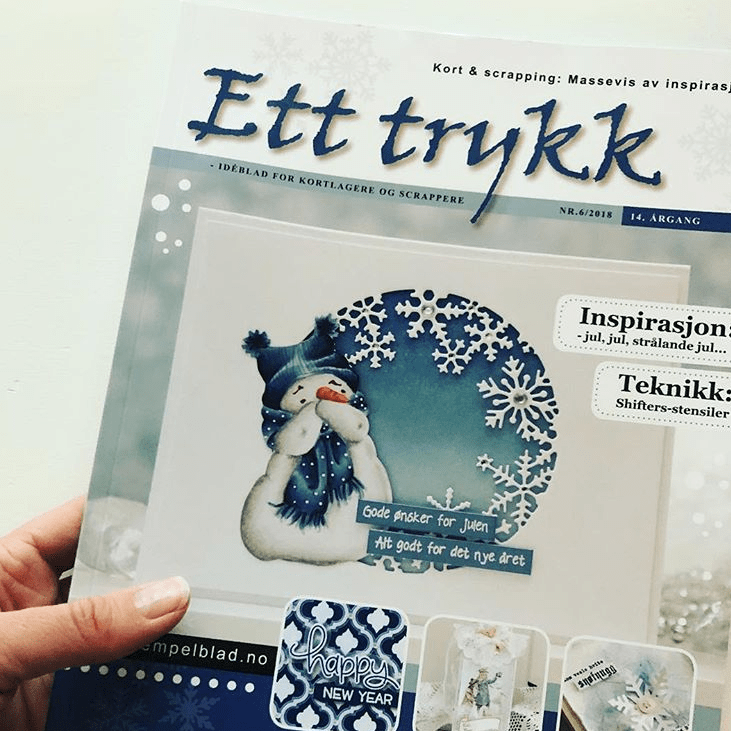
 Kortet er publisert i en artikkel der vi hadde fokus på rester, og tro det eller ei, men hele kortet består utelukkende av resteark. Jeg fant frem omtrent rubbel og bit av det jeg hadde av blå resteark fra Maja Design, og jeg har til og med brukt ark fra en sommerkolleksjon her. Funket fint på julekort det!
 Jeg fargela
 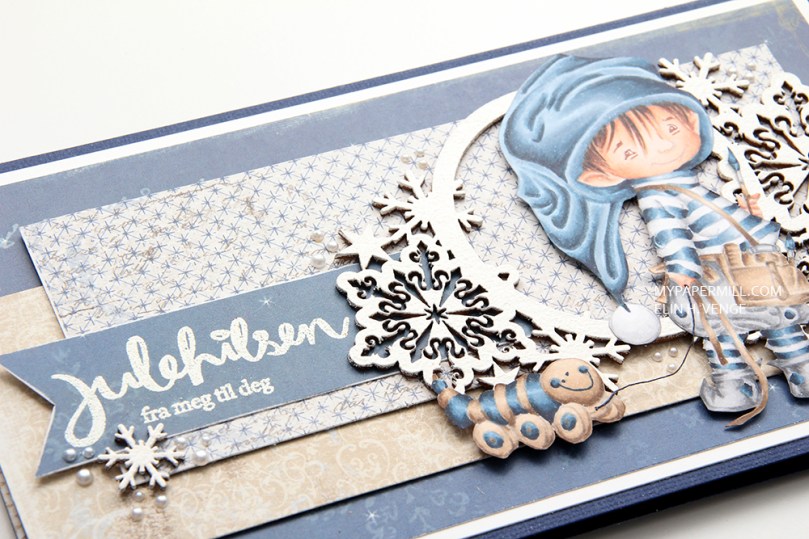 Jeg har stemplet en tekst fra Norsk Stempelblad på en blå rest og embosset i hvitt. Pyntet enkelt med noen perler fra Kort & Godt og flere chipboardsnøfnugg som er embosset.
 Innsiden har det samme oppsettet, men andre mønsterark. Jeg hadde nemlig ikke store nok rester til å bruke de samme arkene jeg brukte på forsiden. Det blå arket med prikker på er arket fra Summertime-kolleksjonen. Tekststempelet fra Norsk Stempelblad AS har jeg stemplet rett på et lyst mønsterark med Enchanted Evening blekk fra Papertrey Ink.
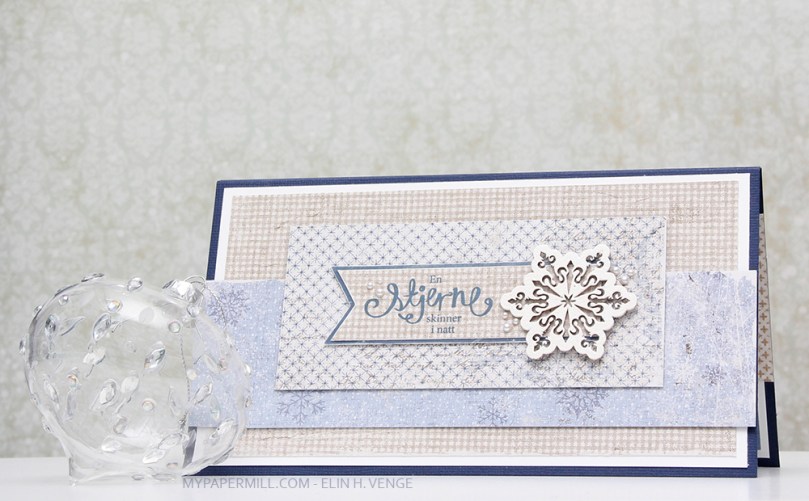 Baksiden er også ganske enkel. Ett stort snøfnugg, banner med tekst og litt lag på lag med mønsterark. Fremdeles samme oppsett som på resten av kortet, men med andre ark igjen, siden det nå begynte å bli tomt for rester.
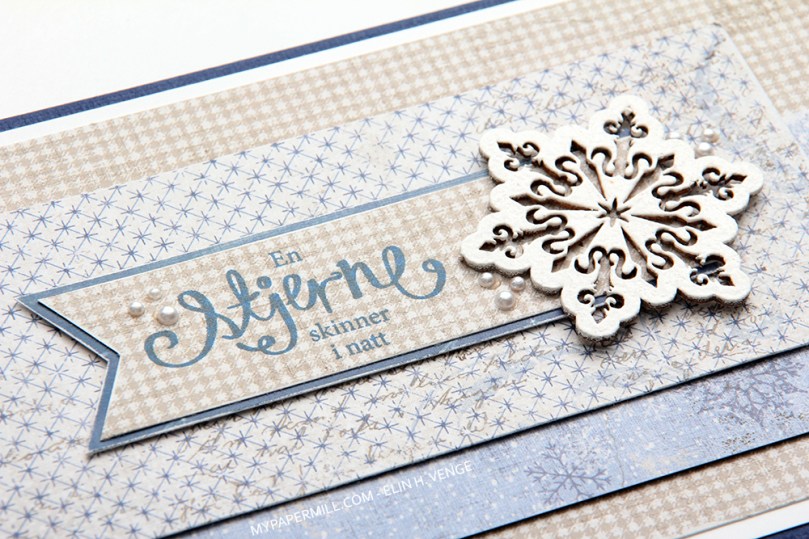 Det er egentlig ikke så rart det gikk hardt utover restene mine på dette kortet. Kortet måler 8 x 4 1/4″, så det er ikke akkurat lite, men siden jeg har holdt meg til det samme oppsettet på alle fire sidene og også de samme fargene på arkene blir det ikke rotete inntrykk likevel, selv om jeg har brukt ark fra seks forskjellige kolleksjoner.
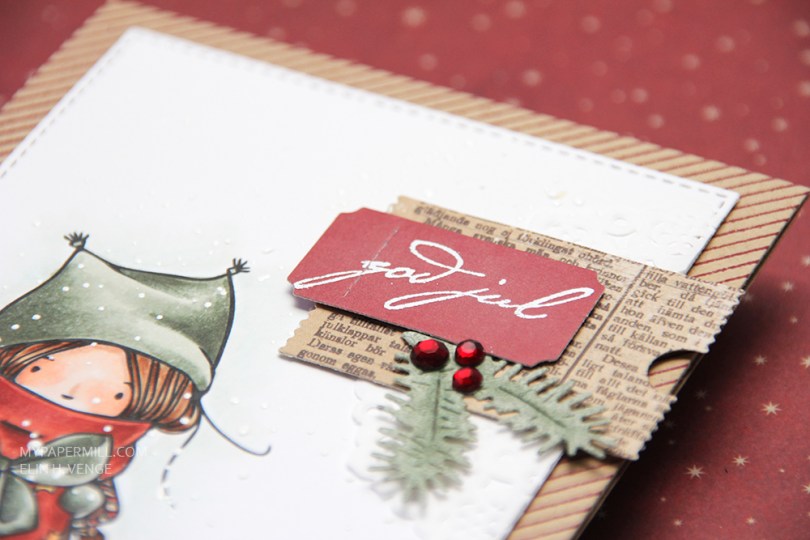
 I chose muted colors with lots of grays in them, diecut my colored panel with a stitched rectangle die from My Favorite Things and sprinkled on chunky white embossing enamel from Stampendous which I heat embossed. It gives the look of falling snow, which I really love for Christmas cards. No pattern, completely random, which really is how snow falls in real life.
 I added my panel to my card base using dimensional adhesive without too much dimension. The card base is Classic Kraft cardstock from Papertrey Ink. I stamped a pinstripe stamp from Altenew across it in Scarlet Jewel ink, also from Papertrey Ink.
 I tend to add little embellishment clusters on my simple cards, and this one is no different. Part of a mini doily from Doodlebug, some patterned paper diecut with a Docrafts die, a ticket with a white heat embossed sentiment from Papirdesign, and diecut pine branches from patterned paper. I added three Papirdesign crystals as a finishing touch.
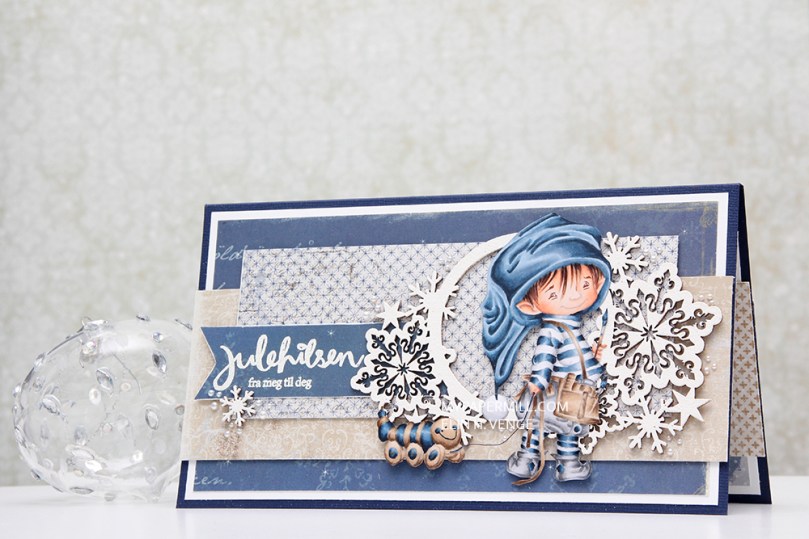
 As usual, I colored my image with Copics. I grabbed some colors that were already out on my desk – no surprise that lots of blue markers were among them. The snowflake background is diecut with a Hero Arts die, and I added rock candy distress glitter in the holes left behind by the die. Unfortunately, glitter and photographs are a bad match, so it doesn’t really show up in the photos.
 I stamped and heat embossed Juleklem (Christmas hug in Norwegian) on a piece of Blueberry Sky cardstock before diecutting it with a fishtail flag frame die from My Favorite Things. I stamped til deg (for you) on a white piece of cardstock using Blueberry Sky ink and diecut that, too. The stamps are from a new Huldra designstudio stamp set.
 I added both my banners with foam tape and finished the card off with a few blue enamel dots from Papirdesign.
 I’ve gone with a tried and true layout on my card. I didn’t have a whole lot of time to make this, so I needed to not reinvent the wheel. I colored up my image with Copics and used patterned papers from the Vintage Baby collection by Maja Design.
 I embellished with blue and white flowers and rose buds, along with a few Kort & Godt diamonds scattered around my flower clusters. I diecut the letters in the little boy’s name twice and stacked them for a little bit of dimension. I added the letters to a fishtail banner in the perfect size.
 I stamped a North Star Design sentiment on the back of the card using Papertrey Ink Blueberry Sky ink.