Hi, everyone! Another Wednesday, and another Mo day around here. This time I have a little bit of Alphabet Soup to share with you.
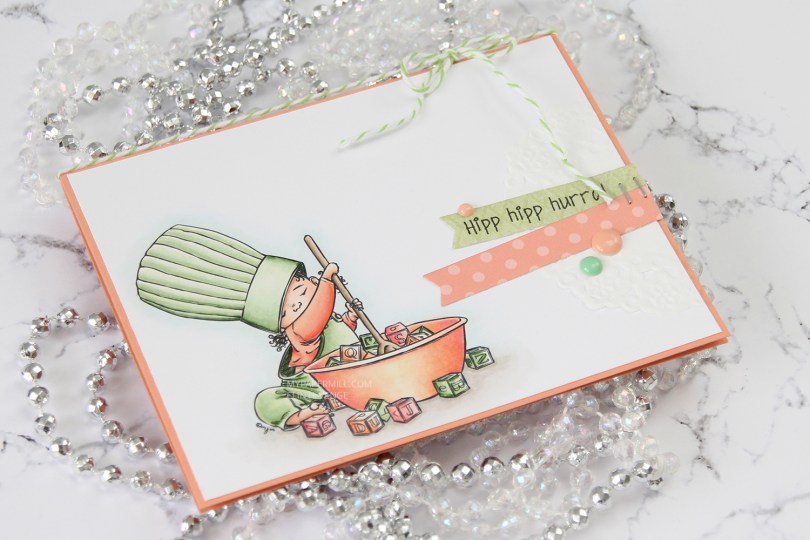
 I printed my image onto X-Press It blending card towards the bottom left corner of a quarter sheet. I colored it in with my Copics, before trimming it down to 5 3/8 x 4 1/8″. I wanted the Melon Berry cardbase from Papertrey Ink to show around the edges, and this size panel creates the perfect 1/16″ border on all four sides.
 If you’ve seen a card or two from me previously, you’ll no doubt know that I’m a fan of adding clusters on my cards. They vary in size and some are simpler than others, but they tend to have three things in common: a piece of a paper doily, fishtail banners and enamel dots or sequins. I also usually put my elements on straight, but this time I went for a less rigid look. I went through my patterned paper scraps and found a green piece from the Vintage Garden collection by Pion Design and diecut it using a fishtail flag frame die from My Favorite Things. I thought I’d have to go for just a piece of cardstock for the other banner, but then I remembered that I have a paper pack from Sunny Studio with pastel colors, and one of them fit perfectly.
 I stamped a Norsk Stempelblad AS sentiment onto the green banner using My Favorite Things Extreme Black ink and stapled the two banners together before gluing them onto the card. I added a string of Green Apple divine twine to the top of the card and a few My Mind’s Eye enamel dots to finish it off. In real life, the green dot looks closer to the greens I used in my image. Photos sometimes lie.

The color palette doesn’t lie, these are the Copics I used to color my image.


 I did what I usually do by diecutting the panel with the hippo using the largest of the stitched rectangle dies from MFT. This is the one die I use more than any other, and it gives such a nice look with that faux stitching around the edge and the 1/16″ border of the cardbase (in this case Berry Sorbet cardstock from Papertrey Ink) showing.
 I diecut a word die from Kort & Godt four times from Aqua Mist cardstock and glued them all together for a stacked look. There was just enough space above the head of that hippo for the word to fit nicely. I stamped and white heat embossed a Norsk Stempelblad AS sentiment on a piece of that Berry Sorbet cardstock and added three more layers behind that, so it’s flush with the word above.
 The small birds were also colored way back in 2018 for that same challenge as the hippo with the balloons. They didn’t have cheeks colored in, so I just went in with a couple of red markers and then a white pen on top to make them look like the first bird. I fussy cut both and added them to my sentiment to form a visual triangle. A few enamel dots from My Mind’s Eye finishes the card nicely. I usually know exactly where to put my enamel dots (or sequins or other small embellishments), but I was really stuck on this one and couldn’t find a good placement until
  Last, but not least, the Copics I used for this card.

 Da jeg var ferdig med svertingen brukte jeg et tørk fra en tørkerull til å tørke over det overflødige blekket som hadde lagt seg oppå embossingen. Jeg kuttet ned panelet mitt til 4 x 5 1/2″, og limte det på en toppbrettet A2 kortbase laget av Stamper’s Select White kartong fra Papertrey Ink.
 Jeg ville ikke dekke til for mye av blomstene, men noe mer måtte jeg likevel ha på kortet. Jeg stanset ut en Gratulerer-die fra Papirdesign seks ganger i hvit kartong og limte dem oppå hverandre. Jeg stemplet også teksten “med dagen” fra
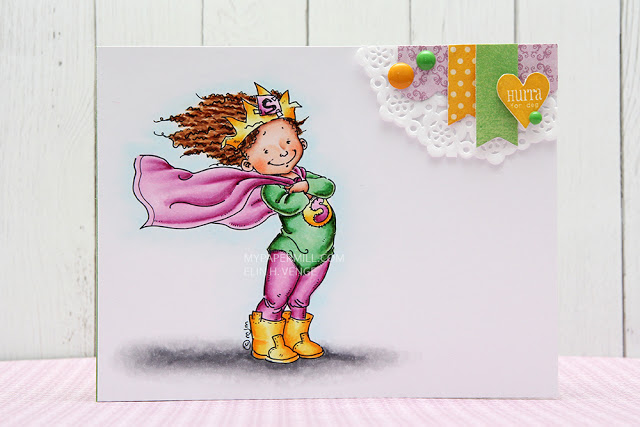
 I’ll admit, I struggled putting this one together. I had a stray pink Copic streak on the left side of the image, and no matter how times I used my blender on it, it was just too stubborn to go away. I decided to cut it off, I wasn’t about to redo the entire image. I sort of had a plan, but that didn’t really work, so I wound up diecutting a scrap piece of 7 Dots Studio patterned paper to go behind my image.
 I used the same patterned paper for my sentiment strip, which I stamped with a Norsk Stempelblad AS stamp and then diecut using one of the Fishtail Flag Frames dies from My Favorite Things. The pink patterned paper behind the sentiment strip is actually the other side of that same patterned paper. I thought it fit my Papertrey Ink Berry Sorbet cardstock pretty well, in addition to the pink in the actual image. The pink cardstock is debossed with an impression plate from Papertrey Ink and then diecut with a stitched rectangle die from My Favorite Things. I also added some enamel dots in coordinating colors, as well as a couple of scraps of some doilies I had in my stash.
 I popped up the entire image using foam tape – lots of it, I’m not shy when I use foam tape.

 This time I chose
  I diecut the banners, as well as the main panel, using dies from My Favorite Things. MFT dies are my favorite, they’re so versatile. I glued part of a doily underneath my banners and stamped a Norsk Stempelblad AS sentiment on the biggest one (It says “BIRTHDAY – a special day that brings together people you love” in Norwegian).
 I used a small star punch for my yellow stars, and added a few veneer ones from Studio Calico to put something on the front that wasn’t made from paper. I added a couple of enamel dots to finish it off, simply because the pink color matched everything else perfectly.
 I put a tiny cluster on the inside. Another banner diecut using an MFT die, another veneer star and also a polaroid frame, diecut with another MFT die – told you they’re my favorite. A couple of punched little pink hearts and another Norsk Stempelblad AS sentiment (Happiness is being one year older), and my card was done.
 This time I chose
  I wanted to embellish the inside, too, but make it very simple. I took the diecut frame left from the banner on the front and glued it to my white cardstock before stamping a sentiment in red. I diecut a small yellow patterned paper circle for an extra bit of detail, and that’s it.
 I colored her with my Copics and cut my panel down. I wanted to use some scraps of Maja Design patterned paper, so I glued the plaid one and a tiny sliver of red right next to it before putting my panel on foam tape and gluing it to the front of my card.
 I stamped and heat embossed a birthday sentiment on a 1″ circle I made from the patterned paper, and glued it to my panel with a pebble on top.
 The pebble adds a little bit of shine to an otherwise simple card. So do the enamel dots I put on the left.
 I colored her up with my Copics in mainly RVs ang BGs. I diecut her with a stitched rectangle die from the Stitched Rectangles STAX Set 2 from My Favorite Things – try saying that ten times fast. I put her on lots of foam tape to a panel of Ocean Tides cardstock from Papertrey Ink, diecut with another stitched rectangle die from MFT, this time from Set 1. I added that to a Plum Pudding cardbase.
 I tend to make my cards simple with clusters of embellishments. This card is no exception. I dug through my patterned paper scraps and found some papers that matched my cardstock pretty well. The light teal is from My Mind’s Eye, the dark teal is from Pion Design, and the purple is from Papirdesign.
 I also added a doily. Well, half a doily, another signature of mine. I diecut my teal banners with a couple of My Favorite Things dies, and glued a little vine from Snip Art on top. This chipboard piece is very delicate, so I used spray adhesive on the back of it to avoid having to deal with liquid glue oosing out the sides. I added my diecut heart with some liquid glue, put a layer of Wink of Stella on top, and then Glossy Accents on top of that.
 Here you can see the Glossy Accents on the heart heaps better. I also added Wink of Stella and Glossy Accents on the heart on her shirt.
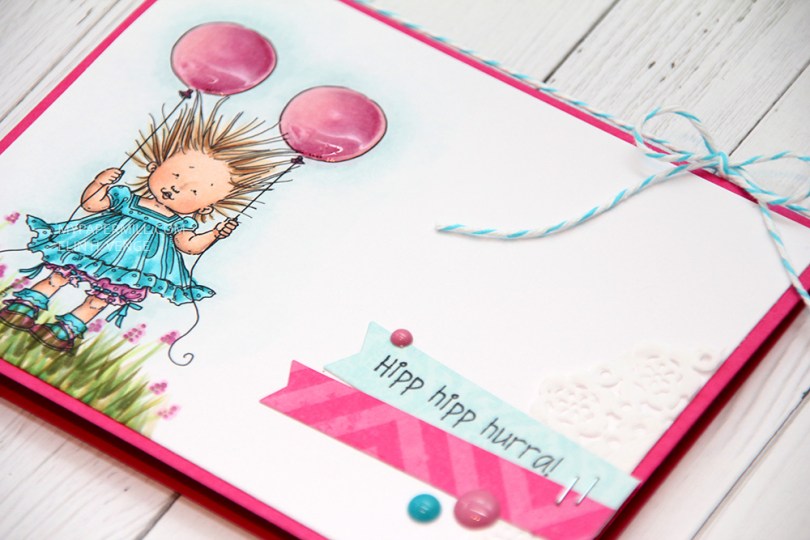
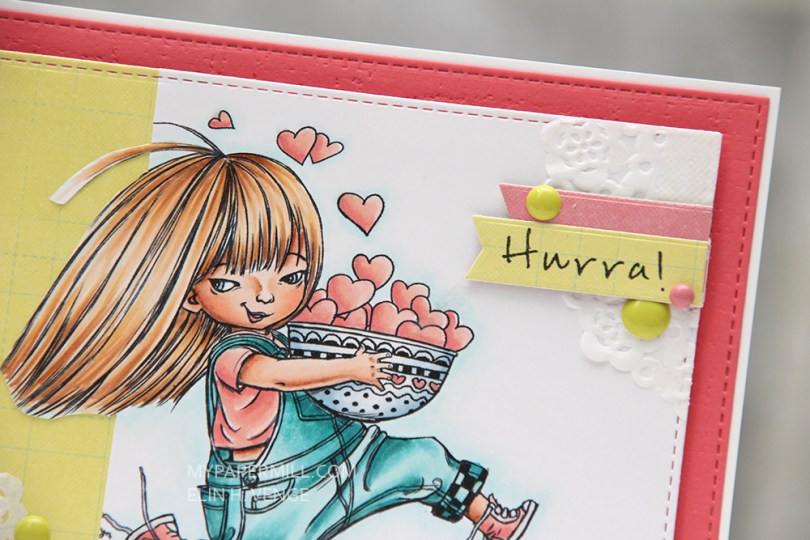
 Back to the card. I colored up my image with Copics and added some grass and a few freehand flowers to ground her. I added tons of Glossy Accents to the balloons, making them super shiny.
 I like making my cards simple, so I put her on a standard A2 sized card base made from Raspberry Fizz cardstock from Papertrey Ink, before adding a scrap of a tiny Doodlebug doily, a couple of strips of patterned paper from Maja Design and Papirdesign diecut with dies from My Favorite Things and a couple of tiny staples.
 The sentiment is from a stamp set from Norsk Stempelblad AS, stamped with Memento Tuxedo Black. I added a couple of enamel dots, the pink ones are from Papirdesign, the teal from My Mind’s Eye. I added some divine twine and tied it in a bow as my last finishing touch. And that’s my card for today.