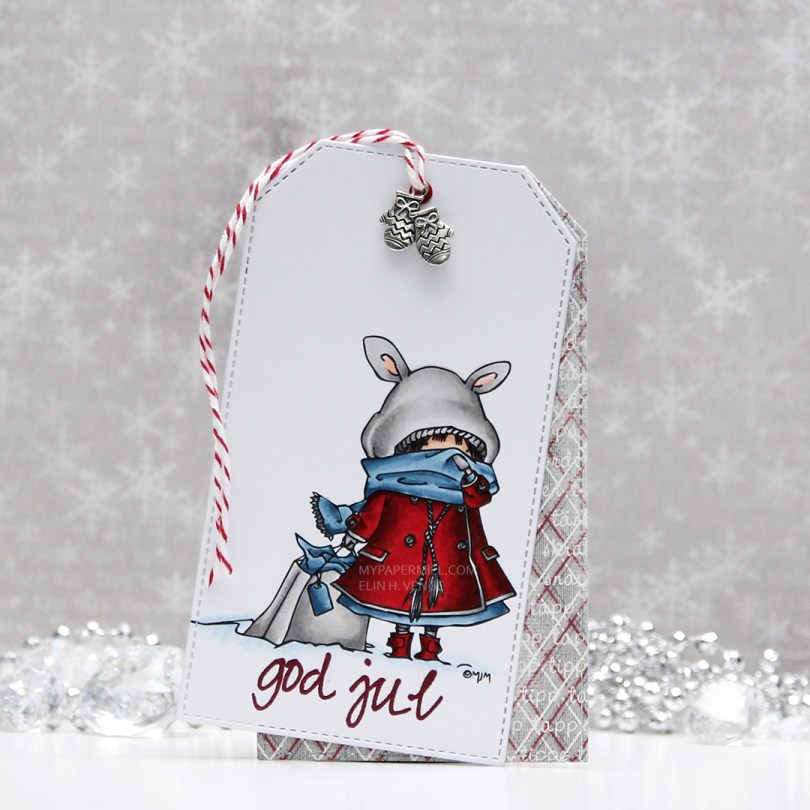
Hi, everyone! I’m ready for Christmas tomorrow. There, I said it, no backsies. This little Shop Tot gift tag is also ready for Christmas tomorrow, and it’s attached to a present going to one of my nieces.
 I colored the image with Copics, die cut it using a large faux stitch tag die from My Favorite Things and stamped a sentiment from Norsk Stempelblad AS on the bottom using Scarlet Jewel ink from Papertrey Ink. I created three more tag die cuts from the Fröjdefull Jul collection from Maja Design and glued one of them to the back of my colored panel. I glued the other two back to back and glued my two double tags together, slightly offset. I cut a hole at the top of the tag, used a red eyelet for strength and threaded some red twine through, adding a charm with mittens for that little bit extra.
 On the back of the tag I stamped a To/From stamp from Norsk Stempelblad AS using Smokey Shadow ink from Papertrey Ink, which is a nice dark gray. I attached a couple of loops I made from one of the patterned papers and was able to thread a candy cane through, I just hope the dog doesn’t get into the presents and eats the candy cane.
![]() Very limited color palette for this one, not a whole lot to color.
Very limited color palette for this one, not a whole lot to color.
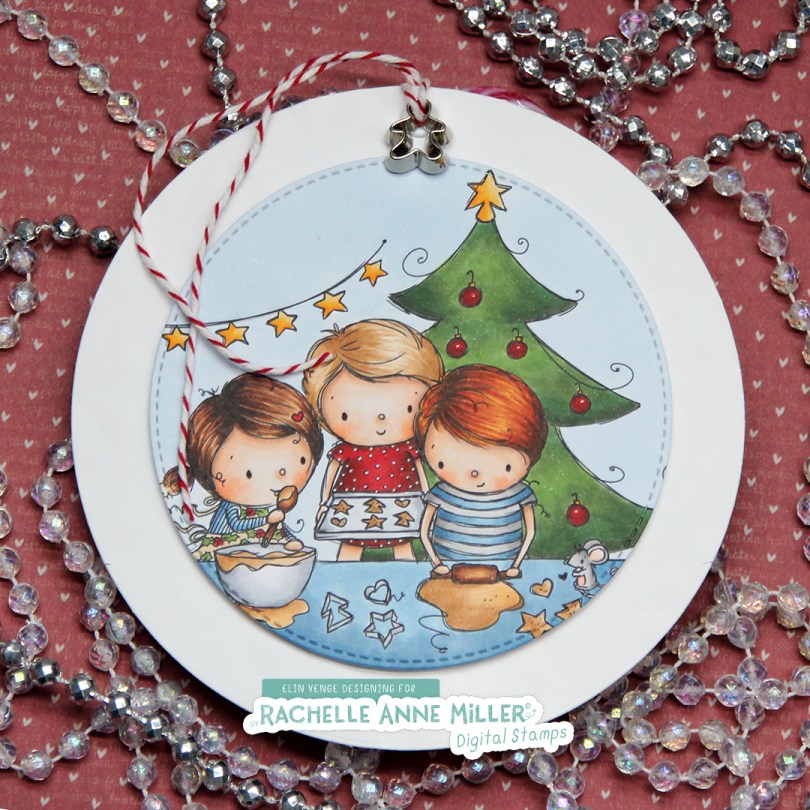
 I created this gift tag for my niece. It’s quite a big tag, its diameter is about 5″. The white circle panel isn’t just a panel, it’s dry embossed using an embossing folder from We R Memory Keepers. Unfortunately, dry embossing doesn’t show up very well in photos, and even less so when you’ve used white cardstock. It’s there in real life, though, and it provides a little bit of texture. I colored and die the Christmas Baking image from Rachelle Anne Miller, and popped it up on foam tape in the center of the white panel, before creating a hole at the top, adding an eyelet for strength. Through the hole I thread some cherry red divine twine and a tiny little cookie cutter embellishment, I thought it fit the image well.
 On the back I added another diecut circle that I’d already added a To/From stamp to, using Scarlet Jewel ink from Papertrey Ink. I cut a slit above and below that to feed the candy cane to, and double up on the foam tape when I glued it to the larger circle.
 Quite a few Copics for this one, and I used B90, which is a color I’ve created myself, on the background.
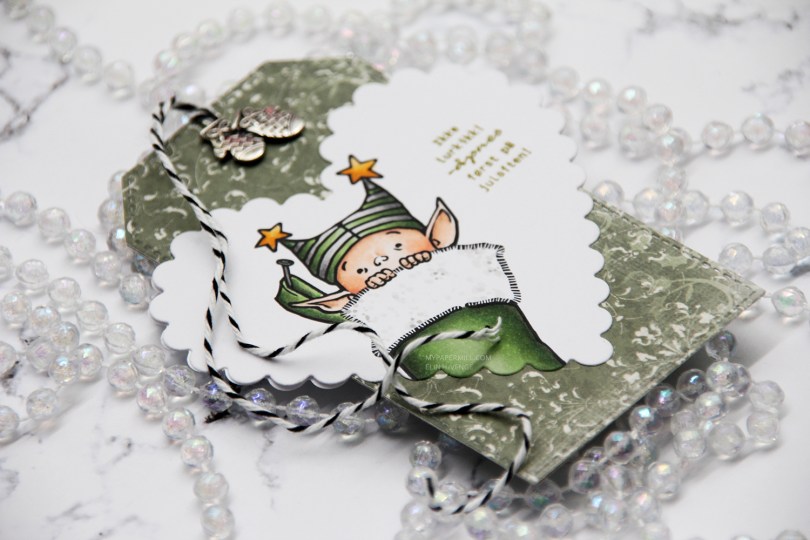
 I decided to go for a version in gray and green, and used a die from Papirdesign to create a scallop heart for the front of my gift tag. I stamped a sentiment from Norsk Stempelblad AS using Ripe Avocado ink from Papertrey Ink.
 I diecut a regular tag shape from patterned paper from Maja Design using a die from My Favorite Things and glued the scalloped heart to the regular tag.
 For the back of the tag I die cut the regular tag shape again from that same patterned paper as the one for the front, as well as a second scalloped heart from white cardstock. I used the same green ink as I did on the front to stamp the To/From stamp from Norsk Stempelblad AS.
 Not a lot of Copics used for this one, but it’s a small image.
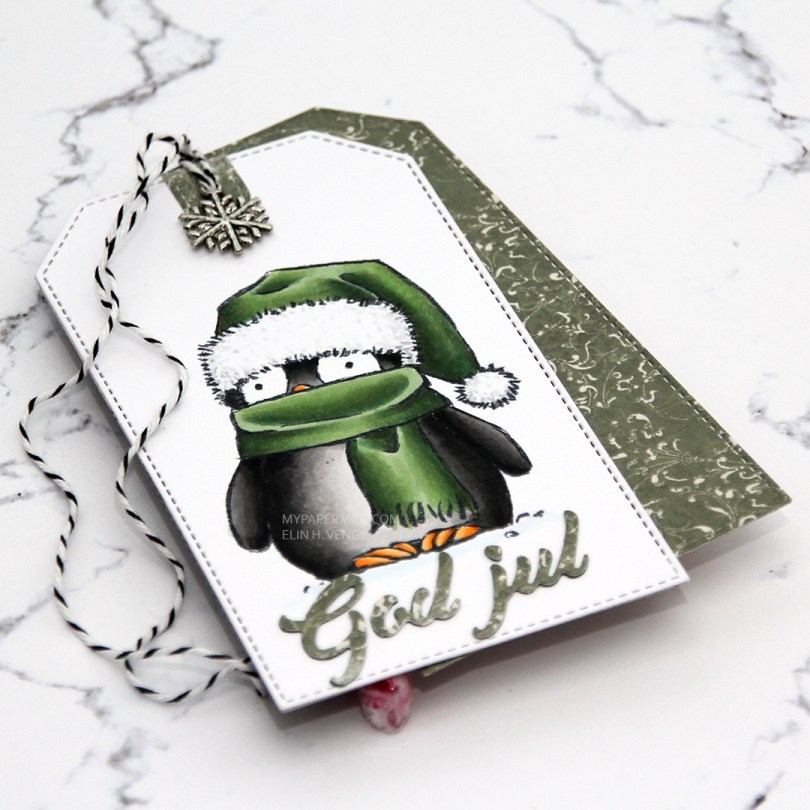
 This is a simple one. I colored
  On the back of the tag I die cut an additional two tags from patterned paper from Maja Design and stamped a To/From stamp from Norsk Stempelblad AS using Olive Twist ink from Papertrey Ink. I used a couple of strips of patterned paper to get a candy cane in there, as well.
 I added some twine through the top of the tag and even a snowflake charm, but let the rest be very simple. I’m hoping this penguin will put a smile on my sister’s face, she loves penguins, and this one is going to her and her husband.
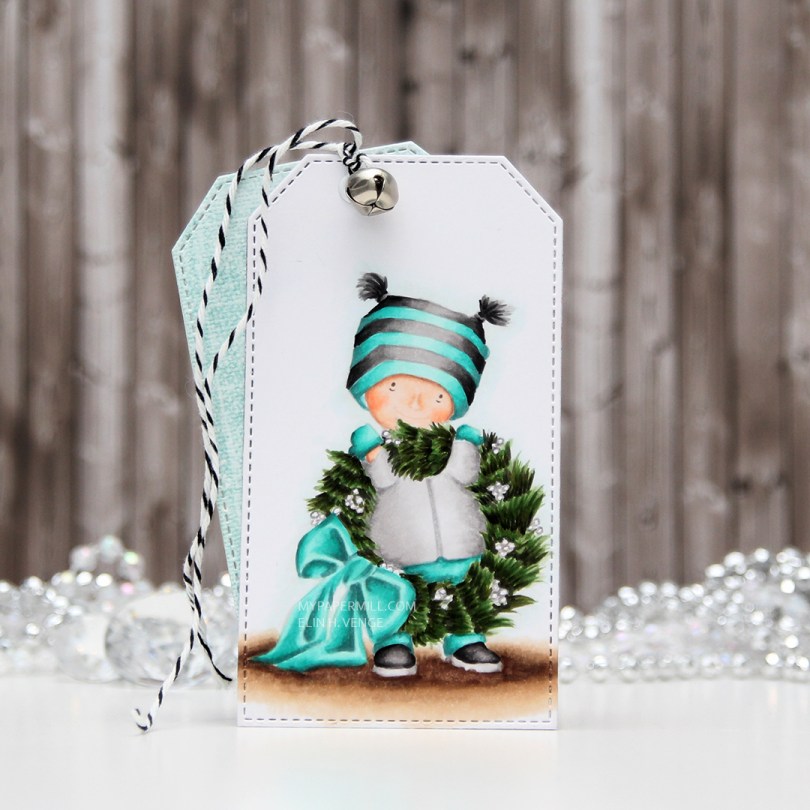
 I decided to go for a teal and gray color combo today, and white berries on the wreath instead of red ones. I just used a gray colored pencil to trace around the outline of the berries, everything else is noline colored using Copics. I used a stitched tag die from My Favorite Things to create the actual tag.
 I diecut a couple of pieces of scraps of patterned paper using the same die. I chose Julbukett from the Fröjdefull Jul collection from Maja Design and Good Cheer from the Christmas Magic collection from Fancy Pants Designs, which happens to be a collection from 2009, I have a lot of patterned paper. I stamped a to/from stamp from Norsk Stempelblad AS using Hawaiian Shores ink from Papertrey Ink straight onto the patterned paper. I made a hole at the top, added an eyelet, some twine and a bell, and my tag was done.
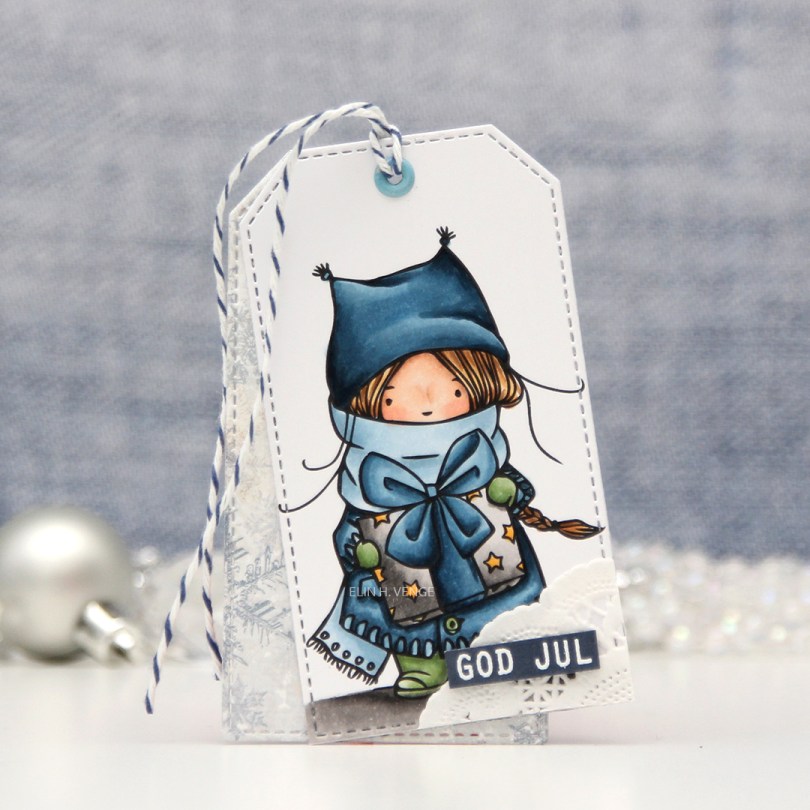
 I colored in my image using Copics and used a stitched tag die from My Favorite Things to turn it into a tag. I die cut another tag from a scrap piece of patterned paper from last year’s Christmas collection from Maja Design and glued the two together, offset a little bit for the patterned paper one to show. I added a tiny bit of a scrap of a doily to the bottom right corner of my colored tag and a white heat embossed sentiment on top using 1 mm foam squares. I punched a hole near the top, added an eyelet and used some Blueberry Twine from Whisker Graphics that I threaded through the hole.
 On the back I used a to/from stamp from Norsk Stempelblad AS that I white heat embossed on blue cardstock from Maja Design. I used my cut align tool to make sure I had an even 1/16″ border around the stamped image. I love that tool, it’s the best thing ever.
 Lots of blues used for this one. Another one, too, actually, I’ve made myself a B90 that I also used. What can I say, I love those blues!
 This was a very simple one. I colored up
  I used a stitched circle snowflake die from Memory Box to die cut from white cardstock and glued that on top. I created a hole towards the top and pulled a bit of blue twine through.
 On the back I glued a white diecut circle. I stamped a to/from stamp from Norsk Stempelblad AS using Blueberry Sky ink from Papertrey Ink. I also added a few snowflakes die cut from another Memory Box die, and my gift tag was finished.
 I colored up the cute
  I die cut the tag an additional two times, once in a red patterned paper that I glued on the back of my colored piece, and once in a green patterned paper that I offset and glued on the back for a little interest. I stamped the standard To/From (this particular stamp is from Norsk Stempelblad AS) on the green patterned paper using Olive Twist ink from Papertrey Ink.
 Underneath the kitten I stamped ho ho ho from the Scripty Xmas stamp set from Mama Elephant, using that same Olive Twist color ink. I added a bit of red lacey ribbon to the hole on the top of the tag, tied a bow around it using a very fine thread that I think is meant for warping looms, it used to be my grandmother’s. I added a little bell charm to the bow, I thought it was a nice finishing touch.
 Not a whole lot of colors used for this one, but the image isn’t very big either.
 I felt like I really needed to add a photo of the kitten in the tree. She was very content up there.
 I started by coloring my little snowman and his friend using my Copics. I went with a bit of a split complementary color scheme on this one. I’m no fan of complementary colors, but split complementary are infinitely better, and blue green (which I used for the snow on the snowman), purple and orange are split complementary colors. I didn’t want a bright orange, though, so I went more coral, and I love how it turned out.
 I used a faux stitch rectangle die from My Favorite Things to turn my colored piece into a nice panel. I love these dies, they add such a finished look. I sprinkled on a moderate amount of chunky white embossing enamel from Stampendous and melted the powder. I love the snowy look this gives.
 I mounted my die cut piece onto a card base made from Lavender Fields cardstock from My Favorite Things using plenty of foam tape. This color perfectly matched the purple in my image, something I always try to accomplish in my cards for a nice, cohesive design. I die cut and stacked four Hurra from Melon Berry cardstock from Papertrey Ink using a Kort & Godt die. I love stacking die cuts, it adds a super nice look of dimension. I also white heat embossed a sub sentiment from Norsk Stempelblad AS onto more of that Lavender Fields cardstock, and stacked that, as well, making it flush with the die cut word.
 I added a couple of sparkling clear sequins from Pretty Pink Posh and my card was complete. I cut a little bit off the largest one with my scissors to make it look like it’s tucked behind that sentiment strip.
 Last, but not least, the Copic markers I used to color my image. I also used B40 and BG71, which are colors I’ve made myself.
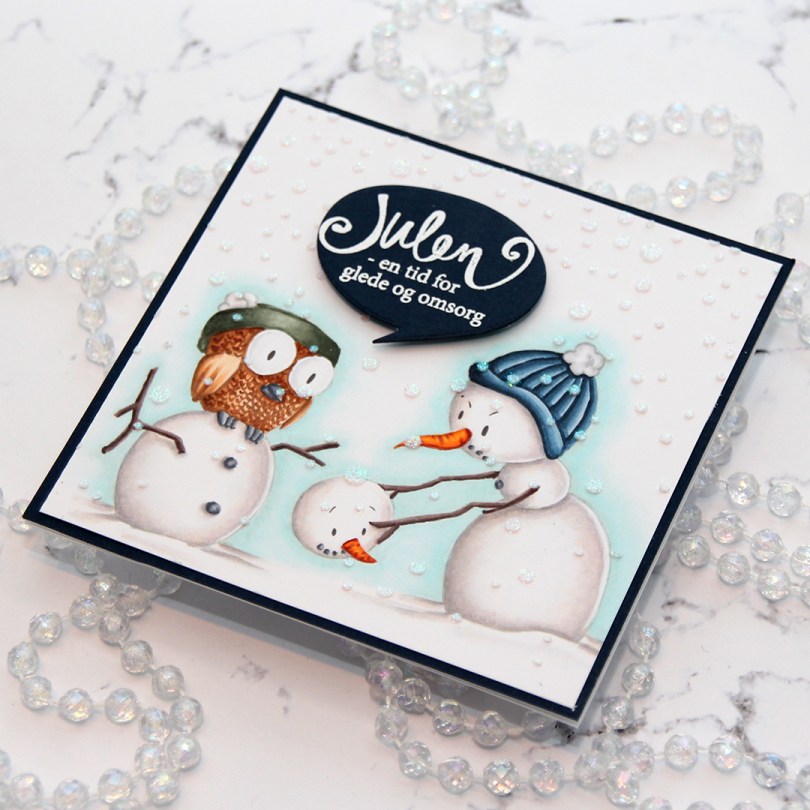
 I colored up this image for day 27 of Kathy Racoosin’s 30 day coloring challenge back in May. Yes, I colored a winter scene in May… BUT I wanted to feature as many different companies as possible during the coloring challenge, and the only ones I have from Kinda Cute are winter ones. I love making Christmas cards, so I really didn’t mind.
 I had initially planned on making an A2 landscape card, but it just wasn’t working, there was no natural place to put the sentiment. After I’d added the iridescent glitter paste over a Simon Says Stamp falling snow stencil and glued my panel to my cardbase, I chopped off 1-1/4″ on the right hand side of the card and then carefully went in with a craft knife to cut off an additional 1/16″ from my top layer. It works if you use a fresh blade and cut multiple times using very light pressure.
 I stamped and white heat embossed a Norsk Stempelblad AS sentiment onto more of that same Dark Indigo cardstock from Papertrey Ink that I used for my card front, before using a speech bubble die from Altenew to die cut. I mounted my speech bubble using some foam tape, and my card was finished.