
Hi, everyone! I’ve got a Christmas card to share with you today, this time a slimline one, featuring some adorable selfies from My Favorite Things. I colored these up for days 5, 7 and 11 of Kathy Racoosin’s 30 day coloring challenge back in July. I love no line coloring, and these were so much fun!
 I used the slimline starter die from My Favorite Things to die cut a panel of Blue Breeze cardstock for my card front. I stamped the Paint Splatter background stamp (also from MFT) using VersaMark ink, and white heat embossed using Super Fine Detail embossing powder from Ranger. I think it looks like snow, and it adds a subtle interest to the background, without being too distracting from the images.
 I didn’t want to add my colored pieces directly to the blue underneath. I decided to add a mat behind each of the images, and I cut them down to be slightly larger than the images themselves. We’re talking super thin frames, I think they wound up being about 1/32″ all around. They might be small, but it was enough that I didn’t have room for a sentiment between my images, so I cut apart the Ho ho ho sentiment from the Secret Santa stamp set (also MFT), stamped repeatedly and white heat embossed the one HO directly onto the panel with the elf. I added that panel to the blue cardstock using some 1 mm foam squares and made sure to center it on my card, before adding the other two images above and below, also using 1 mm foam squares.
 Once I’d colored the image with Copics, I used the largest die in the A2 Stitched Rectangle STAX Set 2 from My Favorite Things to die cut a landscape oriented panel that would fit perfectly on my card base with a 1/16″ border around. I like the 1/16″ little frame, AND it’s the same width as the distance from the faux stitching to the cut line. I like having them the same. Little details like that matter, to paraphrase a famous German architect (Ludwig Mies van der Rohe, who coined the term “God is in the details”).
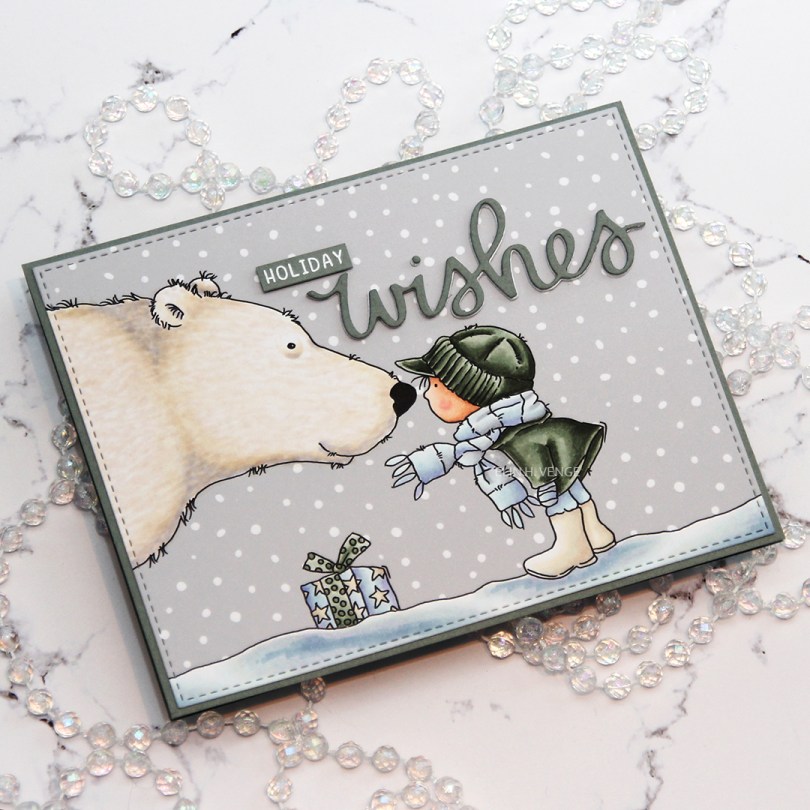
 I created a top fold card from Stormy Sea cardstock from Papertrey Ink. It’s a color that matches the BG90 family from Copic really really REALLY well. I need to order more, I only have half a sheet left of this color. I used the same color cardstock to diecut the word wishes using a die from Mama Elephant that was free with purchase if you spent a certain amount during their birthday extravaganza back in September. Normally I’d diecut the word several times in the color I wanted, but since I was running super low on this particular grayish green, I used a few layers of white diecut words, and only one layer of the colored cardstock on top. I stamped and white heat embossed the word “holiday” from the Iconic Ornament stamp set from Mama Elephant, also free with purchase over a certain amount on the Mama Elephant site back in September. I added a few more layers of cardstock behind it for dimension and glued it to my sky using Gina K liquid glue, which I also used for the die cut word.
 I decided not to add any additional elements. No embellishments, no nothing, I didn’t want to distract too much from that adorable image.
 Not a lot of Copics for this one, and 14 of these were used for the snow and polar bear.
 I started by coloring my little snowman and his friend using my Copics. I went with a bit of a split complementary color scheme on this one. I’m no fan of complementary colors, but split complementary are infinitely better, and blue green (which I used for the snow on the snowman), purple and orange are split complementary colors. I didn’t want a bright orange, though, so I went more coral, and I love how it turned out.
 I used a faux stitch rectangle die from My Favorite Things to turn my colored piece into a nice panel. I love these dies, they add such a finished look. I sprinkled on a moderate amount of chunky white embossing enamel from Stampendous and melted the powder. I love the snowy look this gives.
 I mounted my die cut piece onto a card base made from Lavender Fields cardstock from My Favorite Things using plenty of foam tape. This color perfectly matched the purple in my image, something I always try to accomplish in my cards for a nice, cohesive design. I die cut and stacked four Hurra from Melon Berry cardstock from Papertrey Ink using a Kort & Godt die. I love stacking die cuts, it adds a super nice look of dimension. I also white heat embossed a sub sentiment from Norsk Stempelblad AS onto more of that Lavender Fields cardstock, and stacked that, as well, making it flush with the die cut word.
 I added a couple of sparkling clear sequins from Pretty Pink Posh and my card was complete. I cut a little bit off the largest one with my scissors to make it look like it’s tucked behind that sentiment strip.
 Last, but not least, the Copic markers I used to color my image. I also used B40 and BG71, which are colors I’ve made myself.
 I used a square die from Lifestyle Crafts to die cut my elf down to the size I wanted, in this case 4″.
 I then stamped a sentiment from the Scripty Xmas stamp set from Mama Elephant using Enchanted Evening ink from Papertrey Ink, before gluing my panel to a 4 1/4″ square card base made from Dark Indigo cardstock, also from Papertrey Ink. I finished off my card by gluing on some stars from a sequin mix from Hero Arts. They’re iridescent, which I’m normally not a big fan of, but it worked on this card.
 I love the ease of clear stamps, but rubber stamps like this one have much finer lines, and they stamp beautifully every single time, I love that. I also love blue for Christmas, but that’s hardly a secret 😉
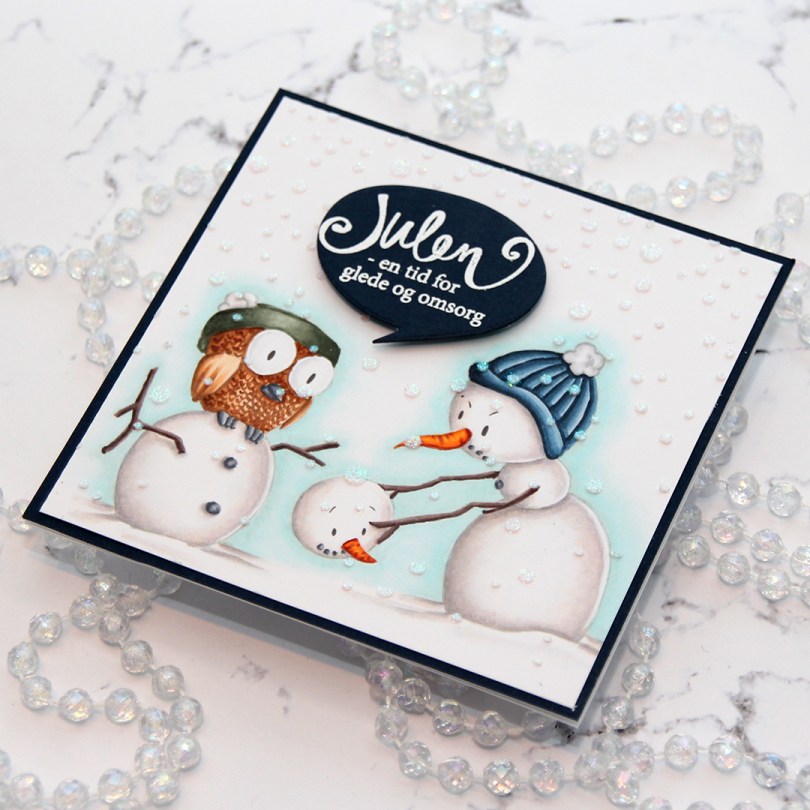
 I colored up this image for day 27 of Kathy Racoosin’s 30 day coloring challenge back in May. Yes, I colored a winter scene in May… BUT I wanted to feature as many different companies as possible during the coloring challenge, and the only ones I have from Kinda Cute are winter ones. I love making Christmas cards, so I really didn’t mind.
 I had initially planned on making an A2 landscape card, but it just wasn’t working, there was no natural place to put the sentiment. After I’d added the iridescent glitter paste over a Simon Says Stamp falling snow stencil and glued my panel to my cardbase, I chopped off 1-1/4″ on the right hand side of the card and then carefully went in with a craft knife to cut off an additional 1/16″ from my top layer. It works if you use a fresh blade and cut multiple times using very light pressure.
 I stamped and white heat embossed a Norsk Stempelblad AS sentiment onto more of that same Dark Indigo cardstock from Papertrey Ink that I used for my card front, before using a speech bubble die from Altenew to die cut. I mounted my speech bubble using some foam tape, and my card was finished.
 This card was a bit of an evolution. Things really didn’t go my way, but I was able to fix it all in the end. The piece of Papertrey Ink Stormy Sea card stock I was planning to use was a teeny tiny bit smaller than I needed to be (and I’m running seriously low on that particular color), so I used a die from Waffle Flower to cut it down a little, and it’s now 4-1/8 x 5-3/8″. I cut the center portion out to use for later, no one will ever know that there’s a whole in the center of it. I glued it to a top folding white card base, creating a nice 1/16″ border around the perimeter. Problem number 1 solved.
 Problem number 2: My hair was wet from showering when I started assembling this card, and there was a drop of water that fell on the bear’s head. Solution: Sprinkle on chunky white embossing powder from Stampendous and melt the powder with my heat gun…
 … which led me to problem number 3. My heat gun was too hot and I burned the panel. It’s not super visible in the photo, but it tuned the piece yellowish right underneath the pole. Solution: use Copics to color the snow under the bear in a similar color, making everything look intentional.
 My final struggle was figuring out where to put the sentiment from Norsk Stempelblad AS. I wanted it on the right side of the card, but it just wasn’t working, so I stamped and heat embossed it a second time with the fishtail end on the right and put it on foam tape on the left side of the front instead. I think it worked pretty well. I added a few snowdrift sprinkles from Little Things From Lucy’s Cards as my final touches.
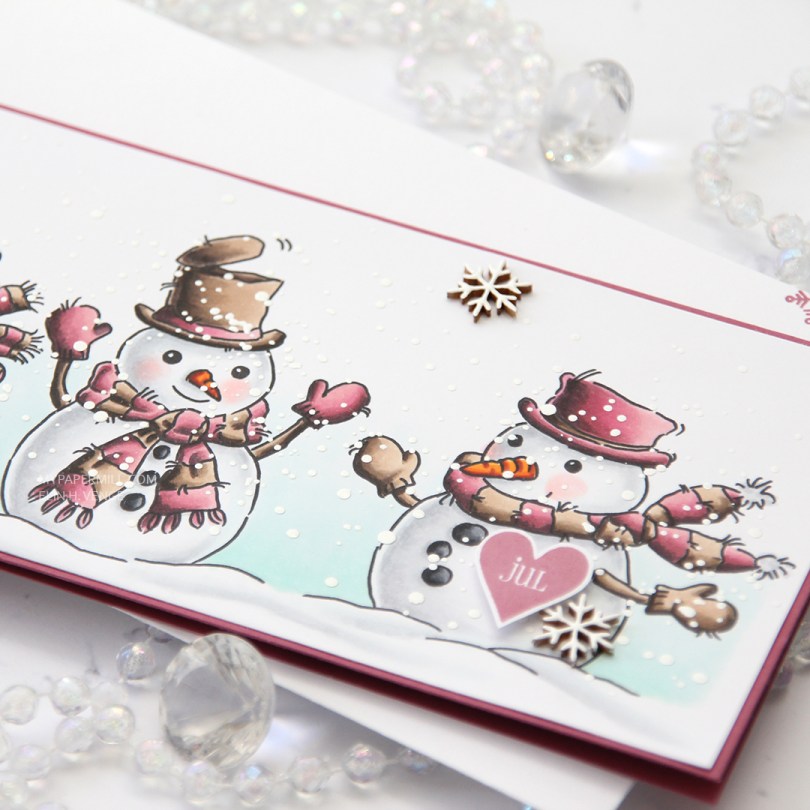
 This color palette is definitely not the norm for me, but I was surprised at how much I like it. I think the secret was finding a pink combo I liked that wasn’t a screaming hot pink, and that also had a bit of contrast within it. Even better – my pink color combo matches the Autumn Rose color from Papertrey Ink, so I created my cardbase from a sheet of Autumn Rose cardstock and even stamped a few snowflakes from an old Simon Says Stamp stamp set (Holiday Envelope Sentiments) on the envelope using Autumn Rose ink. The envelope itself is a Deluxe white slimline envelope from My Favorite Things.
 After coloring all my snowmen with Copics, I added a sprinkling of chunky white embossing enamel from Stampendous and heated my panel from the back until all the granules had melted. It warped quite a bit, so I ran the panel through my Gemini Jr without any dies, just sandwiching the panel between my cutting plates. That took care of the warping, and I could continue by gluing the panel of snowmen to the cardbase, before popping up a Norsk Stempelblad AS heart sentiment that I stamped using Autumn Rose ink. I also added a few Crafty Moly snowflakes that I covered in three layers of white embossing powder.
 RV99, R56, RV34 and RV32 – who would have guessed that it made such a pretty pink? Not me, that’s for sure, but I’m glad I stumbled upon this combo.
 The stamp set comes with this quote, and many others. The quote comes with the name centered, but I wanted it right aligned, so I did some minor tweaking in Photoshop before I printed.
 I die cut my panel using a rectangle die from Waffle Flower and added it to a card base made from Canyon Clay cardstock from Papertrey Ink. This card is slightly smaller than my regular A2 cards, it measures 4 x 5-1/4″.
 I added a few orange sequins (and one clear) from the Candy Corn sequins mix from Little Things from Lucy’s Cards, and my card was complete.
 For something so simple, I used quite a few Copics.
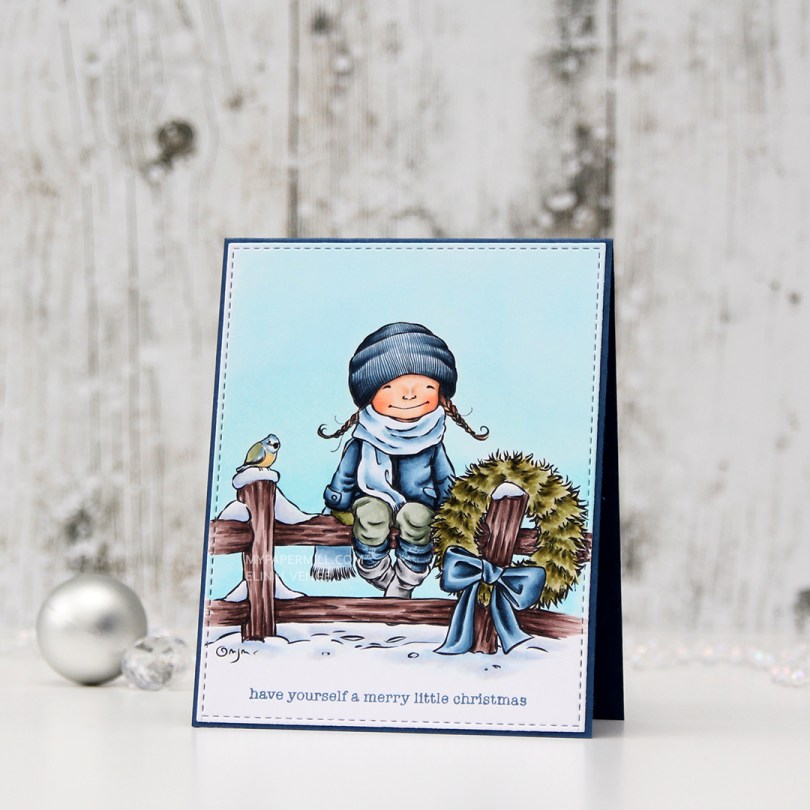
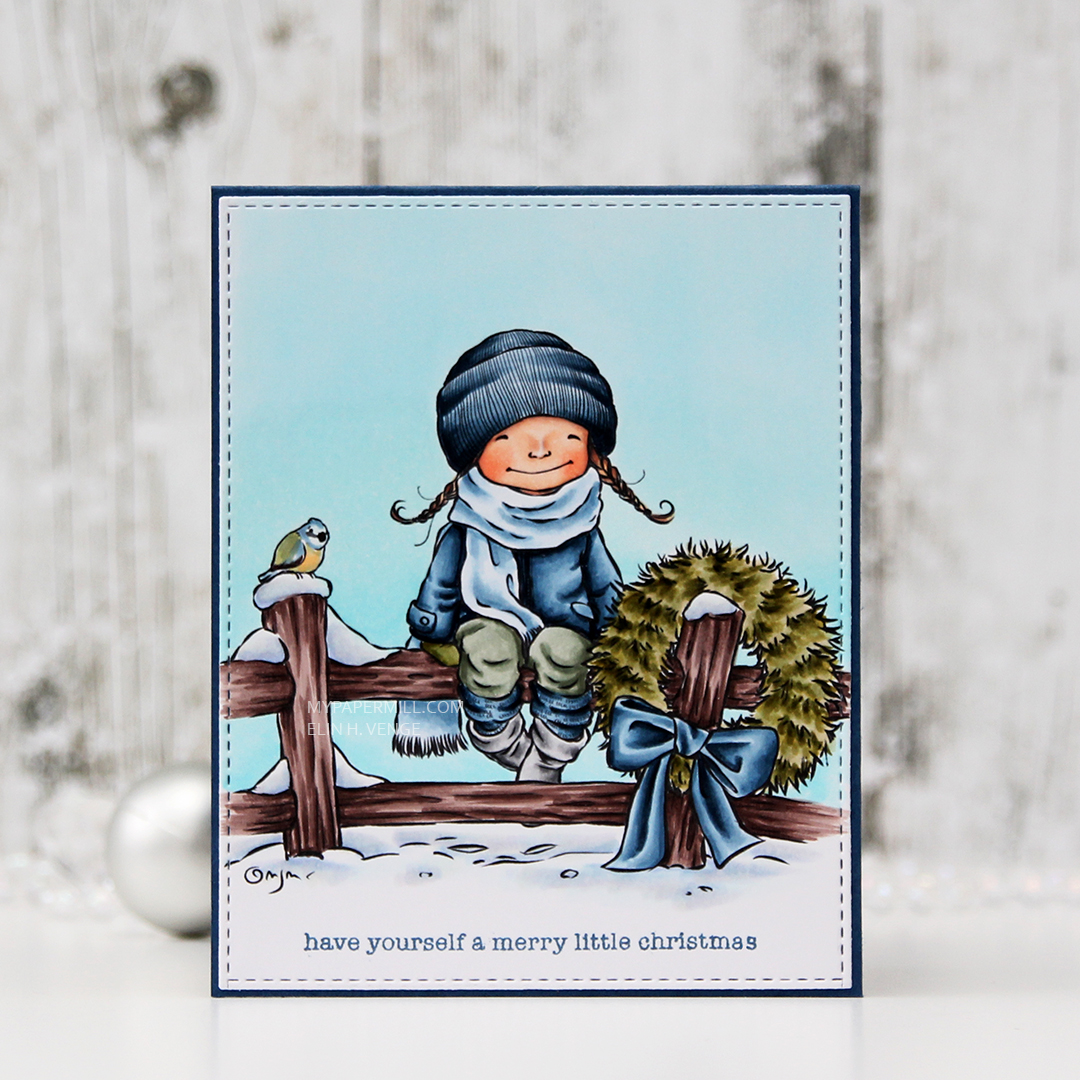 I love this
 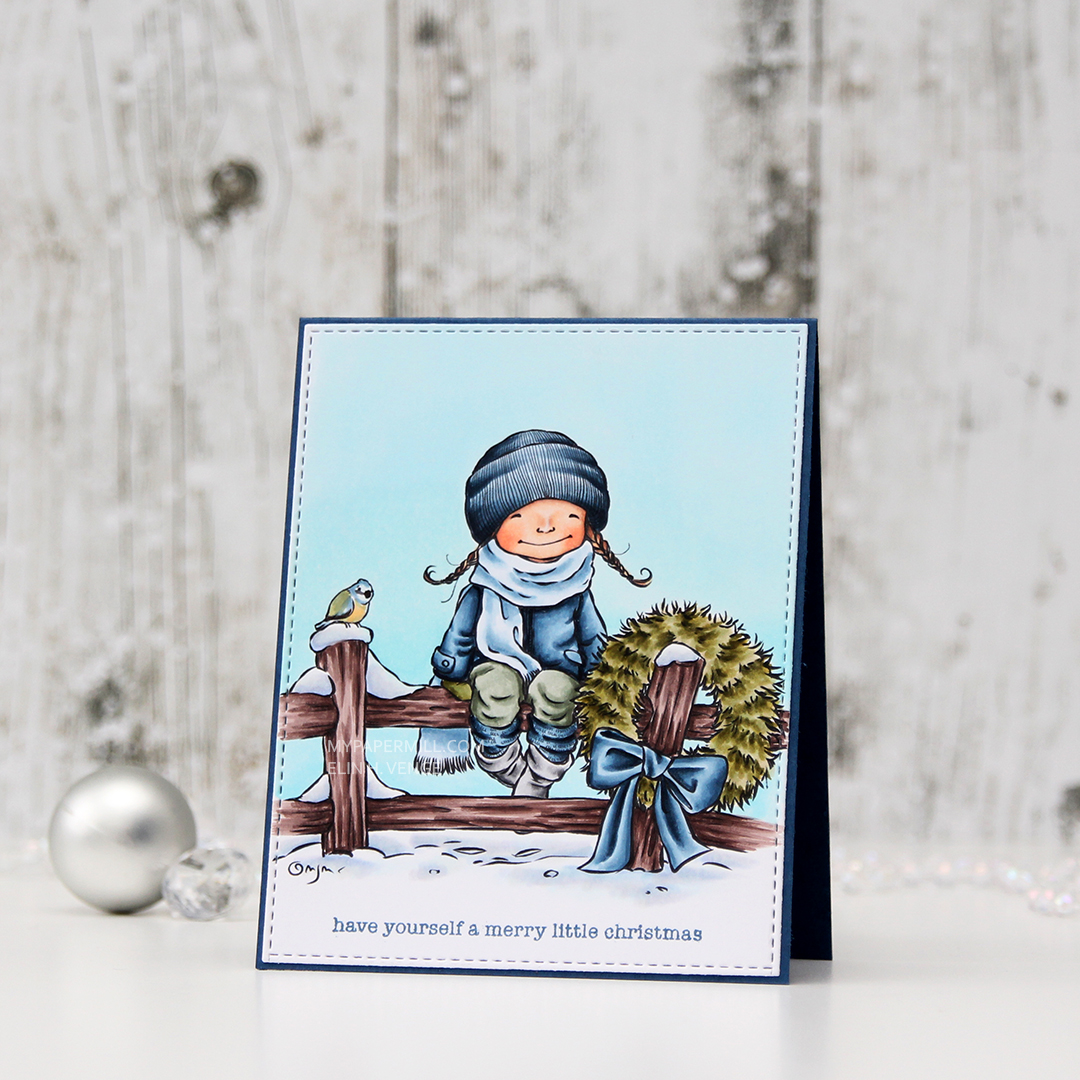 I felt like I’ve colored up far too many red Christmas images lately, so I didn’t want even a hint of red on this one. The blue bow totally works, I think, the same is true of the blue, green and hint of yellow on the bird that I tried to color up like a Eurasian Blue Tit. I die cut my image using a stitched rectangle die from My Favorite Things.
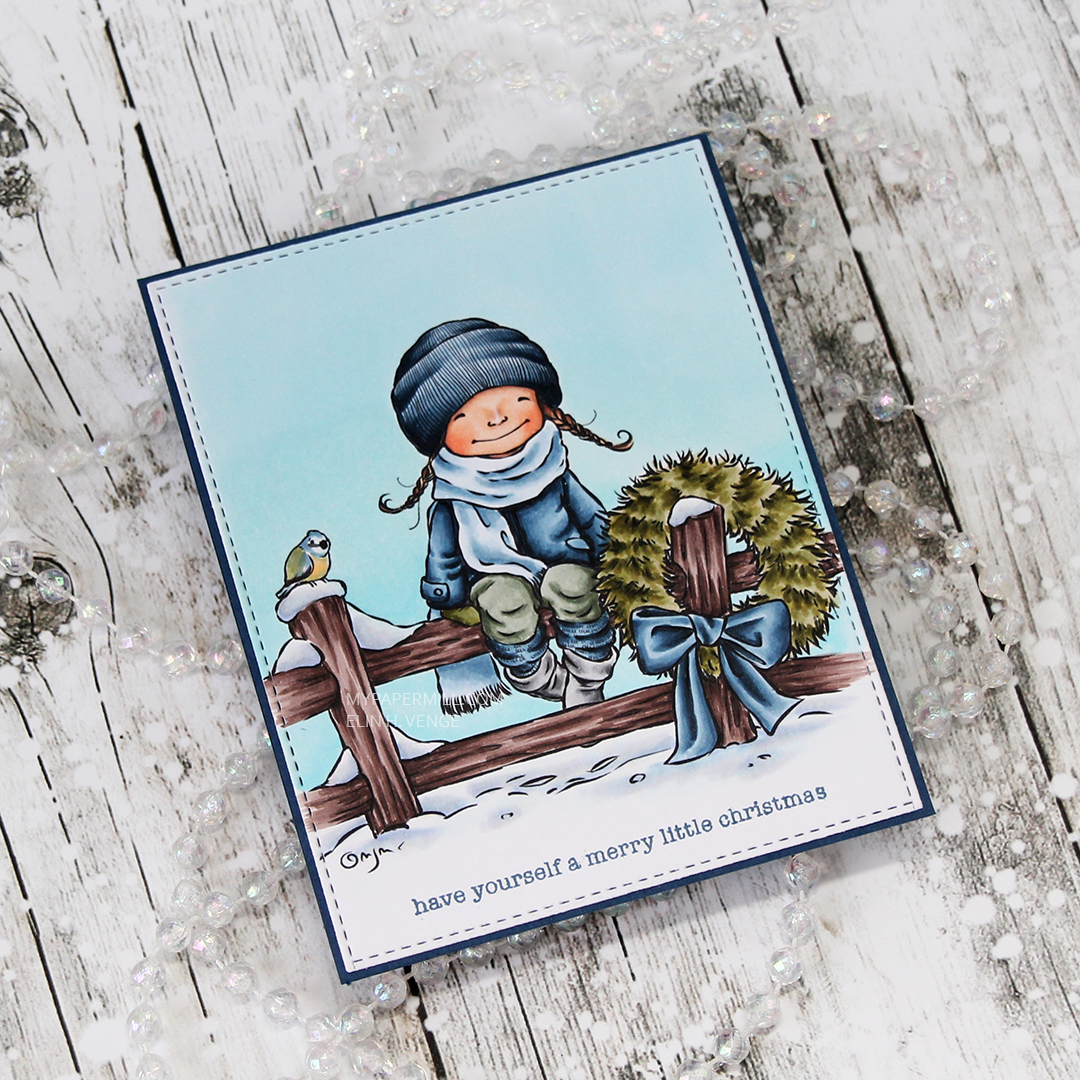 I glued my panel onto a cardbase made from Enchanted Evening cardstock from Papertrey Ink, and stamped a sentiment from the Holiday Messages stamp set from Mama Elephant using Enchanted Evening ink, and my card was complete. I didn’t add any embellishments to this, I wanted the image to shine.
 Speaking of the image, here are the colors I used. I also used B90, which is a color I’ve made myself, on her scarf.
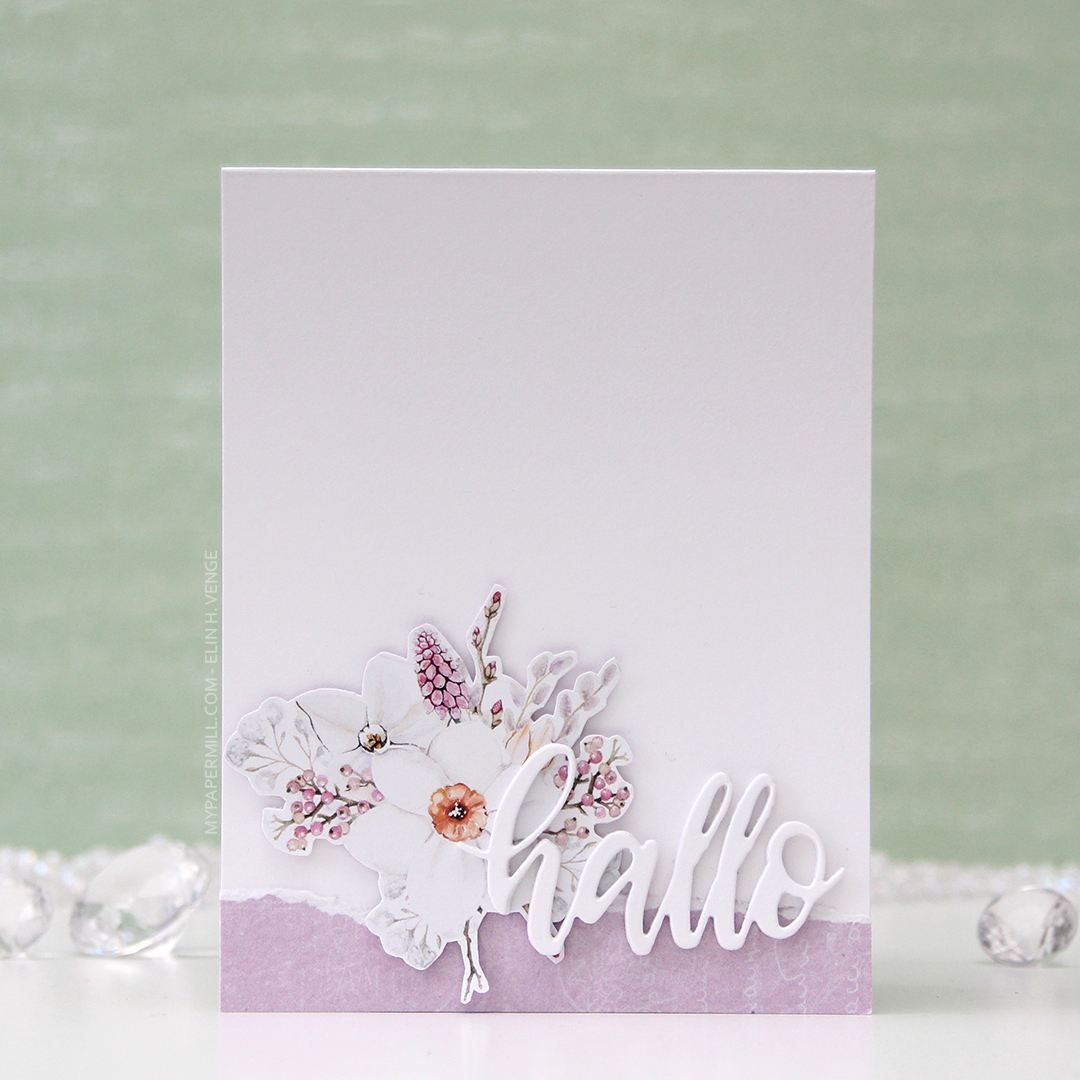 Let’s talk for a minute about P13. They’re a Polish company, and they make beautiful, thick patterned paper. That’s really all you need to know, because it’s all I know. When I say thick, I mean thick. I don’t know their exact weight, but it’s close to card stock weight! I’m telling you, these are wonderful. They’re double sided, and the little strip you see at the bottom here with the torn edge is the back of that very same sheet (
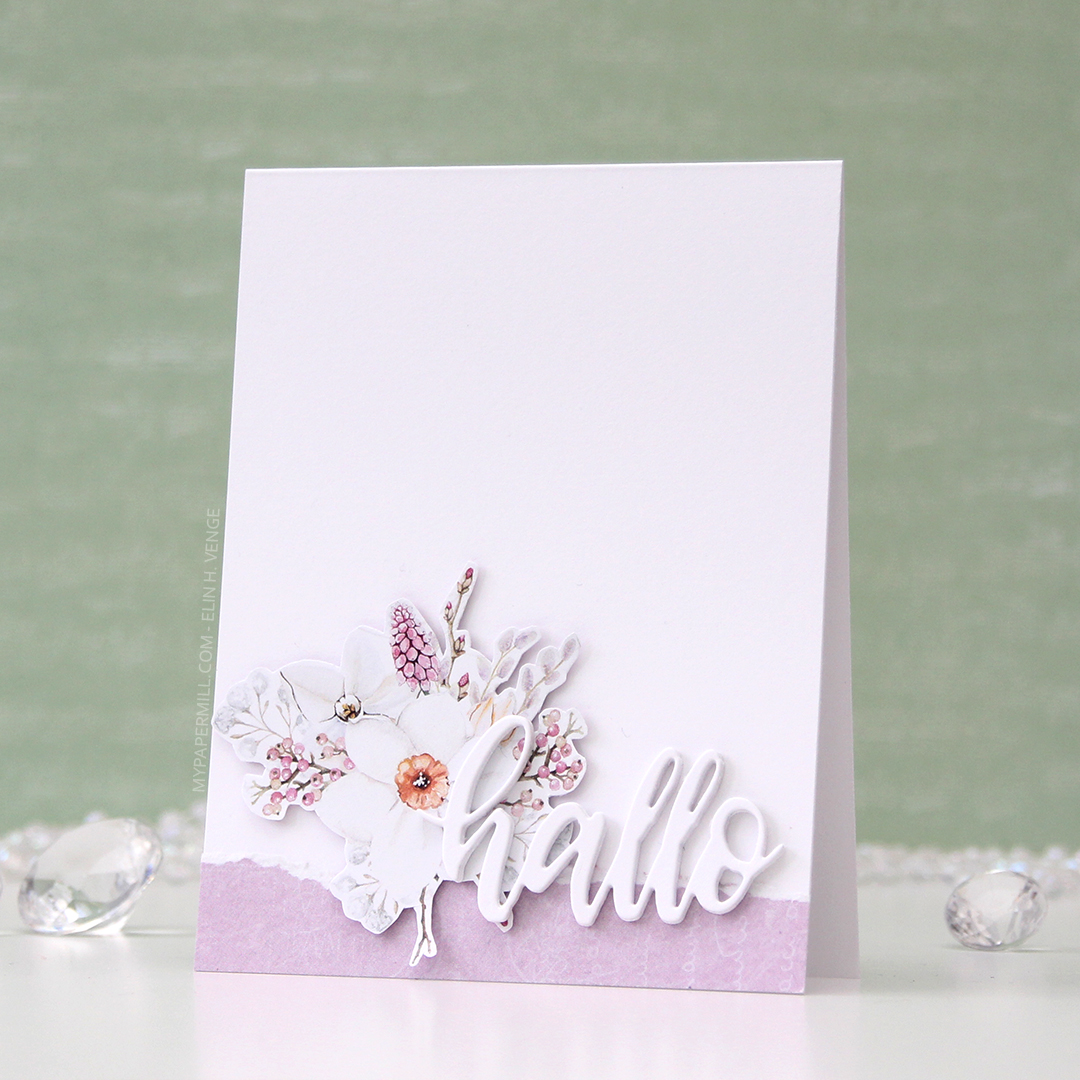
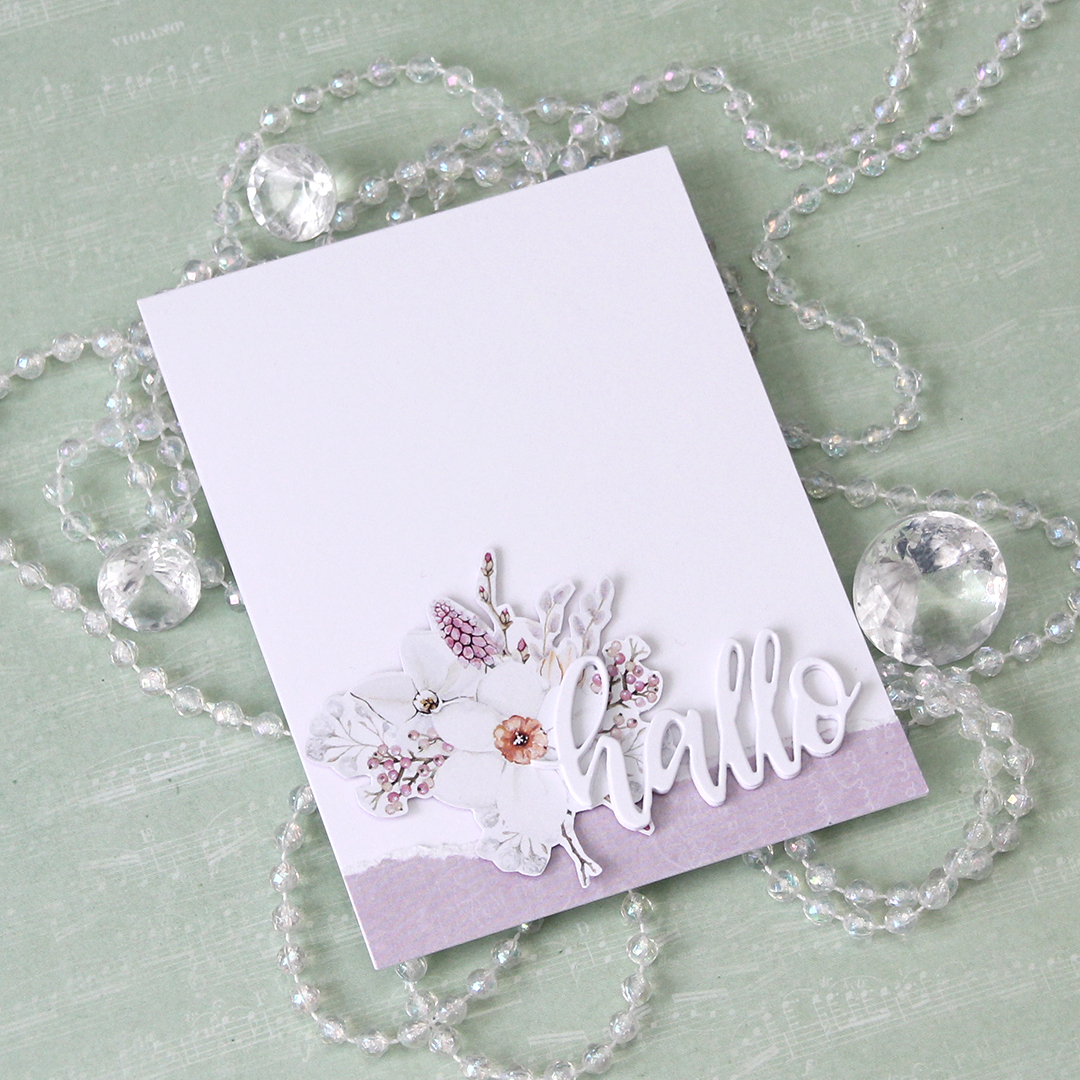 I have tons of floral clusters left over from the patterned paper, and one of the wonderful things about the P13 papers is that the design isn’t repetitive. This specific sheet of patterned paper had plenty of florals on the front, but they were all a little different, which means creating different cards from them will be a breeze.