Hi, crafty friends. I have a beach card to share with you today, made with the Beach critters digi stamp set from Streamside Studios. So far, this summer has been cold and wet, so I’m using this card to dream of warmer weather.
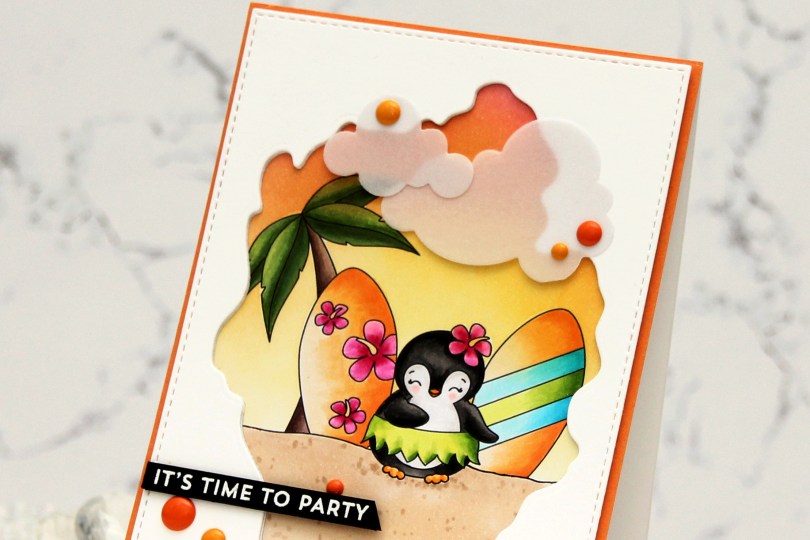
 I created my little scene with the palm tree, a couple of surfboards and a penguin. I can never resist a penguin, and this one has a hula skirt – I was sold! I colored my scene with Copics, and the plan I had initially went out the window. I was going to color the base of the surfboards in a light yellow, almost white, but then I came up with this soft orange combo and totally changed everything else to fit. Instead of a soft blue sky, I ink blended a sunset using Honeysuckle, Clementine and Buttercup inks from Concord and 9th. I then used the largest die in the A2 Stitched Rectangle STAX 1 set from My Favorite Things, along with the Watercolor Wash Free Form die, also from MFT, to create a rectangular panel with a fun window. I die cut a couple more to stack behind the front panel to create a little bit of dimension, before adhering it all to my colored image.
 I adhered a quarter sheet of Clementine cardstock from Concord & 9th directly to a top fold card base and glued my scene in the center. This created a bit of an orange border around the image. I then die cut Cloud 1 & 2 from Papertrey Ink out of Heavyweight Translucent vellum from My Favorite Things. I love die cut vellum clouds. This vellum is super thick, so the glue I put behind it doesn’t even show through, but I still placed enamel dots strategically on top. Old habit, I guess. These enamel dots are actually from a Halloween pack from Papirdesign. Onto a piece of True Black cardstock from Papertrey Ink, I stamped and white heat embossed a sentiment from the Bitty Birthday Wishes stamp set from My Favorite Things. I cut it down to a strip, added a couple of extra layers of cardstock behind it and adhered it to my card.
 I used quite a few Copics for this one.
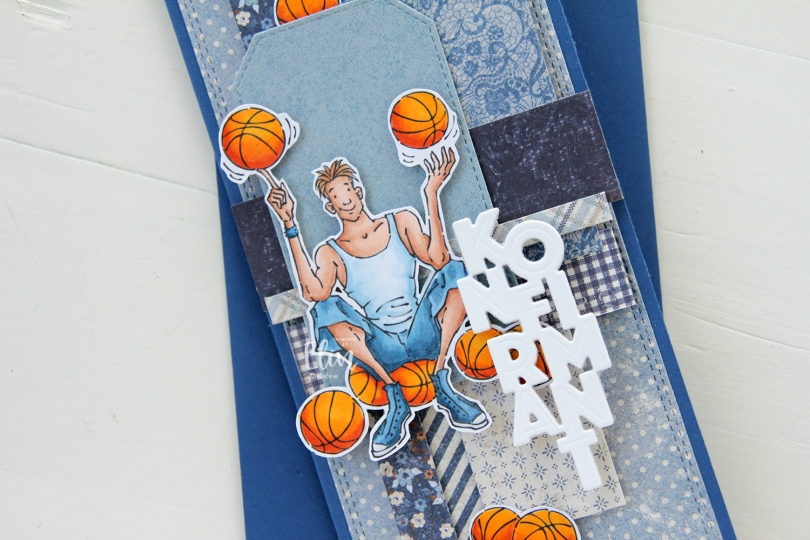
 I made a slimline card this time. I created a background from blue scraps from several collections from Maja Design – Denim & Friends, Denim & Girls, Fika and Vintage Autumn Basics are all represented. One of the things I like about the Maja Design patterned paper is that papers match across collections. They’re also made from really good heavyweight paper, which is another tick in the pro column for me. I used the Slimline Double Stitched Rectangle STAX die set from My Favorite Things to create the panel in the back and also the Stitched Traditional Tag STAX die set, also from MFT, to create the tags.
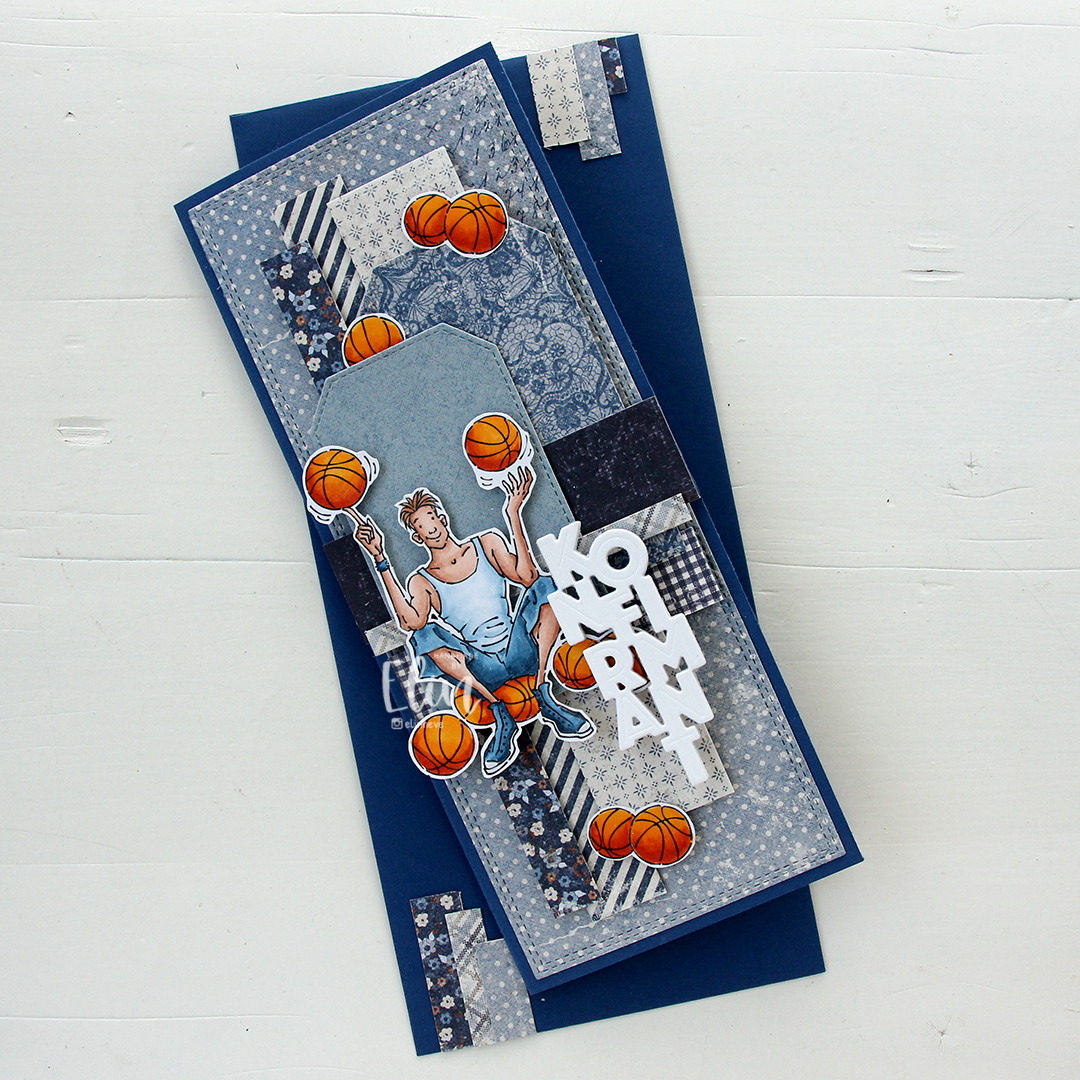
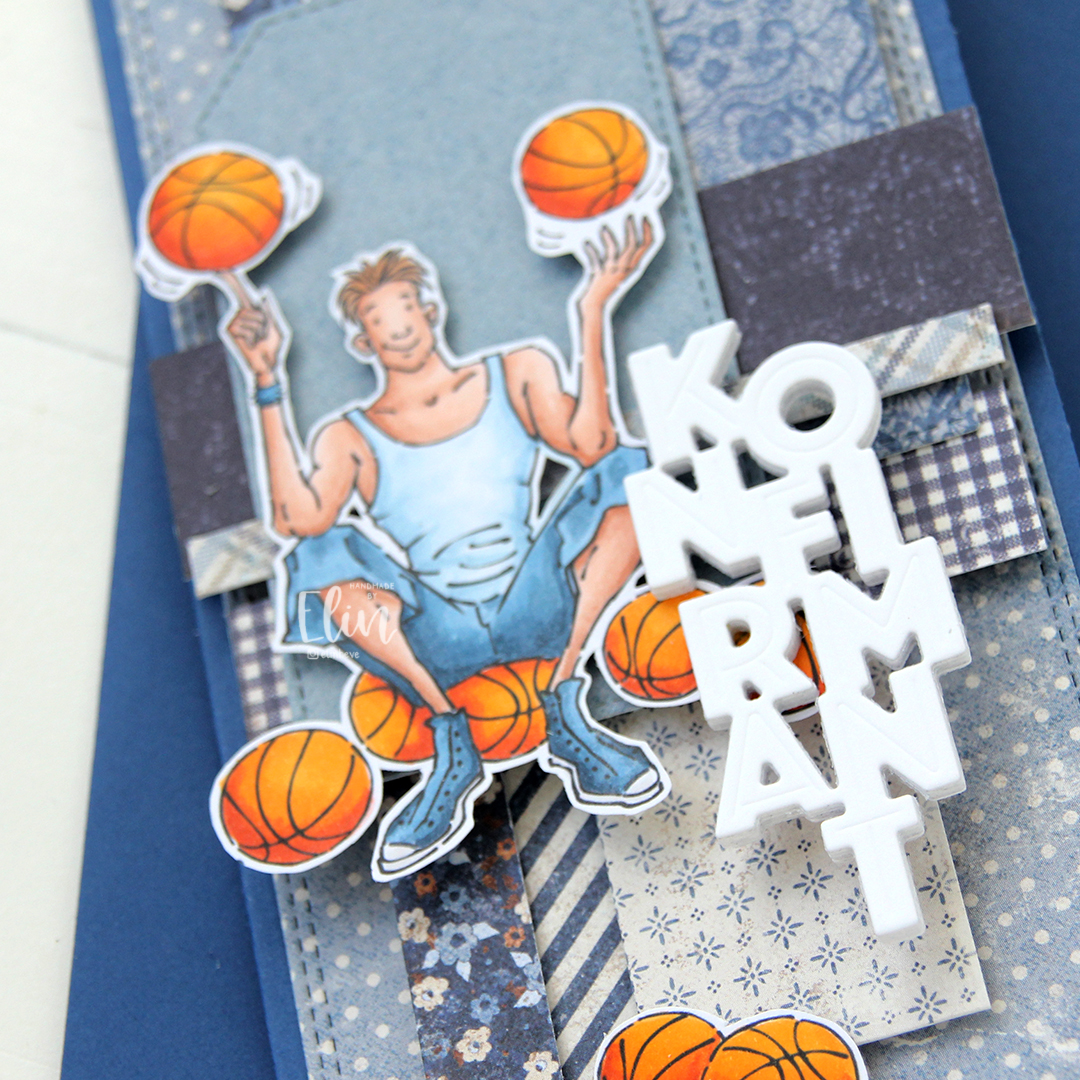 I added the image on top of one of the tags and scattered a few more basketballs around to work as embellishments. The orange really stands out against the blue background. To finish off I die cut the Konfirmant 5 die from Papirdesign six times from white cardstock and stacked them for a dimensional look. I adhered it on top of the image, and it floats above the card further down.
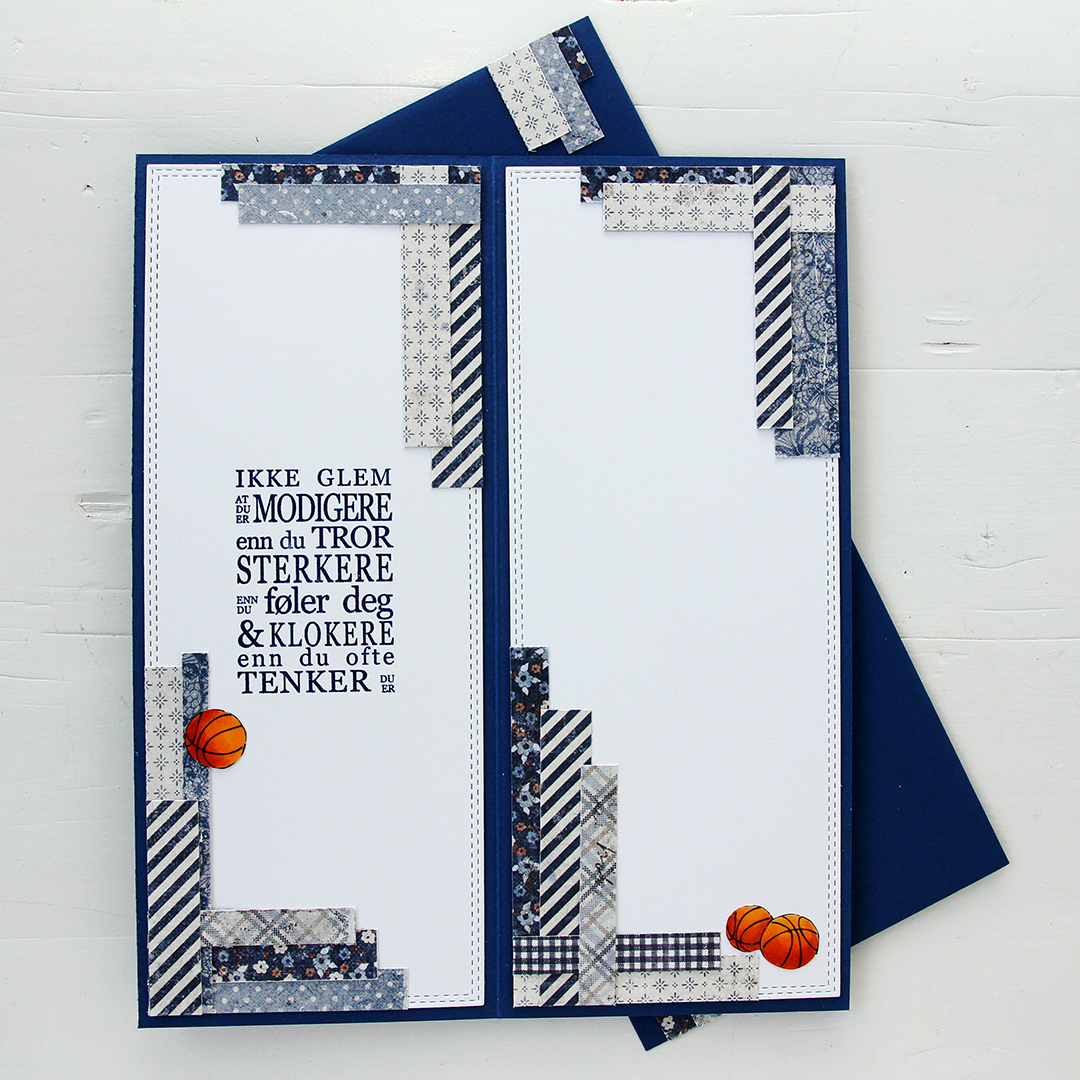 Whenever I make cards to order, I always decorate the inside too. I used the largest slimline double stitched rectangle die to create the white panels on the inside, adding more strips of patterned paper to continue the look from the front of the card and also fill the pages a little. Slimline cards are large, and the added elements make it less daunting to have to come up with a message for the recipient. On one side, I stamped a sentiment from the Konf. 01 stamp set from Norsk Stempelblad using Blue Beyond ink from My Favorite Things, the right side still has plenty of room for a personal message. I also included more basketballs.
 For the back of the card, I used a few strips of patterned paper I had left, die cut a white cardstock circle using the Stitched Circle STAX die set from My Favorite Things and stamped my personal stamp in the center of it using Blue Beyond ink from MFT. The card base is also from My Favorite Things, it’s made from Blueberry cardstock, and the envelope is also in that same Blueberry color.
 Limited color palette for this one.
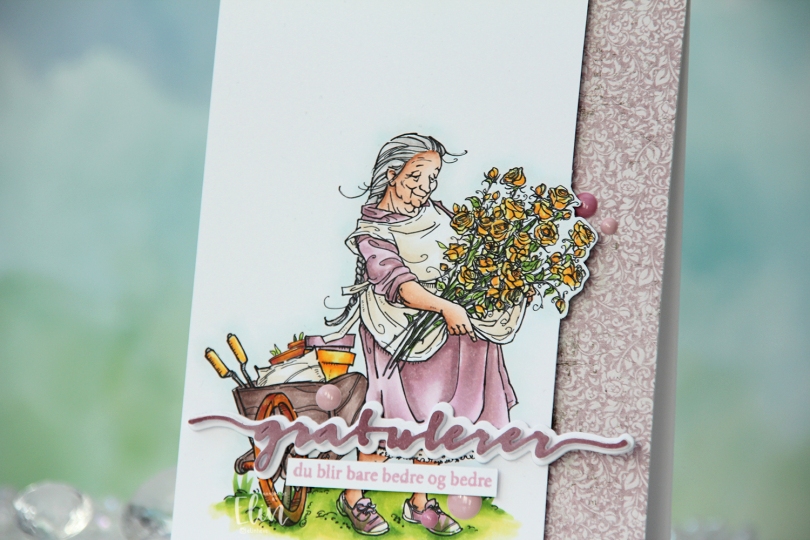
 I printed the image on X-Press It blending card and colored it with my Copics. I pulled out my RV90 series, which I used to use a lot ages ago, but haven’t really used much in recent years.
 Once my coloring was complete, I decided to cut off quite a bit on the right hand side of the panel, which meant doing some fussy cutting around the flowers. I don’t mind fussy cutting, and cutting on the border like this makes for a more dynamic design. Along the right hand side of a top fold card base, I adhered a scrap strip of patterned paper from the Vintage Romance collection from Maja Design, then popped my colored panel on the left.
 I die cut the Gratulerer 6 die from Papirdesign a few times. I die cut the shadow layer in white, then a few stacked of the word, before finishing off with a colored one. I actually colored this one with Copics on the scrap I cut off the panel. This is a neat trick if you want your colors to match, but don’t have the right cardstock color. I stamped a sentiment from the A06 stamp set from Norsk Stempelblad AS using Briar Rose ink from Concord & 9th, cut it down to a strip and adhered it below the die cut, adding a few strips of cardstock behind it for dimension. I finished off the card with a few enamel does from the Shades of Purple pack from Altenew.
 Using patterned paper from Craft Consortium along with a stamp, die and a few sentiment sticker strips from Kort & Godt, I created an envelope to match.
 I colored the image with Copics, added some simple ground and flowers next to her and die cut my panel using the largest die in the Additional A2 Layers die set from Waffle Flower, before adhering it to a card base I created from Lazy Day cardstock from My Favorite Things. It’s been a really long time since I’ve made one of my signature “cluster cards”, so I decided it was time for a new one. I keep little die cut scraps in storage pockets sorted by color, which makes it easy to find pieces that will fit any color combination I’ve chosen for my image. I play around with the composition, and when I’m happy, I adhere it all to my card. Some directly, some using foam tape. This gets very thick very fast, but I love this process.
 I stamped a sentiment from the Pristine Peonies stamp set from Altenew using Picked Raspberry Distress Oxide ink, then die cut it into a banner using one of the dies in the Essential Stitched Sentiment Strips die set from My Favorite Things. This goes really well with the other fishtail banners I already had going in my cluster, and the color matches nicely with the pink striped patterned paper from Sunny Studio that I used. I finished off with a few enamel dots from the Pocketful of Sunshine pack from Altenew.
 Very springy color palette. I’m here for it!!
 I colored up the penguins with my Copics and fussy cut them right up against the black lines. These are very simple shapes and easy to fussy cut. I put the penguins aside while I worked on the rest of my card. Onto a card base I created from Blue Breeze cardstock from My Favorite Things, I stamped tiny snowflakes from North Star Design using Spring Rain ink from Papertrey Ink for a subtle tone on tone look. This is super subtle, my ink pad needed reinking, but I went with it and didn’t reink until after the project was complete, I didn’t want to stop half way.
 I used the Stitched Snowflake Backdrops die from Lawn Fawn to create an impressed snowflake pattern on a piece of Stamper’s Select White cardstock from Papertrey Ink. I added a few extra layers of cardstock behind it and adhered it to the card base. Using the Postage Collage Die and coloring stencil from Waffle Flower, I created postage stamps for my penguins to sit on. I stamped the snowflakes on these as well, and ink blended a little in from the edges to define them a tiny bit. It’s still subtle, I hadn’t reinked my ink pad at this point. I added dimension behind each of the postage stamps, adhered them to the card and mounted the penguins on top. I used the Hjerte 3 die set from Papirdesign to die cut my sentiment from Berry Sorbet cardstock from Papertrey Ink. I die cut four and stacked them together for a dimensional look, before adding a
  Simple coloring for simple images.
 I did a lot of coloring the day I colored these monkeys. As you can probably tell by their fur, my markers needed to be reinked at this point. I could have chosen a different brown combo. I could have taken the time to refill my markers, but I had colored so much the day I colored this that I just wanted to keep coloring. I probably should have stopped and taken the time to refill or chosen a different combo that didn’t need reinking. This is a good reminder to reink your markers. You can be an amazing colorist, but if you don’t take care of your markers, your coloring will look uneven. I went with it anyway. The 5 year old getting this card is not going to notice that my coloring’s not perfect, and it doesn’t always have to be. I’m trying to let go of my perfectionist tendencies, and this was a good exercise. I will refill these markers before I use them again, though, don’t you worry.
 The card itself is very simple. I stamped a sentiment from the A06 stamp set from Norsk Stempelblad AS below the image, using Cornflower ink from My Favorite Things. I then used the second largest die in the Watercolor Rectangle STAX die set from My Favorite Things to turn it into a panel with a fun edge, before I added dimension behind it and adhered it to a top fold card base I created from Cornflower cardstock from My Favorite Things. I finished off the card with some enamel dots from Papirdesign.
 Simple color palette. And I really do need to refill those browns. Even E23 was giving me trouble.
 I created a mini slimline card this time. I figured it would go well with the tall, skinny image. This particular mini slimline measures 3 1/8 x 6 1/8″. I colored the image with Copics and used a die from the Stitched Mini Slimline STAX die set from My Favorite Things before I went over it with the Bokeh Elements Stencil Duo set from Waffle Flower and Rose Quartz ink from Altenew to create a soft background behind the chicks. I didn’t even bother masking them off, the pink ink was so light. I then trimmed down a piece of Lemon Tart cardstock from Papertrey Ink and used the Diagonal Stripe stencil from Simon Says Stamp with Scattered Straw Distress Ink to create some interest to the base as well. I stamped a sentiment from an Easter stamp set from Papirdesign (PD18390 Påske) using Obsidian ink from Altenew, and the card was complete.
 I’ve used this image a few times in the past, but I’ve never colored the penguins blue, which kind of blew my mind when I realized. I decided to remedy that and created soft blue penguins and a corally pink scarf. I cut my panel down to a square, die cut a heart in the center using a die from Papirdesign and mounted the negative onto a square card base I created from Berry Sorbet cardstock from Papertrey Ink.
 Onto my colored heart, I stamped a sentiment from the Mini Messages stamp set from Mama Elephant using Berry Sorbet ink from Papertrey Ink. I adhered the heart to the card front and added a few sequins from the Starry Night mix from Little Things from Lucy’s Cards to finish my card.
 Oh, and before I forget, I used a super simple color palette for this one.
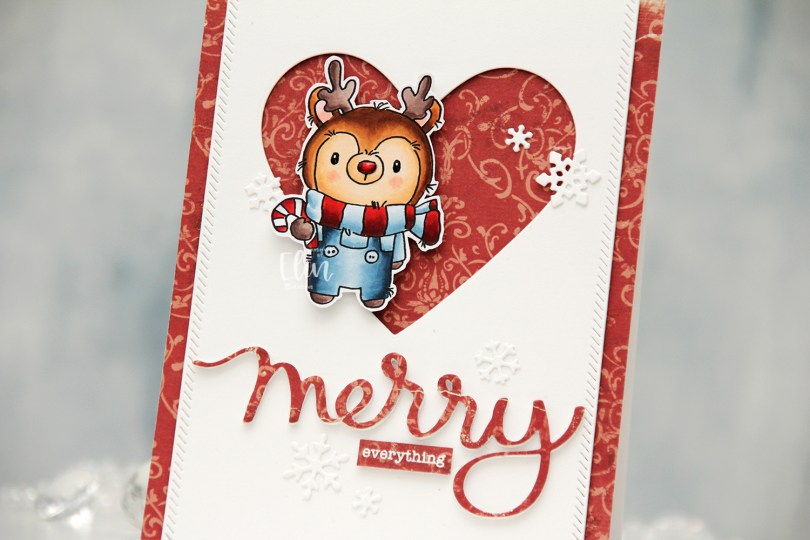
 I colored my reindeer with Copics, added black Glaze to his eyes for shine, a white dot on top with a Gelly Roll 05 once the black was dry and also a thick layer of Glossy Accents to his nose for dimension as well as shine. I fussy cut him leaving a white border and proceeded to work on the rest of my card.
 I covered a card base with the Julhälsningar sheet from the Vintage Winter collection from Maja Design. This has a little bit of pattern to it, but not so much that it’s too distracting. I created a window in a white panel using a heart die from Papirdesign, then used one of the dies in the Stitched Borders die set from Lawn Fawn to create a little bit of interest to the sides, before adhering the panel with foam tape to the center of the card front.
 Using the Merry Script die from Mama Elephant, I die cut three layers from white cardstock and one from the patterned paper to adhere on top. I stacked the four together and adhered my die cut to the card. I white heat embossed a sub sentiment from the Holiday messages stamp set from Mama Elephant onto a scrap piece of patterned paper and trimmed it down to a strip, before I added a few layers of cardstock behind it for dimension and adhered it below my die cut word.
 I mounted the reindeer on foam tape offset in the heart opening and added die cut snow flakes here and there. Some I created with the Snowflake Confetti Fancy die from Hero Arts, some are made with the Stitched Let It Snow Circle Frame die set from Memory Box, which includes a die that cuts three individual snowflakes (which is what I used).
 This card has a lot of texture and dimension, and the shine on Rudolph’s nose is the perfect detail to draw attention to him!
 I colored the image with Copics, and after a couple of cards recently with very muted, vintage colors, I went super bright with this one. I love penguins done with BGs instead of grays, it’s like they’re happier, somehow.
 I stamped and white heat embossed a sentiment from Huldra Designstudio directly onto my card base, which I made from Oceanside cardstock from Concord and 9th.
 Above and below the colored panel, I added strips of patterned paper from the Party Patterns paper pad from My Favorite Things, before mounting it all on foam tape for dimension. I finished off the card with enamel dots. The bright green ones are from Papirdesign, the teal and yellow ones from the Cool Summer Nights and Pocketful of Sunshine packs from Altenew. The Papirdesign ones have more dimension to them than the ones from Altenew, which creates a little more variety.
 By using an untraditional color palette and a non holiday sentiment (winter hug), this image can be used for more than just Christmas. I’m thinking this would make a great wintery birthday card.
 Fun colors used for this one!