Hi, everyone! I hope you’re having a great week.
We’ve reached the last Wednesday of 2020, and it’s once again time to start making something that isn’t holiday related. I have a fun birthday card to share today, featuring Tall Cake, which is such an awesome image from Mo Manning. Super quick to color, too, even for me.
 I colored the image with Copics before fussy cutting right up to the black lines. I contemplated leaving a white border, but opted for this look in the end. I feel it’s cleaner, somehow.
 For the background I used the Detail Ringlet Plate from Simon Says Stamp on a piece of Sweet Blush card stock from Papertrey Ink, and glued it onto a cardbase made from Stamper’s Select White card stock, also from Papertrey Ink. It’s my favorite white cardstock, and whiter than anything else I’ve tried, which ticks of a huge box for me! I used Gina K. Connect liquid glue on the back of my image to adhere it to the textured background.
 I die cut the Happy Birthday Brush Script die from Simon Says Stamp five times from Spring Rain card stock from Papertrey Ink, glued them together for a stacked look and adhered the layered die cut directly on top of the cake and the textured pink background. I stamped and white heat embossed part of a sentiment from the Bitty Bears stamp set from My Favorite Things onto a scrap piece of Spring Rain cardstock, cut it down to a strip and added four more behind it, making it flush with the die cut above. I finished the card by adding a few Sparkling Clear sequins from Pretty Pink Posh.
 Those stacked die cuts add a lot of dimension to an otherwise very simple card. I pulled out an envelope from My Favorite Things in the color Blue Breeze to match the card, it’s uncanny how well the Blue Breeze color from MFT matches the Spring Rain color from PTI.
 Simple images don’t require a lot of colors. However, in addition to these, I did use B90, which is a color I’ve made myself.

 I started by coloring my little snowman and his friend using my Copics. I went with a bit of a split complementary color scheme on this one. I’m no fan of complementary colors, but split complementary are infinitely better, and blue green (which I used for the snow on the snowman), purple and orange are split complementary colors. I didn’t want a bright orange, though, so I went more coral, and I love how it turned out.
 I used a faux stitch rectangle die from My Favorite Things to turn my colored piece into a nice panel. I love these dies, they add such a finished look. I sprinkled on a moderate amount of chunky white embossing enamel from Stampendous and melted the powder. I love the snowy look this gives.
 I mounted my die cut piece onto a card base made from Lavender Fields cardstock from My Favorite Things using plenty of foam tape. This color perfectly matched the purple in my image, something I always try to accomplish in my cards for a nice, cohesive design. I die cut and stacked four Hurra from Melon Berry cardstock from Papertrey Ink using a Kort & Godt die. I love stacking die cuts, it adds a super nice look of dimension. I also white heat embossed a sub sentiment from Norsk Stempelblad AS onto more of that Lavender Fields cardstock, and stacked that, as well, making it flush with the die cut word.
 I added a couple of sparkling clear sequins from Pretty Pink Posh and my card was complete. I cut a little bit off the largest one with my scissors to make it look like it’s tucked behind that sentiment strip.
 Last, but not least, the Copic markers I used to color my image. I also used B40 and BG71, which are colors I’ve made myself.
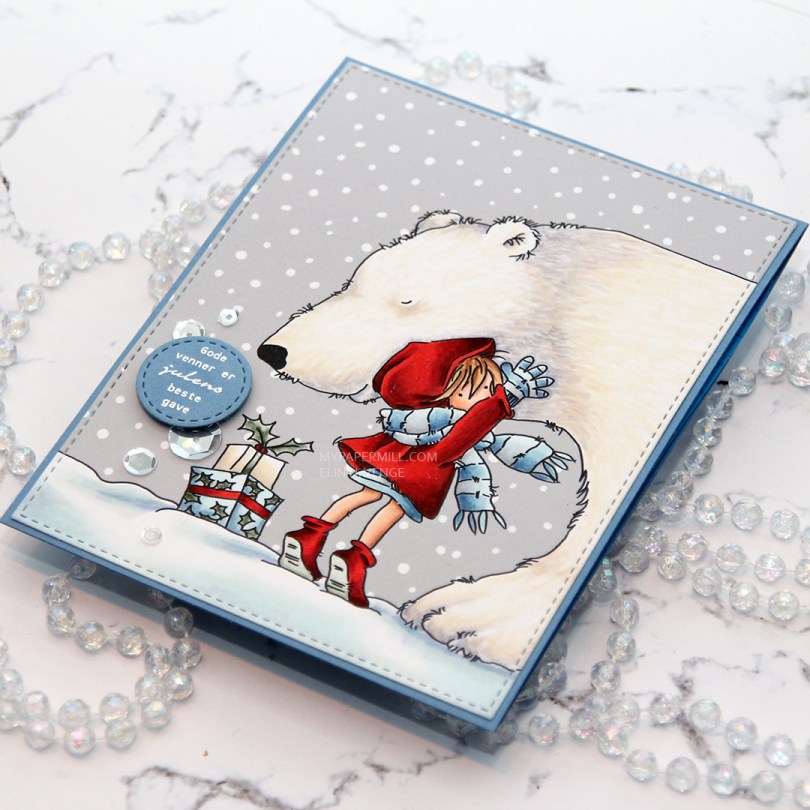
 I colored this image a while back, but only now had time to turn it into a card. I considered using a red card base for this, but really wanted the girl to pop, so I went with my trusty blue. This time I chose Blue Yonder card stock from My Favorite Things.
 I die cut the panel with the girl and the polar bear with the largest faux stitch rectangle die from My Favorite Things from their Stitched Rectangles STAX 2 set of dies.
 I used another faux stitch die to create the little circle for my sentiment, which is a stamp from Norsk Stempelblad AS. I stamped the sentiment in VersaMark ink and sprinkled on super fine detail embossing powder from Ranger before heating that until it melted.
 I mounted my little circle sentiment with foam tape and had planned to leave it at that, but I managed to spill a drop of coffee on the snow portion of my image and needed to cover that up. One single sequin would look silly, so I added a few more to make it look intentional. No one will ever know that there’s a coffee stain under that smallest one. The sequins are sparkling clear from Pretty Pink Posh.
 I use a crazy amount of markers to color snow…
 This is a small, but mighty one. It may look very unassuming as a 2-3/4″ square shaker card, but there’s a secret. It opens up to be quite big in the end. The shaker itself is filled with sequins, gems and a few die cuts in colored cardstock die cut using one of the dies in the Tag Builder Blueprint 5 set. I cut them down a little with my scissors and cut the ends off so they wouldn’t get tangled inside the shaker.
 The gorilla from the Picture Perfect Party Animals stamp set covers the entire front, but there’s a magnetic flap on the back, and once you undo that, more is revealed.
 Flip the gorilla over, and you’ve got more animals ready to join the party. I used the yellow polka dot pattern from the Party Patterns paper pad for even more fun and a way to get even more happy color into my card. These three panels are flaps that open to the sides (two to the right and one to the left) to reveal even more…
 The last three (technically four, since there are two parrots in that one selfie) animals are ready to party. They’re tucked inside pockets, and I’ve stamped a couple of the sentiments that come with the stamp set onto Razzle Berry heavyweight cardstock from MFT and heat embossed them. That pink really packs a punch. I die cut my sentiments using the largest of the Fishtail Flag Frames dies, and cut down another patterned paper from the Party Patterns paper pad to strips that included the yellow, green and pink colors that I have throughout my card. I also added some die cut streamers from the Tag Builder Blueprint 5 die set using Razzle Berry, Pineapple and Limelight cardstock, all from MFT.
 You can pull the selfies out of their pockets, and there’s room to write a personal message to the birthday boy or girl on the back of the selfies. The best thing about this card is that no specialty dies are required, this is all done with a paper trimmer, score board, bone folder, craft knife and a steel ruler. I prefer the craft knife and steel ruler over the paper trimmer, but that goes way back to my days of creating architectural models. Those knives are handy!
 There you have it, my entry for the Innovation Master category for MFT’s annual superstar contest.
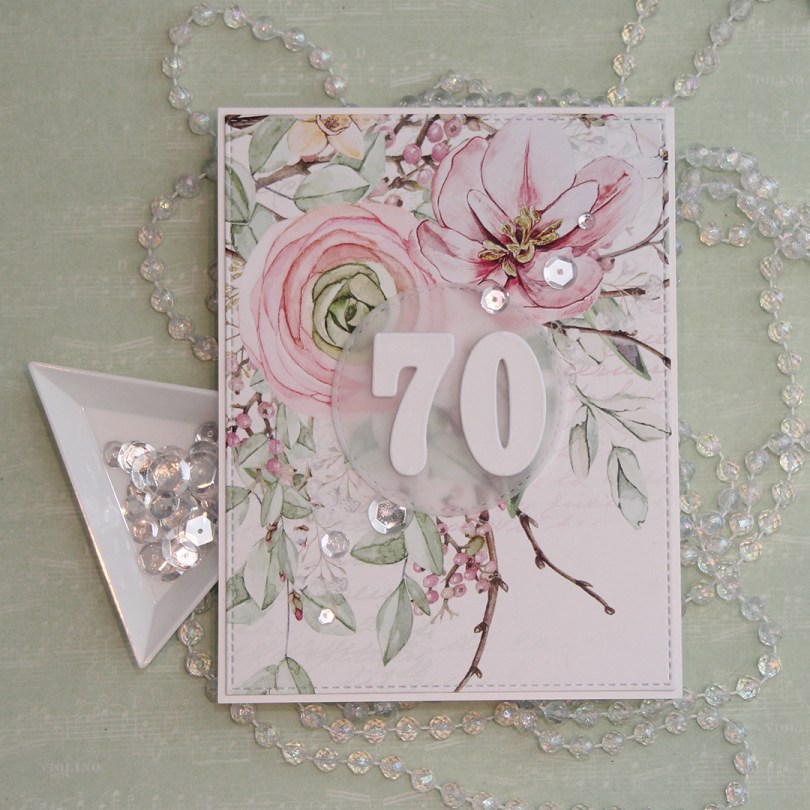
 For this card, I used the largest die in the Stitched Rectangles STAX 2 set from My Favorite Things. You can find set 1
  I glued my die cut panel onto a cardbase made from Stamper’s Select White cardstock from Papertrey Ink. I die cut a circle from vellum using a circle die from the Stitched Circle STAX set, also from My Favorite Things. It matches nicely with the stitching around the edge of my floral panel.
 I also die cut a bunch of numbers using a die set from Papirdesign. I made most of them from white card stock, but the top numbers from a piece of that same patterned paper. It might not look like patterned paper, but there’s a lot of white space on this sheet, and I used some of that for my numbers. It makes the whites match, which I really love. I put a 3 layers of my numbers underneath the vellum, and the remaining four layers on top. It makes the vellum stand out a bit from the background, which makes the number show up a little better and not get lost in that busy background.
 I finished off the card by gluing on some sparkling clear sequins from Pretty Pink Posh.
 I used a cover die from Neat & Tangled to diecut twice from white cardstock and several times from scraps of different green patterned paper scraps. These are a mix of Papirdesign, Maja Design, Kaisercraft, and one that I don’t even know. Great way to use all those little bits.
 I glued my white frames together and inlayed my green pieces, before die cutting a word die from Papirdesign using Ripe Avocado cardstock from Papertrey Ink for the word itself and white for the shadow. I stacked a few of the green ones on top of each other for it to stand out a little bit.
 I used some angel hair to make a nest underneath my diecut and glued it right on top using liquid glue. I also added a few sparkling clear sequins from Pretty Pink Posh for some shine, and stamped a Norsk Stempelblad AS sentiment in Ripe Avocado ink from Papertrey Ink on a white strip and added it below my die cut word.
 Simple, but the dimension in the frame and the focal point still give the card a little bit of interest.
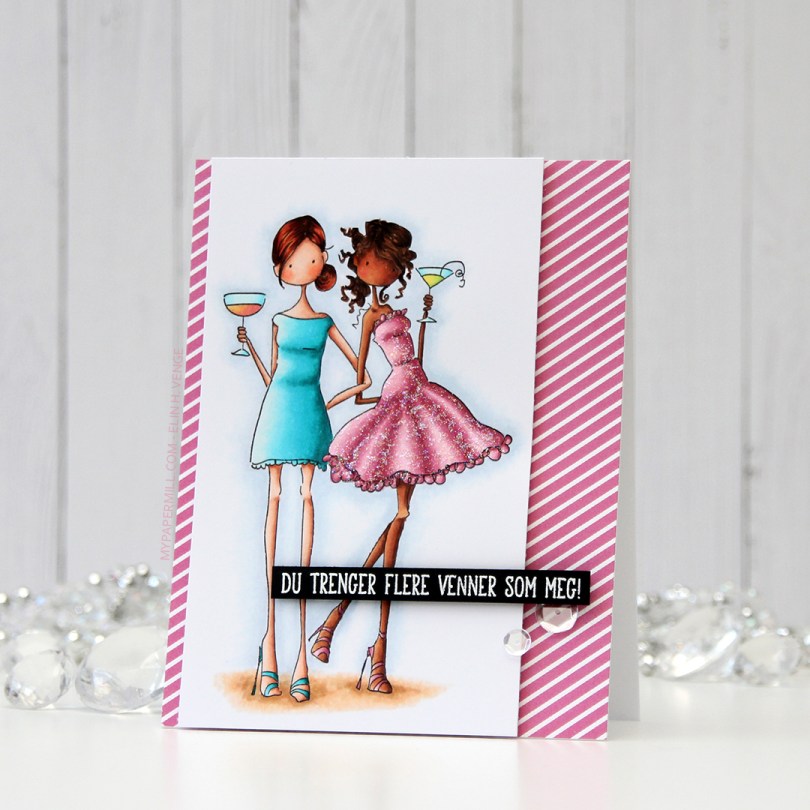
 I colored my image with Copics on X-Press It blending card and added
  I put a piece of patterned paper from the Party Patterns paper pad from My Favorite Things on the card front, and mounted the image on foam tape. Lots of foam tape, I was not shy!
 I stamped and white heat embossed a
 I colored up this
  I ran a white cardstock panel through my Gemini Jr with an embossing folder from We R Memory Keepers to create some texture in the background. I mounted it on foam tape and centered it on my card front, before adding my colored image with some 1 mm foam squares for even more dimension.
 I white heat embossed a sentiment from the same stamp set onto True Black cardstock from Papertrey Ink, mounted that on more foam tape and added some sparkling clear sequins from Pretty Pink Posh for a finishing touch.
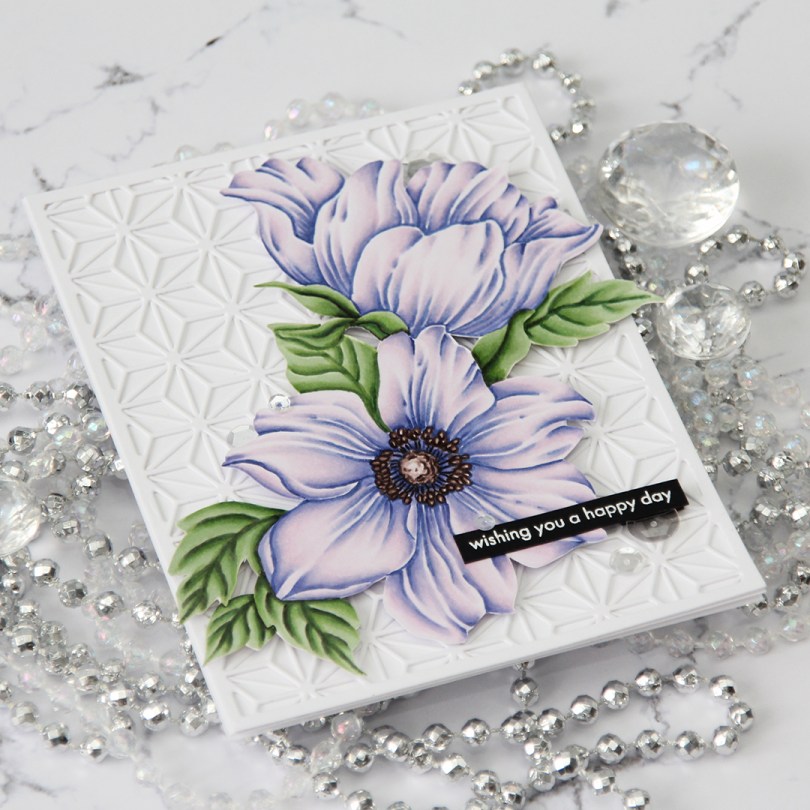
 The
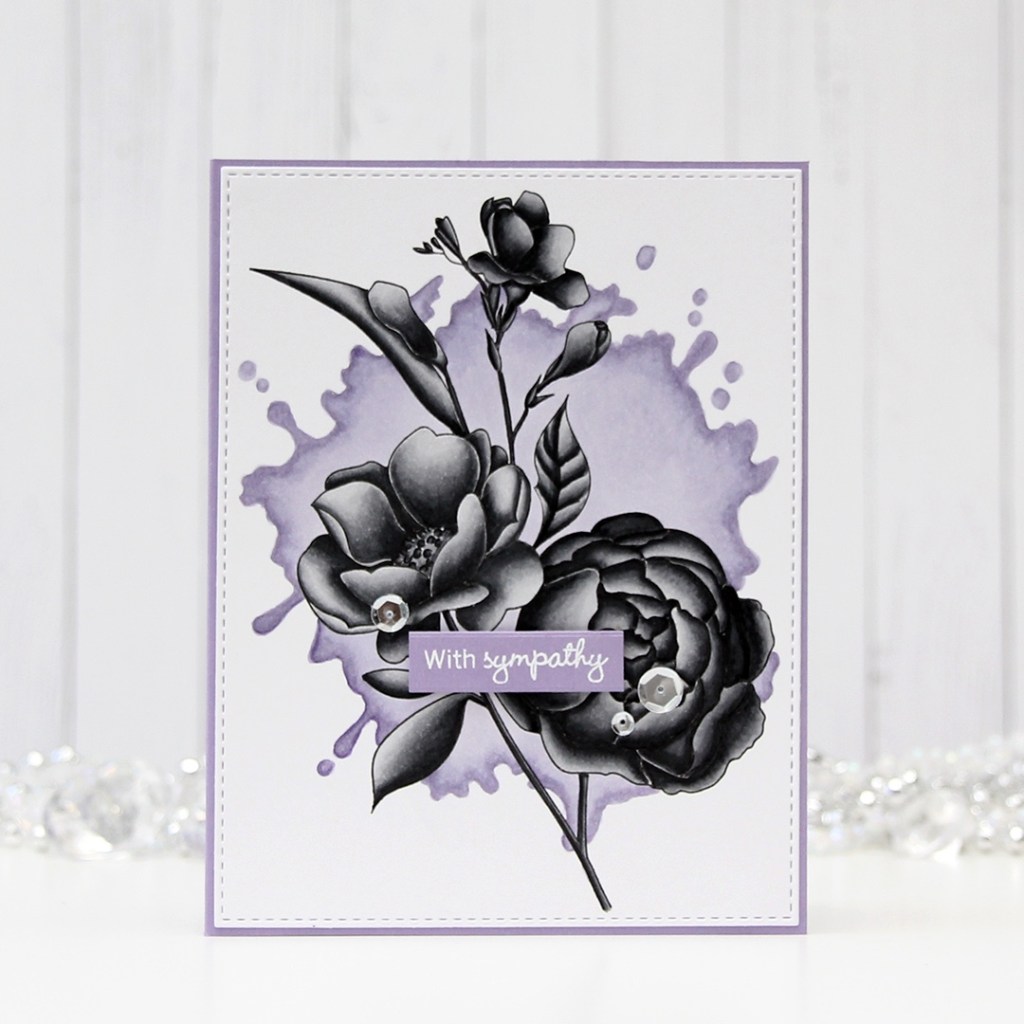
The  I wanted something in the background, but nothing too distracting. White on white is such a classic look, and I diecut both the Layered Snowflake cover dies from Altenew (there’s
  I fussy cut around my colored image and mounted it on foam tape. This image is quite large, and even though there’s a lot of detail in the image, it’s very easy to fussy cut. I mounted it on a bit of an angle, making the leaves stick out from both sides of the card. I also white heat embossed a sentiment from the same stamps set on black cardstock and added that to my design.
 My last finishing touch was a few sparkling clear sequins from Pretty Pink Posh. Some of them tucked, in true Laura Bassen style, and I even used my scissors on one.